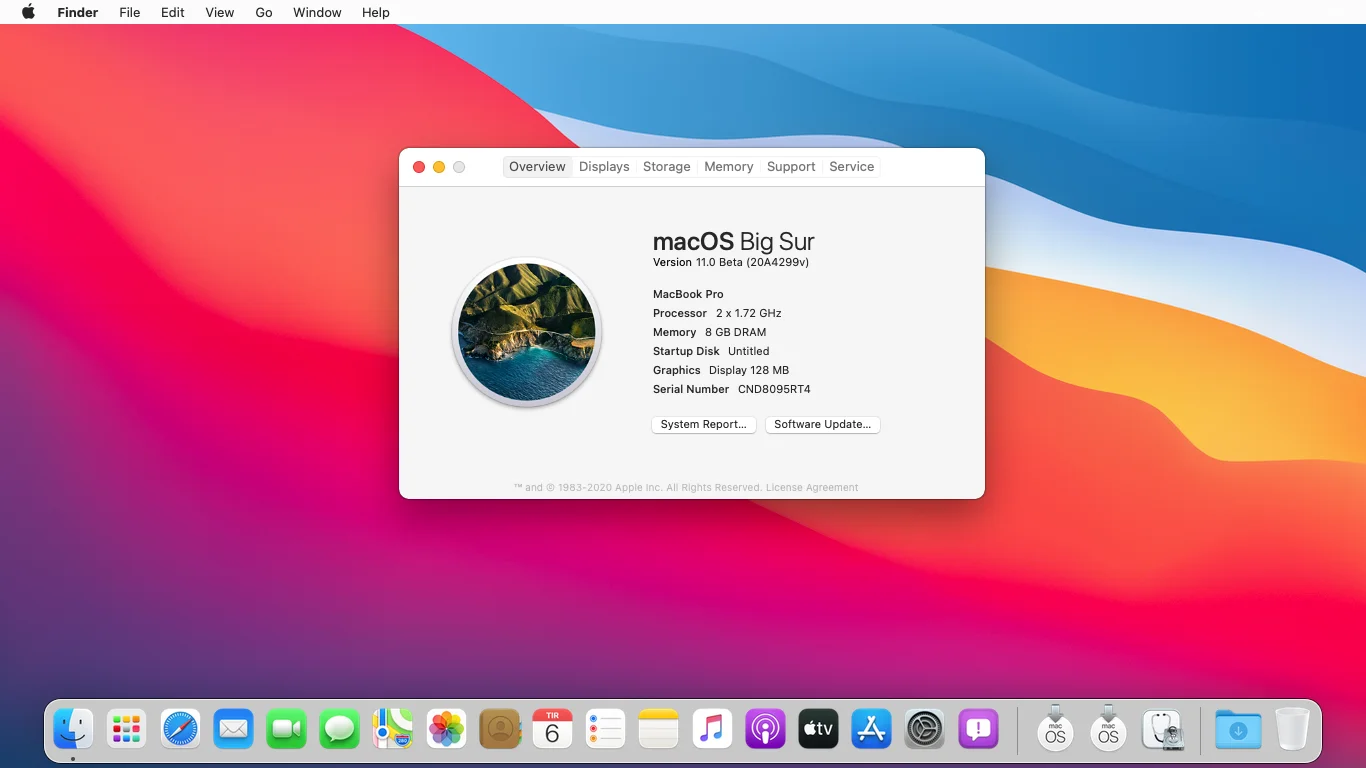
Yesterday 22nd June, 2020 at WWDC “Worldwide Developer Conference” Apple released the biggest operating system macOS 11 Big Sur. The new macOS 11 Big sure, with a unique name, is pretty interesting for Mac users. macOS 11 Big Sur is the advanced operating system of Apple company ever, the world new level of power and beauty. You can complete your experience with the fullest with refined and new designs. Enjoy the new and biggest Safari update on macOS 11 Big Sur. The other changes that discover new features for Maps and Messages, and more transparency around the privacy.
Apple announced the biggest design update to macOS since the introduction of macOS X with macOS Big Sur. Overall, everything is new in macOS Big Sur with the Window corner curvature, colors, and dock icons. macOS 11 Big Sur has a lighter appearance for a cleaner look and rounded edges.
Worldwide Developer Conference 2020 gone online due to CoronaViruse Pandemic. With this pandemic everything gone clear as satisfied for users. With this Keynote 2020, Apple kicked out the latest iOS, macOS, iPad OS, AirPods, Apple Watch, and other Softwares that in build.
Apple wanted to select a macOS version like previous version macOS 10.16, but according to its schedule, they have changed the version into 11. macOS Big Sur-name has taken from the section of the central coast of California between Carmel Highlands and San Simon. The latest and biggest macOS 11 Big Sur complete version will be released till the end of this year in September and October 2020. But Apple put a section by the name of “Developer Beta”, which macOS Big Sur is available there if you have a Developer account you can get the beta version of macOS 11 Big Sur.
The latest operating system of Apple is having lots of features to be tested out. Before testing it on your actual Mac PC you have to test it on the following platform. Or to test its latest features, you can install macOS 11 Big Sur on VMware on Windows PC.
- How to Install macOS 11 Big Sur on VirtualBox on Windows PC
- How to Install macOS Catalina 10.15 on VMware on Windows PC
- How to Install macOS Mojave 10.14 on VMware on Windows PC
- How to Install Windows 10 on macOS Big Sur Via VMware Fusion
- How to Install Windows 10 on macOS Big Sur Via VirtualBox
Learn how to install macOS Big Sur on VMware & VirtualBox using VMDK file.
- Install macOS Big Sur on VMware on Windows – VMDK
- Install macOS big Sur on VirtualBox on Windows – VMDK
macOS 11 Big Sur Features
When macOS 11 Big Sur is new in the market, so let’s get some important hints about its latest features. Check out the below list of new features of macOS 11 Big Sur.
- Control Center: Apple took the idea from iOS, and brought it inside the macOS 11 Big Sur. They designed a dropdown in the upper right area screen that allows you to access the display brightness option, Volume, Dark Mode, WiFi Control, and many more.
- Notification Center: The notification center is totally cool in macOS 11 Big Sur, now in macOS Big Sur there is a specific notification center to clear all lots of notifications at one time.
- New Maps: The maps are redesigned in macOS 11 Big Sur that supports the following things, in-door maps, guides, favorite locations, etc.
- Safari: Safari now monitors the saved passwords to look for those that might be exposed in breaches. A “Privacy Report” meanwhile breaks down what data is being tracked by the site you are on there.
Install macOS 11 Big Sur on VMware on Windows PC
1. Download macOS 11 Big Sur
For downloading macOS 11 Big Sur operating system you have to download it firstly. If you don’t about the downloading process then follow this guide on how to download it. For downloading the macOS 11 Big Sur you need to login to Apple Developer Account. Apple Developer Account costs an amount per year $99. Check out below how to sign in to the Apple developer account.
- Over ahead to your browser and search for Apple Developer Account.
- When the Developer page opened click on top on the “Account” option.
- Follow the process of creating an Apple Developer account.
- When you signed in to your Apple Developer account, click on “Discover” at the top left, then click on the macOS tab.
- Click the download option at the top-right screen.
- Again Sign in to your Developer Account.
- Click on the install button of macOS 11 Big Sur, and wait for it to download.
- Open your download folder, then open the macOS Big Sur Developer Beta Access Utility, double-click on macOSDeveloperBetaAccessUtility.Pkg to run the installer.
- When the installer download, system preferences will check for the update of macOS 11 Big Sur. If you want to update directly from the current macOS to macOS 11 Big Sur click Update to install.
2. Download macOS 11 Big Sur Required files for VMware
Once the beta version of macOS 11 Big Sur successfully downloaded, you can create it to VMDK (Virtual Machine Disk Image). Manually, you can download the macOS 11 Big Sur beta version VMDK file for VMware and VirtualBox from the links below down.
The next thing is you have to download and install properly the VMware Workstation/VMware Player on your Windows PC. For the extraction of macOS 11 Big Sur, you need WinRAR/ 7zip, if you have them in your PC then extract the VMDK file of macOS 11 Big Sur with that. If not then simply download and install them on your Windows PC.
– Create macOS Big Sur ISO file
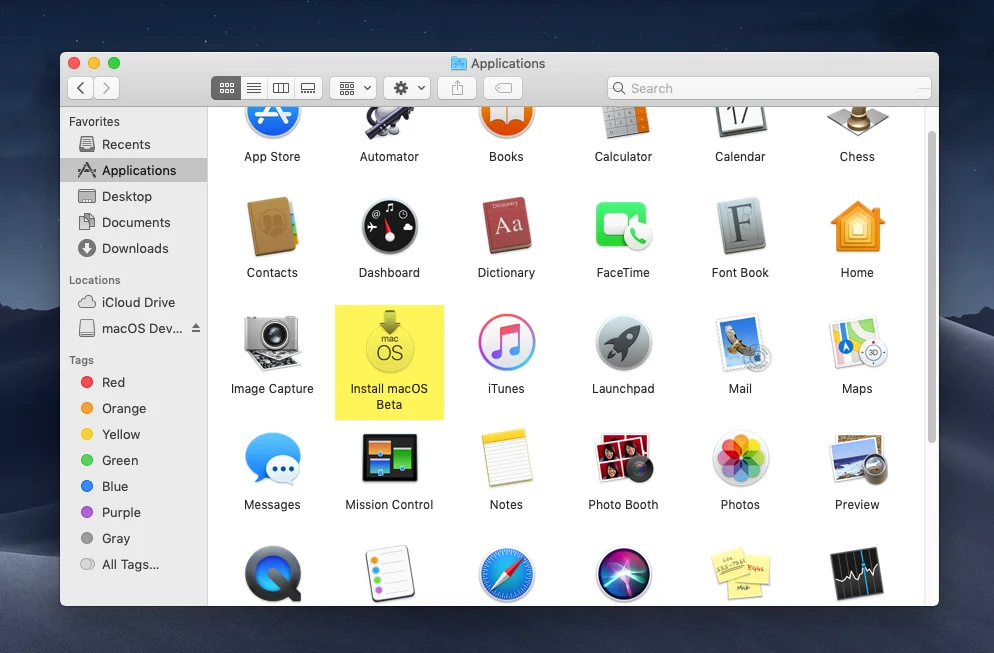
One of the important points in here while downloading macOS Big Sur in Beta version. Then that is not available in ISO file. Therefore, you have to create a macOS Big Sur ISO file, using some commands. Firstly, download the macOS Big Sur installer file, then move that to the Applications folder. The name of macOS Big Sur will be located as “macOS Big Bur. Beta”. After that, open the terminal for applying the commands to create macOS Big Sur ISO.
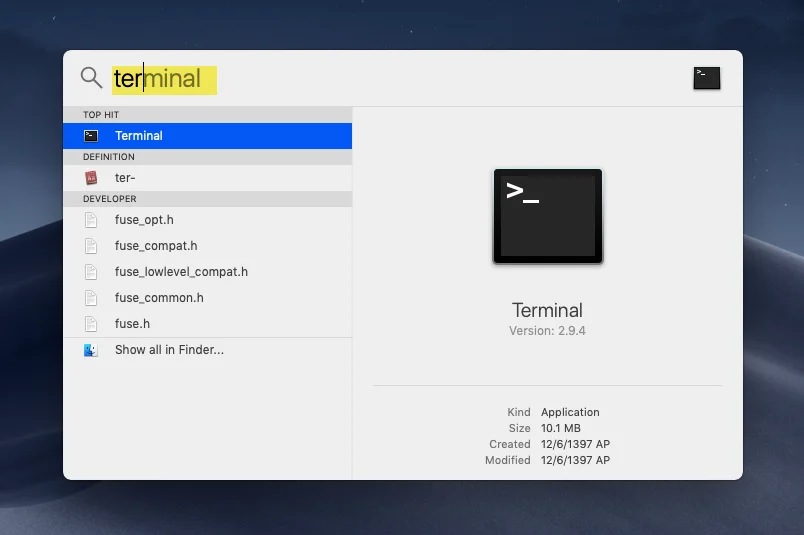
Navigate to search spotlight then search for terminal and press enter to open.
When the terminal opened one by one apply the below commands into terminal.
# Create a macOS Big Sur Virtual Disk Image
hdiutil create -o /tmp/bigsur -size 10250m -volname bigsur -layout SPUD -fs HFS+J
# Mount this Image to macOS
hdiutil attach /tmp/bigsur.dmg -noverify -mountpoint /Volumes/bigsur
# Use macOS Big Sur Createinstallmedia Tool to create a Installer Image
sudo /Applications/Install\ macOS\ Beta.app/Contents/Resources/createinstallmedia --volume /Volumes/bigsur --nointeraction
# Unmount Volume Install macOS Beta
hdiutil eject -force /Volumes/Install\ macOS\ Beta
# Convert the bigsur.dmg to a bigsur.iso for Virtual Machine
hdiutil convert /tmp/bigsur.dmg -format UDTO -o ~/Desktop/bigsur.cdr
# Move and Rename bigsur Image to Desktop
mv ~/Desktop/bigsur.cdr ~/Desktop/bigsur.iso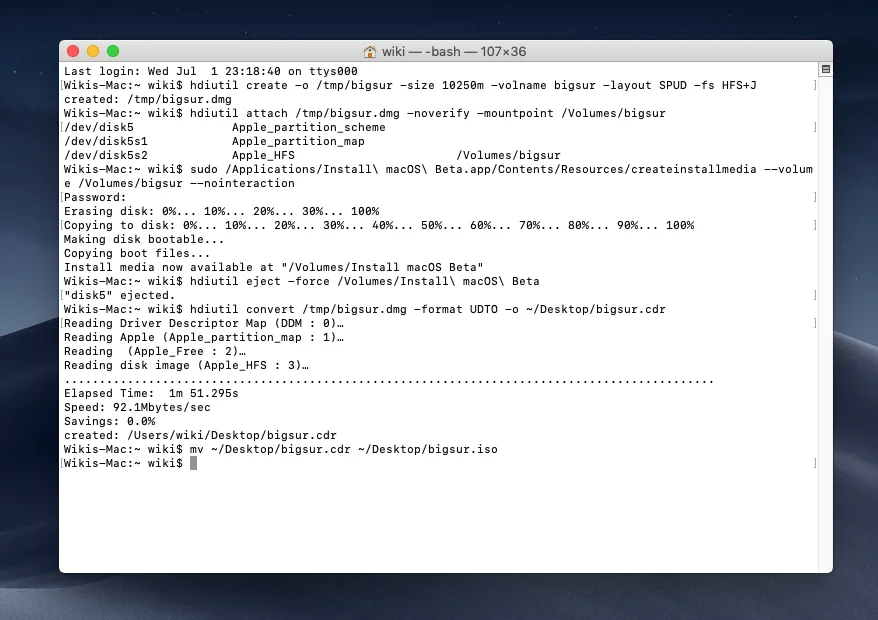
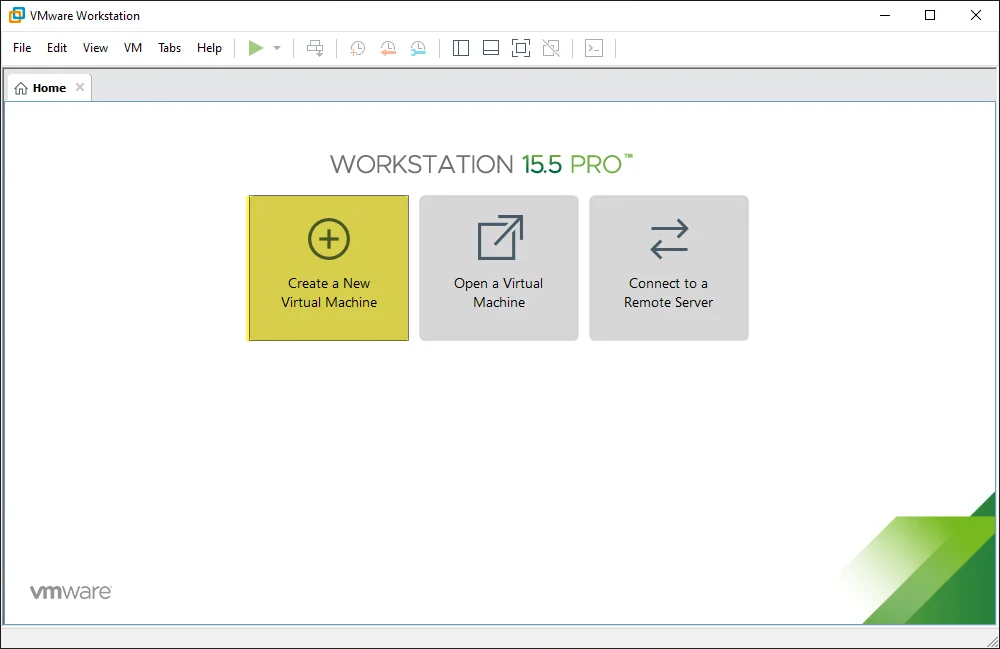
3. Install VMware Workstation on Windows PC
VMware Workstation/ VMware Player is an open-source that allows the Windows users to test other operating systems on Windows PC. Using the VMware Workstation you can test the following operating system Windows, Linux, macOS, or even Android OS. There will come two kinds of VMware versions for you, one of them is to use it for a 15-days trial. But if you want to use the VMware permanently you need to purchase it for a lifetime. OK, it depends on which one you prefer to use.
- When the VMware Workstation successfully downloaded, double-click to open the installation.
- On the VMware Workstation welcome wizard click next.
- Click the box of (I accept with terms and conditions of VMware) then click next.
- In the custom setup window simply click next.
- On the user experience settings window click next.
- Now check the boxes of shortcuts then click next.
- When the VMware Workstation gets ready for the installation click install.
- Wait for it until it should successfully install on your PC.
- When the installation completed click Finish to close the window.
4. Install macOS Unlocker
macOS Unlocker will allow the macOS X service on the VMware Workstation/VMware Player. Without the macOS Unlocker, you won’t be able to install macOS on VMware Workstation. Don’t the VMware Unlocker from below downlink.
- Download macOS Unlocker (Github)
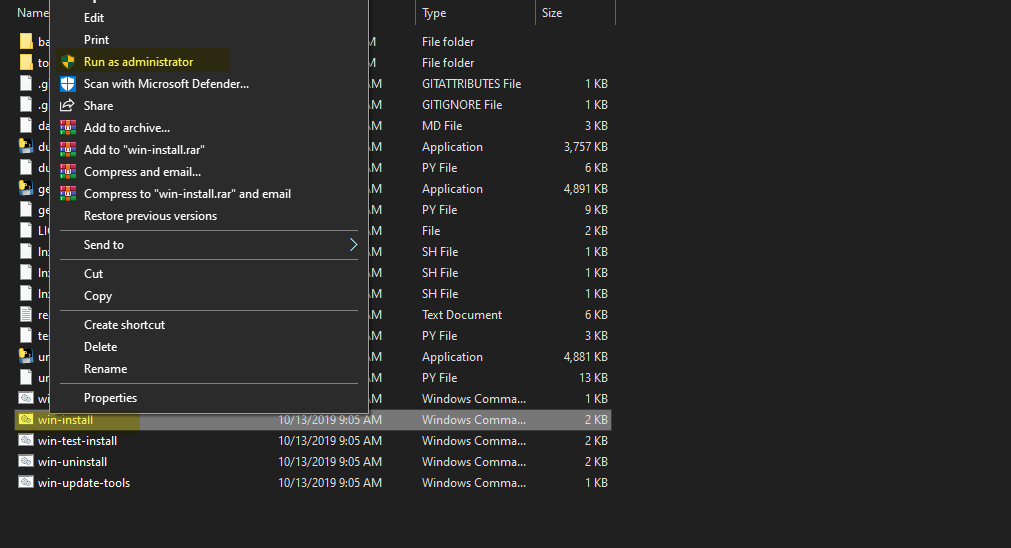
Once the macOS Unlocker downloaded, then the file is compressed with WinRAR. For the extracting use the WinRAR. When the macOS Unlocker extracted over ahead and open its folder, then find out the “Win-Install” file. Right-click on that and “Run As Administrator”, the installation process might take some time. But until it should download the required components for VMware Workstation.
5. Create a New Virtual Machine for macOS 11 Big Sur
When the VMware Workstation successfully installed on your Windows PC. Over ahead to VMware Workstation, and check if the latest update is not installed also check for update, and create a new virtual machine for macOS 11 Big Sur.
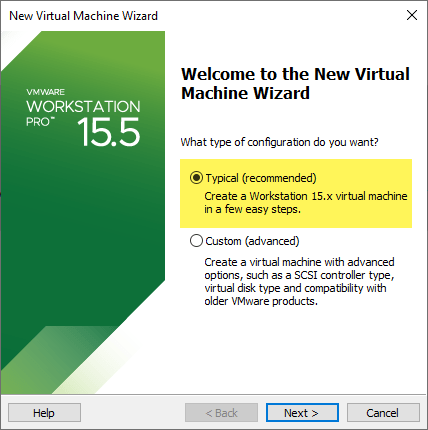
Step 1. Open the VMware Workstation/ VMware Player on the VMware main window click on “Create a New Virtual Machine”.
Step 2. In the Virtual machine wizard select the option “Typical (Recommended) then click next.
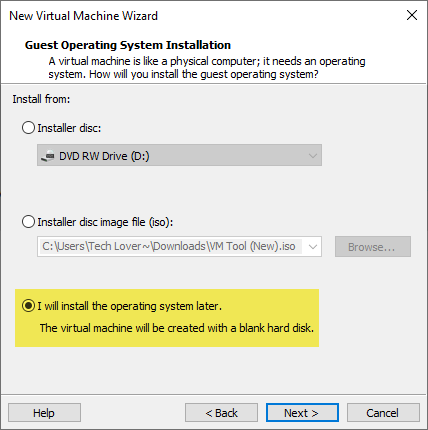
Step 3. When you reached to this window select the third option “I will install the operating system later” then click next.
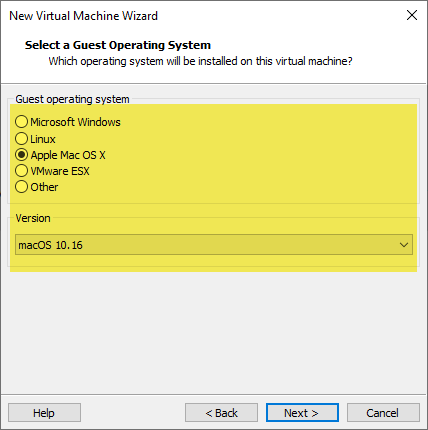
Step 4. Here select the guest operating system “Apple Mac OS X”, and the Version “macOS 10.16” then click next.
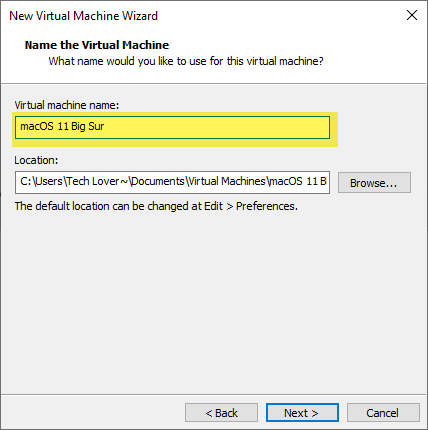
Step 5. Select a name for the virtual machine, and specify the location where you want to place the macOS 11 Big Sur then click next.
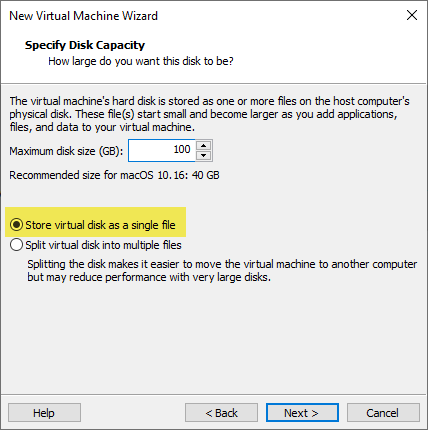
Step 6. Select the maximum size disk for macOS 11 Big Sur, then select the first option “Store virtual disk as a single file” then click next.
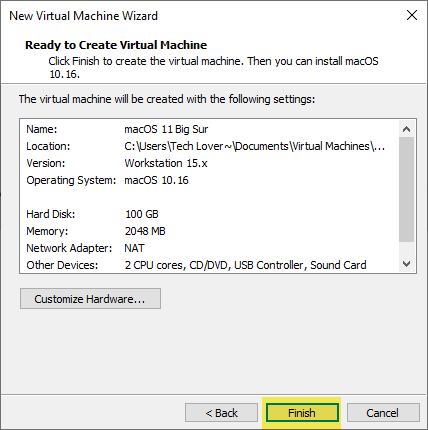
Step 7. When everything completed, the virtual machine is ready to create so click finish to create the virtual machine.
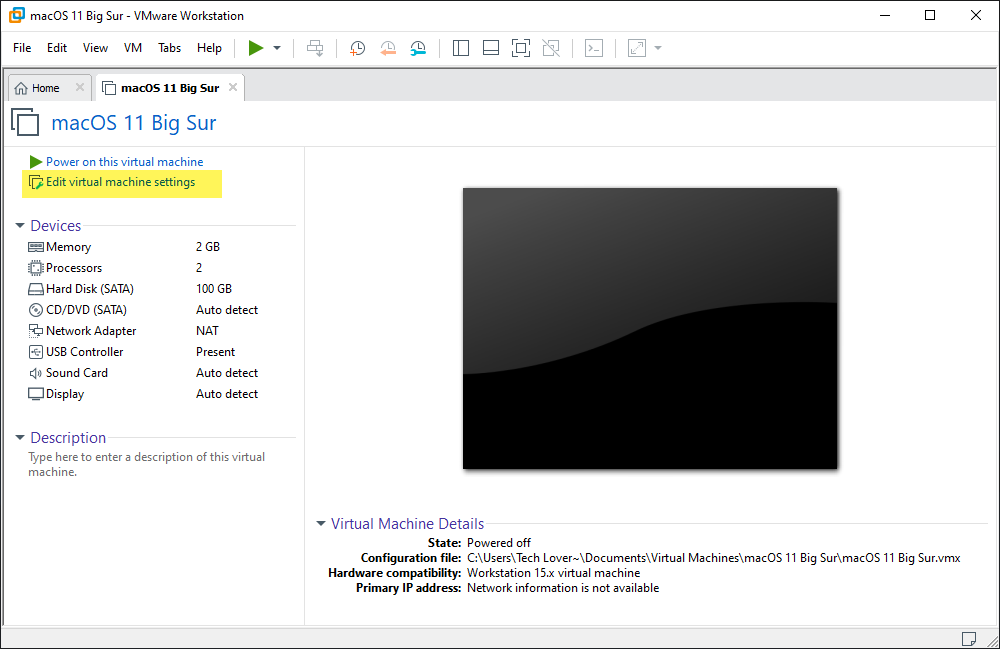
6. Edit Virtual Machine Settings
For the better and fast installation of macOS 11 Big Sur on VMware Workstation, you need to edit some bios settings of the virtual machine. To do this select the created virtual machine, then click “Edit Virtual Machine Settings”.
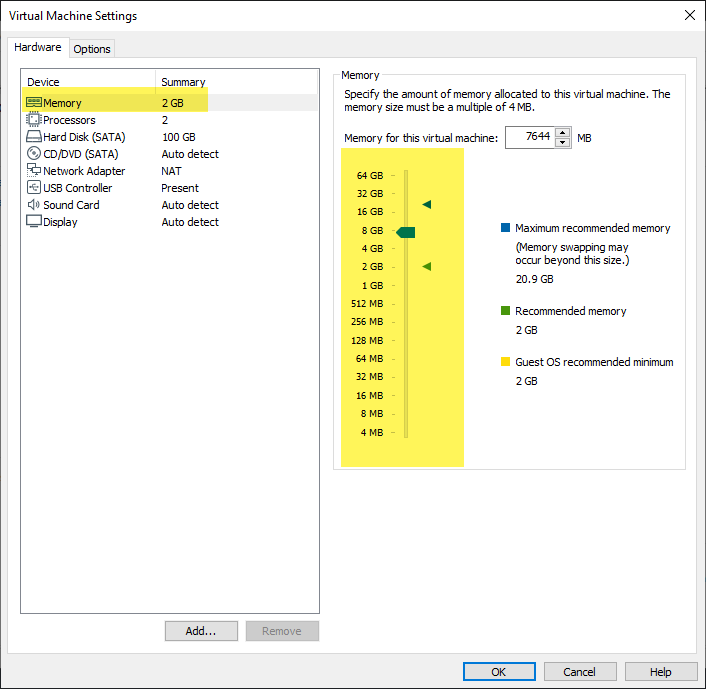
When the Virtual machine settings opened, from the top left-handed select the “Hardware” option and increase the memory size for the virtual machine.
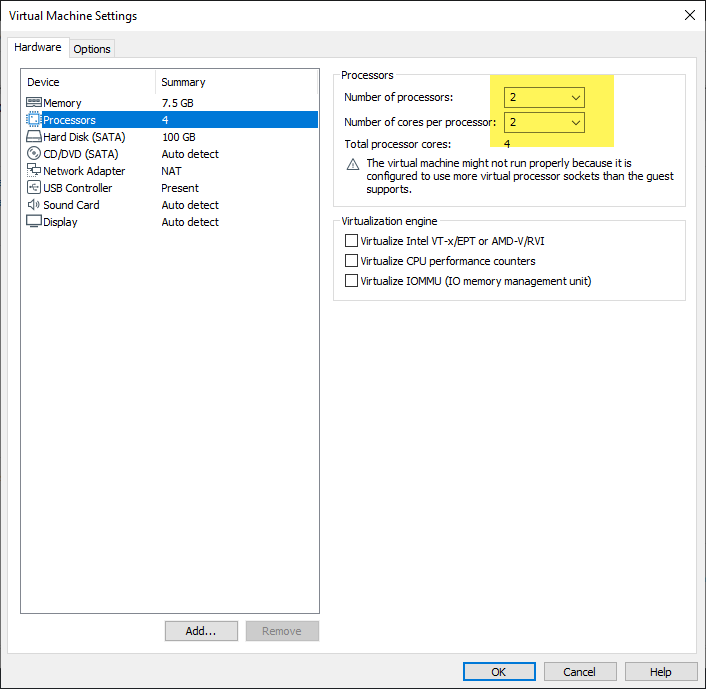
Select the processor tab, then increase the number of processors, and increase the number of core processors.
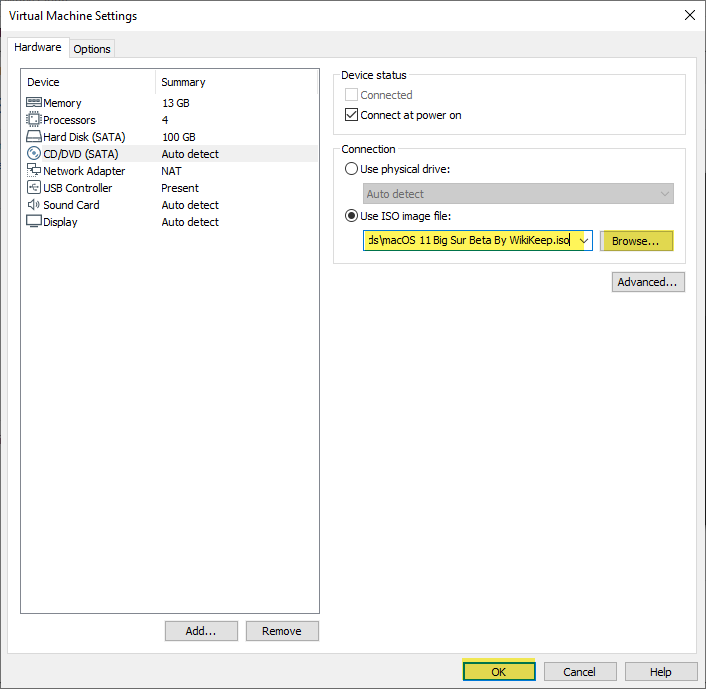
When you reached this step, click on the “CD/DVD (SATA)” tab then select “Use an ISO file” option, and click the “Browse” option, select the macOS 11 Big Sur vmdk file and click “Open”. Be sure that macOS vmdk is inserted after that click “OK” to save changes.
7. Edit the VMX file
VMware stores virtual machines as a package that includes the virtual machine settings filename.vmx and the virtual disks. When required you must provide the path to the vmx.file. The examples that follow are of default paths to Windows and Linux virtual machine for Mac OS X, OS X, or macOS. A small commands directory that configures the macOS virtual machine settings to install the operating system on VMware Workstation.
To edit the VMX file for macOS 11 Big Sur on VMware Workstation, find out the location of macOS 11 Big Sur created virtual machine. Find out the macOS VMX file right-click on that and Open With>Notepad.
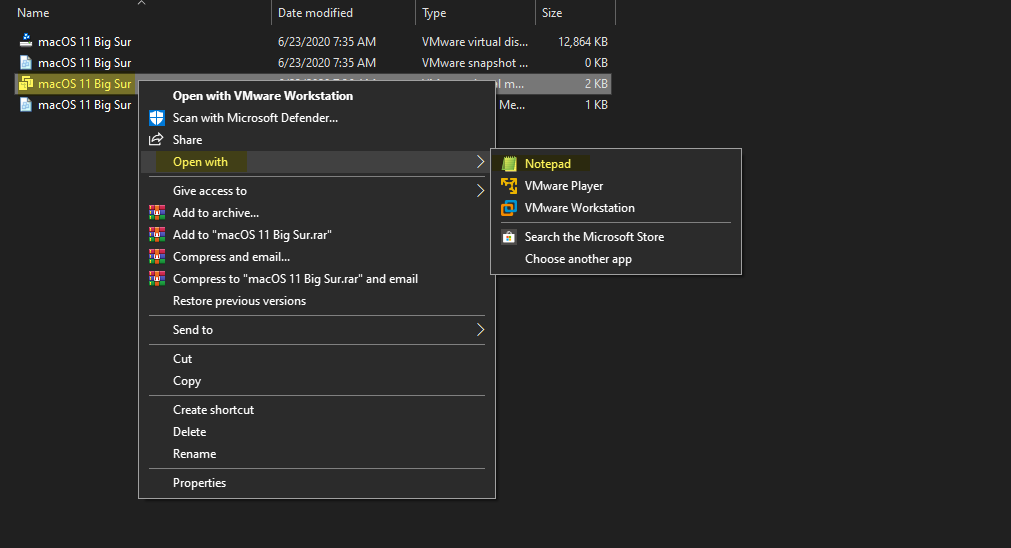
When the VMX directory opened with Notepad scroll down, at the end copy and paste the below commands and press Ctrl+S to save changes.
smbios.reflectHost = "TRUE"
hw.model = "MacBookPro14,3"
board-id = "Mac-551B86E5744E2388"
Smc.version = "0"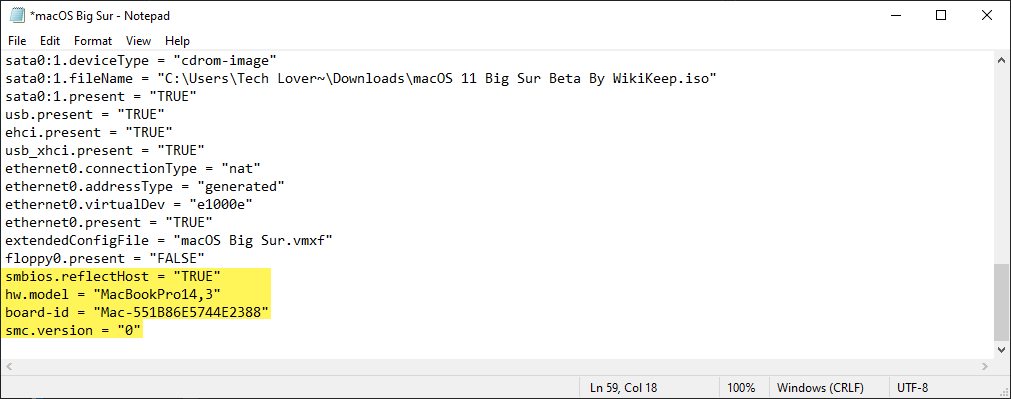
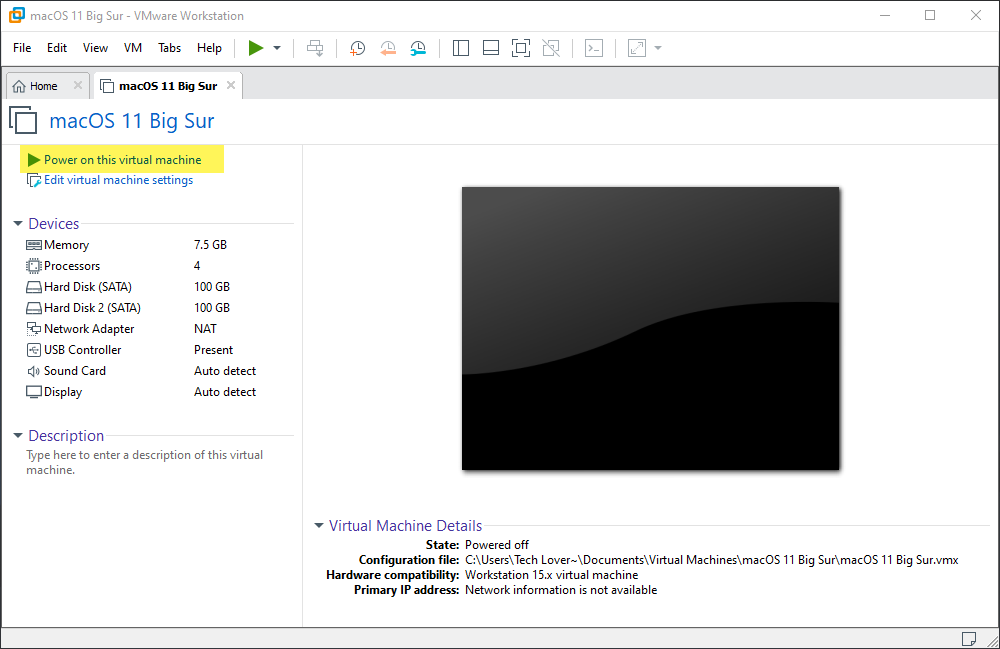
8. Install macOS 11 Big Sur on VMware on Windows PC
We reached to install macOS 11 Big Sur on VMware on Windows PC. Because everything perfectly and clearly done for the current guest operating system to run on the virtual machine on VMware on Windows. To install it run the VMware Workstation and select the created virtual machine of macOS 11 Big Sur and click “Power on this Virtual machine”.
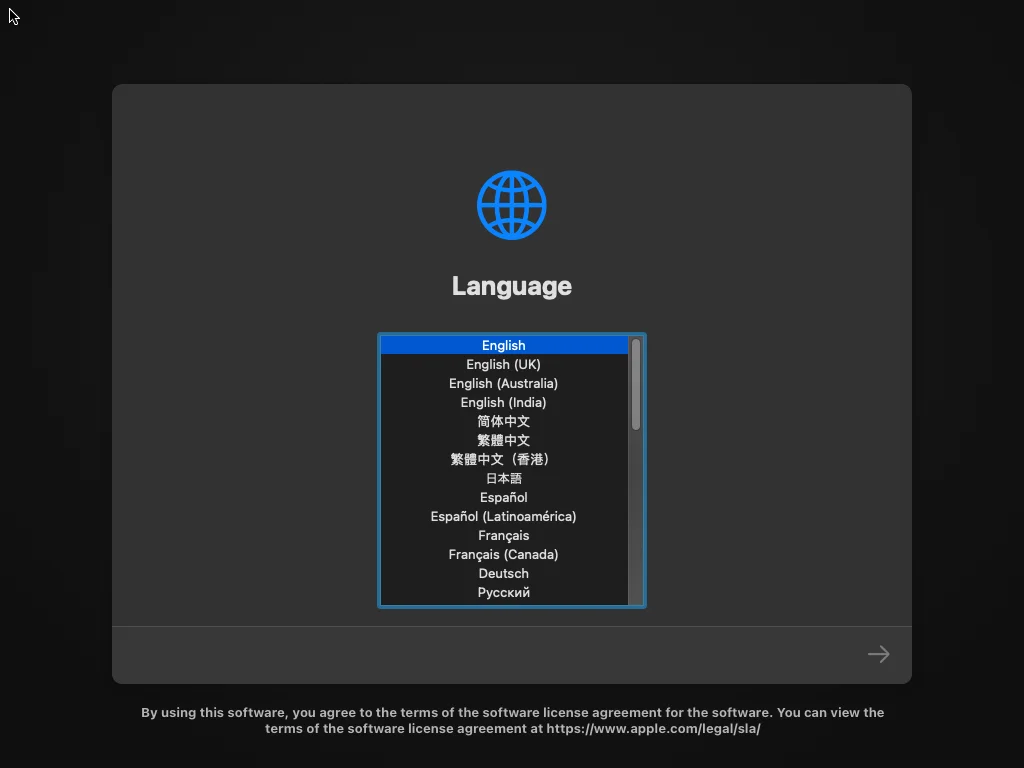
When the installation of macOS 11 Begin started, wait for the Apple logo.

Select your language and click the arrow option.
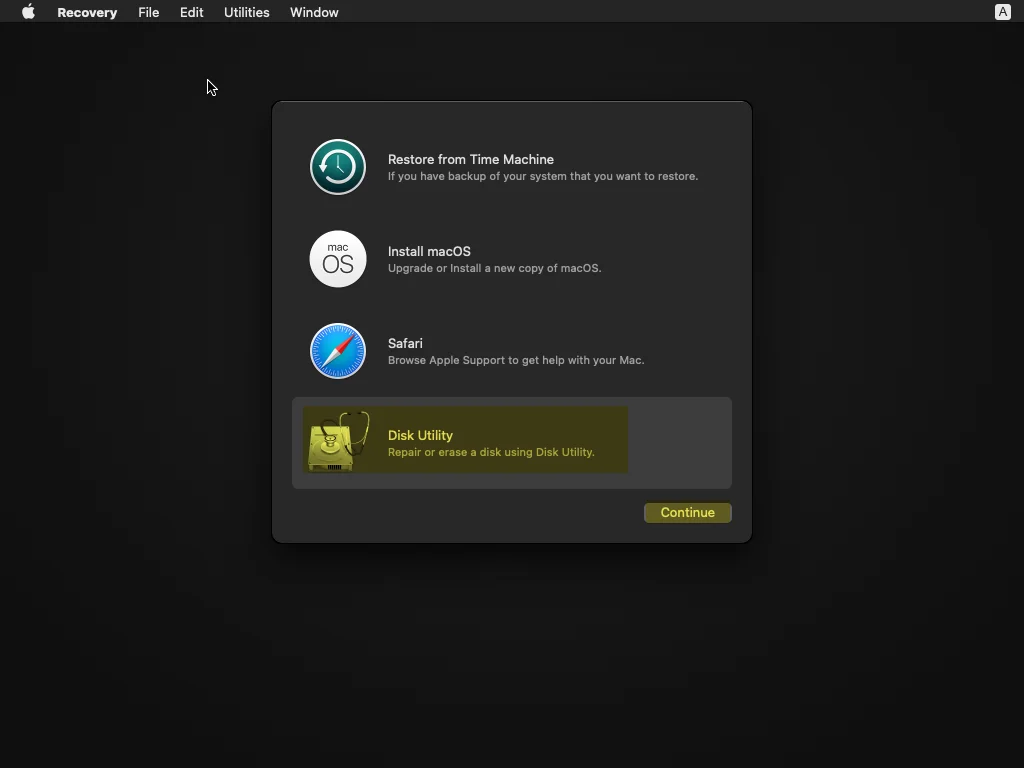
Once this window appeared, select “Disk Utility” option, then click continue.
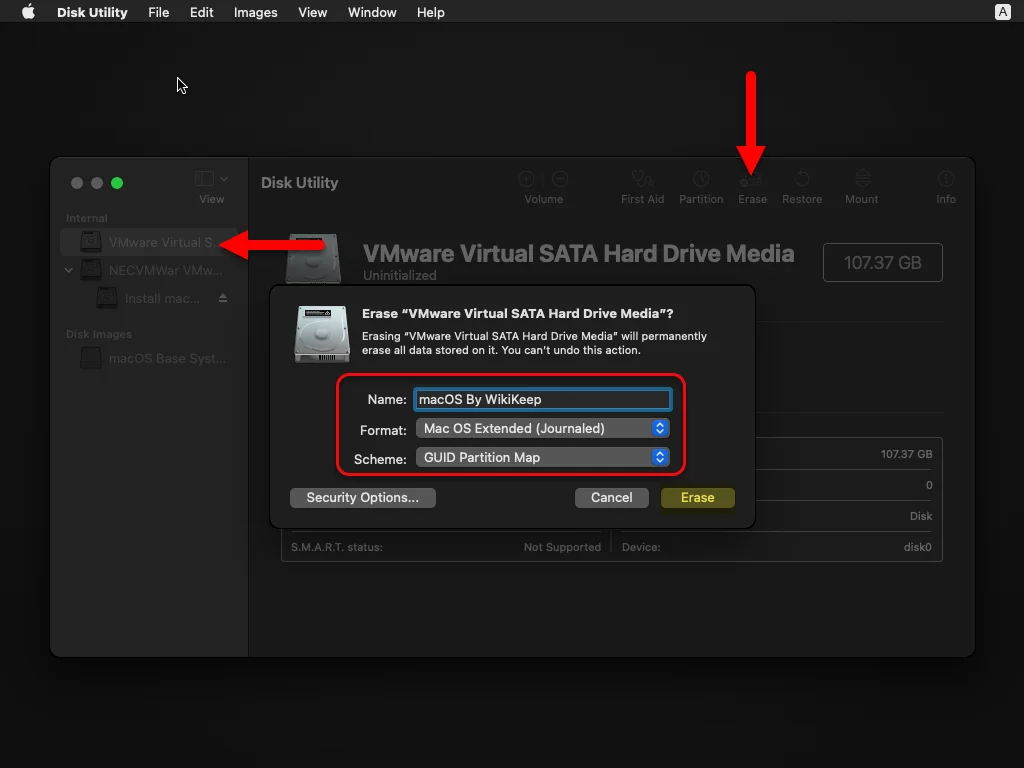
When the Disk Utility window opened, from left-handed window select the drive which you want to make partition for macOS Big Sur. Then click on the top “Erase” tab, and erase the disk according to the below down settings.
- Name: macOS Big Sur
- Format: Mac OS Extended (Journaled)
- Scheme: GUID Partition Map
- At Last, click erase option to erase the disk
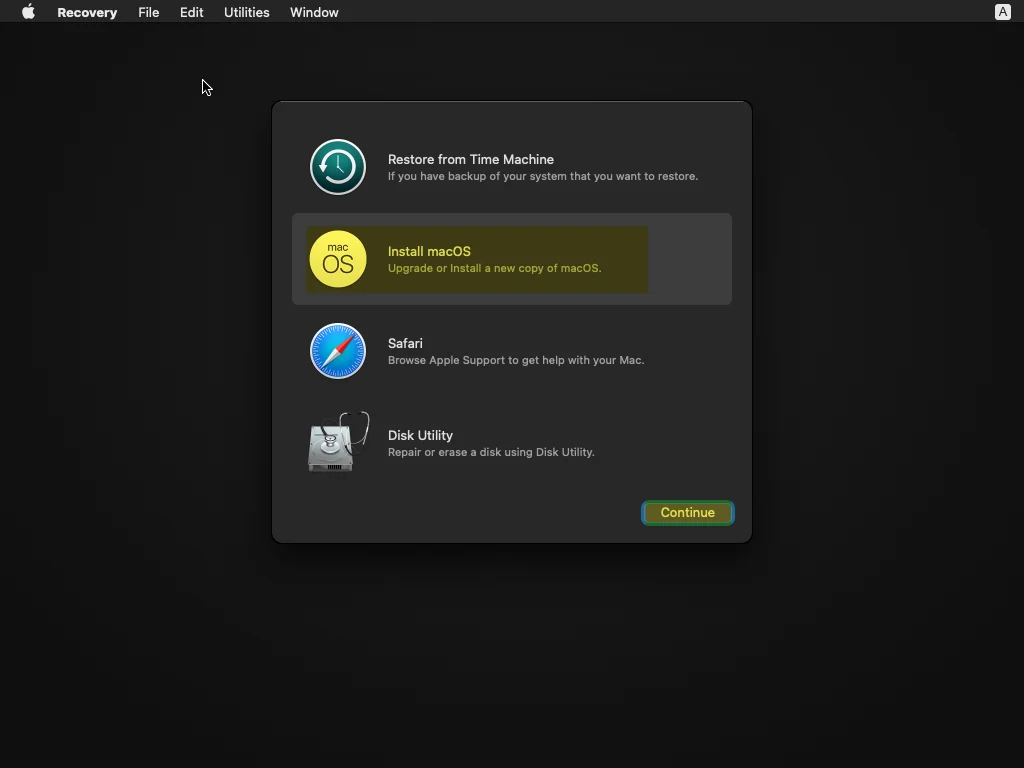
Once the disk erased click Done and close the Disk Utility window.

Again coming back to this window select the “Install macOS” option and click continue.
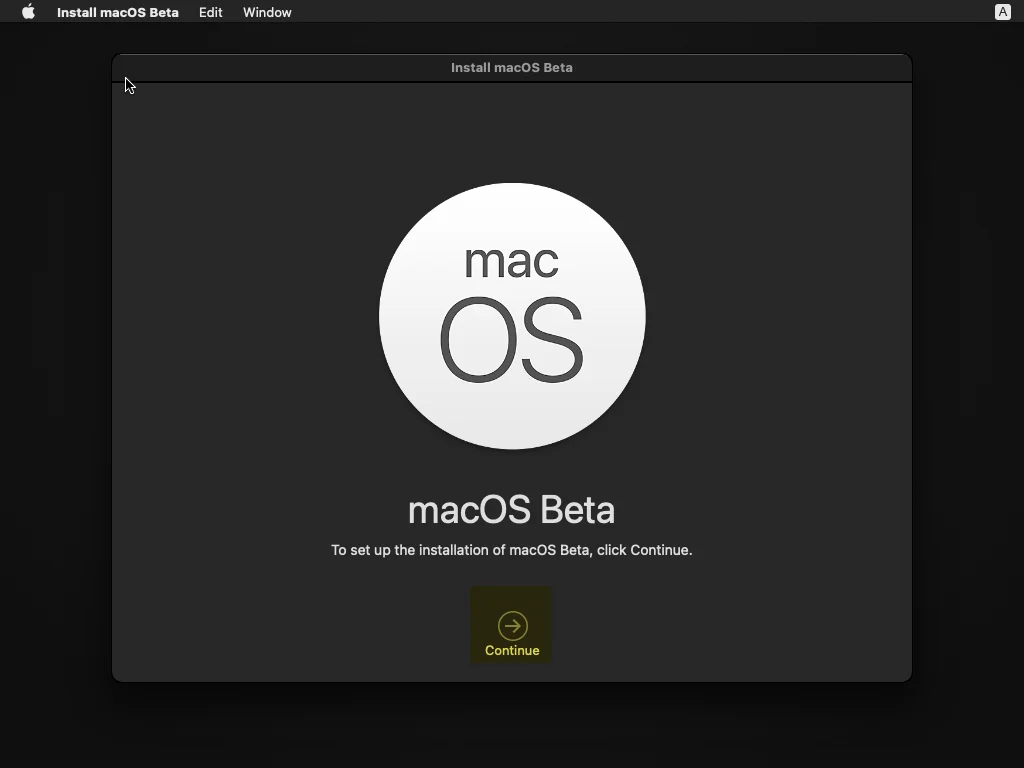
To set up the installation of macOS Beta, click continue.
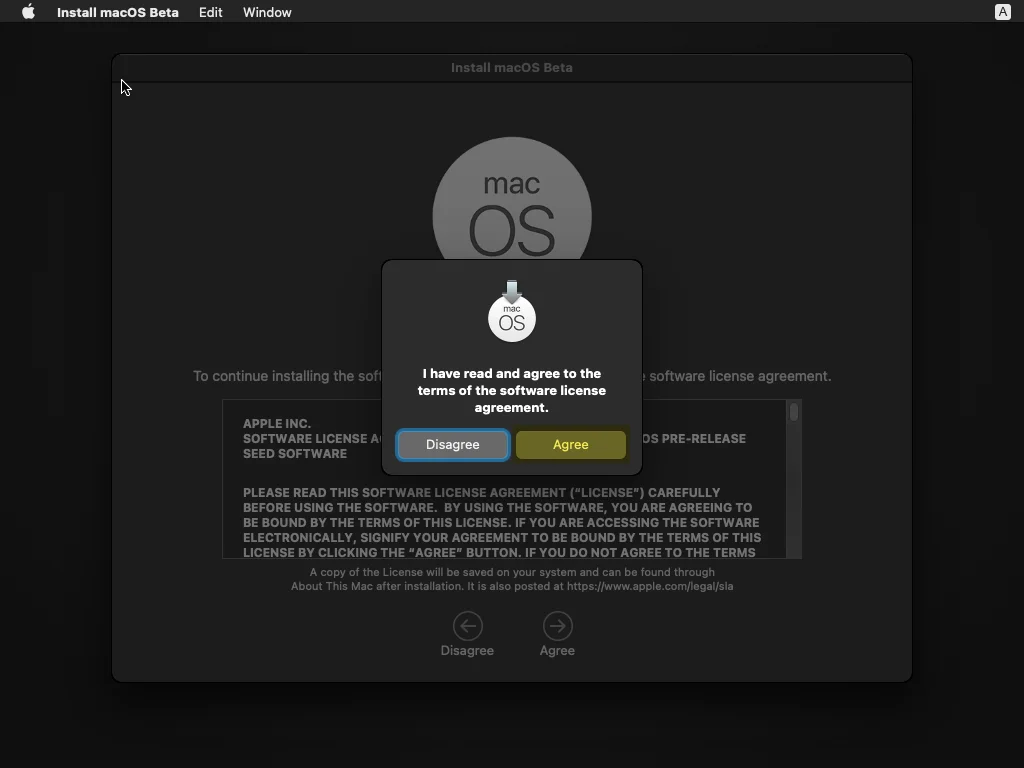
To continue the software installation of macOS Big Sur, you must agree with the terms and conditions of macOS Big Sur by clicking two times on the Agree option.
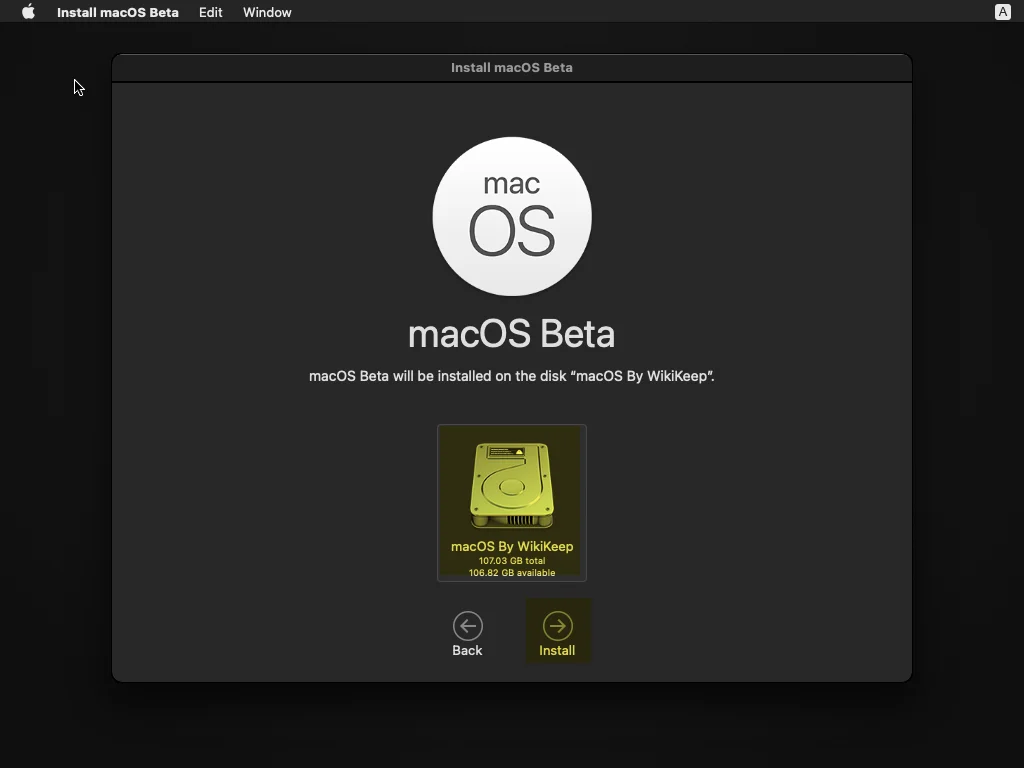
Select the disk where you want to install macOS Big Sur on it, if you remembered this disk was erased by Disk Utility. To continue the process click install.
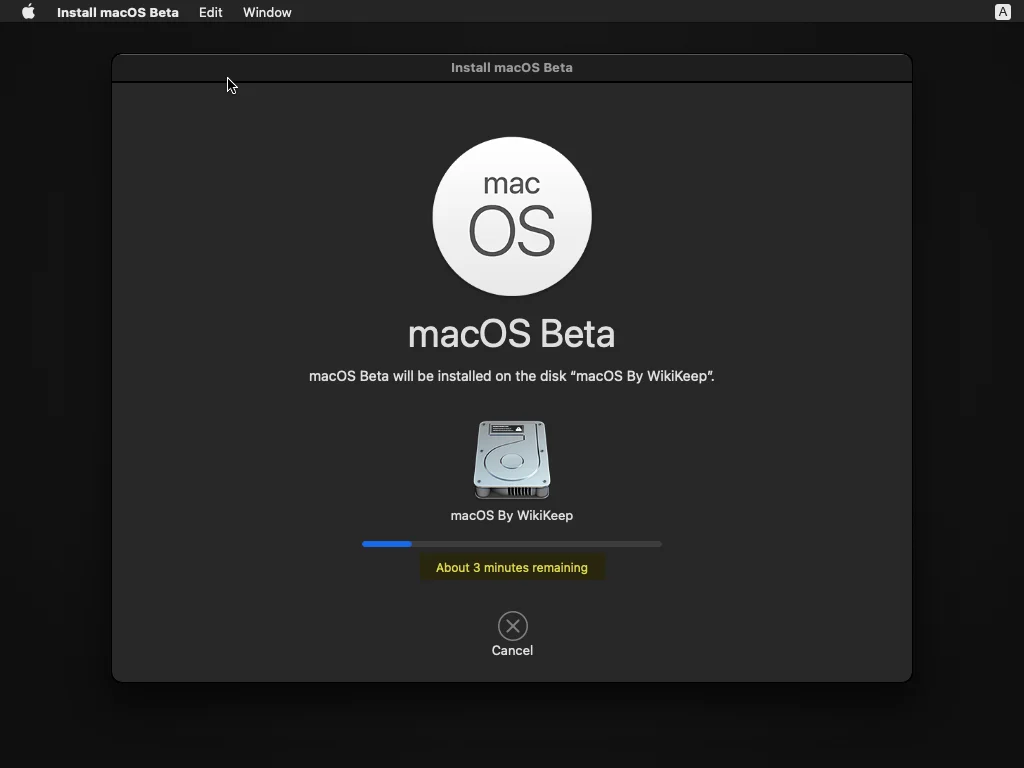
When you clicked on install button, wait here until the installation should be completed. When the installation completed automatically the virtual machine will restart.
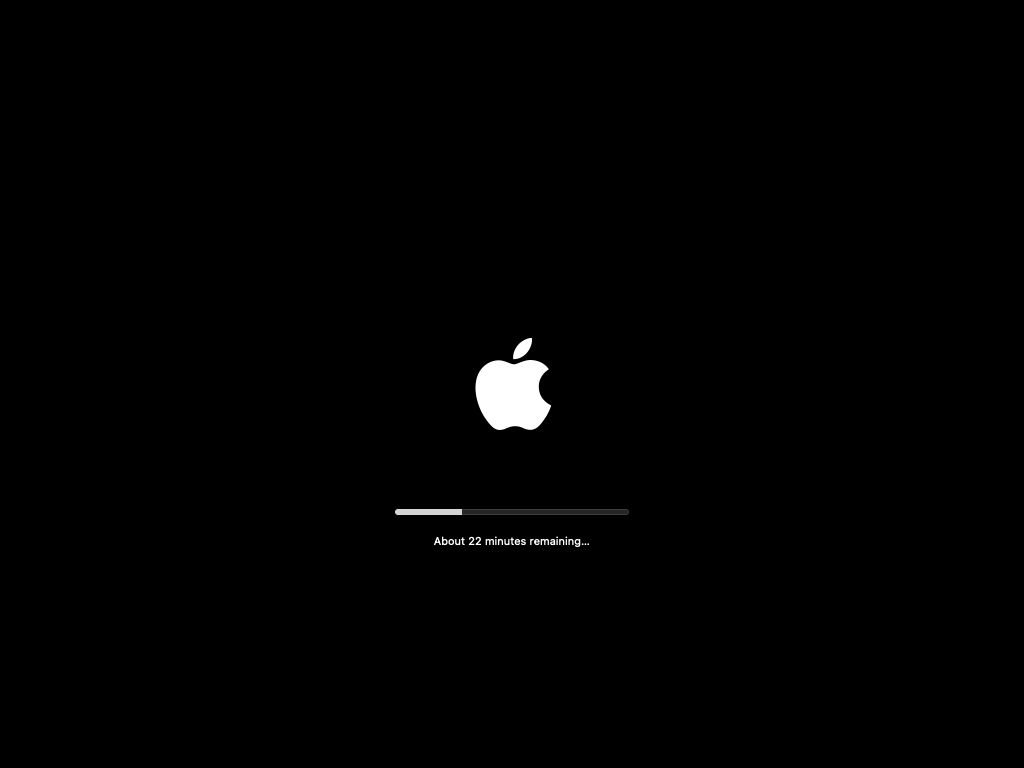
When the virtual machine restarted again the macOS Big Sur will begin starts installation, this portion of installation cover sometimes wait and don’t do anything.
Complete macOS 11 Big Sur Installation
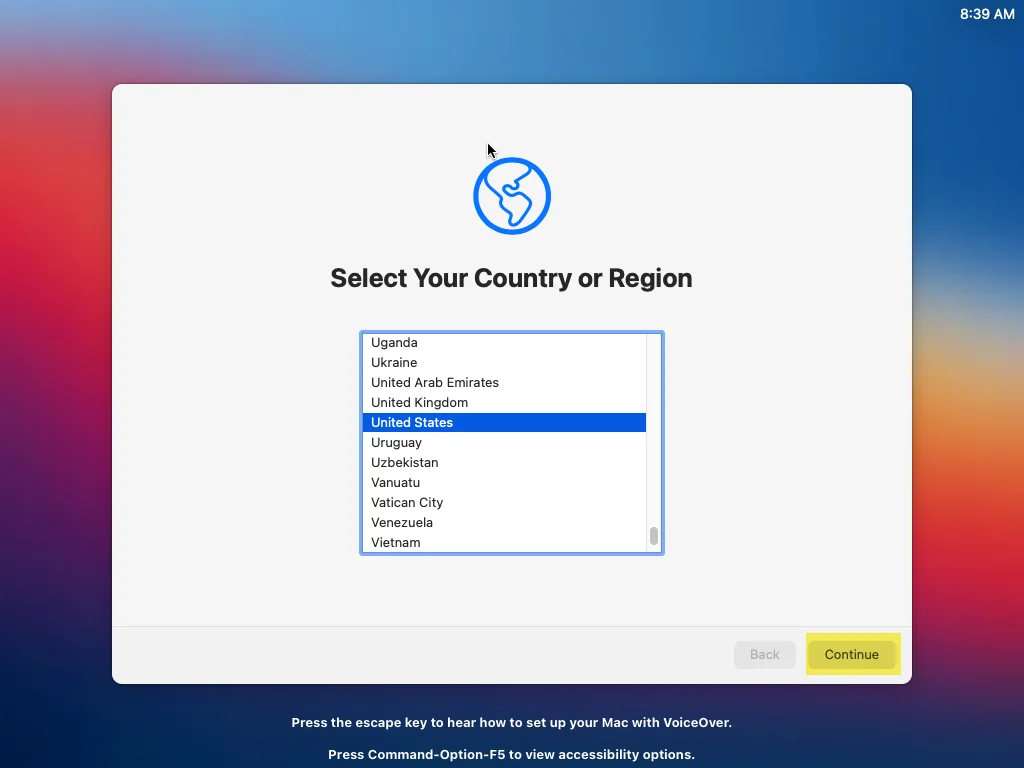
When the installation completed, you need to configure the first macOS Big Sur settings. In the first welcome screen Select your Country or region and click continue.
Select your Written and Spoken Languages and click continue.

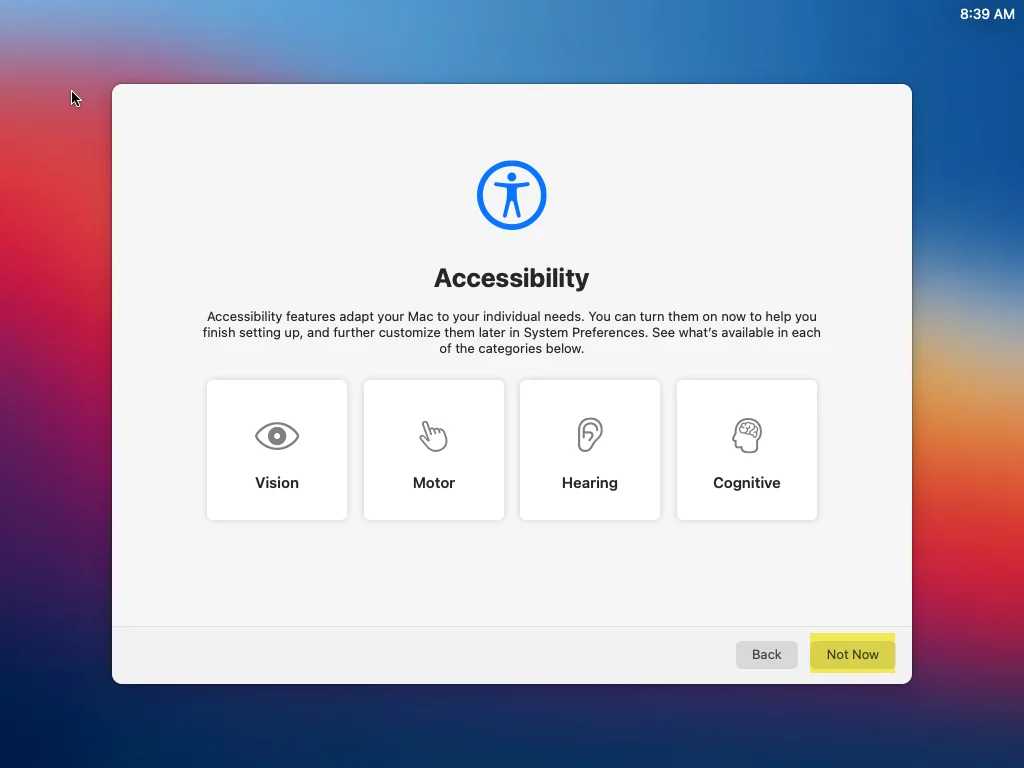
Accessibility features adapt your Mac to your individual need, therefore, you can customize it or simply click Not now.
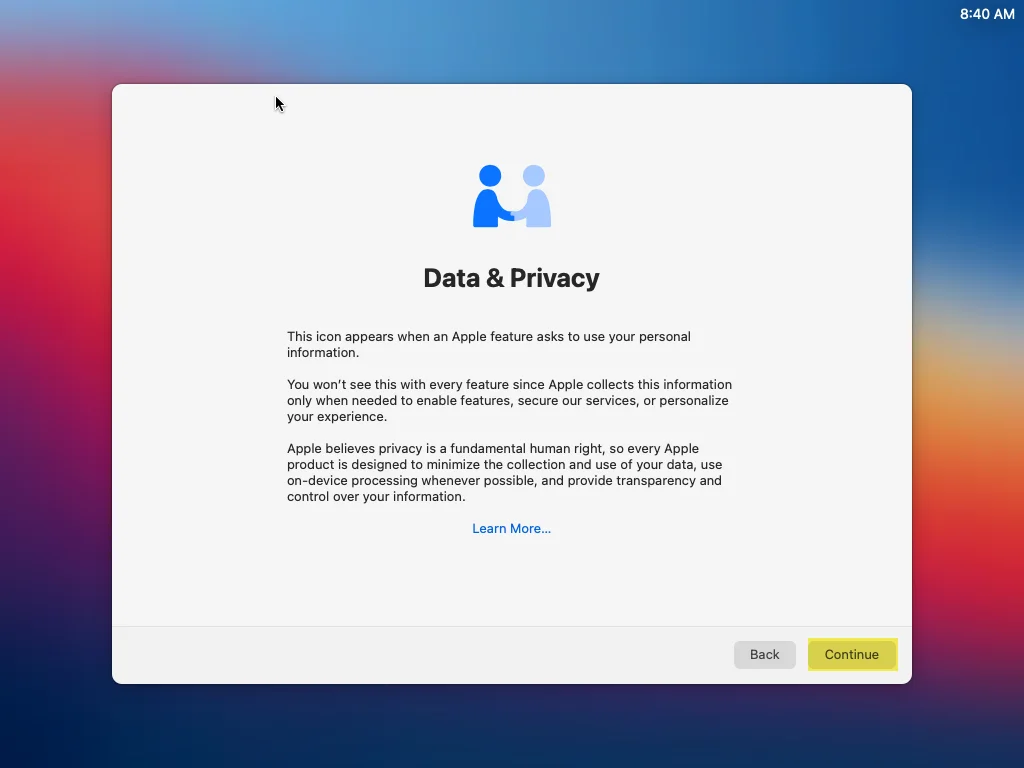
On the Data & Privacy window click continue
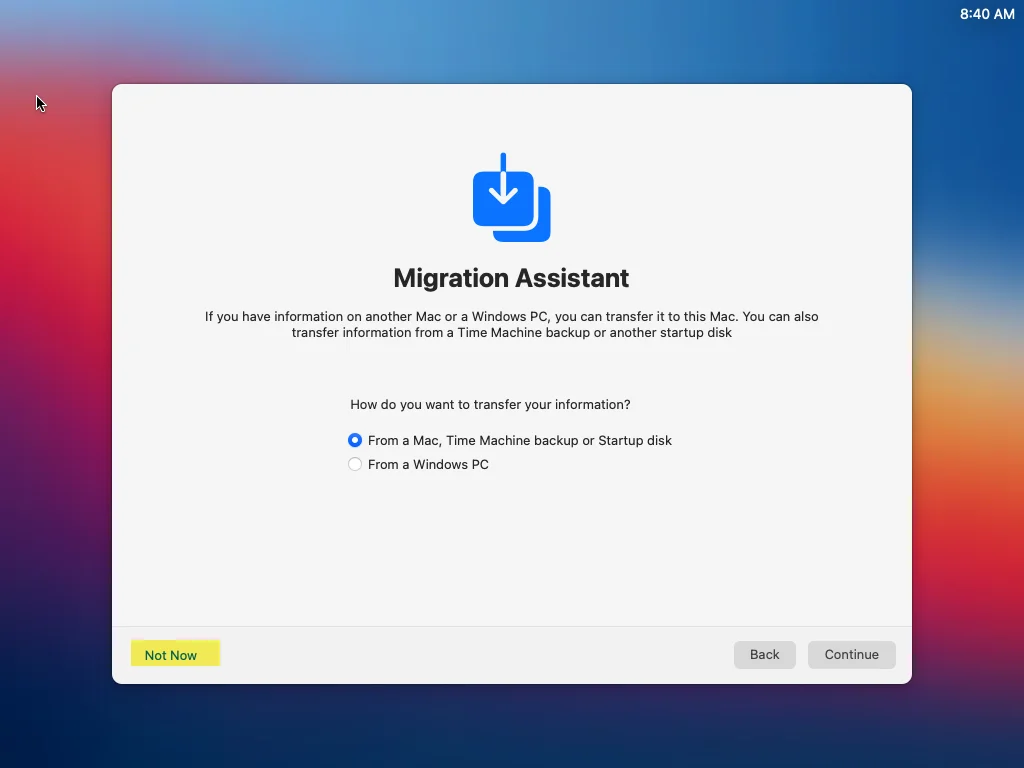
In the Migrant Assistant window, you can choose two options, “From a Mac, time machine backup or startup disk”, or “From a Windows PC”. If you have information on another Mac or a Windows PC, you can transfer it to this Mac, or simply you can select Now now option.
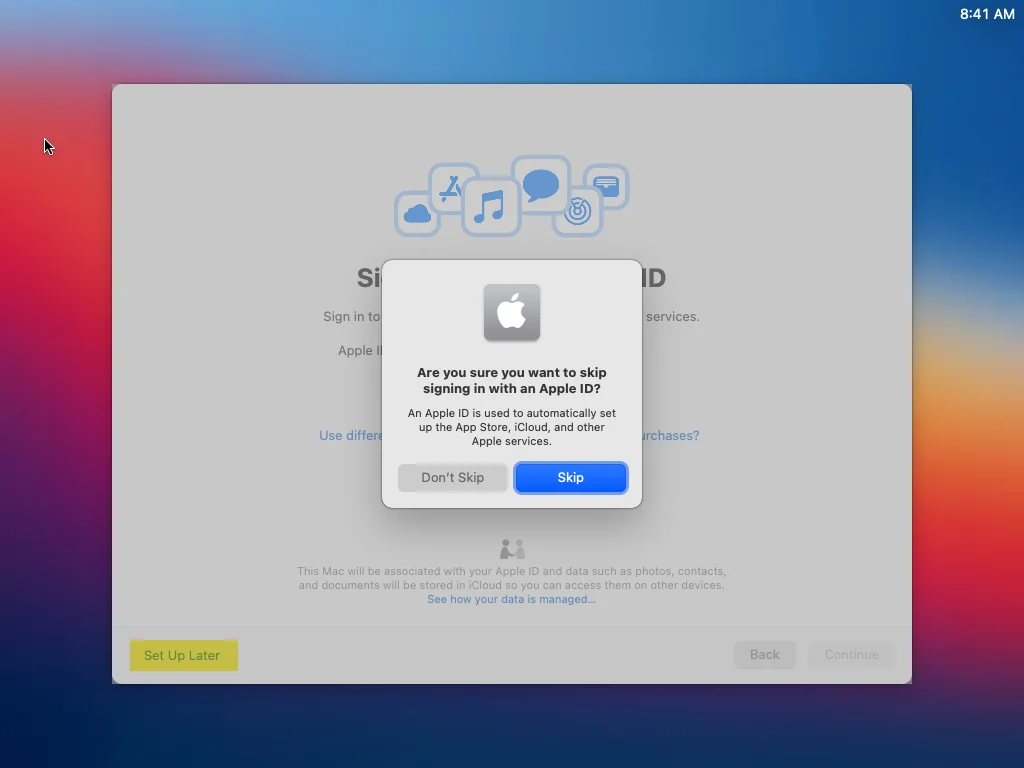
Now sign in with your Apple ID, if you don’t have any then click “Set up Later” and click Skip.
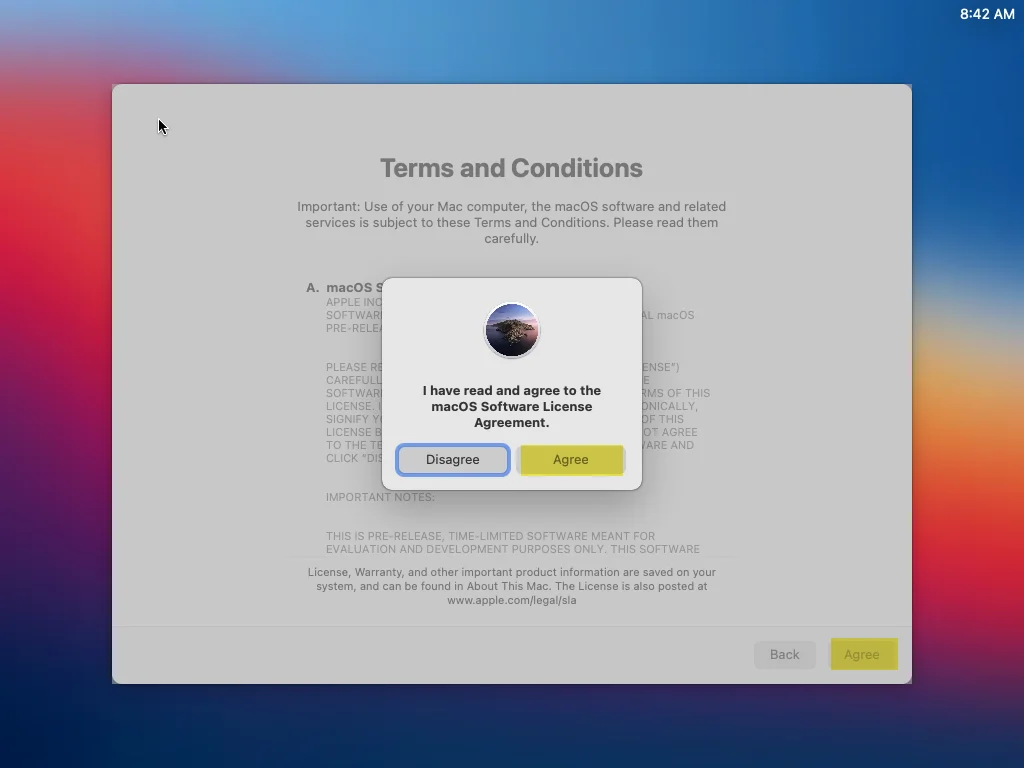
Agree with the terms and conditions of macOS Big Sur 11.
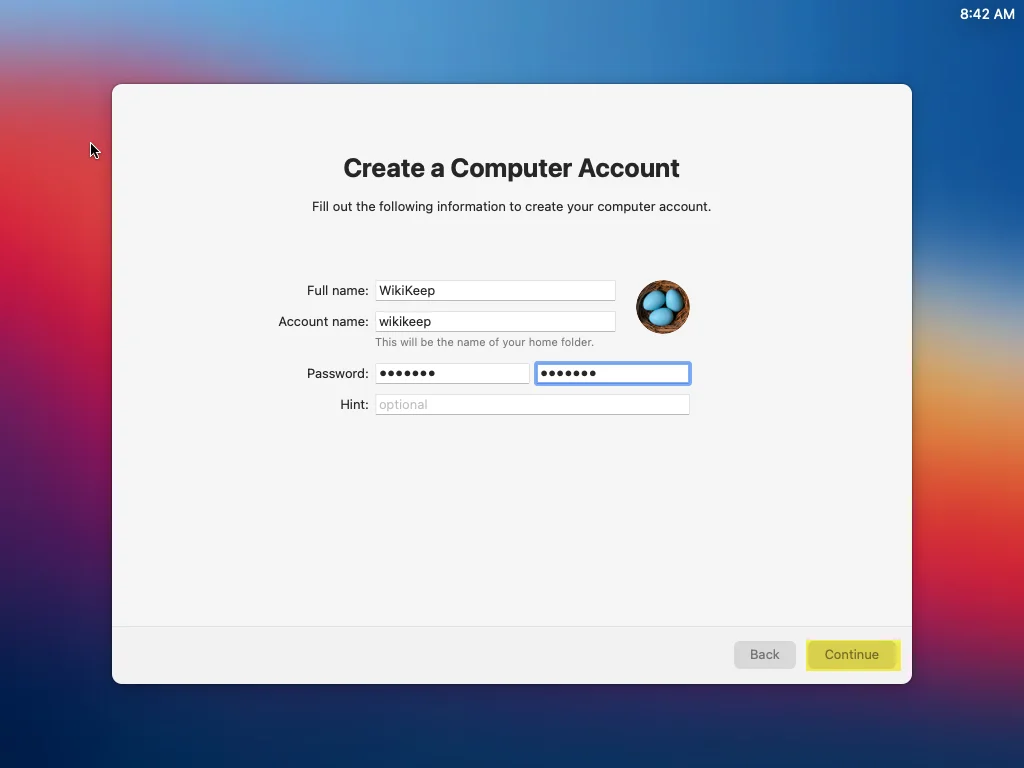
Create a computer account for macOS Big Sur by entering your full name, Account name, Password, and Hint then click continue.
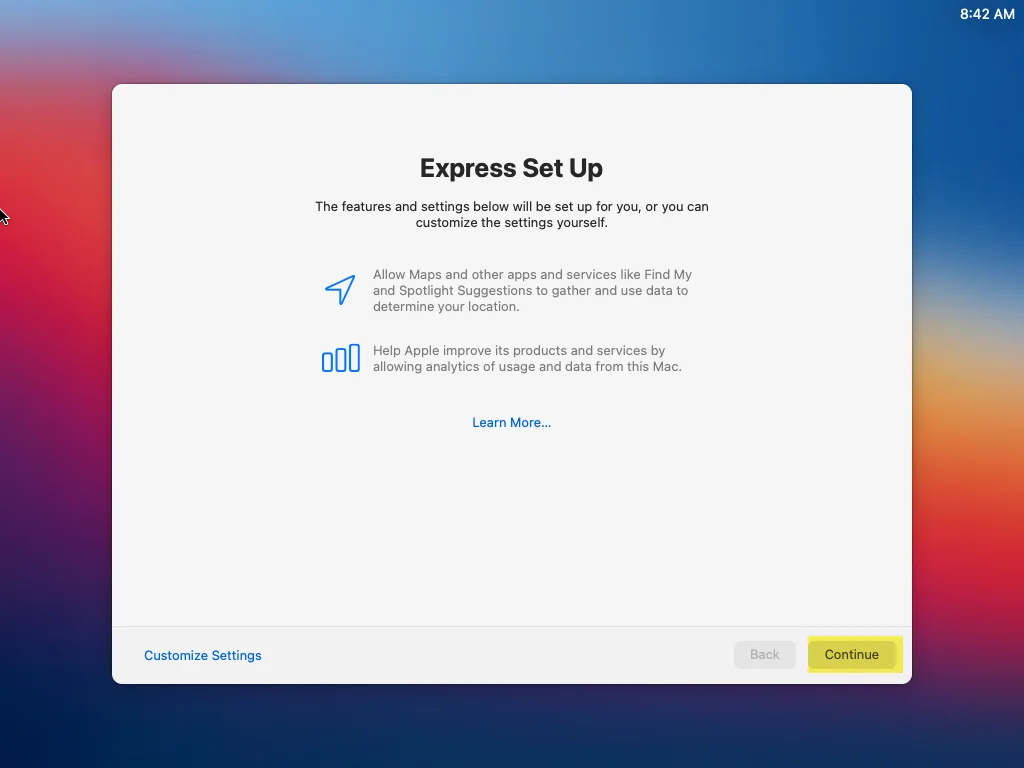
On express set up click continue without doing anything.
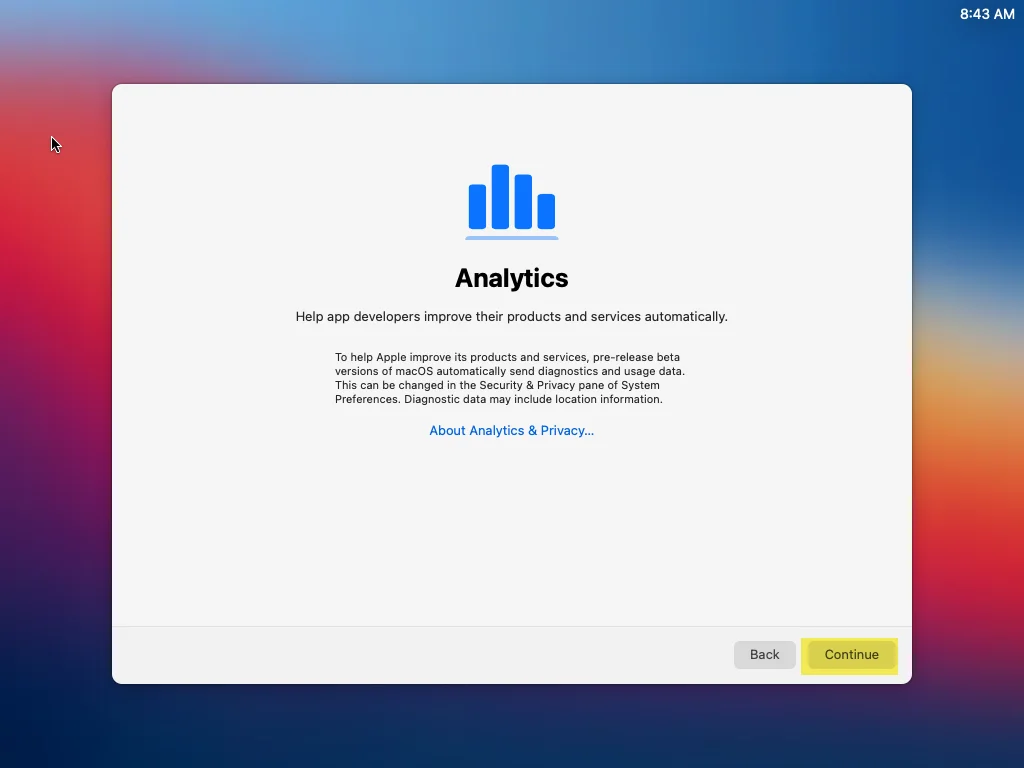
In the Analytics again click continue.
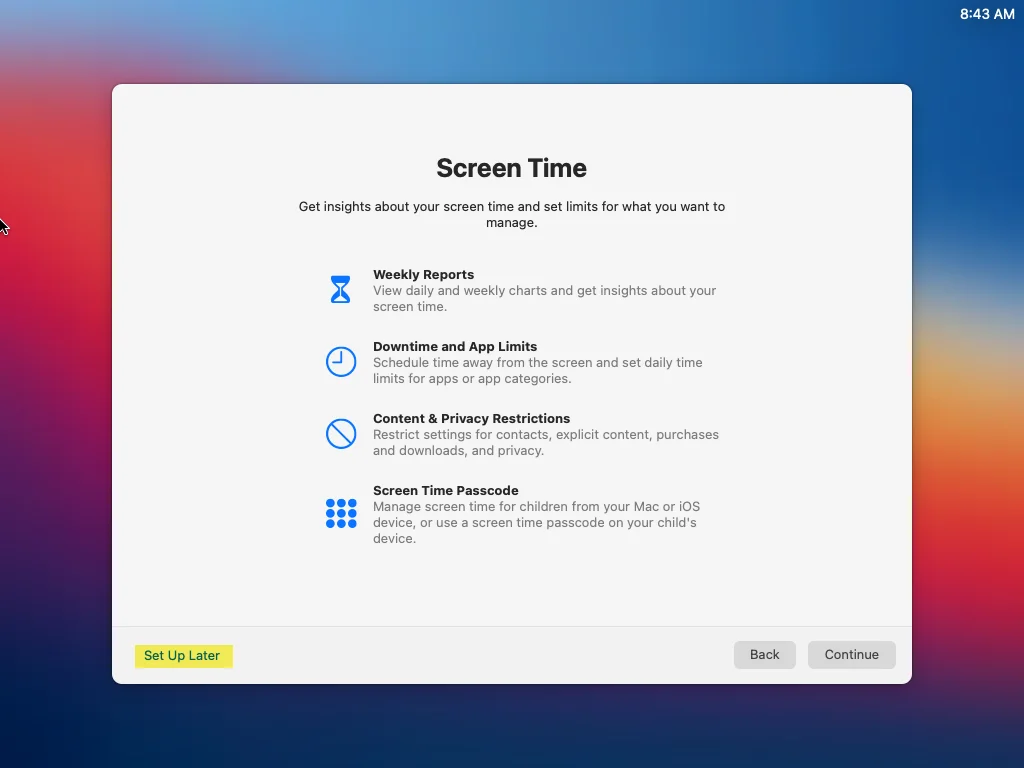
Click Set up later on the screen time window.
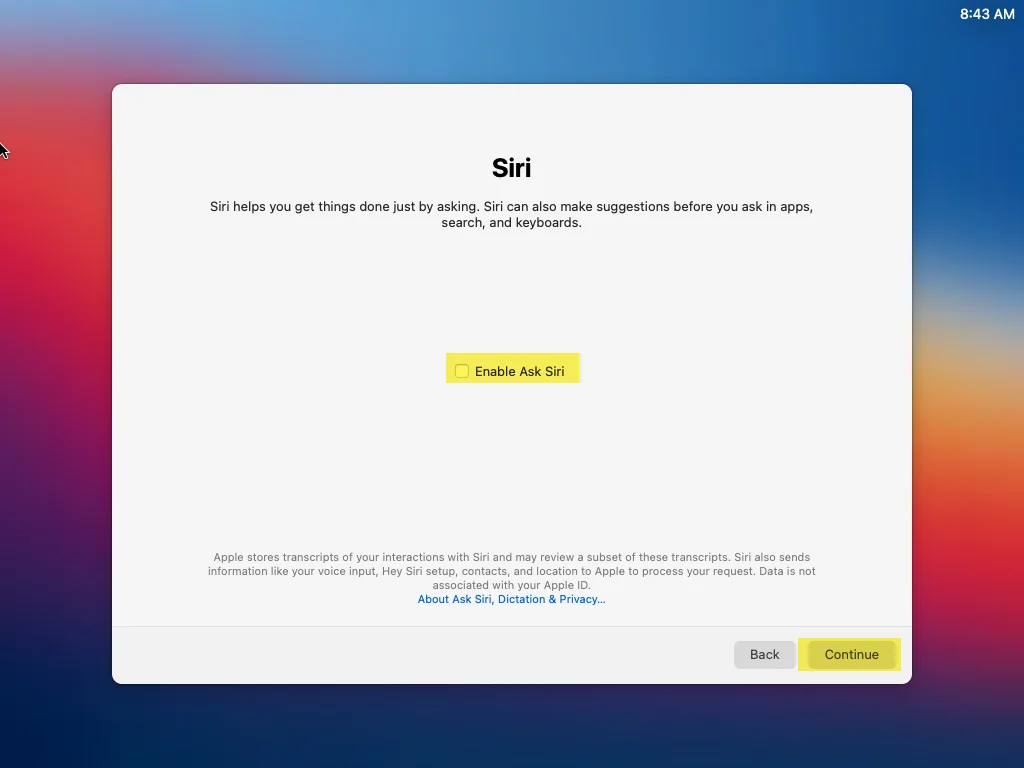
Disable the Siri option and click continue.
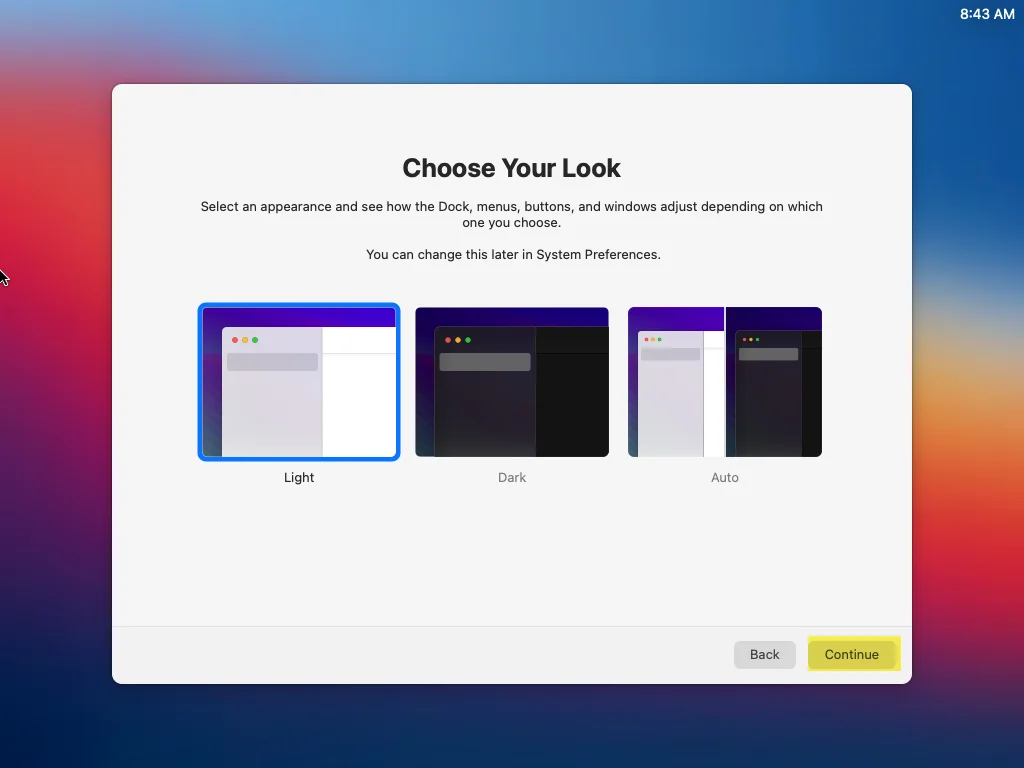
Select your look for macOS 11 Big Sur and click continue.
And wait until your Mac settings should get ready for the first use. Finally, macOS 11 Big Sur has been successfully installed on VMware on Windows PC.
Enter macOS 11 Big Sur Full-screen Mode
The last thing is to enter macOS 11 Big Sur full-screen mode on VMware is remaining. So, check the below link on how to enable the full-screen mode of macOS 11 Big Sur on VMware Workstation. Furthermore, when the installation completed after installing the VMware Tools on macOS 11 Big Sur. You will be able to see the full-screen mode of it. And also, for better instruction contact the below link.
Hi, I have my installation stopped with an error message ” An error occurred loading update. I have tried it many times on different days still same error, what do you suggest I do.
Thank you for your support.
The CPU has been disabled by the guest operating system. Power off or reset the virtual machine.
I have the same problem with my Ryzen 7 4800H