At the recent WWDC 2020 “Worldwide Developer Conference” Apple released one of the biggest Macintosh operating systems macOS 11 Big Sur. The macOS Big Sur is the successful major release of macOS Catalina 10.15. This operating system is completely changed and pretty cool for everyone. In the era of the Macintosh operating system, we have experienced the dark mode for the first time in macOS Mojave 10.14 with a bunch of other features. And for the first time, we completed our experience using our iPad screen, as the second screen display on macOS Catalina 10.15.
22nd June 2020 was the biggest day for Apple that announced the biggest operating system macOS Big Sur, iOS 14, iPad OS 14, Watch OS 7, tvOS 14. And for MacBook users, Apple unveiled the next macOS Big Sur operating system. The biggest OS has the biggest redesign since the introduction of macOS 10. According to Apple announcements, the new operating system has brought many new elements from iOS, which includes a cool customizable Control Center, where you can control the Brightness of your PC with a single toggle, Do Not Disturb, and other pretty nice settings. You will face the Notifications center in macOS Big Sur.
Apple has redesigned some more cool tweaks in macOS Big Sur, such as the menu bar is taller and translucent. Also, the interface font color automatically will change according to your desktop background color. Alongside, the macOS window is more translucent with rounded edges.
The number of Applications has been redesigned in macOS Big Sur such as Mail, Photos, Notes, and iWork. Apple has introduced new features for messages, customizable icons, group chats, a new photo selection interface, messages effects, and new Memoji stickers. The new version of Maps with a bunch of features in macOS Big Sur, including Custom Guides, 360-degree location, Bicycle, and electric-vehicle directions.
Apple introduced several new Catalyst Apps in macOS Big Sur in WWDC with a new look. The dock buttons also redesigned to look more similar to their iOS counterparts. The new update for the Safari browser made the browser %50 faster than Google Chrome.
Still, macOS Big Sur is in Beta mode, firstly Apple releases the Beta version for their users, due to some issues. After that, getting some feedback from users they will release the full version. Now you can Download and Install macOS Big Sur on your Mac PCs. And the macOS Big is available on the Apple Beta Developer Program website. If you have an Apple Developer Account simply sign in and download it there. But due to critical issues, I want to install macOS 11 Big Sur on VirtualBox on Windows PC.
If you don’t have a Mac PC, or you are a Windows user, easily you can test macOS operating system on your Windows PC to complete your experience and check out the new features. In the era of Hypervisor, there are a lot like VMware Workstation/VMware Player, VirtualBox, Hyper-V. But VirtualBox is the best option for Windows users to test operating systems. Because VirtualBox is a non-paid application which you don’t need to purchase it. But VMware Workstation will come in two different versions. After installing you will use it for a 15-Days trial, but to use it permanently you need to purchase it.
- How to Install macOS 11 Big Sur on VMware on Windows PC
- How to Install macOS Mojave 10.14 on VirtualBox on Windows PC
- How to Install macOS Mojave 10.14 on VMware on Windows PC
- How to Install Windows 10 on macOS Big Sur Via VirtualBox
- How to Install Windows 10 on macOS Big Sur Via VMware Fusion
Learn how to install macOS Big Sur on VMware & VirtualBox using VMDK file.
- Install macOS Big Sur on VMware on Windows – VMDK
- Install macOS big Sur on VirtualBox on Windows – VMDK
Install macOS 11 Big Sur on VirtualBox on Windows PC
1. Required Files
Before getting started to install macOS 11 Big Sur on Windows PC, you need to download some requirements.
- Download macOS 11 Big Sur vmdk
- Download VirtualBox latest version
- Download VirtualBox Extension Pack
- Download WinRAR and 7zip
After installing VirtualBox on your Windows PC, besides that, you have to install VirtualBox Extension Pack. The extension pack is a helper tool that fixes the problem of mouse & keyboard stuck on VirtualBox. While installing macOS operating you might face mouse & keyboard stuck, but after installing the extension pack the issue will fix.
WinRAR and 7zip will help you to extract the macOS Big Sur vmdk file. If you don’t have the WinRAR and 7zip simply download and install it on your PC. It will allow you to extract the vmdk file of macOS Big Sur.
– Create macOS Big Sur ISO file
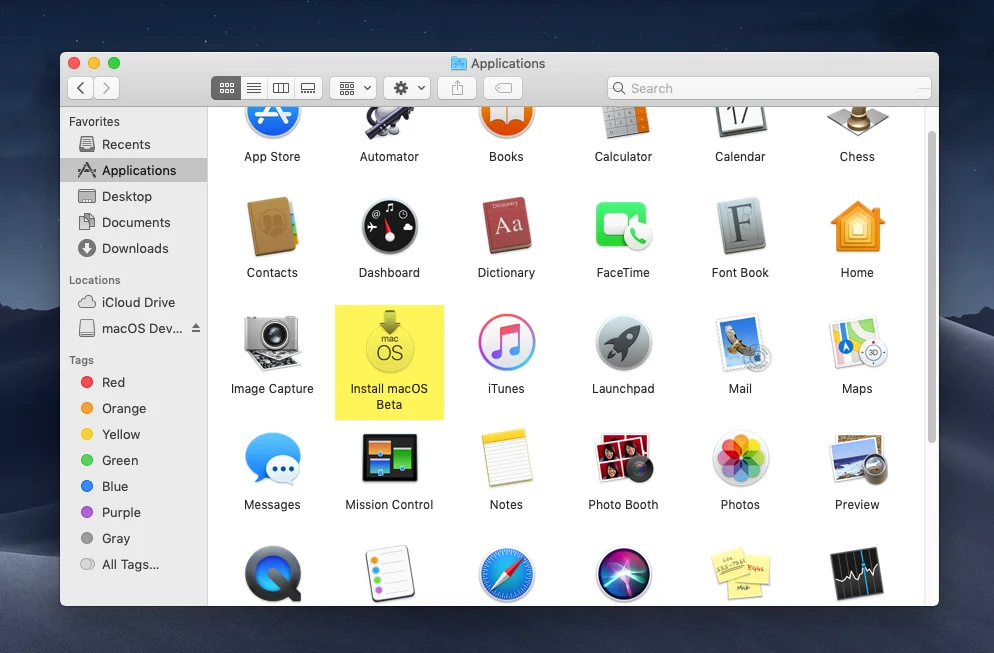
One of the important points in here while downloading macOS Big Sur in Beta version. Then that is not available in ISO file. Therefore, you have to create a macOS Big Sur ISO file, using some commands. Firstly, download the macOS Big Sur installer file, then move that to the Applications folder. The name of macOS Big Sur will be located as “macOS Big Bur. Beta”. After that, open the terminal for applying the commands to create macOS Big Sur ISO.
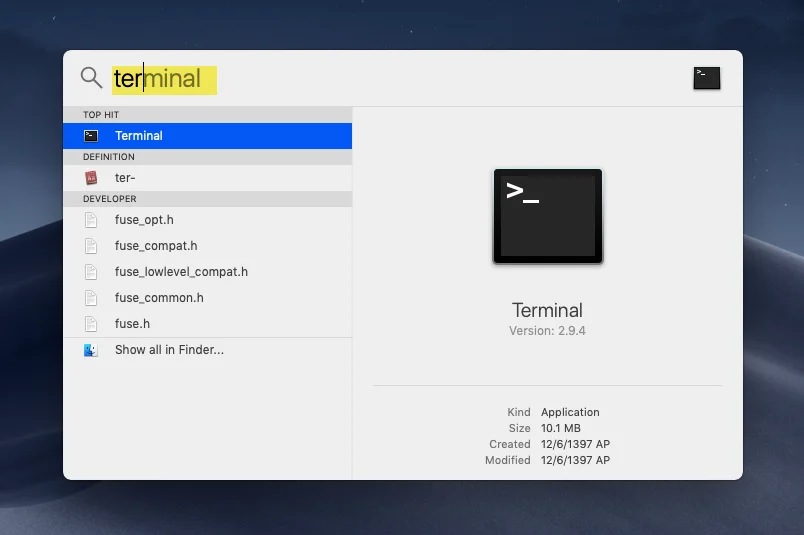
Navigate to search spotlight then search for terminal and press enter to open.
When the terminal opened one by one apply the below commands into terminal.
# Create a macOS Big Sur Virtual Disk Image
hdiutil create -o /tmp/bigsur -size 10250m -volname bigsur -layout SPUD -fs HFS+J
# Mount this Image to macOS
hdiutil attach /tmp/bigsur.dmg -noverify -mountpoint /Volumes/bigsur
# Use macOS Big Sur Createinstallmedia Tool to create a Installer Image
sudo /Applications/Install\ macOS\ Beta.app/Contents/Resources/createinstallmedia --volume /Volumes/bigsur --nointeraction
# Unmount Volume Install macOS Beta
hdiutil eject -force /Volumes/Install\ macOS\ Beta
# Convert the bigsur.dmg to a bigsur.iso for Virtual Machine
hdiutil convert /tmp/bigsur.dmg -format UDTO -o ~/Desktop/bigsur.cdr
# Move and Rename bigsur Image to Desktop
mv ~/Desktop/bigsur.cdr ~/Desktop/bigsur.iso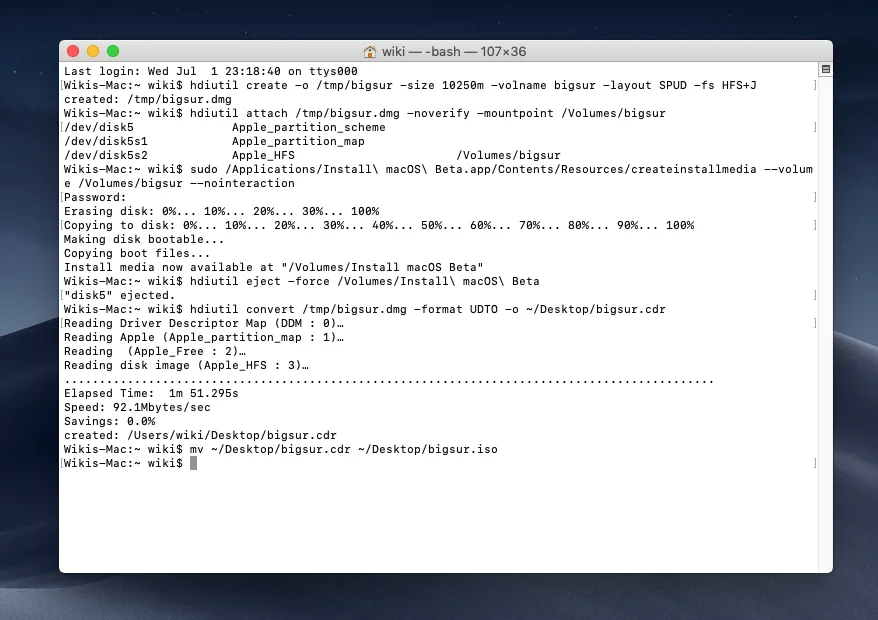
2. Install VirtualBox on Windows 10
When you have downloaded the VirtualBox setup so let’s get started with the installation guide.
- Double-click to launch the VirtualBox installation, on the welcome wizard click Next.
- To continue the installation click Next.
- Now the setup will get ready for the installation click Install.
- Oracle VirtualBox is a trusted application for Windows, so click Install.
- Wait for the installation to be completed.
- When the installation completed click Finish to close the window.
3. Install VirtualBox Extension Pack
As I above mentioned for you that while installing any macOS operating system on VirtualBox the mouse and keyboard stuck. To stop this error on VirtualBox you need to install VirtualBox Extension Pack properly after installing VirtualBox.
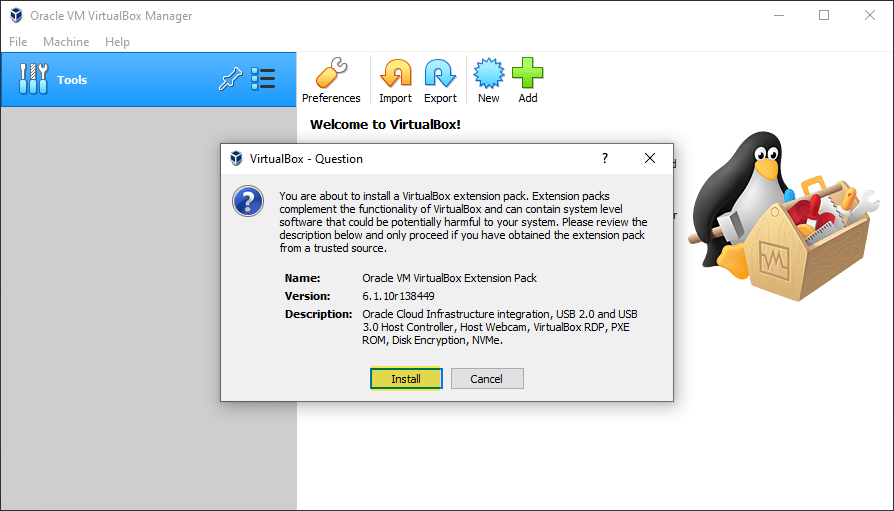
When you have downloaded VirtualBox Extension Pack, double-click on setup to open. On the welcome screen click on (Install) button.
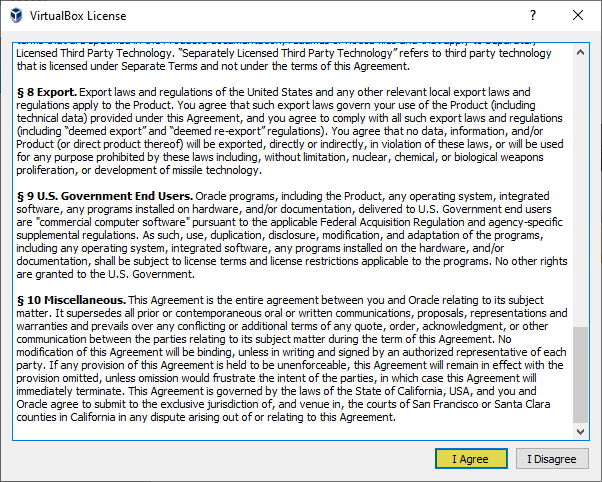
Agree with the terms and conditions of the VirtualBox license and click Agree.
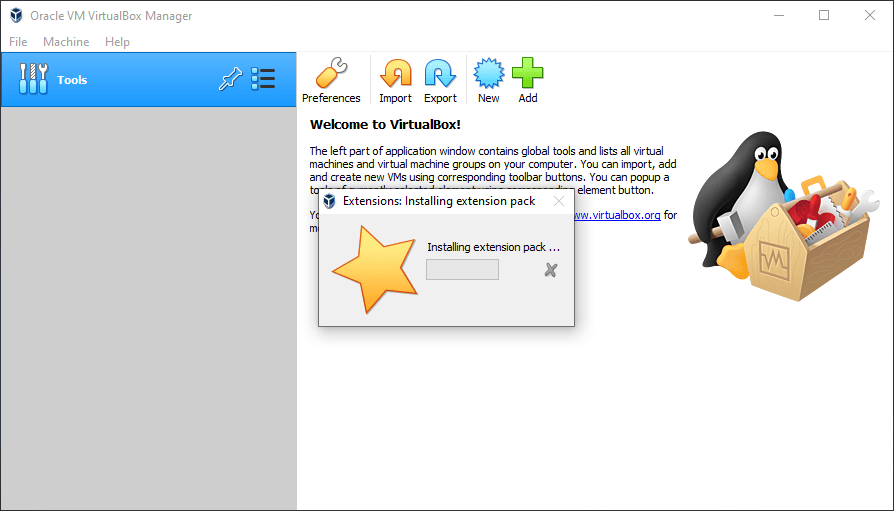
Wait here until the VirtualBox Extension Pack should install.
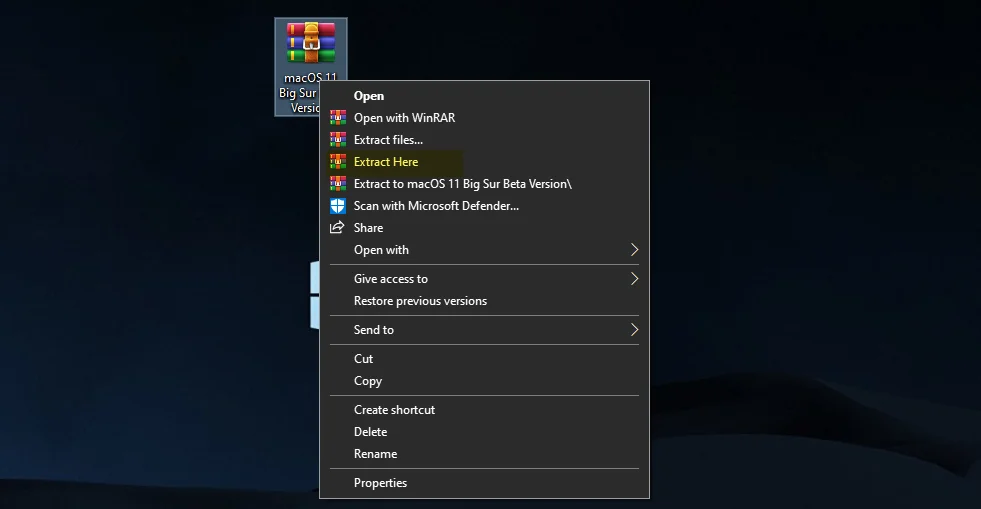
Once the VirtualBox Extension Pack successfully installed alongside the VirtualBox. Over ahead to macOS 11 Big Sur vmdk file, and using the WinRAR or 7zip extract that. Because in next we are going to create a virtual machine for macOS 11 Big Sur. To extract the vmdk file right-click and select “Extract Here”.
4. Create a New Virtual Machine for macOS 11 Big Sur
To create a new virtual machine for macOS 11 Big Sur open up the VirtualBox, on the VirtualBox main window click on the “New” option.
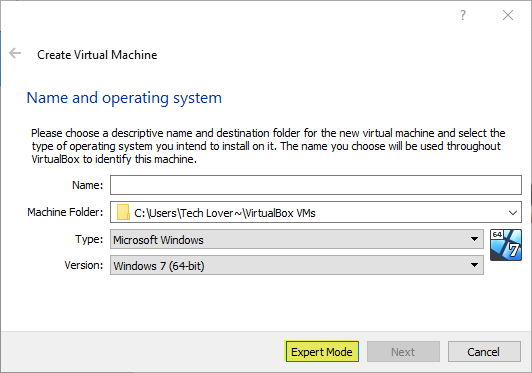
Click on “Export Mode”, always using any ISO file of any operating system use the export mode method.
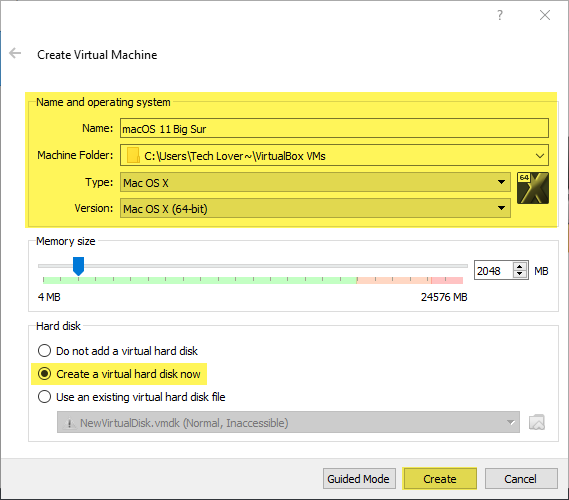
For creating a virtual machine for macOS 11 Big Sur select a name, specify the machine folder, Type Mac OS X, Version Mac OS X (64-Bit). Then select “Create a virtual hard disk now” option, and click Create.
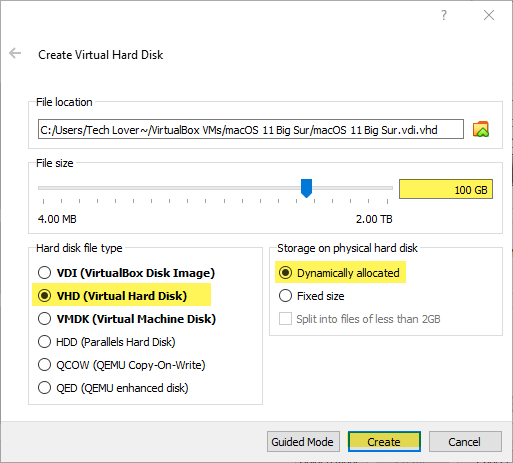
Now specify the location where you want to save macOS 11 Big Sur, at least select the file size for macOS Big Sur 100GB or more than that. From hard disk file type select the “VHD (Virtual Hard Disk)” option, and select the “Dynamically allocated” option and click create.
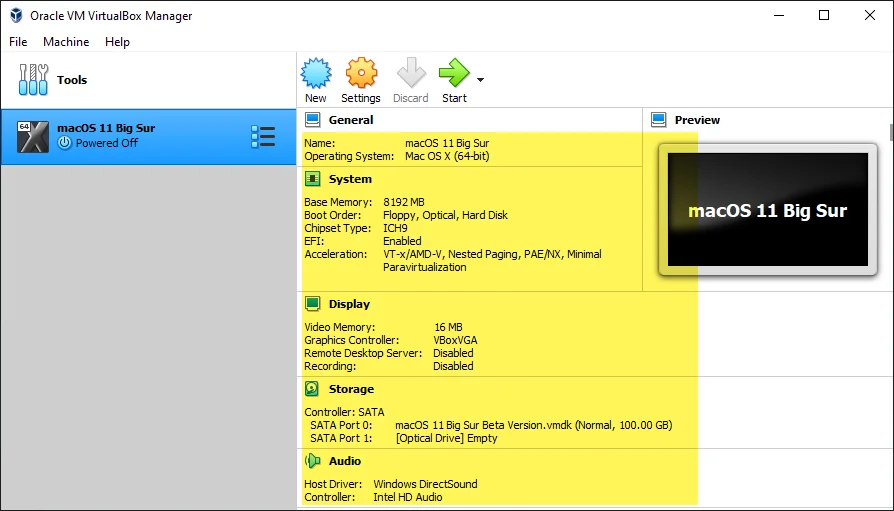
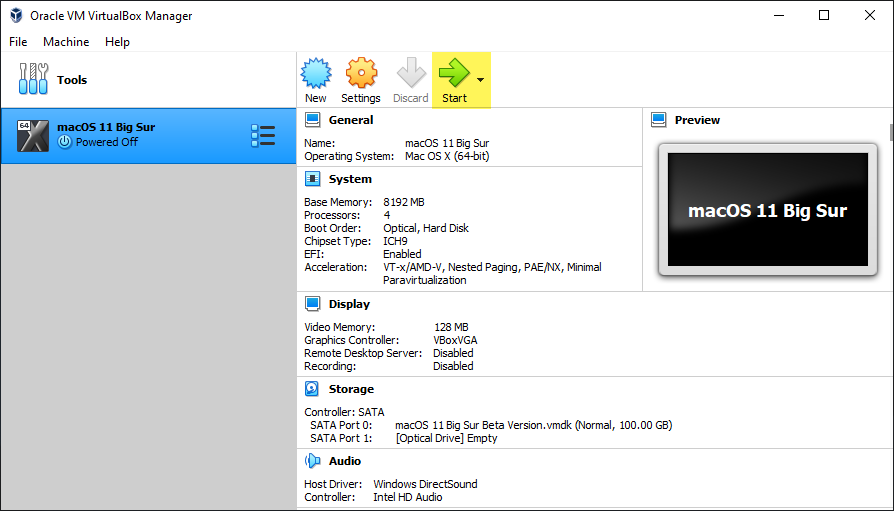
And at last, be sure that your Virtual machine should be according to below down screenshot settings.
5. Edit Virtual Machine Settings
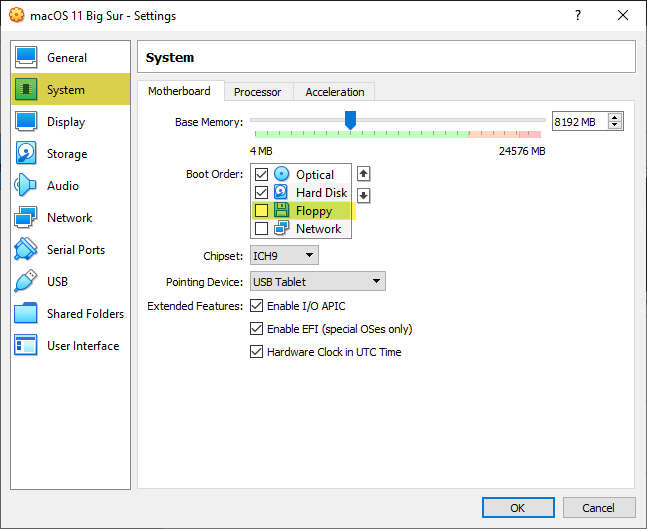
For better performance of the installation, you need to edit some BIOS settings of the Virtual machine. To edit that select the created virtual machine, then click on top bar on “Settings”. When the settings window opened select the “System” tab from left-handed, then on the “Motherboard” tab uncheck the “Floppy disk.
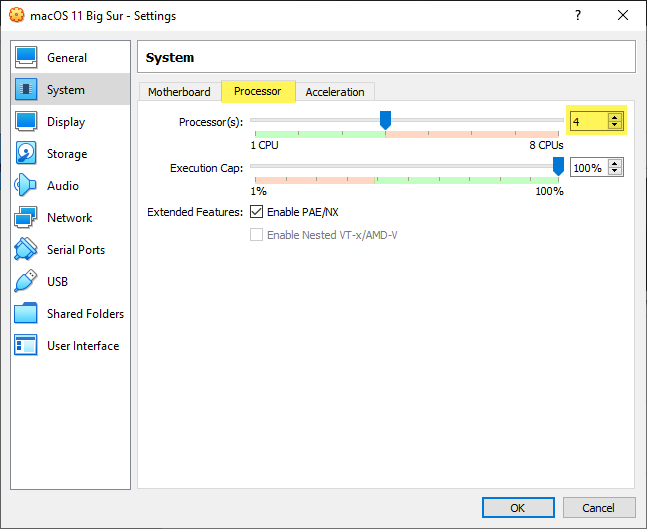
Select the processor tab, and increase the number of processors.
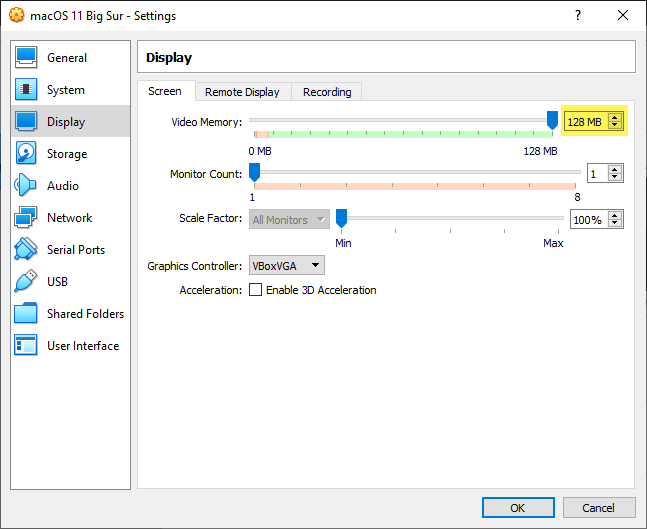
Over ahead to the “Display” tab, then increase the “Video Memory” up to “128MB”.
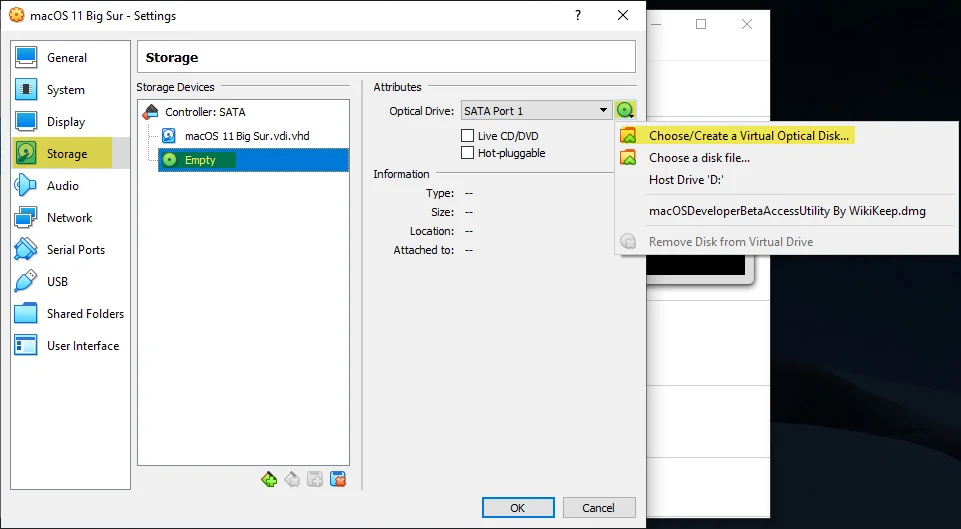
Select the “Storage” tab, click on “Empty” then click on “CD Drive icon” and select the “Choose/Create a virtual optical disk…” option.
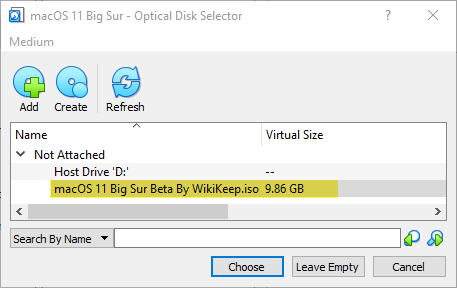
Here click on the “Add” option, then select the macOS 11 Big Sur vmdk or ISO where you placed that and click Open. Be sure that macOS vmdk inserted to VirtualBox, at last click “Choose”.
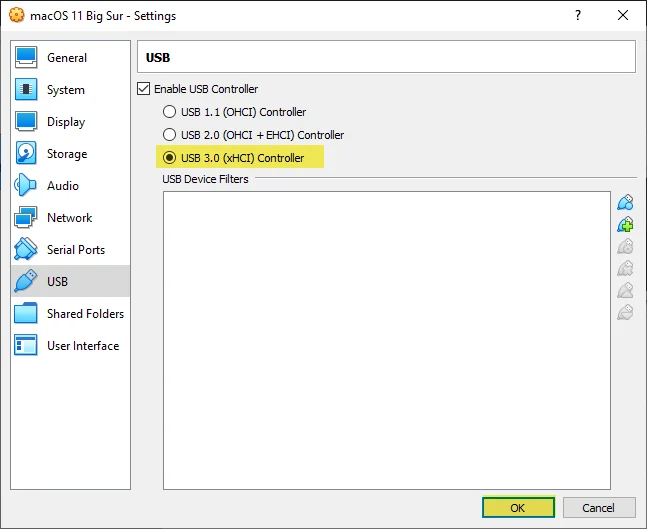
Navigate to the “USB” tab and select the third option “USB 3.0 (xHCI) Controller, at last, to make these changes to the virtual machine click OK.
6. Apply the VirtualBox Commands using Command Prompt
The VirtualBox commands are those commands which stop critical issues during the installation. On the other hand, we can nominate this commands the configuration of Virtual Machine on VirtualBox on Windows PC. If you don’t apply these commands then you won’t be able to install the macOS operating system on VirtualBox.
Attention! To apply the VirtualBox commands completely close the VirtualBox if it’s running in the background.
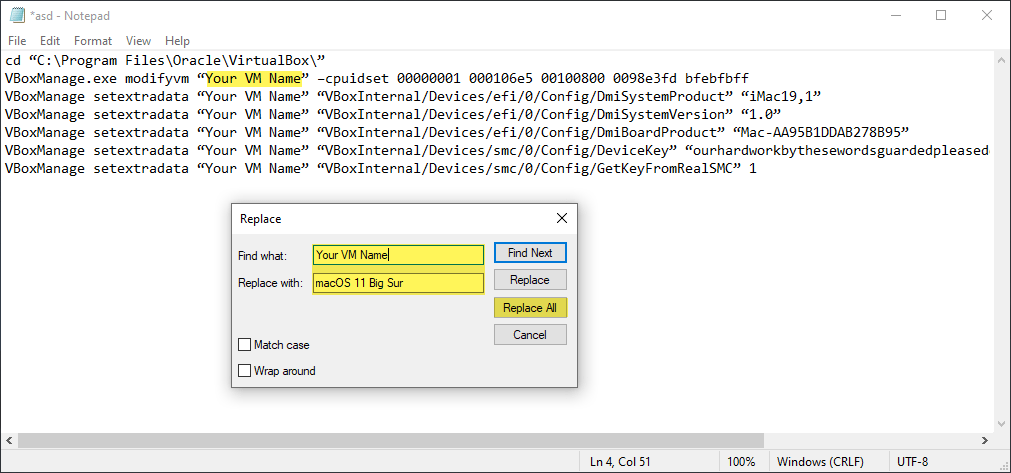
Now copy the below commands into Notepad, Wordpad, or MS.Word. Because further, we need to change the “Virtual Machine Name” with the commands name.
cd “C:\Program Files\Oracle\VirtualBox\”
VBoxManage.exe modifyvm “Your VM Name” –cpuidset 00000001 000106e5 00100800 0098e3fd bfebfbff
VBoxManage setextradata “Your VM Name” “VBoxInternal/Devices/efi/0/Config/DmiSystemProduct” “iMac19,1”
VBoxManage setextradata “Your VM Name” “VBoxInternal/Devices/efi/0/Config/DmiSystemVersion” “1.0”
VBoxManage setextradata “Your VM Name” “VBoxInternal/Devices/efi/0/Config/DmiBoardProduct” “Mac-AA95B1DDAB278B95”
VBoxManage setextradata “Your VM Name” “VBoxInternal/Devices/smc/0/Config/DeviceKey” “ourhardworkbythesewordsguardedpleasedontsteal(c)AppleComputerInc”
VBoxManage setextradata “Your VM Name” “VBoxInternal/Devices/smc/0/Config/GetKeyFromRealSMC” 1
For the easiest replacement of the Virtual Machine name, I have chosen Notepad. When all the commands copied to notepad, click on the top bar on “Edit” and select the “Replace” option. After that, replace “Your VM Name” with the name of Virtual Machine and click “Replace All”, as you see the below down screenshot.
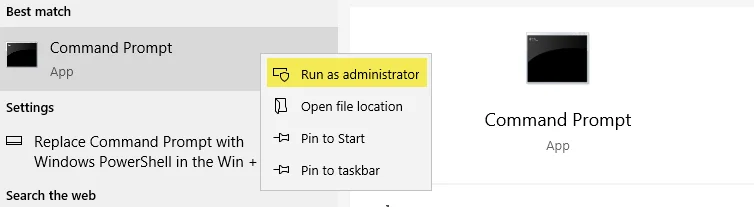
Now over ahead to Windows start menu type there “CMD”, when cmd appeared right-click and select “Run As Administrator”.
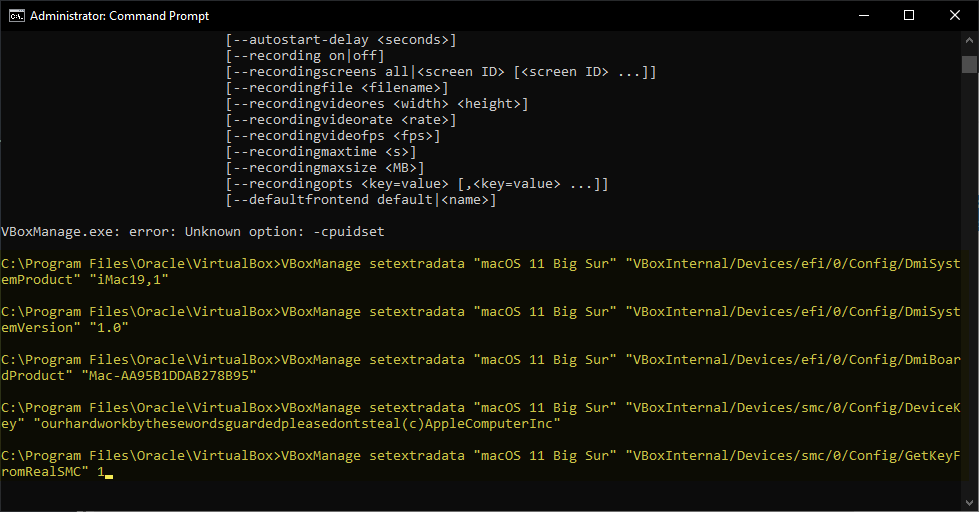
While the command prompt opened, copy the first line of the commands then paste it to cmd and press enter key. After that, select all the rest of the commands and paste it into cmd then press enter.
Install macOS 11 Big Sur on VirtualBox on Windows PC
When everything perfectly done, and you won’t see anything is remaining. Simply over ahead VirtualBox and open it, select the macOS 11 Big Sur created virtual machine, and click the “Start” button.
Once the macOS 11 Big Sur installation started on VirtualBox wait for the Apple.

- Select your internal language and click continue
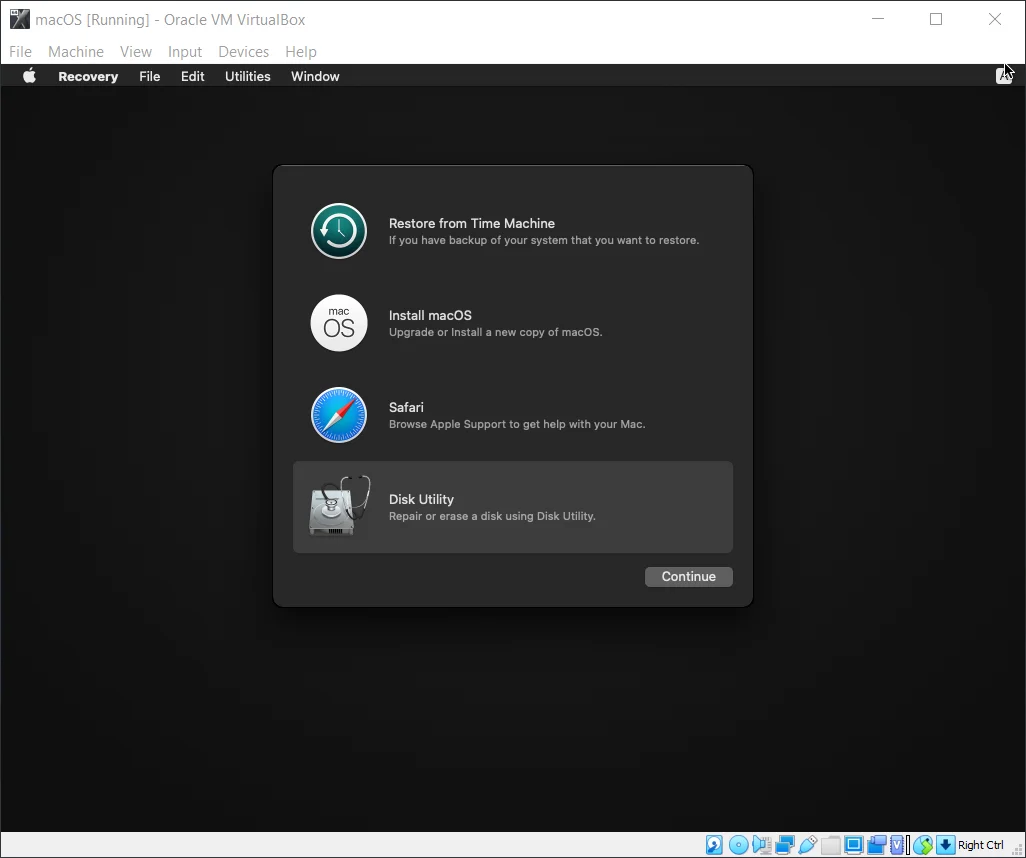
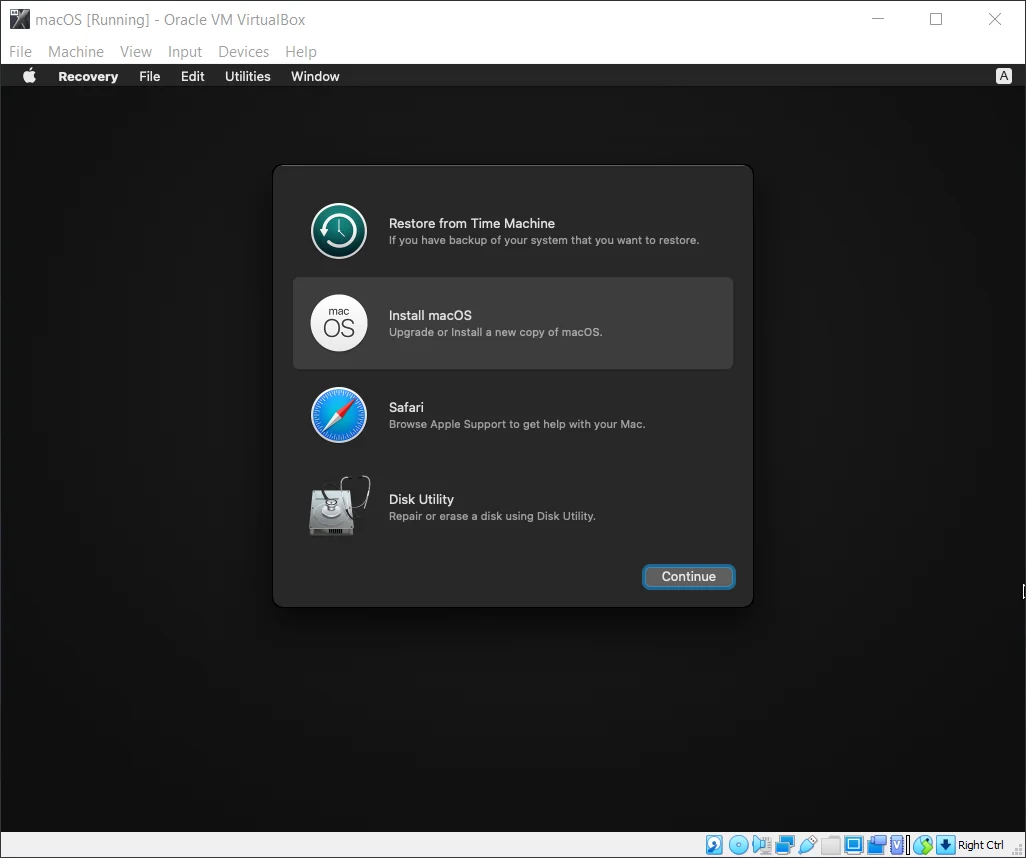
- When you come to this window, select “Disk Utility” option and click continue.
While the Disk Utility window opened, then you have to create a partition for macOS 11 Big Sur. To do that select the drive from the left-handed window, then click on the “Erase” option and follow the below down settings.
- Name: macOS 11 Big Sur
- Format: Mac OS Extended (Journaled)
- Scheme: GUID Partition Map
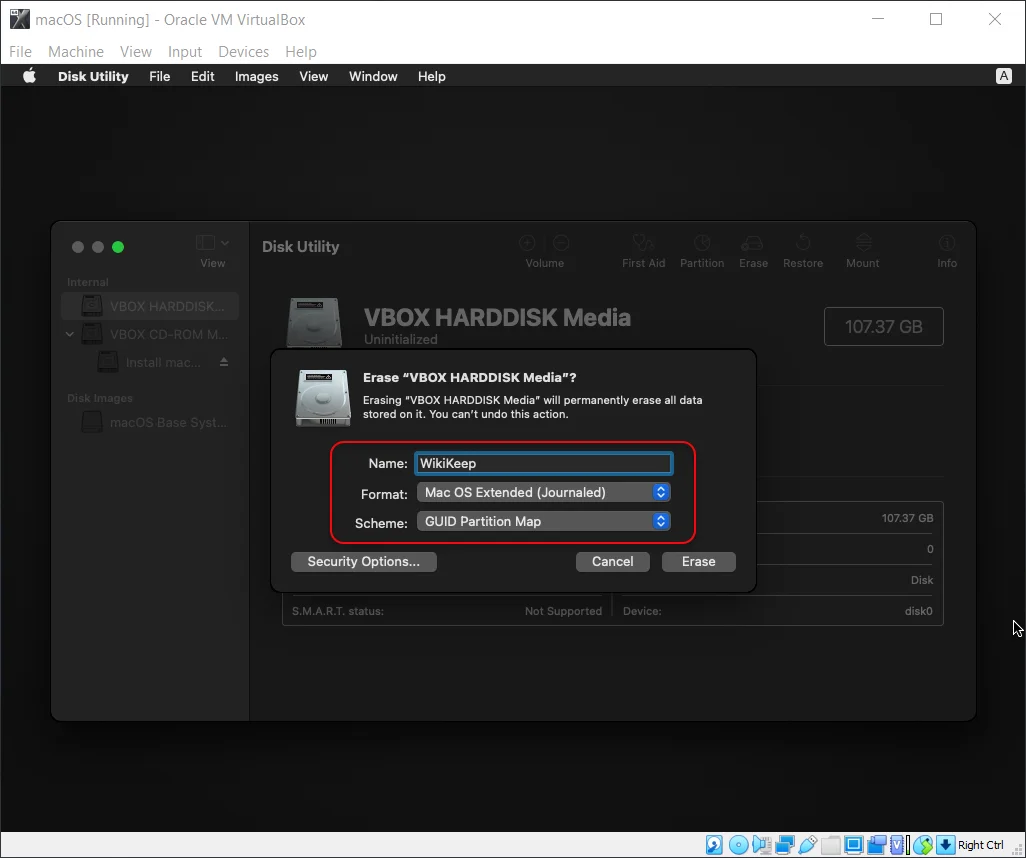
- Once the disk erased by Disk Utility click Done, and close the Utility window.
- Select the “Install macOS” option and click continue.
- To set up the installation of macOS Big Sur Beta, click continue.
- Now read completely about the new terms and conditions of Apple’s macOS Big Sur 11 newest operating system and click agree.
Fix “BiErrorDomain error 3.” on VirtualBox
Select the drive where you want to install macOS 11 Big Sur and click Install.

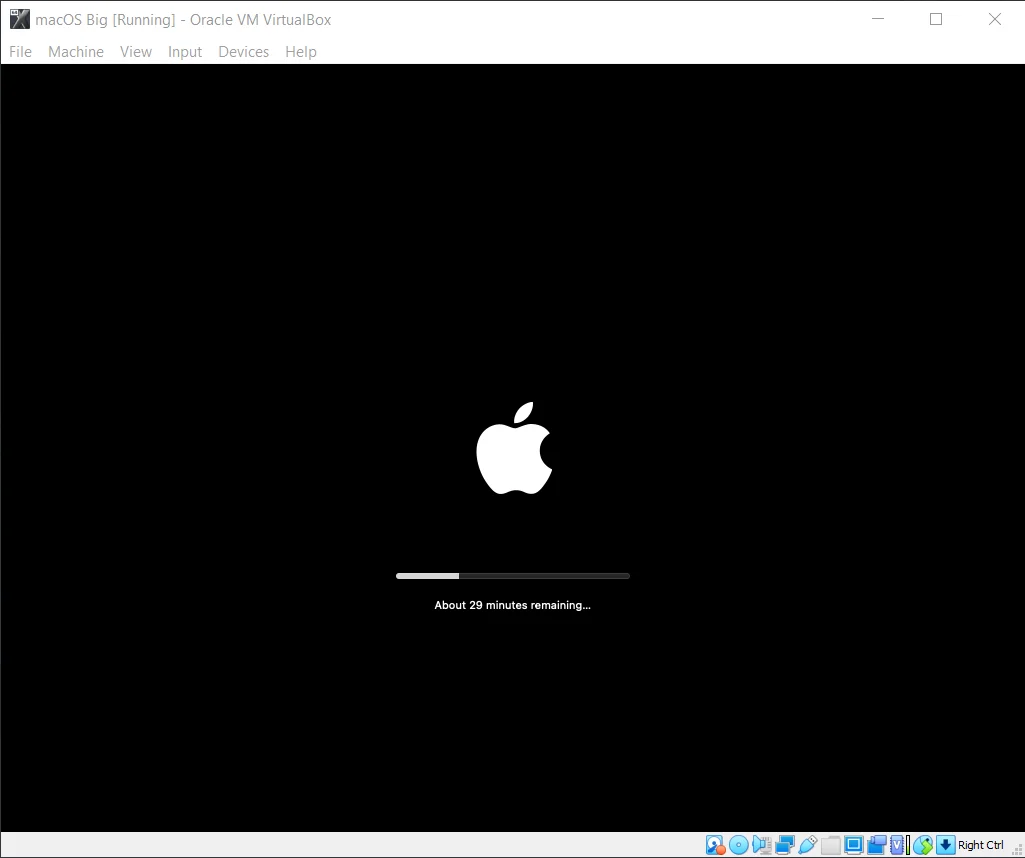
The macOS 11 Big Sur starts the installation it might take some time, be patient, and wait for it. After the installation completed the virtual machine automatically will restart.
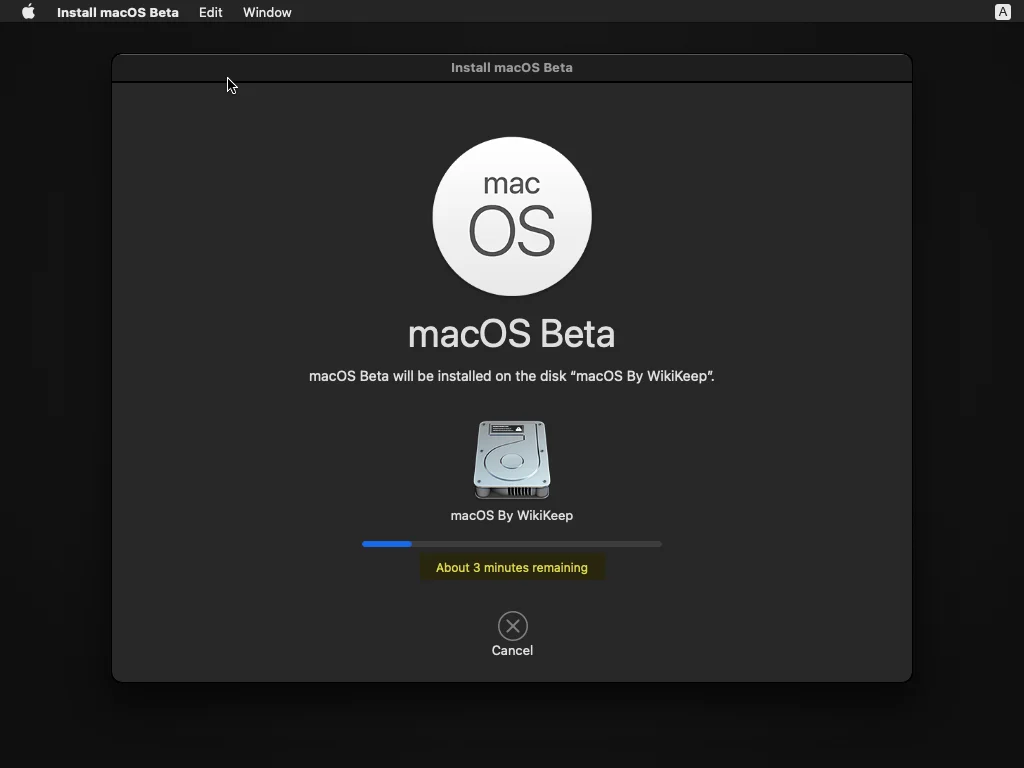
Also, wait for this step of the installation, this will take plenty of time, be patient, and don’t do anything.
Complete macOS 11 Big Sur Final Settings
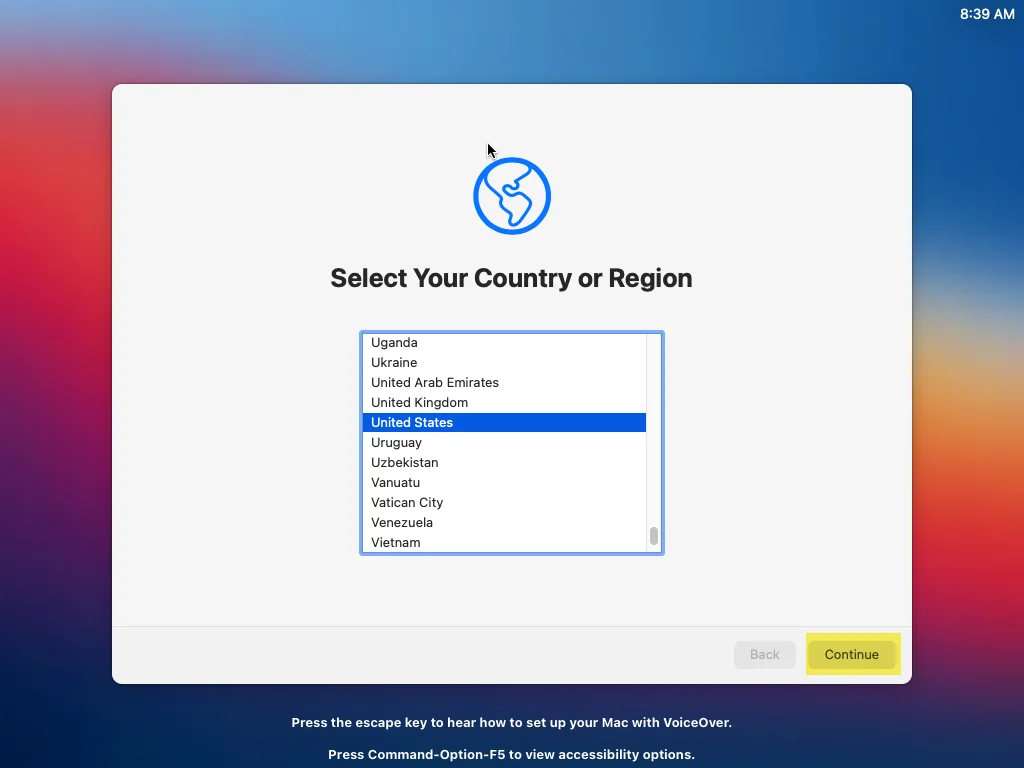
- When the installation completed, you need to configure the first macOS Big Sur settings. In the first welcome screen Select your Country or region and click continue.
- Select your Written and Spoken Languages and click continue.
- Accessibility features adapt your Mac to your individual need, therefore, you can customize it or simply click Not now.
- On the Data & Privacy window click continue
- In the Migrant Assistant window, you can choose two options, “From a Mac, time machine backup or startup disk”, or “From a Windows PC”. If you have information on another Mac or a Windows PC, you can transfer it to this Mac, or simply you can select Now now option.
- Now sign in with your Apple ID, if you don’t have any then click “Set up Later” and click Skip.
- Agree with the terms and conditions of macOS Big Sur 11.
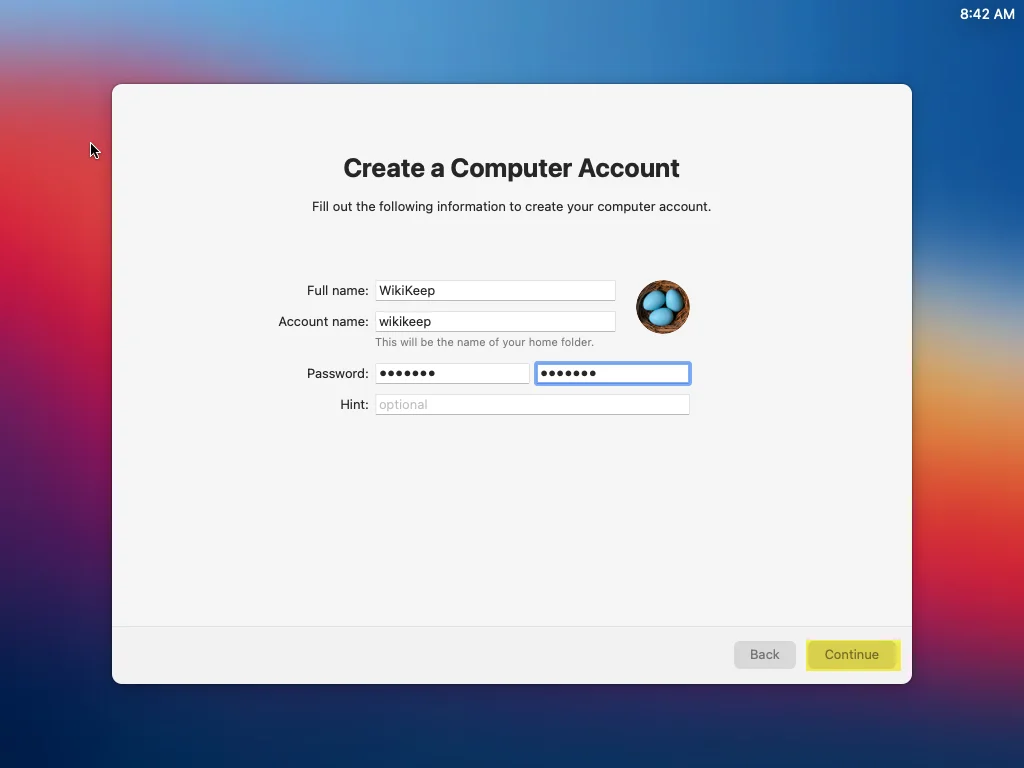
Create a computer account for macOS Big Sur by entering your full name, Account name, Password, and Hint then click continue.
- On express set up click continue without doing anything.
- In the Analytics again click continue.
- Click Set up later on the screen time window.
- Disable the Siri option and click continue.
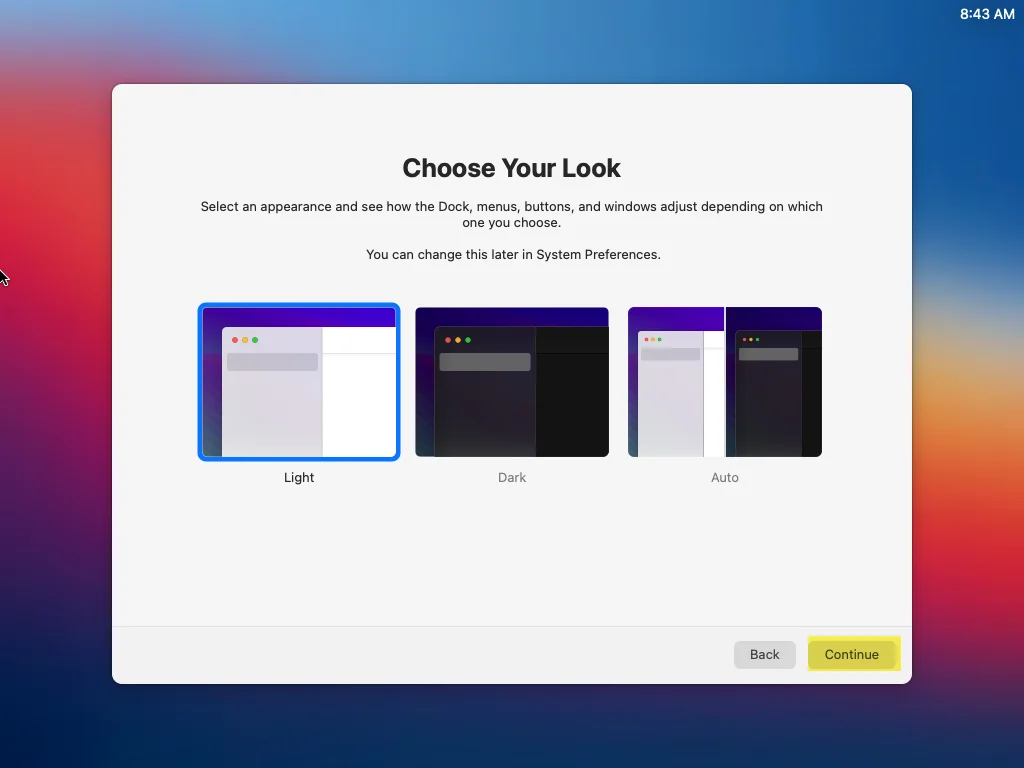
- Select your look for macOS 11 Big Sur and click continue.
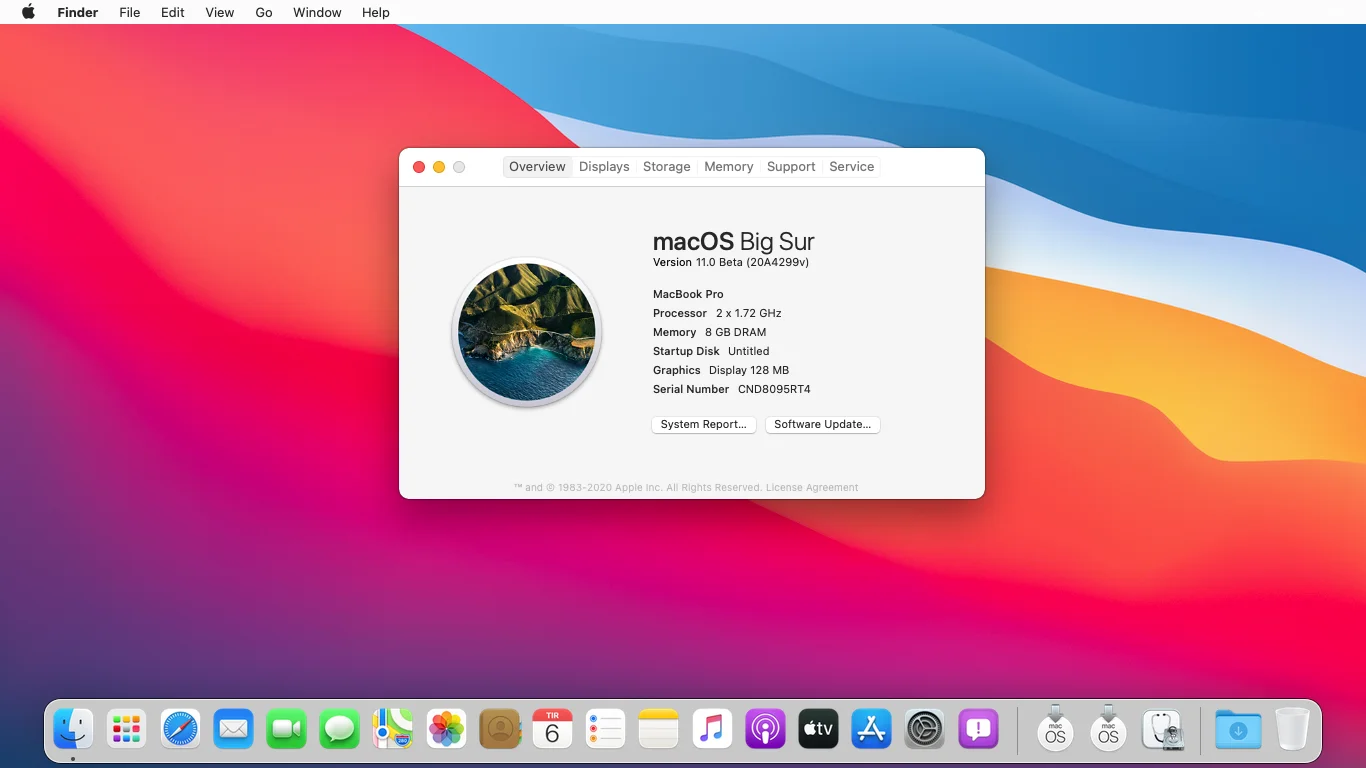
Now macOS 11 Big Sur has successfully installed on VirtualBox on Windows PC, its beautiful screen is now in your hand. Go ahead and enjoy its unlimited features on Windows PC.
Enter macOS 11 Big Sur Full-screen Mode on VirtualBox
It’s last but not list, the only thing is remaining to enter macOS 11 Big Sur full-screen on VirtualBox on Windows PC. After a perfect installation of the macOS 11 Big Sur, you need to enter its full-screen resolution. And we have covered each and everything starting from installing VirtualBox, Creating a Virtual machine for macOS 11 Big Sur, Applying the Commands, and a clean installation of it on VirtualBox + macOS 11 Big Sur vmdk file for you. So, you can get all the kinds of stuff for VirtualBox from this article. And check the method of entering the full-screen resolution of macOS 11 Big Sur on VirtualBox on Windows PC from below downlink.
- How to Enter macOS Full-Screen Mode on VirtualBox
- How to Install macOS Catalina 10.15 on VMware on Windows PC
- How to Install macOS Catalina 10.15 on VirtualBox on Windows PC
For further inquires you can use the below down comment section.
Can you please update the vmdk at the earliest?
Yes add another dash ” –cpuidset “
Thanks for the article!
When macOS 11 Big Sur vmdk will be available for download?
Hi sure we are working on vmdk soon it will be uploaded.
Thank you! 🙂
I already used Catalina vmdk and it is working. Thanks again for all your efforts 🙂
Hi. You mean working, as Catalina works, or working, as installed Catalina and upgraded via profile to Big Sur?
No, I tried Catalina previously just to get to know how to do it.
Now I am trying Big Sur, following the tutorial, but I stuck to the installation point where I need to select a disk, needed for installation. I get error “The operation couldn’t be completed. (BIErrorDomain error 3.).
I will be very appreciated if somebody can help 🙂
Hi Stoyan Toshev kindly check the link for fixing the “BiErrorDomain error 3.” https://wikikeep.com/how-to-fix-macos-big-sur-bierrordomain-error-3-on-vmware-virtualbox/
Sorry I saw previous post after sending mine.
I was able to start the installation, after reading the above post, but now I am stuck at boot time at the line showing
Forcing CS_RUNTIME for entitlement: com.apple.rootless.restricted-block-devices.
Anybody with the same problem?
Thank you guys for supporting us with this tutorial!
Same here. Did you find a solution?
Yes, I did it, thank you, guys!
You are great, continue doing such a great how-to’s!!!
We appreciate your beautiful feedback.
How did you do it, I am using a hp laptop with ubuntu os, i can’t find any options in my bios settings
Enable Virtualization from the BIOS setting, then download VirtualBox for Ubuntu and follow the steps of installation from this article.
I got stuck on error (Forcing CS_RUNTIME for entitlement: com.apple.rootless.restricted-block-devic)
I tried to disable Serial ports (SuperIO) but i didn’t find that option in my Bios
I have Lenovo L340 Core i7
Thanks for the tutorial! I was able to install Big Sur successfully but encountered a problem setting up Apple ID. It shows ICLOUD_UNSUPPORTED_DEVICE when signing in. Is there a walkaround for this issue?
hey buddy, having the same issue. Do you have a solution
how to activate fullhd resolution?
I was only with HD resolution
A simpler method here!
Steps:
Start or boot the macOS guest OS.
1. In VMWare menu, click the “VM” and select “Settings…”
2. Under “Hardware” tab select “Display” and under the “Display scaling” uncheck the “Automatically adjust user interface size in the virtual machine”:
Note: it is important that your guest OS is booted or else the “Automatically adjust user interface size in the virtual machine” option will not be available.
another important thing when you are running an AMD CPU: you need to add
VBoxManage modifyvm “YOUR VM” –cpu-profile “Intel Core i7-6700K” to the list of commands to start the virtual machine
According your instruction, I did every thing correctly with double check. But I got no even the first Apple on screen. What I got is as following:
UEFI Interactive Shell v2.2
EDK II
UEFI v2.70 (EDK II, 0x00010000)
Mapping table
Fs0: Alias(s):F0c65535s:;BLK1:
PciRoot (0x0)Pci (0x1F,0x2)/Sata(0x2,0xFFF,0x0)
BLK0: Alias(s):
PciRoot (0x0)Pci (0x1F,0x2)/Sata(0x2,0xFFF,0x0)
Press ESC in 5 seconds to skip startup.nsh or any other key to continue.
But I come not away from this screen.
Please help me to go forwards.
VirtuallBox:6.1.22 r144080(Qt5.12.8) and Extestion with same version
thanks a lot and br.