At the recent “WWDC19” Worldwide Developer Conference Apple Inc, rolled out its latest operating system macOS Catalina 10.15 with its unbelievable and significant features and security or speed performance to people. macOS Catalina 10.15 includes a bunch of new features that includes security improvements. One of the waited features of users from Apple Inc was SideCar. If you are using macOS Catalina recently on your Mac computers then you might know about it. SideCar is an application of macOS Catalina 10.15 that allows you to use your iPad screen display on macOS Catalina 10.15 monitor. Besides these features there are bunch features that I am going to clarify for you below down.
Before clarifying the features let me give some hints about the release date of macOS Catalina 10.15 and the latest update. macOS Catalina 10.15 name has been taken from Santa Catalina Island. This island has located on the coast of Southern California United States of America. Also, macOS Catalina 10.15 is the sixteenth major succeed release of Apple Inc after macOS Mojave 10.14. And macOS Catalina is the operating system based on Macintosh computers. Or ever macOS Catalina is the first operating system of Apple Inc that supports 64-Bit Softwares on it. Officially macOS Catalina 10.15 can be run on the supported Macs that support macOS Mojave 10.14. 2010-2012 Mac Pros computer that runs macOS Mojave 10.14 only with a GPU upgrade is no longer supported. Catalina required 4GB of RAM, upgrade then macOS Mojave 2GB more, SSD recommended, at least 2GB of Graphic cards.
macOS Catalina 10.15 can be supported by the following Mac computers, if you have any of this Mac computer. Hurry up! and upgrade your older macOS to the latest macOS Catalina 10.15.
- iMac Late 2012 or newer
- iMac Pro
- Mac Pro Late 2013 or newer
- Mac Mini Late 2012 or newer
- MacBook Early 2015 or newer
- MacBook Air Mid 2012 or newer
- MacBook Pro Mid 2012 or newer
I think you are interested to tweak your iPad display as a second screen display on your Mac computer. If you are using the same Apple ID on your iPad and macOS Catalina PC, then easily you can activate the SideCar feature. The SideCar feature of macOS Catalina is helpful if you want to draw on your iPad, while giving a presentation using your Mac computer. Or even if you are watching a movie on your iPad, easily you can watch it on your Mac computer. The goal of SideCar is to give you a second screen display of your iPad to macOS PC, when you are connected to it.
When macOS Catalina released for the first time on the App Store. After downloading and installing most of the users faced lots of bugs, by the passage of time those bugs that cause users to stop working with the macOS Catalina operating system were reported and finally fixed. Some of the bugs were OS lagging during using, and security performance. After macOS Catalina 10.15 Apple updated the operating system with fixing the bugs, and bringing some changes to its features. Moreover, now macOS Catalina reached to 10.15.4 latest update.
OK, our main purpose in this post was to install macOS Catalina 10.15 on VMware on Windows PC. Have you ever faced a lack of Mac PC? mostly Mac PCs currently are highly expensive in the market. And most of us doesn’t have the budget to buy a Mac PC. Due to that, if you are much interested to test any macOS operating system, then you can test it out on Windows PC too. For your better experience to get in touch with the features of the macOS operating system, use your Windows PC. If you are a Windows user, then you don’t have a Mac computer. Then there are multiple ways to install macOS, one of them is VirtualBox, VMware Workstation, VMware Player, or Hyper-V.
What is VMware? VMware is a traded software company listed int he NYSE under stock ticker. VMware Incorporation is a company, that provides cloud computing, and virtualization. VMware is the best software that provides the best virtualization service for Windows, macOS, Linux. Using VMware Workstation is much interesting then VirtualBox. It allows the best and easiest ways of installing a guest operating system on it. You can find VMware in two different versions. VMware Workstation can be found freely also, but if you want to use VMware Workstation Pro, for that you have to pay money. I think the VMware free version is working perfectly. And there is no need to purchase the Pro version. As I am using the free version of VMware on my Windows PC, and it works perfectly for me.
To install macOS Catalina 10.15 on VMware on Windows PC, you need the following requirements.
- A compatible computer that should run Guest OS
- VMware Workstation
- macOS Catalina 10.15 Virtual Machine Image
Install macOS Catalina 10.15 on VMware on Windows PC
To install macOS Catalina 10.15 on VMware on Windows PC, firstly you need to download or create its Virtual machine image. After that, install the VMware Workstation, create a new virtual machine for macOS Catalina.
1. Create macOS Catalina VMDK “Virtual Machine Image”
What is a Virtual Machine Image? virtual machine image doesn’t exist physically, but we use it as a part of the real OS using the VMware Workstation. As we are talking about macOS that it runs only on Mac systems. But you can run it on Virtual machines on Windows systems. VMware Workstation is the same as other application you can install it on your Windows system.
 For creating the virtual machine image of macOS Catalina 10.15 you need to have a Mac computer. Or if you are using currently any version of the macOS operating system on Virtual machine. Then easily you can download and create macOS Catalina 10.15 virtual machine image. Now macOS Catalina 10.15 is available on Mac App Store, navigate to Mac Store and download it. The download file will be as an installer file, after that, using some commands you can convert it to “Virtual machine image”.
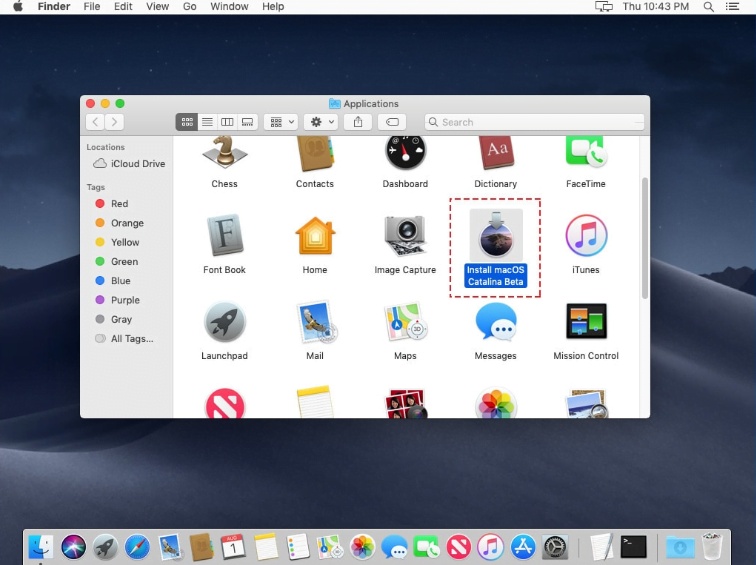
Open your macOS Mac App Store, search there macOS Catalina press enter. When it appeared, press the download button. Once the macOS Catalina file downloaded, it automatically launch installing so cancel it. And you can find the macOS Catalina on “Application folder”.
If macOS Catalina stored somewhere else then move it to the Application folder. Or if you have already the macOS Catalina. App then move it to the application folder. Once it moved for creating the VMDK open up the “Terminal”, the terminal can be found on Applications, Utilities. When the terminal opened use the following commands for creating the virtual machine image.
# Mount it to your macOS
hdiutil attach /tmp/Catalina.dmg -noverify -mountpoint /Volumes/Catalina
# Create macOS Catalina Installer
sudo /Applications/Install\ macOS\ Catalina.app/Contents/Resources/createinstallmedia --volume /Volumes/Catalina --nointeraction# Unmount Catalina Disk
hdiutil detach /volumes/Install\ macOS\ Catalina# Convert the dmg file to a iso file
hdiutil convert /tmp/Catalina.dmg -format UDTO -o ~/Desktop/Catalina.cdr# Rename and Move to Desktop
mv ~/Desktop/Catalina.cdr ~/Desktop/Catalina.isoDownload macOS Catalina 10.15 VMDK file by WikiKeep
[penci_button link=”https://wikikeep.com/download-macos-catalina-10-15-5-vmdk-vmware-virtualbox-images/” icon=”” icon_position=”left” background=”Red” hover_bgcolor=”Green”]Download Now[/penci_button]
2. Install VMware Workstation on Windows
Use your browser for getting the VMware Workstation or VMware Player. Open up your browser then in the search tab type VMware. Officially the VMware website will appear on the top, click on that a download the VMware Workstation or Player from there. Once it downloaded install it on your computer, the installation process is pretty easy everyone can do it.
- When the VMware Workstation downloaded, double-click to open the setup.
- In the welcome window simply click next.
- Next agree with the terms and conditions of VMware Workstation and click next.
- Check the box of the enhanced keyboard driver and click next.
- Now leave this step and click next.
- Do you want to create shortcuts on the Desktop and Start menu, check the box of them and click next?
- Now click install, it will take some time.
- When the installation completed click Finish to close the window.
- Now open up once again the VMware Workstation, there you have to enter its license key to activate.
3. Install VMware Patch Tool
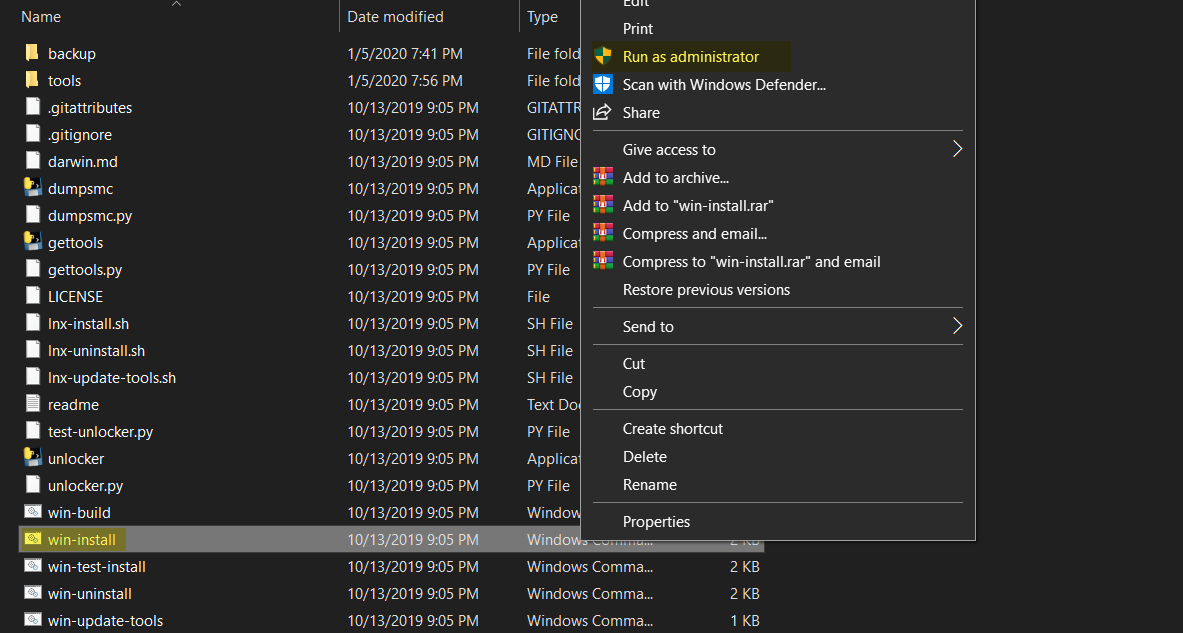
Patch tool allows you to activate the macOS service on VMware Workstation or VMware Player. After you successfully installed the VMware Workstation on your Windows PC. Then there is a small tool that called the Patch tool “Unlocker”. Also, you can download it from the “GitHub” website with the latest version. When you download it, use the WinRAR for the extraction. Once the Patch tool file extracted open its folder, scroll down, and find “Win-Install”. Right-click on that and select “Run As Administrator”.
4. Create a New Virtual Machine for macOS Catalina 10.15
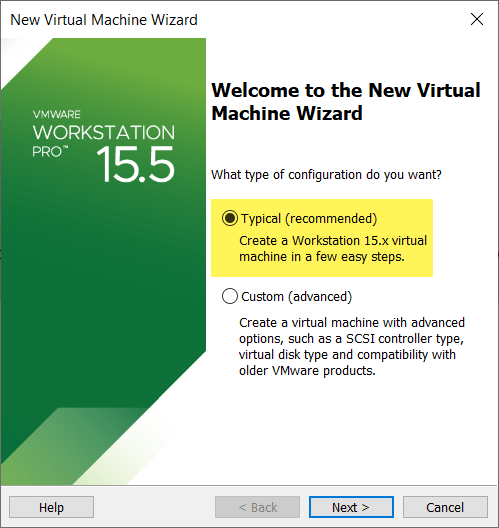
When you successfully installed VMware Workstation, and installed the Patch tool for unlocking the macOS service on VMware. Or if the VMware Workstation or Player is properly working on your Windows PC, so let’s create a virtual machine. For creating a virtual machine open the VMware Workstation, once it opened click on “Create a new virtual machine” option.
 In the first window select typically “Recommended” and click next.
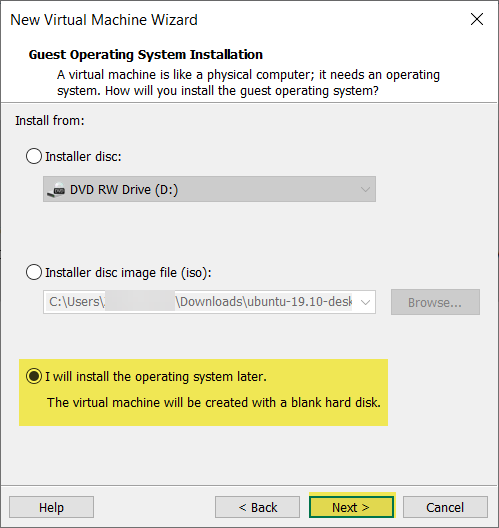
 Choose the option “I will install the operating system later” and click next.
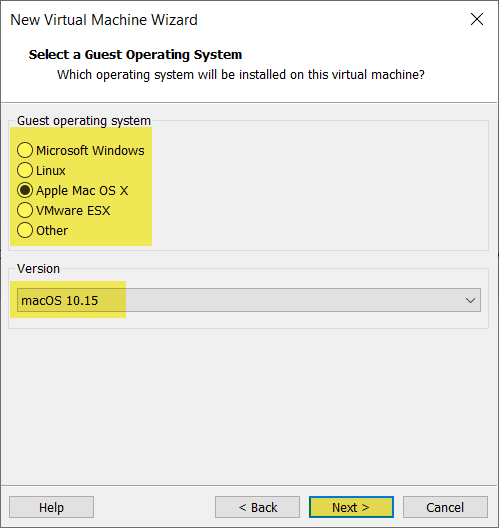
 Here you will see after installing the Patch tool, the macOS service is available. So, for the guest operating system select “Mac OS X”, and the version “10.15” then click next.
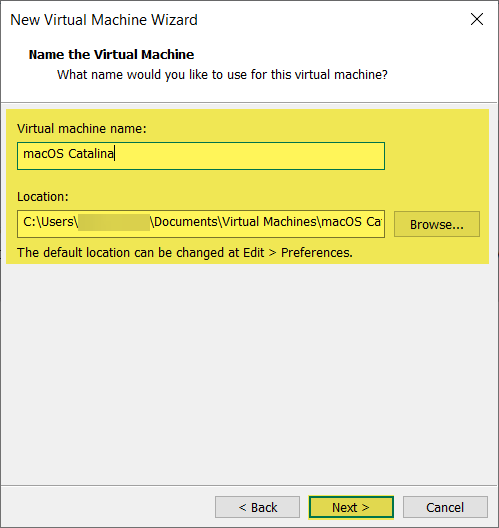
 Give a name for macOS Catalina virtual machine, specify the location where you want to place it and click next.
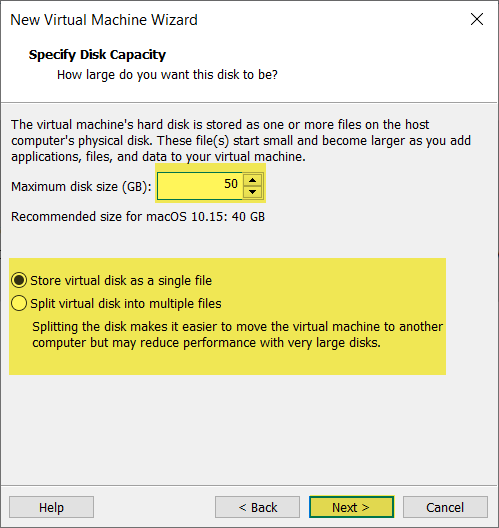
 Select the maximum disk size for macOS Catalina, and select the option “Store virtual disk as a single file” and click next.
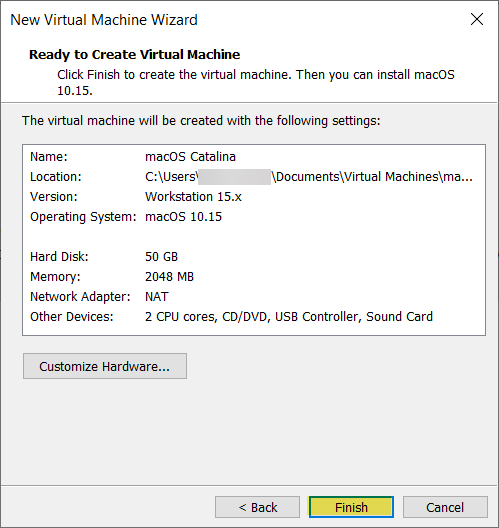
 Now macOS Catalina virtual machine is ready, so click Finish to create.
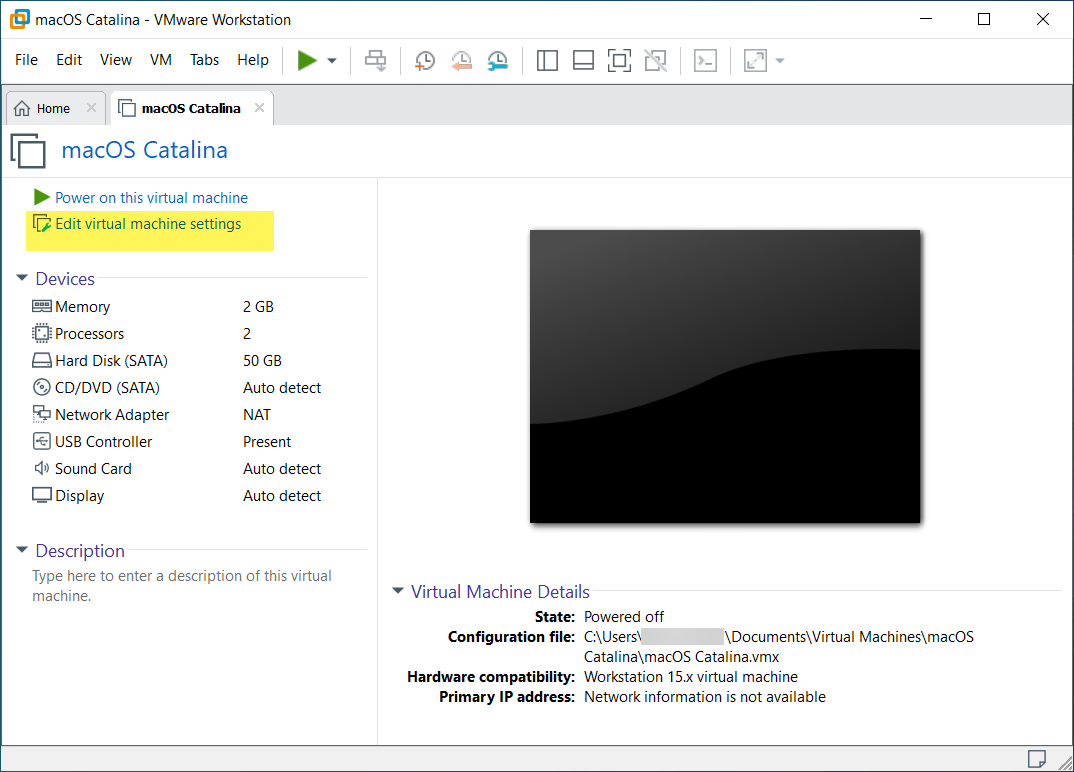
5. Edit Virtual Machine Settings
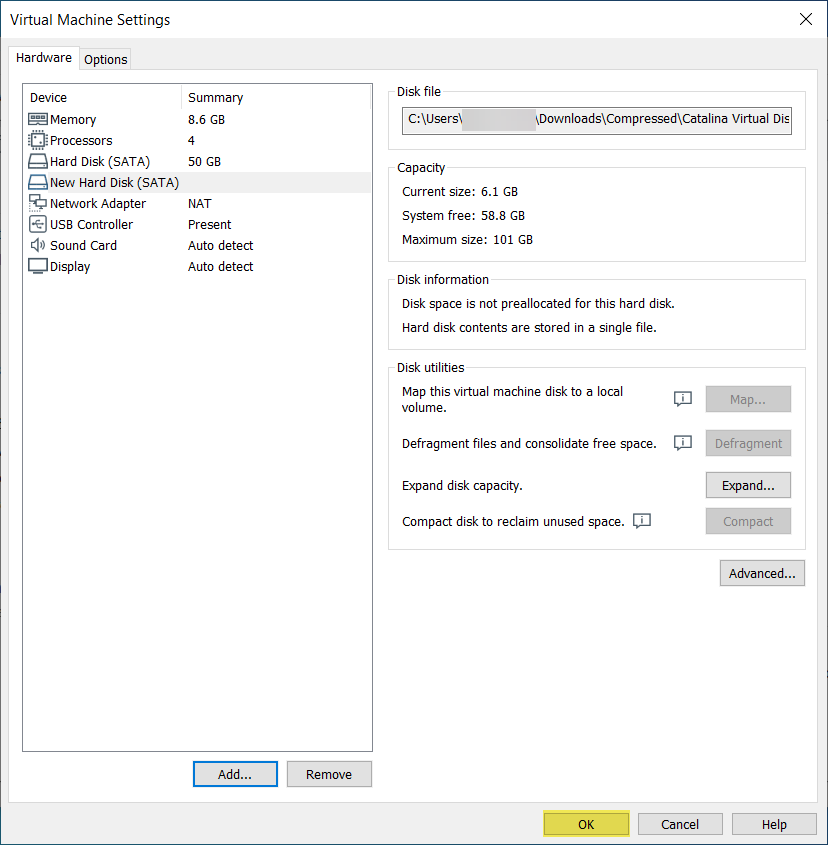
Now we have created a virtual machine for macOS Catalina 10.15 on VMware Workstation. Therefore, for better speed performance we need to edit some settings of it. Select the created virtual machine and click on the “Settings” option.
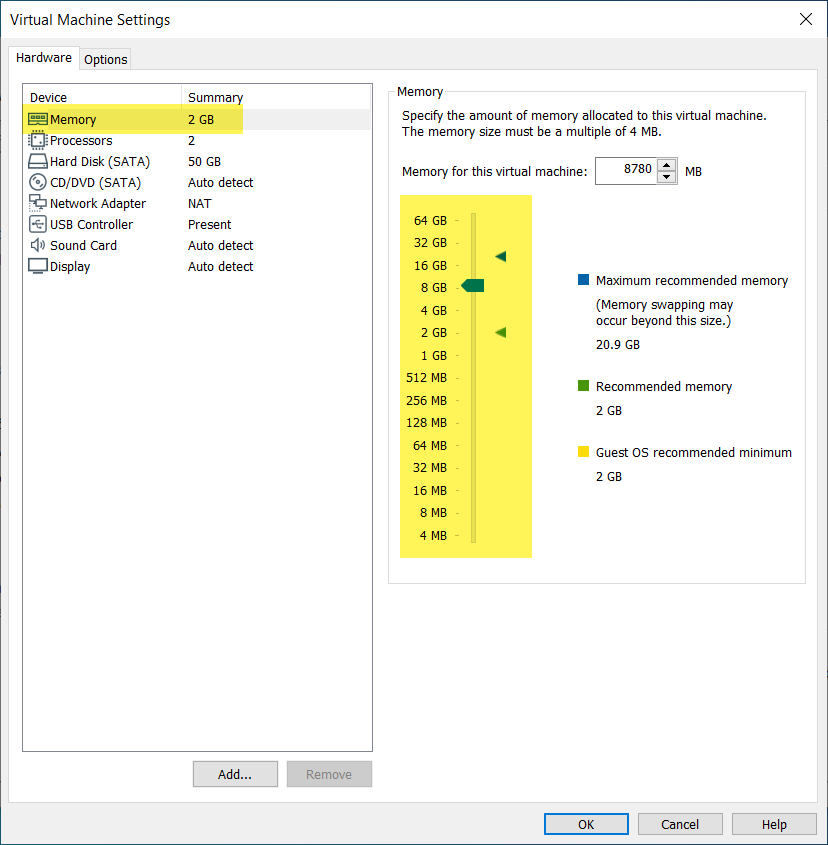
 While the settings window appeared select the “Memory” tab from left-handed, and increase the memory size.
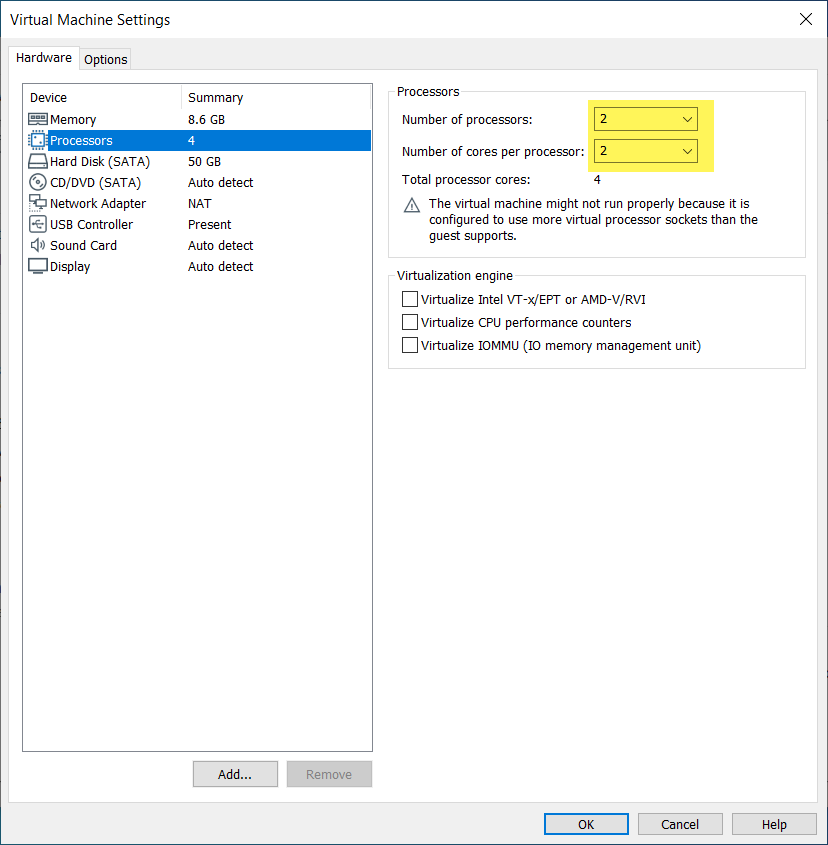
 Select the Processor tab, from here increase the number of processers, and increase the number of core processors.
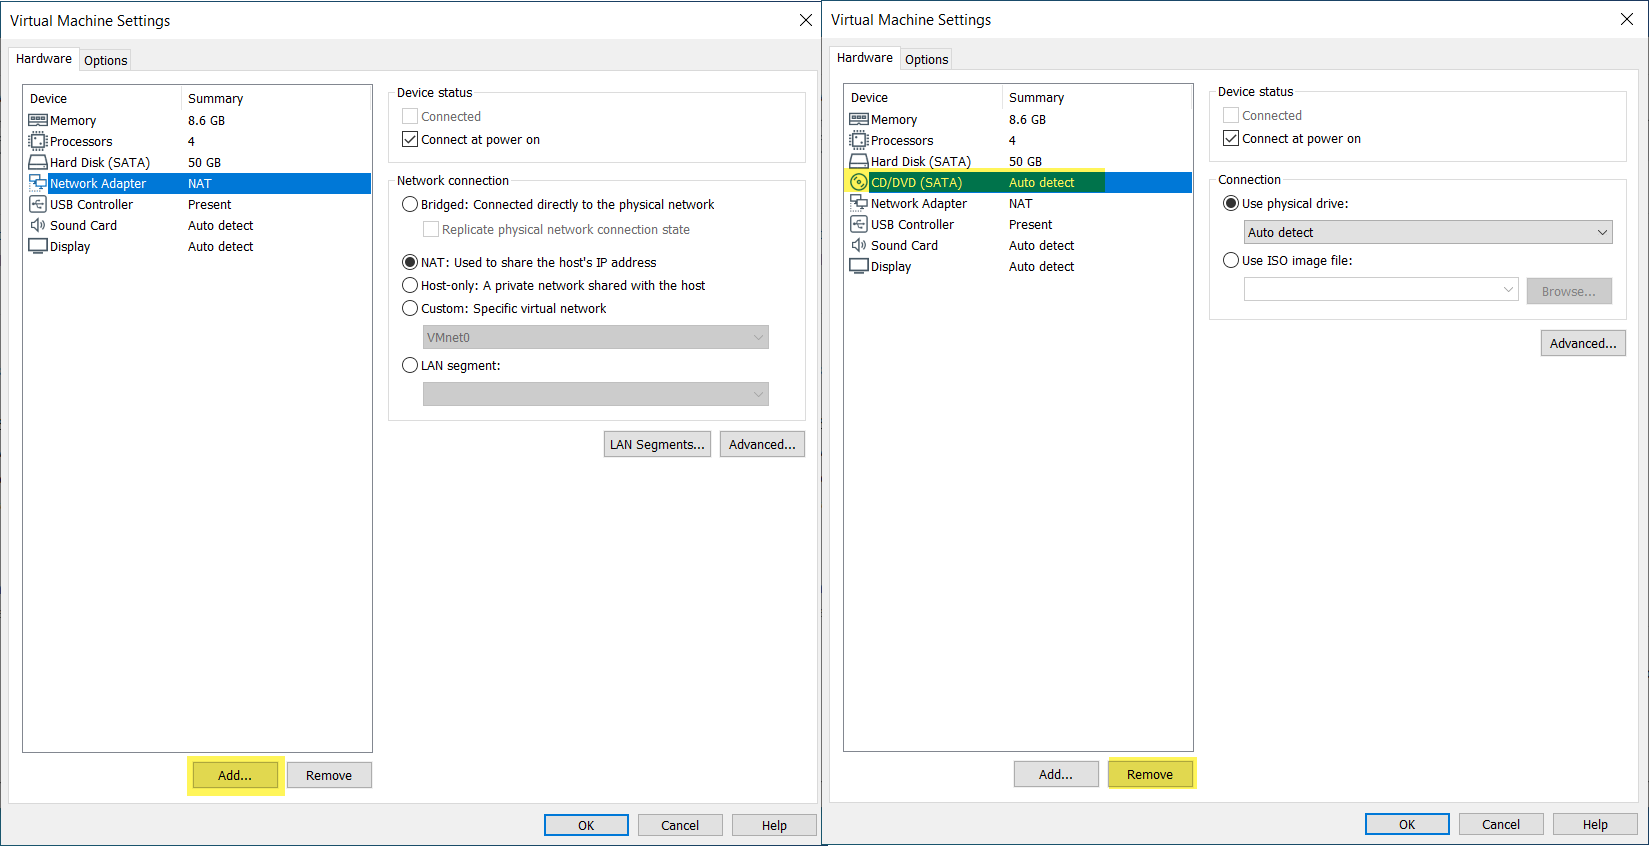
 Now for inserting the macOS Catalina VMDK file select the “CD/DVD (SATA)” tab, and click Remove. Again click the “Add” option.
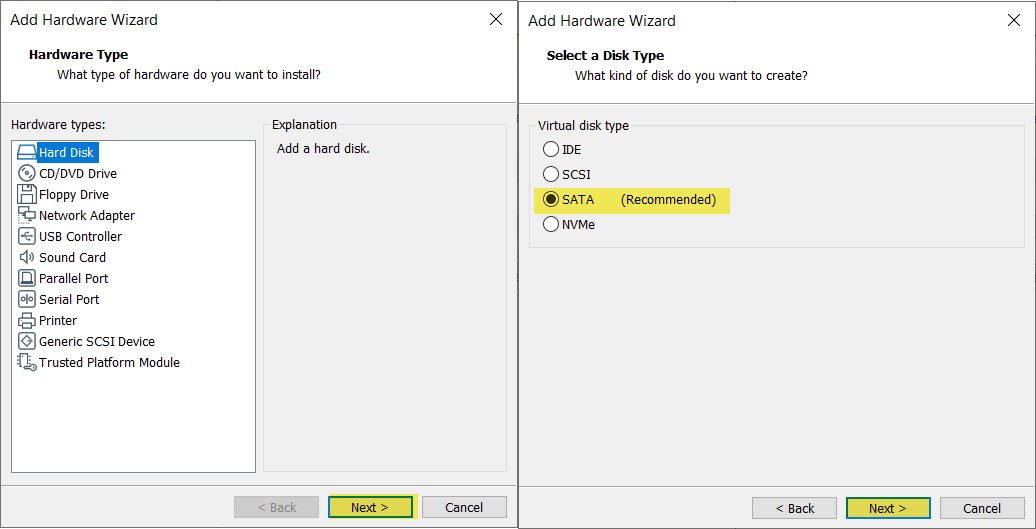
 Here select “Hard disk” then click next, select the “SATA (Recommended)” option and click next.
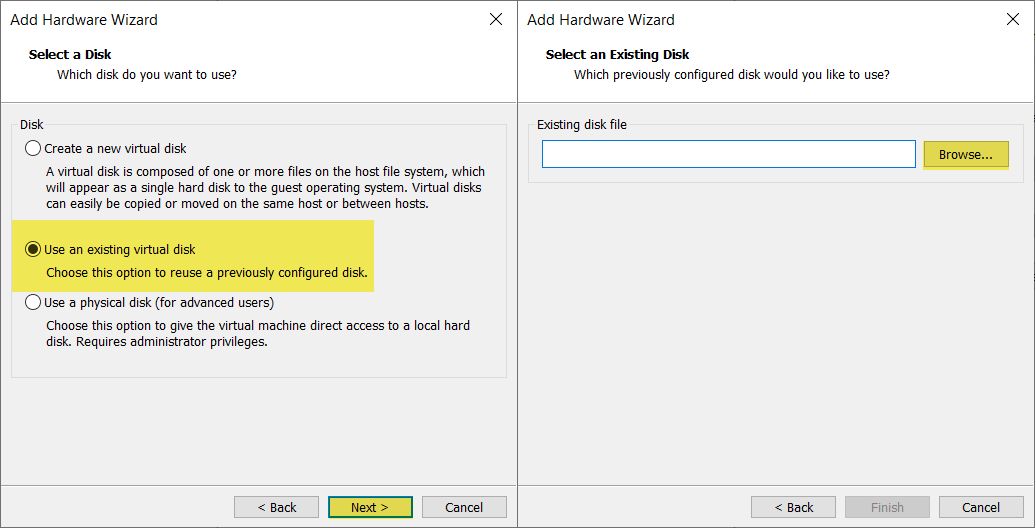
 Select “Use an existing virtual disk” and click next, click on “Browse” option for inserting the macOS Catalina image.
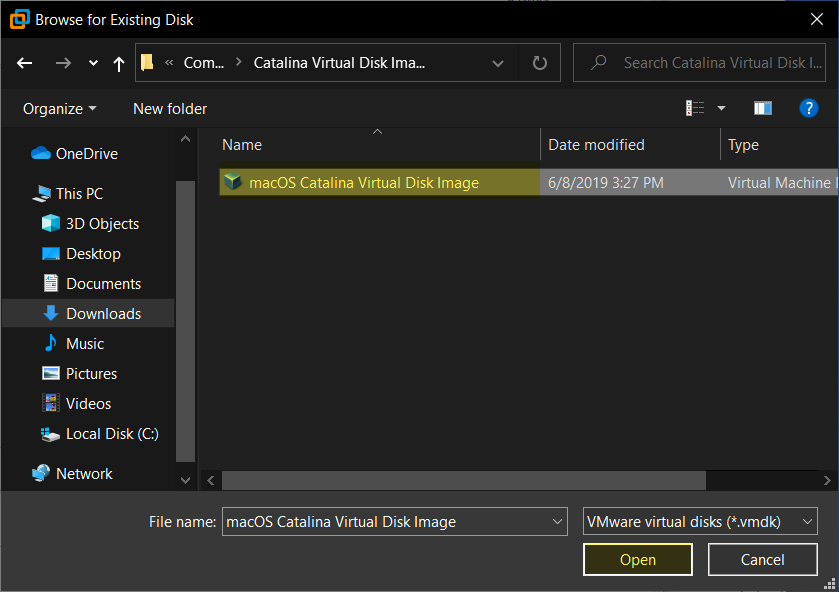
 Select macOS Catalina image and click Open, once it inserted to VMware click Finish.
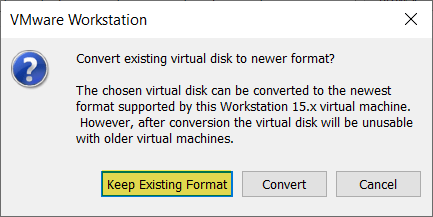
 Now click on “Keep existing format”.
 When you successfully edited the Virtual machine settings, and inserted the macOS Catalina VMDK. So, click OK to save changes.
6. Edit VMX File
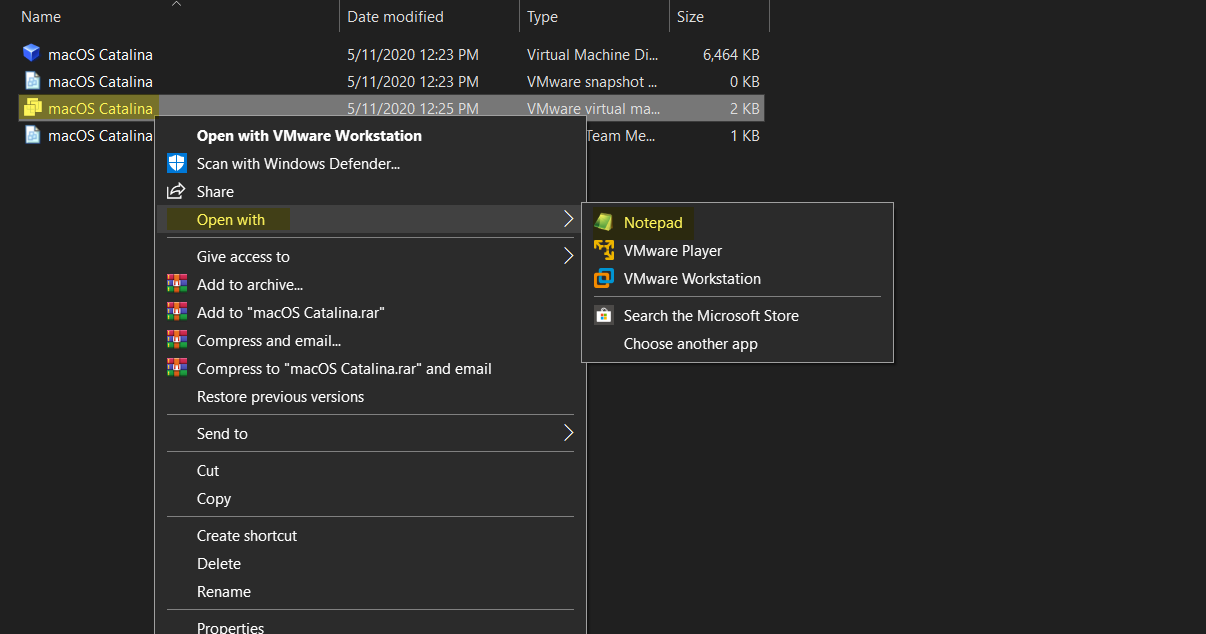
When the virtual machine successfully created, so its time to edit the VMX file. Before starting the installation of macOS Catalina 10.15. You need to edit the VMX file, VMX file is the full configuration of the Virtual machine. For editing the VMX file find out the macOS Catalina location. When find it right-click on VMX file and open with “Notepad”.
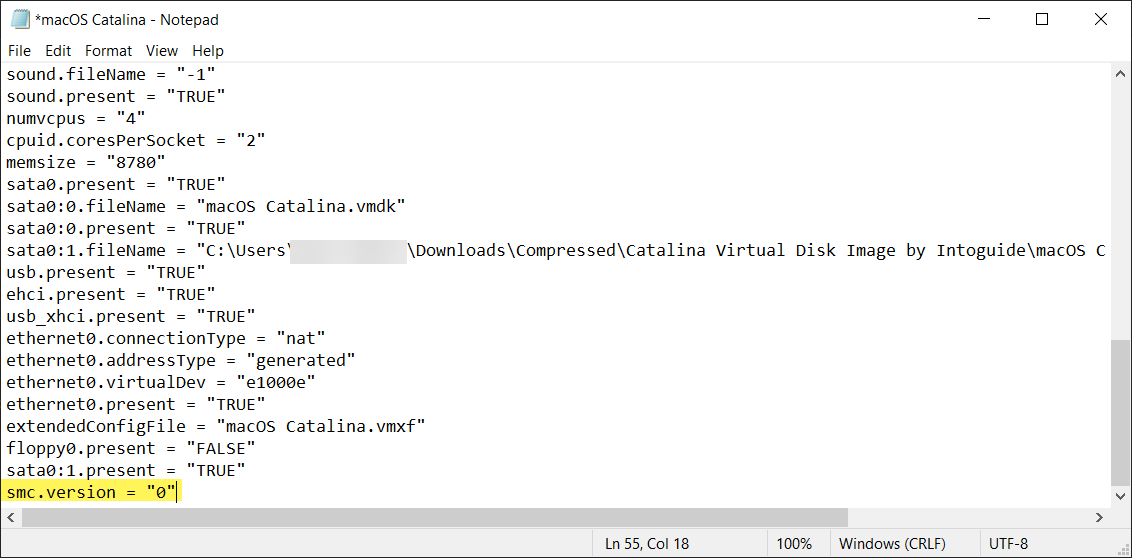
 When the VMX file opened via notepad, scroll down at the bottom of the commands. Add “Smc.version = “0”, after that, press Ctrl+S to save changes.
6. Install macOS Catalina 10.15 on VMware on Windows PC
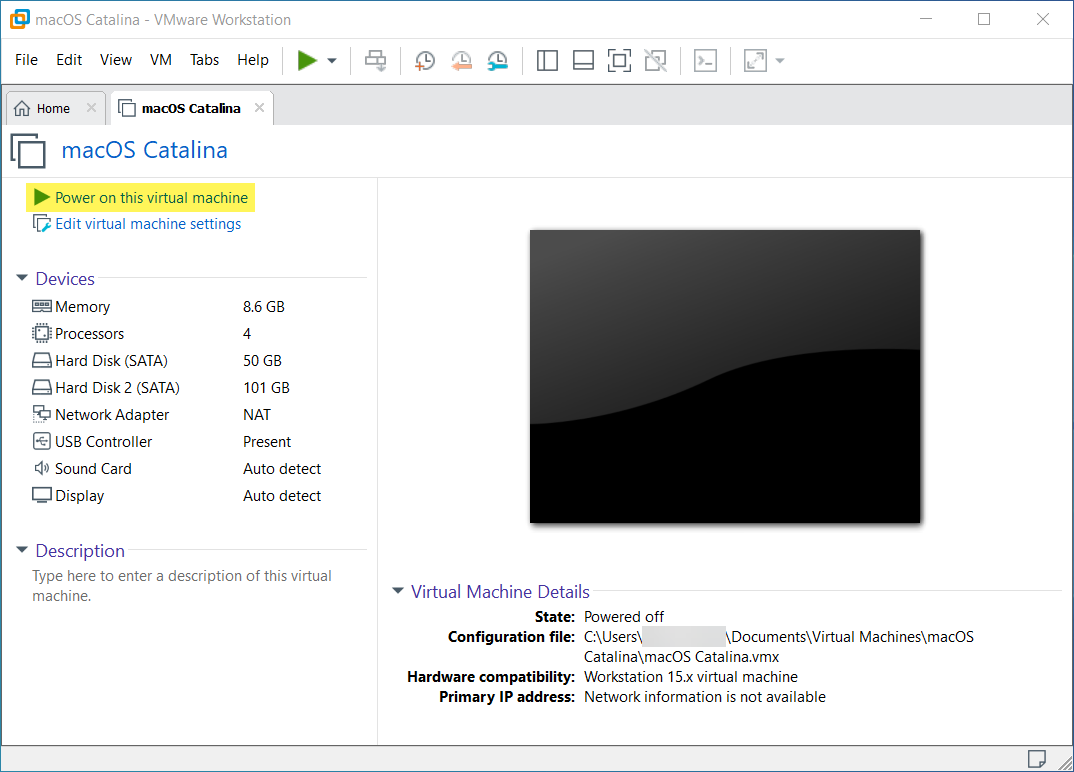
Now everything successfully gets ready for a clean installation, therefore, once again open up the VMware Workstation. Select the created macOS Catalina 10.15 virtual machine and click on the “Start” button.
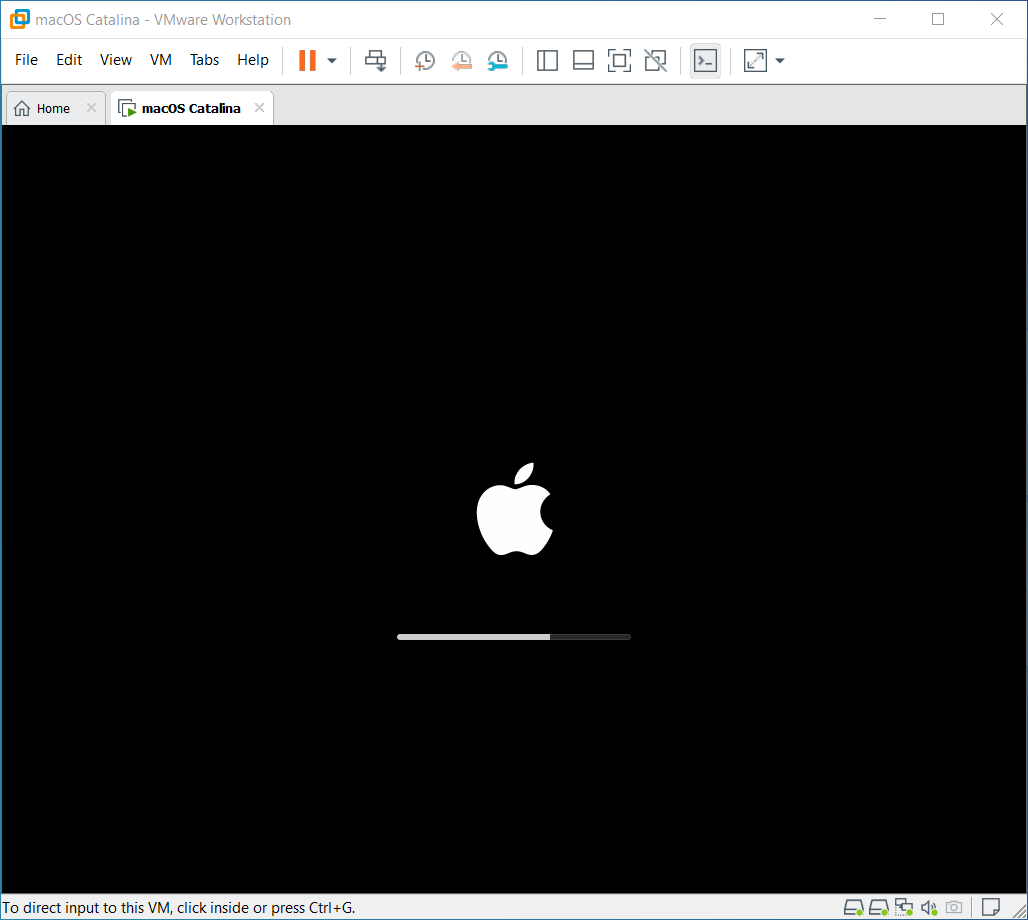
 Wait for the Apple Logo to go ahead.
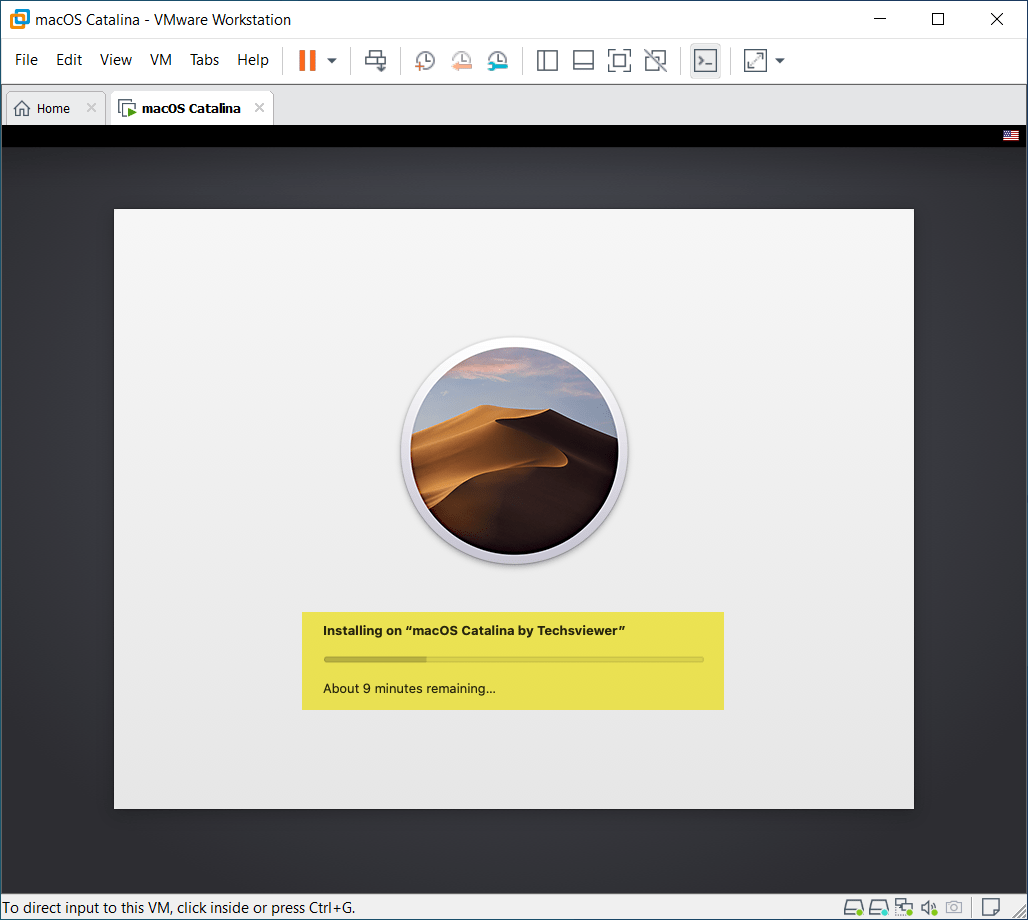
 After the Apple Logo, the macOS Catalina will start installing, the installation process might take some minutes. Wait until the installation should be completed, when it completed automatically macOS Catalina will restart.
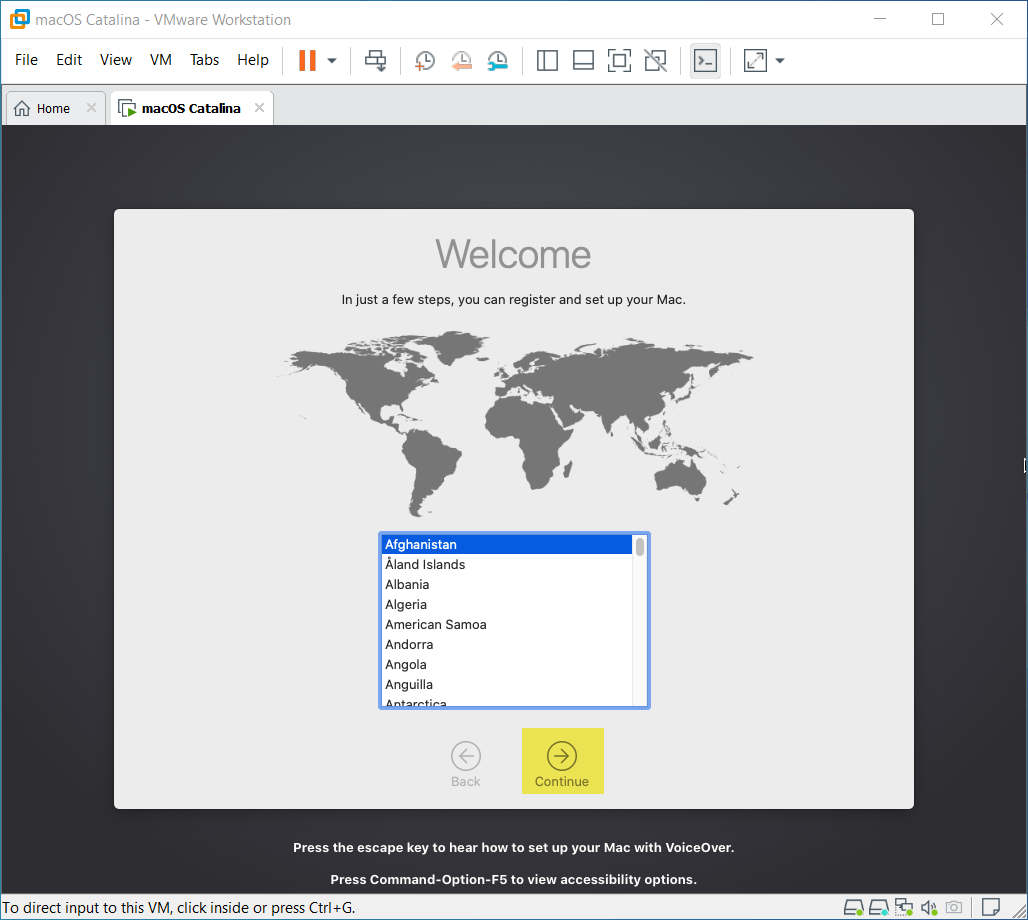
 On the welcome screen of macOS Catalina select your country where you live and click continue.
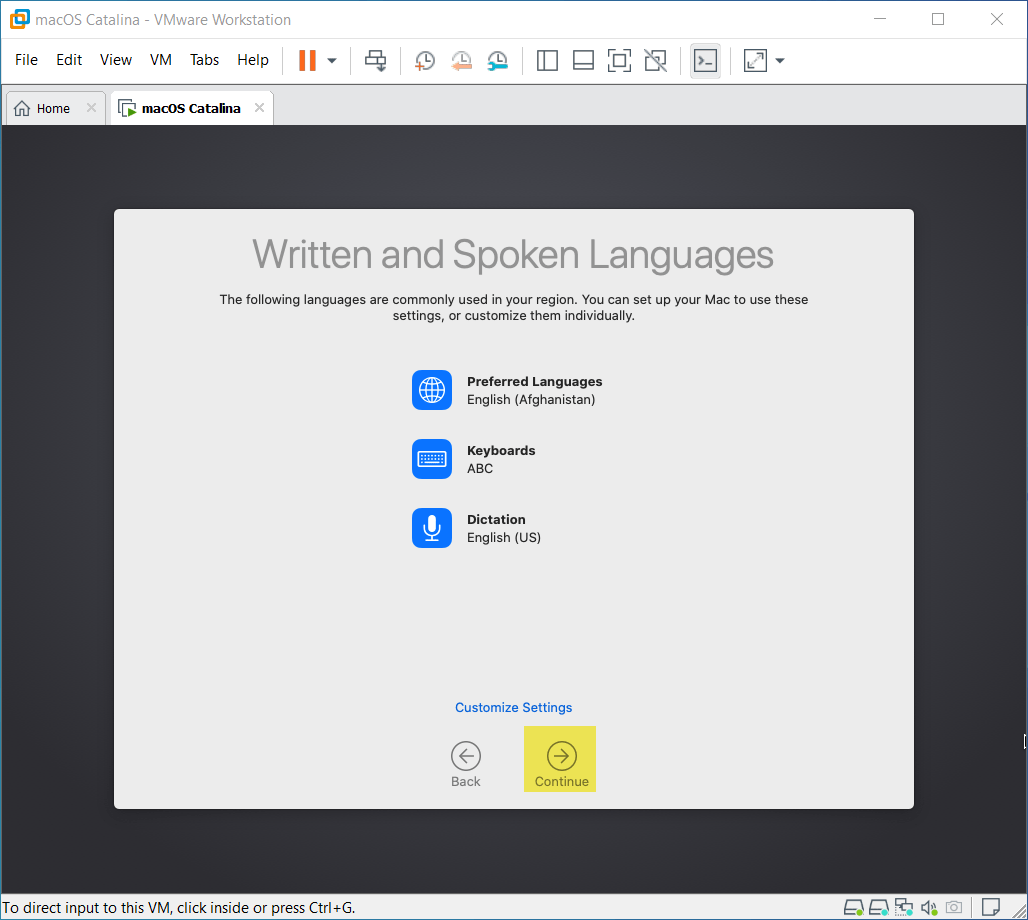
 Select your written and spoken languages then click continue.
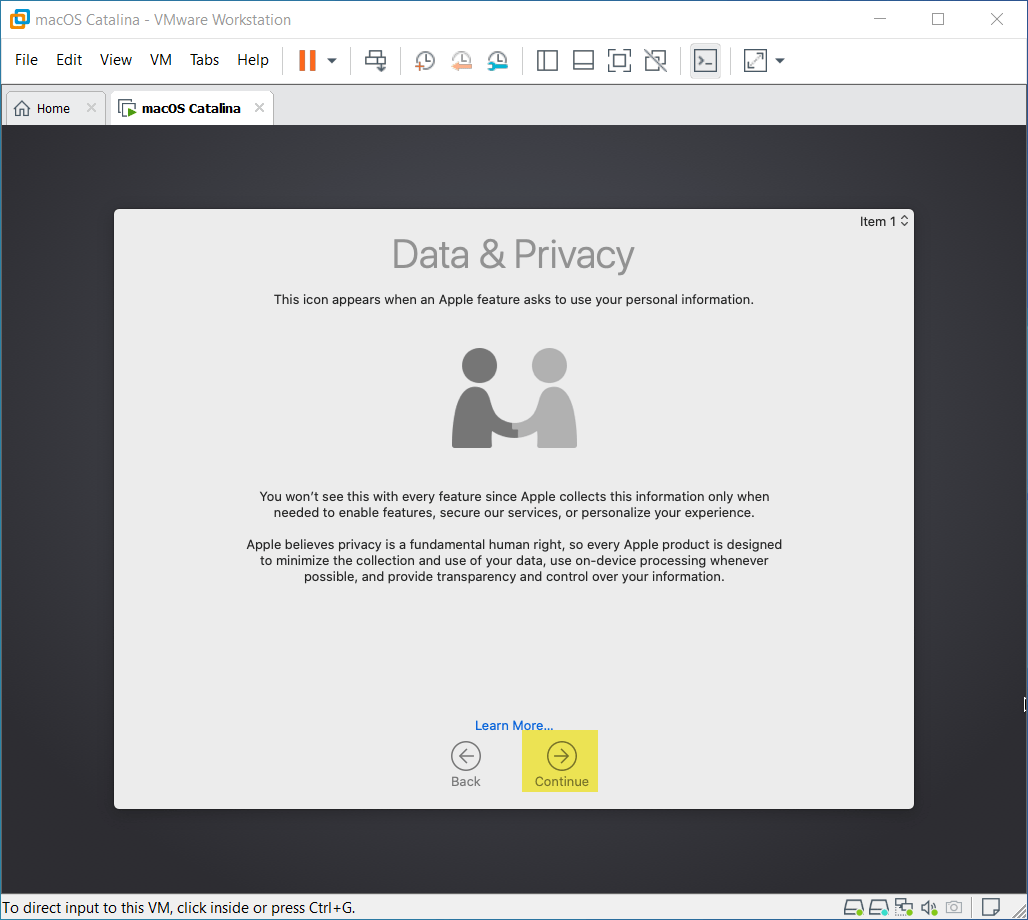
 On the Data & Privacy window don’t do anything simply click continue.
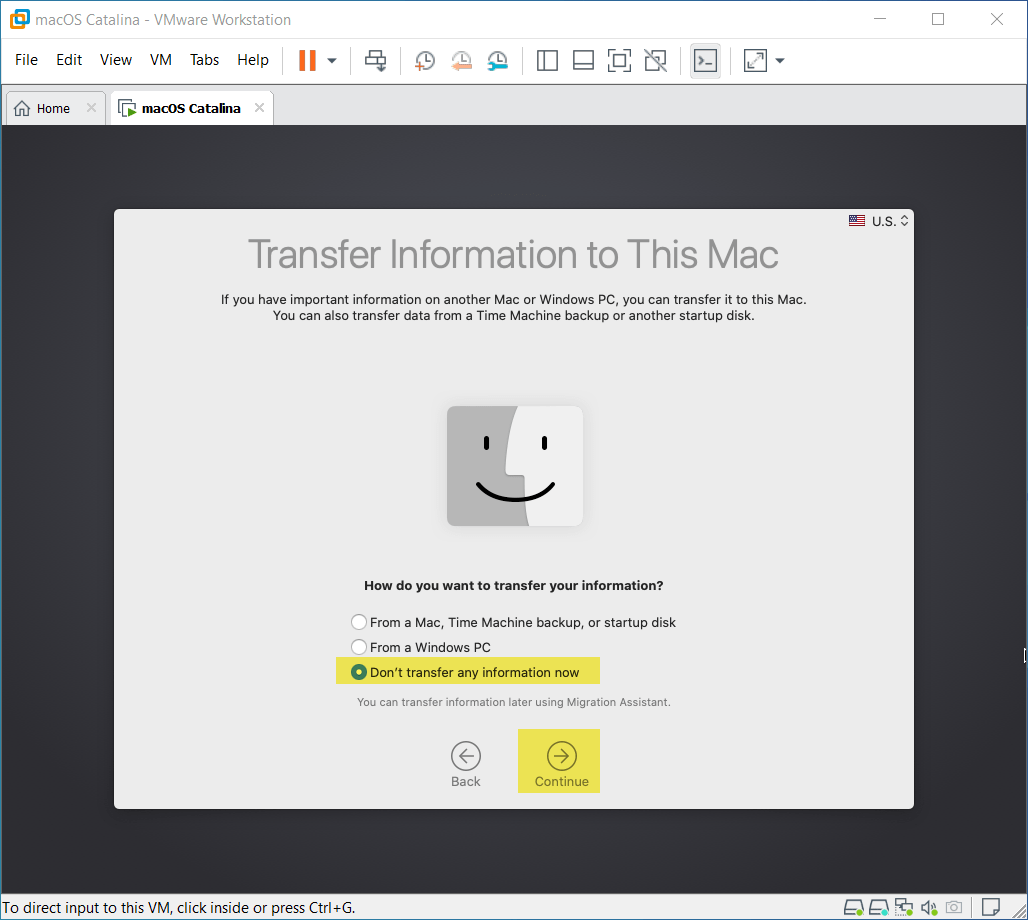
 In this step, select the option “Don’t transfer any information right now” and click continue.
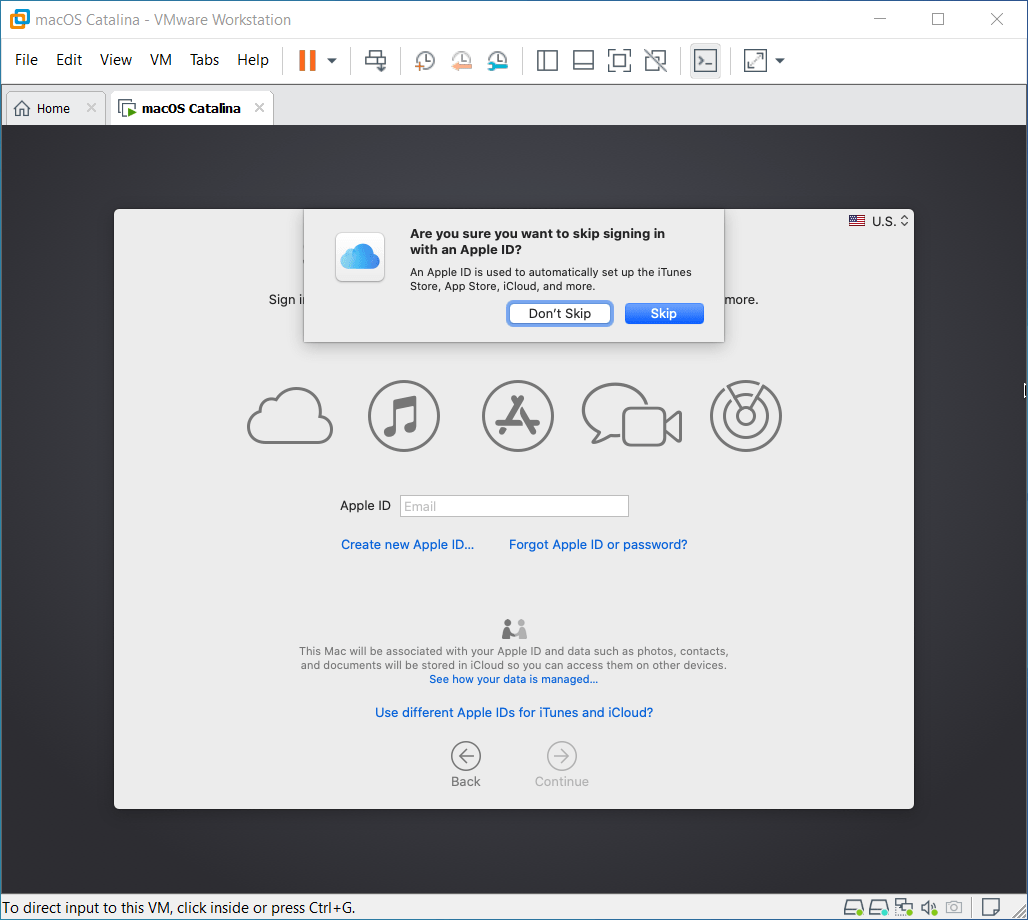
 Now enter your Apple ID if you have, if you don’t have any then click on “Sign Up later” and click continue.
 Agree with the terms and conditions of macOS Catalina 10.15 and click continue.
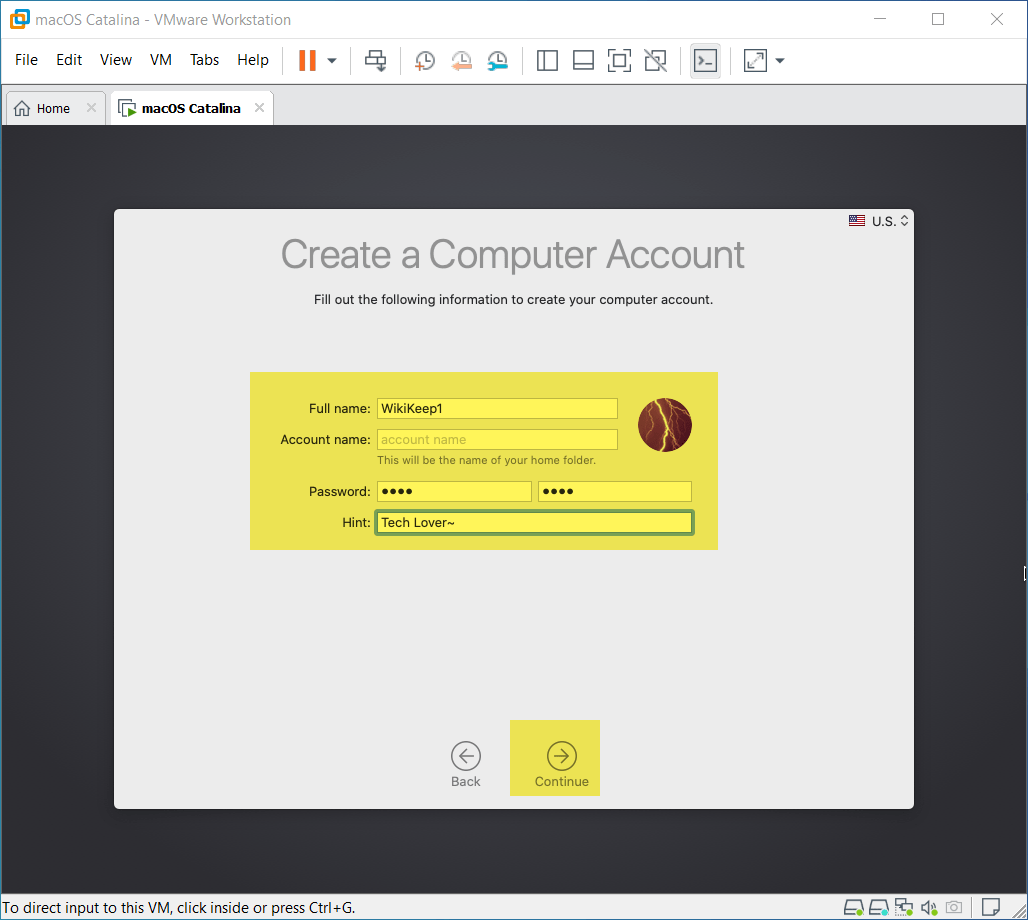
 Here create a computer account, by filling your full name, account name, password, and hint then click continue.
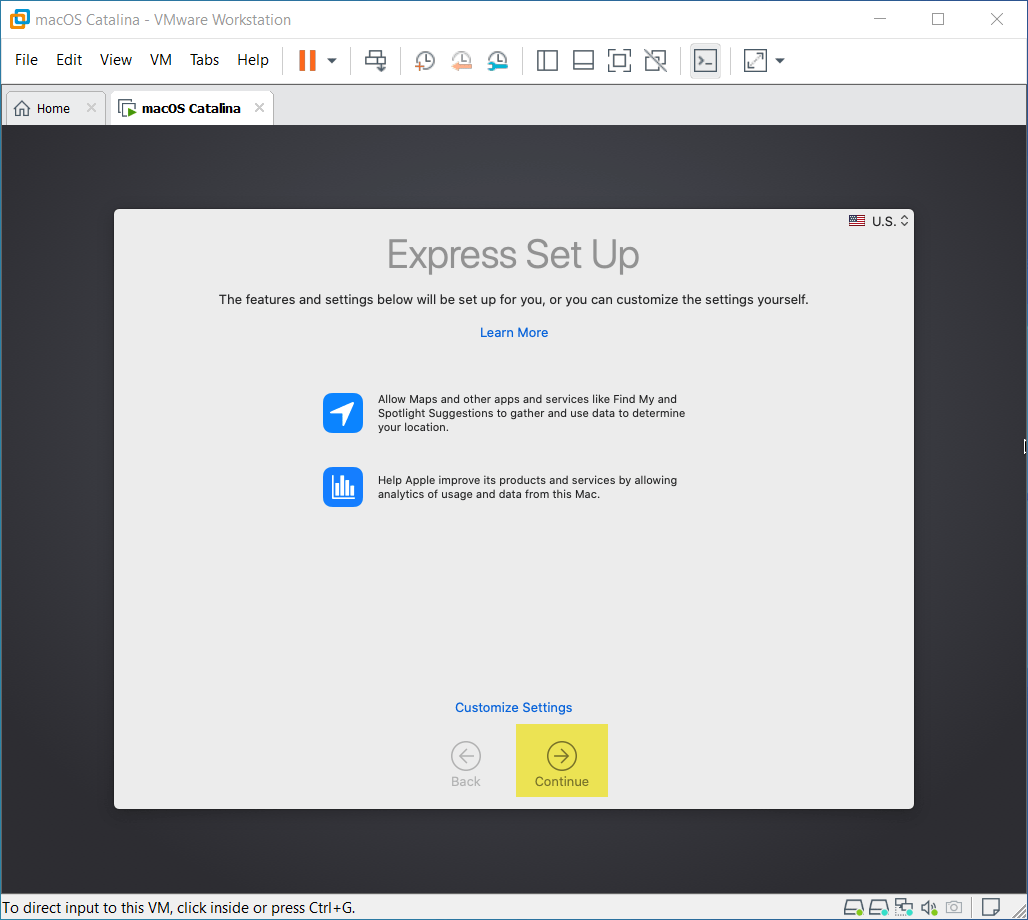
 On the express set up click continue.
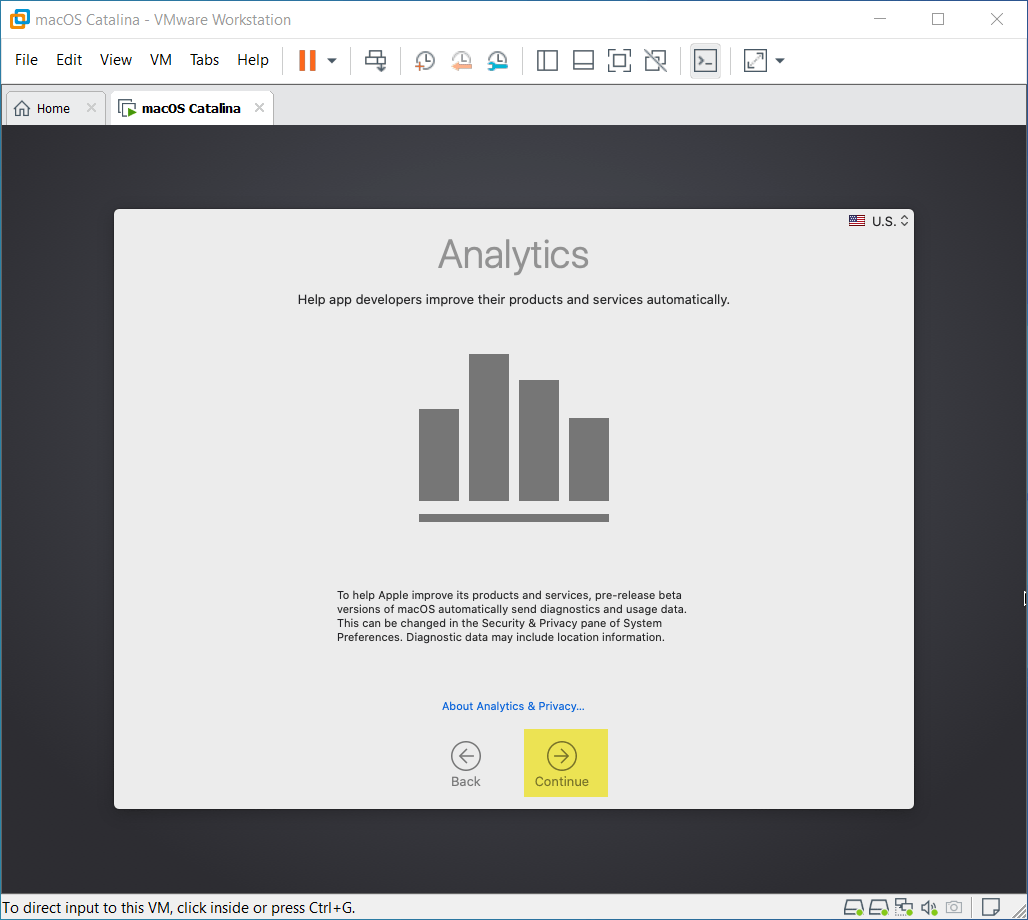
 Here on the Analytics simply click continue.
 In the screen time, you can set up and customize the settings and click continue.
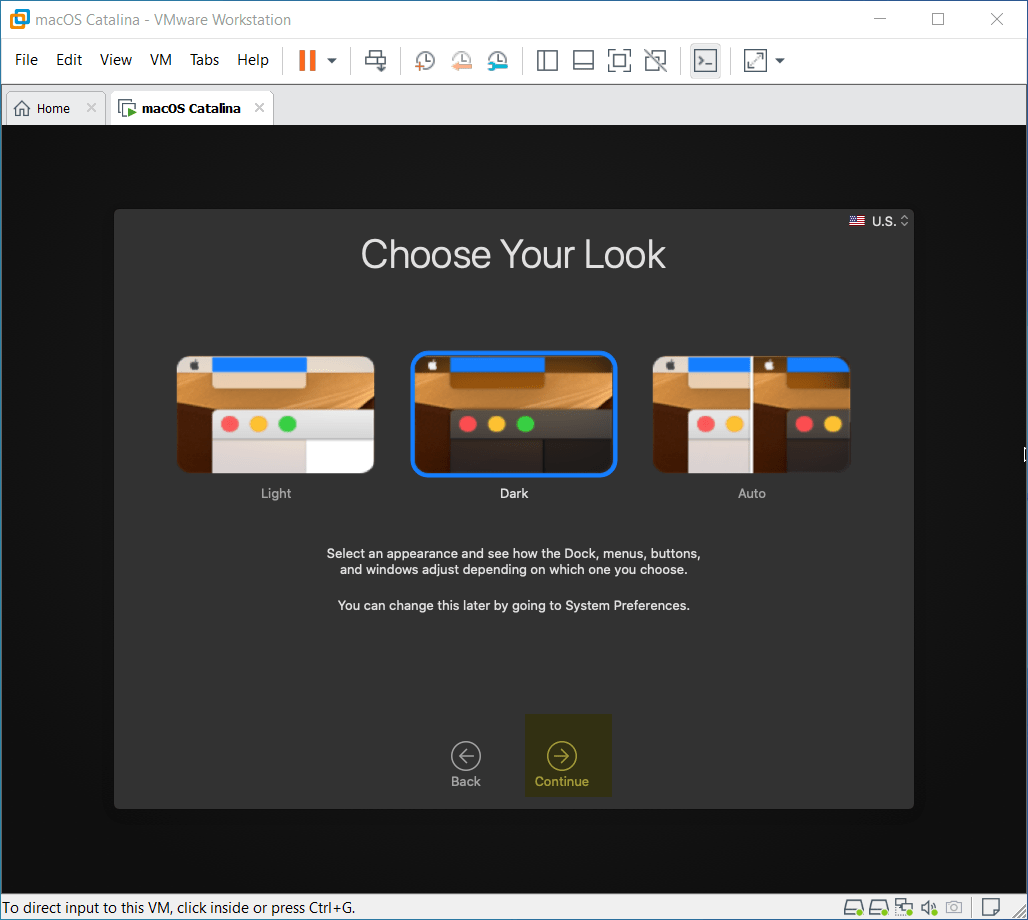
 Finally, its time to select your look for macOS Catalina 10.15, after selecting click continue.
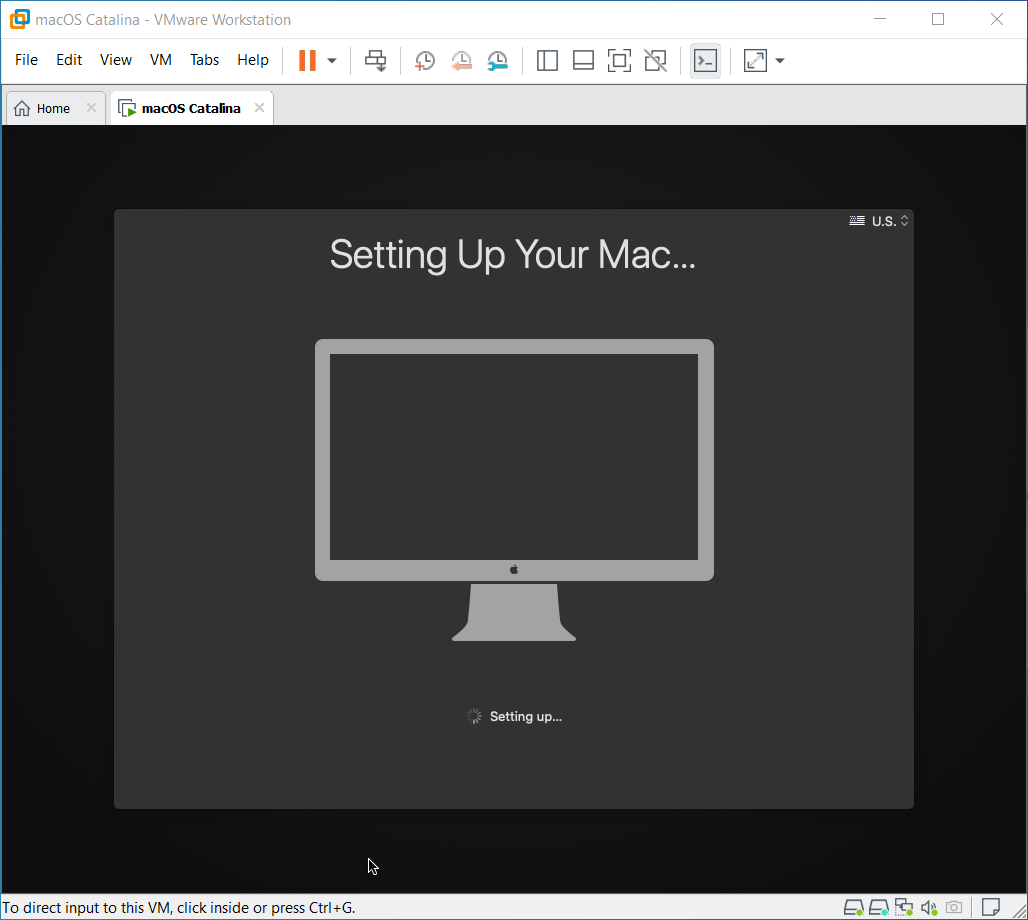
 Wait until it should set up your Mac for the first use.
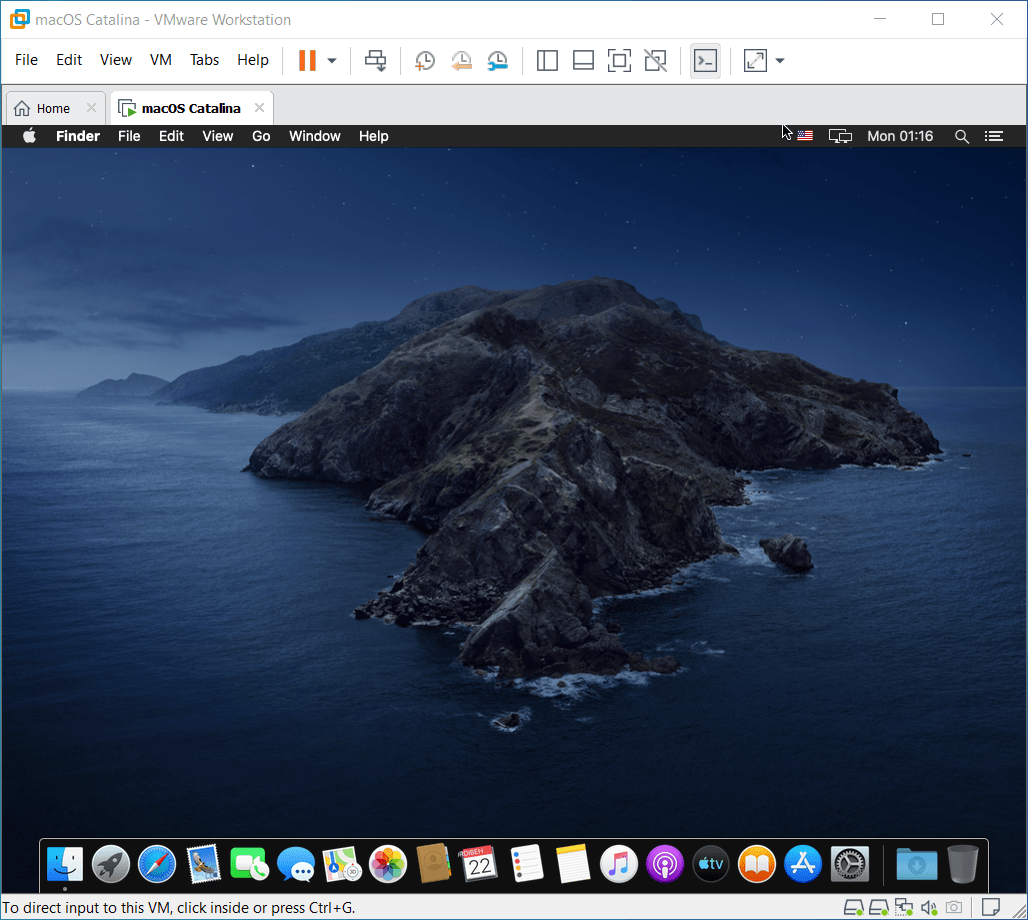
 Finally macOS Catalina 10.15 successfully installed on VMware Workstation on Windows PC. Go ahead and enjoy its features on Windows PC. Again it will not work as an actual operating system, but we can full our experience using it on Windows.
- How to Install macOS Mojave 10.14 on VMware on Windows PC
- How to Install macOS Mojave 10.14 on VirtualBox on Windows PC
That’s it macOS Catalina has been installed on VMware on Windows PC. Further, if there is remaining something feel free to share with me below down in the comment section. Also, read about how to enter macOS Catalina full-screen mode on VMware Workstation on Windows PC.