macOS Mojave 10.14 is the fifteenth major release of Apple Inc macOS desktop operating system for Macintosh computer. It was 4th June 2018, that Apple kicked out its operating system on the “WWDC” Worldwide developer conference. Then they released the public version on September 24, 2018. Also, macOS Mojave 10.14 is the successful major release of macOS High Sierra. After macOS High Sierra it’s macOS Mojave 10.14 that brought lots of iOS applications to desktop OS. Those iOS applications include Apple News, Voice Memos, and Home. However, macOS Mojave 10.14 includes many incredible features, and one of the best features among all the operating systems is Dark Mode. For the first time, it was Apple Inc that announced their night mode feature for the macOS users.
macOS Mojave 10.14 professionally designed with advanced technology and best name. Overall, macOS Mojave 10.14 is one of the successful operating systems of Apple until now. As it’s now the time of macOS Catalina 10.15, but macOS Mojave 10.14 attracted most of the user to itself. And macOS Mojave 10.14 is pre-installed on over 100K devices now. Do you want to install macOS Mojave 10.14 on your computer? As for myself, I don’t have a Mac computer. But I have much enthusiasm to install it on my Windows PC. You might ask this it’s impossible to install it on Windows PC. But there are several ways to complete your wishes using macOS operating system on your Windows PC. Firstly, we should be thankful for the Virtual machine technology that they have provides us such a great platform.
What is Virtual Machine? virtual machine is a separate or built-in technology that allows you to test out different operating systems on it. For example, there is multiple virtual machine like Hyper-V, VMware Workstation & Player, and VirtualBox. Hyper-V is counted as a built-in application on Windows PC. But VMware Workstation and VirtualBox are applications that you can download and install it on your Windows PC. These are Virtual machines that offer you to install macOS, Linux, or even Windows operating system as a guest OS on it. So, through this post, I wanted to install macOS Mojave 10.14 on VirtualBox on Windows PC. Follow my steps for a clean installation and for your experience betterment.
- How to Install macOS Catalina 10.15 on VirtualBox on Windows PC
- How to Install macOS Catalina 10.15 on VMware on Windows PC
Install macOS Mojave 10.14 on VirtualBox on Windows PC
1. What is VirtualBox?
VirtualBox is a free open-source virtualization application that can be used as a virtual machine on Windows PC, macOS, and Linux. Building a virtual machine on Windows PC is pretty easy, for example, you can run two Windows operating systems on one device. One of them is a real operating system that already installed on your device, and the second is you will install it via virtual machine. Also, the virtual machine operating system will not act as an actual operating system. Thanks to the Oracle corporation that they provide such a nice facility like VirtualBox Hypervisor.
To install macOS Mojave 10.14 on VirtualBox on Windows PC, you need some requirements to complete that.
- A compatible device that should have the ability to run Virtual machine.
- VirtualBox
- macOS Mojave 10.14 Image
- VirtualBox Codes
- And installation
[penci_button link=”http://www.mediafire.com/file/pph3v402wi4vjo0/macOS_Mojave_10.14.6.iso/file” icon=”” icon_position=”left” background=”REd” hover_bgcolor=”Green”]Download macOS Mojave[/penci_button]
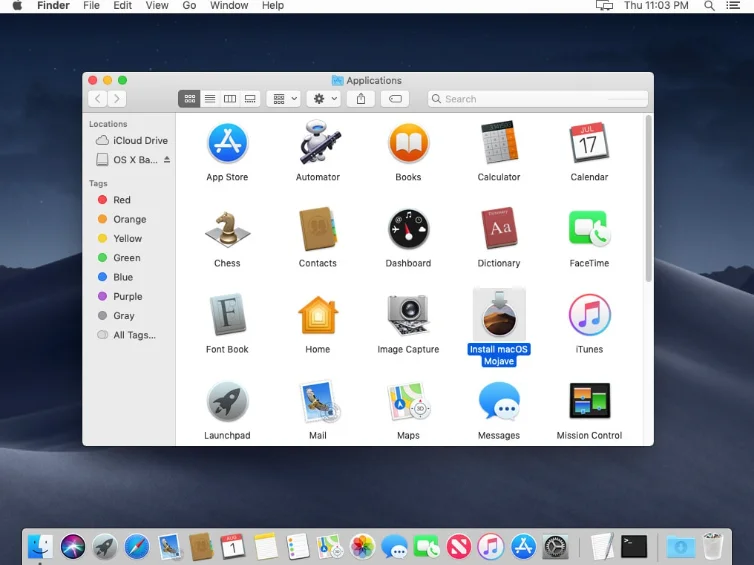
You can create a macOS Mojave image by yourself, the method is easy just you need to have a virtual Mac PC. OK over ahead to Mac App Store, once you reached there on search bar, search for macOS Mojave 10.14 and press download button. When the file downloaded navigate to the application folder if the macOS Mojave file does not exist there. So, find it and move it to the application folder. To create a macOS Mojave image file run the “Terminal” and apply the following codes.
# Create macOS Mojave DMG Image
hdiutil create -o /tmp/mojave -size 7900m -volname mojave -layout SPUD -fs HFS+J
# Mount Mojave DMG image to macOS
hdiutil attach /tmp/mojave.dmg -noverify -mountpoint /Volumes/mojave# Create a Mojave Installer
sudo /Applications/Install\ macOS\ Mojave.app/Contents/Resources/createinstallmedia --volume /Volumes/mojave --nointeraction# Unmount Disk Image
hdiutil detach /volumes/Install\ macOS\ mojave# Convert DMG File to ISO File
hdiutil convert /tmp/mojave.dmg -format UDTO -o ~/Desktop/mojave.cdr# Rename and Move Mojave ISO file to Desktop
mv ~/Desktop/mojave.cdr ~/Desktop/mojave.iso
2. Install VirtualBox on Windows
- Over ahead to VirtualBox.org website and search for the latest version then download it. Be sure to download and install its latest version.
- Once the setup downloaded double-click to open the installation process, in the welcome wizard window click next.
- On the next screen you will face a warning, again simply click Yes to continue.
- When the installation gets ready click Install.
- Now check the box of “Always trust software from “Oracle Corporation” and click Install.
- When the installation completed click Finish.
While the VirtualBox successfully installed on your computer, therefore, you need to install its “Extension Pack” also. This package allows you to fix the mouse stuck on macOS Mojave 10.14 or any other operating system during the installation. You can find out the “Extension Packages Pack” under the download link of VirtualBox on the VirtualBox.org.
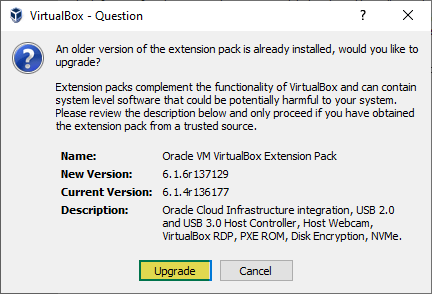
When the Extension Packages Pack download, double-click to launch the installation. Now here you will see it says that an older extension pack is already installed. So, this version is new here then click “Upgrade”.
 Now read the license of VirtualBox, then scroll down and click Agree.
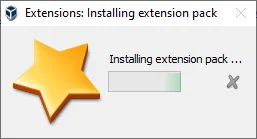
 Finally, it’s ready to install the VirtualBox extension pack. This process will take short time wait for it. Once it installed click OK to close the window.
3. Create a New Virtual Machine for macOS Mojave 10.14
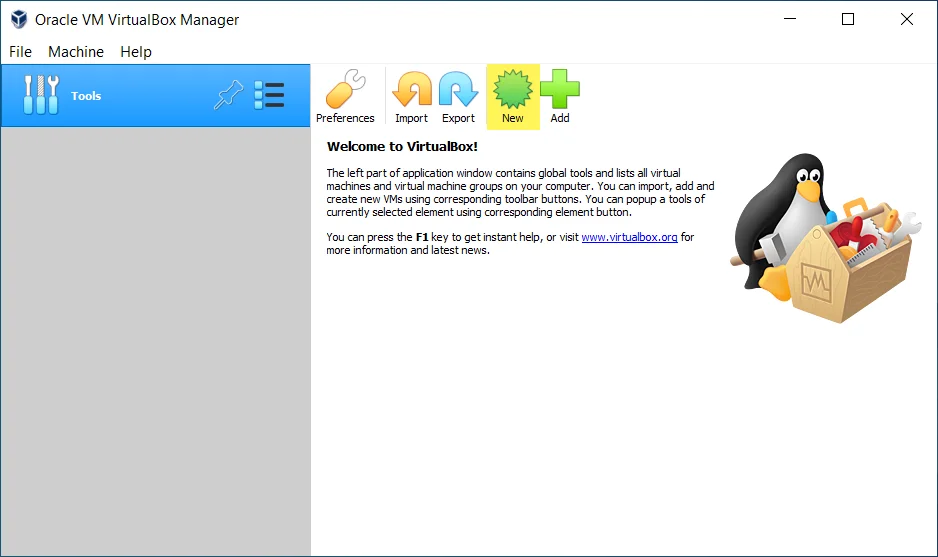
When everything works properly so let’s create a new virtual machine for macOS Mojave 10.14 on Windows PC. Creating a virtual machine is pretty easy, but it needs some effort to handle it. Therefore, during the creating you will be asked several settings questions to answer it. OK, let’s do it open up the VirtualBox and on the main window click on “New”.
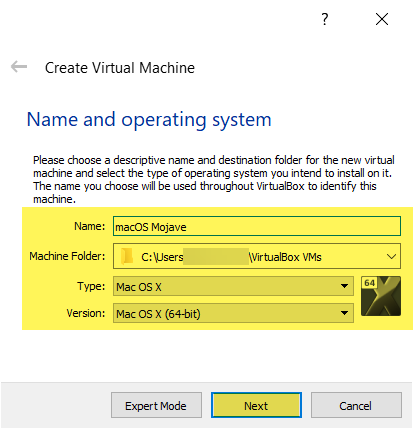
 When this window opened type a name for macOS Mojave virtual machine. Specify the machine folder, choose the type “Mac OS X”, the version “Mac OS X (64-Bit) and press next.
 In this step, increase the memory size also more memory have better speed and performance. So, try to select more memory size for macOS Mojave 10.14 installation.
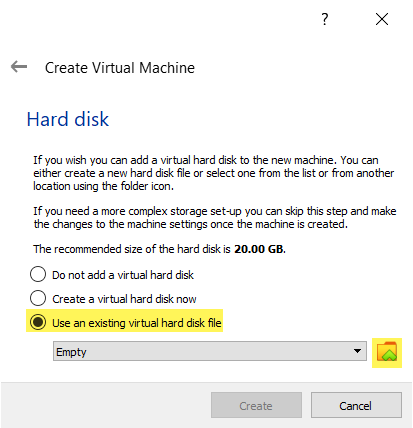
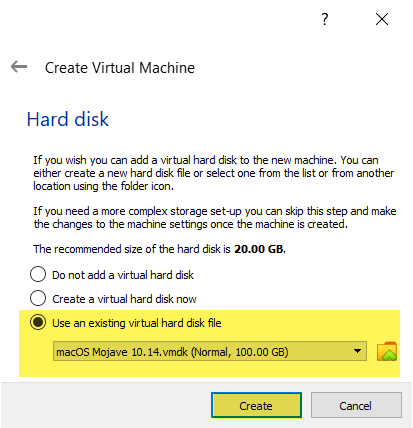
 Here choose the third option “Use an existing virtual hard disk” and hit on the yellow folder icon.
 Now click on the Add (+) option.
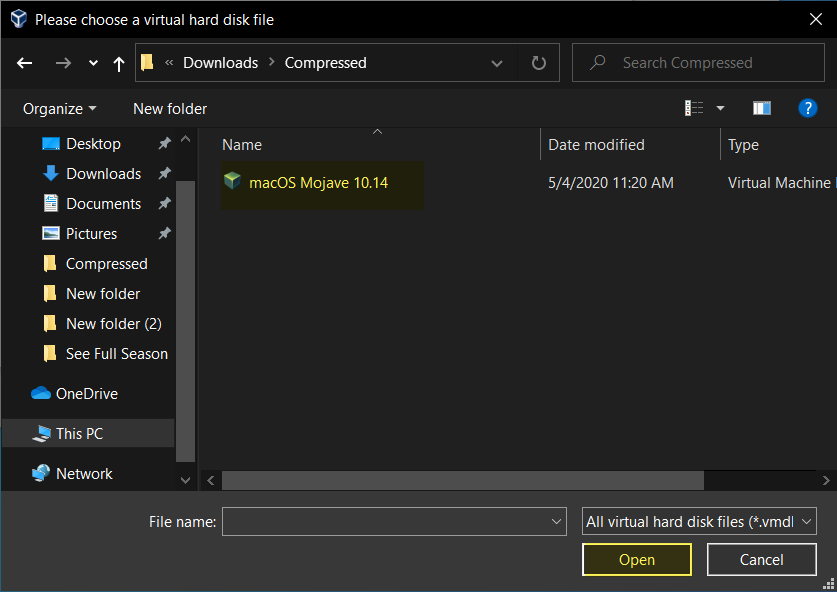
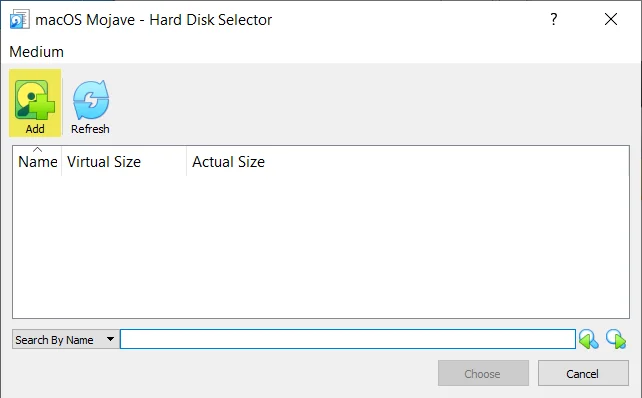 Now select the macOS Mojave 10.14 VMDK or ISO file and hit Open.
 Below down you will see that macOS Mojave VMDK is inserted, there you need to click create option.
4. Edit Virtual Machine Settings
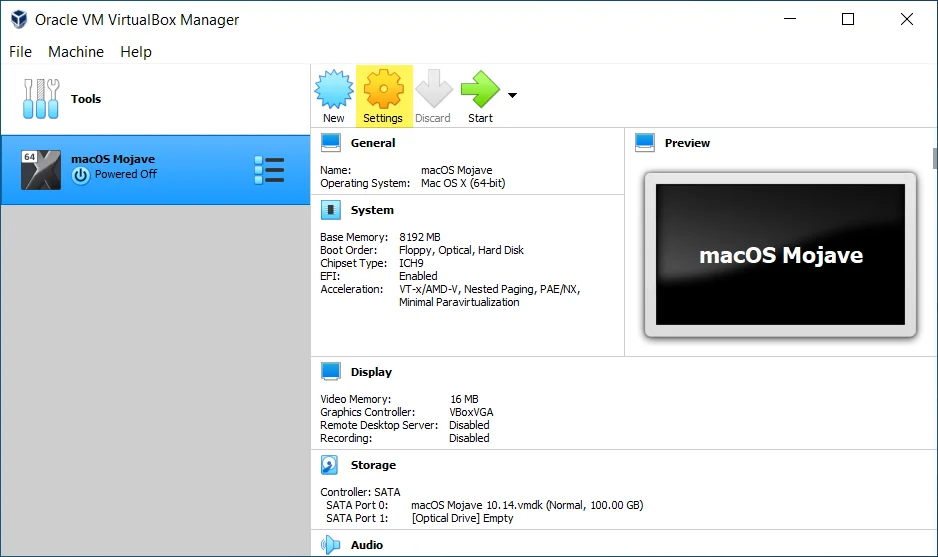
Once the macOS Mojave 10.14 virtual machine created therefore for better speed & performance. You will be required to bring some change changes to virtual machine BIOS settings. To do that, select the created virtual machine then click settings.
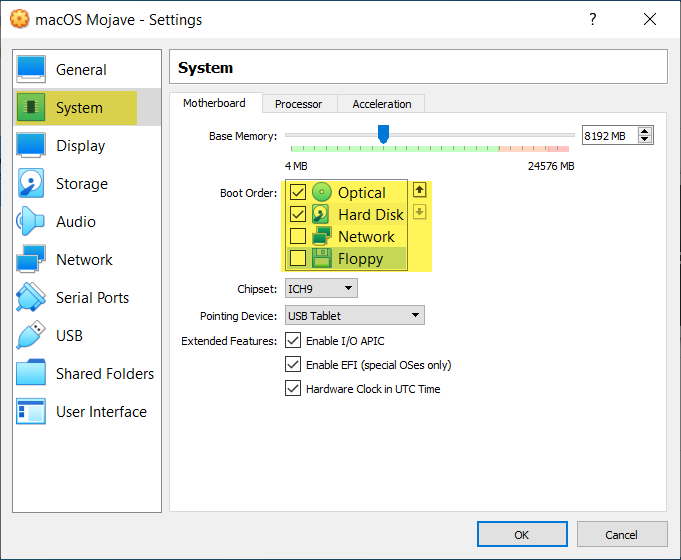
 When the settings window opened from the left-handed tab select the “System” tab, and uncheck the “Floppy disk”. Move over ahead to the Processor tab and increase the number of processors, and the number of core processors.
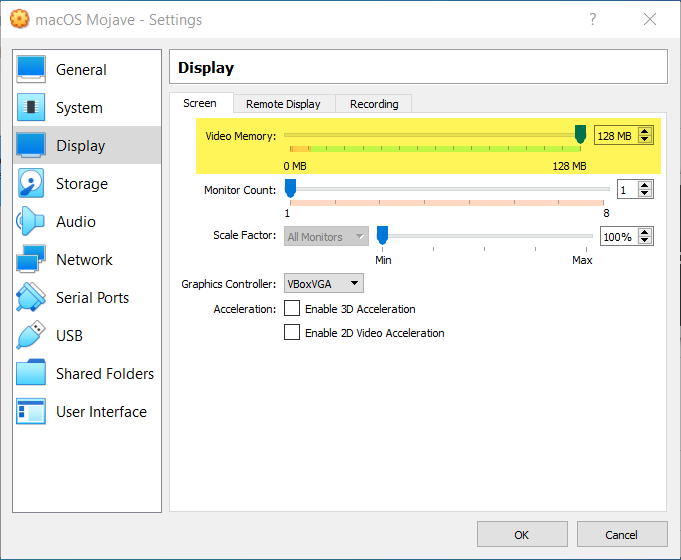
 Now select the “Display” tab and increase the Video Memory size up to 128MB.
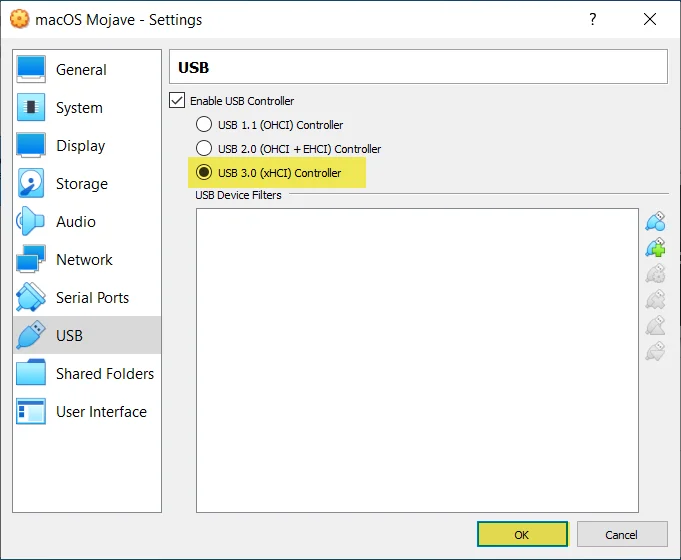
 And now select the “USB” tab, there you will see three option of USB’s. And for macOS Mojave 10.14 you need to select “USB 3.0 (xHCI) Controller”. When you get sure of all the settings click OK to save changes.
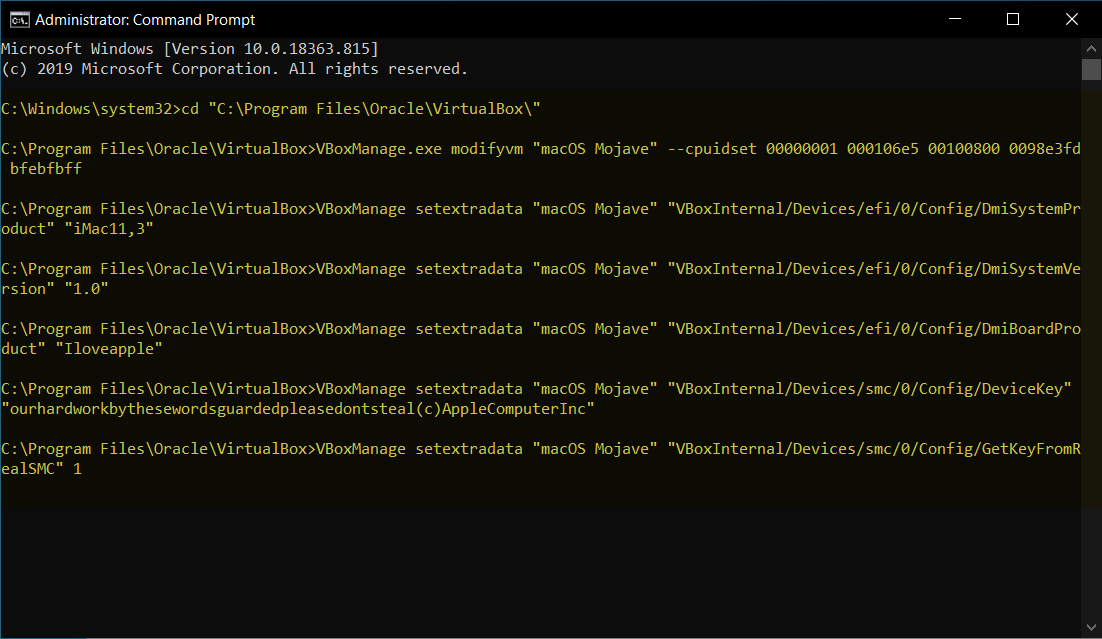
5. Use Command Prompt “CMD” to Add VirtualBox Codes
VirtualBox codes are the configuration of the virtual machine, that without these codes you won’t be able to install any macOS operating system on Virtual machine using VirtualBox. The same VMware Workstation has its configuration code.
Copy the below codes into notepad or Wordpad
cd "C:\Program Files\Oracle\VirtualBox\"
VBoxManage.exe modifyvm "Virtual Machine Name" --cpuidset 00000001 000306a9 04100800 7fbae3ff bfebfbff
VBoxManage setextradata "Virtual Machine Name" "VBoxInternal/Devices/efi/0/Config/DmiSystemProduct" "MacBookPro11,3"
VBoxManage setextradata "Virtual Machine Name" "VBoxInternal/Devices/efi/0/Config/DmiSystemVersion" "1.0"
VBoxManage setextradata "Virtual Machine Name" "VBoxInternal/Devices/efi/0/Config/DmiBoardProduct" "Iloveapple"
VBoxManage setextradata "Virtual Machine Name" "VBoxInternal/Devices/smc/0/Config/DeviceKey" "ourhardworkbythesewordsguardedpleasedontsteal(c)AppleComputerInc"
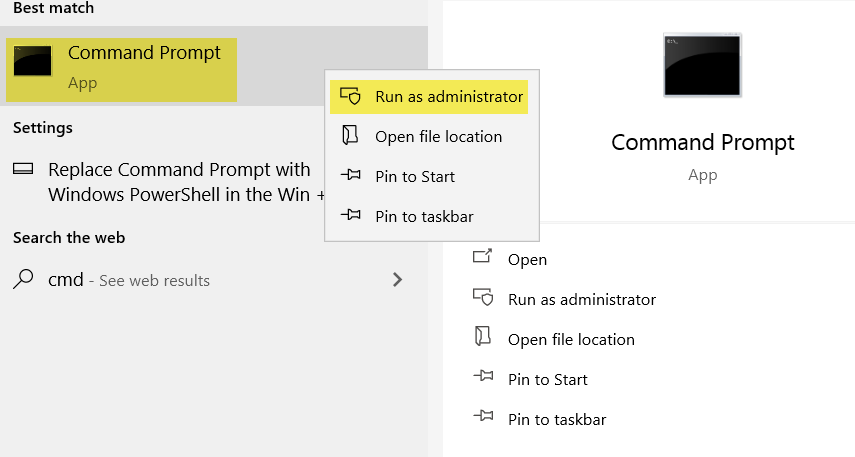
VBoxManage setextradata "Virtual Machine Name" "VBoxInternal/Devices/smc/0/Config/GetKeyFromRealSMC" 1Before opening the CMD completely close the VirtualBox, after that, to open the CMD “Command Prompt” navigate to Windows start menu, type on the search box CMD. Once the CMD prompt up right-click and select “Run As Administrator”.
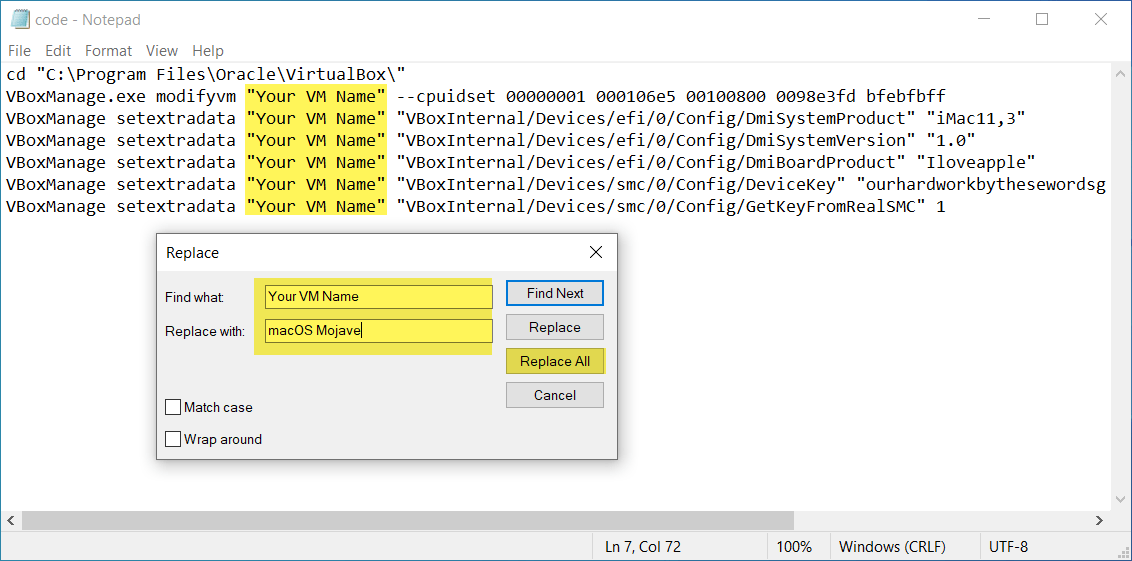
 Now replace the “Your VM Name” with the name of your virtual machine, and click replace all.
 So, on the command prompt “CMD”, code the first line of the code and paste on the CMD window and press enter. Then select all the rest of the code and paste it into the command prompt and press enter.
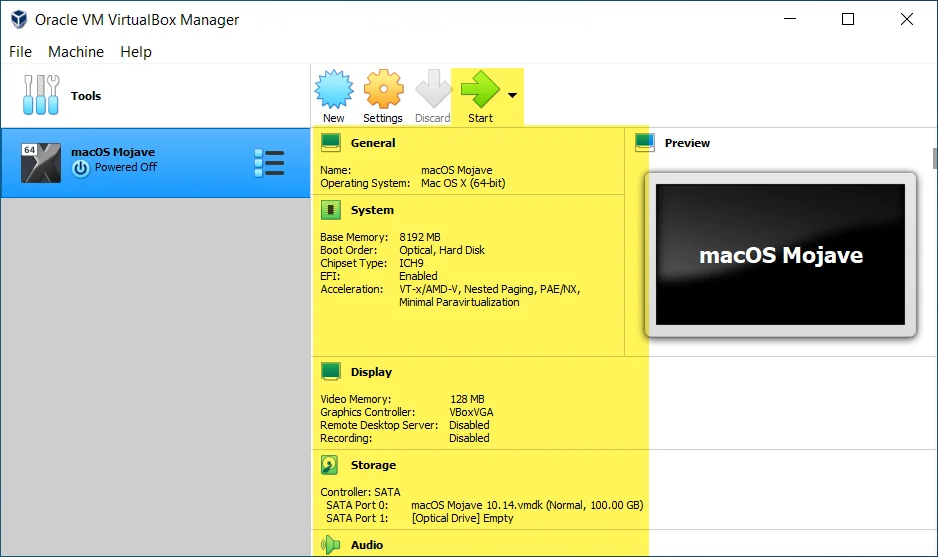
6. Install macOS Mojave 10.14 on VirtualBox on Windows PC
Now its time to perform a clean installation of macOS Mojave 10.14 on VirtualBox on Windows PC. Because everything is ready, firstly we installed VirtualBox, installed the Extension Pack of VirtualBox, created macOS Mojave 10.14 image, created a Virtual machine for macOS Mojave, Applied the configuration code of VirtualBox.
Open up the VirtualBox then select the created virtual machine of macOS Mojave 10.14 and click Start option.
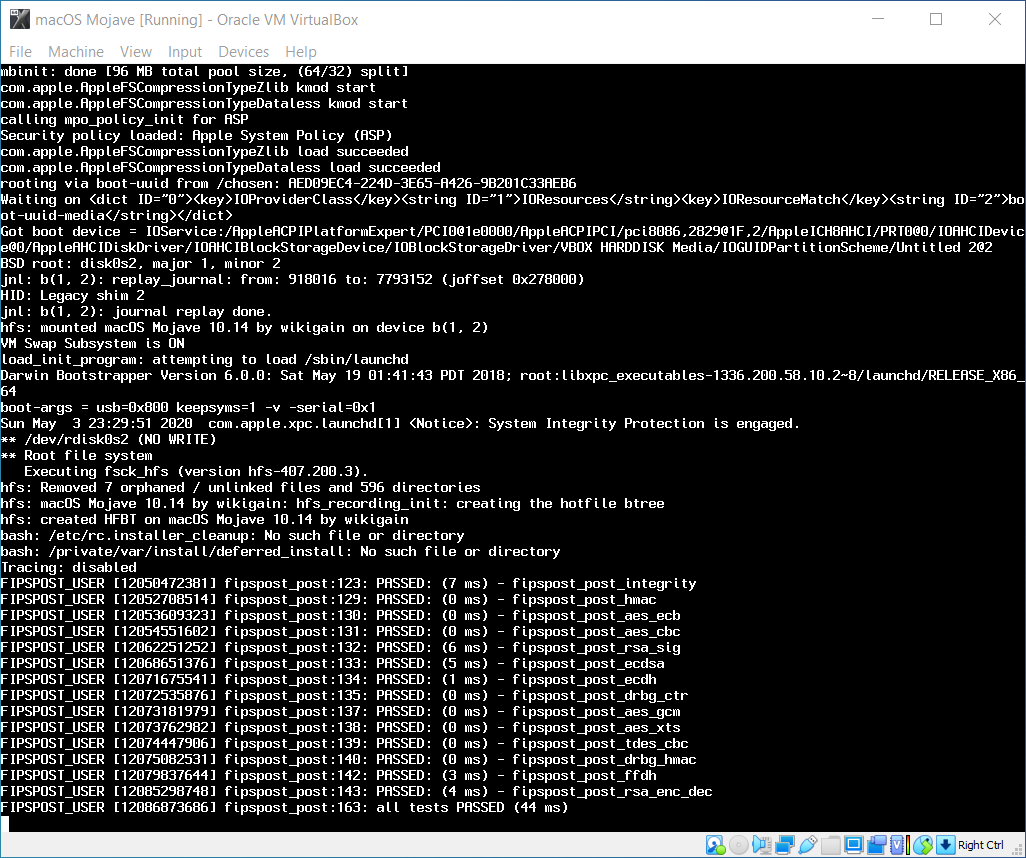
 When the VirtualBox boot to macOS Mojave installation you will see the black window full of codes, wait until it should go ahead.
 When the macOS Mojave 10.14 window appeared, on the first window select your country where you live and press continue.
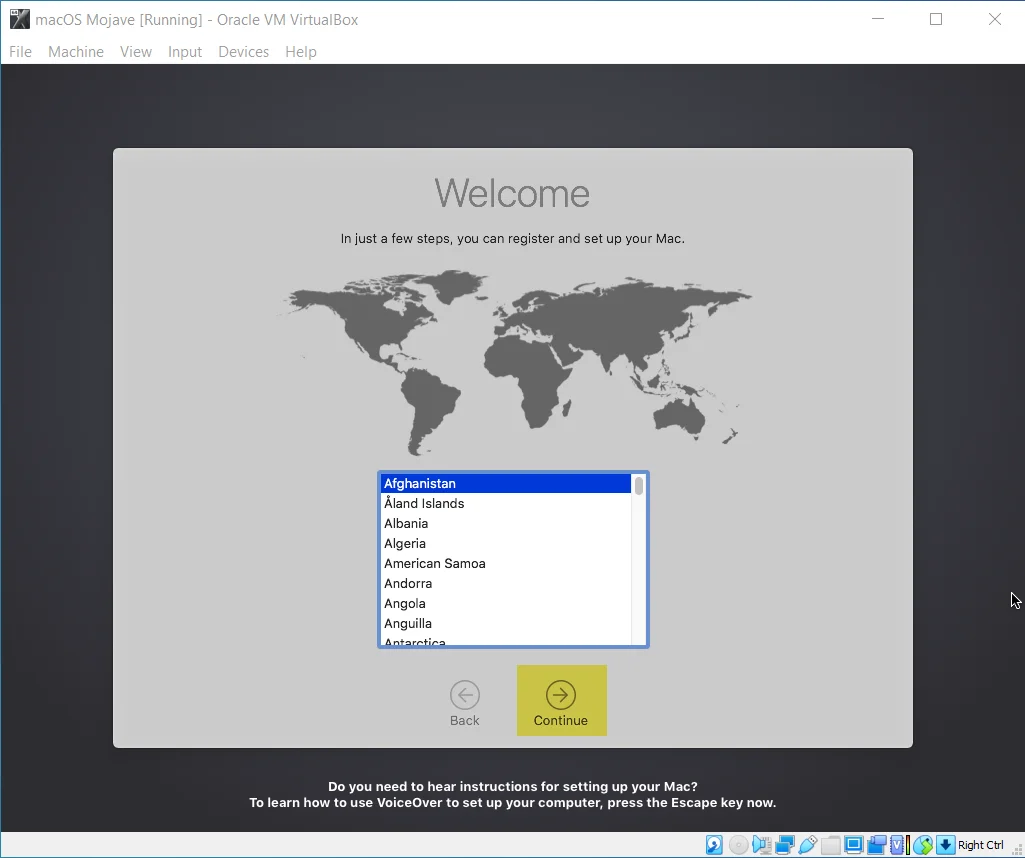
- Choose your keyboard layout and press continue.
- On the Data & Privacy simply click continue.
- Now select the option “Don’t transfer any information right now” and press continue.
- Click on Sign up later and press Skip.
- Agree with terms and conditions of macOS Mojave 10.14 and press continue.
- Now create a computer account and press continue.
- On the express set up window again click continue.
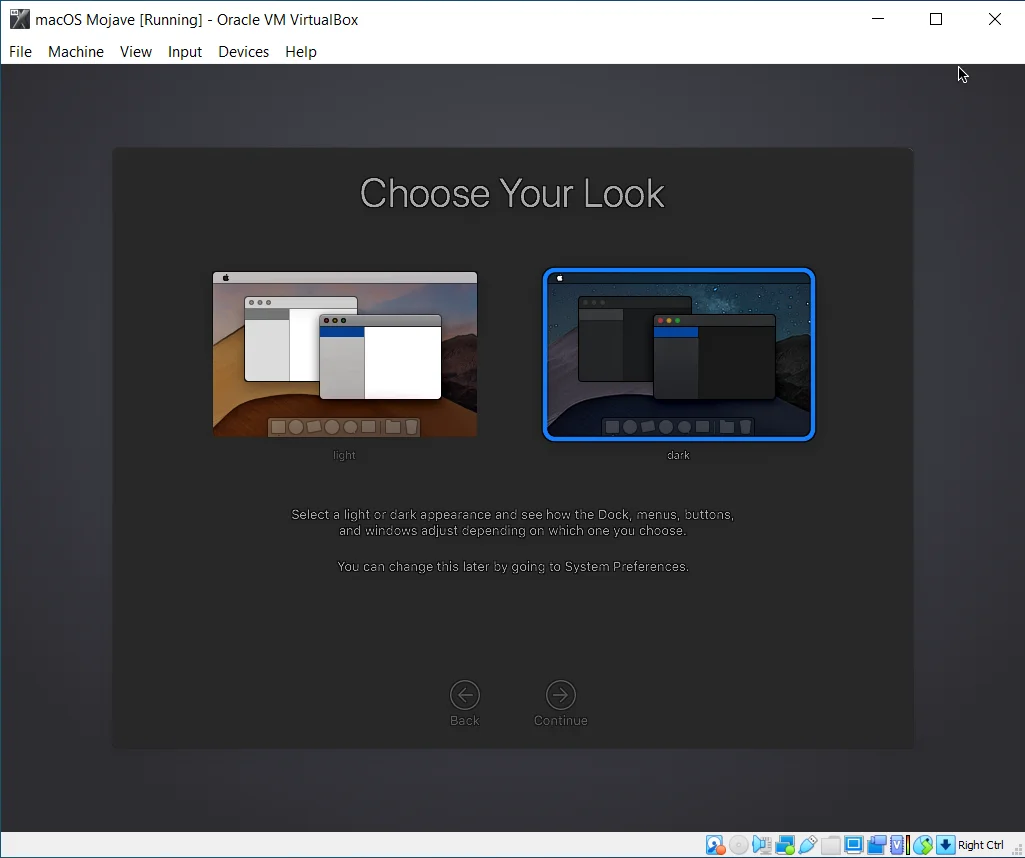
- And now you need to choose your macOS Mojave look and press continue.
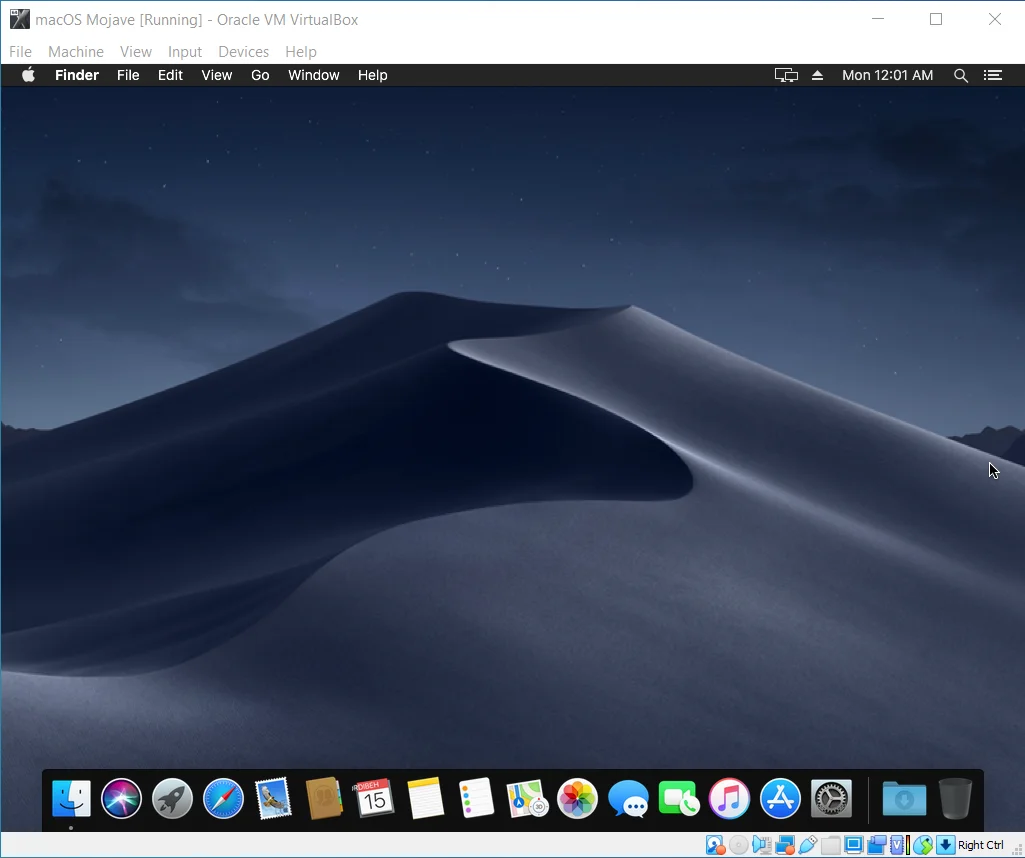
That’s it macOS Mojave 10.14 successfully installed on VirtualBox on Windows PC.
 To complete your experience with macOS operating system on Windows PC. You need to install it on your Windows PC, whether you use VMware Workstation or any other virtualization platform. But to get access to those features of macOS Mojave 10.14 you need to have created a better environment of the virtual machine. On the other hand, at the same time, you can access two operating systems on one device. Or you can think about it that you have two computers, one of them is Windows, and the second one is macOS or Mac.