After installing macOS Big Sur 11 on VirtualBox on Windows PC, you might have noticed you won’t be able to enter macOS Big Sur full-screen mode. By default after the installation of any macOS operating system, it will not be able to show the full-screen mode on VirtualBox. Indeed it required some extra tricks to enter any macOS operating systems full-screen on VirtualBox. There are a variety of methods that help you to enter macOS Big Sur full-screen mode on VirtualBox on Windows PC, but the method which you will learn in this post will completely help you to enter macOS Big Sur full-Screen mode on VirtualBox.
However, previously we have tested lots of methods on fixing macOS full-screen mode VirtualBox including macOS Mojave, macOS Catalina, and now its the time of macOS Big Sur 11 which newly released the latest event of Apple in 2020. We have tested out the final version of macOS Big Sur on VirtualBox on Windows, then decided to mention the article on fixing its screen resolution.
Fix macOS Big Sur Screen Resolution on VirtualBox
One of the most tested methods which are compeletly working for fixing macOS Big Sur screen resolution on VirtualBox will be this method which can help you to fix any macOS operating system screen problem on VirtualBox.
Step 1. Before applying to fix macOS Big Sur screen resolution on VirtualBox on Windows you have to compeletly shut down the VirtualBox if that is running in the background. And the next you need have to edit the “VM Name” command, with the name of macOS Big Sur Virtua Machine as you can check it in the below down screenshot how to do it.
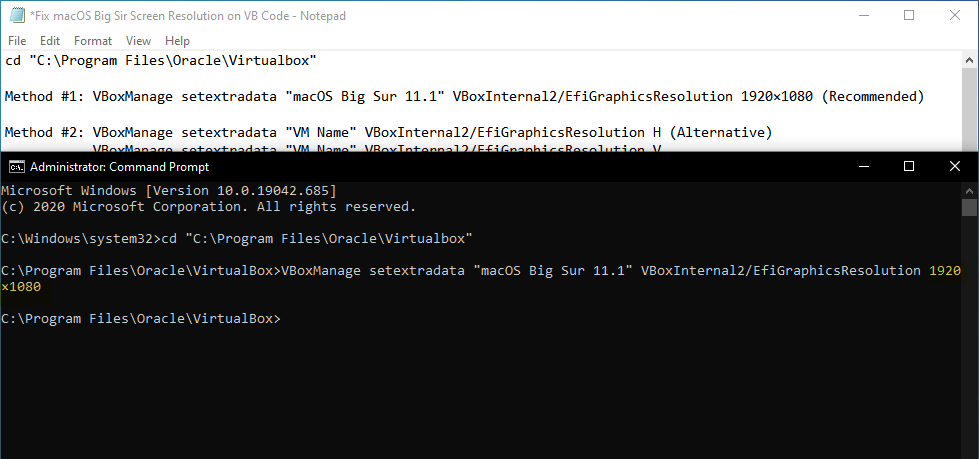
cd "C:\Program Files\Oracle\Virtualbox"

Method #1: VBoxManage setextradata "VM Name" VBoxInternal2/EfiGraphicsResolution HxV (Recommended)
---------------------------------------------------------------------------------------------------
The following Resolutions are supported on VirtualBox:
1280×720  | 1920×1080  |  2560×1440  |  2048×1080  |  3840×2160  |  5120×2880  |  7680×4320
   HD		FHD	     QHD	   2K		  4K		5K	      8K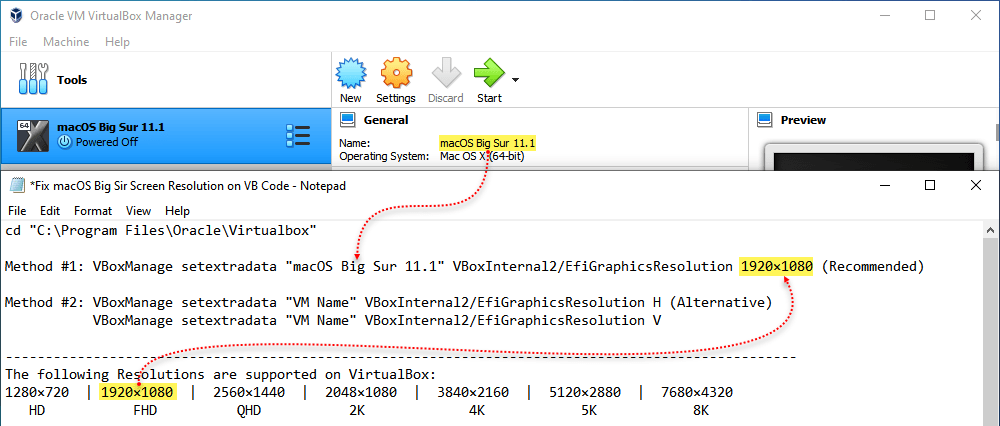
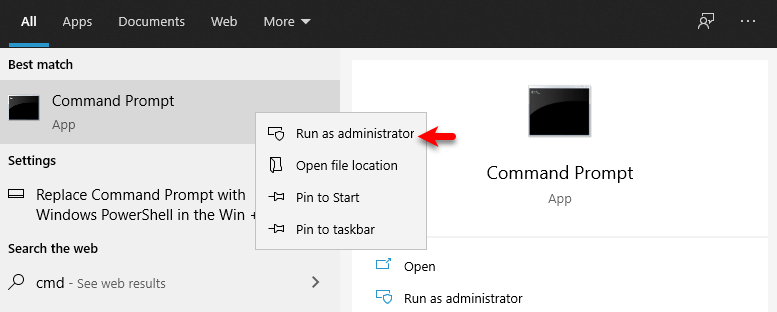
Step 2. Now head over to the “CMD” command prompt by navigating to Windows start menu type there “CMD” once it appeared right-click and “Run As Administrator”.
Step 3. Be sure that you have compeletly replaced the Virtual machine name, the HxV with the recommended one. Once that’s done copy the first line of command and press enter, like these copy the next line of command and press enter. When that is done simply close the command prompt.
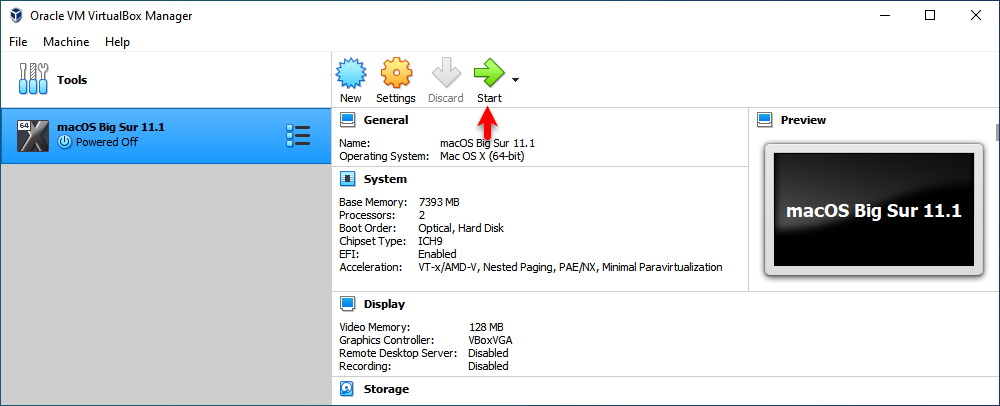
Sep 4. Now head to the VirtualBox and open it, then select the macOS Big Sur virtual machine and press on “Start” button.
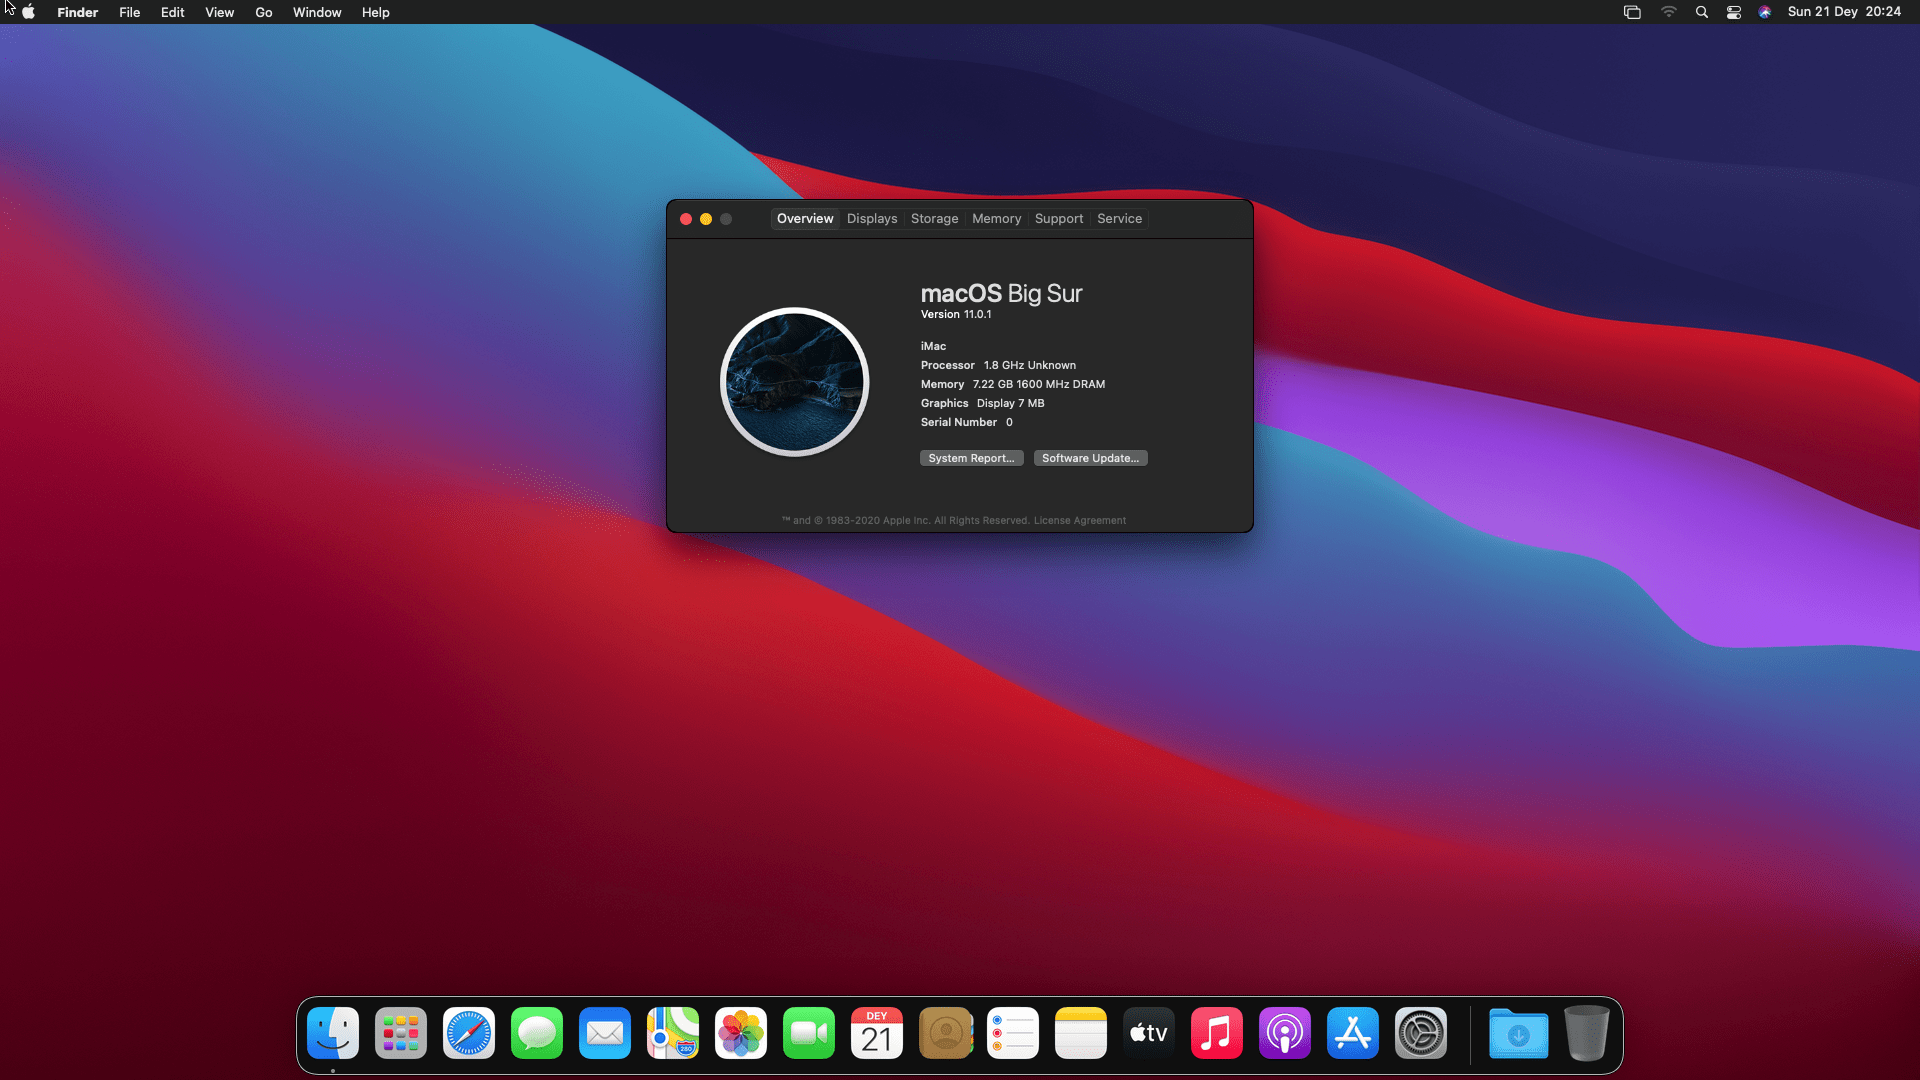
Step 5. When macOS Big Sur successfully launched navigate to the left-handed of window and click on “Apple Logo”, from the drop down list click on “About this Mac” from there you can check the Graphics display.
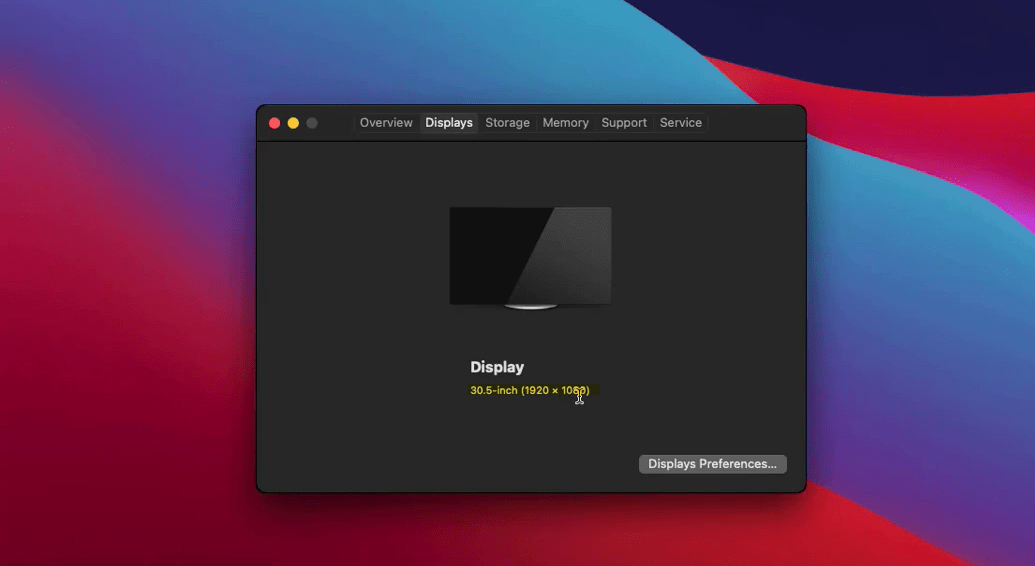
Step 6. Head over to the “Display” and there you can see the screen resolution of macOS Big Sur which you applied via the commands. As you can see here macOS Big Sur screen resolution is 1920×1080 currently on VirtualBox.
Here it is if you faced any kind of problem feel free to share with us via comment section. Also, if you know any other methods of fixing macOS Big Sur screen resolution on VirtualBox on Windows PC, then we are happy to hear from you via comment section.