In this article, I will show you how to install macOS Big Sur on VirtualBox on Windows – VMDK. macOS Big Sur is the recent release of Apple in the year 2020. Alongside, macOS Big Sur is one of the advanced operating system which make your computer more beautiful with its interface look. The latest version of the macOS operating system is being inspired by the iOS 14. Now you can enjoy using iOS 14 Applications on macOS Big Sur which can give you a better experience of using Applications of iPhone and iPad on macOS Big Sur.
Since macOS Big Sur was in Beta we have created its ISO file for installing on Windows PC. On the other hand, and finally, Apple kicked out the final version of macOS Big Sur. In November 2020 Apple released the final version of macOS Big Sur, which includes lots of bug fixes and other critical issues.
Successfully Apple update the macOS Big Sur 11.0 to the latest version and that is 11.1. In macOS Big Sur 11.1 update Apple fixes a bunch of errors and other issues. More than that, its interface look is redesigned all the portion of macOS Big Sur is now completely fixed in the final update. If you are using macOS Big Sur 11.1 version then soon you will get the latest update notification of macOS Big Sur 11.2. Everyone can download and install macOS Big Sur on their MacBook, and that latest MacBook Pro & Air. On the other hand, if you own a Windows 10 PC then you can install macOS Big Sur on your PC as a guest OS.
However, while talking about guest OS it comes to the Virtualization platforms that access you to point to install macOS, Linux, Android OS, and Windows on the actual PC. Virtualization platforms give you the ability to install multiple operating systems on the physical PC. Installing the secondary operating system on the physical PC is having the same process. It means whenever you are installing macOS on your actual Mac or installing it on the Virtualization platform the both installations will have the same process.
Coming to Virtualization tools there are many Virtualization tools such as Hyper-V, VMware Workstation, VMware Player, and VirtualBox. We have tested all of them on Windows and macOS, but the best platforms come to VirtualBox and VMware. So, through this guide, you will learn how to install macOS Big Sur on Windows – VMDK.
This method might be new because you can’t find the ways of installing macOS Big Sur on VirtualBox on Windows using VMDK. As we have tested macOS Big Sur on VirtualBox on Windows PC using ISO file. You can find the installation process from the below downlink.
- How to Install macOS 11 Big Sur on VirtualBox on Windows PC
- How to Install macOS 11 Big Sur on VMware on Windows PC
Check the below link on how to install macOS Big Sur on VMware on Windows – VMDK.
Install macOS big Sur on VirtualBox on Windows – VMDK
#Required Files:
As we have mentioned this point in our few articles, if you are installing macOS Big Sur on your Windows be sure that you have to follow the below down recommended settings.
- Enable the Virtualization option from the BIOS settings.
- Pre-installed Windows 10 64-Bit OS
- 16GB of RAM for installing macOS on VirtualBox on Windows.
- For installing macOS Big Sur on Windows you need at least 40GB of free space.
#Download macOS Big Sur VMDK File
For installing macOS Big Sur on Windows 10 PC using VMDK file, you need to download the macOS Big Sur VMDK file. We have created a macOS Big Sur VMDK file and uploaded it on Mediafire storage. And the macOS Big Sur is divided into several parts, each file is compressed with WinRAR. After the downloading, you need to extract its file using the WinRAR and 7Zip.
#Install VirtualBox on Windows
Once the VMDK file downloaded alongside you need to download and install the VirtualBox on your Windows PC.
- Head over to the VirtualBox official website and open it and download the latest version of VirtualBox for Windows host.
- When the VirtualBox setup file downloaded-go to the download folder, double-click on the setup to open. Once the installation wizard launched on the first screen press next.
- Click next on the first three pages
- Click yes when prompted
- Click Install
- Click Yes when prompted
- Click again on Install when prompted, click on install to allow the VirtualBox app on Windows.
- Once the installation successfully completed click Finish to close the window.
#Create macOS Big Sur Virtual Machine
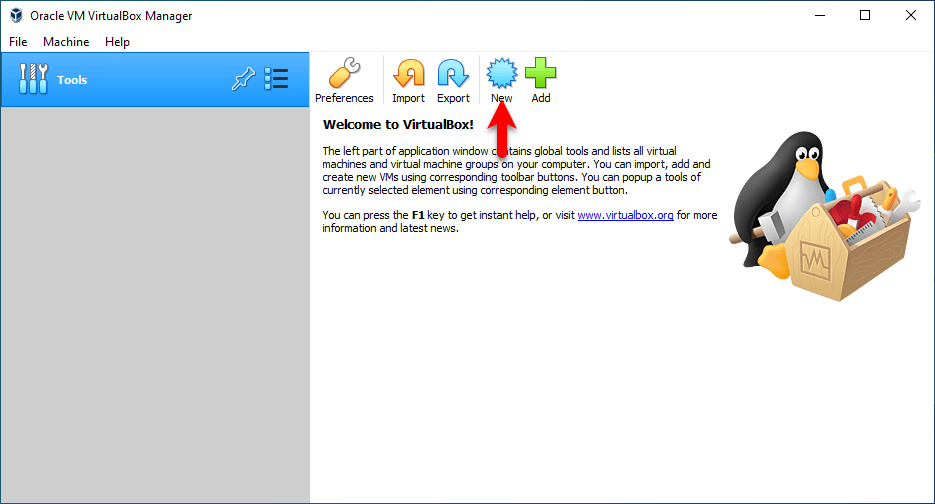
Once the VirtualBox successfully installed on Windows, for installing macOS Big Sur on VirtualBox on Windows you need to create a new virtual machine. So, open up the VirtualBox to create a new virtual machine. On the welcome wizard of VirtualBox click on the New option.
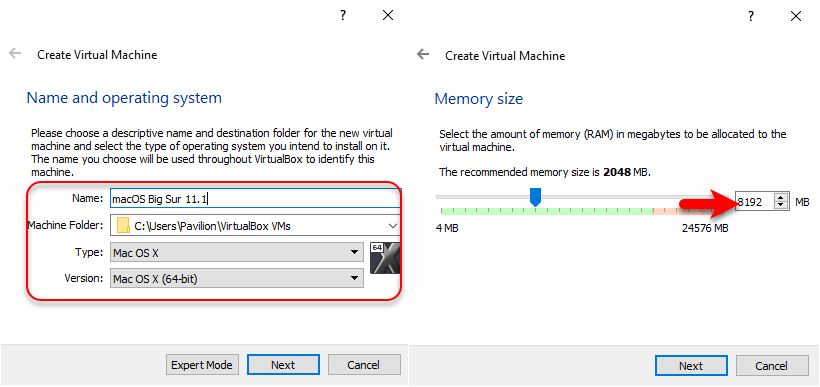
On the next window type the name macOS Big Sur, choose the machine folder, Type, Version then click Next. On the next window increase the Memory Size and click Next.
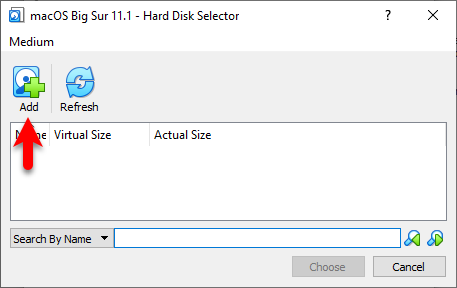
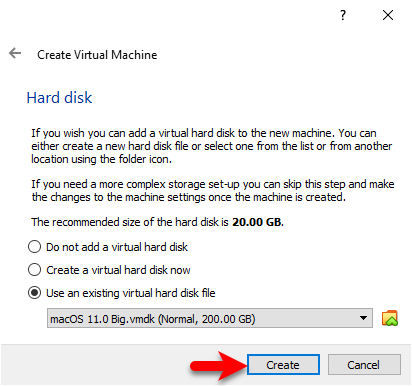
Now select the option “Use an existing virtual hard disk file” and click on the folder.

When this window opened click on the “Add” option.
Now select the macOS Big Sur VMDK file and click open, once the VMDK file added click Choose.
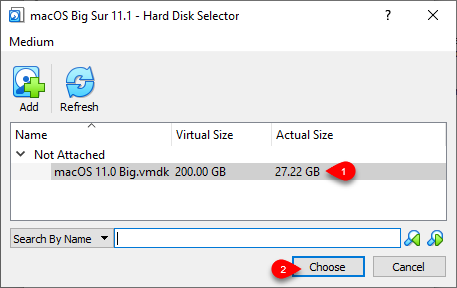
Here you can see the macOS Big Sur VMDK file added, so click on the Create option.
#Edit Virtual Machine Settings
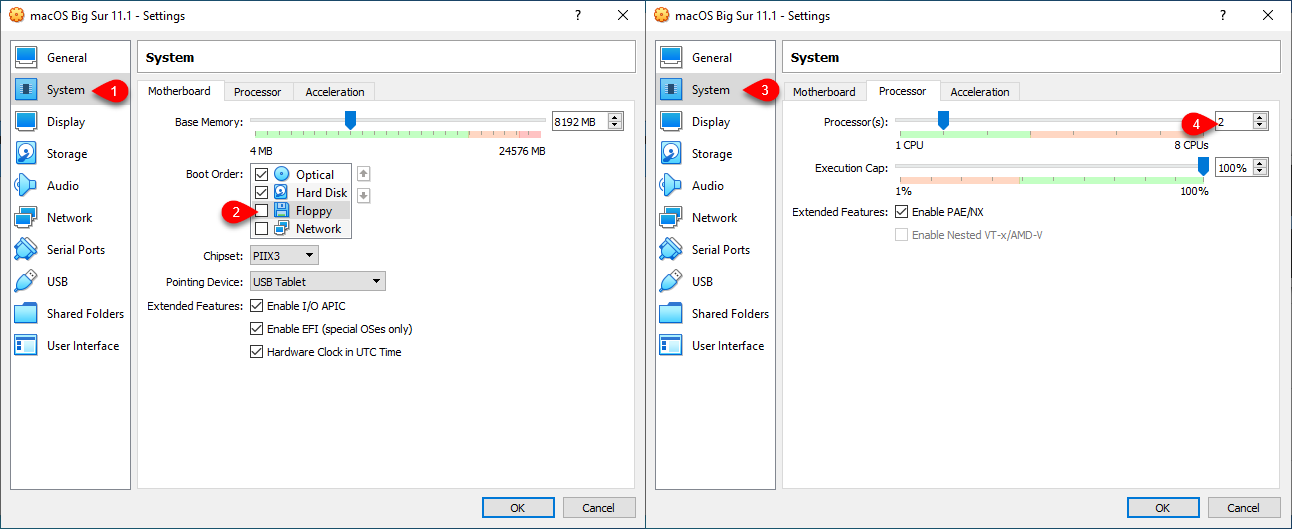
For better performance of macOS Big Sur on VirtualBox on Windows, you need to configure some settings. On the virtual machine settings window, you can increase Memory Size, Processors. So, select the created virtual machine and click Settings.

When the virtual machine settings window opened from the left-handed side select the “System” option. And on the system window select the “Motherboard” option and uncheck the Floppy disk. Select the “Processor” option and increase the processor’s number.
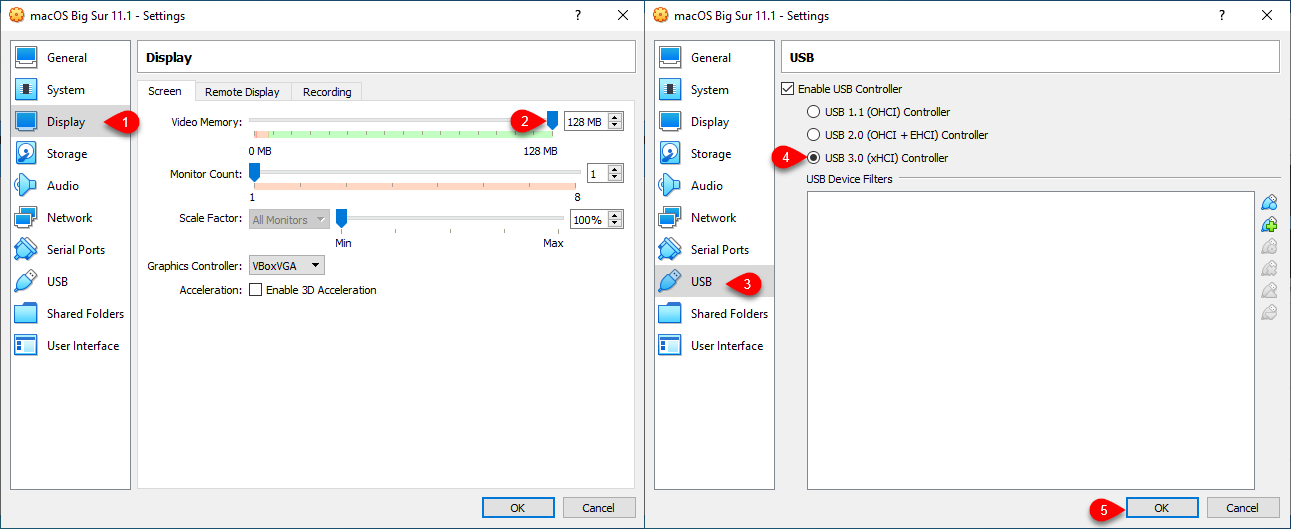
Select the “Display” option, and from the display window select the “Screen” option and increase the memory size up to 128MB. Select the USB option, then select the (USB 3.0 (xHCI) Controller) option. Once everything completed click OK to save changes.
#Run VirtualBox codes to the Command Prompt
Once you have created a Virtual machine for macOS Big Sur and edited the settings. So, for configuring the macOS Big Sur on VirtualBox on Windows you need to add some codes into the command prompt. This command will able you to install the macOS Big Sur on Windows, without these codes you won’t be able to run macOS Big Sur on Windows on VirtualBox.
Before running the codes into the command prompt be sure to completely close the VirtualBox.
cd "C:\Program Files\Oracle\VirtualBox\"
VBoxManage.exe modifyvm "VM Name" --cpuidset 00000001 000106e5 00100800 0098e3fd bfebfbff
VBoxManage setextradata "VM Name" "VBoxInternal/Devices/efi/0/Config/DmiSystemProduct" "iMac19,1"
VBoxManage setextradata "VM Name" "VBoxInternal/Devices/efi/0/Config/DmiSystemVersion" "1.0"
VBoxManage setextradata "VM Name" "VBoxInternal/Devices/efi/0/Config/DmiBoardProduct" "Mac-AA95B1DDAB278B95"
VBoxManage setextradata "VM Name" "VBoxInternal/Devices/smc/0/Config/DeviceKey" "ourhardworkbythesewordsguardedpleasedontsteal(c)AppleComputerInc"
VBoxManage setextradata "VM Name" "VBoxInternal/Devices/smc/0/Config/GetKeyFromRealSMC" 1
Copy and paste the above commands into the Notepad window, then replace the “VM Name” with the name of macOS Big Sur virtual machine. For replacing all the VM Names on the commands click on Edit, In place of “Replace with” type the name of the virtual machine and click replace All.
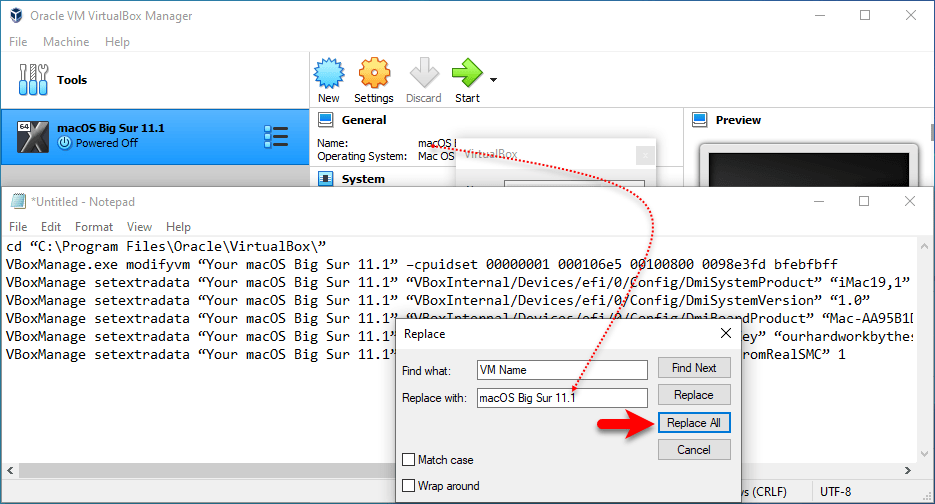
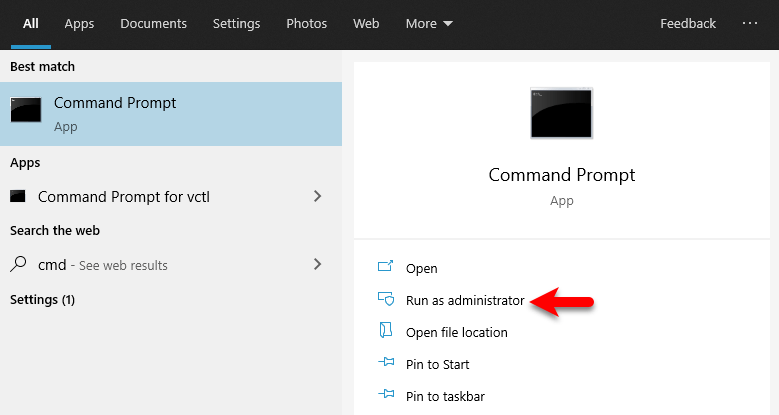
Now head over to the Windows start menu type CMD, once it appeared Run As Administrator.
Copy the first line of command and paste it into the command prompt window, then select the rest of the commands copy it, and paste it into the command prompt, and press enter.

#Install macOS Big Sur
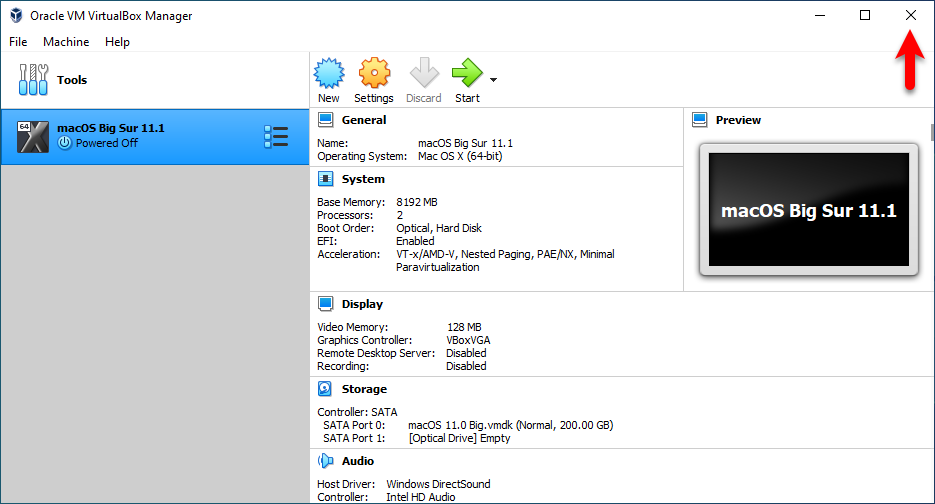
- When everything successfully completed open up the VirtualBox then select the created macOS Big Sur Virtual machine and click on the Start button.

- When everything gets ready for a clean installation of macOS Big Sur open up the VMware Workstation. From the list select macOS Big Sur virtual machine and click Power on this virtual machine.
- Once the installation launched wait for the Apple logo
- Wait until the installation should be completed, once the installation successfully completed the virtual machine will restart automatically.
- When the virtual machine restarted at the first welcome screen select your country and click continue.
- Select your written and spoken language and click continue.
- On the Data & Privacy click continue.
- Select “Don’t transfer any information right now” and click continue.
- Click Sign up later and click Skip.
- Agree with the terms and conditions of macOS Big Sur.
- Create your computer account and click continue.
- On the express setup simply click continue.
- On the Analytics click continue
- And on the Screen time again click continue.
- Select your theme for macOS Big Sur.
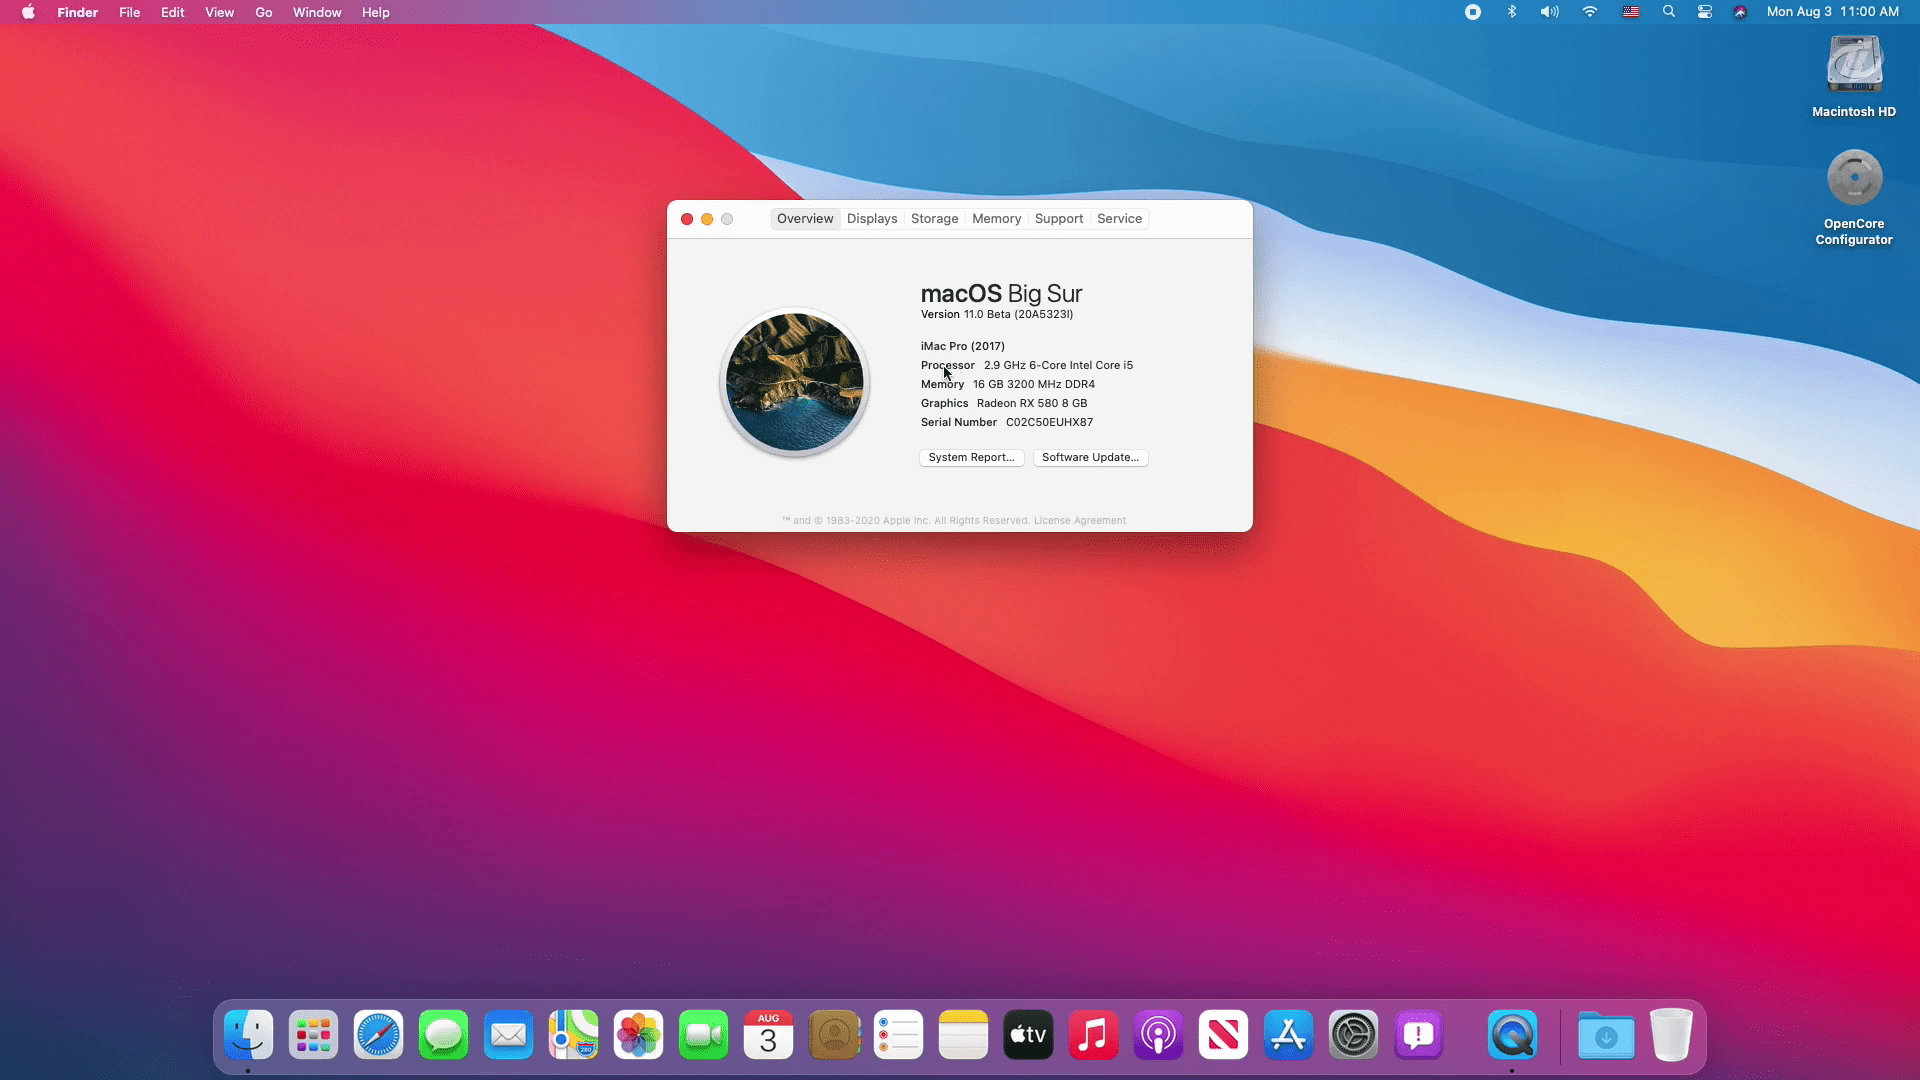
- Wait until it should set up the macOS Big Sur for the first use.
- And finally, macOS Big Sur successfully installed on VMware.
If you faced any kind of problem feel free to share with us via the comment section.