At the recent WWDC Conference 2020, Apple announced the latest version of its Mac operating system which called macOS Big Sur. This year Apple announced bundles of incredible technologies that comes to laptop, Apple Watch, Mobiles, OS, and the latest MacBook with M1 Chip processor. That Apple have selected its name as Apple Silicon Processor.
Now macOS Big Sur is not in Beta mode, because Apple released the latest version for the users. And finally, macOS Big Sur 11.1 is available at the App Store, if you are using macOS Catalina, macOS Mojave, on your Mac then easily you can upgrade it through the App Store.
On the other hand, if you are a Windows users who want to test macOS Big Sur alongside your Windows OS. Then you can install it through the virtualization world. Virtualization gives you the ability to test multiple operating systems on your Windows at the same time. Usually, there is two Virtualization software that is VMware & VirtualBox. This two Virtualization software gives you the handy features to test macOS Big Sur on your Windows PC.
Through this guide, I will show you how to install macOS Big Sur on Virtual machines – VMware & VirtualBox. We installed macOS Big Sur on VMware and installed macOS Big Sur on VirtualBox separately, but completing our experience in this article I will guide both processes in one article.
Note: If you didn’t enable the Virtualization Technology from the BIOS window then now restart your computer and press the BIOS key and enable it.
Install macOS Big Sur on Virtual Machines – VMware & VirtualBox
For installing macOS Big Sur on Virtual Machine you need to follow the below down guides which is important for the installation process.
- Download the required files
- Install the required files
- Create a New Virtual machine for macOS Big Sur on VMware & VirtualBox.
- Configure the Virtual Machines
- Start macOS Big Sur Installation
- Complete the Basic settings for the first use.
- Fix macOS Big Sur screen Resolution on VMware & VirtualBox.
#Download the Required Files
To start installing macOS Big Sur on Virtual machines then you have to download the required files. Once the required files downloaded you need to perform the installation for the further required.
- VMware Required Files
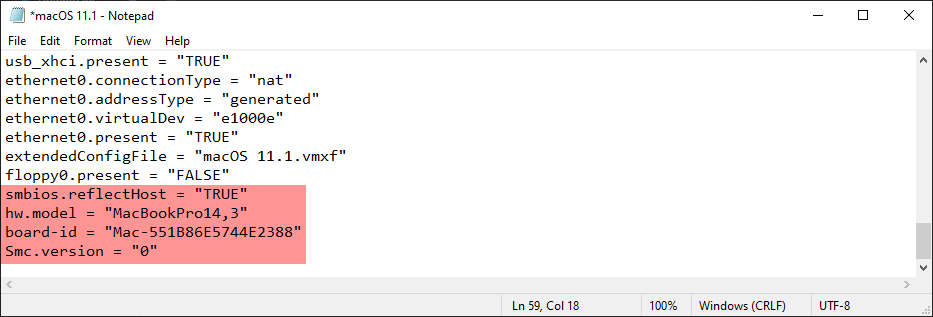
smbios.reflectHost = "TRUE"
hw.model = "MacBookPro14,3"
board-id = "Mac-551B86E5744E2388"
Smc.version = "0"
2. VirtualBox Required files
cd "C:\Program Files\Oracle\VirtualBox\"
VBoxManage.exe modifyvm "VM Name" --cpuidset 00000001 000106e5 00100800 0098e3fd bfebfbff
VBoxManage setextradata "VM Name" "VBoxInternal/Devices/efi/0/Config/DmiSystemProduct" "iMac19,1"
VBoxManage setextradata "VM Name" "VBoxInternal/Devices/efi/0/Config/DmiSystemVersion" "1.0"
VBoxManage setextradata "VM Name" "VBoxInternal/Devices/efi/0/Config/DmiBoardProduct" "Mac-AA95B1DDAB278B95"
VBoxManage setextradata "VM Name" "VBoxInternal/Devices/smc/0/Config/DeviceKey" "ourhardworkbythesewordsguardedpleasedontsteal(c)AppleComputerInc"
VBoxManage setextradata "VM Name" "VBoxInternal/Devices/smc/0/Config/GetKeyFromRealSMC" 1
Install macOS Big Sur on VMware on Windows
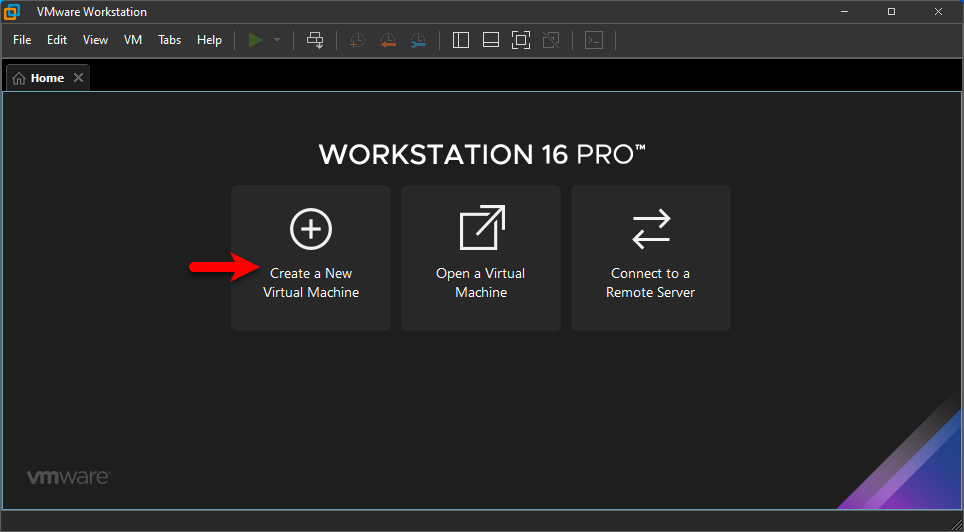
When you have successfully installed the VMware Workstation on your Windows. So, you have to create a new Virtual machine for macOS Big Sur on the VMware platform, open-up the VMware and click on “Create a New Virtual Machine”.
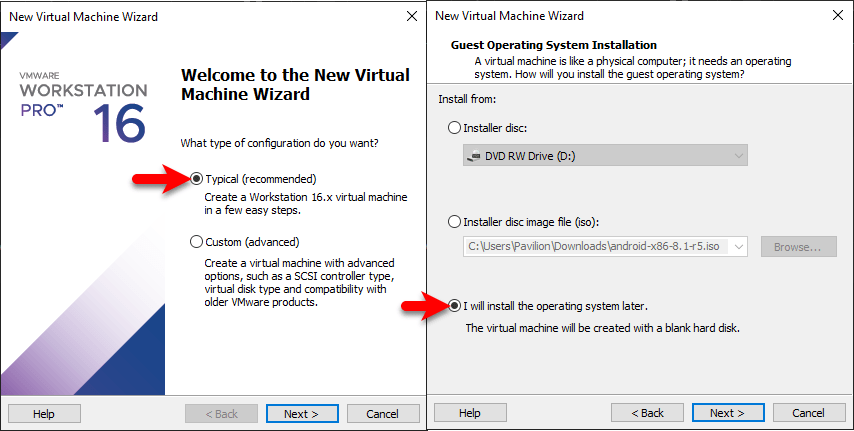
Select Type (Recommend) then click next, select the option “I will install the operating system later” and click next.
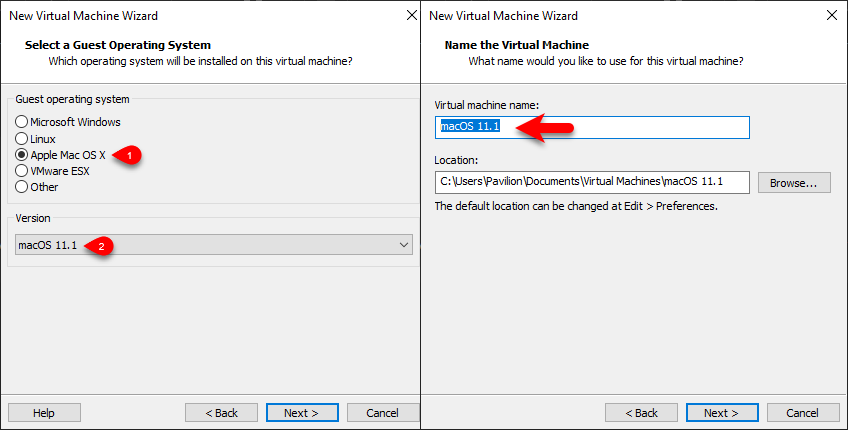
Under the Guest operating system select “Apple Mac OS X” and under the Version section select “macOS 11.1” then click next. Under name type any name for macOS Big Sur then click next.
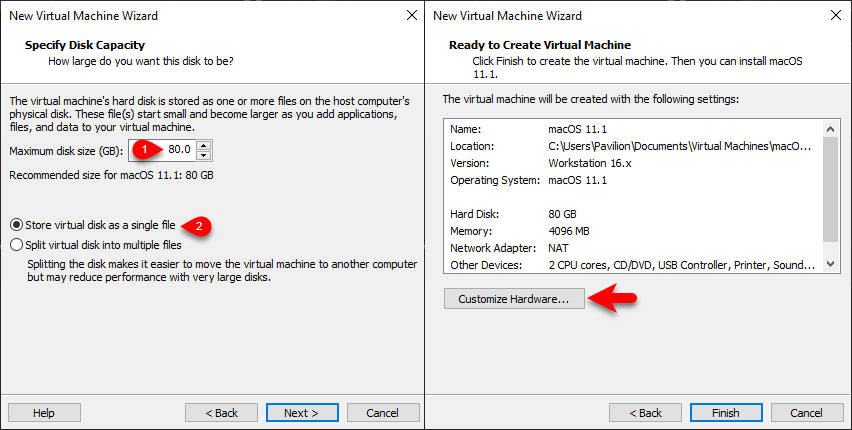
Choose the Maximum size disk for macOS Big Sur, then select “Store virtual disk as a single file” then click next. Once you get to the final window click on “Customize Hardware”.
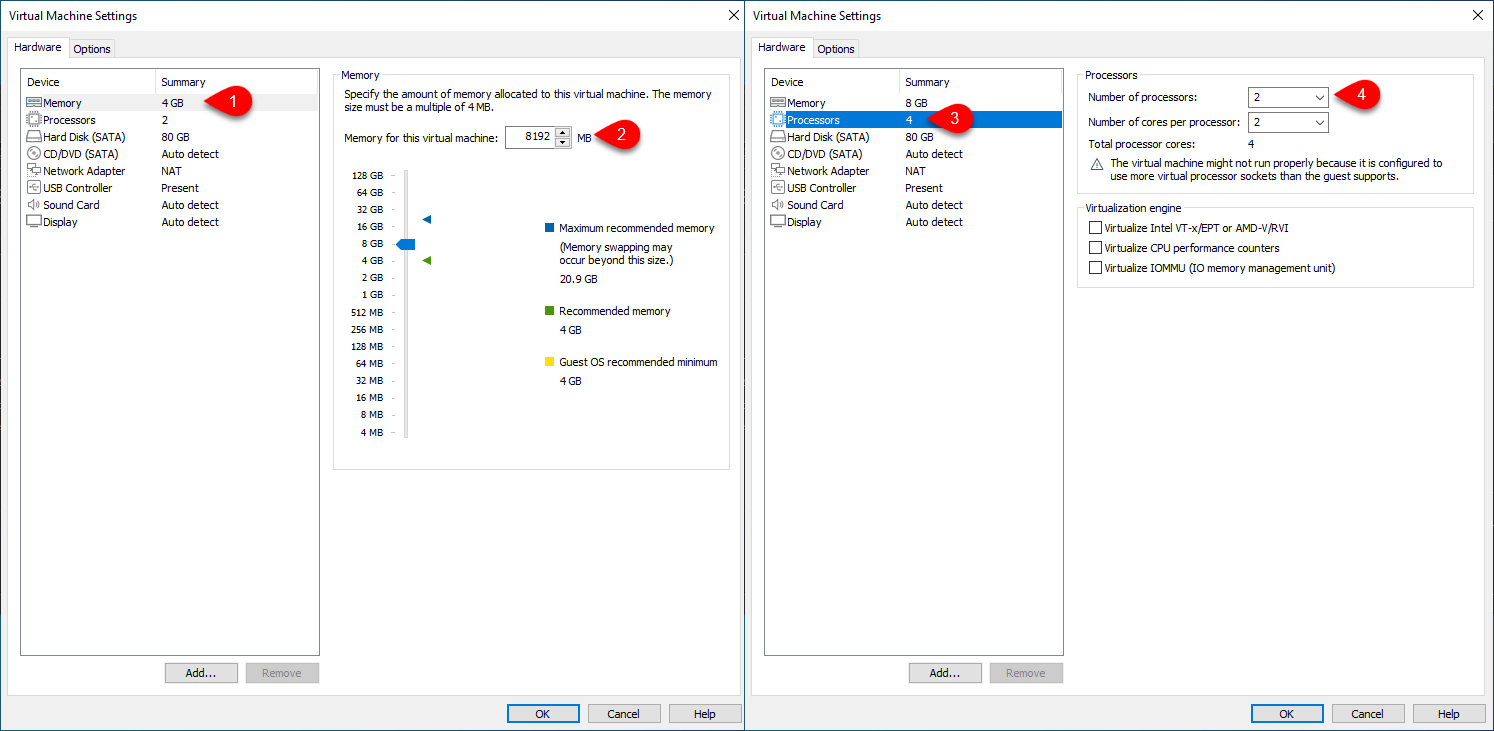
When the settings window opened from the left-handed bar click on the “Hardware” tab, then under the “Device” select “Memory”, then increase the memory size. Select the “Processor” tab, and increase the number of processors.
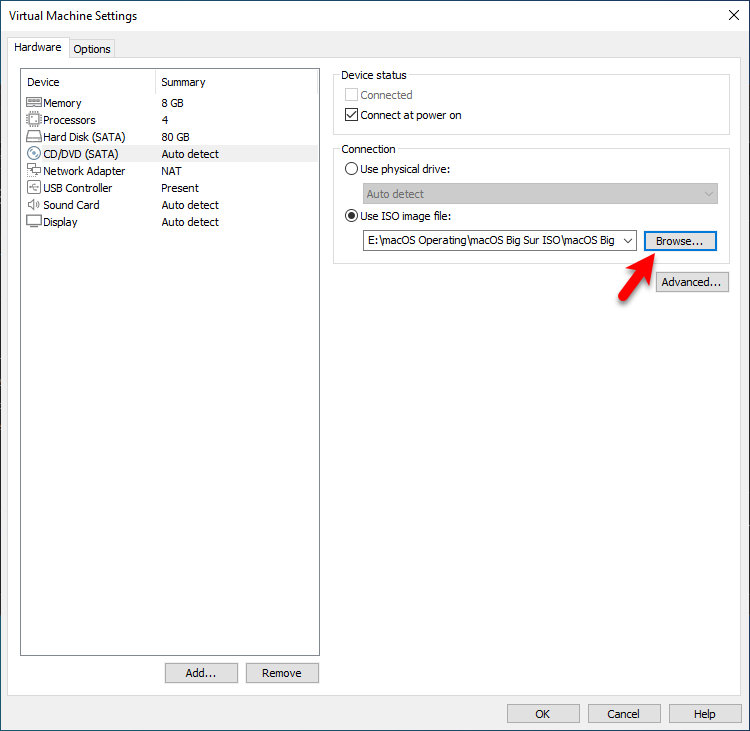
Now select “CD/DVD (SATA)”, then click on “Use ISO Image file” and click on the “Browse” option. Once another window popped up choose the macOS Big Sur ISO file and click Open. At last click OK to make changes into virtual machine.
#Edit Vmx file
For configuring macOS Big Sur on VMware you need to edit small commands of the Vmx file on macOS Big Sur. For editing the Vmx file completely close the VMware Workstation from the background.
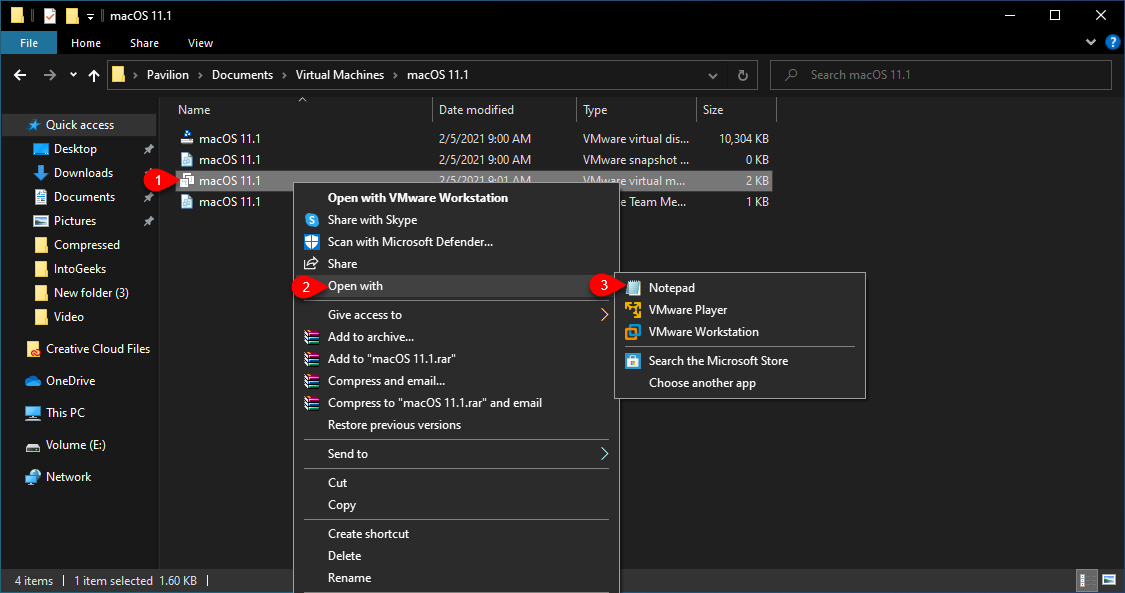
Now head over to the Virtual machines folder from the Documents, open up the macOS Big Sur file. Right-click on macOS Vmx file then Open With>Notepad.
Scroll down and paste the codes provided in the description section at the end of other commands and press Ctrl+S to save changes.
#Install macOS Big Sur
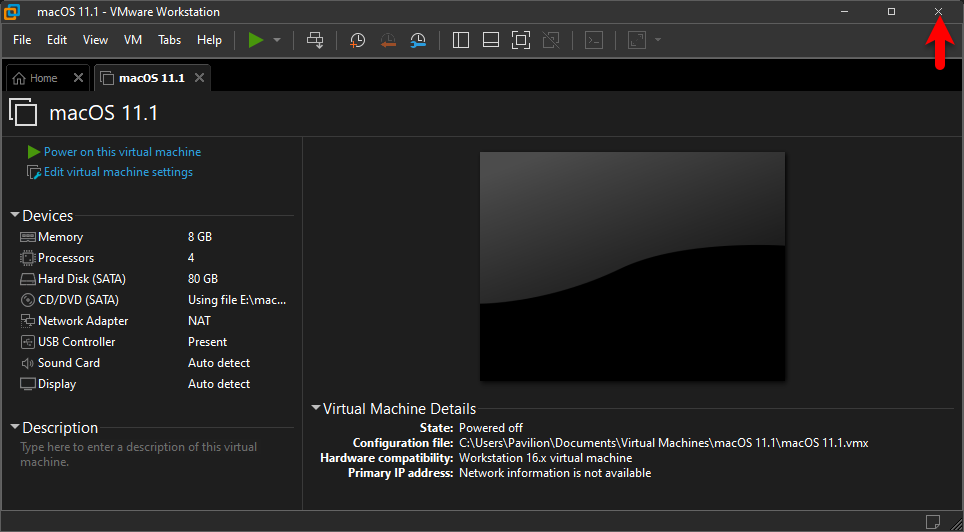
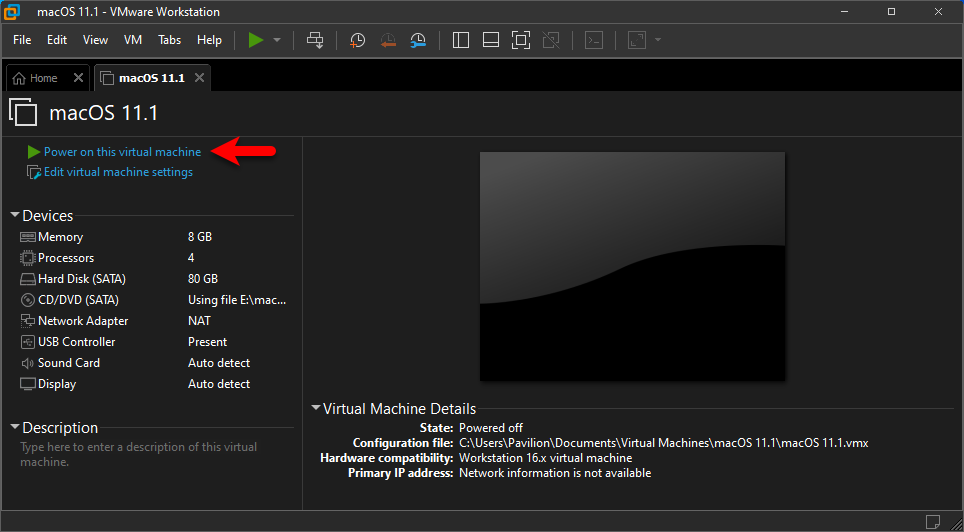
Once everything successfully cleared you have to install macOS Big Sur on VMware. So, open up the VMware Workstation select the created macOS Big Sur virtual machine, and click “Power on this virtual machine” to start the installation.
When the installation launched at the first window select your language and click on the Arrow key.

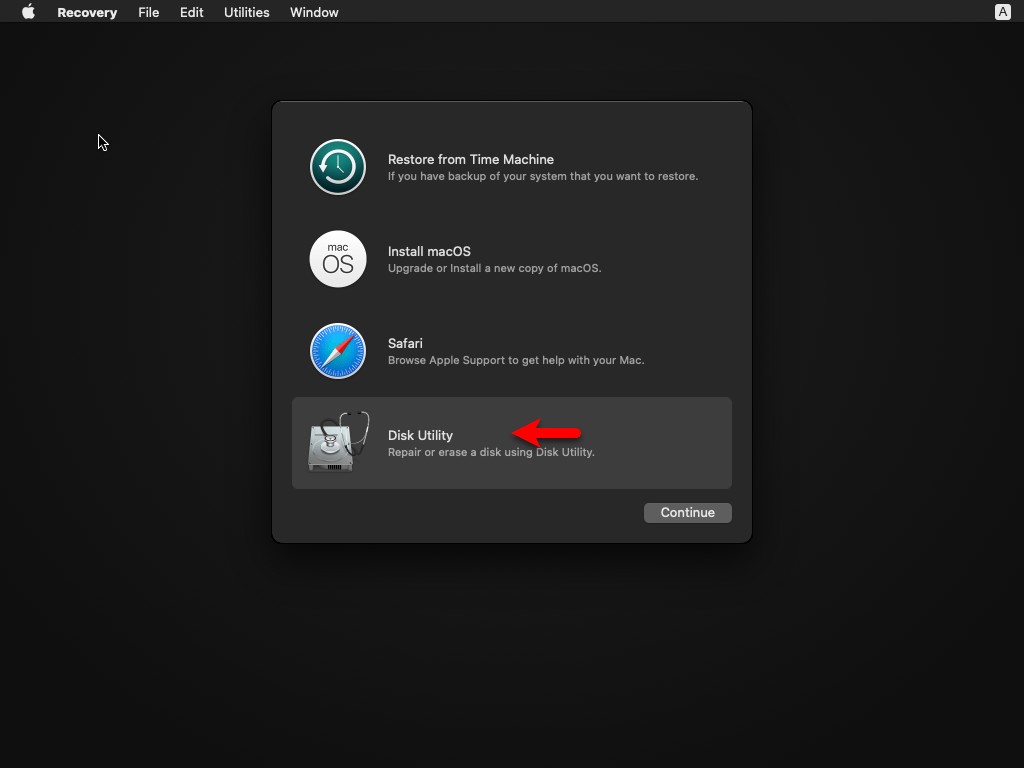
When you are in the recovery window select “Disk Utility” then click on continue.
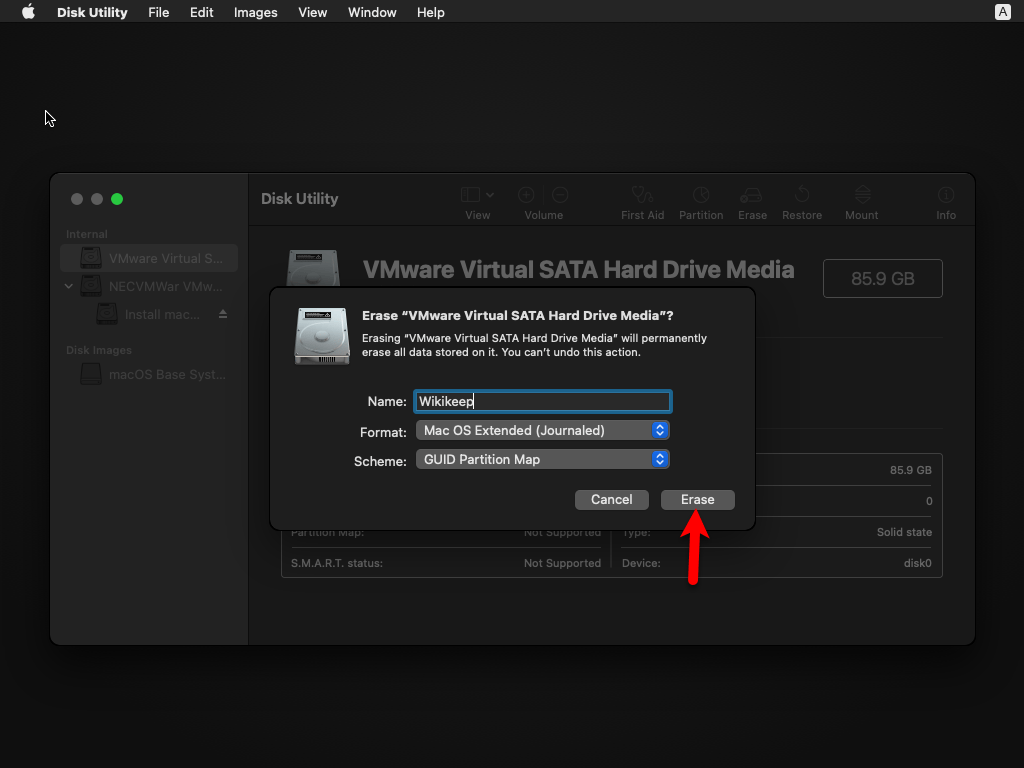
Select the virtual machine disk from the left-handed menu, then click on “Erase” and Erase the disk according to the below down settings.
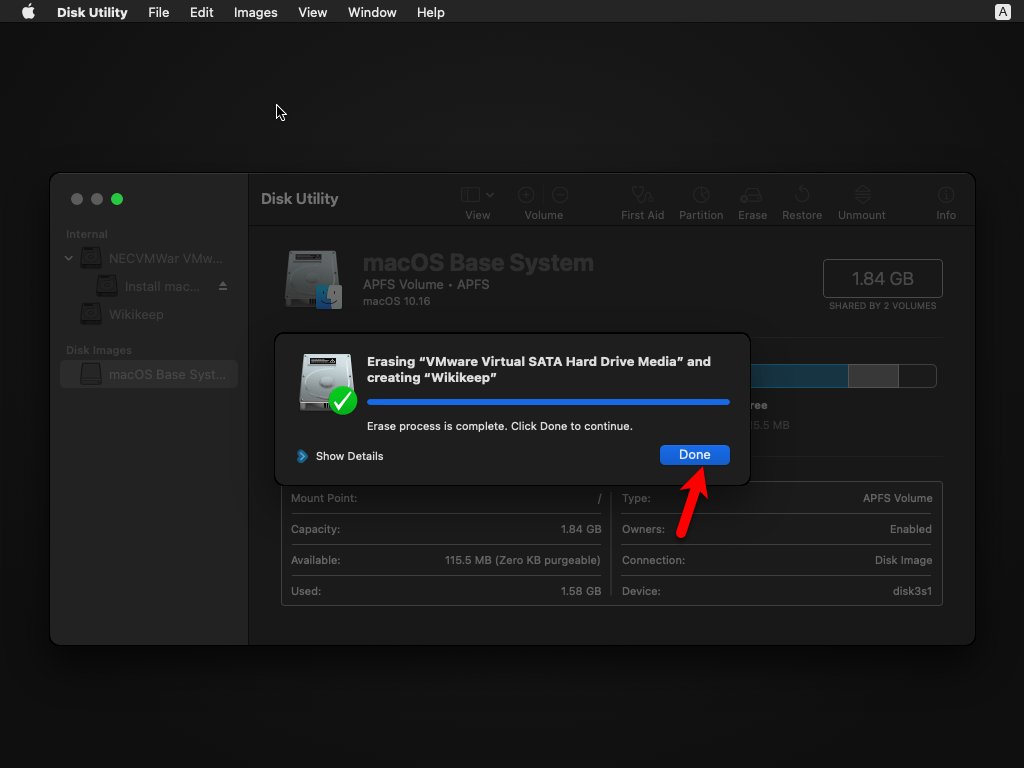
Once the disk successfully erased click on Done and close the disk utility.
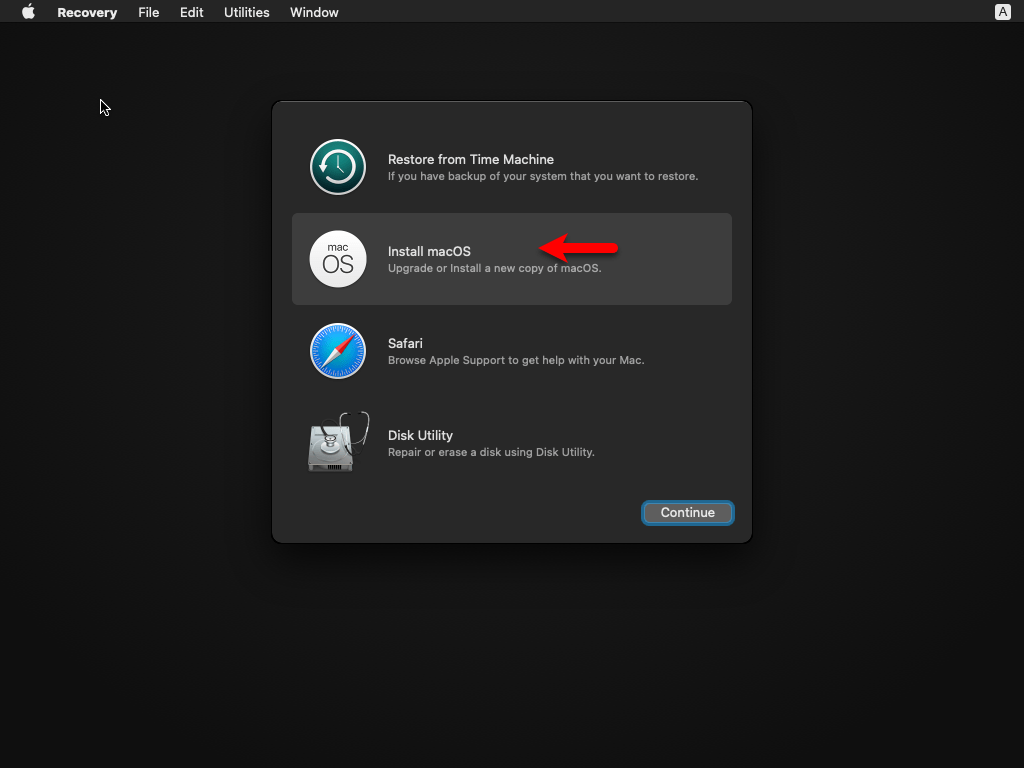
Again in the recover window select “Install macOS” and click continue.
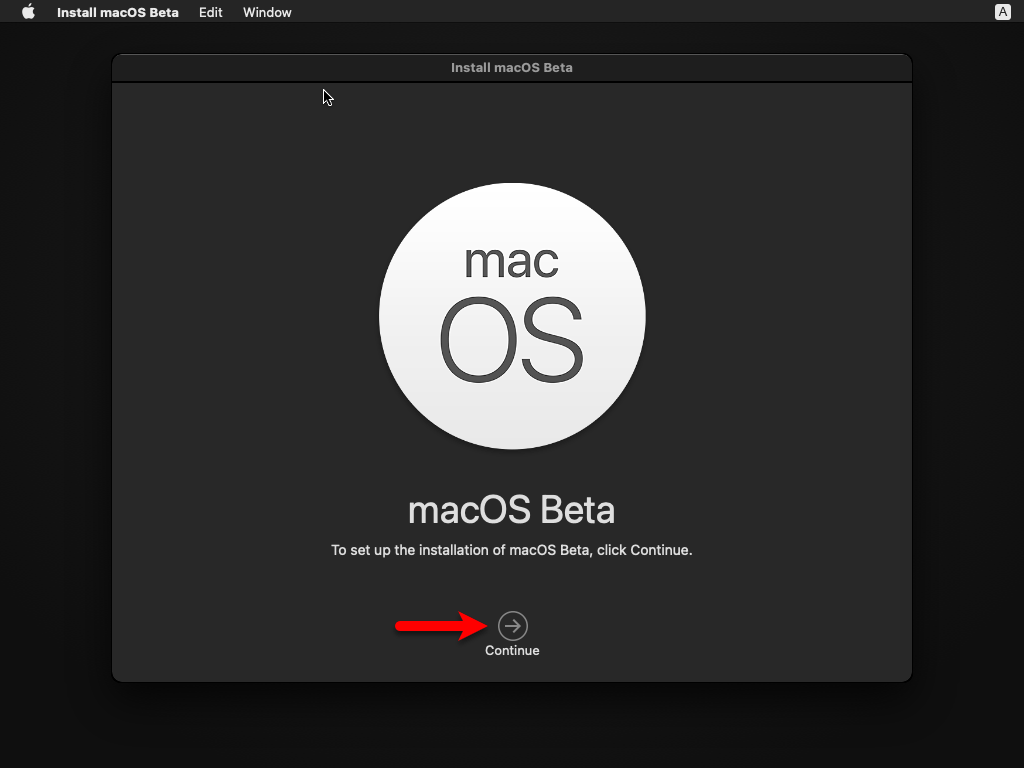
To set up the installation of macOS click continue.
Agree with the terms and conditions of macOS Big Sur.

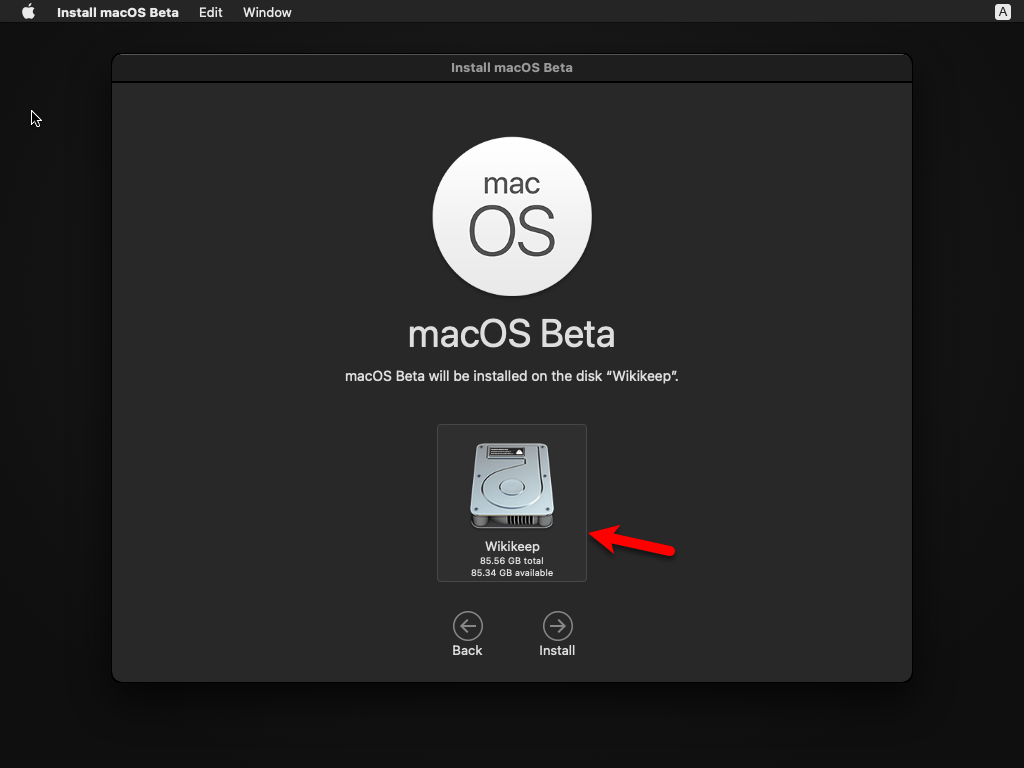
Select the disk where you want to install macOS Big Sur and click continue.
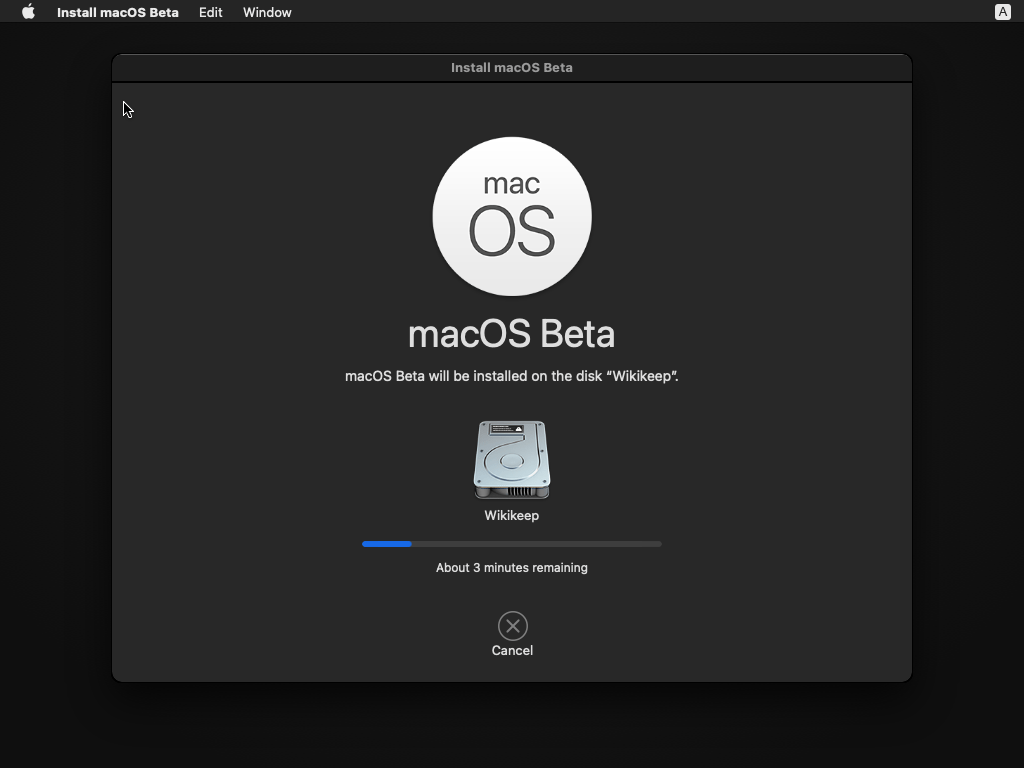
Wait for the installation until it should be completed, once the installation completed the virtual machine will restart automatically.
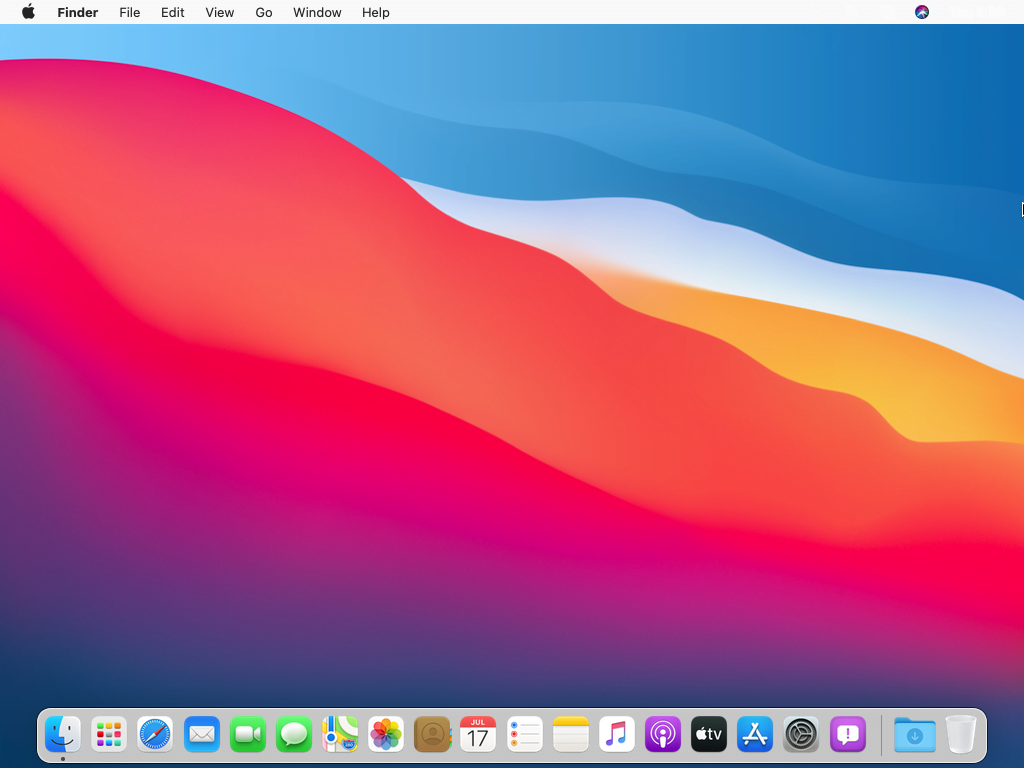
When the virtual machine restarted after the installation, you need to complete some basic settings for the first use of macOS Big Sur on VMware.
Install macOS Big Sur on VirtualBox on Windows
Installing macOS Big Sur on VMware and VirtualBox is the same, but there are two different platforms. This means there are some changes while creating the virtual machine. So, for installing macOS Big Sur on VirtualBox you have to download the VirtualBox and install it on your Windows, and its extension pack which is required.
#Install Extension Pack
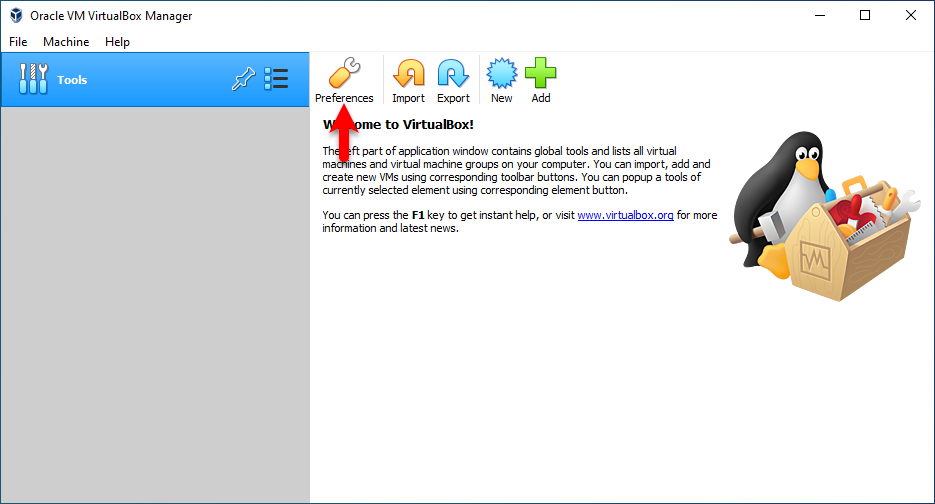
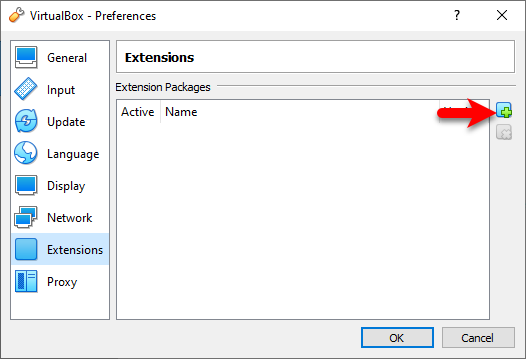
When the VirtualBox installed open up, then click on the “Preferences” option.
From the left-handed window click on the “Extensions” tab, from the extension window click on (+) option.
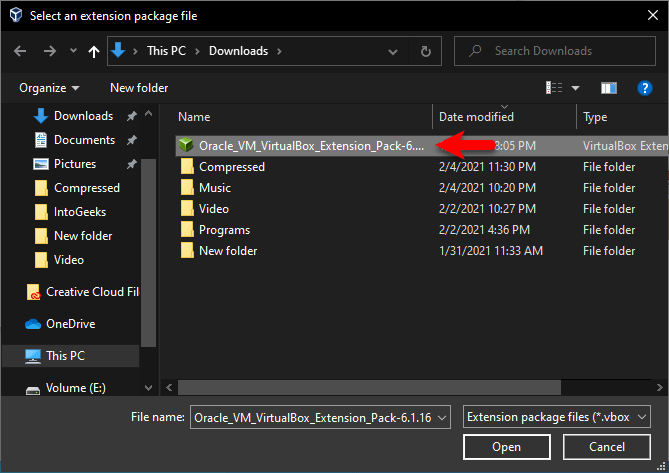
Select the Extension pack and click open.
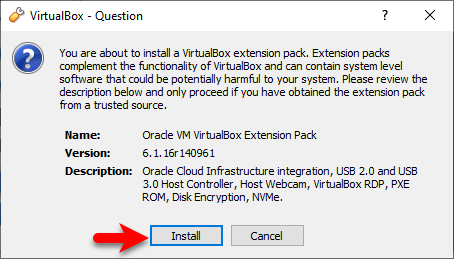
Click on Install
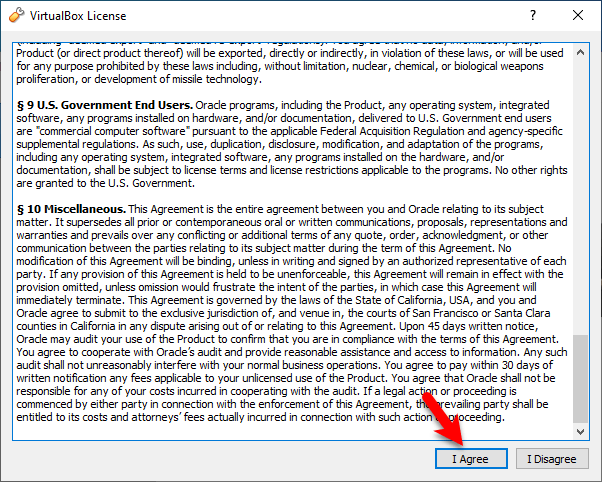
Now scroll down then click on the “I Agree” button.
Automatically it will start the installation wait it will take few seconds.

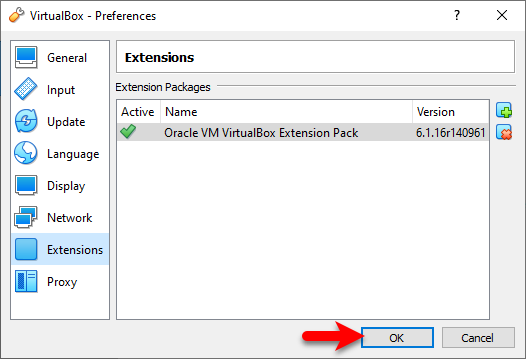
Once the Extension pack successfully installed on VirtualBox click OK.
#Create a New Virtual Machine for macOS Big Sur on VirtualBox
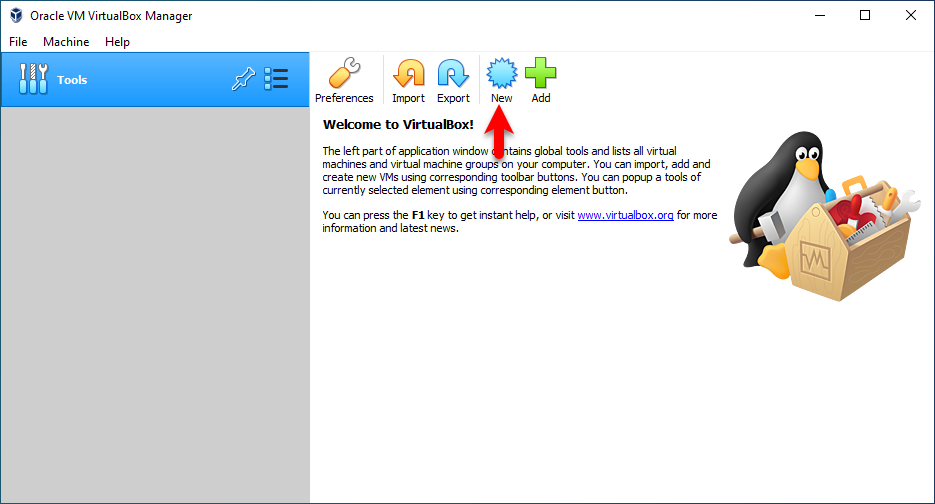
When everything has done you need to create a new virtual machine for macOS Big Sur on VirtualBox for creating click on “New”.
Click on “Export Mode”, under name type macOS Big Sur, increase the memory size, select “Create a virtual hard disk” and click Create.

Increase the file size, select “VHD (Virtual Hard Disk), select “Dynamically allocated”, and click create.

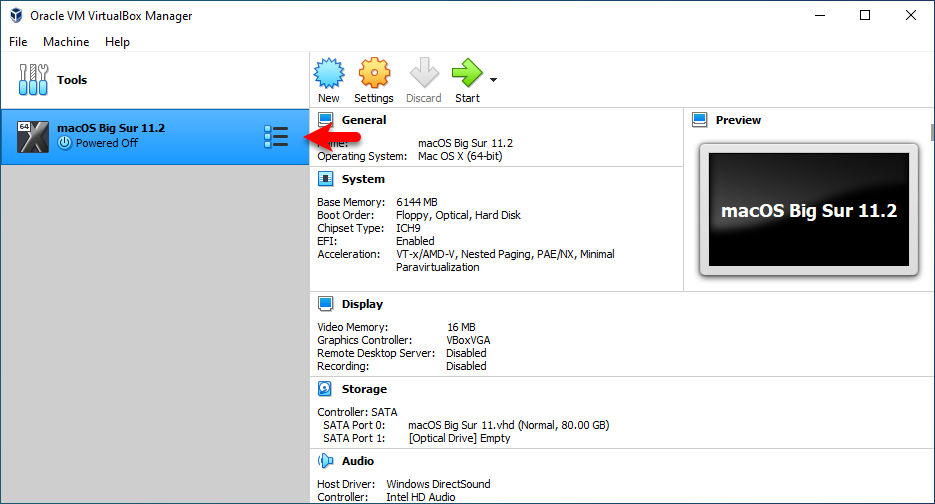
Once the virtual machine created for better performance you need to edit some settings. So, select the virtual machine and click Settings.
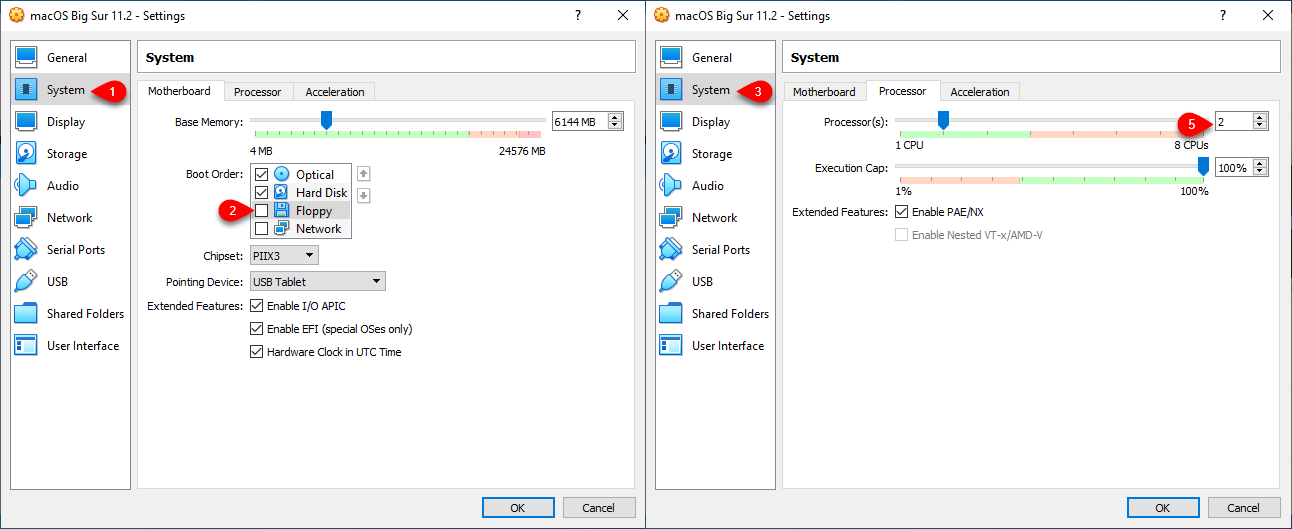
When the settings window opened from the left-handed window select the “System” tab, increase the Memory size, uncheck the floppy disk. Navigate to the Processor tab and increase the Processor.
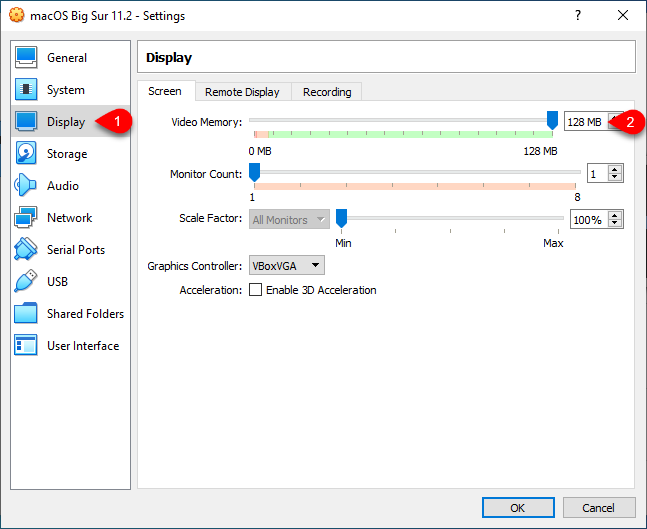
Select the Display tab and increase the Video Memory up to 128MB.
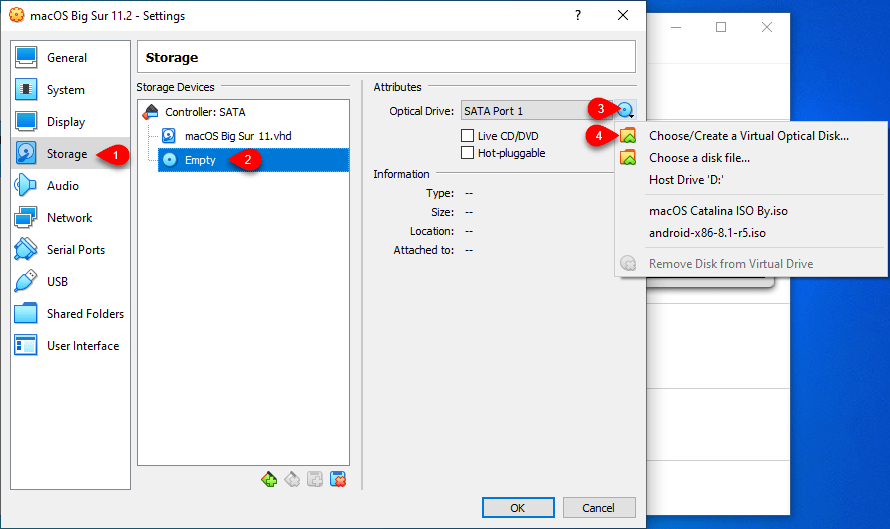
Select the Storage tab, click on Empty then click on the disk icon and click on “Choose/Create a virtual optical disk.
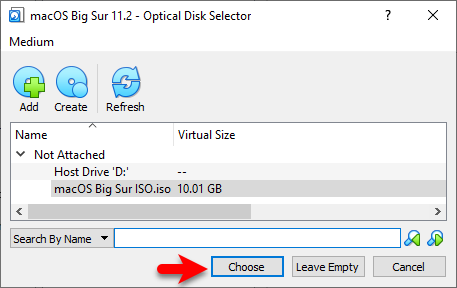
Click on add button then another window will open select the macOS Big Sur ISO image file and click open. Once the image inserted click choose.
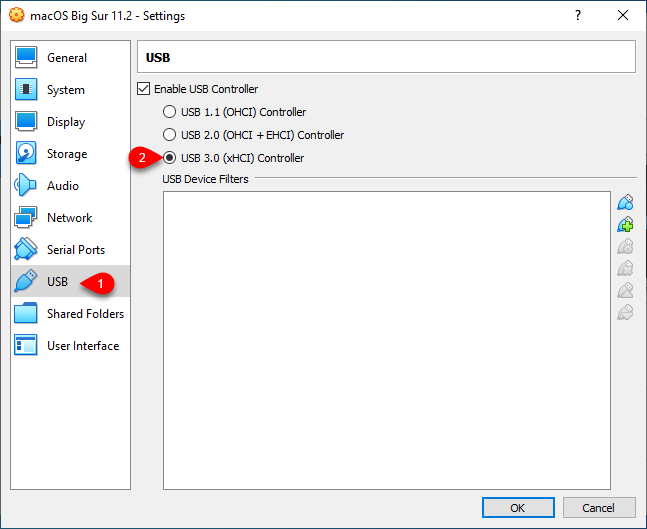
Select the USB tab, then select (USB 3.0 (xHCI) Controller.
#Add codes to the Command Prompt
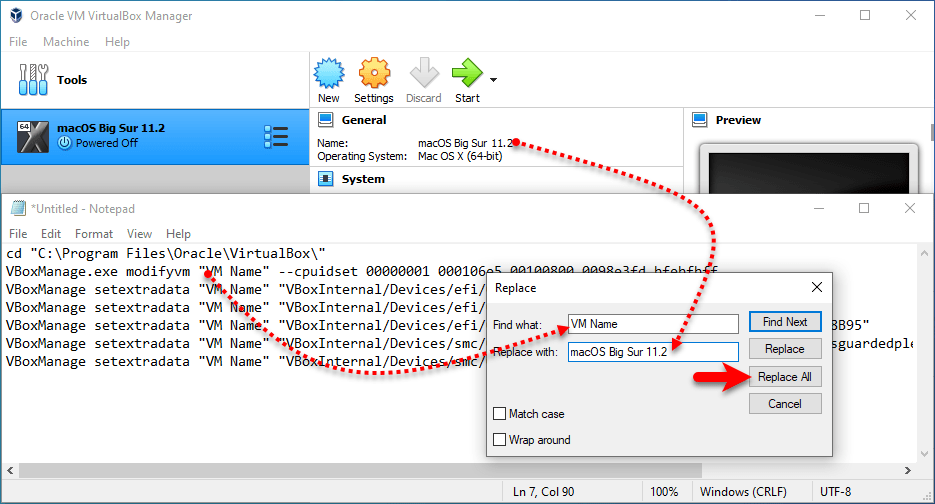
Once the virtual machine successfully created therefore for its configuration you need to add some codes into command prompt. You have to copy the above codes from the above description, then replace the VM Name with the name of created Virtual Machine. If you don’t know how to do it, then check the below down screenshot.
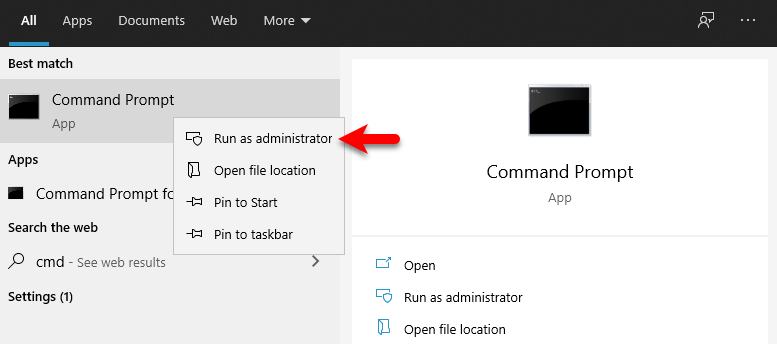
Once the codes successfully edited completely close the VirtualBox, then head over to the Windows start menu. Type there CMD right-click on that and Run As Administrator
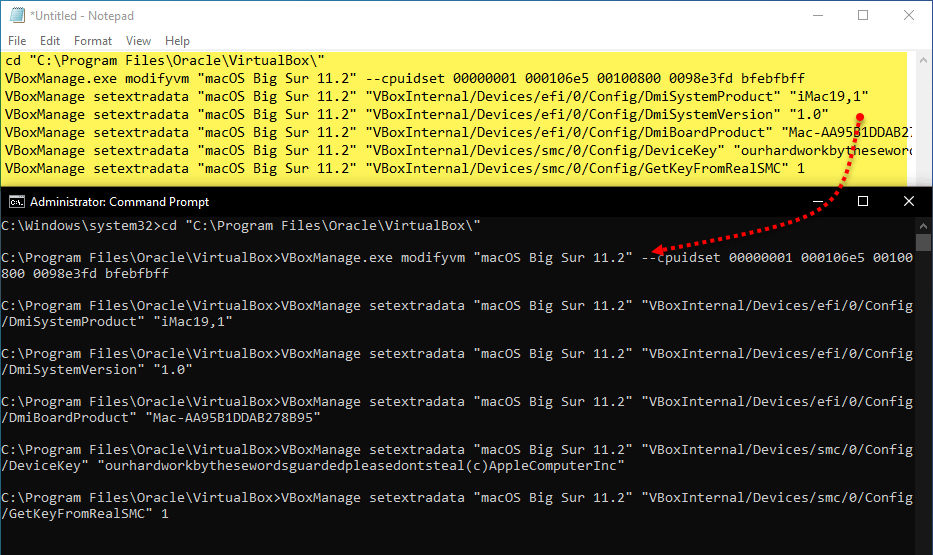
Copy the first line of the command and paste into the command prompt and press the enter key. The select the rest of the commands and paste into the command prompt and press the enter key. Once the commands applied close the command prompt window.
#Install macOS Big Sur
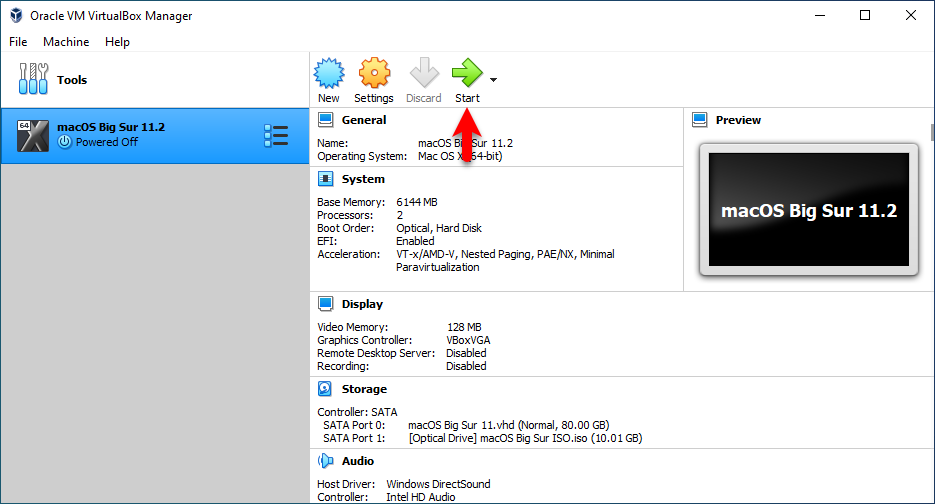
When everything successfully done then you have to perform the macOS Big Sur installation on VirtualBox on Windows. Open-up the VirtualBox select the created virtual machine and press the start key to launch the installation process.
The procedure of installing macOS Big Sur on VMware & VirtualBox is the same. Due to that I didn’t take it important to provide you the screenshot of installing macOS Big Sur on VirtualBox. If you faced any kind of problem related to the installation of macOS Big Sur on VirtualBox then you may check out the above screenshots.