VMware Workstation Pro is a hosted Hypervisor that runs on 64-Bit versions of Windows, macOS, and Linux operating systems. VMware Workstation Pro enables users to set up Virtual Machines on a single physical machine. Running the separate operating system simultaneously alongside the actual operating system in a single PC. Each virtual machine can execute its own operating system, including Microsoft Windows, Linux, macOS.
VMware Workstation Pro is developed and sold by VMware Inc, a division of Dell technologies. VMware Workstation is a free open source charge version, and non-commercial use. We can run a different operating system on VMware Workstation on an actual PC. VMware Workstation Pro is available for macOS, Windows, and Linux. Before releasing the complete of any operating system, you can use VMware Workstation to test the beta version of any operating system on your actual PC.
The VMWare Workstation supports the existing host network adapters and physical disk drives, with a Virtual Machine. The VMware virtual machine can support the ISO Image, Virtual hard disk drives, such as VMDK files. VMware Workstation Pro can save the state of the virtual machine a “Snapshot” at any instant.
- Also, VMware Workstation Player is known as player Pro, free for non-commercial use, the license may be purchased for commercial use only, also providing the eligibility for paid support.
- And the VMware Workstation Pro available for a 30-day trial free trial before purchase to permanent version.
VMware Tools? is a package drivers for various guest operating system, after installing any operating system on an actual operating system, then installing the VMware tool add other functionality. The latest version of the VMware tool was updated in September 2017, which allows the users to get the functionality of an operating system on VMware Workstation. The functionality is the following.
- VESA-compliant graphics for the guest to access high screen resolutions
- Network drivers for the Vmxnet2 and Vmxnet3 NIC
- Ensoniq AudioPCI audio
- Mouse Integration
- Suppor the share folder and enable the drag-and-drop files between host and guest.
install & update VMware Workstation Pro on Windows 10
Check out the below down content on how to install & update VMware Workstation Pro on Windows 10. The Installation Process is much easy. But the new VMware Workstation Pro has consisted of some extra requirements that you have to complete that, in order to run a perfect a virtual machine on the actual operating system.
First of all, you need to prepare the VMware Workstation Pro/ VMware Player setup. Remember that you can find the VMware Workstation Pro/VMware Player setup from its official website. After the installation, you will be required to enter the license key. Or you can use the VMware Workstation Pro for a 15-day trial also, to use the permanently you need to purchase its license key also.
- Download VMware Workstation Pro
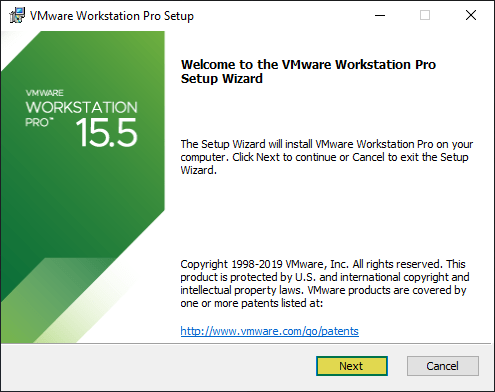
When you have downloaded the VMware Workstation Pro on your Windows PC. After that, double click and run the installation, once the welcome wizard appeared simply click next.
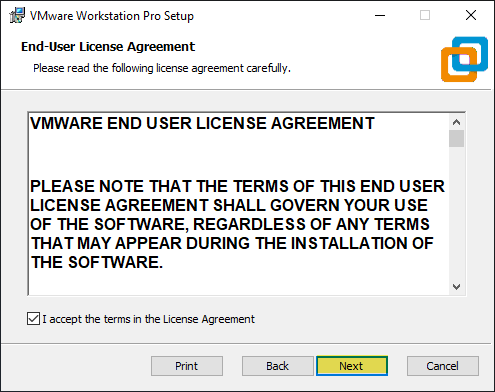
Check the box of (I accept the terms in the license agreement) then click next.
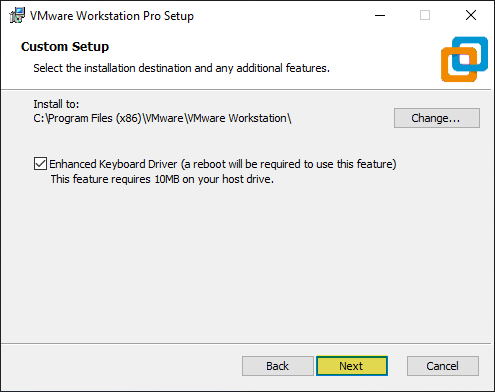
Now here also check the box of (Enhanced keyboard driver (a robot will be required to use this feature) this feature requires 10MB on your host drive). It will install the required keyboard driver with VMware Workstation installation automatically.
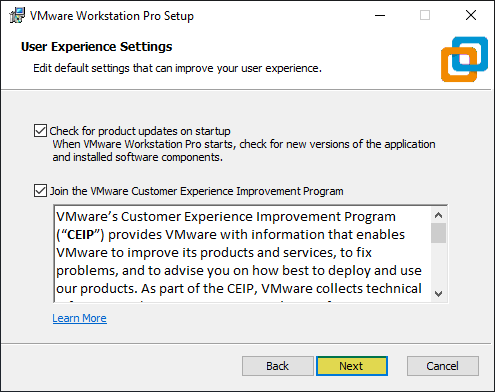
On the users experience settings window simply click next. In here you will be asked to check for updates, or join the VMware Customer experience improvements program, it’s up to you, but I leave it as a default.
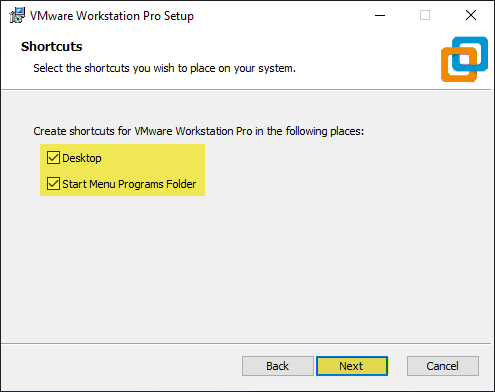
In this step, you will be asked to create VMware shortcuts for VMware Workstation Pro in the following places, such as (Desktop) and (Start menu program folder) after that click next.
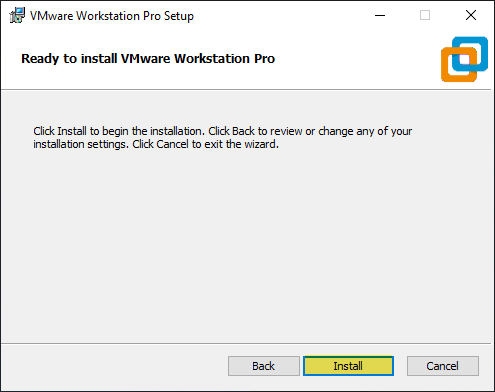
Now you begin to the installation process of VMware Workstation Pro, so click Install to start the installation.
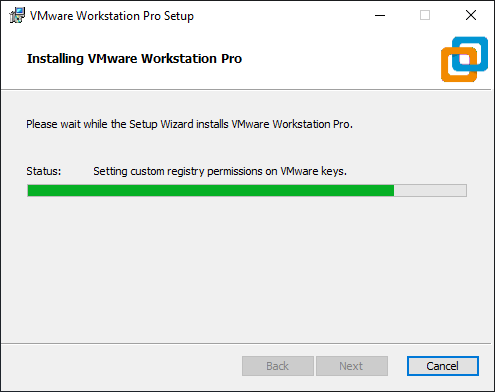
Wait until the installation process should be completed, this may take some time so be patient for the completion.
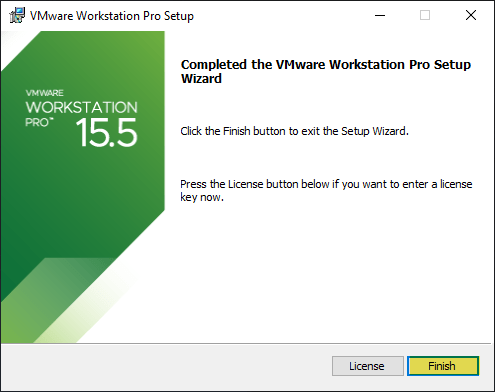
Once the VMware Workstation Pro installed on your PC, click Finish to close to the window.
Update VMware Workstation Pro
When the VMware Workstation successfully installed on your PC, after that, over ahead and double-click to open it. Once the VMware opened you will be required to enter its license key, if you have the license key enter it if not continue as its trial.
If you are using VMware Workstation Pro 15.5 then now you can find the latest update of it. Check out the process on how to update VMware Workstation Pro to the latest version.
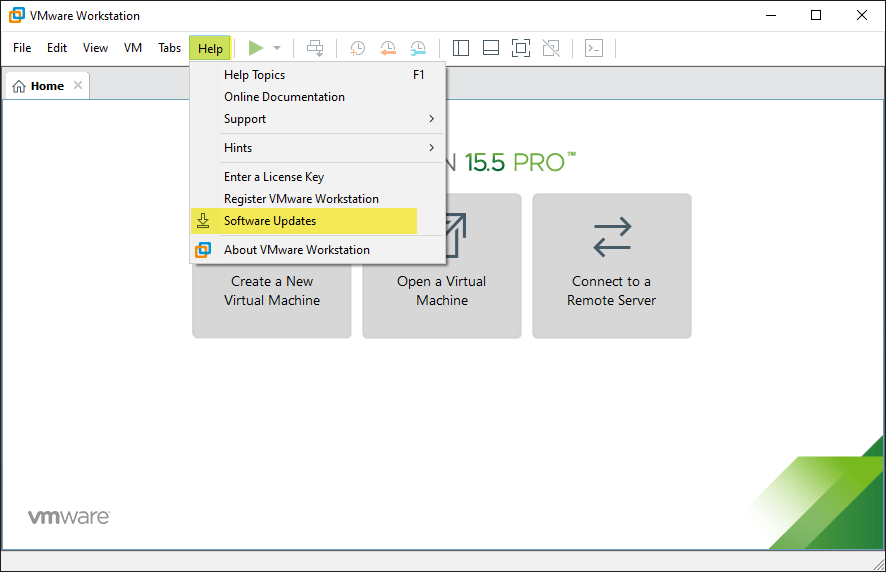
When the VMware Workstation Pro opened, on the main window navigate to the top then click on (Help) option. After that, click below down on the (Software update) option.
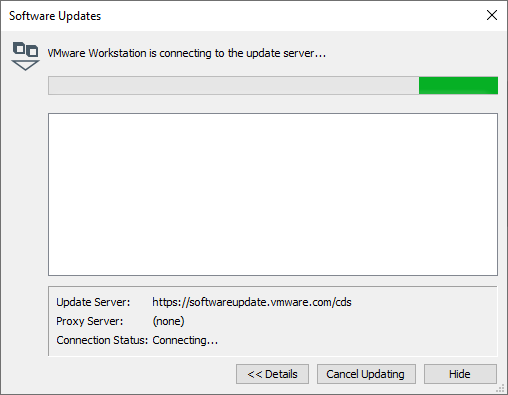
Again here click on the (Check for update) option, wait for VMware to check and search for the latest update.
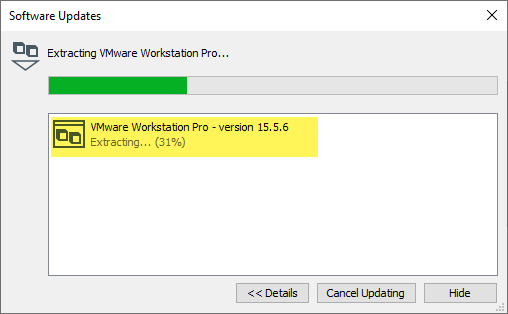
Here you will see that VMware Workstation Pro 15.5.6 is available for you to update and install it, therefore, click on (Download and Install) option.

Now wait for VMware Workstation to download the latest update, this may take some time. But again it depends on your internet connection speed.
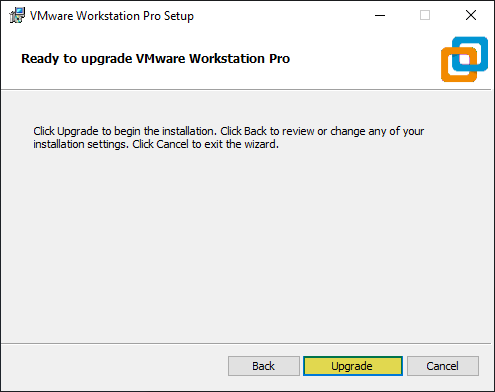
Once the VMware Workstation latest update downloaded, the installation process will begin start as you newly installing the VMware Workstation on your PC for the first time. So, simply click on (Upgrade) option, and continue the next process.
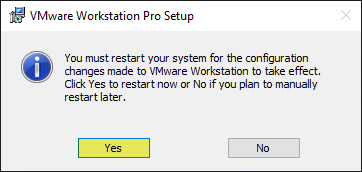
While the latest update of VMware Workstation successfully installed, you will be required to restart your PC for further changes to VMware Workstation, so click the (Yes) button to restart your PC.
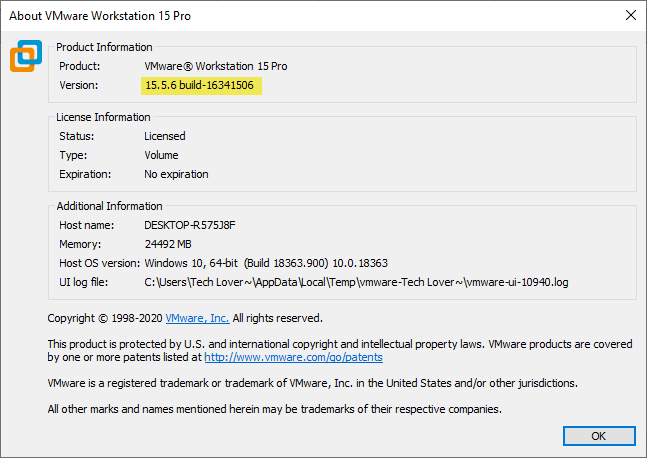
Once your PC restarted successfully again over ahead to VMware Workstation and open it. On VMware Workstation main window, navigate to (Help) option and click on (About VMware Workstation) option and check the latest update that installed.
A virtual machine also called Hypervisor or virtual machine monitored, sometimes it allows you to run multiple operating systems on the same physical machine. Sometimes also it performs the work of dual-booting two operating systems on a single PC.
Check below down the process of how to install macOS Mojave/macOS Catalina on VMware Workstation on Windows PC.