In this post, I will show you how to install macOS Monterey 12 on VMware on Windows PC?. macOS Monterey 12 is the latest Apple operating system for Macs and MacBooks. The latest version of macOS Monterey is available right now in our hand but in a Beta mode. Most of the Apple operating system as its release versions will have a bunch of problems. Like every time Apple noticed that the Beta version is not safe and every time release that in a Developer mode for developers in order to rectify the issues.
With the release of macOS Monterey at the recent Keynote event of Apple. Apple kicked out bunches of their new operating system for different devices. At the WWDC 2021, Apple released iOS 15, iPadOS 15, WatchOS 15. If we should compare macOS Monterey with the rest of other macOS like macOS Mojave, macOS Catalina, macOS Big Sur, the internal look and interface design of macOS Monterey 12 is perfect with its new added features.
However, the new feature of macOS Monterey is Universal Control, Shortcuts, Facetime’s SharePlay, Focus Mode, Emojis, Live text, New redesigned Safari with new tabs, and several other features.
Unfortunately, the recent macOS Monterey operating doesn’t support the Mac with Intel-Based machines. The devices which macOS Monterey supports are the below-down machines.
Related:
- 2015 and later MacBook
- Early 2015 and later MacBook Air
- Early 2015 and later MacBook Pro
- Late 2014 and later Mac mini
- Late 2015 and later iMac
- 2017 and later iMac Pro
- Late 2013 and later Mac Pro
Why Do We Need to Install macOS Monterey on Windows PC?
If you should concentrate on the above title that why do we need to install macOS Monterey on Windows PC? then you might think about how it’s possible to run macOS operating systems on Windows machine. The era of Virtualization technology allows you and gives you the ability to test the different OS on Windows or even Mac PC. It comes to Virtual machine like VMware Fusion, VirtualBox, VMware Workstation/Play, that makes you task easy. You download the Virtual machine and install it on your Windows or Mac PC then simply the procedure of installation which you are doing on your actual machine will be the same producer on the Virtual machines.
Virtualization technology gives you the ability to check the differences between Windows and macOS on the same devices at the current time. The procedure of installation is easy you can check out the below downlink on how to install macOS Big Sur on VMware Workstation and VirtualBox on Windows PC.
- How to Install macOS 11 Big Sur on VMware on Windows PC
- How to Install macOS 11 Big Sur on VirtualBox on Windows PC
Steps to Install macOS Monterey on VMware on Windows PC
- Download VMware Workstation and install it on your Windows PC.
- Download the VMware Unlocker tools and run them as Administrator.
- Extract the macOS Monterey ISO file.
- Create a New Virtual Machine for macOS Monterey on VMware.
- And perform a clean installation of macOS Monterey.
Step 1. Download Required Files
- Download VMware Workstation Latest version
- Download VMware Unlocker (GitHub)
- Download WinRAR
- Download macOS Monterey ISO image file
- Download macOS Monterey VMDK file
Step 2. Install VMware Workstation
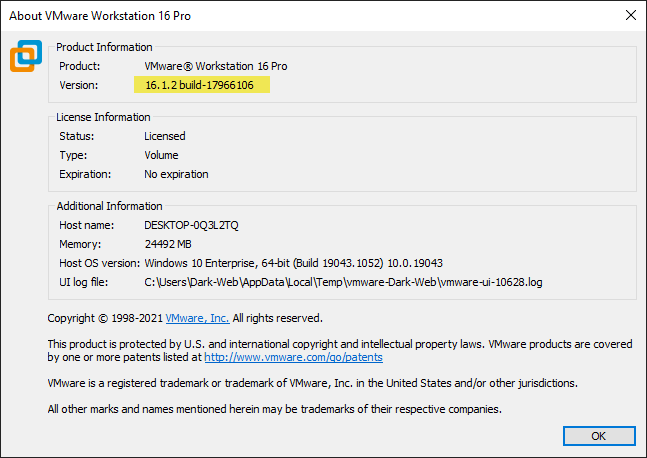
You can get the VMware Workstation latest version from the above link, also, simply navigate o VMware website and download it from there. Don’t forget that the above link provides you the free version of VMware, and the VMware official website will provide you the 15 days trial version. Once the file successfully downloaded within a few clicks you can install it on your Windows PC.
After the installation successfully downloaded check the update and download the latest update.
Step 3. Download and Install macOS Unlocker
macOS Unlocker is a free tool that builds for macOS unlocking services on VMware Workstation/Player. How does it work? after installing the VMware workstation during creating a new virtual machine you may notice that the macOS service is not available there. So, after installing the macOS Unlocker you will activate the macOS service on the VMware Workstation.
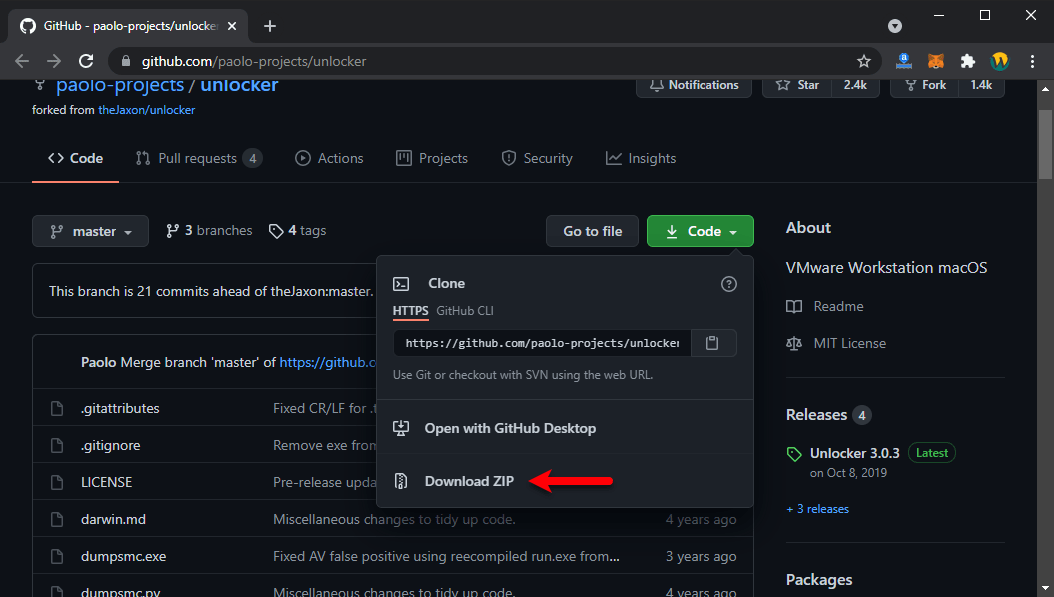
Simply navigate to GitHub’s official website, search there for macOS Unlocker or download from the above link which redirects you to the official website. For downloading click on the Code green button, and click on Download Zip file.
Note: While installing the macOS unlocker be sure your VMware workstation should be completely closed otherwise it will not enable the macOS service
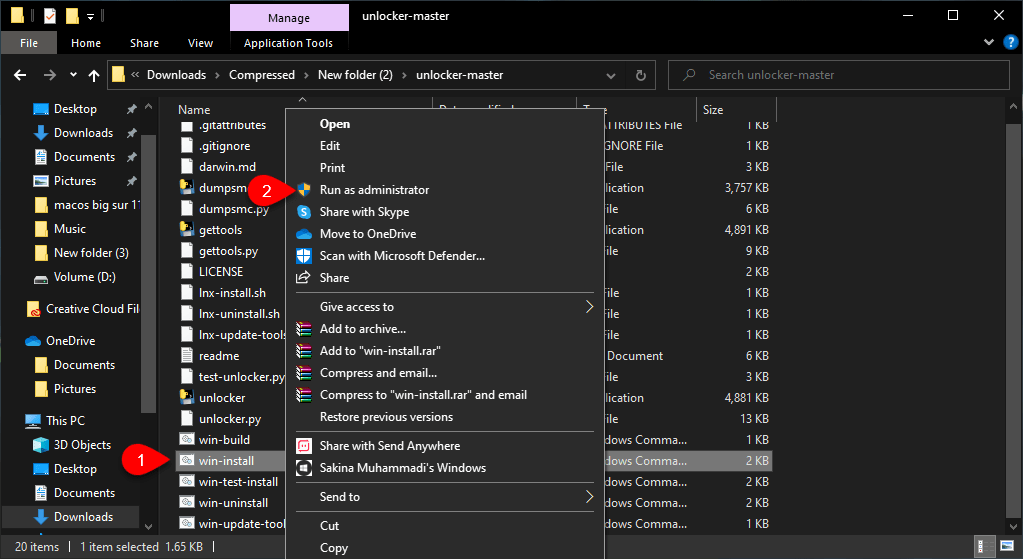
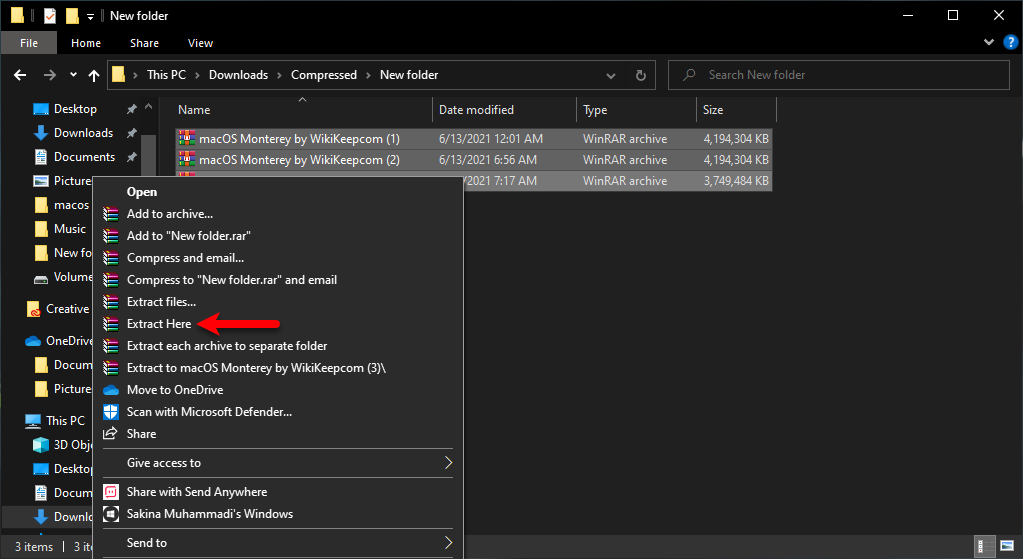
When the macOS Unlocker downloaded navigate to the download folder, then right-click on the Zip file and Extract Here.

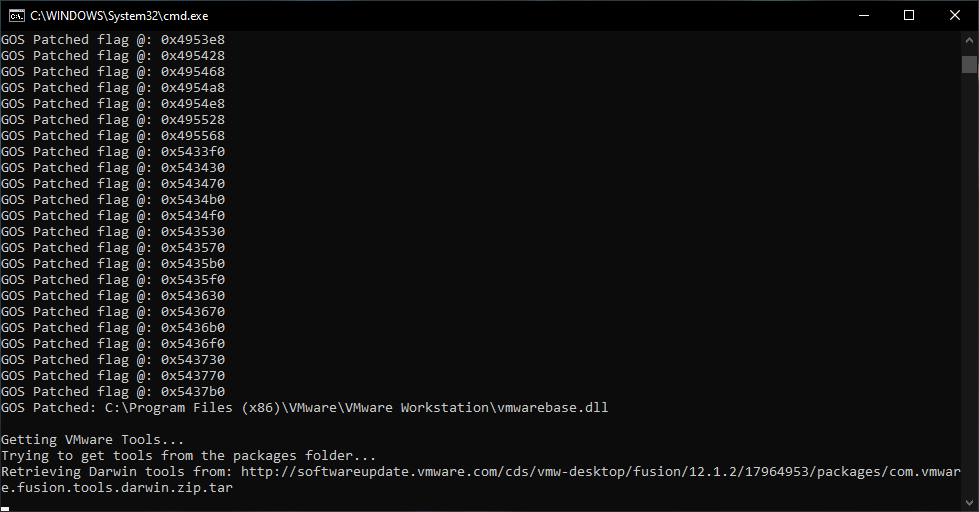
After extracting open its folder then right-click on Win-Install and Run As Administrator.
Once the installation started, wait until it should be completed.
Step 4. Extract the macOS Monterey ISO image file
Right-click on the ISO image file and extract the ISO file.
Step 5. Create a New Virtual Machine for macOS Monterey
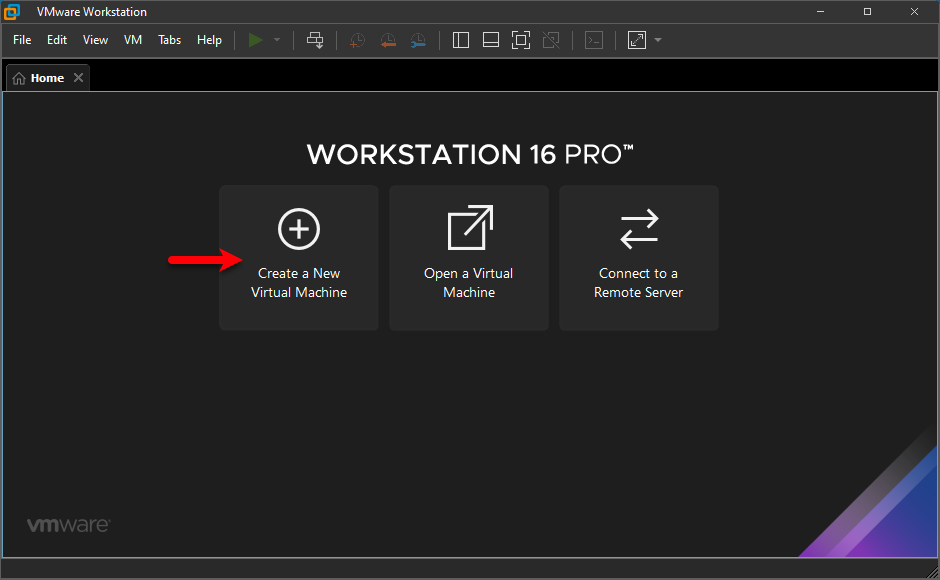
After that, everything is completely done open up the VMware Workstation/Player on the main screen click on the Create a New Virtual Machine.
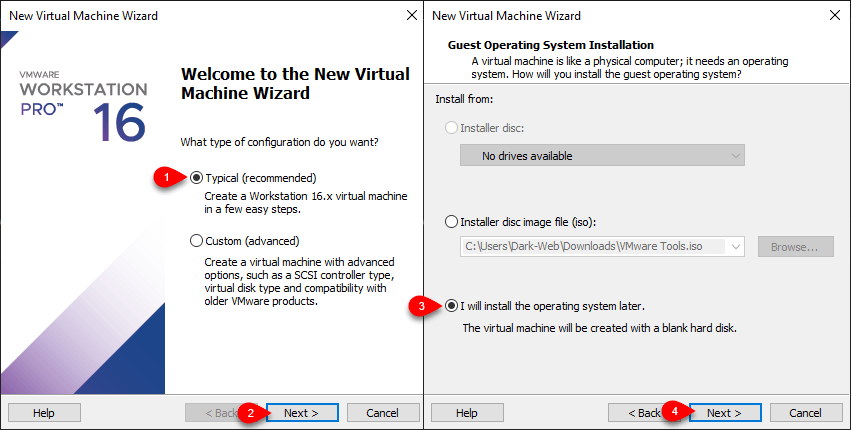
In the first step select the Typical recommend then click next, select I will install the operating system later, and click next.
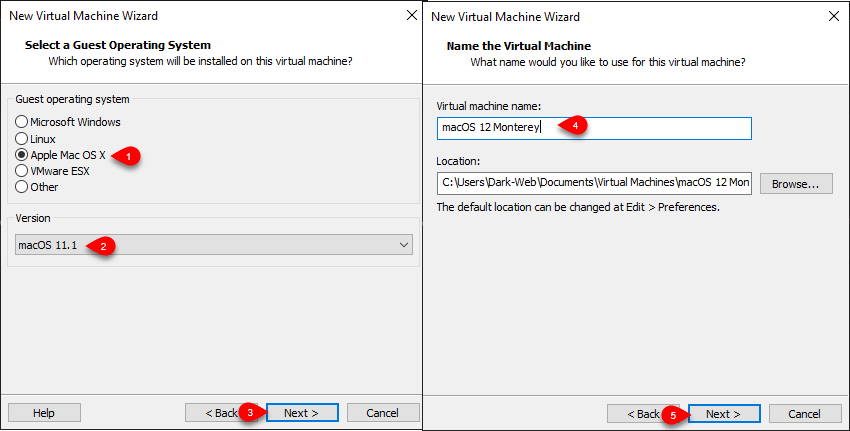
Select Apple Mac OS X then click next, select the virtual machine name “macOS Monterey” and click next.
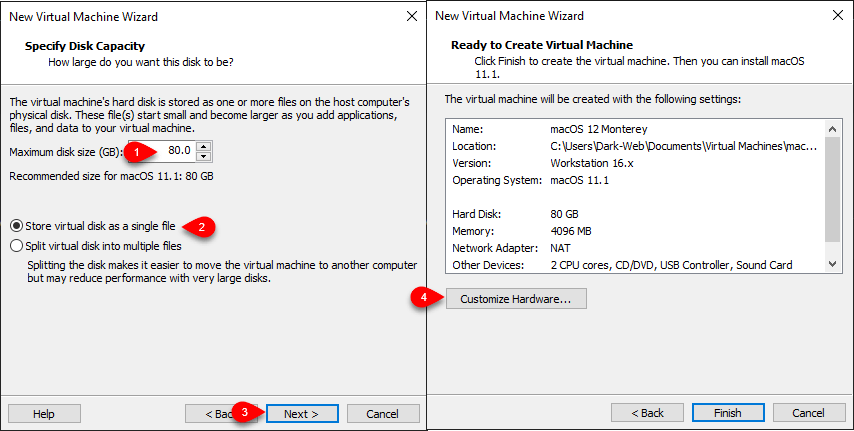
Select the Maximum size disk then check the box of Store disk as a single file then click next, once the next window appeared click on Customize hardware.
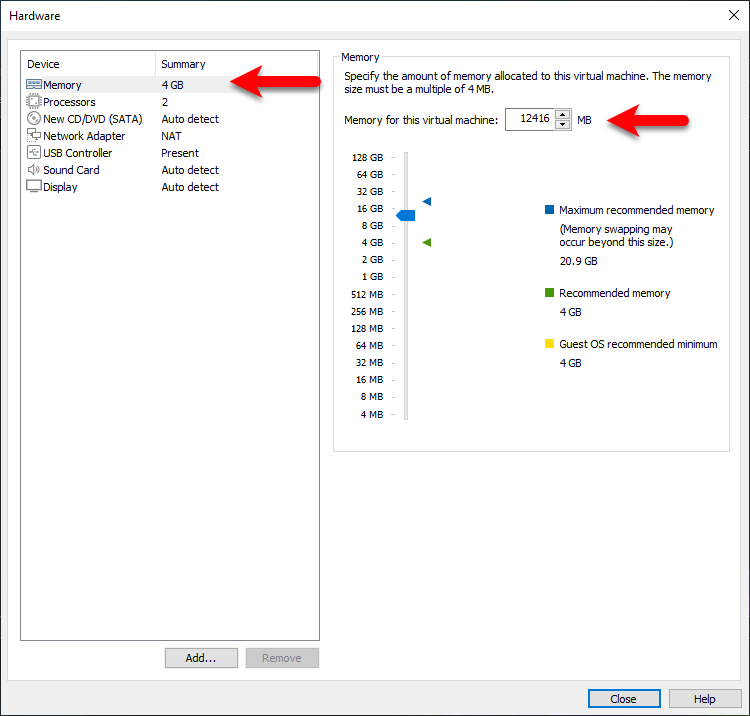
Once the settings window opened, increase the memory size accordingly.
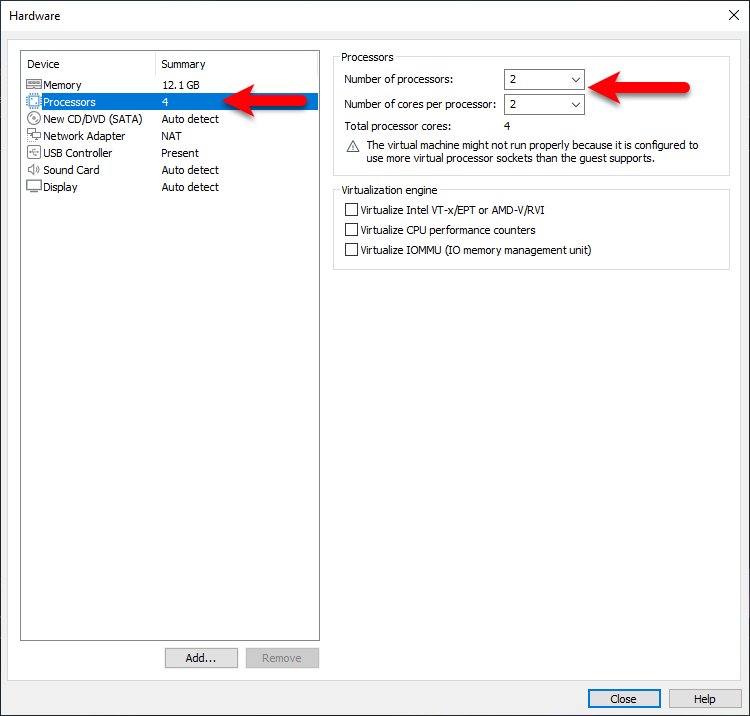
Select the processor tab, then increase the number of processors up to 2, and increase the number of core processors up to 2.
Now select the “New CD/DVD SATA) tab, click on Use an ISO image file then click on Browse option.
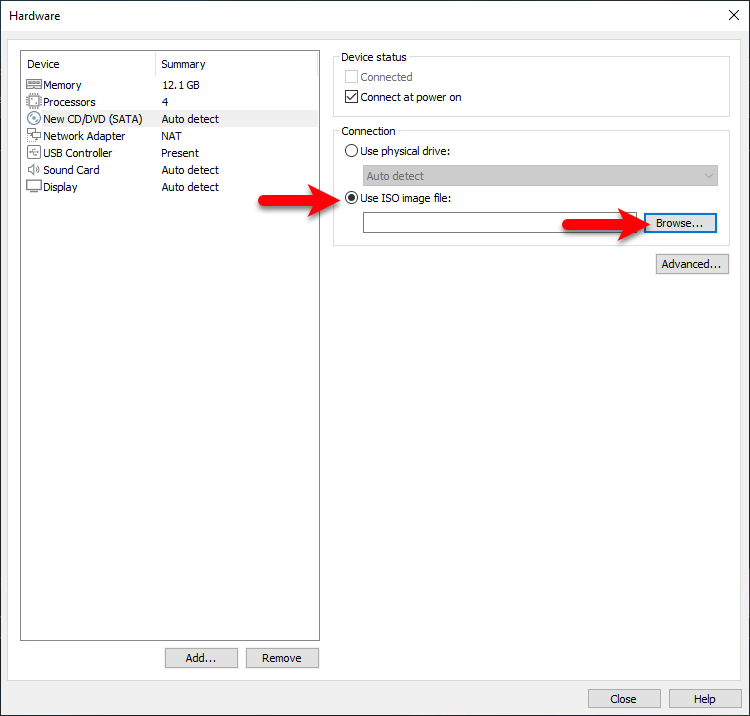
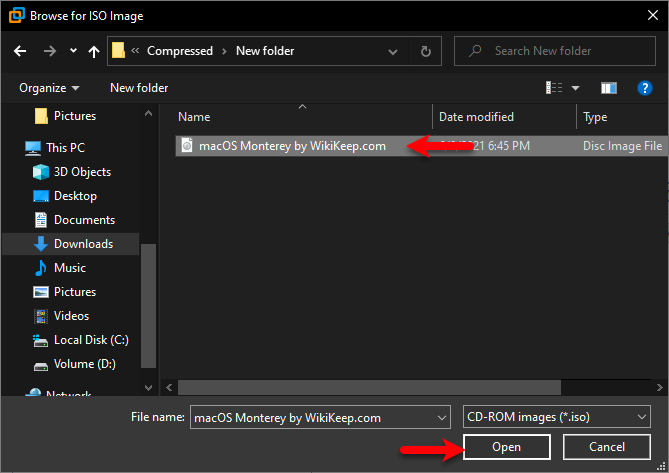
Now select the macOS Monterey ISO image file and click on Open.
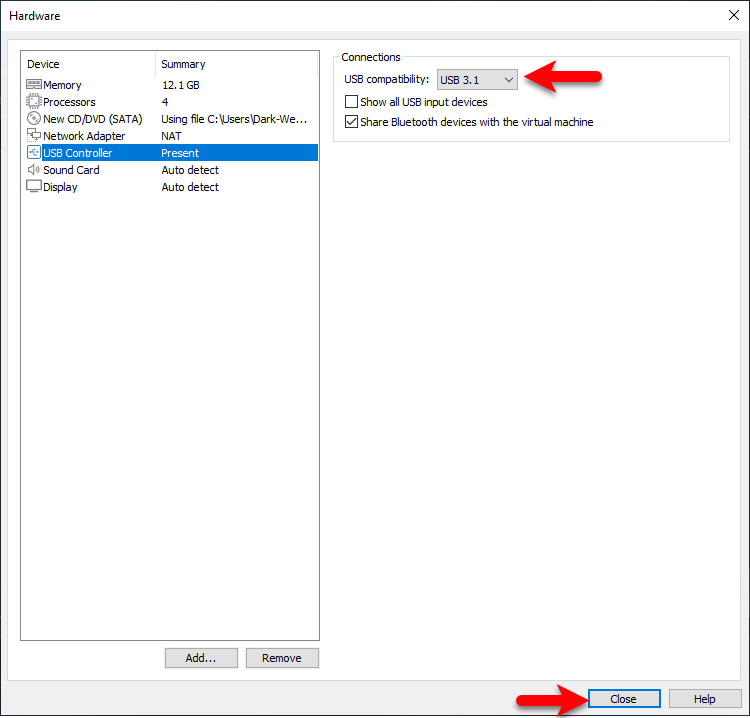
Select the USB Controller tab, and select USB 3.1. Once everything is completely done click the Close tab.
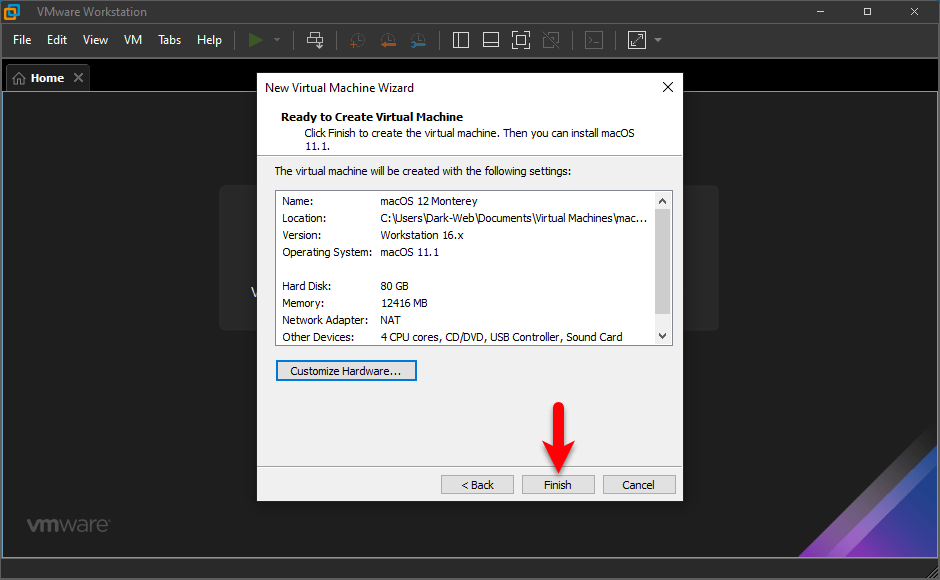
Now click Finish to create the virtual machine.
Step 6. Edit VMX file
VMX file is a small piece of code that allows the installation of any macOS operating system on VMware Workstation/Player. Therefore, for adding the code you need to close the VMware Workstation completely that is running in the background.
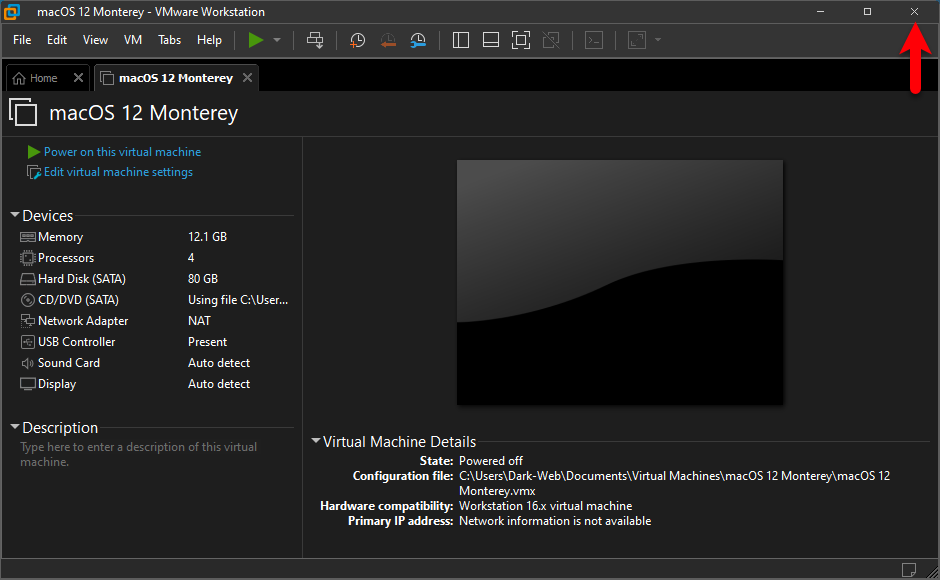
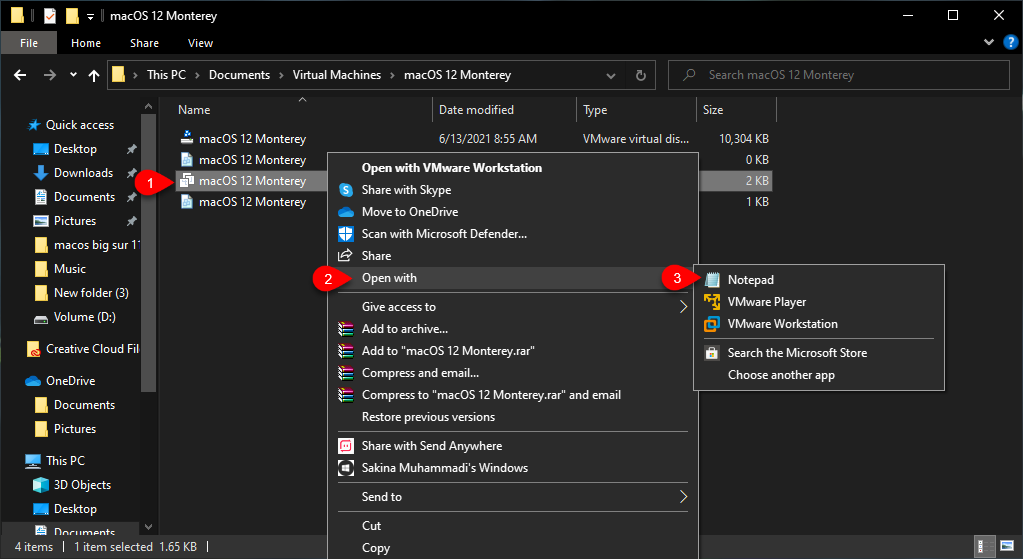
Now find out the folder in which you have saved the macOS Monterey Virtual machine. Once you find it right-click on the VMX file and open it with Notepad.
Scroll down and edit the below-down code at the end of other codes, then press Ctrl+S to save the code.
smc.version = 0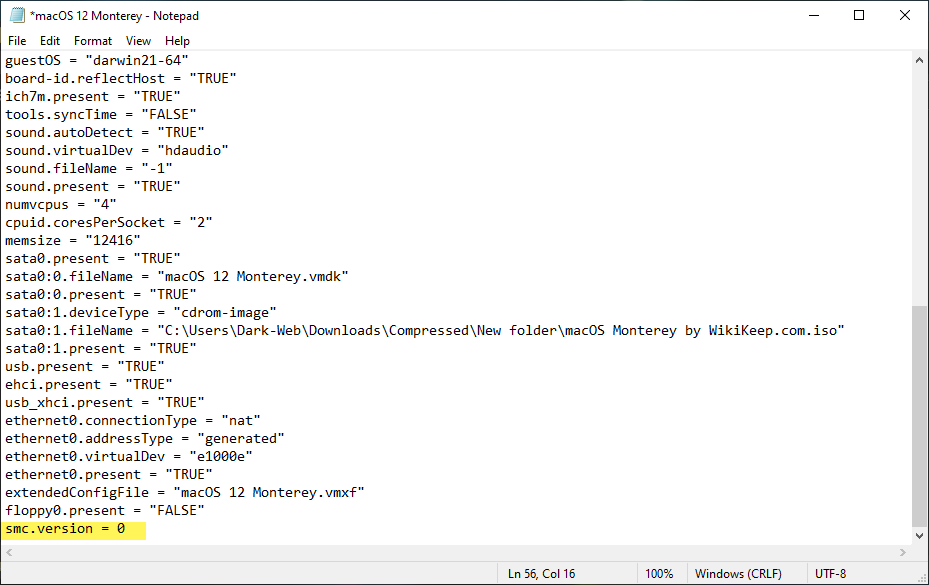
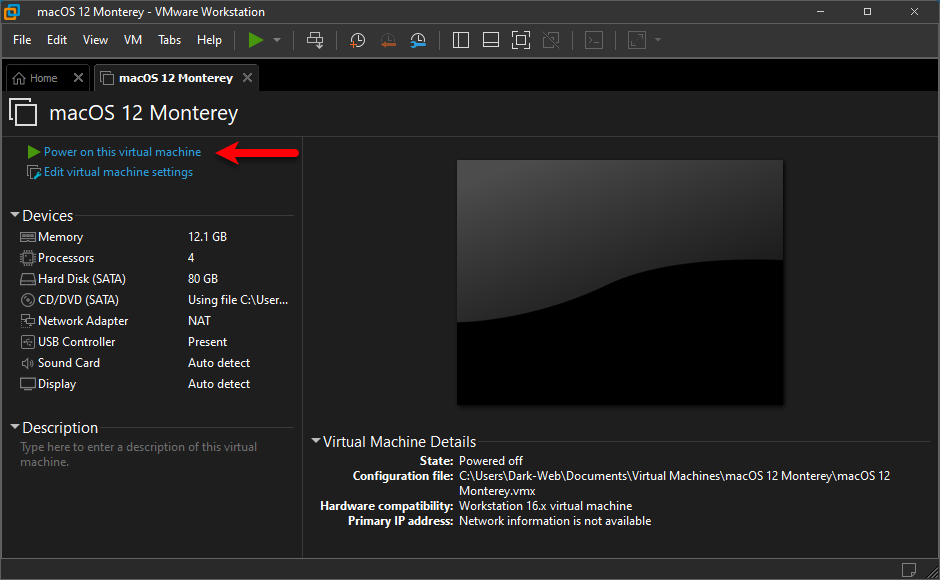
Step 7. Perform a Clean Installation of macOS Monterey on VMware Workstation
Once everything is completely done so now it’s time to install macOS Monterey on VMware Workstation on Windows PC. For installing head over to VMware Workstation and open it, then select the created virtual machine of macOS Monterey and click Power on this virtual machine.
Once the installation launched wait for the first Apple logo screen.

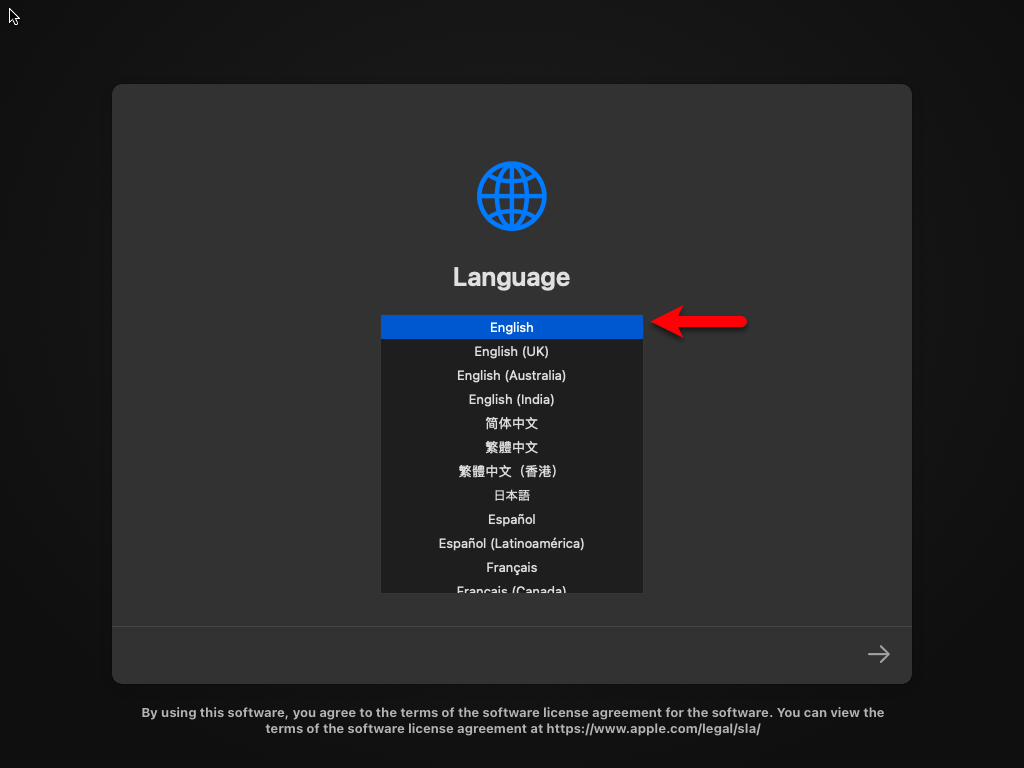
Select your language and click on the arrow key.
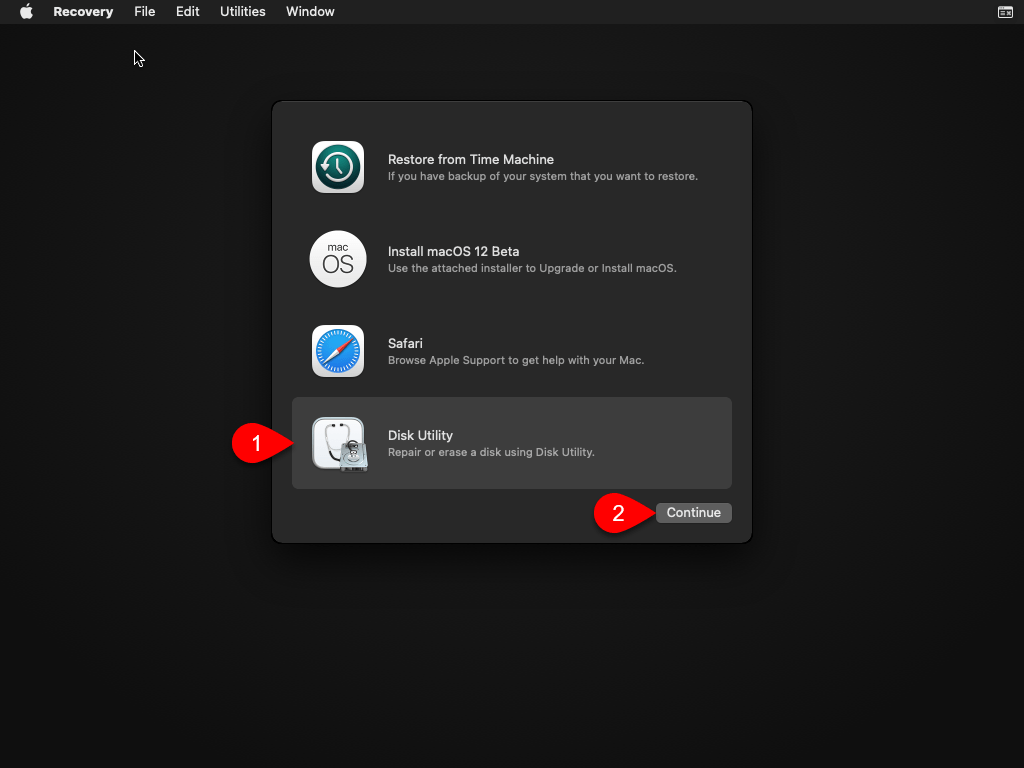
Select Disk Utility and click on the continue option.
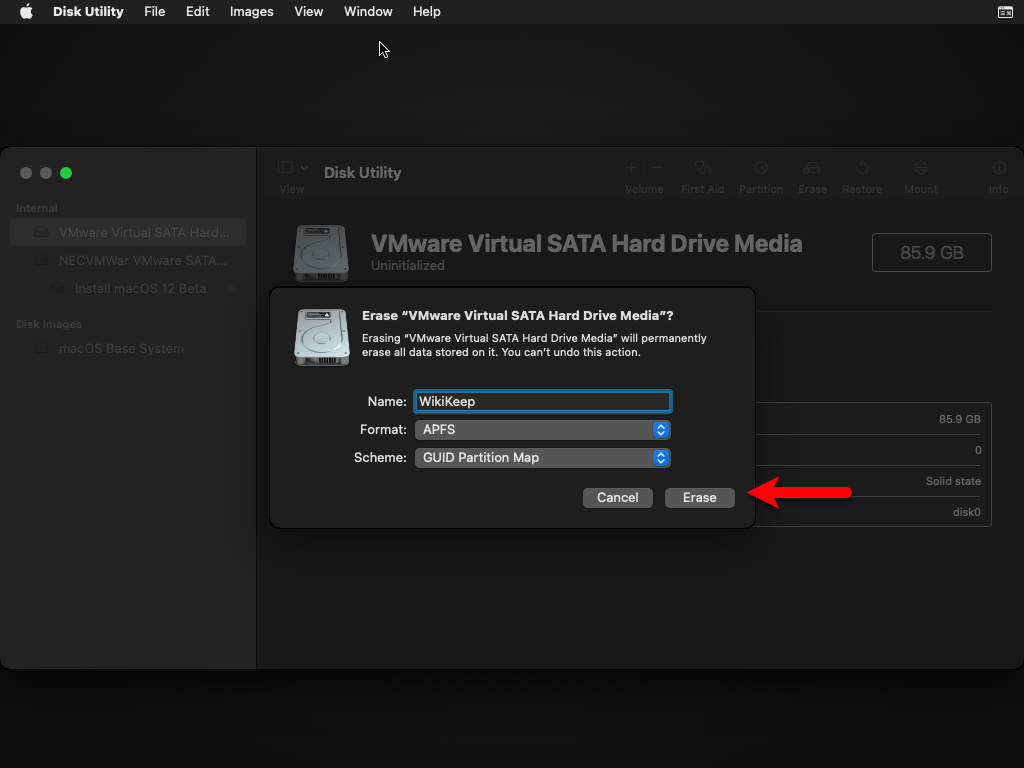
Now select the virtual SATA hard disk and click on the Erase option, then erase the disk with the following settings.
- Name: Optional
- Format APFS
- Scheme GUID Partition Map
When the disk successfully formatted click Done.
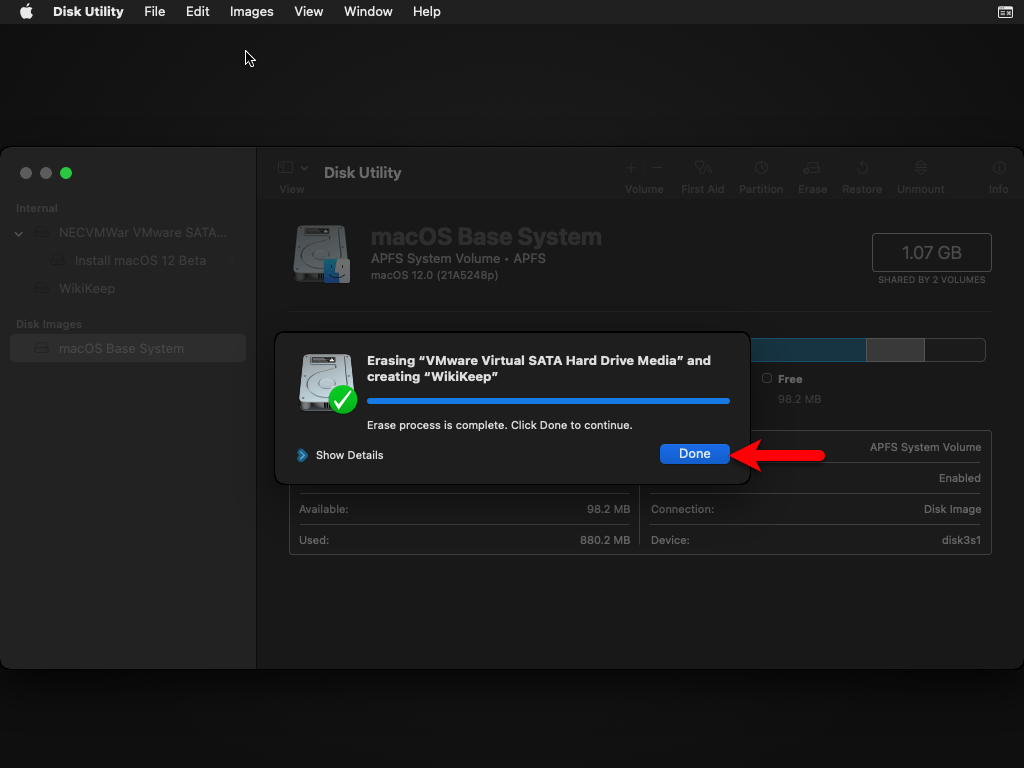
Now close the Disk Utility.

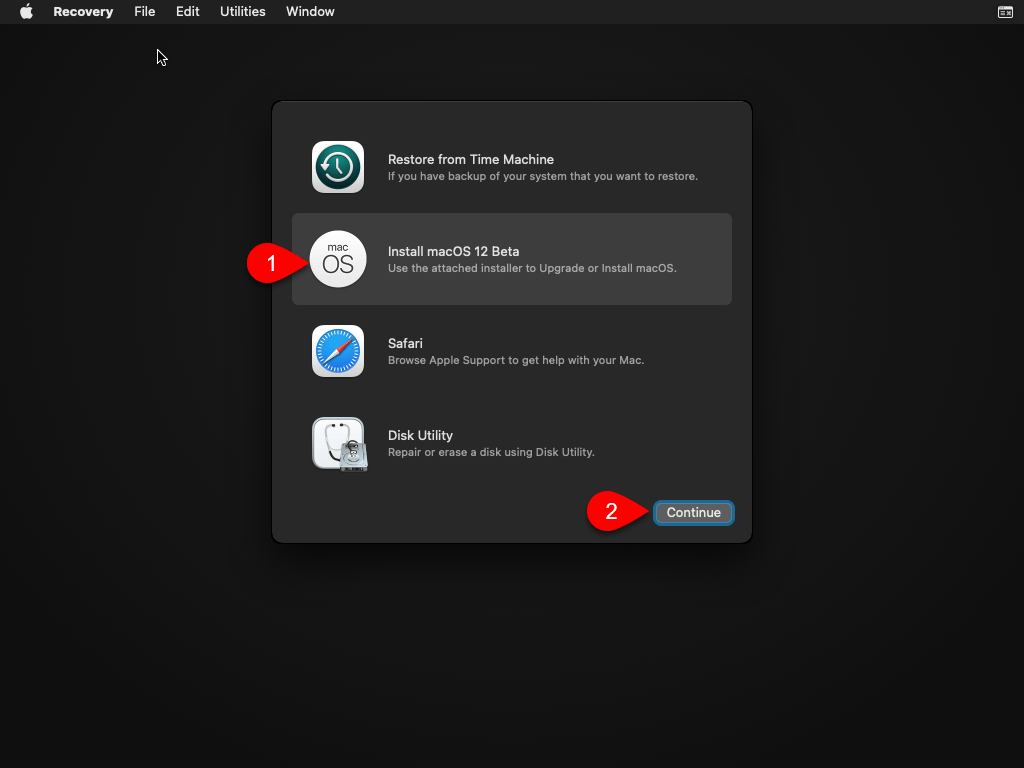
When you back to the recovery window select “Install macOS 12 Beta” and click on continue.
To set up the installation click, continue.

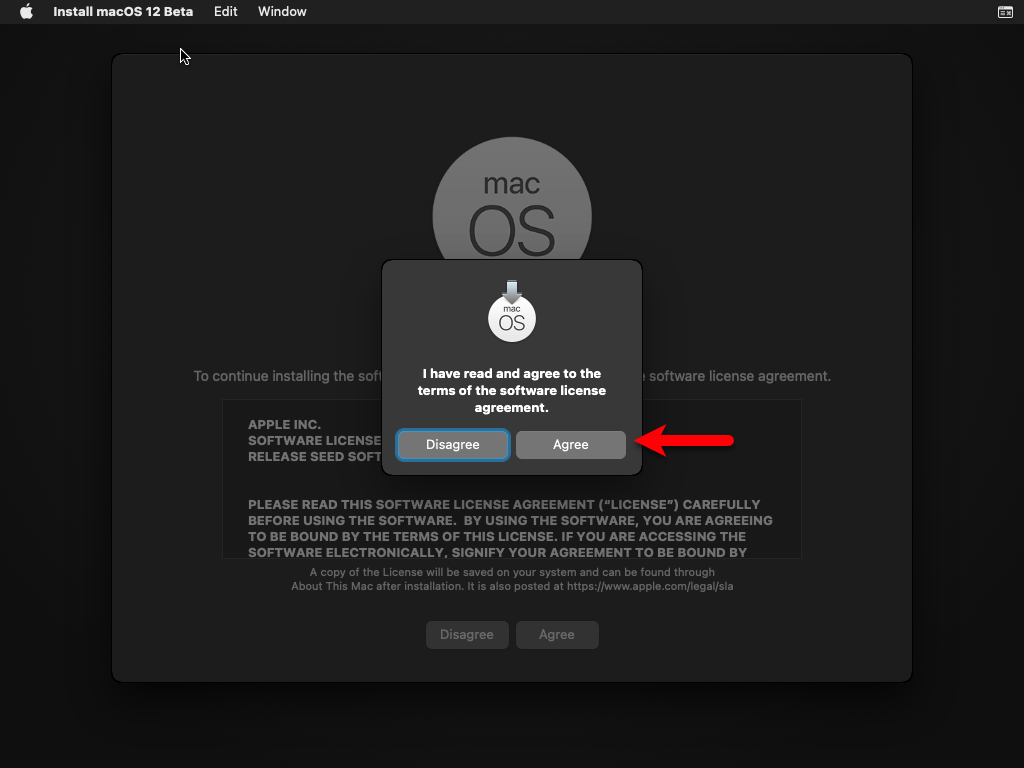
Agree with the terms and conditions of macOS Monterey 12.
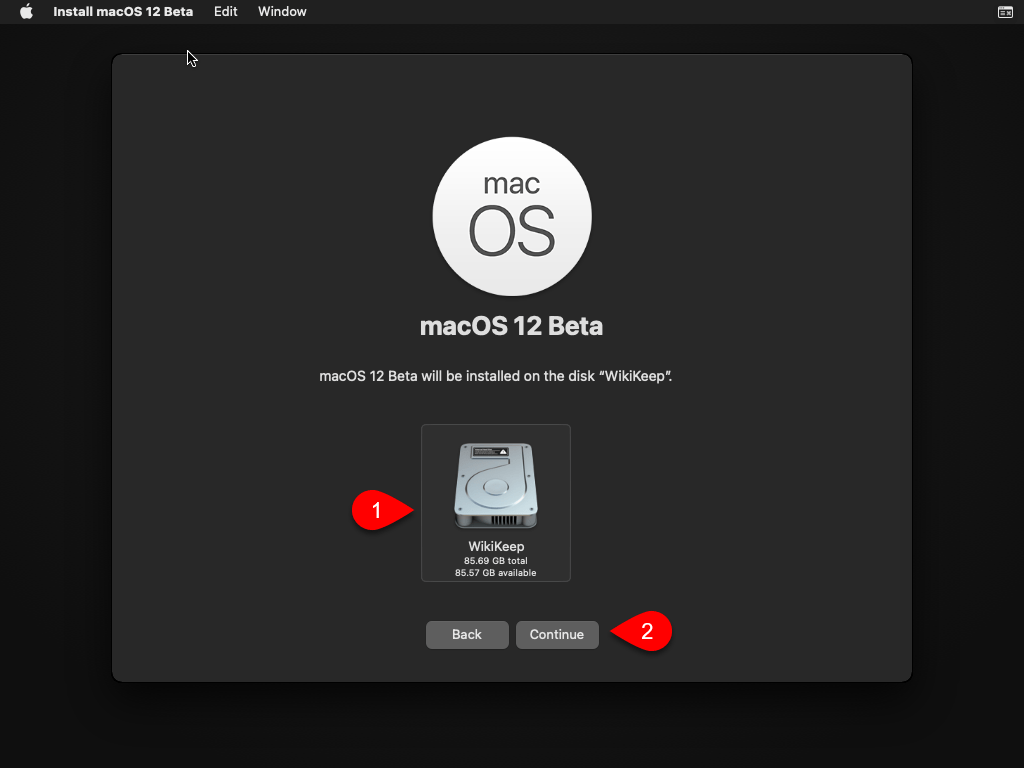
Now select the disk where you want to install macOS Monterey and click continue.
Now it starts installing macOS Monterey on VMware Workstation, also read the below down note.
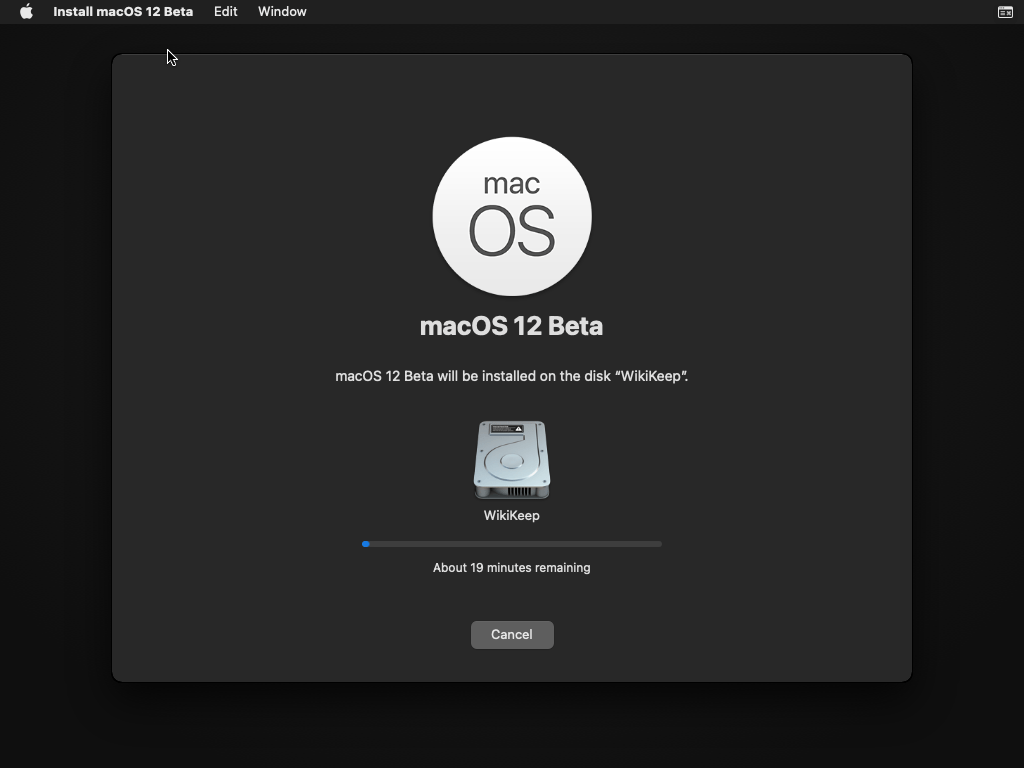
Note: The installation process may take some time, so be patient until the installation should be completed. Also, during the installation, the Virtual Machine will restart several times. Don’t do anything until the installation should be completed and take you to the basic settings window.
Step 8. Complete the Basic Settings
- Select your country and click continue
- Choose your keyboard layout and click continue, on the other hand, if you do not agree with the keyboard layout you can simply click on customize settings and set your preset.
- On the accessibility, window click on the Not Now option.
- Choose the option my computer doesn’t connect to the internet and click continue.
- Again click on the Continue option.
- On the Data & Privacy window click continue.
- On the migrant window click on the Not Now option.
- Agree with the terms and conditions of macOS Monterey and click continue.
- Create your computer account such as entering your name, account name, password, and Hint, then click on continue.
- You can customize your settings by yourself, but I recommend you to go by default by clicking on the continue option.
- On the screen, time window, click on the Sign Up Later option.
- On the Siri window simply click continue.
- Select your Language for Safari and click continue.
- In the “Improve Siri & Dictation” simply click continue.
- Now choose your look for macOS Monterey and click continue.
- Wait until it should set up your macOS for the first use.
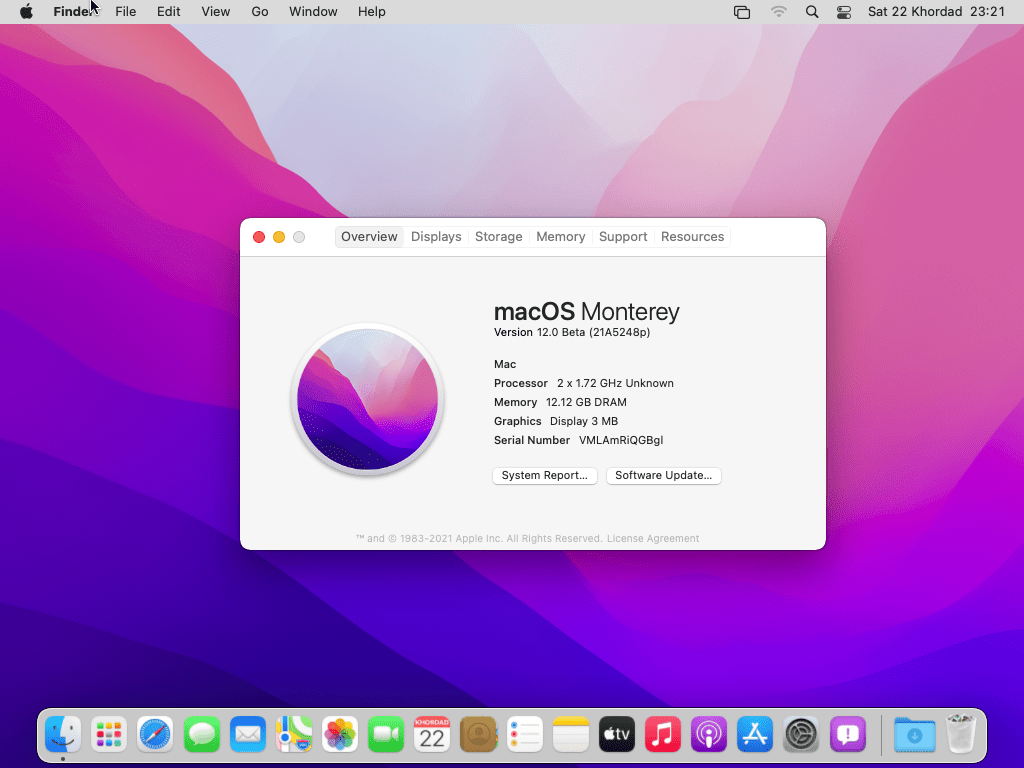
- Once the macOS Monterey successfully completed you can see its beautiful window.
[metaslider id=5524]
Step 9. Take Snapshot of the Virtual Machine
Using the Beta 1 Version of macOS Monterey on VMware Workstation/Player will require taking or capture the snapshot of the Virtual machine. Otherwise, you will face problems while trying to log in for the second time in the virtual machine. This problem will be fixed in the public Beta update of macOS Monterey.
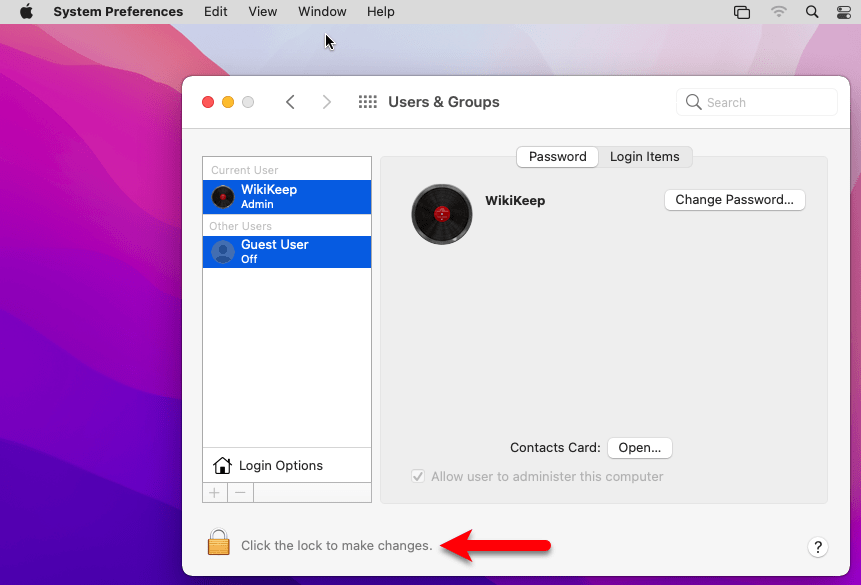
For taking a snapshot navigate to “System Preferences” click on “User & Group” then click on the Lock icon.
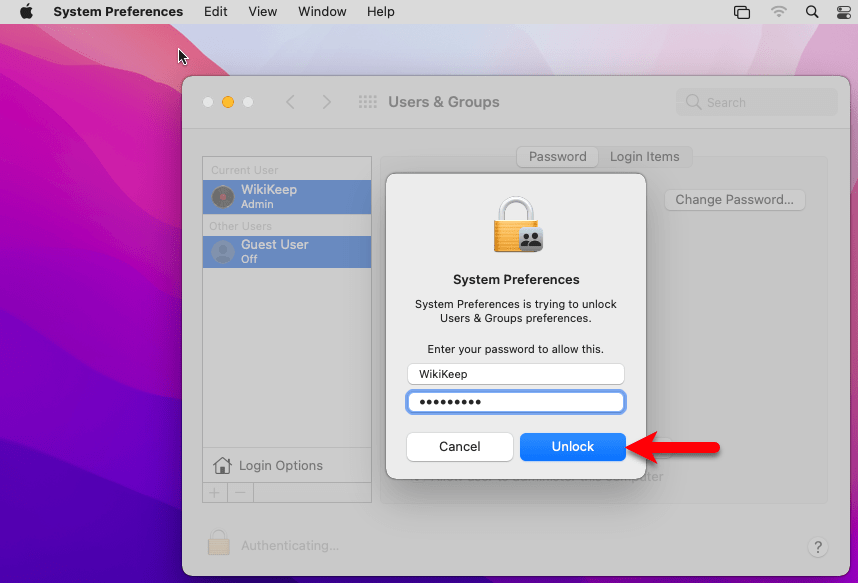
Enter the password and click Unlock.
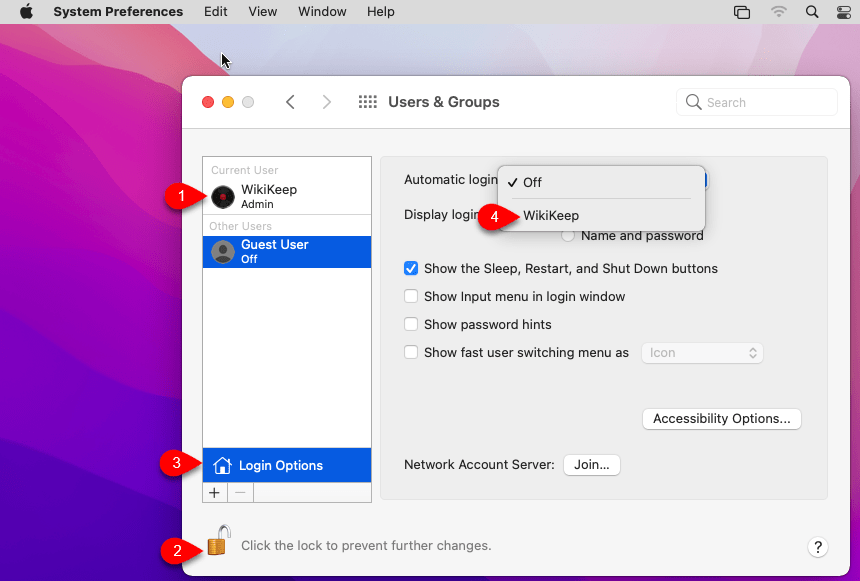
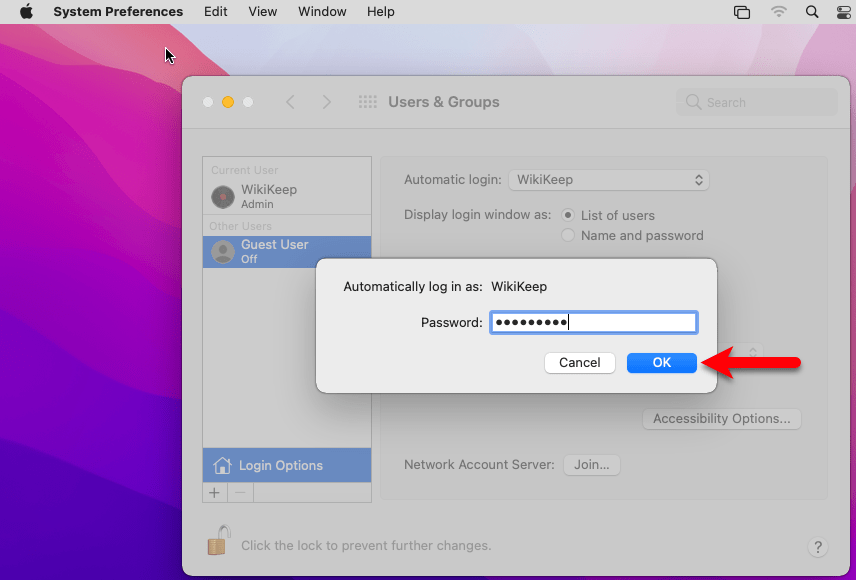
Select your username from the left-handed side window, then select “Login Options” from the top “Automatic Login” select your username.
Again it will require you to enter your password then click OK.
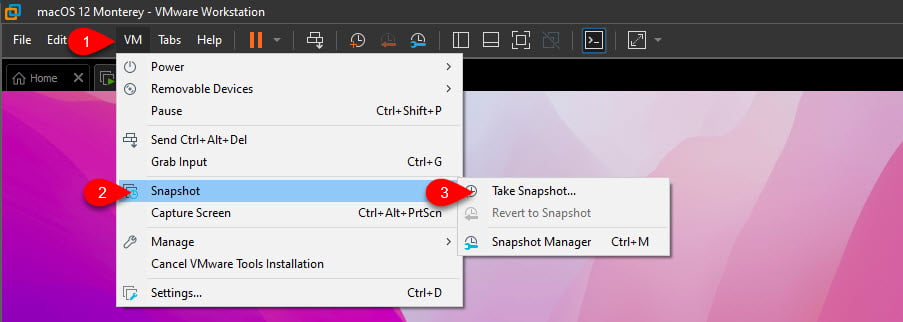
Now navigate to the top menu bar click on VM>Snapshot>Take Snapshot. Simply take a snapshot whenever you face any issue you can start the VM from the starting point or from the beginning.
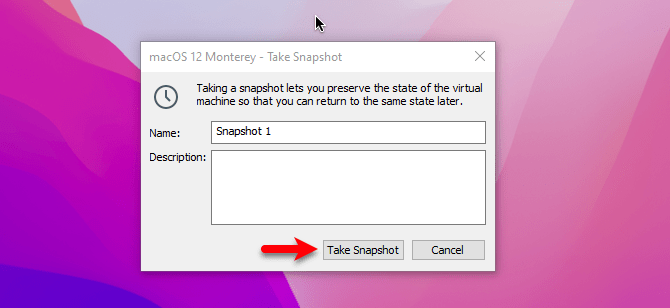
Now save the snapshot with a description that you should not forget that.
Install VMware Tools
If installing macOS Monterey 12 on VMware Workstation you have been noticed that the full-screen resolution is not working and not smooth. Therefore, you need to install something called VMware Tools which can help you to enter macOS Monterey full-screen mode. So, the installation process is much easy you can install it with few clicks, for the installation guide, click on the below downlink.
Summary
Overall the complete process of installing macOS Monterey on VMware Workstation covered up to nine steps. And the final step was optional it depends on you whether you want to use the full-screen mode of macOS Monterey on VMware or not. But again if there is remaining something in the above article then feel free to share with me in the below down comment box section. Also, we will happy that you should share with us your nice feedback about the article. However, if you faced any kind of problem-related to this article then share it with us, soon we will be in touch with you with a positive response.
After installing macOS Monterrey on VMware Fusion, I installed VMware Tools, rebooted the VM, and then got a black screen.
After installing macOS Monterey please take snapshot.
hello
i can’t connect in virtual machine with workstation at ethernet connection could you help me
thanks