After installing macOS Monterey on VMware on Windows PC, you will see the macOS Monterey screen resolution is not perfect and not smooth. So, while installing macOS Monterey on VMware Windows PC it requires some important components to be completed after the installation. Like, if you want macOS Monterey full-screen mode with HD resolution on Windows. Then you have to install a tool called “VMware Tools” on VMware.
This small tool is developed for enabling the full-screen mode, HD resolution, enabling drag and drop, allow you to work with macOS Monterey smoothly. On the other hand, these tools enable several features on the macOS Monterey.
However, in this post, I will show you step by step how to install VMware Tools on macOS Monterey on VMware on Windows PC. Follow the guide to get a positive result after the installation of macOS Monterey on the VMware virtualization tool.
You can check out the below down-link on how to install macOS Monterey on VMware on Windows PC. All procedure of installation is being covered in one article with a clear method.
Install VMware Tools on macOS Monterey
After installing macOS Monterey on VMware if the “Install VMware Tools” doesn’t exist in the VM>option. Then you have to download the tool from the below down-link.
- Download VMware Tools (VMware.Inc)
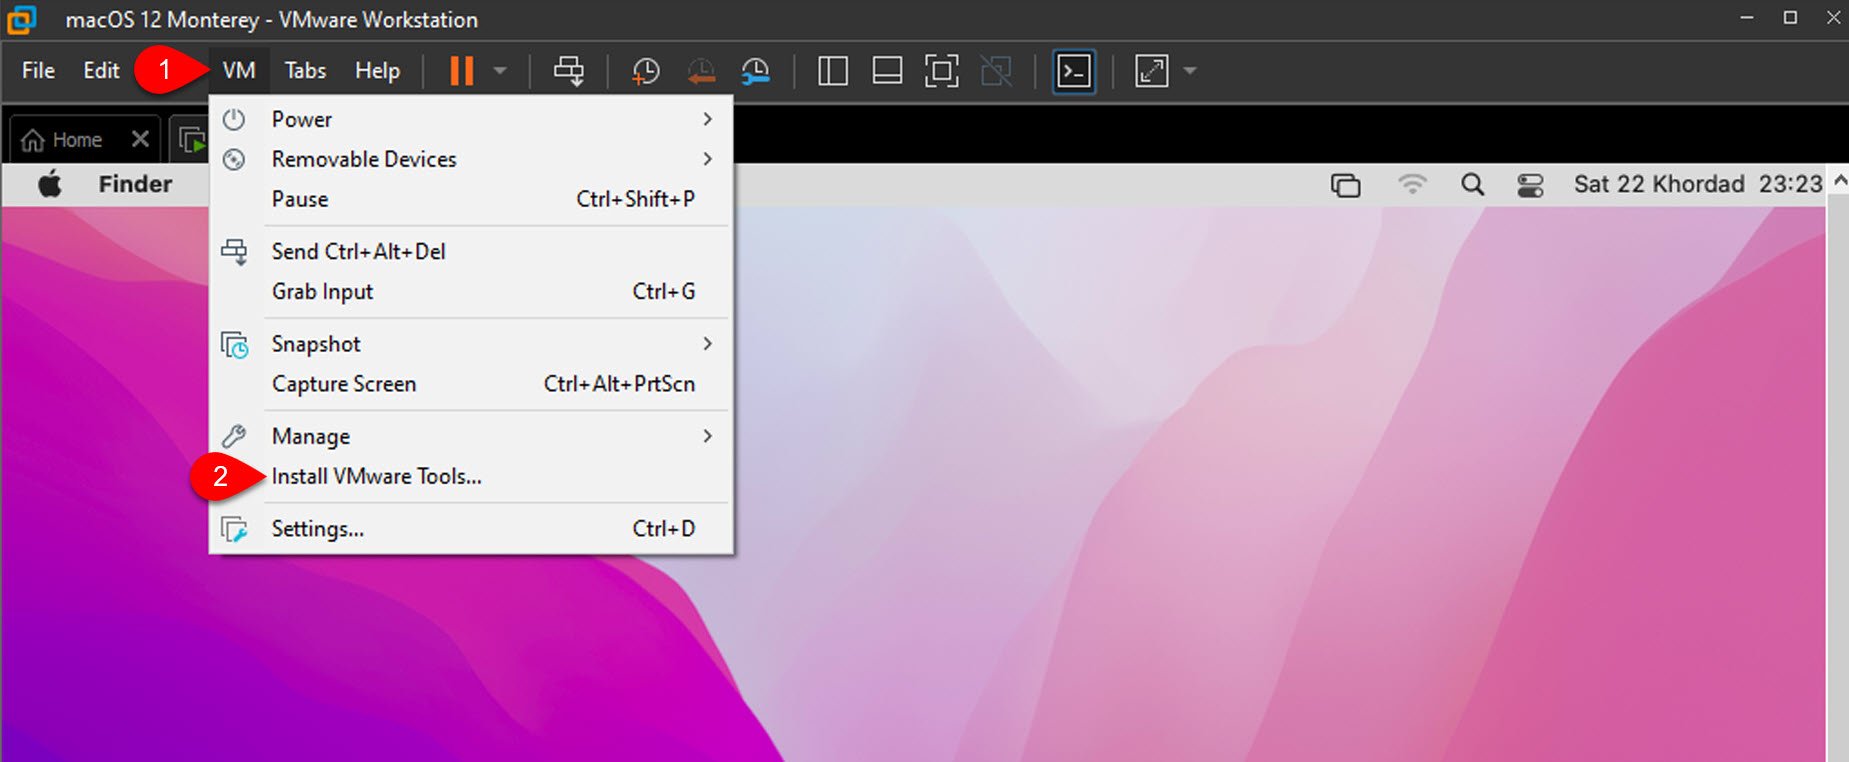
Turn on the macOS Monterey on VMware navigate to the top bar click on VM tab> then select Install VMware Tools.
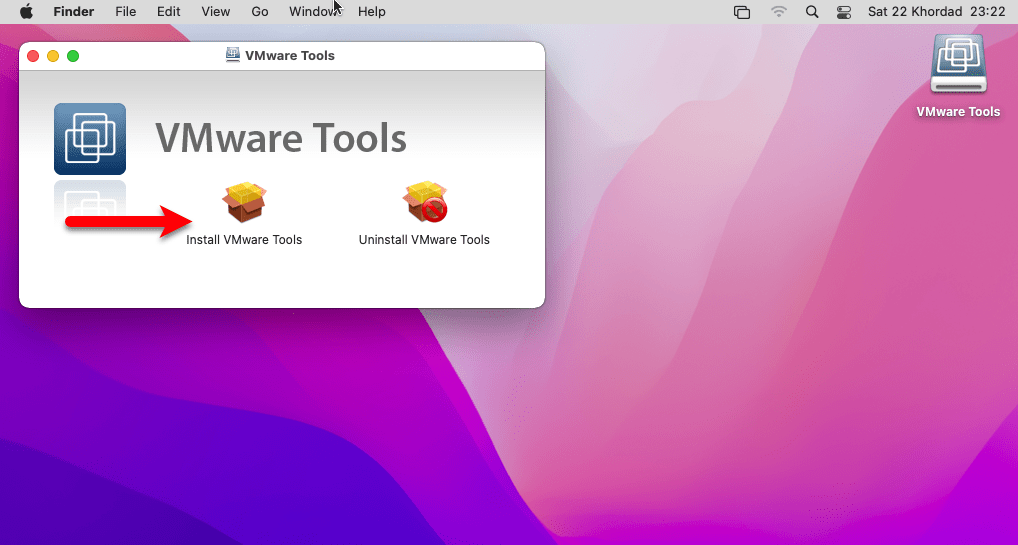
Now the VMware Tools setup file will appear on the desktop, double-click on that to launch the installation. On the VMware Tools window again double-click on “Install VMware Tools”.
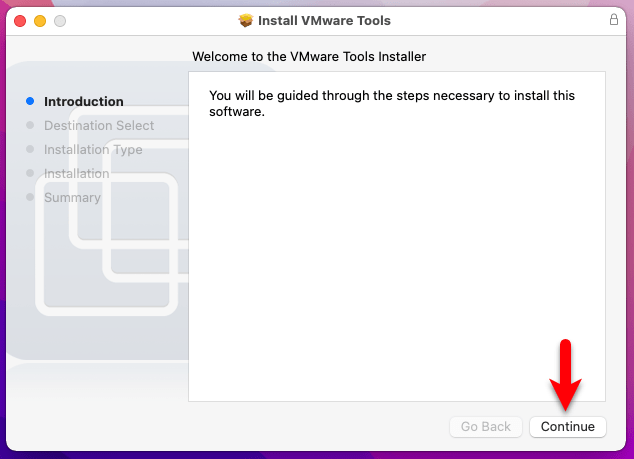
Once the installation launched on the wizard window click on the continue option.
On the installation, window click on continue, once another window pops up enter your username password and click on the “Install Software” option.

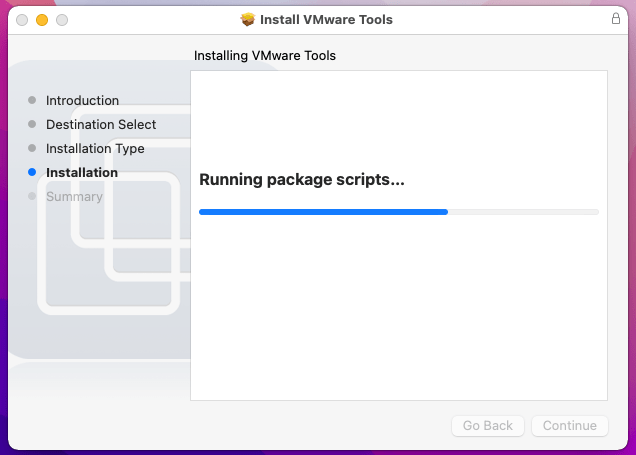
Now the installation begins and installs the packages.
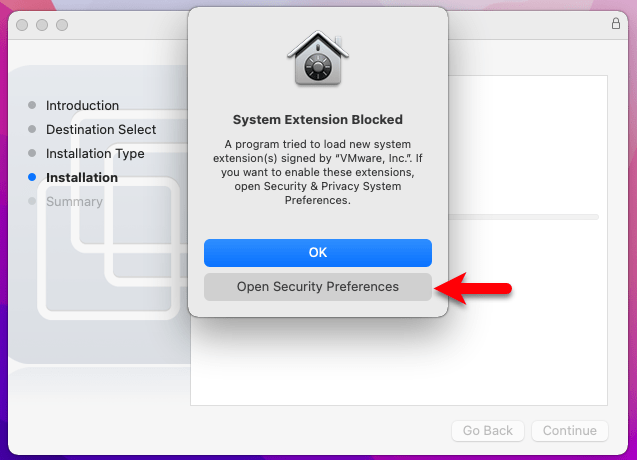
During the installation, another window will pops-up that the “System Extensions Blocked”. Allows on macOS installing the third-party software will ask you to allow that. For allowing the VMware Tools on macOS Monterey simply click on “Open Security Preferences”.
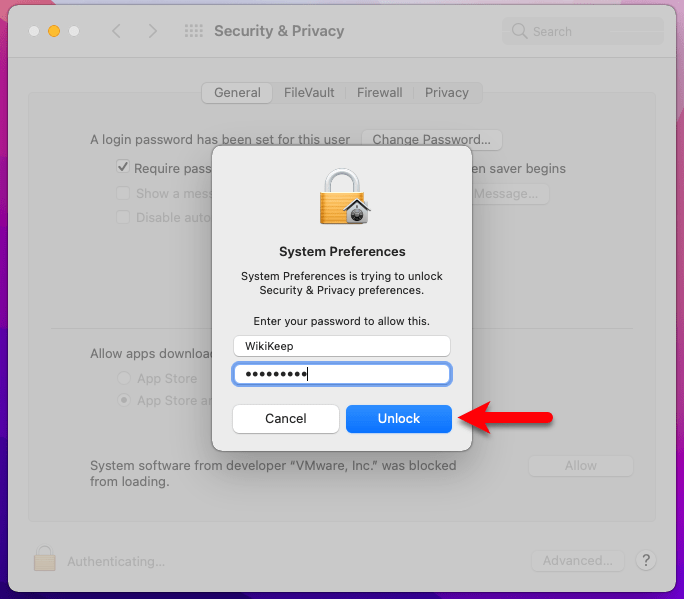
Once the Security & Privacy window opened, click on the left-handed lock icon. Then enter your username password and click Unlock.
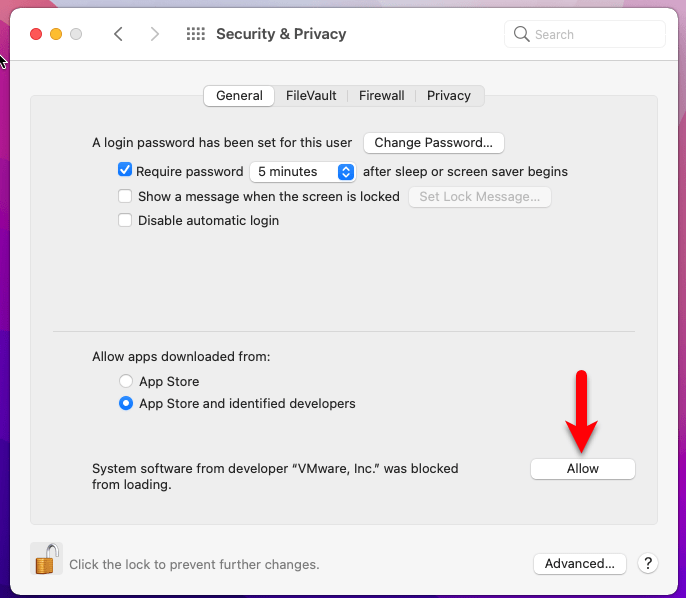
Once the window unlocked click on Allow option.
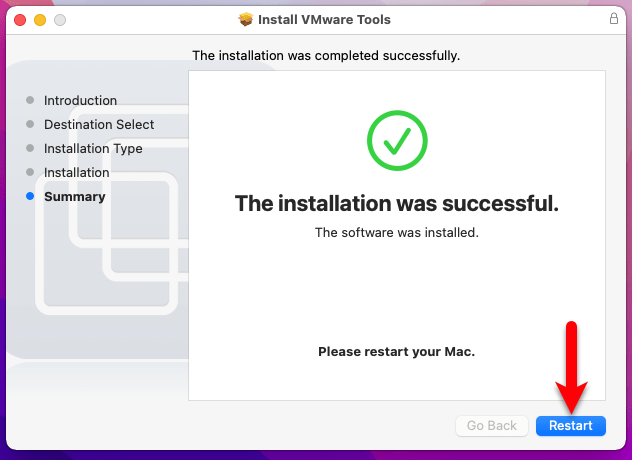
After allowing a restart required, so don’t click on restart wait for the rest of the installation, and click on Not Now.
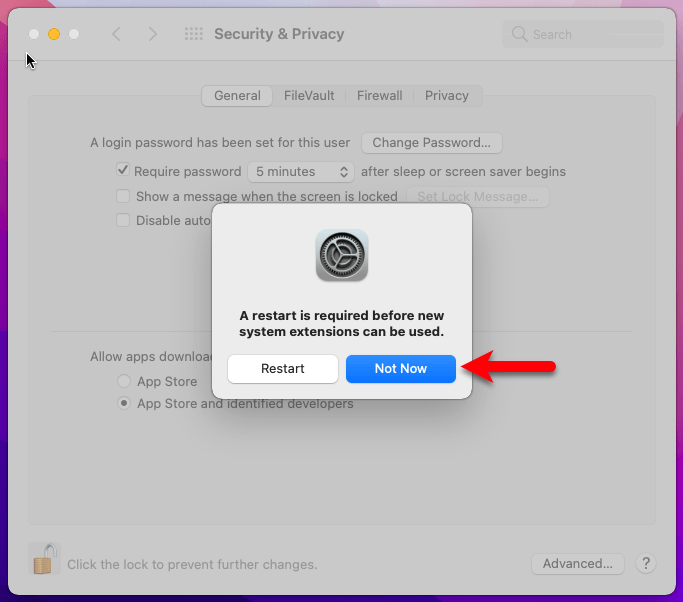
Close the Security & Privacy window and Restart the Virtual machine.
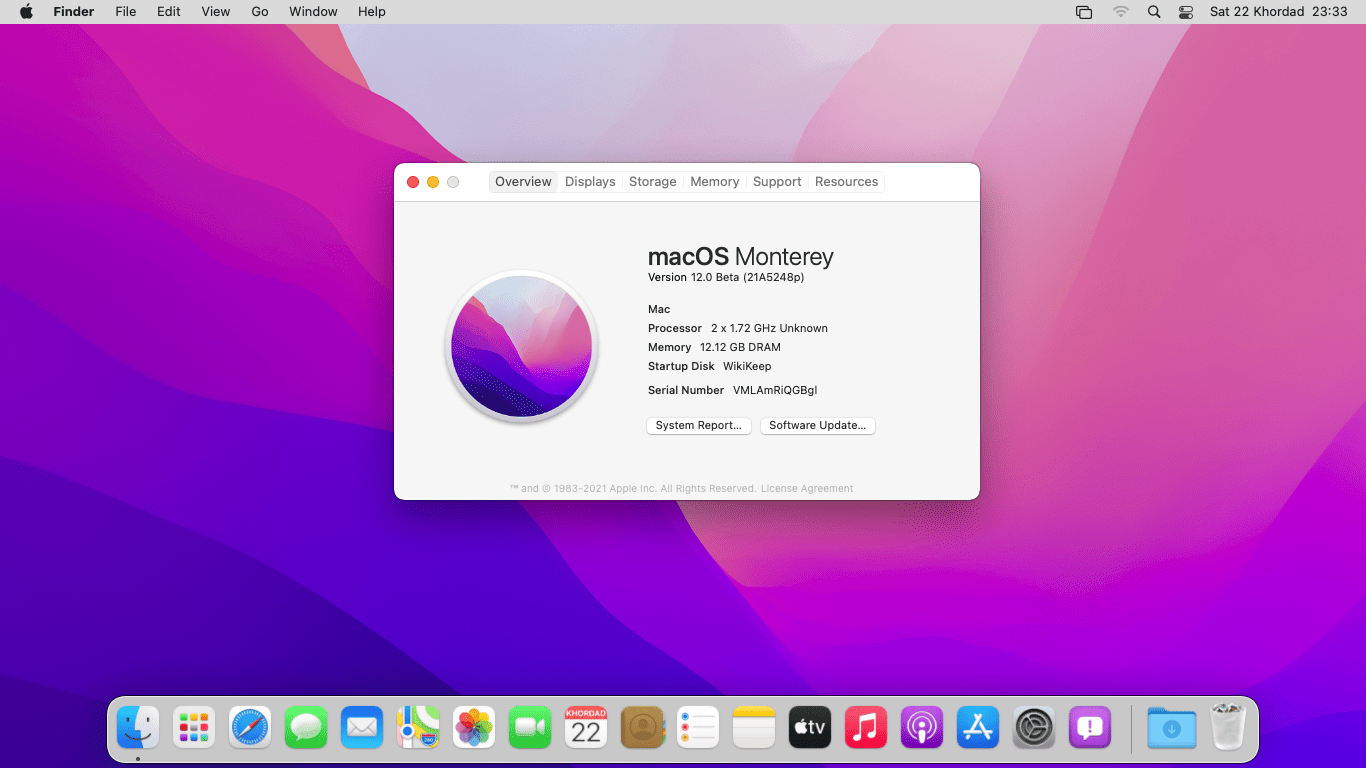
Once you back to macOS Monterey you will see that the macOS is now having the full-screen mode with the highest resolution and working smoothly.
Note: If the VMware Tools didn’t work for the first installation then try to re-install it again.
Final Point
That was about how to install VMware Tools on macOS Monterey on VMware Workstation on Windows PC. I hope you got something from this article if the article was interesting for you then don’t forget to share your nice comments about the article in the below down comment section box.