In this post, I will guide you on how to install macOS Monterey 12 on VirtualBox on Windows PC. macOS Monterey is kicked out by Apple at the recent WWDC Keynote event on 7th June 2021. At the recent event, Apple CEO Tim Cook announced the iOS 15, iPadOS 15, WatchOS 15, and macOS 15.
You know that macOS Monterey is the replacement for macOS Big Sur 11. If we should compare macOS Big Sur and macOS Monterey internal and its interface look we will see there are bunches of changes on it. Like there are more curves and refined edges rounded on the sides of its every portion interface. However, macOS Monterey is the biggest replacement and the biggest operating system this year released by Apple.
Mostly Apple releasing their operating system firstly in the Beta version. If you noticed like in previous years this year, Apple kicked out every operating system in Beta mode. Next month in July 2021 you will find out the Public beta version of the macOS operation system through your system update menu.
Now you can update your macOS Big Sur to macOS Monterey but I recommend you do not install it. Because it’s much risk due to its security issues. So, wait until the public beta update should release, the date is not confirmed but in July you will have its update.
Related:
Steps to Install macOS Monterey on VirtualBox on Window PC
- Download all the required files, macOS Monterey ISO image, VirtualBox, VirtualBox Extensions Pack.
- Install VirtualBox
- Install VirtualBox Extensions Pack
- Create a New Virtual Machine for macOS Monterey on VirtualBox, and set perfect settings.
- Run the VirtualBox codes using CMD
- Start the installation and perform a clean installation of macOS Monterey.
- After the installation of macOS Monterey takes a snapshot.
- Final Point
- Download macOS Monterey ISO Image file
- Download macOS Monterey VMDK file
- Download VirtualBox & Extensions Pack
Step 1. Install VirtualBox on Windows PC
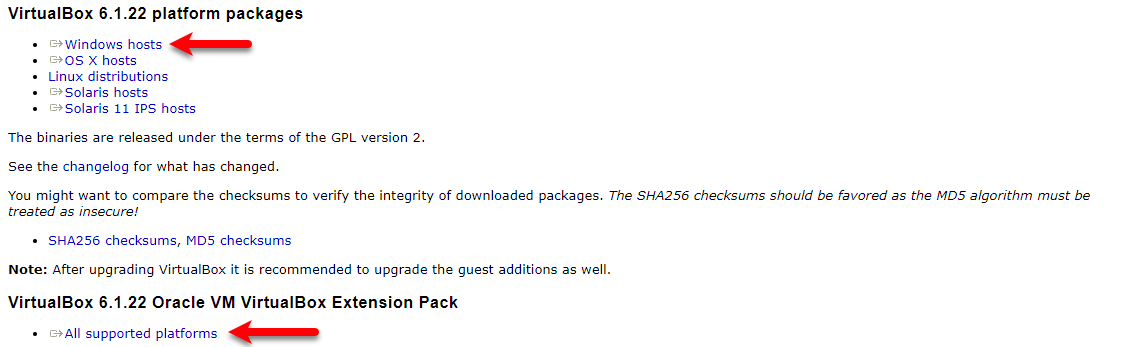
Navigate to the official website of VirtualBox and download the Windows host plus All Extensions Pack of VirtualBox. Extensions Pack allows you to remove the mouse and keyboard error on VirtualBox while installing macOS Monterey on VirtualBox. Download the VirtualBox and follow up the below down guides on how to install its Extensions Pack.
When you successfully installed the VirtualBox now open up the VirtualBox. On the main screen click on the Preferences option, then from the left-handed menu side click on Extensions and click on the + icon.
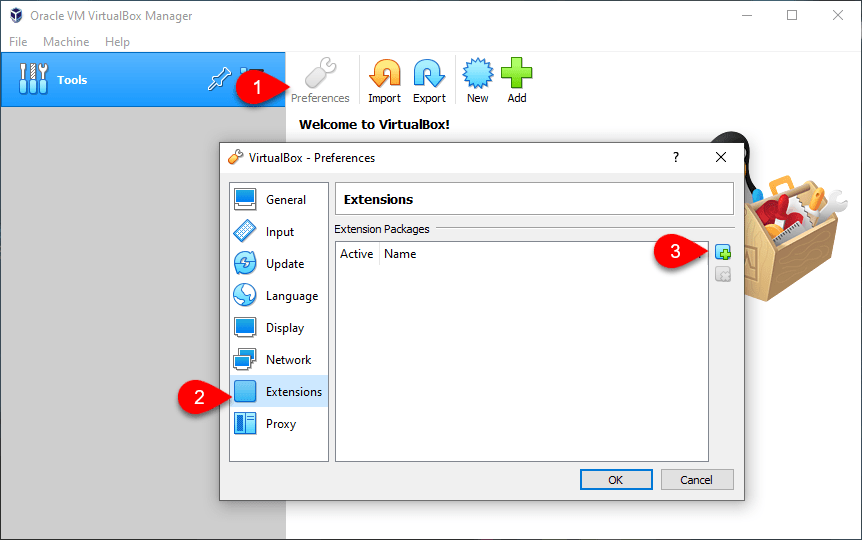
Now select the Extensions where you have saved that and click Open.

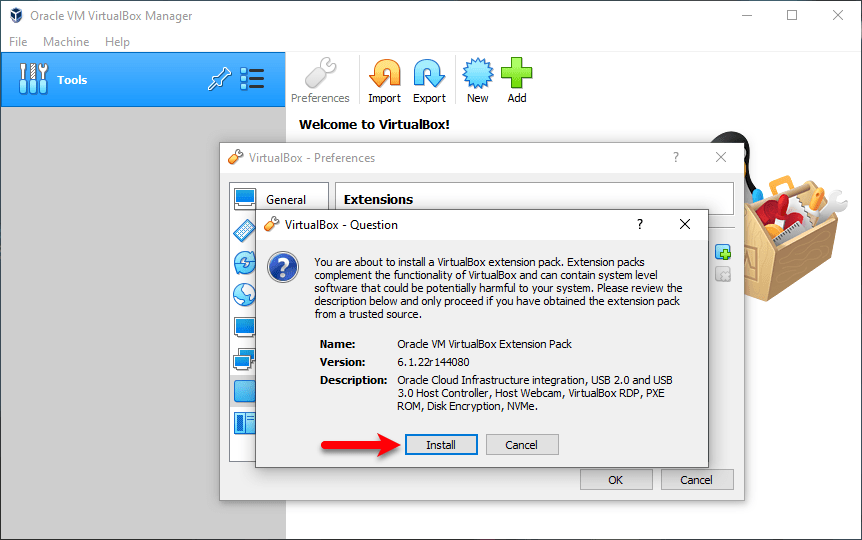
When the Extensions are added click on the Install button.
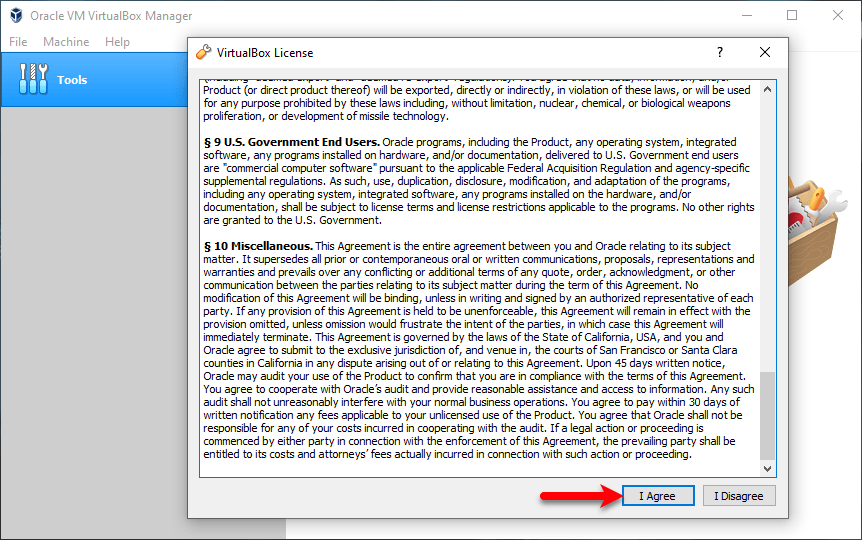
Scroll down to the bottom and click on I Agree.
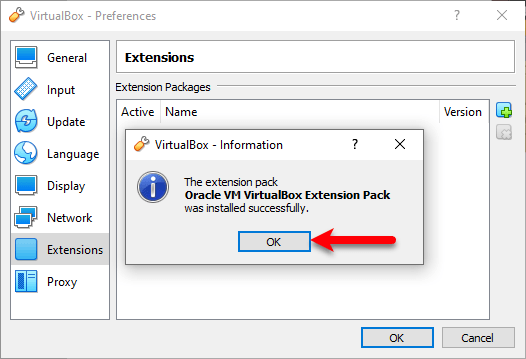
When the installation is completed click on OK and closes the Preferences window.
Step 2. Create a New Virtual Machine for macOS Monterey
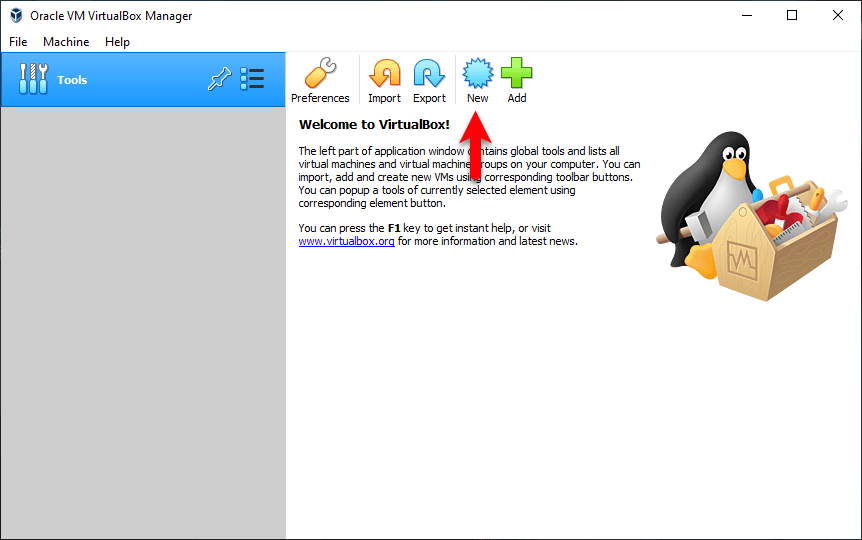
When the VirtualBox and Extensions Pack is installed, so let’s jump to creating a New Virtual machine for macOS Monterey on VirtualBox. For creating a Virtual machine click on the New option.
When the next window opened click on the Expert Mode.
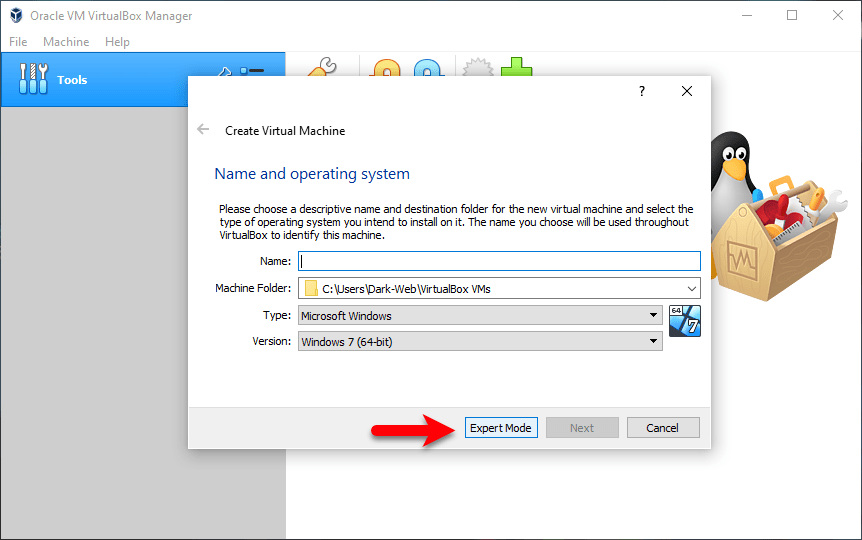
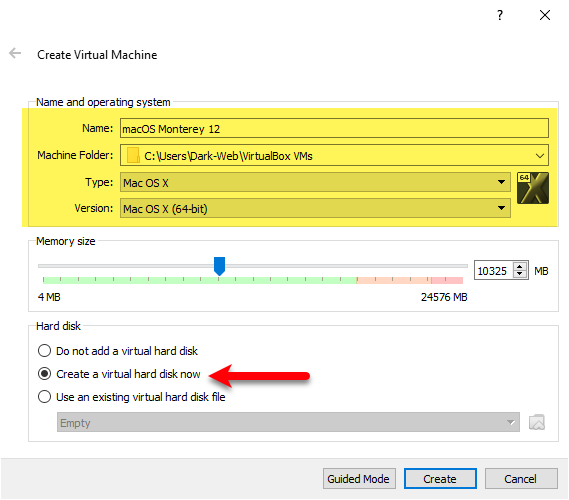
Here enter the Virtual Machine name, specify the location, select type Mac OS X, Version Mac OS X (64-Bit). Then select the option, create a virtual hard disk now and click create.

Increase the file size according to your hard disk space, the maximum size should more than 20GB. Also, select VHD (Virtual Hard Disk), select Dynamically allocated, and click create.
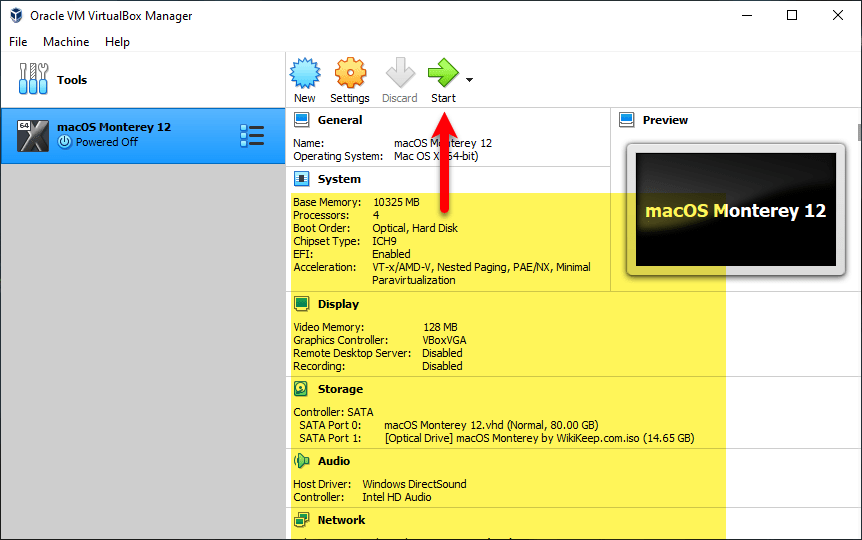
Step 3. Customize the Virtual Machine Settings for a Better Performance
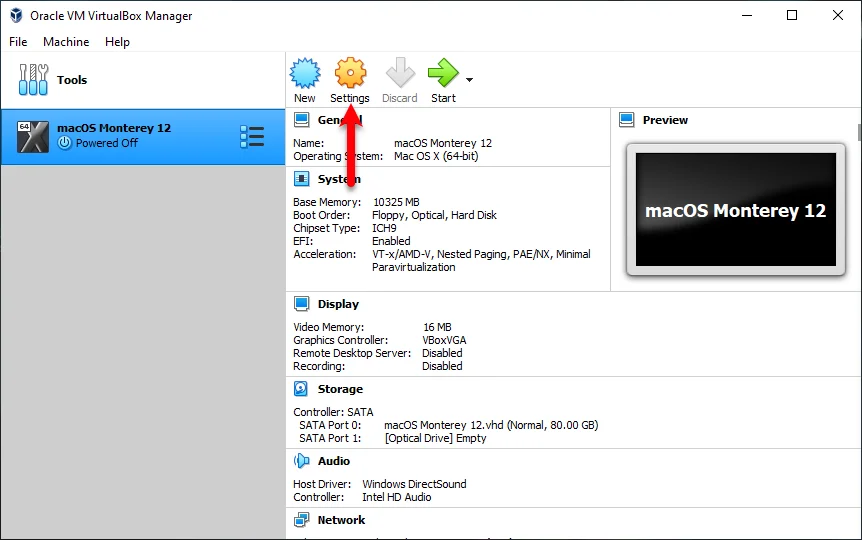
While the virtual machine was successfully created for macOS Monterey. Therefore, for a better and speed performance of the installation you need to customize and bring few changes to the virtual machine settings. In that case, select the created virtual machine and click on the Settings option on the top menu bar.
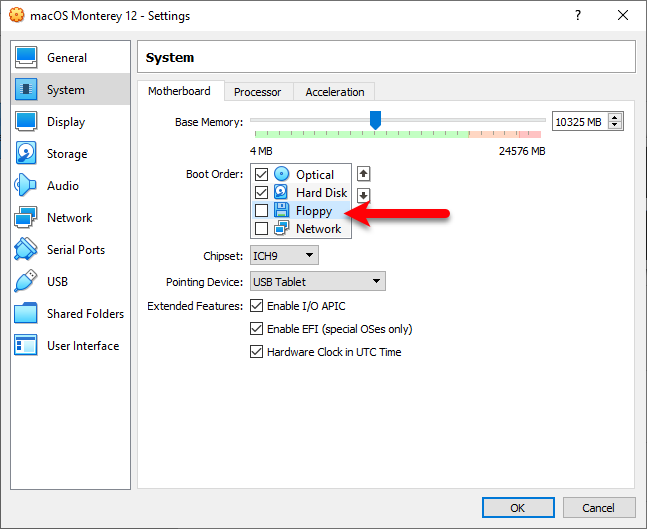
When the settings window opened from the left-handed side choose the “System” tab, and on the motherboard bar deselect the Floppy disk.
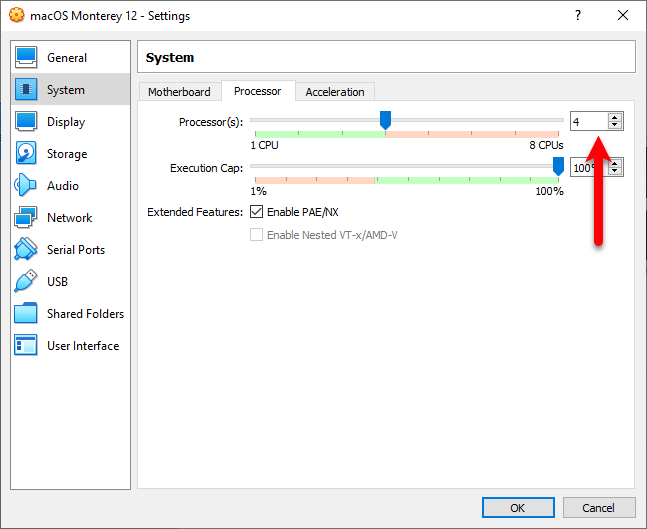
Select the Processor tab and increase the number of processors up to 4.
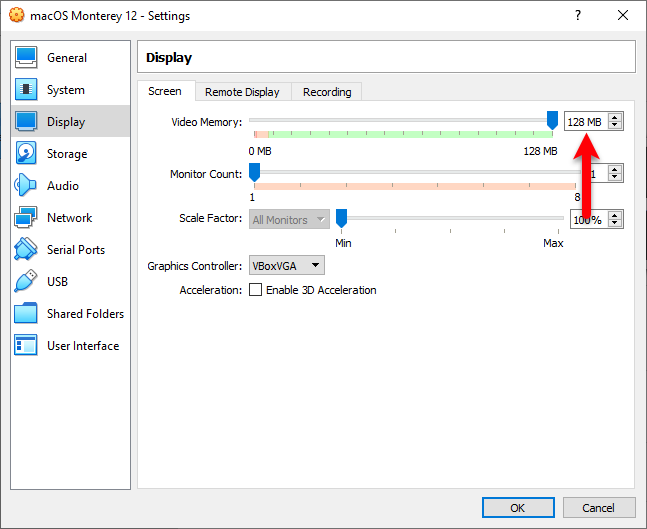
Select the Display tab, and increase the number of Display up to 128MB.
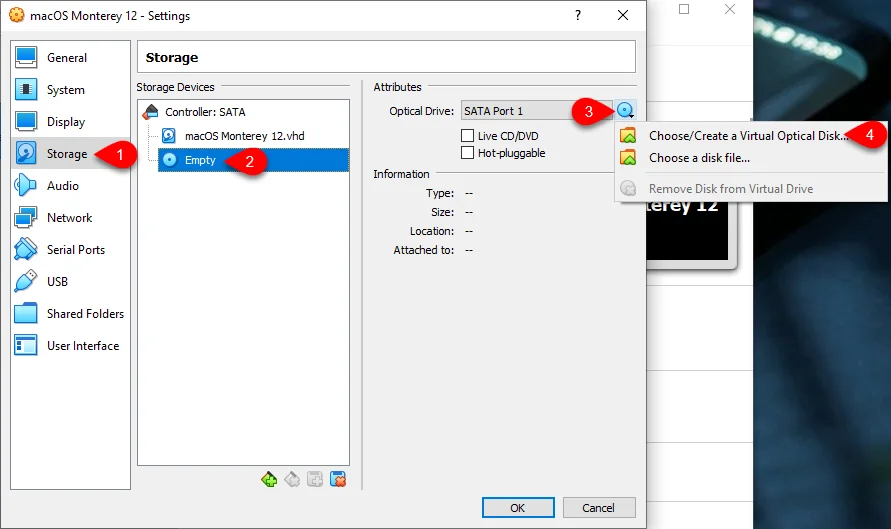
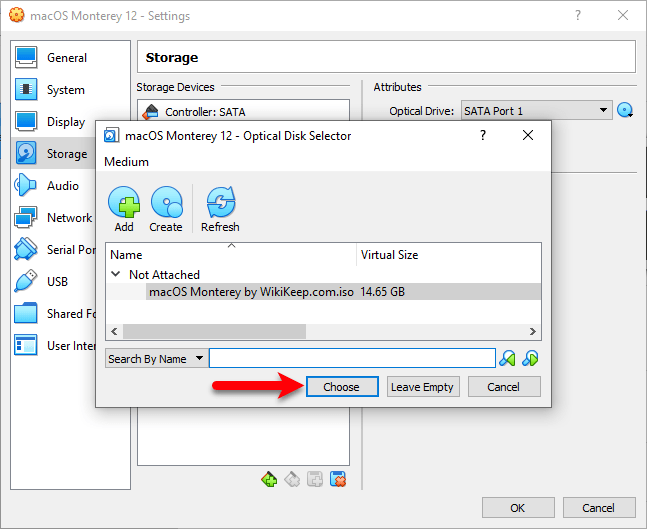
Select the Storage tab, select the Empty icon, then click on the blue disk icon and choose/Create a virtual optical disk.
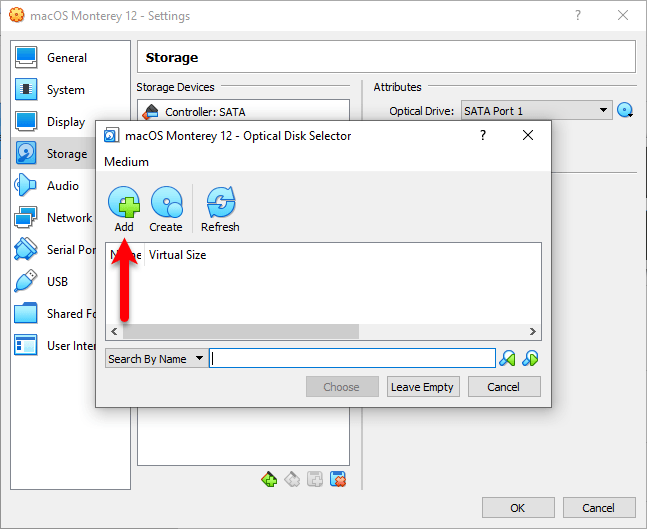
Now click on Add.
Select the macOS Monterey ISO Image file and click on Open.
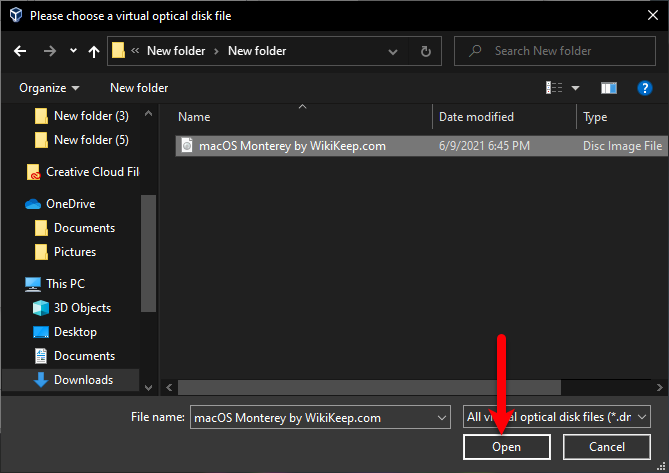
Once the macOS Monterey ISO image is inserted click on Choose to add it on Virtual Machine.
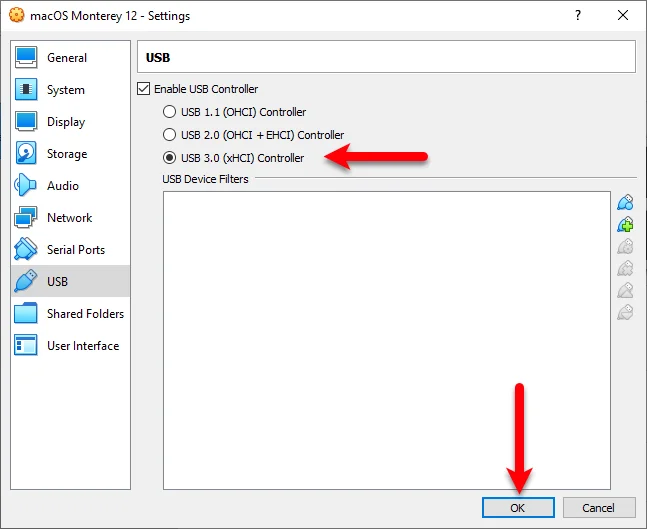
Select the USB tab, and from the list select the USB 3.0 (xHCI) Controller option then click OK.
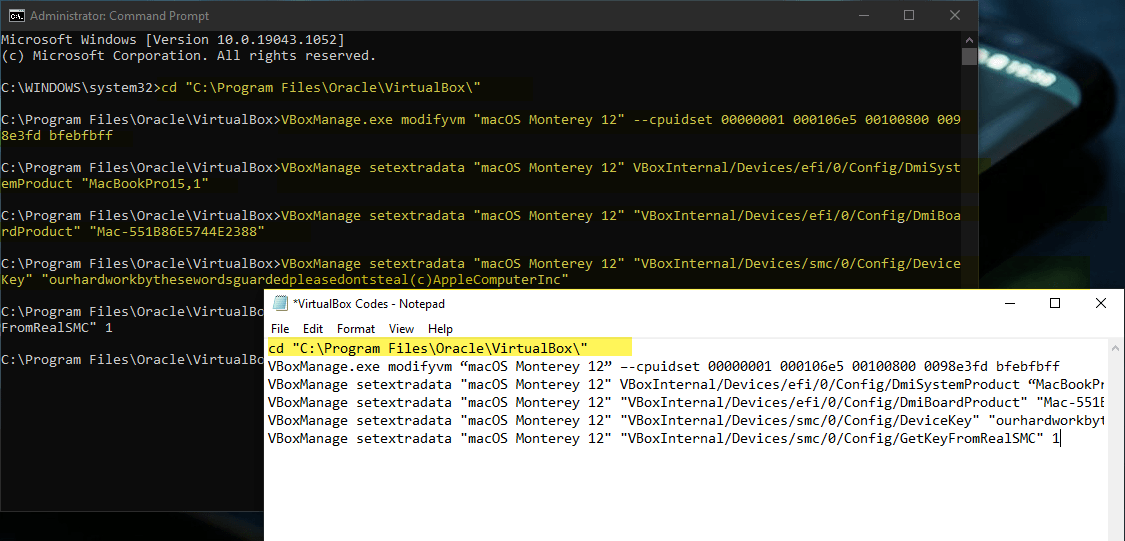
Step 4. Add Commands to CMD
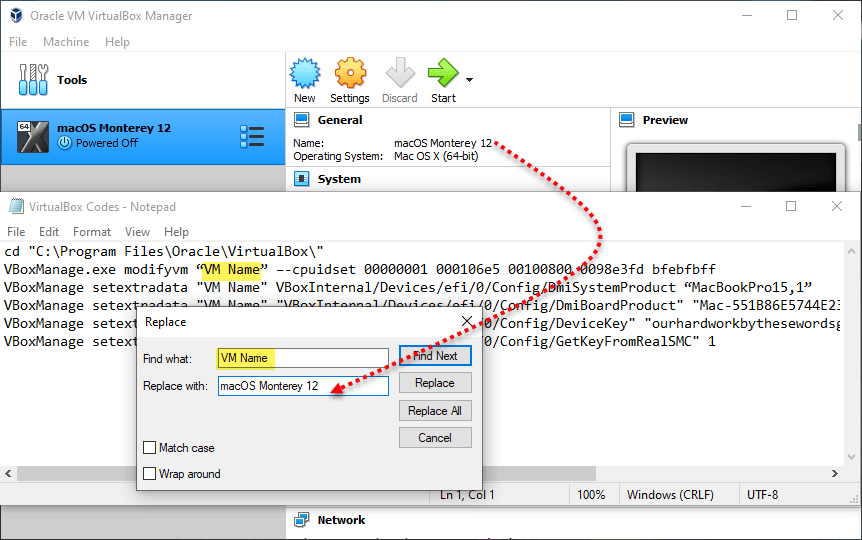
The below down codes will allow you to install macOS Monterey on VirtualBox on Windows PC. Without this code, you won’t be able to install the macOS Monterey. The codes mean the configuration of macOS Monterey on VirtualBox on Windows PC. So, be aware to apply codes properly on the CMD window, with the following steps.
cd "C:\Program Files\Oracle\VirtualBox\"
VBoxManage.exe modifyvm “VM Name” –-cpuidset 00000001 000106e5 00100800 0098e3fd bfebfbff
VBoxManage setextradata "VM Name" VBoxInternal/Devices/efi/0/Config/DmiSystemProduct “MacBookPro15,1”
VBoxManage setextradata "VM Name" "VBoxInternal/Devices/efi/0/Config/DmiBoardProduct" "Mac-551B86E5744E2388"
VBoxManage setextradata "VM Name" "VBoxInternal/Devices/smc/0/Config/DeviceKey" "ourhardworkbythesewordsguardedpleasedontsteal(c)AppleComputerInc"
VBoxManage setextradata "VM Name" "VBoxInternal/Devices/smc/0/Config/GetKeyFromRealSMC" 1
Copy the above codes in the notepad window, then click on Edit>Replace. And copy the Virtual Machine and replace it with the VM Name. Once that is done simply click on Replace All to replace all the VM Names on the codes.
Now navigate to Windows start menu type there “CMD” once it appeared, right-click and Run As Administrator.
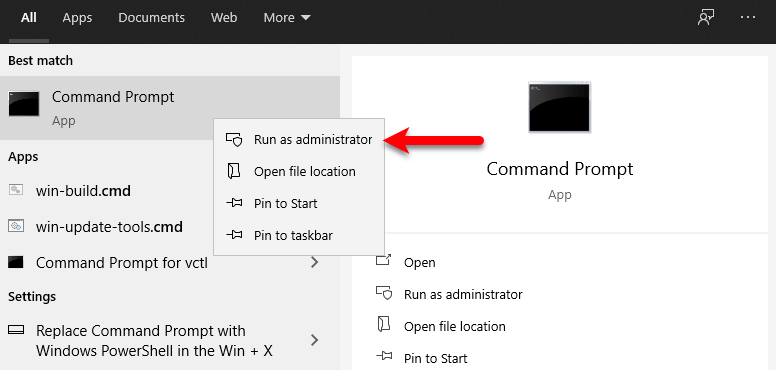
Now copy each line step by step on the CMD window and press enter.
Step 5. Perform a Clean Installation of macOS Monterey on VirtualBox on Windows PC
And now it’s time to perform a clean installation of macOS Monterey on VirtualBox on Windows PC. We have completed all the requirements step by step guide with the complete process. Therefore, now open up the VirtualBox and start installing the macOS Monterey.
For installing the macOS Monterey fire up the VirtualBox and select the created virtual machine of macOS Monterey and click on the Start option.
Note: Be sure that the virtual machine which you are creating should be similar to the below down screenshot.
- Once you launched the installation wait until the first screen full of codes should proceed.
- On the first screen of installation choose your language and click on the arrow option.
- In the recovery choose the Disk Utility and click continue.
- When the Disk Utility opened from the left-handed window side, choose the Virtual Disk which you have created for macOS Monterey. And click on Erase>Choose the name> Format=APFS>Scheme=GUID Partition map and click on Erase.
- Once the disk erased click on Done and close the Disk Utility.
- Now choose Install macOS 12 Beta and click continue.
- To set up the installation of macOS click continue.
- Agree with the terms and conditions of macOS Monterey.
- Select the disk where to install macOS Monterey and click continue.
- And now it starts installing macOS Monterey, wait until the installation should be completed.
- During the installation, the Virtual machine will restart several times.
[metaslider id=5613]
Step 6. Complete the Basic Settings of macOS Monterey for the First Use
- Choose the country where you live and click continue.
- Choose your written and spoken language, if you do not agree with the default preset click on Customize settings and click continue.
- On the Accessibility window simply click not now.
- Select, my computer does not connect to the internet and click continue.
- On the next window again click continue.
- In the Data & Privacy window simply click continue.
- On the Migrant Assistant, window click on Not now.
- Agree with the terms and conditions of macOS Monterey.
- Create your computer and account and click continue.
- On the next window simply click continue.
- On-Screen Time window click Sign Up Later.
- On Siri, the window click continues and enables it.
- Choose your language for Siri and click continue.
- On the Improve & Siri Dictation click Not now and click continue.
- Choose your look for macOS Monterey on VirtualBox on Windows PC and click continue.
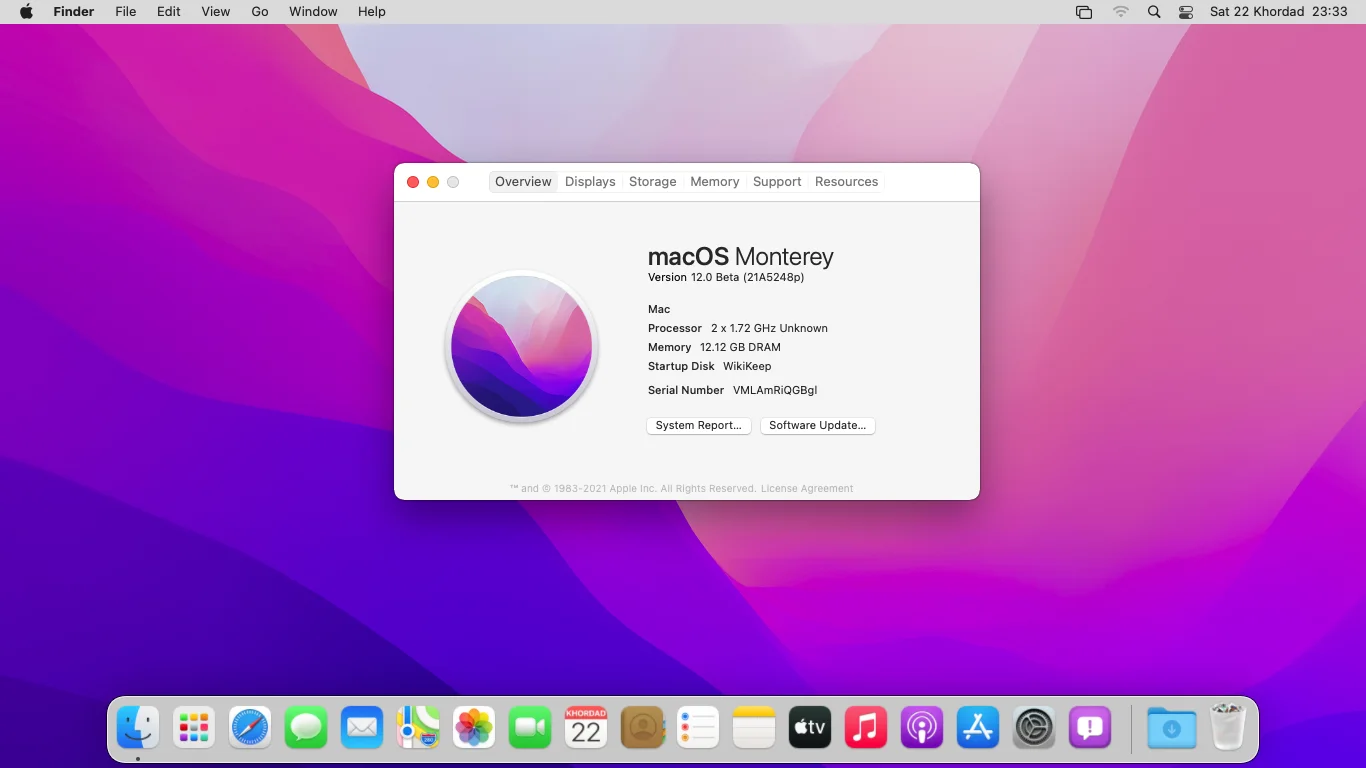
- Wait that macOS Monterey should be ready for the first use.
- And Finally, macOS Monterey is successfully installed on VirtualBox on Windows PC.
[metaslider id=5524]
Final Point
Finally, macOS Monterey is being installed on VirtualBox on Windows PC. If you enjoyed reading this article we will happy that you should share your nice comments about this article in the below down comment section. And the only last thing is remaining in this part is to enter macOS Monetere full-screen mode on VirtualBox on Windows PC. However, if you faced any kind of problem feels free to share with us via the comment box section.