macOS Big Sur is the biggest and first operating system inspired by iOS 14. All the feature categories of iOS 14 are now available in macOS Big Sur including lots of features, and Applications. In macOS Big Sur now lots of iOS 14 Applications is available that due to that the users announced macOS Big Sur is being inspired by iOS 14.
macOS Big Sur 11 is the first operating system that starts with 11 series version. On the other hand, there will not be any more 10 series of macOS. macOS Big Sur looks great to install on Macs, MacBooks, and Laptop, or even Intel-based processors computers.
If you are facing lake of Mac PC, then we offer you the three best virtualization platforms to test macOS Big Sur or any other series of macOS versions. Like VMware Workstation, VirtualBox, Hyper-V, allow the portability to run different operating system including macOS, Android OS, Windows on it.
We have covered each and everything since macOS Big Sur released in the market in Beta version. Firstly, we create a macOS Big Sur ISO file, then we have performed a clean installation process on VMware Workstation and VirtualBox. If you don’t know how to do it then check out the below links
- How to Install macOS Catalina 10.15 on Laptop – Complete Guide
- How to Install macOS 11 Big Sur on VirtualBox on Windows PC
- How to Install macOS 11 Big Sur on VMware on Windows PC
Install macOS Big Sur on Laptop
Installing macOS Big Sur on Intel-based processor laptop’s is possible. For its installation, you need to configure your computer BIOS according to the below down instructions. As through this guide, I will explore the way of installing macOS Big Sur Asus laptops which looks complicated, but it’s easy.
Required Files
- Download macOS Big Sur dmg (Installer file)
- Download OpenCore Configurator
- Download EFI files
- Download Commands
- 16GB Gigabytes USB Drive
Firstly to run macOS Big Sur on the laptop to create a Bootable USB drive, which is pretty easy. Whether you are a Windows user or Mac user. Creating a Bootable USB drive for macOS Big Sur on both OS is easy. How to do that, check out the below links.
- How to Create a Bootable macOS Big Sur USB Installer
- How to Create macOS Big Sur Bootable USB Drive on Windows & Mac
Sometimes the EFI doesn’t work for every computer, but for a proper EFI, you need to create an OpenCore EFI file. The EFI files may contain the fixes files such as WiFi, Bluetooth, Sound, Graphics display drivers. To create an OpenCore EFI file related to your PC hardware check the below link.
Change Laptop BIOS Settings for Installation
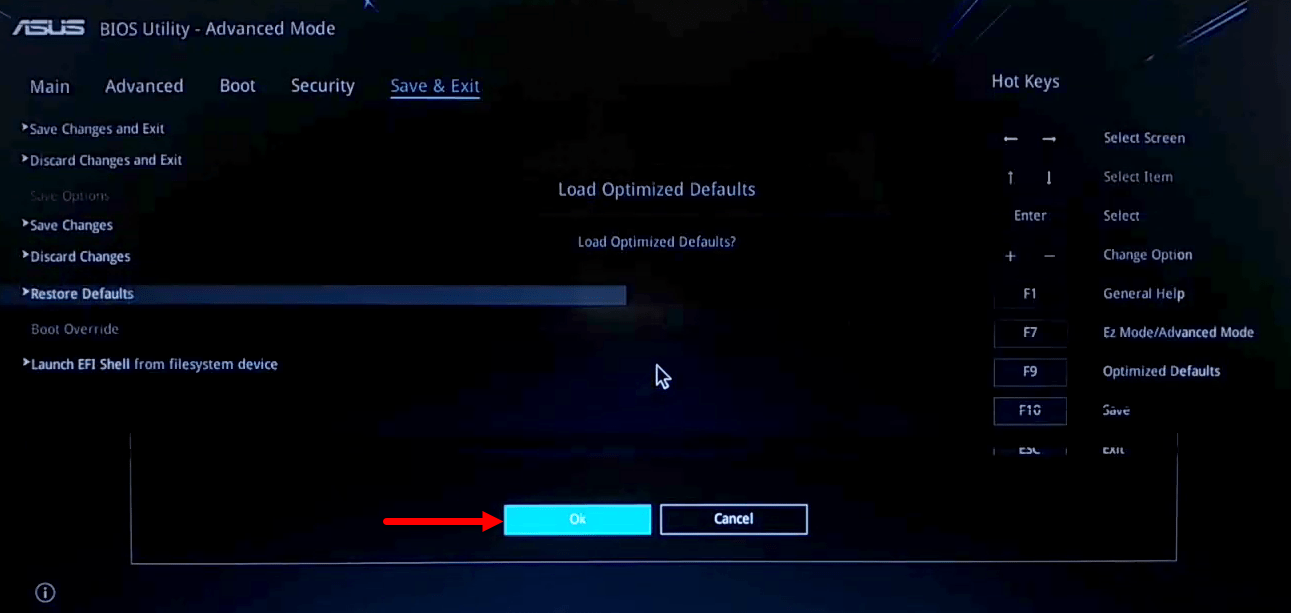
For installing macOS Big Sur or any other version of macOS on Intel-based processors. You need to bring a few changes to BIOS settings. Restart your PC press the BIOS menu key, head over to the last tab “Save & Exit” select the “Restore Defaults” option and press the enter key and select OK.
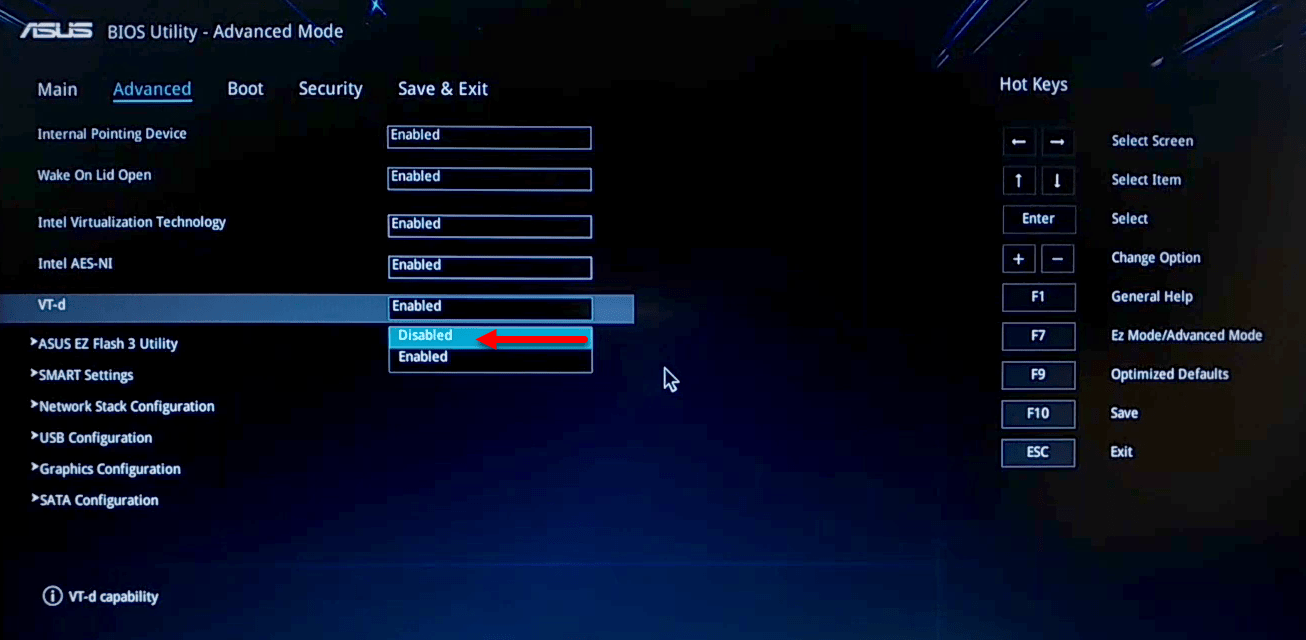
Select the “Advanced” tab select “VT-d” press enter and select the “Disabled” option.
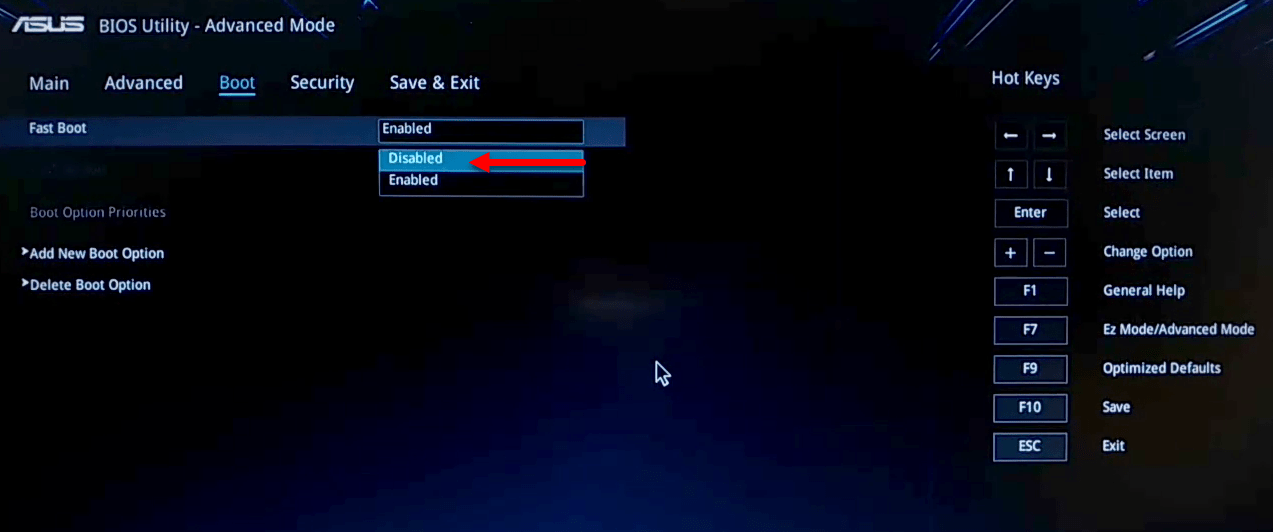
Select the “Boot” tab, select the “Fast Boot” option press enter, and select the “Disabled” option.
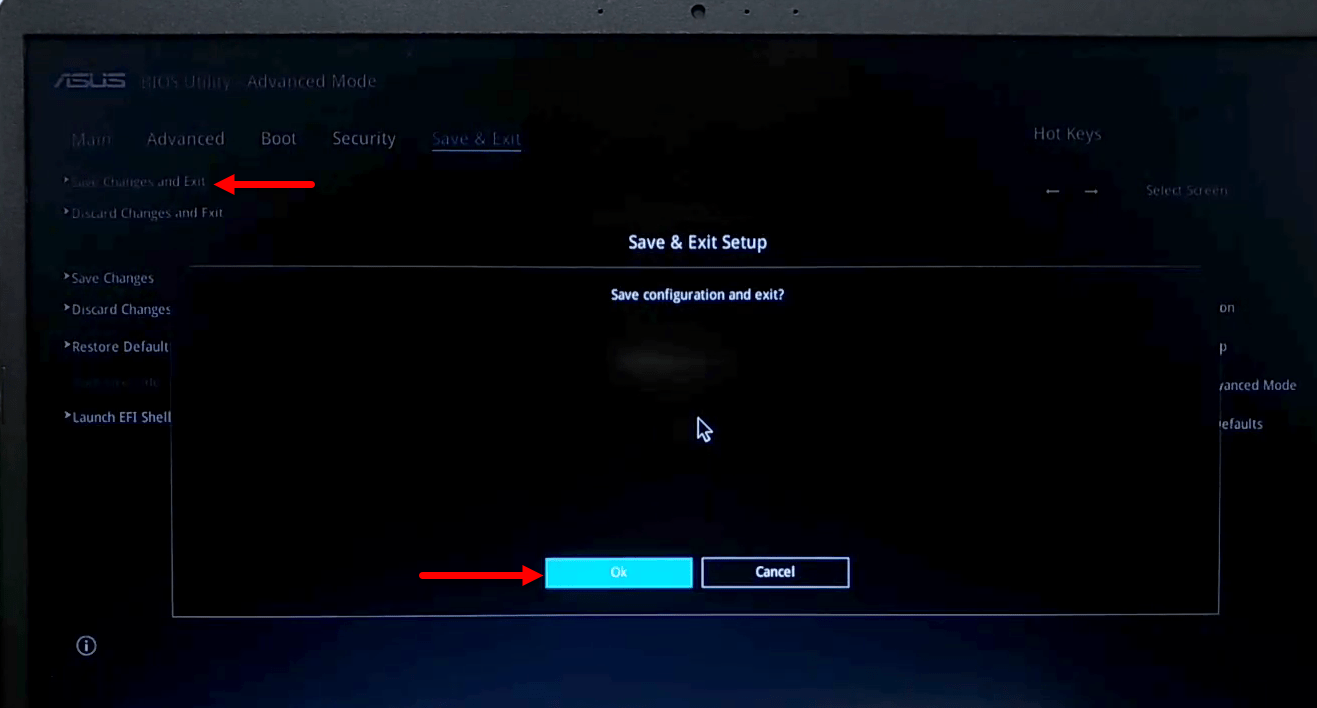
When the BIOS settings changed head over to “Save & Exit” select “Save Changes and Exit” and press and select OK.
Install macOS Big Sur on Laptop
Now you are ready to perform macOS Big Sur installation on the laptop, attach the USB drive then restart your PC and press the Boot menu key. When the Boot menu appeared select USB flash drive and press the enter key to boot into macOS Big Sur.
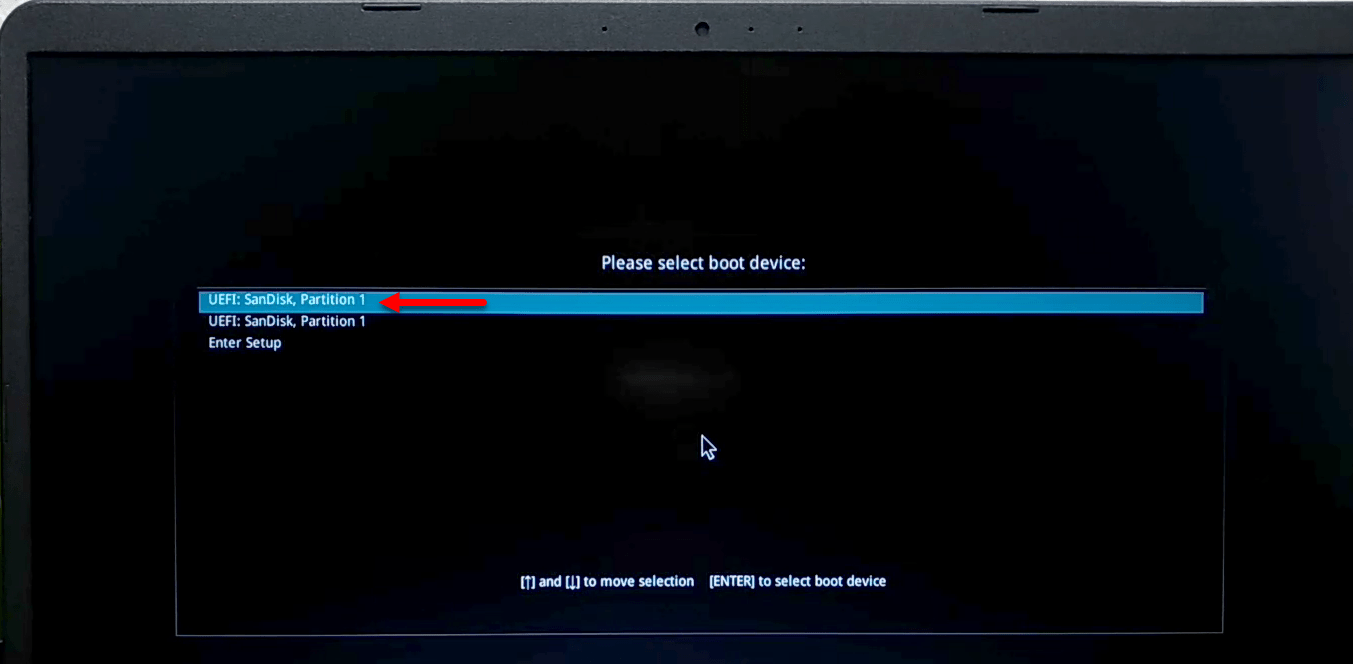
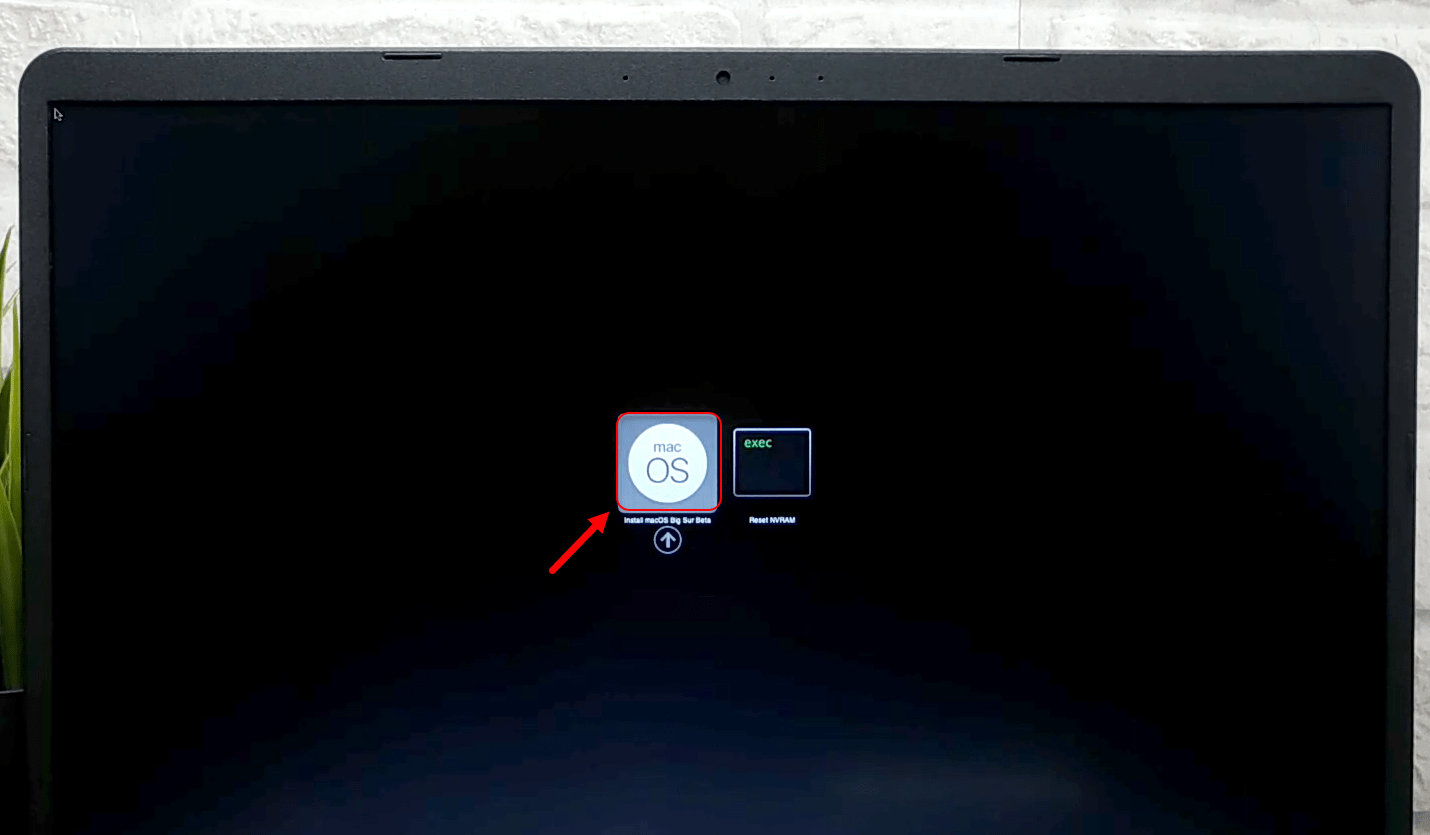
Select install macOS Big Sur and press enter.
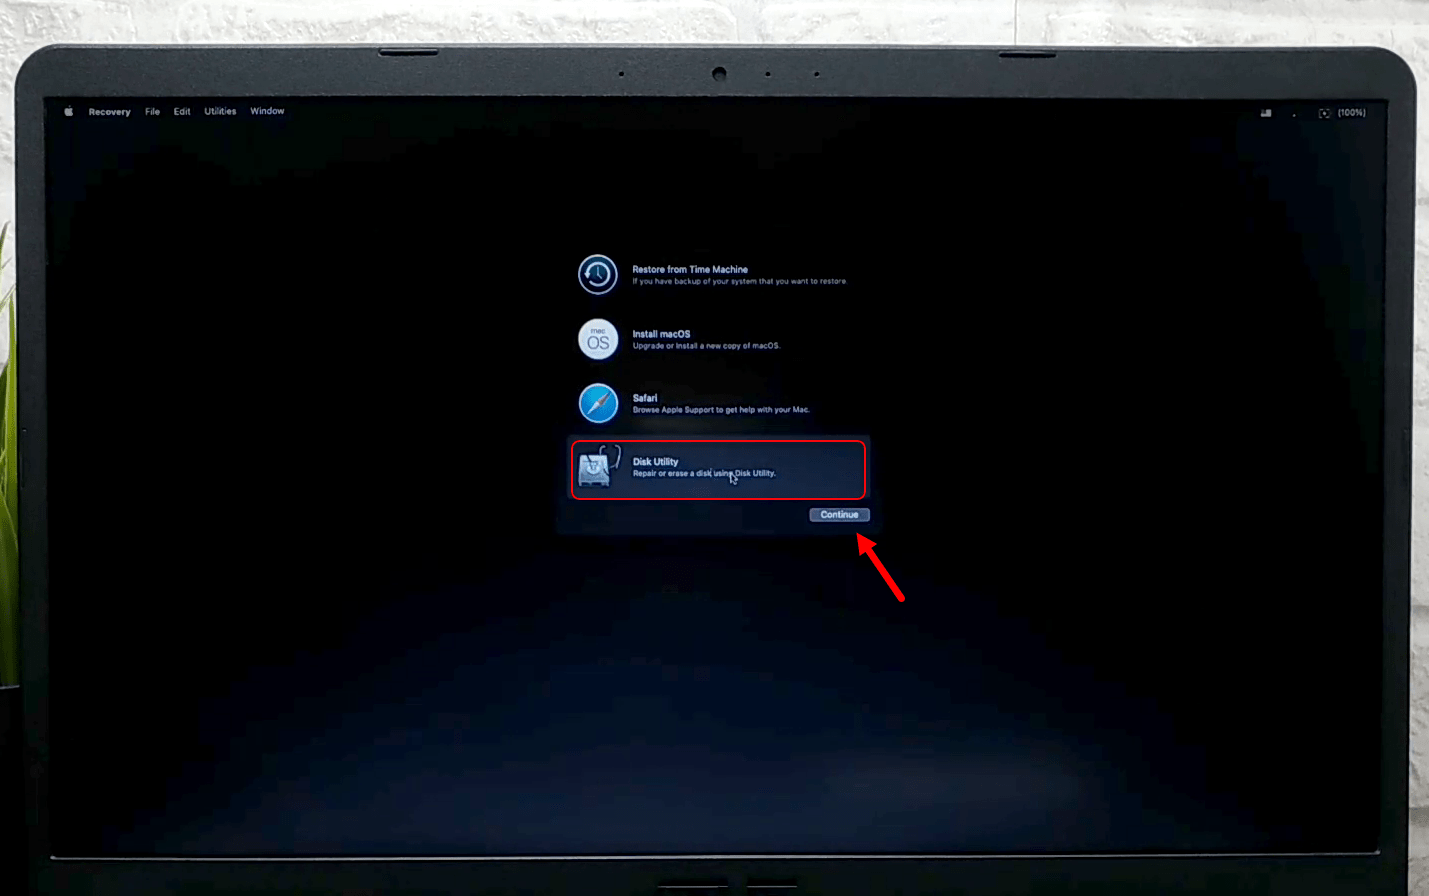
From the recovery window select “Disk Utility” and press the continue option.
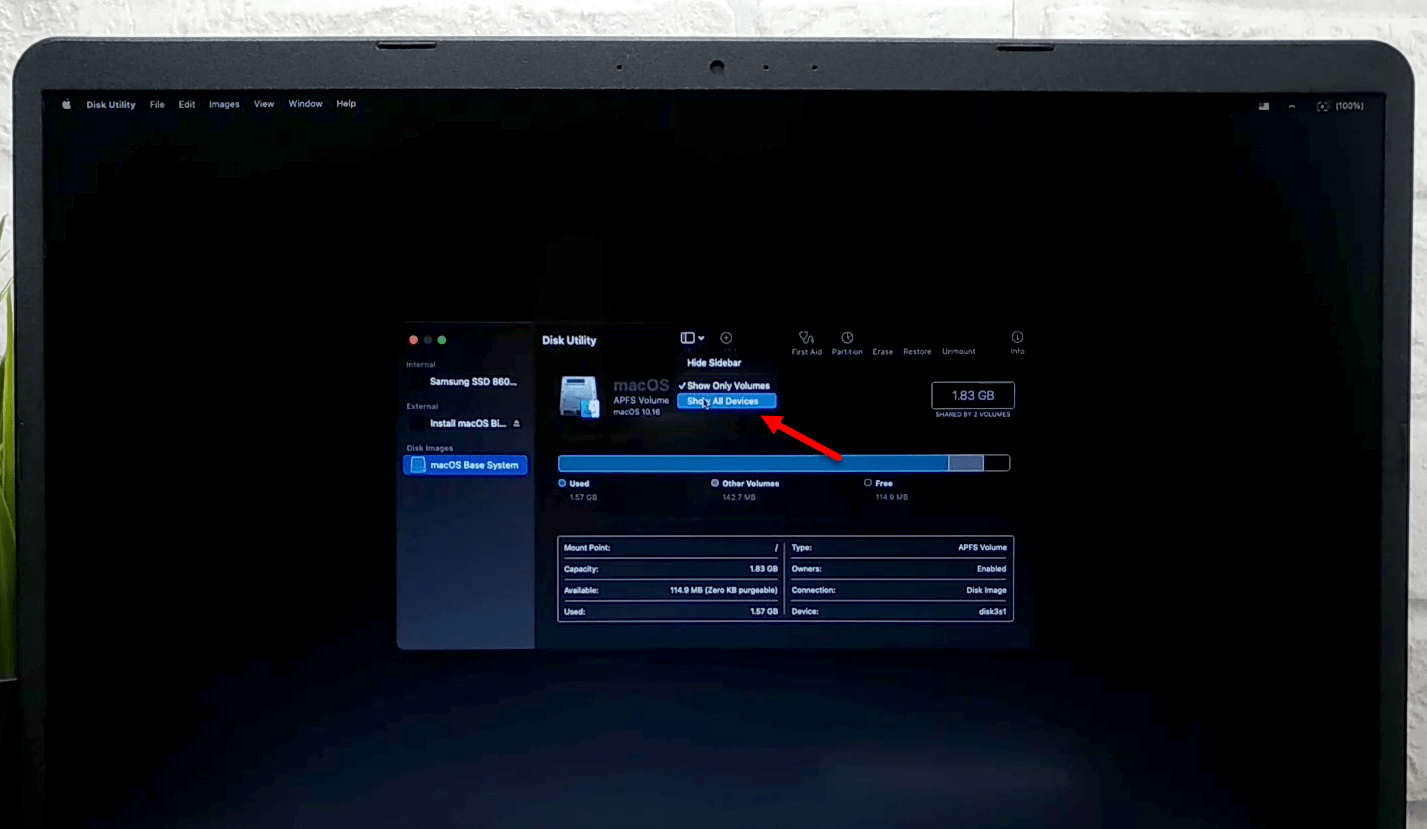
If the drives are hidden here click on the “View” option and select “Show All Devices”.
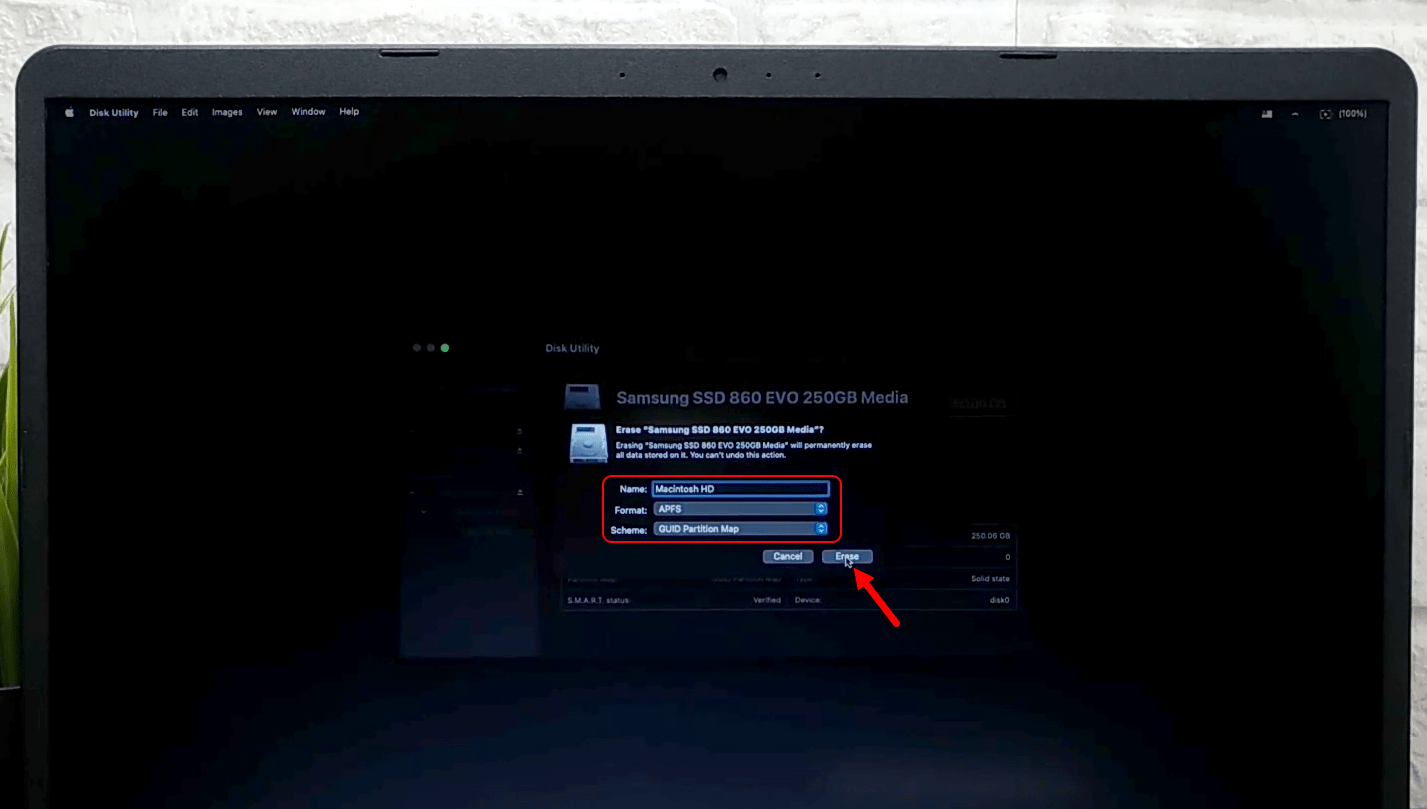
Select the drive where you want to install macOS Big Sur on that, and format the drive according to the following settings.
- Name: Macintosh HD
- Format: APFS
- Scheme: GUID Partition Map
When you cleared the settings, click on the Erase option and wait until the drive should format. While the drive format clicks on the Done option and close the Disk Utility window.
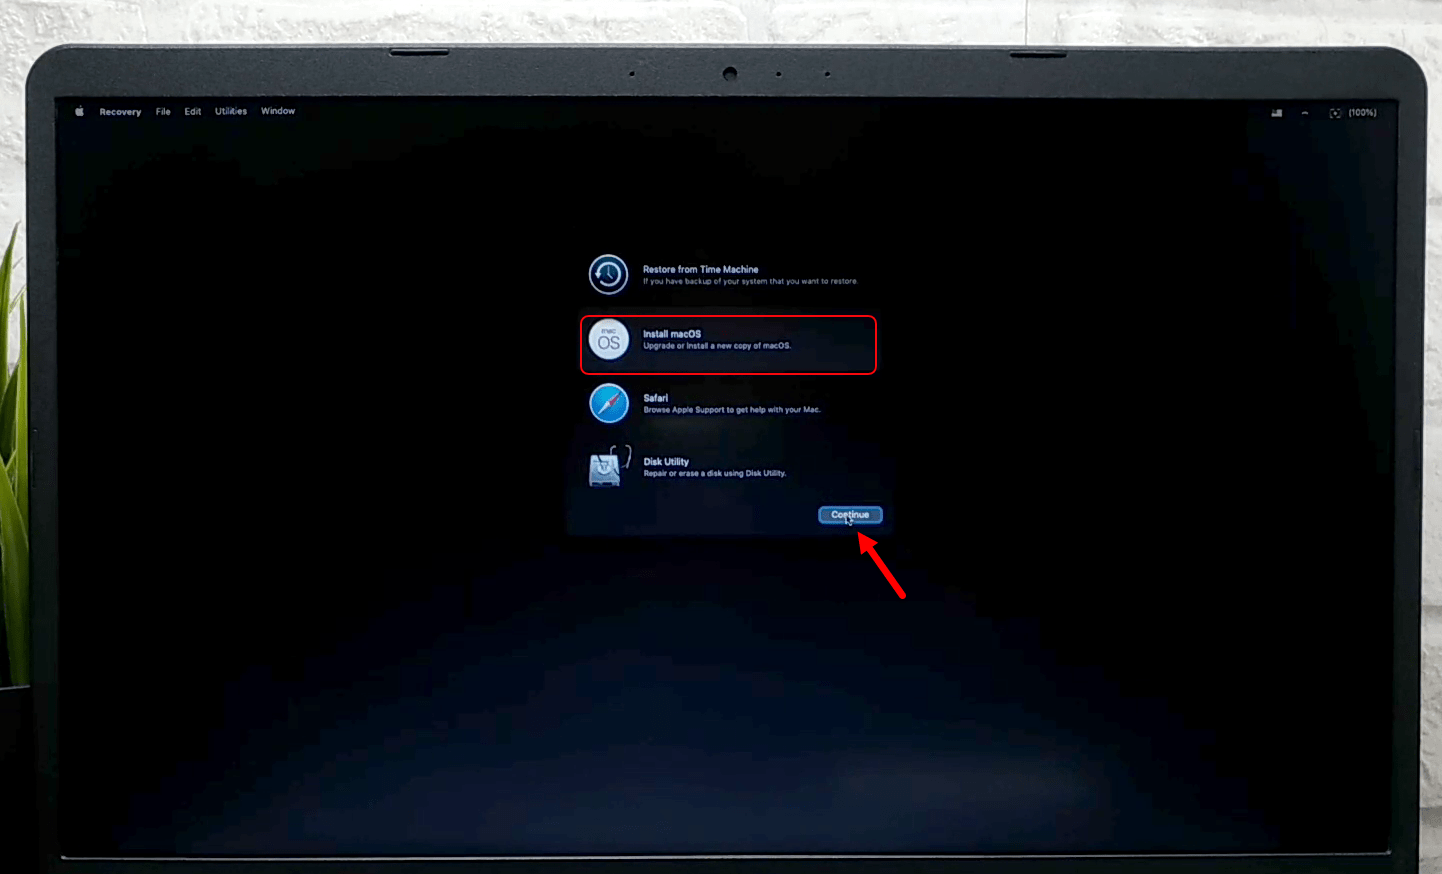
Again from the recovery window select “Install macOS” and click on continue.
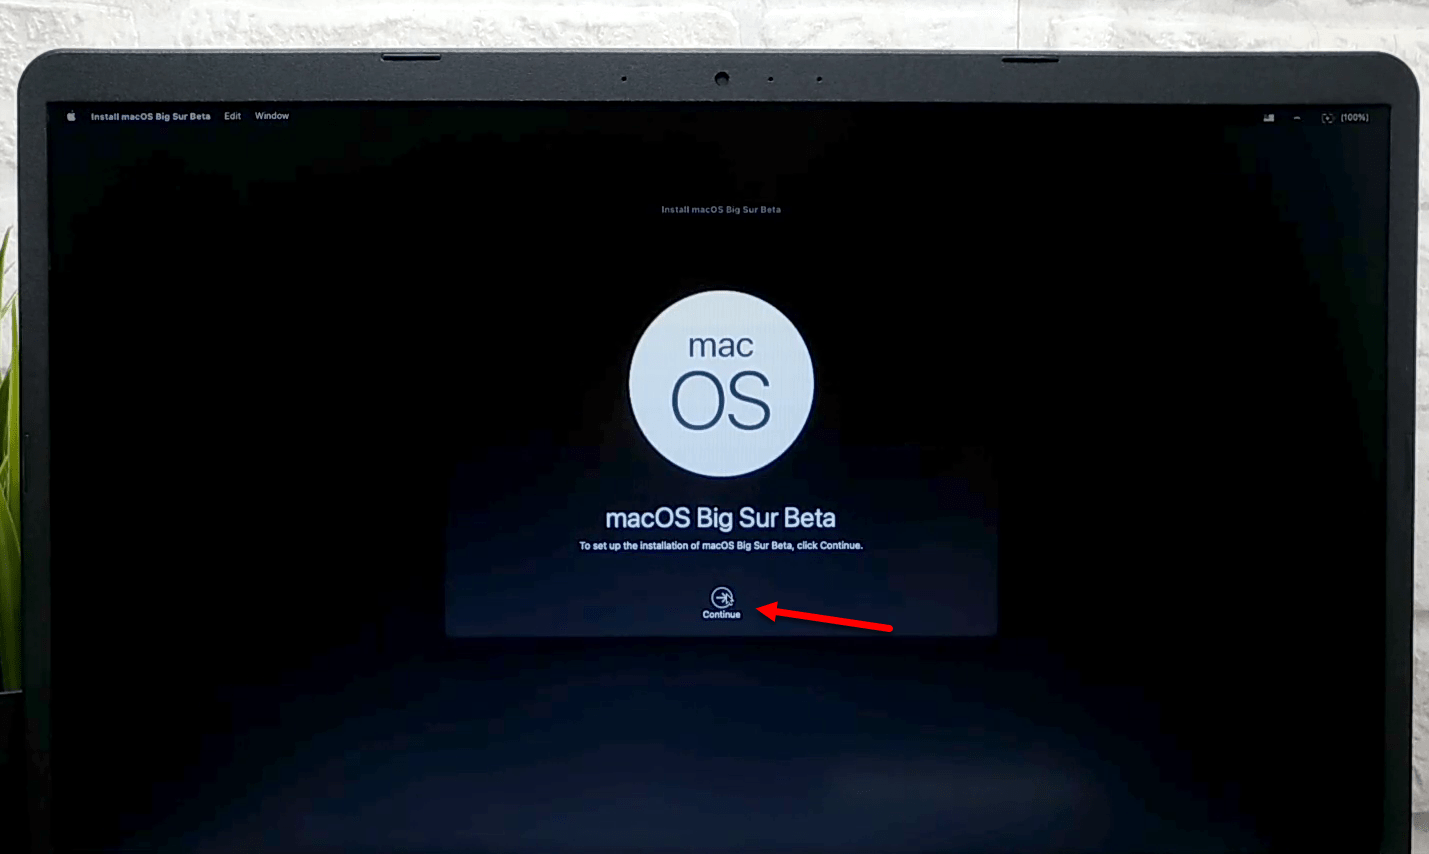
To set up installation of macOS Big Sur, click continue.
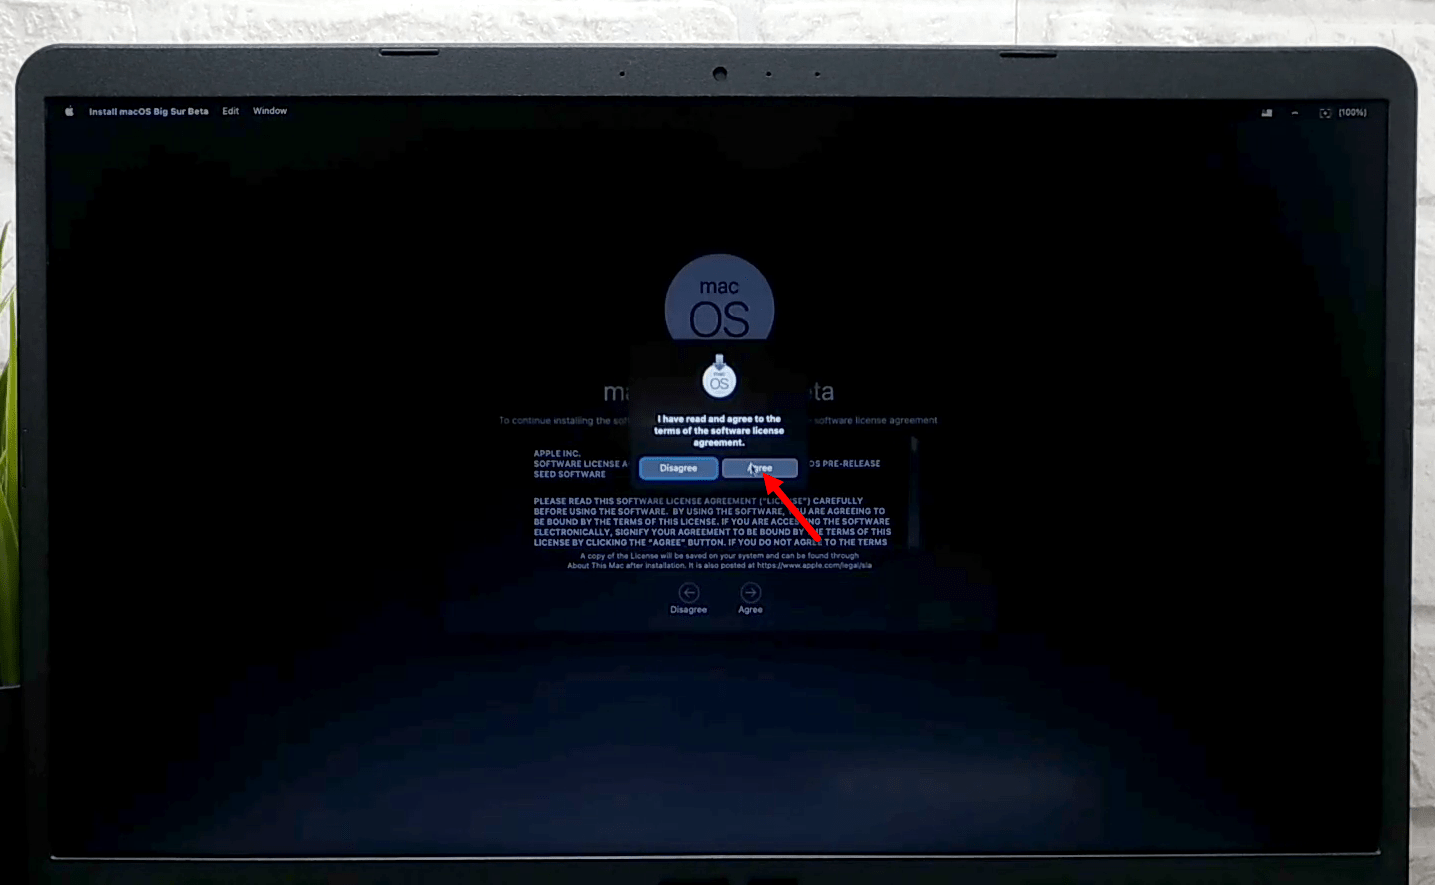
Agree with the terms and conditions of macOS Big Sur.
Select the drive where you want to install macOS Big Sur and click on Install.
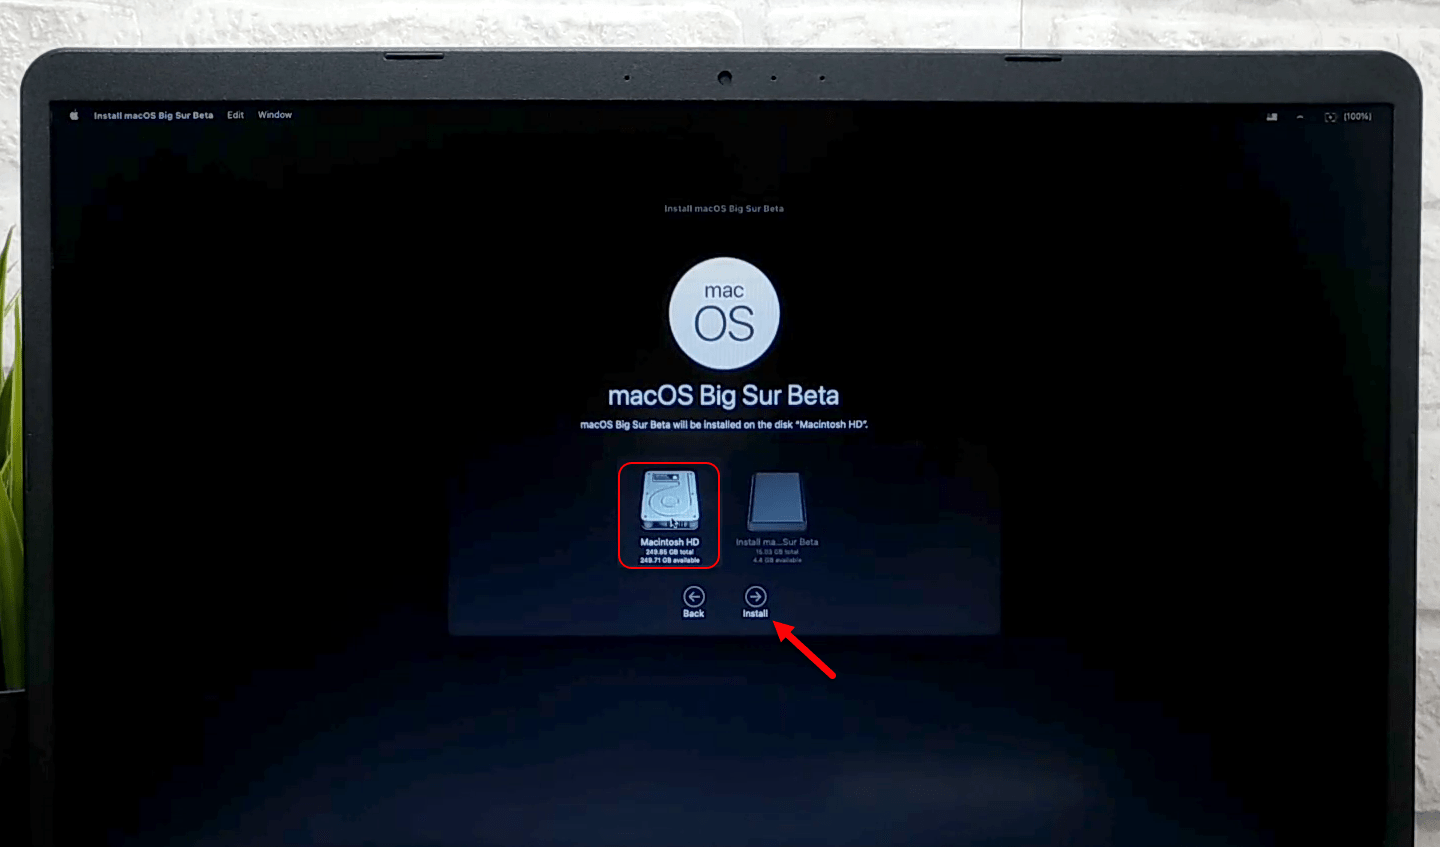
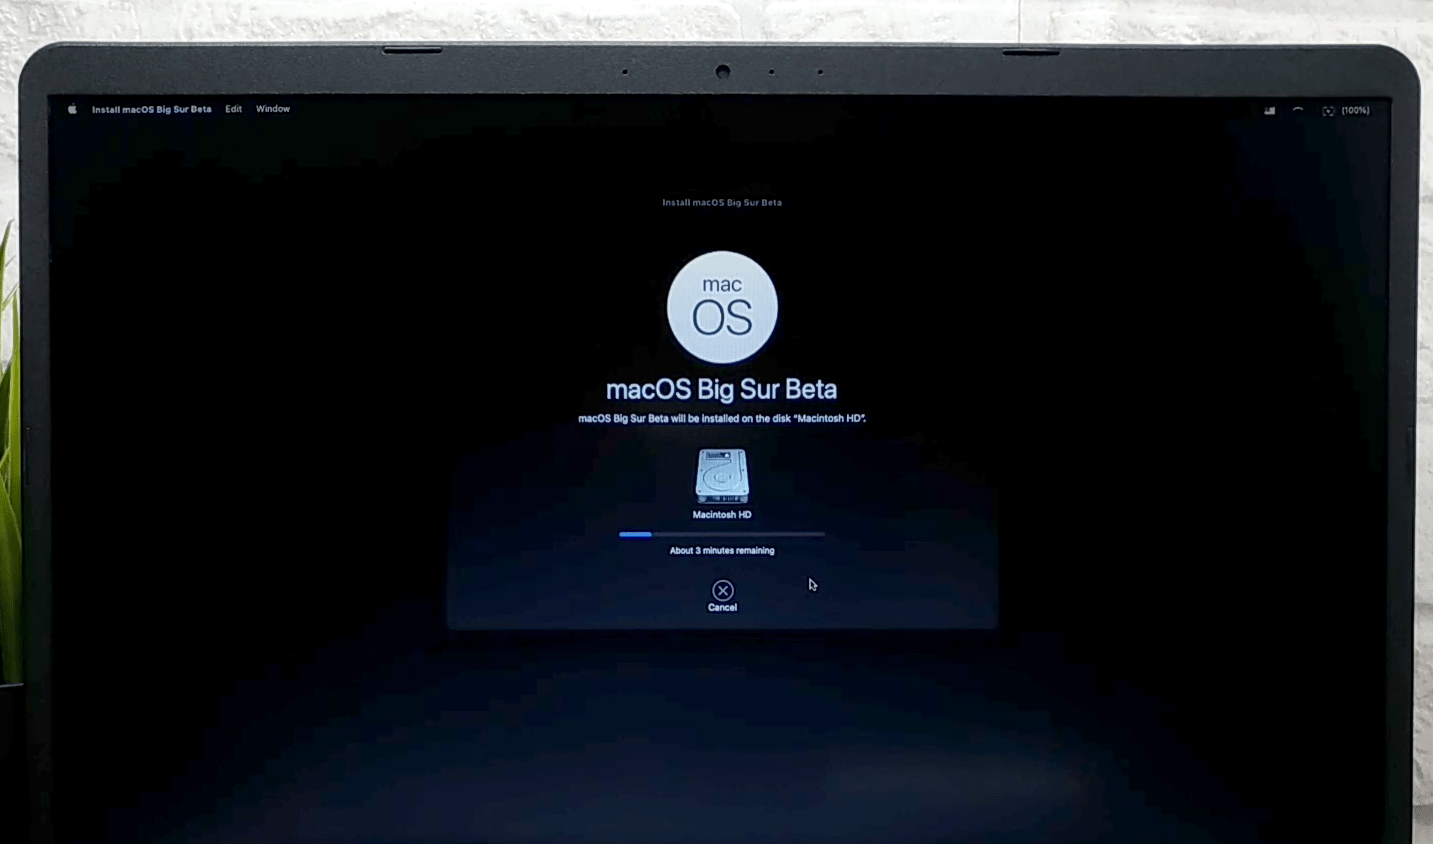
Wait until macOS Big Sur installation should complete, once the installation completed automatically your PC will restart. Again after restarting wait for the next step of the installation to be completed.
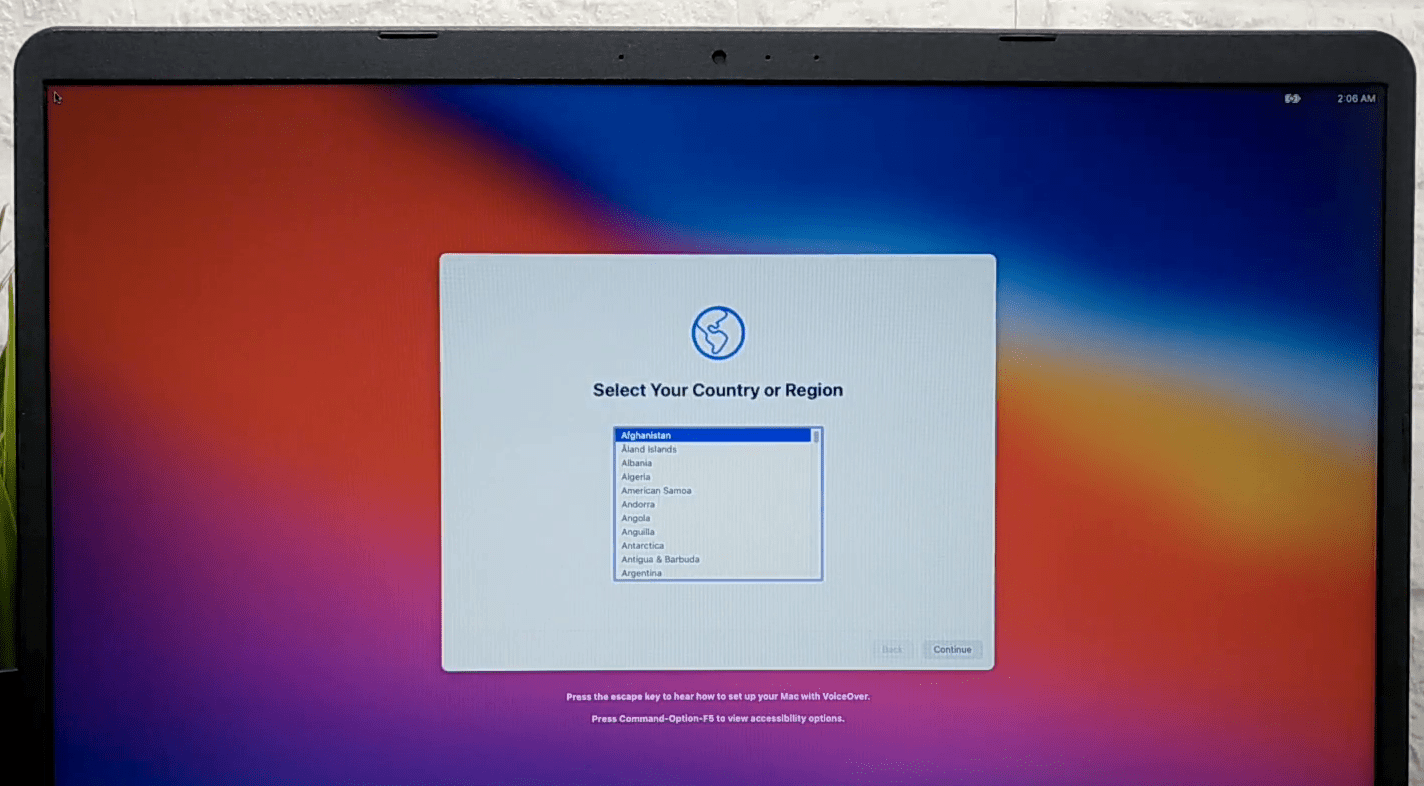
Complete macOS Big Sur Basic Settings
When the installation of macOS Big Sur completed, so complete the basic settings with selecting your country and region.
Mount the Partition
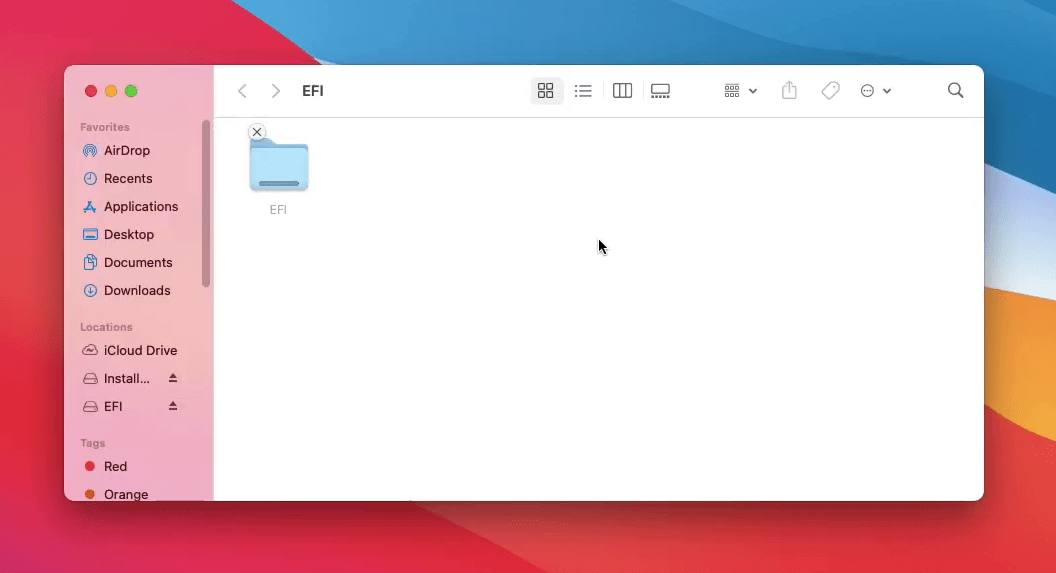
When the basic settings of macOS Big Sur completed, head over and mount the EFI partition of system drive and USB flash drive via OpenCore Configurator.
Attach your USB drive copy the OpenCore Configurator to desktop. Double-click to open it, and mount the EFI partition of USB drive and the system drive.
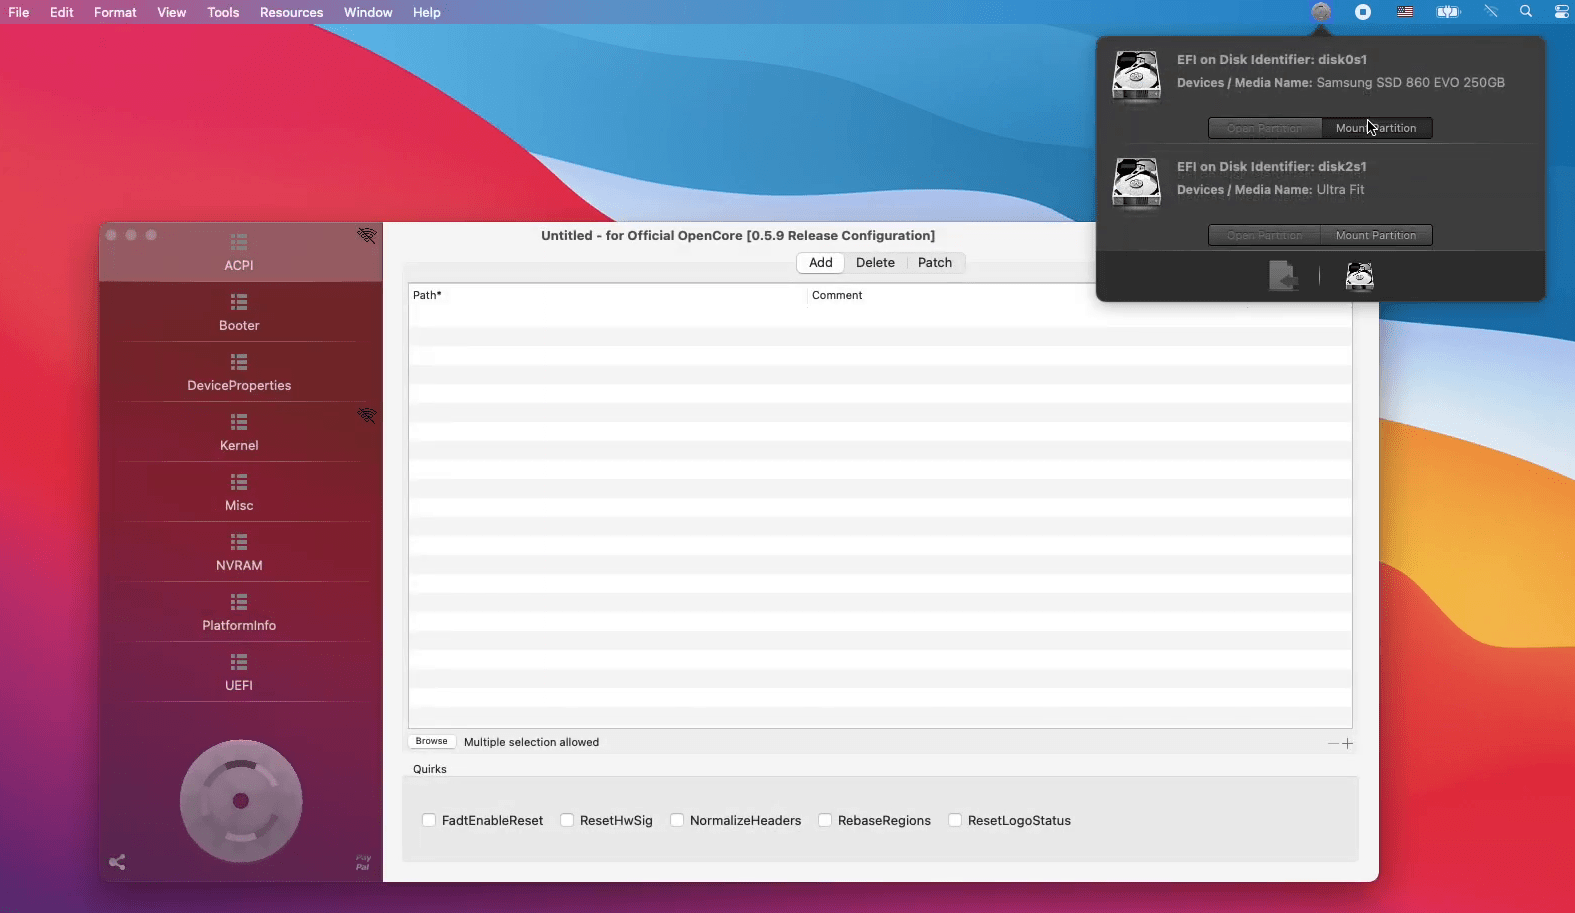
Once the partition mounted to your desktop copy the EFI file from USB drive, and paste it into the system drive then restart your PC.
While your PC restarted check the below down settings are working properly on macOS Big Sur.
And finally macOS Big Sur is being installed on laptop PC, if you faced any issue use the below down comment section.
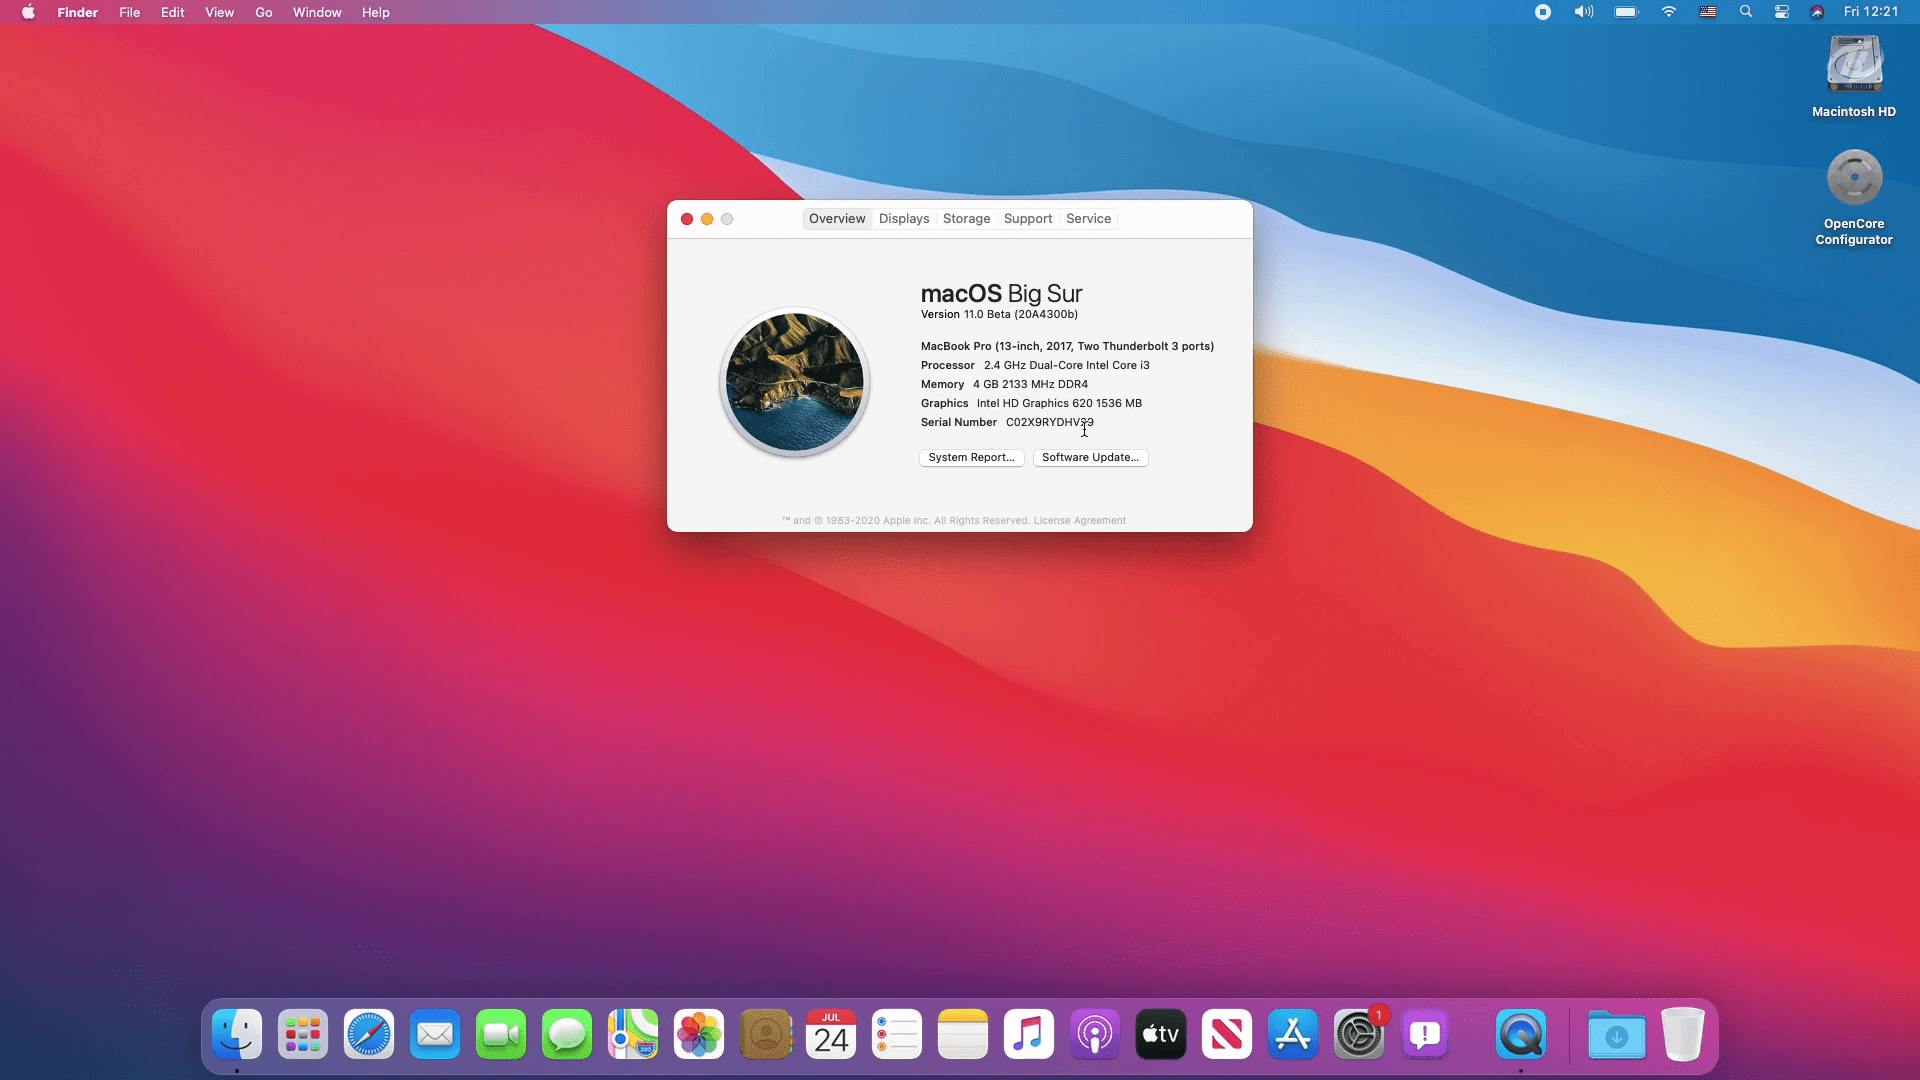
Now macOS Big Sur is available in Beta version 3, further macOS Big Sur will be available in Public Beta version. And also, Apple released the Beta 3 update a few days ago, if you are using macOS Mojave 10.14 or macOS Catalina 10.15 on your PC. Directly you can update through the “System Preferences” and “Software Updates”. And Apple Inc will kick out the final version of macOS Big Sur later this year in October or September. Stay tuned with us because we will update every time macOS Big Sur installation file and other required files.
Related:

Where you used the commands download files. I don’t see anywhere
Commands for creating Bootable USB Drive
How is the support for graphic drivers and others like BT and Wi-Fi?