
macOS Big Sur version 11.0 is the next biggest release of Apple Inc operating system for Macintosh computers. It is the successor to macOS Catalina 10.15 version 10.15. The macOS 11 Big Sur was announced at the “Apple Worldwide Developer Conference” on June 22, 2020. You can get macOS Big Sur in Beta version now, and the Public Beta scheduled for July to be released.
The primary version number of operating systems has been incremented for the first time with the release of Mac OS X Beta 2000. macOS Big Sur features are a major of new interface user design, support for iOS and iPadOS, and also are designed to the Apple future Macs with ARM Processors. A refreshed design to macOS Big Sur, Control Center for Wifi and Bluetooth connectivity, Notification center, Support for Apple Designed ARM processors, Support for iOS and iPadOS apps, Signed system volume, Software updates, Spotlight, improvements to Safari, Messages, App Store, Notes, Photos, Maps, and New Apps introduced in Mac Catalyst.
Related:
Unfortunately, macOS Catalina, which supported the standard configuration Mac that Mojave supported, now macOS Big Sur drops support of various Macs released in 2012 and 2013. The below down is the list of Macs that are compatible with macOS Big Sur.
- MacBook Early 2015 or newer
- MacBook Air Mid 2013 or Newer
- MacBook Pro late 2013 or newer
- Mac Mini Late 2014 or newer
- iMac Pro
- Mac Pro Late 2013 or newer
Create macOS Big Sur Bootable USB Drive on Windows & Mac
Required Files:
- macOS Big Sur installer file
- At least 16GB Pen Drive
- TransMac (Download)
Testing macOS Big Sur with its new features is much interesting, but before that, you need to prepare some requirements such as macOS Big Sur image, Create a Bootable USB Drive, and a compatible machine that should support macOS Big Sur. Now macOS Big Sur is available in the Beta version in App Store, that you can download from there. Beta version means the Developer version, that only developers can download the file.
No worries we covered each and everything for you to download macOS Big Sur installed file free without Developer account, check the below link.
Create Bootable USB Using TransMac
TransMac is an application for Windows users for file management to read, write, and format Mac disks in your PC. A Windows application that allows you to open the Mac-formatted devices and drives on your Windows machine. Alongside this, most of the people are using the TransMac software on their Windows PC for creating Bootable USB Drive. The same here I want to use TransMac, as before I used this software for creating macOS Catalina 10.15 Bootable USB Drive. And the TransMac gives me the positive result on Windows PC.
TransMac is non-paid software for Windows users, therefore, for using TrasnMac full version you need to pay money. But TransMac has the limitation of 15-days trial to use it for free.
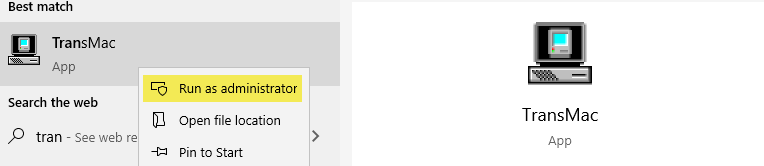
Download and install TransMac on your Windows PC, then attach the USB Drive. And run TransMac software as Administrator.
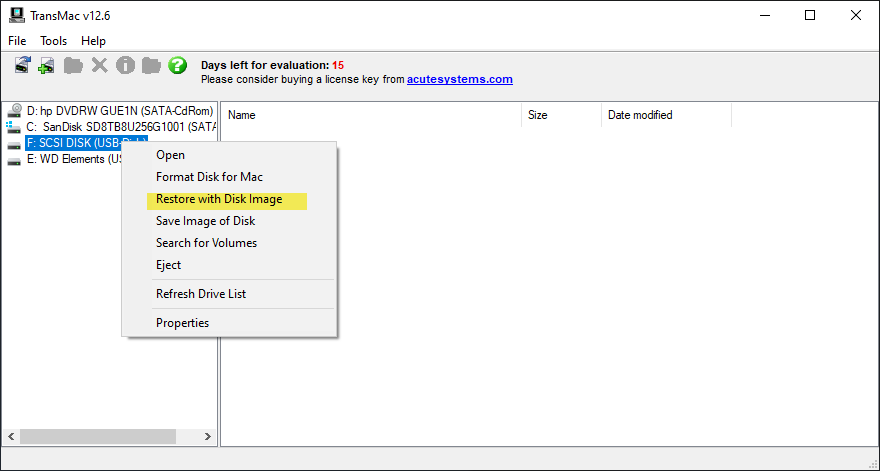
Select the USB Drive from left-handed, then right-click and select (Restore with Disk Image).
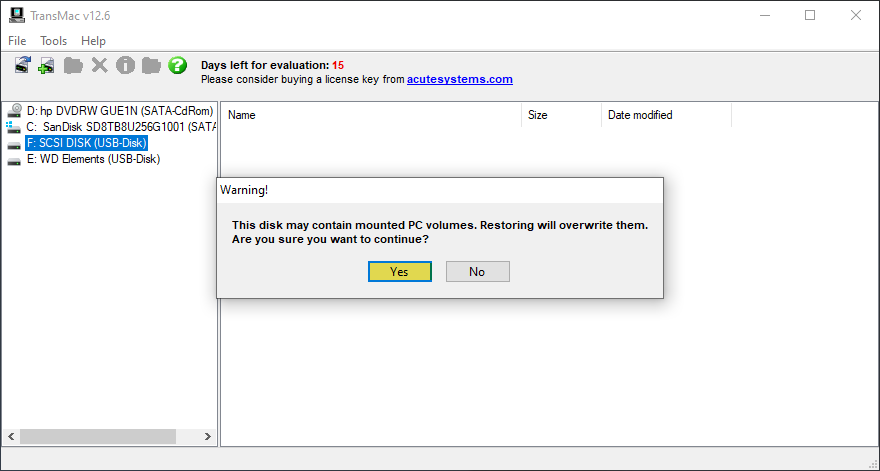
In here you will face Warning! the disk may contain mounted PC volume, simply click “Yes”.
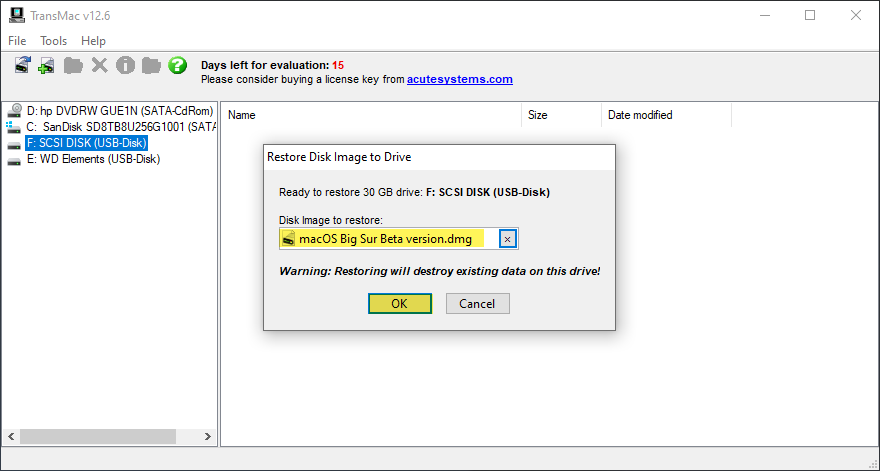
Now click on three dotes then select the macOS Big Sur dmg file and click Open. Be sure that macOS Big Sur dmg file inserted then click OK.
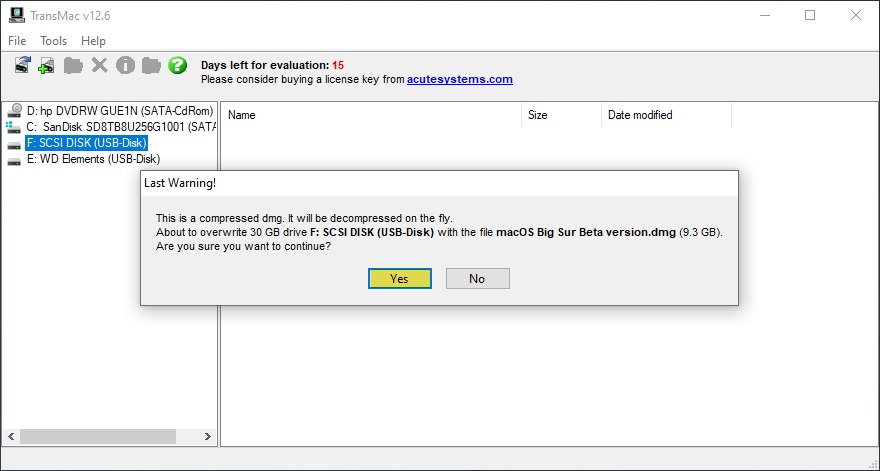
And this will be the last Warning! this is a compressed dmg, it will be decompressed on the fly, again click “Yes” to go ahead.
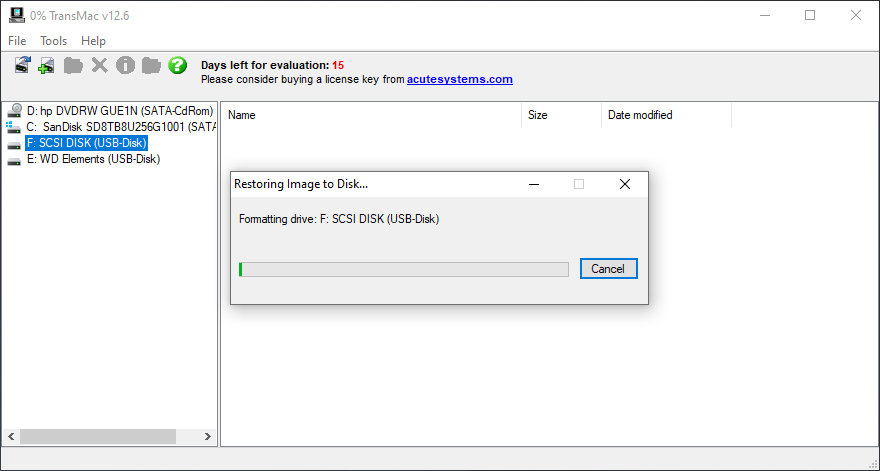
Now the TransMac will start copying the macOS Big Sur installer file to USB Drive, it will take some time, have patient, and don’t do anything.
Create Bootable USB Drive on Mac
When the macOS Big Sur installer file downloaded, then it will be much easy to create a Bootable USB Drive on Mac. For this process, you need to use “Terminal” and apply some commands.
- Firstly attach the USB Drive to your Mac
- Over ahead to search spotlight and search terminal
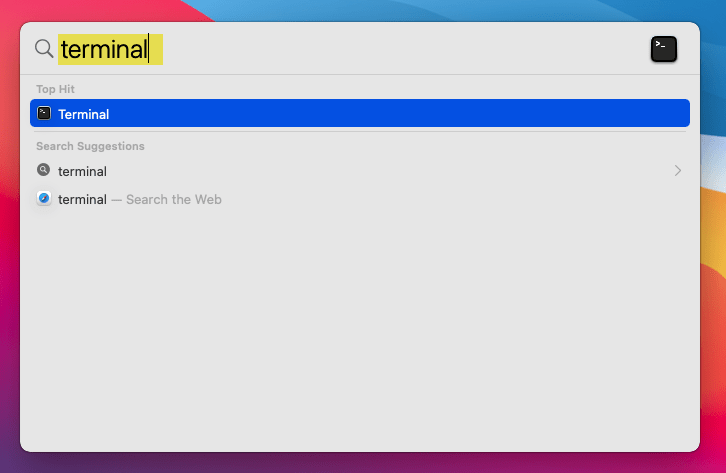
- Once terminal appeared press enter to open
- On the terminal window apply the below commands and press enter
sudo /Applications/Install\ macOS\ Beta.app/Contents/Resources/createinstallmedia --volume /Volumes/USB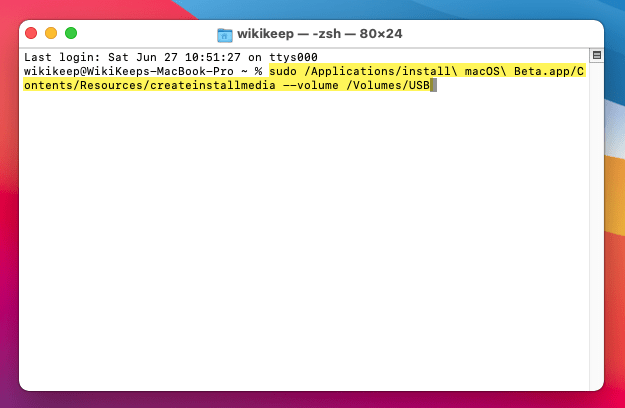
- Type your username password and press enter
- For the confirmation type “Y” and press enter
- Wait for the copying of the macOS Big Sur installer file to USB Drive.
Check out the related articles about creating macOS Catalina, macOS Mojave Bootable USB Drive on Windows, and Mac.
Hey bro my TransMac doesn’t show Restore with Disk Image option. What to do?
Have you followed my steps?