macOS Big Sur with 11.0 version released earlier this year with a bunch of +85 new features including New UI interface, Control Center, Curved Notification edges, Messages, and many more. On the other hand, it’s the first Apple operating system inspired by iOS 14. Most of the iOS 14 Apps brought in macOS Big Sur 11.
However, you must try out installing macOS Big Sur on VMware, and VirtualBox. But never thought about this that AMD processors also can support the macOS operating system. Since macOS Mojave 10.14 released the developers build specific commands. That gives the user the ability to run a macOS operating system on the VMware Virtualization machine as a second operating system.
The developers figured out the method of installing macOS on the VMware machine, as most of the users are saying it’s impossible but we sort out the complete method. Whenever, we take about AMD Processors, it means it covers all the AMD processors related to AMD Radeon, AMD Rayzen.
The PC which I want to install macOS Big Sur 11 on that is having the below down specifications. It means if you consist of this PC with the following specifications, then following our guide you can install macOS Big Sur on that.
Related:
- How to Install macOS 11 Big Sur on VMware on Windows PC
- How to Install macOS 11 Big Sur on VirtualBox on Windows PC
Install macOS Big Sur on VMware on AMD Processor
To perform installing macOS Big Sur on VMware with AMD Processor, you need some basic stuff to accomplished before getting ahead to the installation process. Like you need the VMware Workstation Pro setup, VMware Unlocker, macOS Big Sur VMDK/ISO file, and AMD Processor commands.
- Download VMware Workstation
- Download VMware Unlocker (GitHub)
- Download macOS Big Sur VMDK
- Download macOS Big Sur ISO
- Download WinRAR or 7Zip
As now macOS Big Sur is supporting Intel-based processors, it means it supports AMD Processors also. Because Apple Inc is developing the upcoming Macs computer with Intel processors. So, most of the users have installed macOS Big Sur on the Intel processors right now.
But again after creating macOS Big Sur Virtual machine you need to configure the machine to ahead the installation. And for the configuration (GitHub) developed a small piece of commands which allows you to continue to the installation. As for macOS Big Sur configuration on Windows 10 PC, we use the following commands “Smc.version = “0”, but for AMD processors we need other commands.
Install VMware Workstation+WinRAR+macOS Unlocker
First of all, to begin the installation we need to install VMware Workstation/ VMware Player. The second for the extraction of macOS Big Sur VMDK/ISO file you need to install WinRAR or 7Zip. The third for enabling macOS service on VMware you need to install macOS Unlocker.
Here one of the most important parts is macOS Unlocker without this you won’t be able to install any macOS products on VMware. macOS Unlocker is a small tool that gives the service of Mac OS X on VMware.
1. Update VMware Workstation
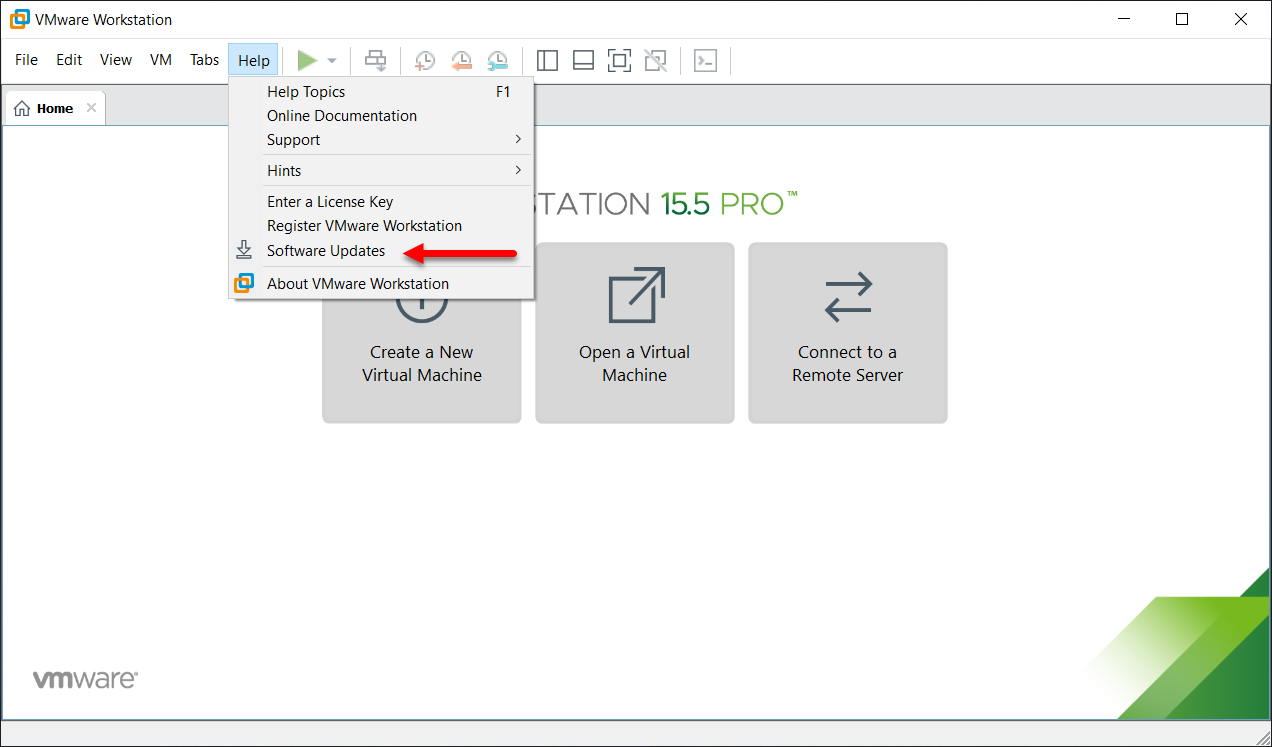
Installing VMware Workstation on AMD Processor and Windows PC is the same. I didn’t make it important to provide you the screenshots. Once the VMware Workstation installed, therefore, you need to update it to the latest version. For that open the VMware Workstation then from top-handed click on Help option and click on VMware Updates.
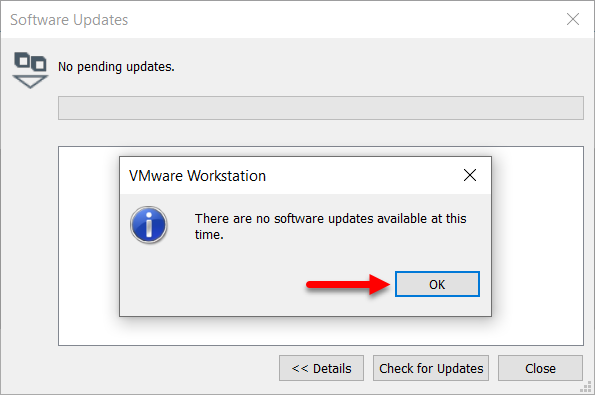
While the update window opened click on “Check for updates” option, await until it should search for the latest update. As here you can see that VMware Workstation has the latest update.
2. Install macOS Unlocker
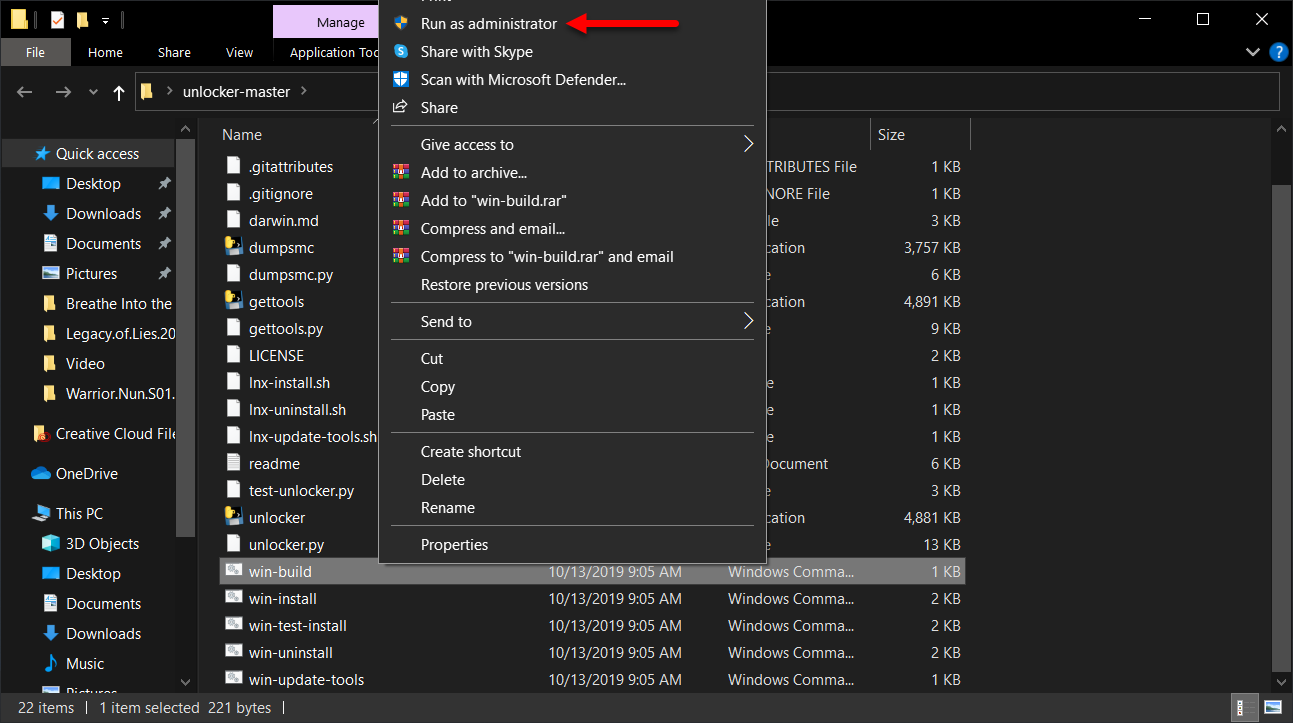
When you have downloaded macOS Unlocker from GitHub, the file will be compressed. Extract the file and scroll down and find the file Win-Install, right-click on that and “Run As Administrator”. Automatically, it will download the service compatible with your VMware version.
3. Extract macOS Big Sur VMDK+ISO file
For extracting macOS Big Sur vmdk and ISO file you need the WinRAR or 7Zip. While macOS Big Sur downloaded right-click on the 1st part and select “Extract Here”.
4. Create macOS Big Sur New Virtual Machine
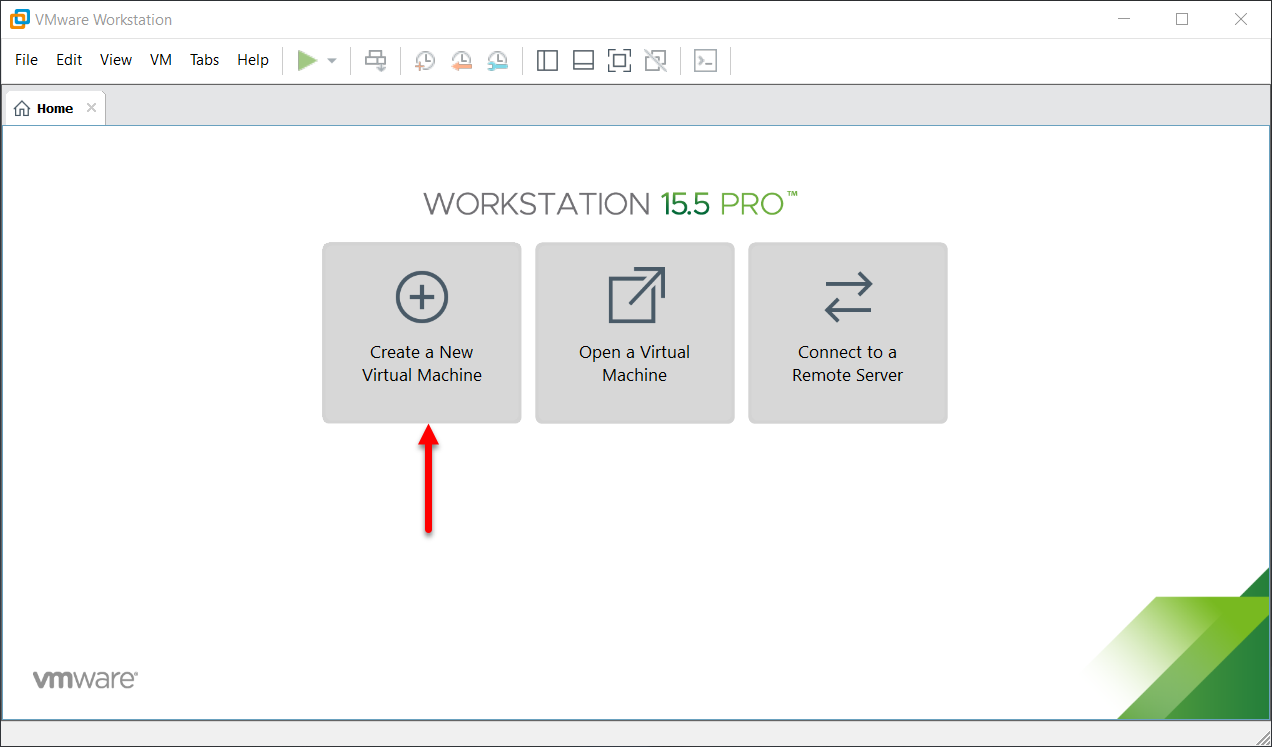
Now everything is ready and the Apple service is enabled in VMware Workstation, and the macOS Big Sur Virtual machine file is also ready. So, let’s get started and create a new virtual machine for macOS Big Sur. Open the VMware Workstation, then on the main home window click on “Create a new Virtual machine”.
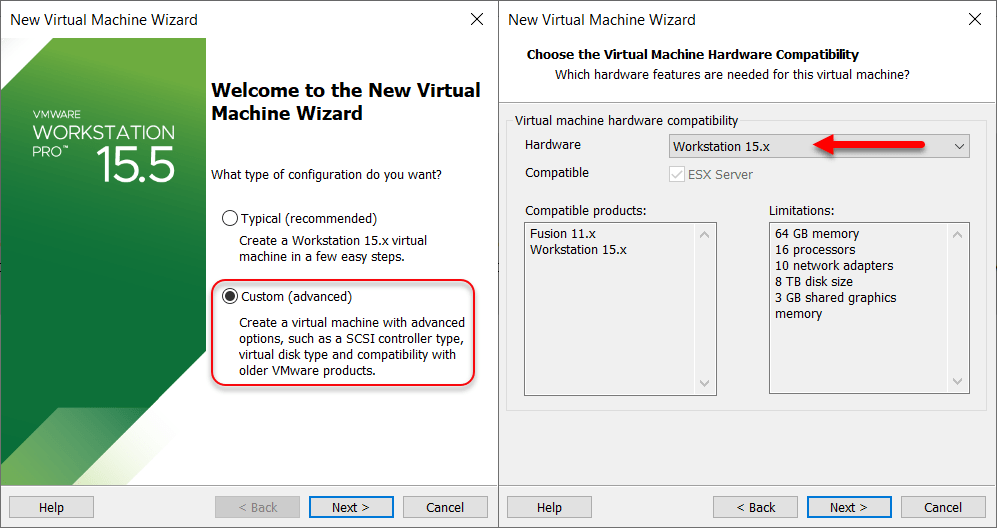
On the welcome window select the “Custom (Advanced)” option and click next. Select VMware hardware compatibility then click next.
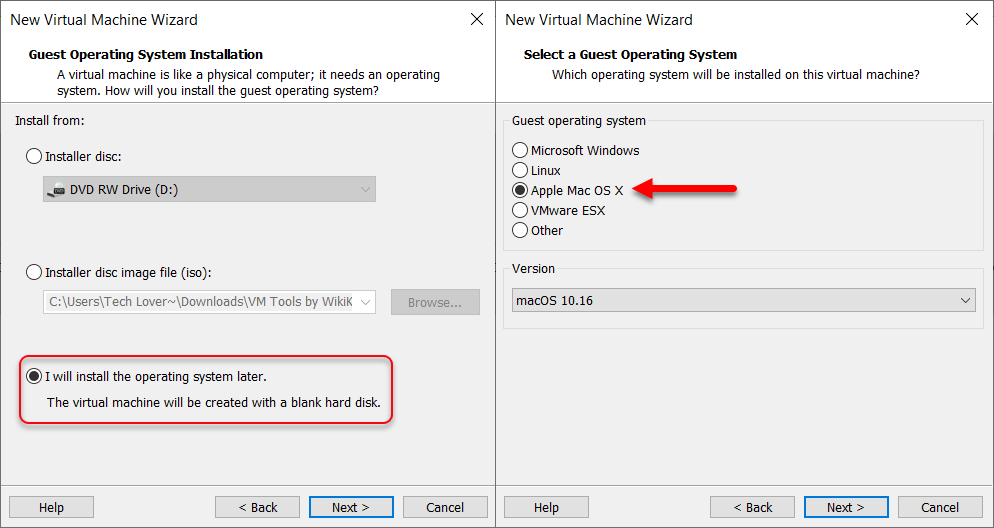
Select the option “I will install the operating system later” then click next. Select “Apple Mac OS X” and the version “macOS 10.16” and click next.
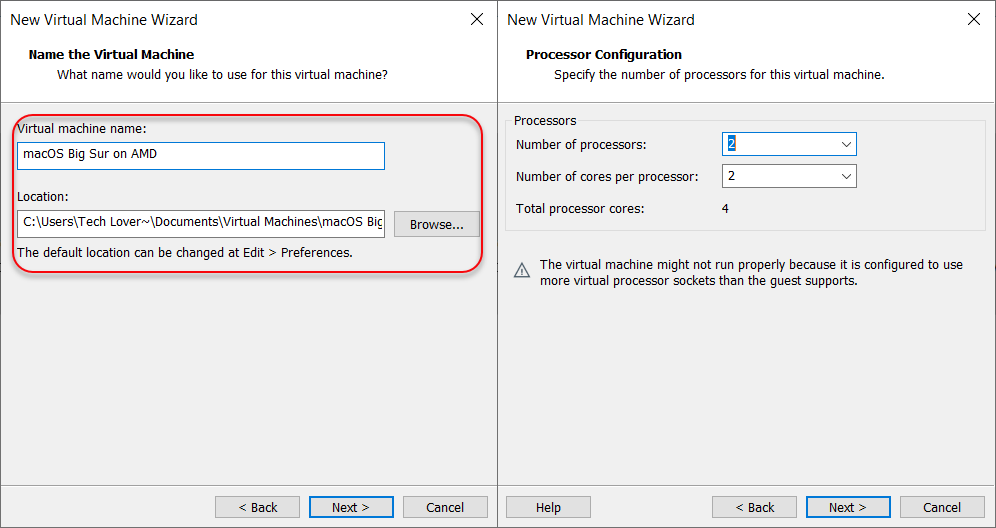
Give a name for the virtual machine, specify the location where you want to store macOS Big Sur, and click next. Select the number of processors and the number of core processors and click next.
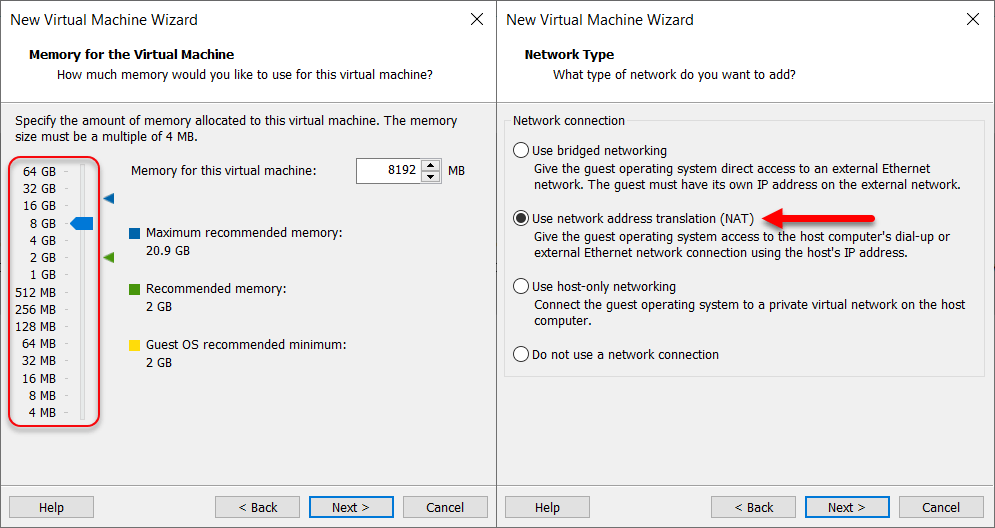
Increase the memory size for macOS Big Sur virtual machine and click next. Select the option “Use network address translation (NAT)” and click next.
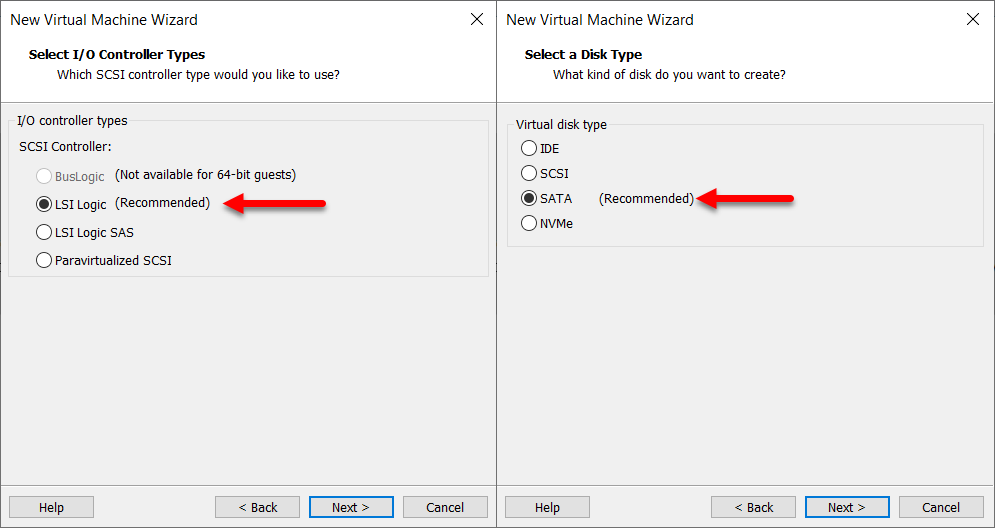
Select controller types “LSI Logic (Recommended)” and click next. Select the disk type “SATA (Recommended) and click next.
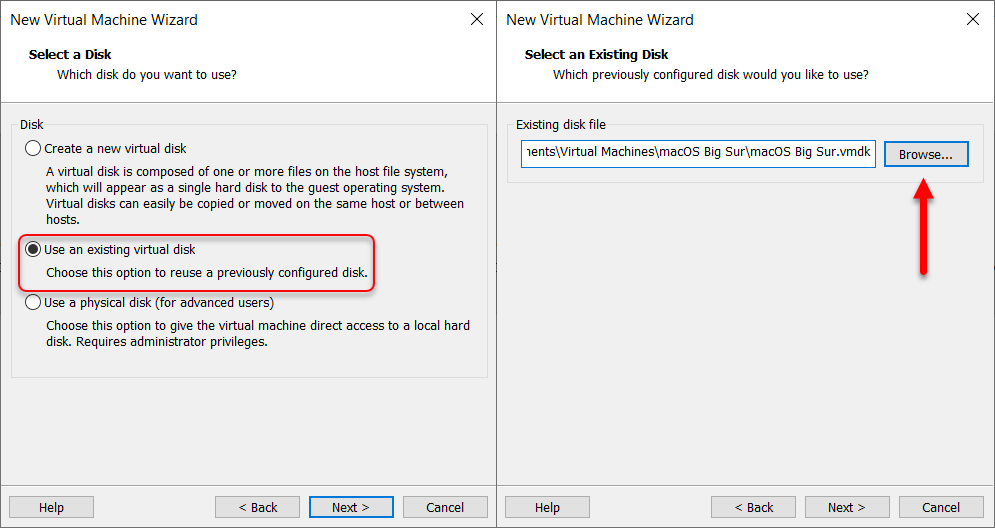
Select the option “Use an existing virtual disk” and click next. Now to insert the macOS Big Sur ISO or vmdk file click on Browse option, then select the file and click Open and click next.
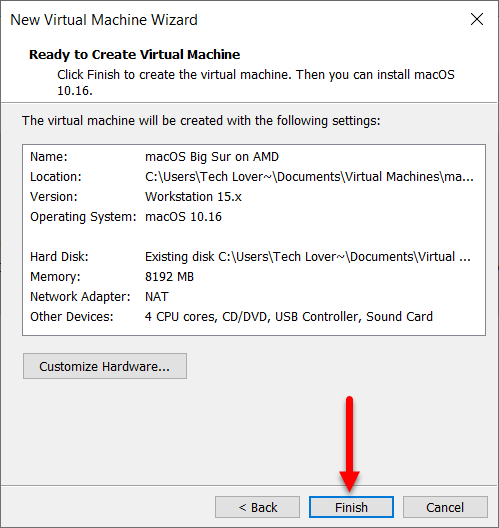
Now your virtual machine is ready to create, so click Finish and save the virtual machine with the below settings.
4. Configure macOS Big Sur Virtual Machine
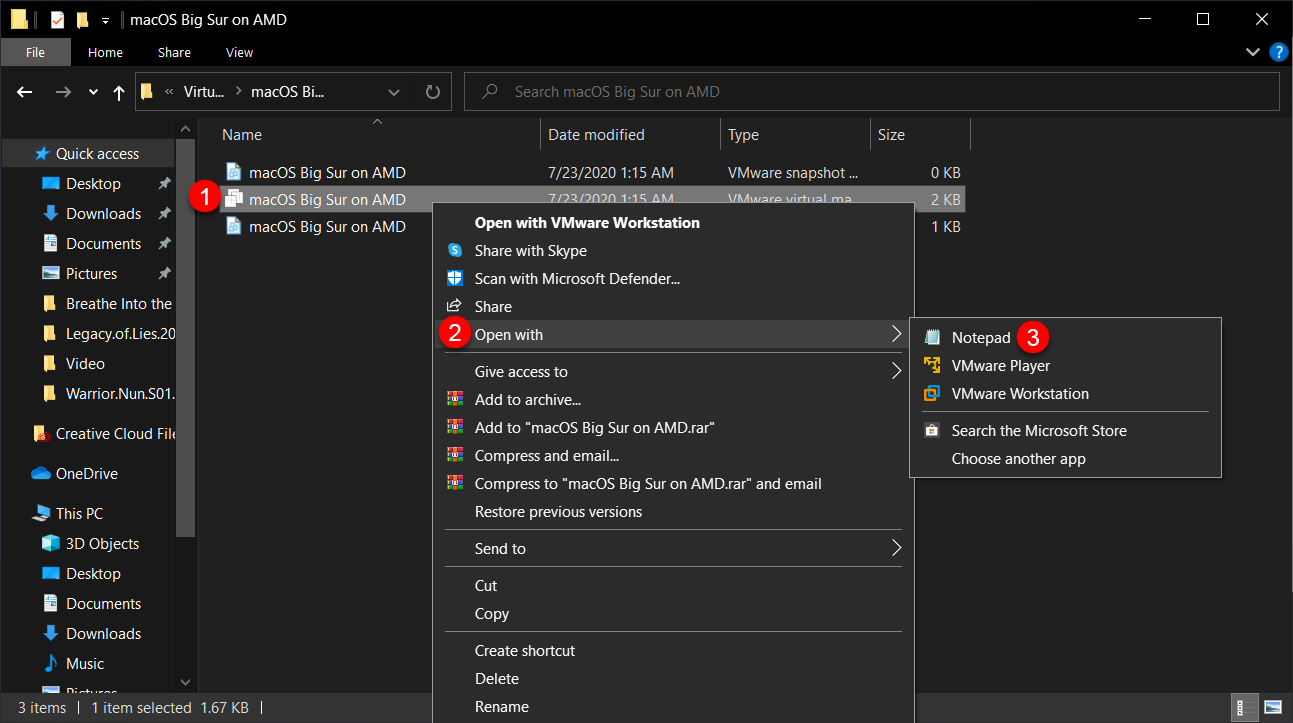
To configure the virtual machine and make it ready for the installation on VMware Workstation. You need to apply some piece of commands to configure it. Head over, to the macOS Big Sur location, usually the virtual machine file will be stored in Documents>Virtual Machines. When you find the file destination right-click on VMX and open with notepad.
Once the VMX file opened via notepad scroll down and apply the below commands and press Ctrl+S to save the commands.
smbios.reflectHost = "TRUE"
hw.model = "MacBookPro14,3"
board-id = "Mac-551B86E5744E2388"
smc.version = “0”
cpuid.0.eax = “0000:0000:0000:0000:0000:0000:0000:1011”
cpuid.0.ebx = “0111:0101:0110:1110:0110:0101:0100:0111”
cpuid.0.ecx = “0110:1100:0110:0101:0111:0100:0110:1110”
cpuid.0.edx = “0100:1001:0110:0101:0110:1110:0110:1001”
cpuid.1.eax = “0000:0000:0000:0001:0000:0110:0111:0001”
cpuid.1.ebx = “0000:0010:0000:0001:0000:1000:0000:0000”
cpuid.1.ecx = “1000:0010:1001:1000:0010:0010:0000:0011”
cpuid.1.edx = “0000:1111:1010:1011:1111:1011:1111:1111”
featureCompat.enable = “FALSE”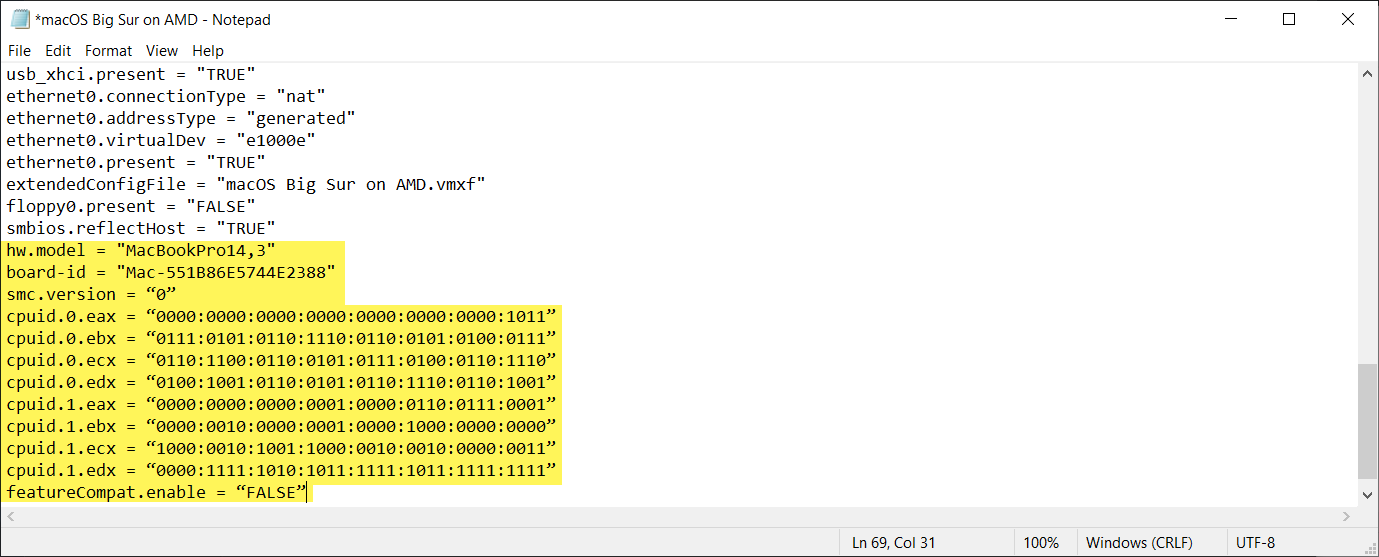
5. Install macOS Big Sur on AMD Processor
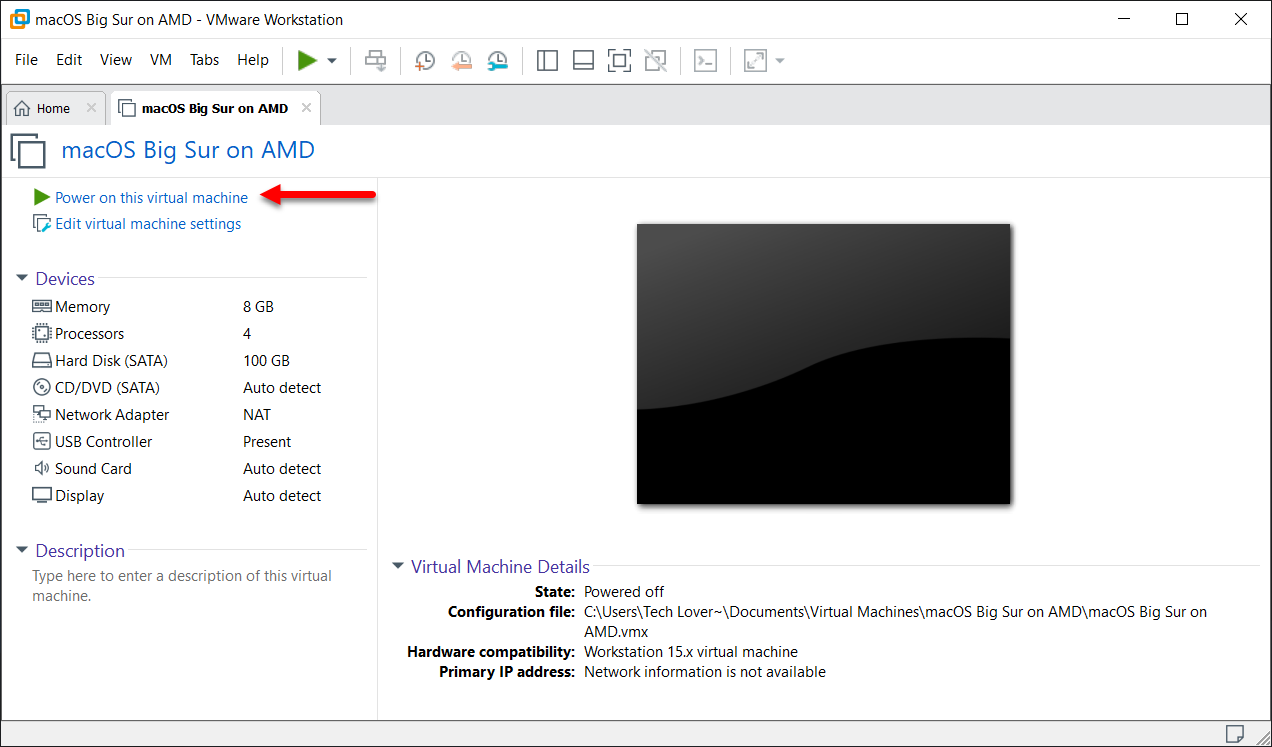
Once everything cleared in the virtual machine, head over to VMware Workstation and open it. When VMware opened select the created Virtual Machine and press on “Power on this virtual machine” button.
- When macOS Big Sur begins the installation wait for the Apple Logo.
- From Utilities window select Disk Utility and click on Arrow button.
- Select Virtual machine drive and erase the drive
- When the drive erased click Done and close the Disk Utility.
- Select Install macOS option and click continue
- To set up the installation of macOS Big Sur click continue
- Agree with macOS Big Sur terms and conditions and click continue
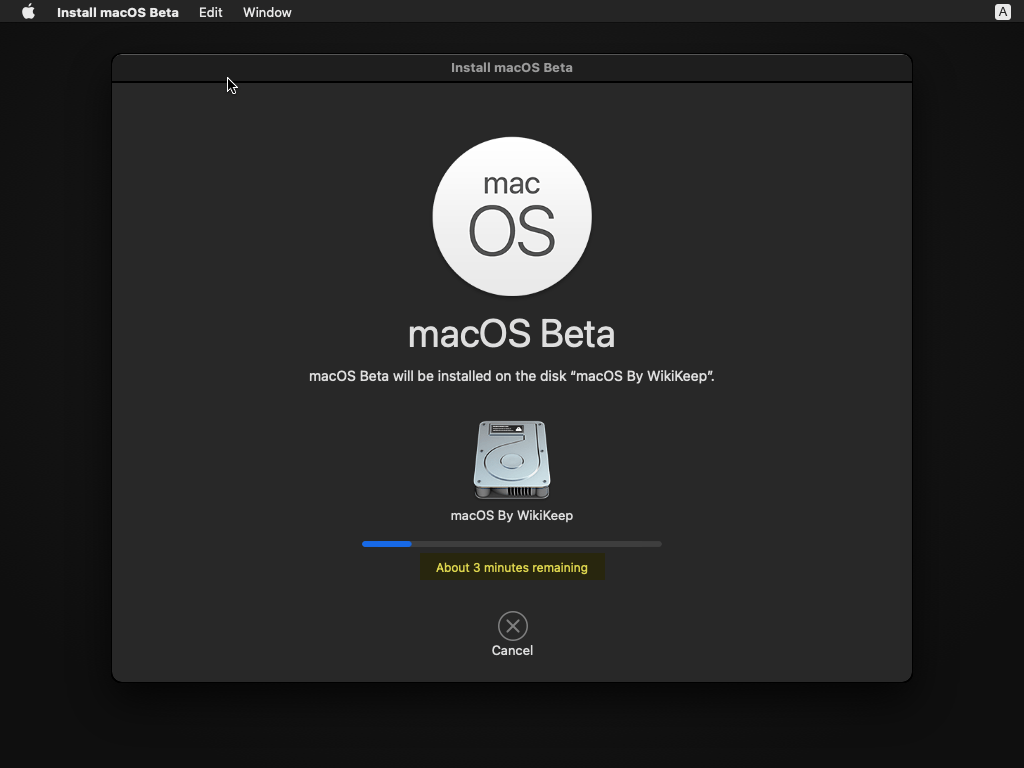
- Select the drive where you want to install macOS Big Sur
- Now wait for the macOS Big Sur to be installed
- Once the installation completed automatically the virtual machine will restart, so wait for this step of installation that will take some moments.
6. Complete macOS Big Sur Basic Settings
- Once the installation completed select your country and click continue
- Select your written and spoken language and click continue
- On accessibility window click Not now
- On Data & privacy click continue
- In Migration assistant click not now
- Provide your Apple ID or sign up later
- Agree with terms and conditions
- Create your computer account
- In express set up simply click continue
- Click sign up later for screen time
- Enable Siri and click continue
- Choose your look for macOS Big Sur
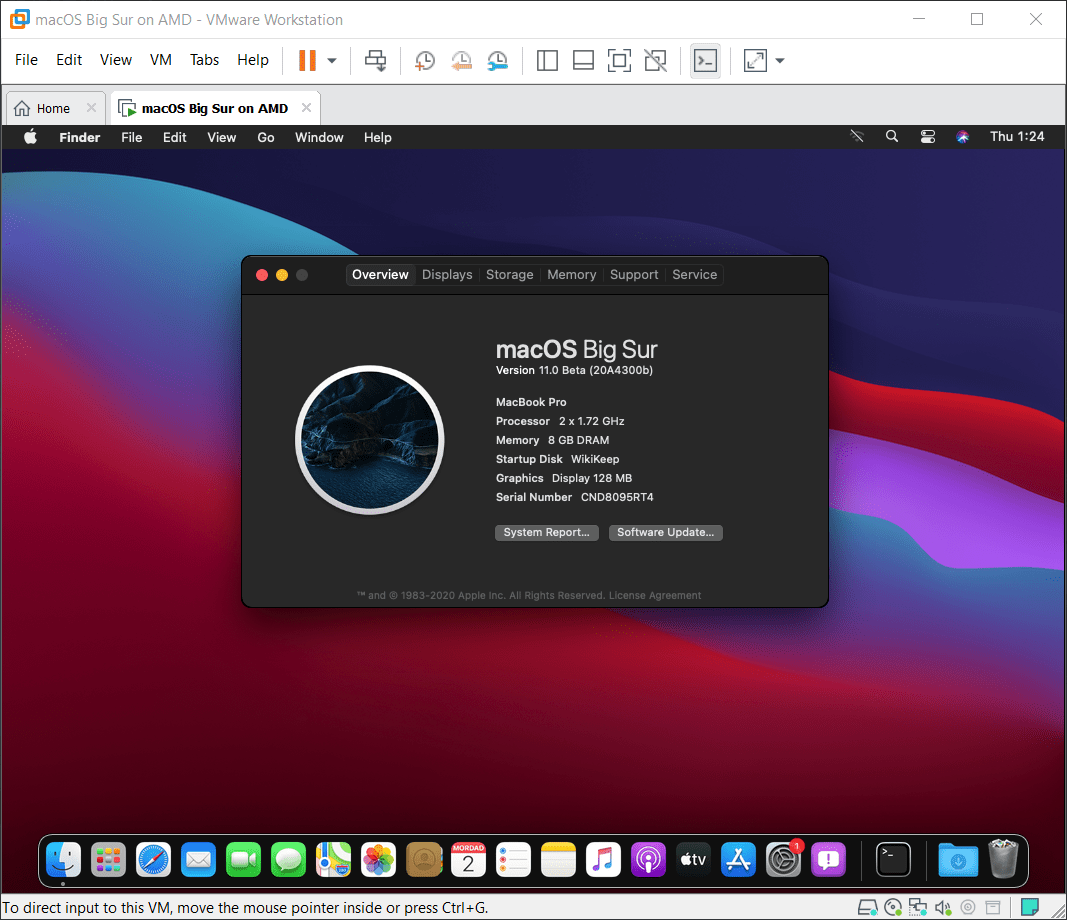
- And that’s it finally macOS Big Sur is being installed on VMware on AMD Processor without any issue. Go ahead and enjoy macOS Big Sur as a second guest operating system on AMD Processor.
6. Use macOS Big Sur Full-screen on VMware
It’s last but not list, the only thing that has remained is to use macOS Big Sur full-screen mode on VMware on AMD Processor. And the only solution to use full-screen is to install VMware Tools on macOS Big Sur. VMware Tool alongside that enables macOS full-screen it will enable drag & drop on VMware, and many other hidden features. To do that check out the below link.
Error?
This virtual machine requires AVX2 but AVX is not present. This virtual machine cannot be powered on.
Value ““FALSE”” for variable “featureCompat.enable” is not a valid boolean value. Using value “TRUE”.
Value ““0”” for variable “smc.version” is not a valid integer value. Using value “-1”.
This virtual machine requires AVX2 but AVX is not present. This virtual machine cannot be powered on.
Failed to start the virtual machine.