
Apple announced the latest operating system at the WWDC “Worldwide developer conference” this year and has selected the best name macOS Big Sur. macOS Big Sur is the biggest release of the Apple operating system after macOS Catalina 10.15. The operating system has built for Apple Silicon and the M1 Processor is called macOS Big Sur. This operating system of Apple brings bunches of optimized applications for the new architecture, universal apps, and better responsiveness across the board. On the other hand, we thank the Apple company for the day by day increasing bundle of packages for their latest technologies. Such as there is news for iPhone and iPad users that they can use all the apps when they get the M1 processor.
Overall, macOS Big Sur 11.0 will have remained as one of the fastest and compatible operating systems for your MacBook. If you have noticed it’s new interface look design, the round and curved edges of the full internal window, New design language, icons more iOS look, improved Safari, Mac Catalyst iMessage App, New Apple map experience, the Safari application is faster then before. After lots of experiments, Apple finally did well to increase the speed of the Safari application on the macOS operating system.
Apple kicked out the beta version of macOS Big Sur on June 22, 2020, at the worldwide conference. The reason that they won’t release the full version of the operating system that they will receive bunches of feedback from the developers and from users. Because at every beginning of the operating systems every user might face bugs and issues. Due to that later the Apple will release the full version of their operating system which includes macOS, iOS, TvOS, WatchOS, and built-in applications. Therefore, Apple finally released the final version of their operating systems last month on November 12, 2020.
Unfortunately, there are several Macs that are not compatible with macOS Big Sur 11.0. Because macOS Big Sur is heavier than the previous versions of macOS operating systems. That’s why at the WWDC Apple introduced their Apple Silicon Processor with new MacBooks that easily can support macOS Big Sur. But if you are not having one of the below down MacBooks, or you are having a MacBook that is not available in the list of compatible Macs. Then don’t worry though this guide I will explore how to install macOS Big Sur on an Unsupported Mac.
- Download macOS Big Sur DMG File for a Perfect Installation
- Download macOS Big Sur ISO (Virtual Machine Image)
- Download macOS 11 Big Sur VMDK (VMware & VirtualBox Images)
- MacBook: Early 2015 or newer
- MacBook Air: Mid 2013 or newer
- MacBook Pro: Late 2013 or newer
- Mac Mini: Late 2014 or newer
- iMac: Mid 2014 or newer
- iMac Pro
- Mac Pro: Late 2013 or newer
- Developer Transition Kit (2020)
Also, below is the list of MacBooks that are not supported by macOS Big Sur.
- MacBook Pro Air 2012
- MacBook Pro 2012 and early 2013 MacBook Pro
- Apple 2012 Mac Mini
- iMac 2012 and 2013
Install macOS Big Sur on Unsupported Mac
Don’t forget that through this guide you will learn the process of installing macOS Big Sur on one of the unsupported MacBooks. If you have one of them, or already you are using macOS Mojave or macOS Catalina then easily following the below down guide you can install macOS Big Sur on it.
However, before getting to the point please note that you need to have a heavy backup of your important files. Because sometimes it may cause to face any issue during the installation of macOS Big Sur. So, it’s much important to take backup in order to not lose your data.
Required Files
Do you want to install macOS Big Sur on your 2012 or 2013 Mac? I will show you the easiest way to do it! This video is a step-by-step tutorial on how to use Patched Sur a macOS Big Sur patcher to create a USB Patched Installer and use it to upgrade macOS Catalina to Big Sur.
Download the above-required files and move them to your computer desktop. Also, extract if that was dmg, do you know how to extract it? simply double-click on the dmg file it will automatically extract the file.
Get Started with Patched Sur
Patched Sur is UI patched for macOS Big Sur, designed to make it easy to run macOS Big Sur 11 on unsupported Macs. This patched hopes to allow any user of any knowledge to patch their Mac, while still giving your freedom on how you want to use your Mac.
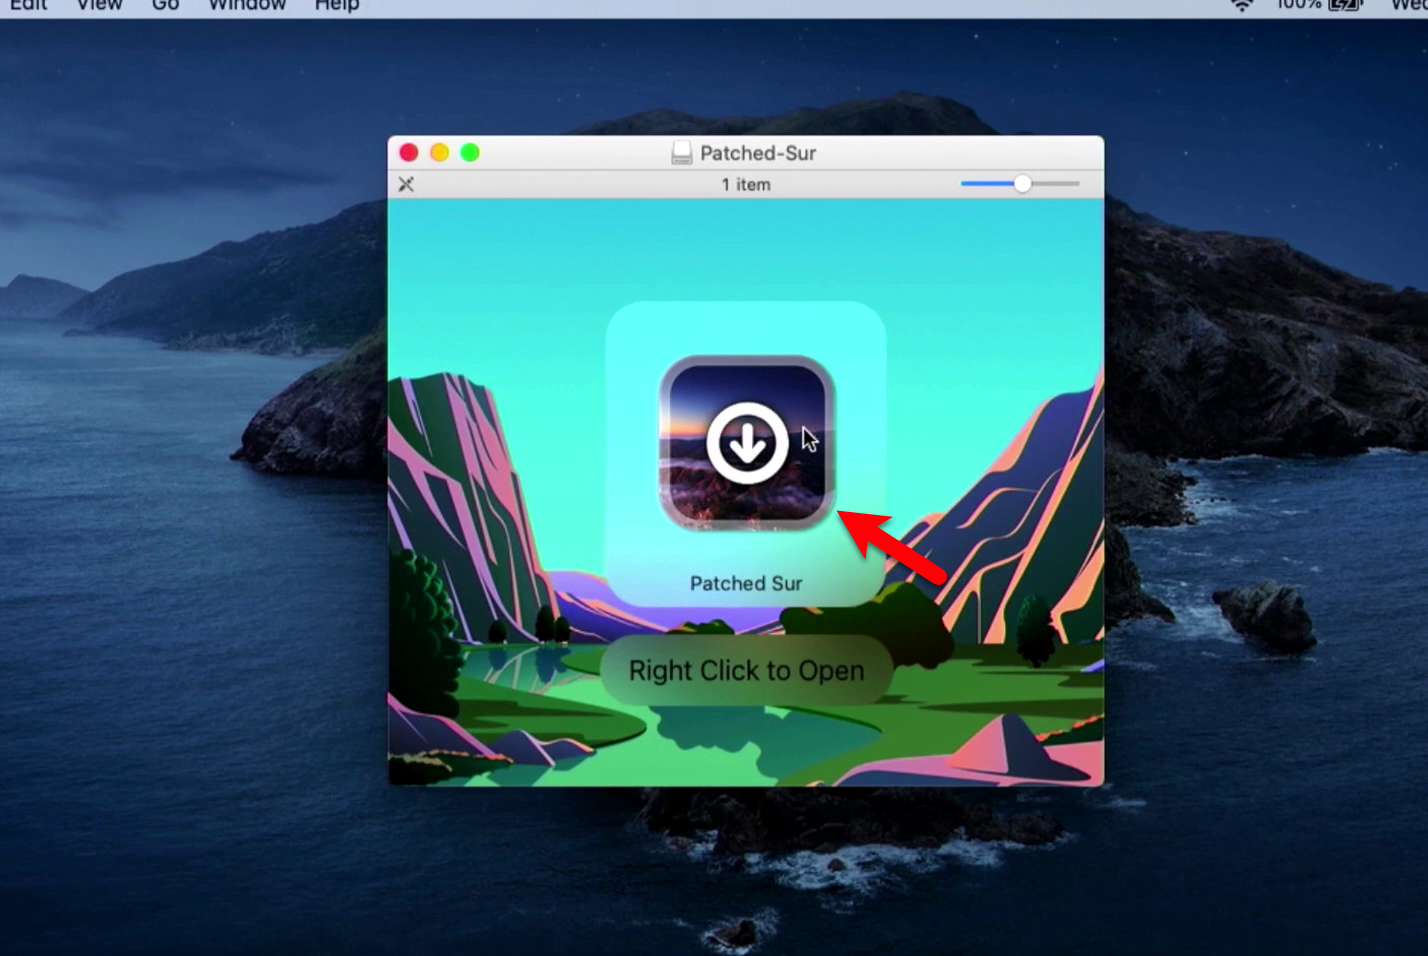
Double-click on the Patched Sur file to open the installation, when it’s window appeared right-click and select open, or simply double-click on the icon to launch the installation.
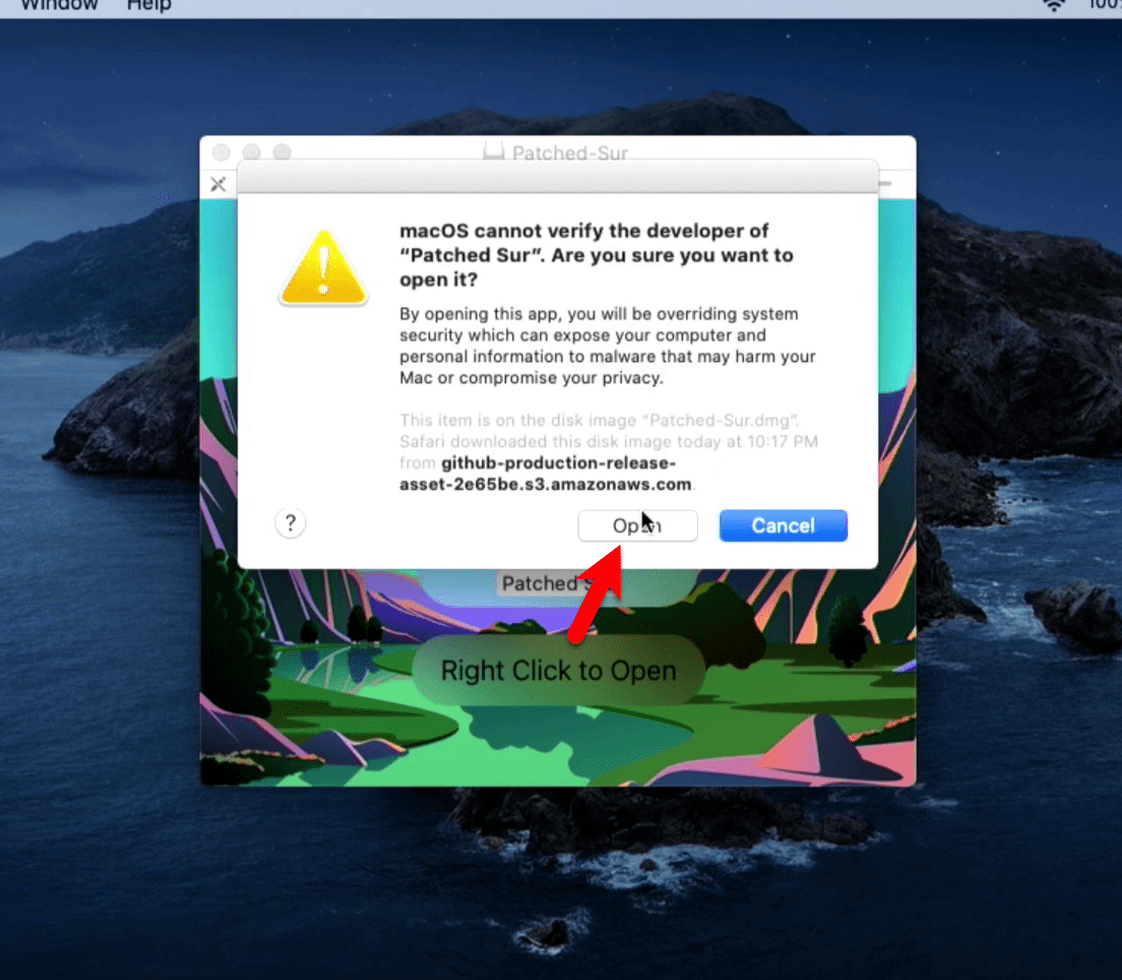
macOS cannot verify the developer of patched Sur are you sure want to open it? simply click the Open option.
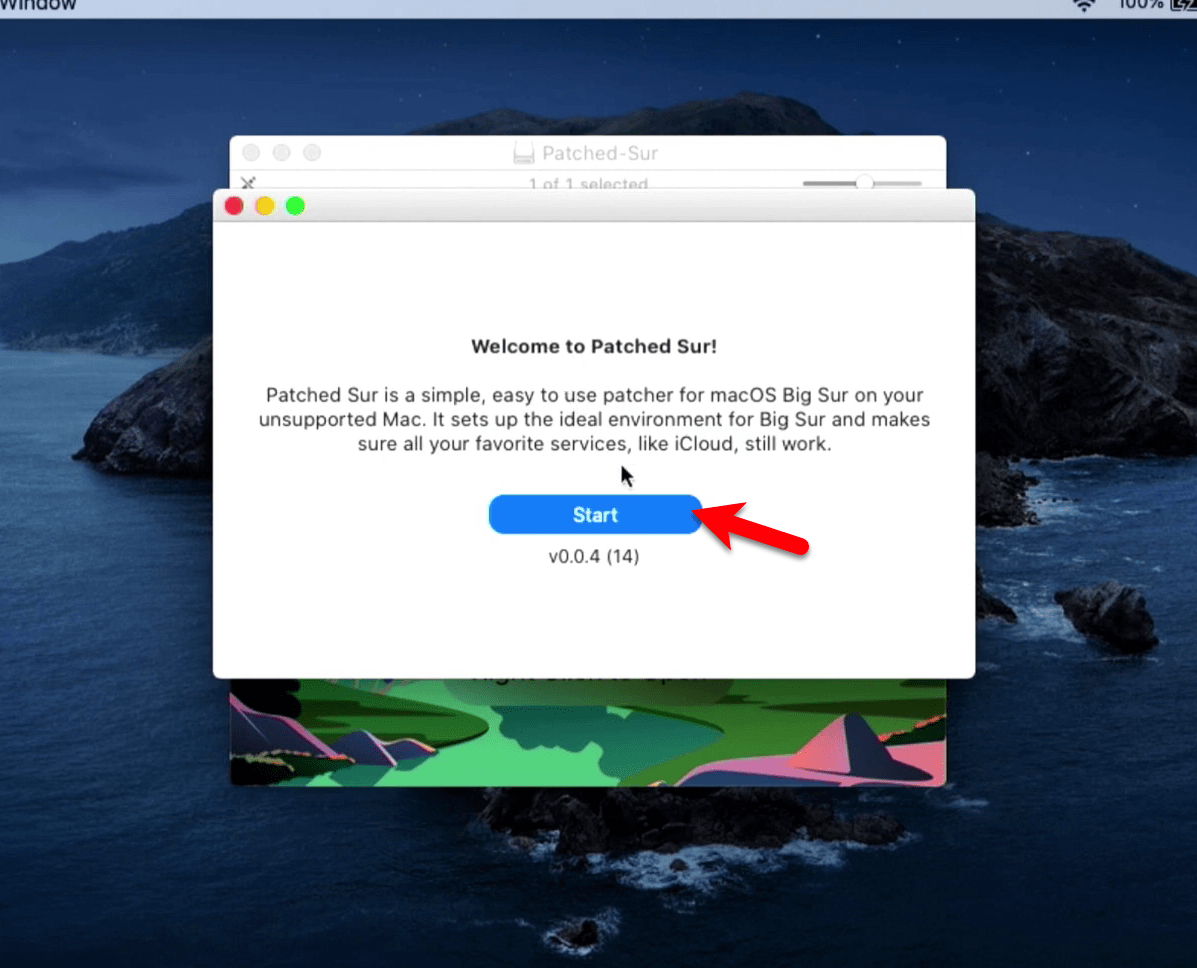
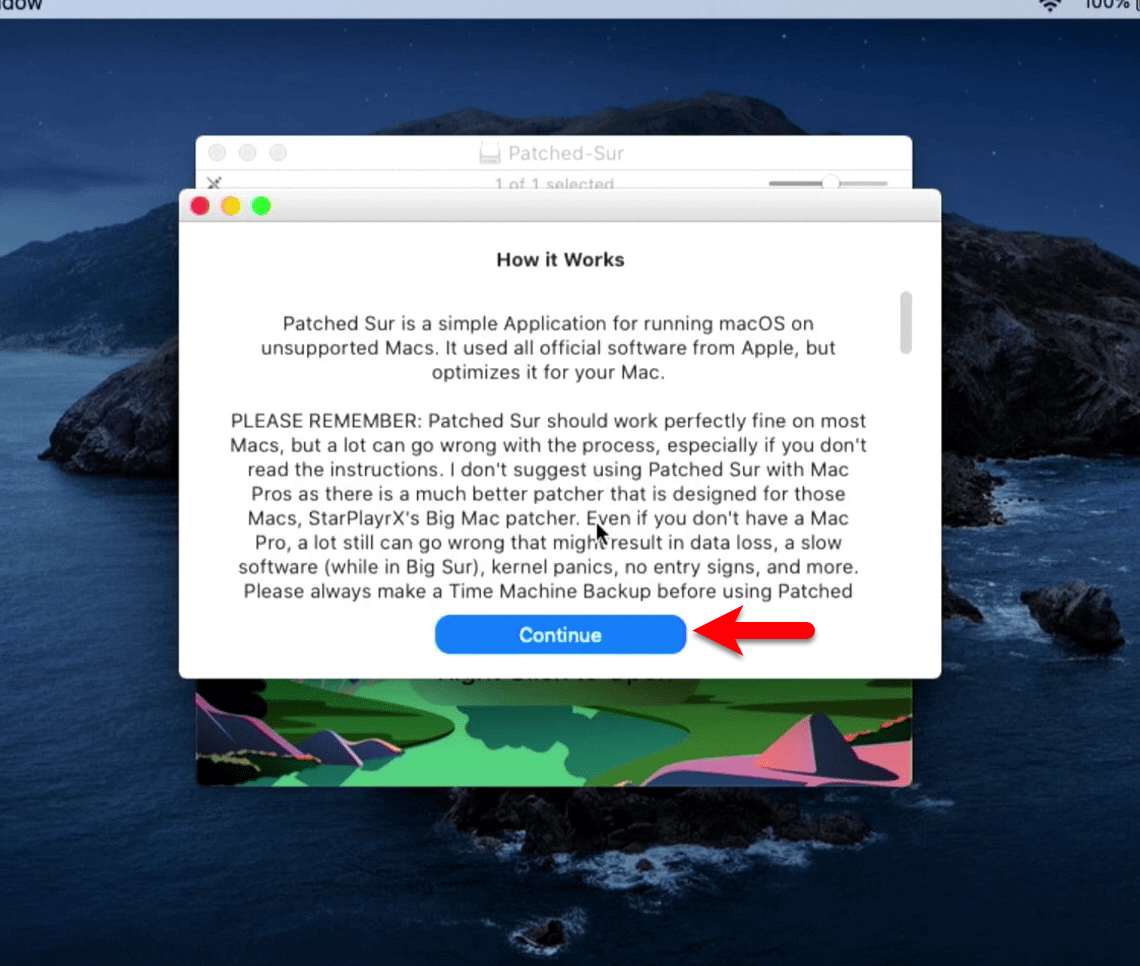
Patched Sur is a simple, easy to use patcher for macOS Big Sur on your unsupported Mac. It sets up the ideal environment for Big Sur and makes sure all your favorite services, like iCloud, still works. So, to get started click on the Start button to go ahead.
Click on continue
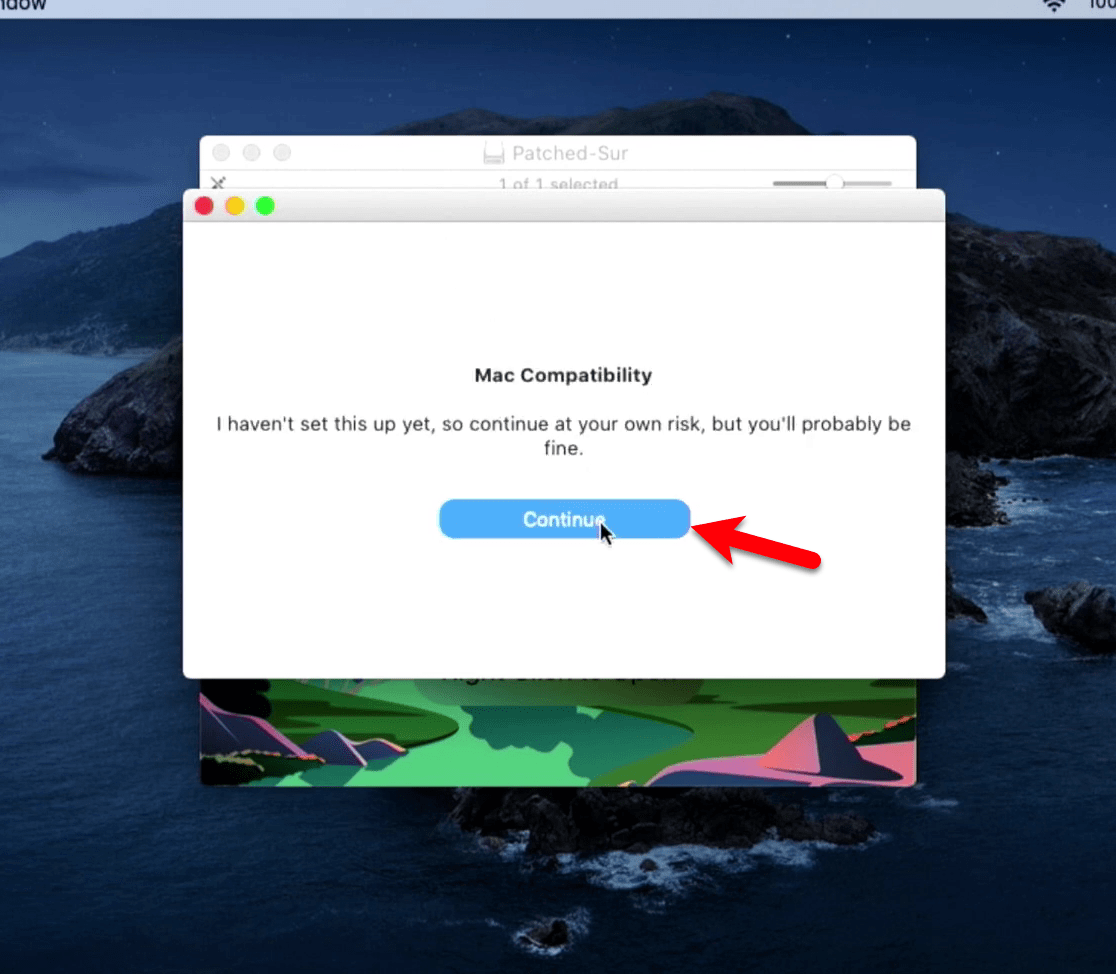
Read about Patched Sur how it works on your Mac, then click continue.
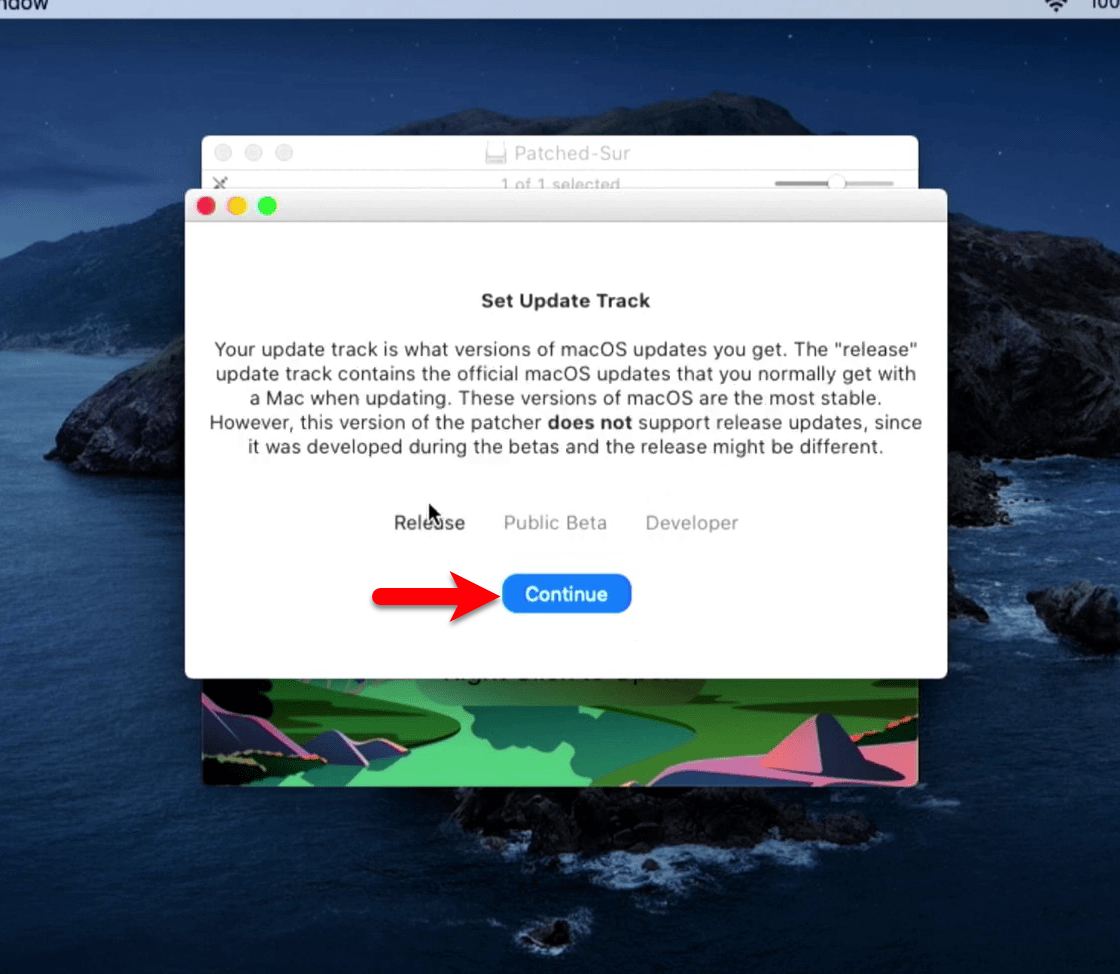
Your update track is what version of macOS updates you get. The “Release” update track contains the official macOS updates that normally get with a Mac when updating. These versions of macOS are the most stable. However, this version of the patcher does not support release updates, since it was developed during the betas and the release might be different. For this purpose, you need to select the “Release” option to get the latest update of upcoming updates for macOS Big Sur. Select the “Release” option then click continue.
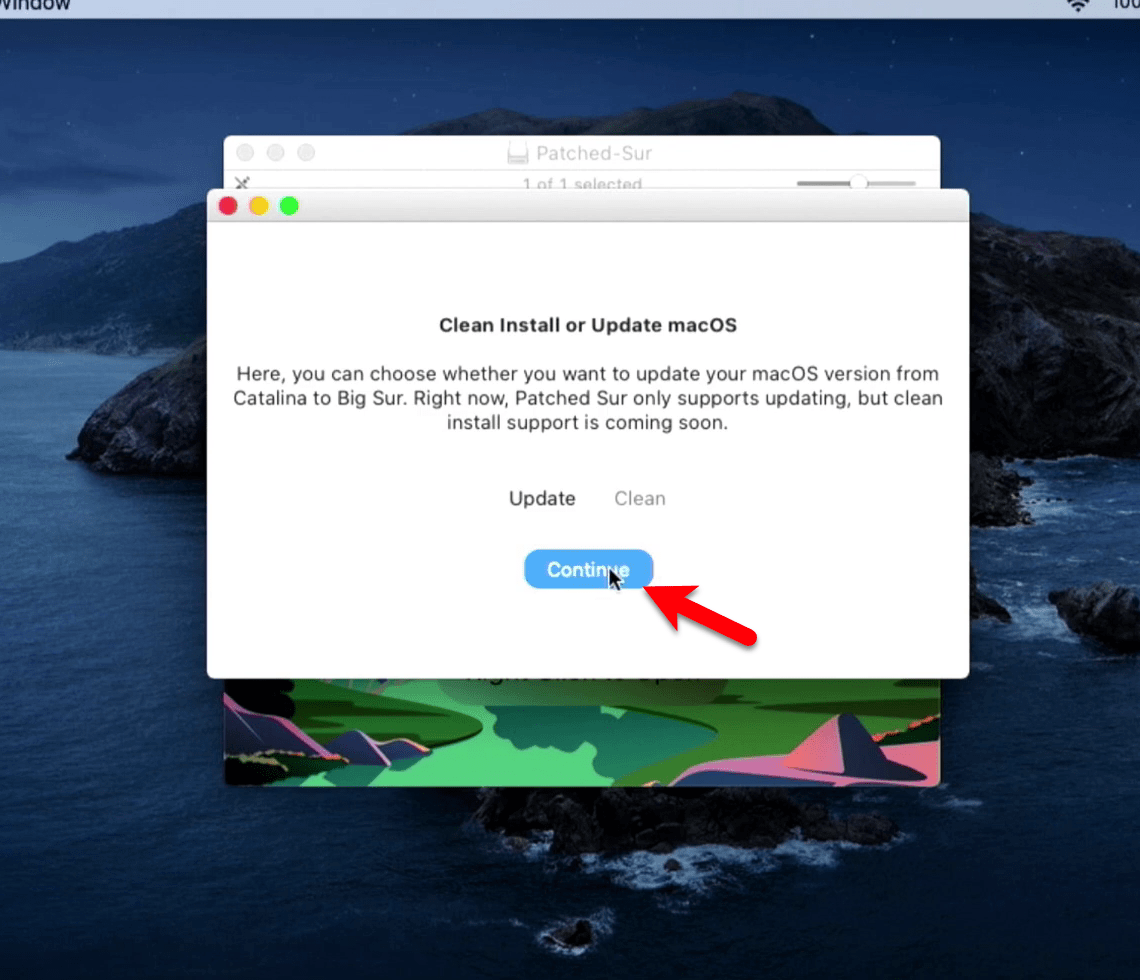
Here you have to choose the update option, whether you want to update your macOS version from macOS Catalina of macOS Mojave directly to macOS Big Sur 11. So, select the “Update” option and click continue.
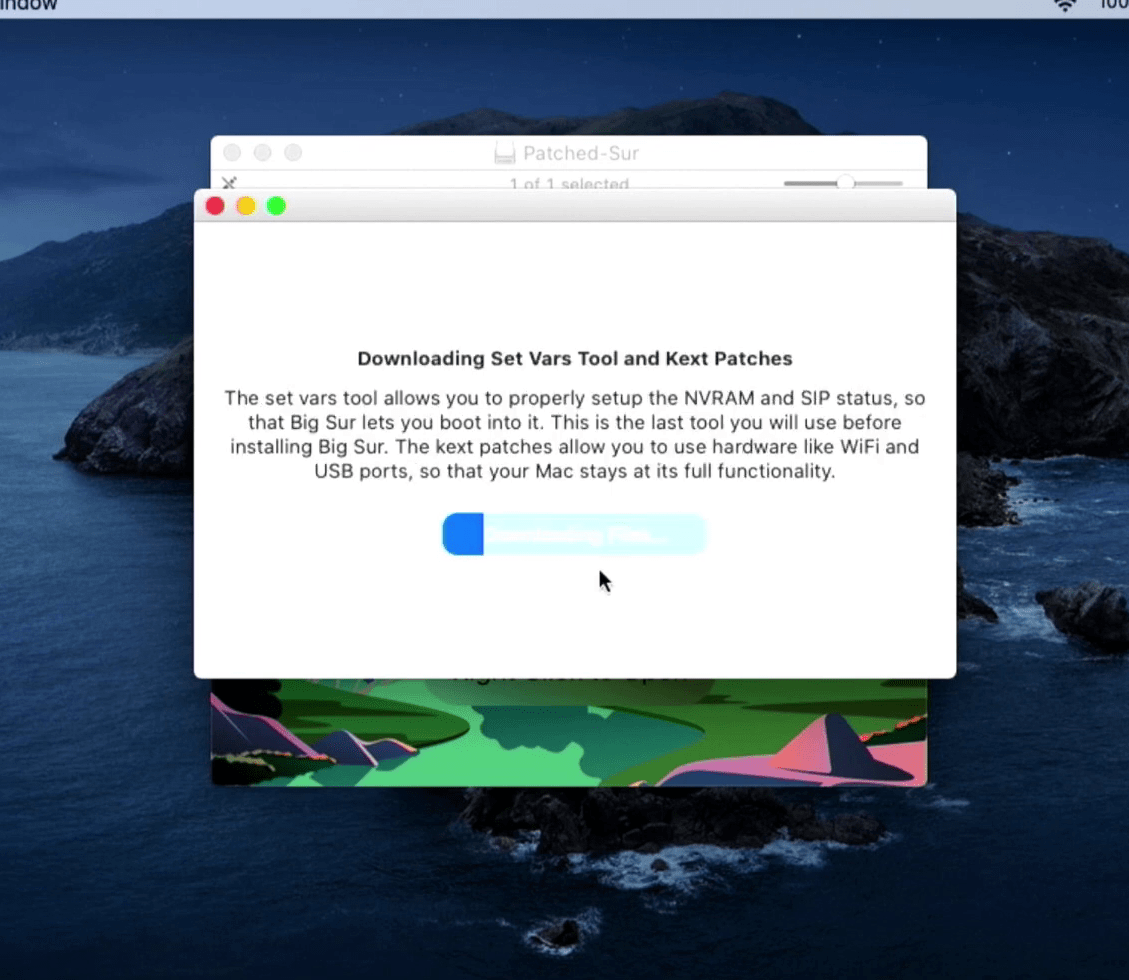
Now the Patched Sur will start downloading the Vars tool and Kext Patchers. The set of vars tool allows you to properly set up the NVRAM and SIP status, so the Big Sur lets you boot into it. This is the last tool you will use before installing Big Sur. The Kext patches allow you to use hardware like WiFi and USB ports so that your Mac stays at its full functionality.
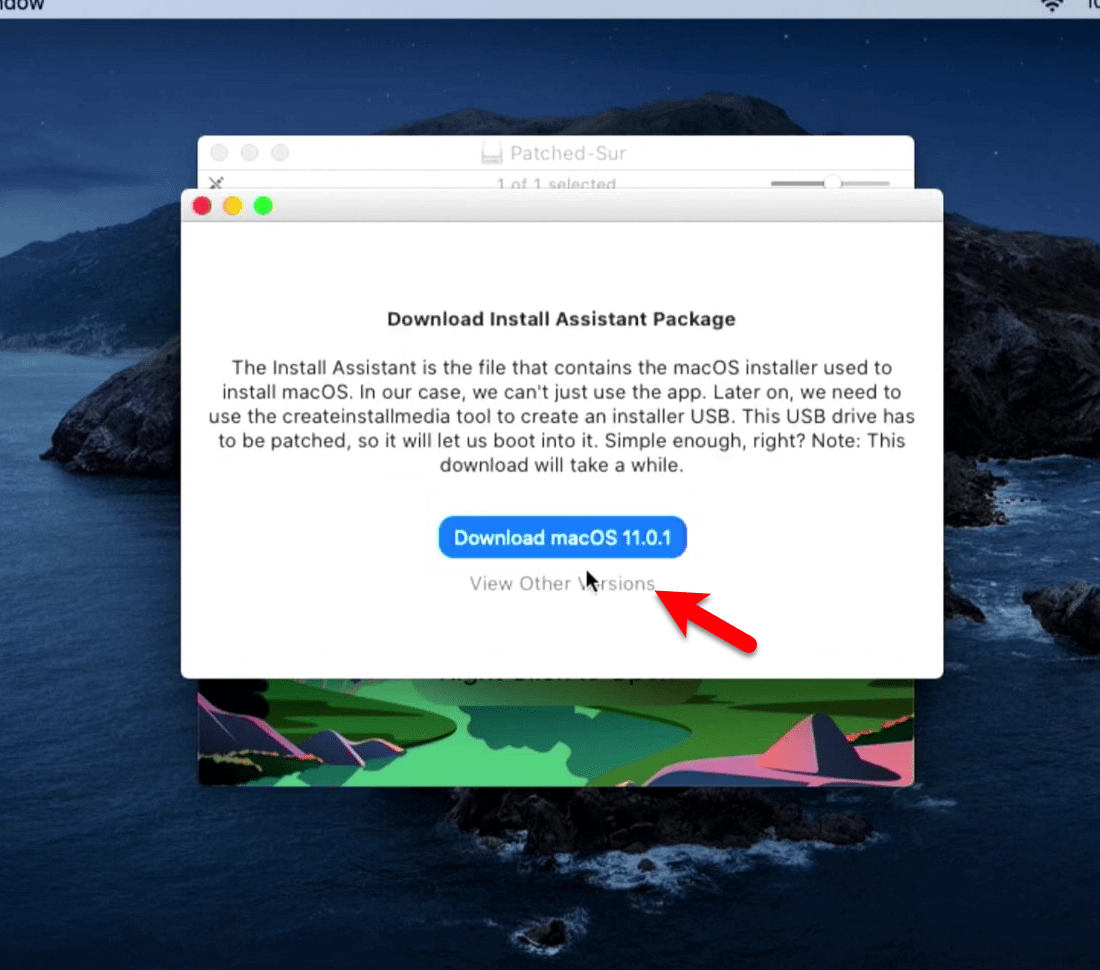
Now it will require to download the Package installer or Assistant Package. As you have it right now on your desktop so for that click on “View other options”.
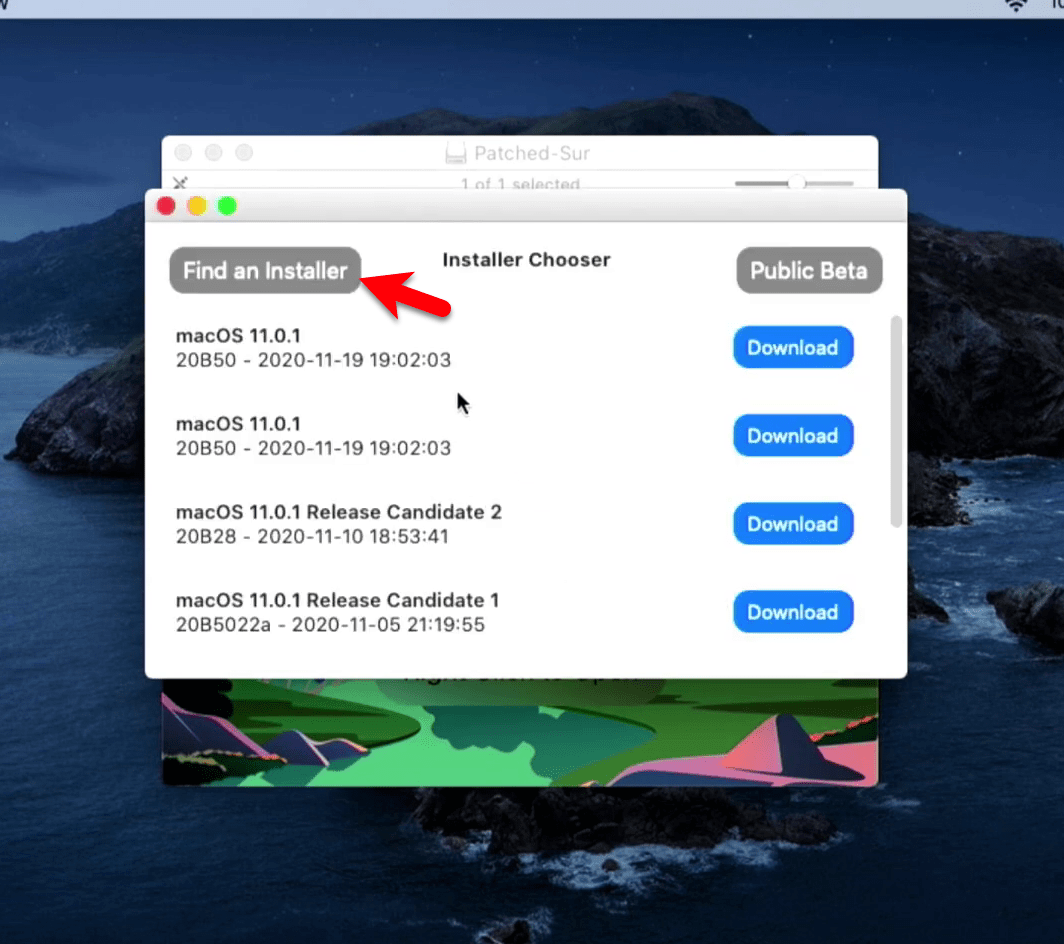
Once this window popped-up click on “Find an Installer” to insert the Package installer file.
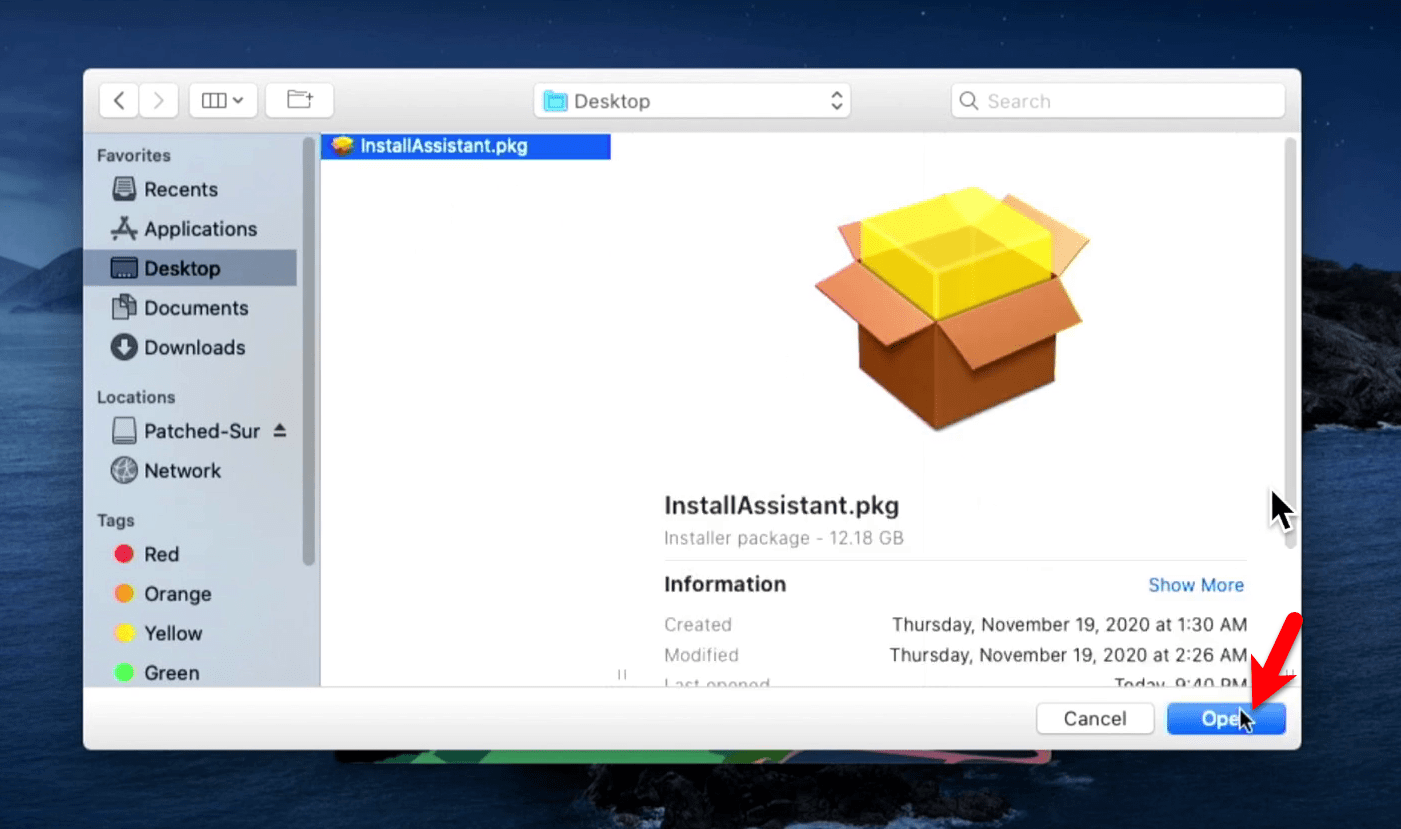
Now find out the packager installer where you have placed it, select that and click on open.
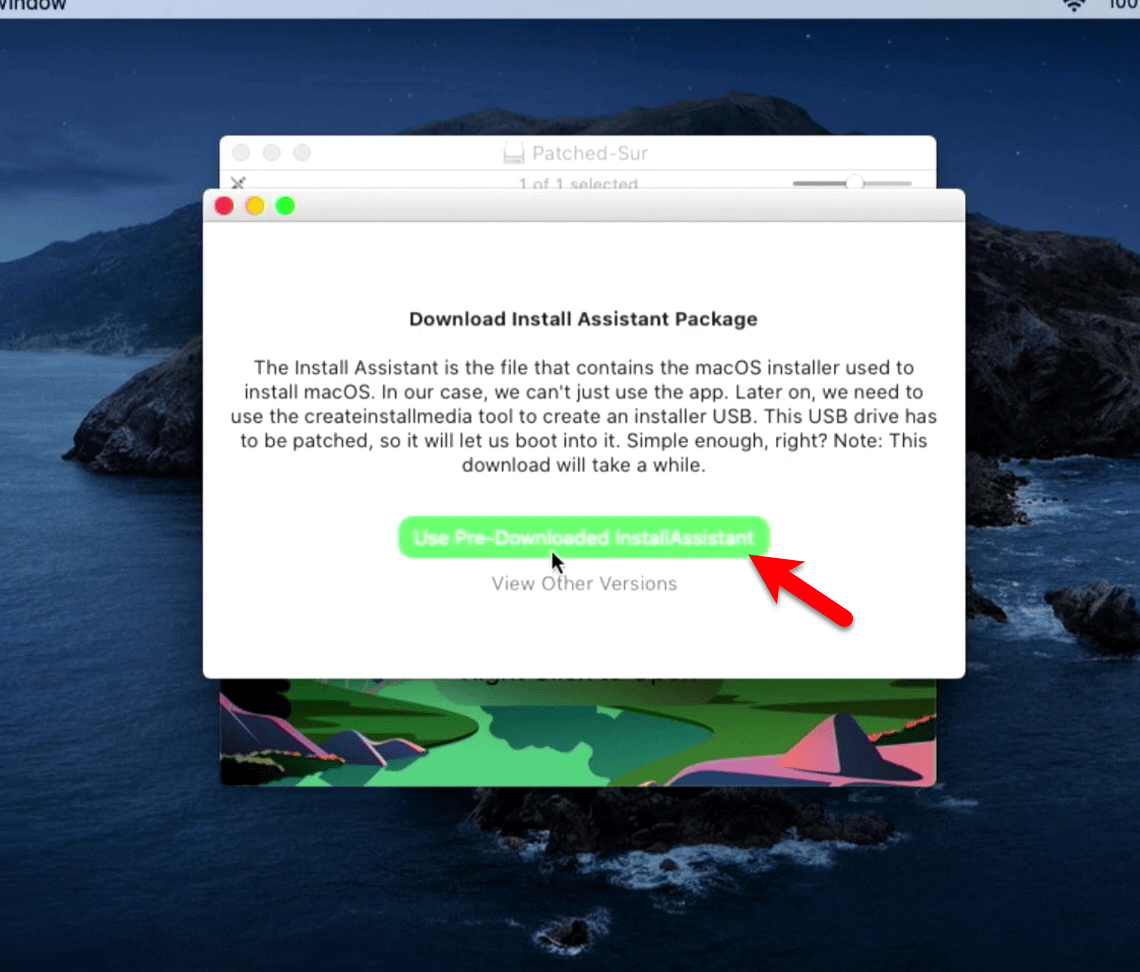
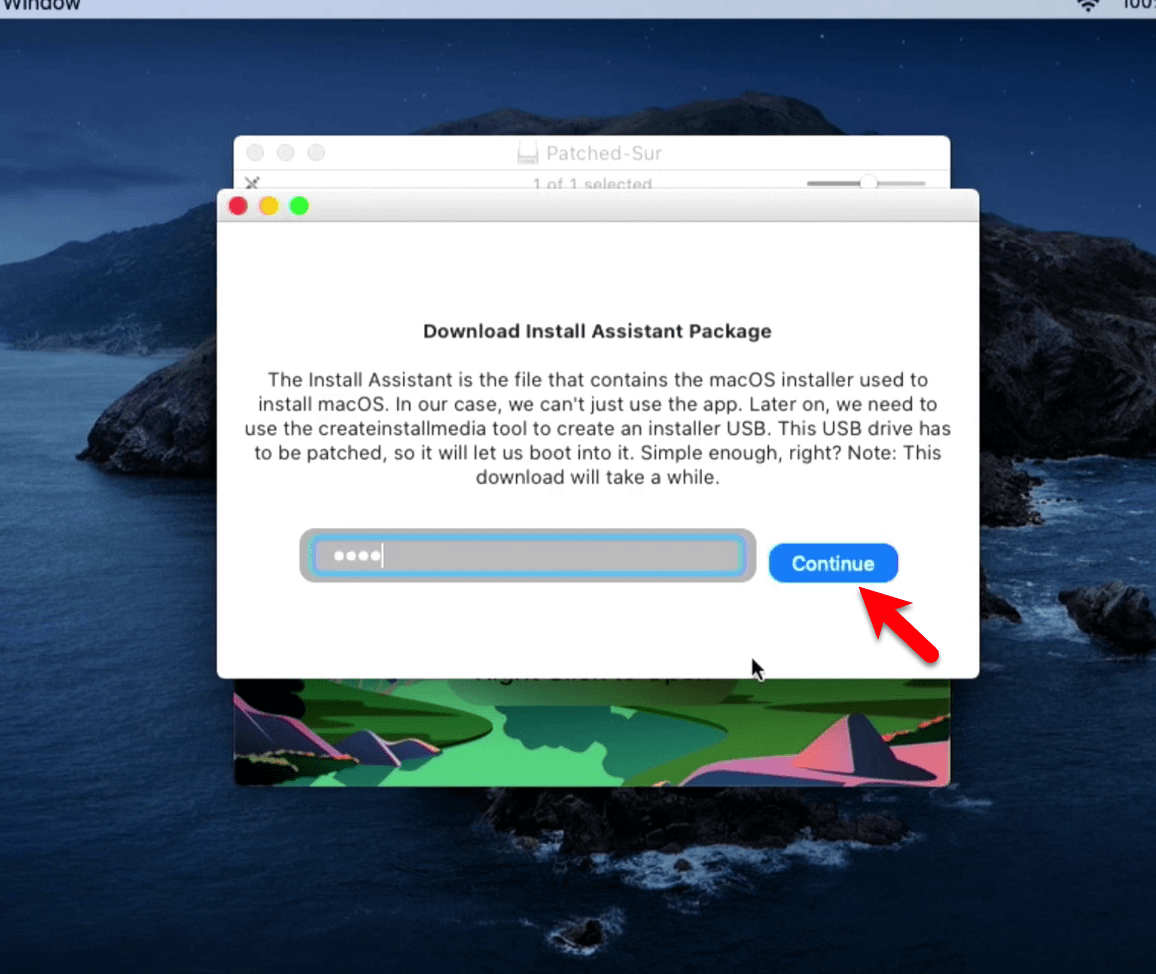
The install Assistant is the file that contains the macOS installer used to install macOS. In our case, we can’t just use the app. Later on, we need to use the creatinstallmedia tool to create an installer USB. This USB drive has to be patched, so it will let us boot into it. Simple enough, right? To install the inserted Packager installer click on the “Use pre-downloaded InstallAssistant” option.
Now enter your user account password and press the enter key.
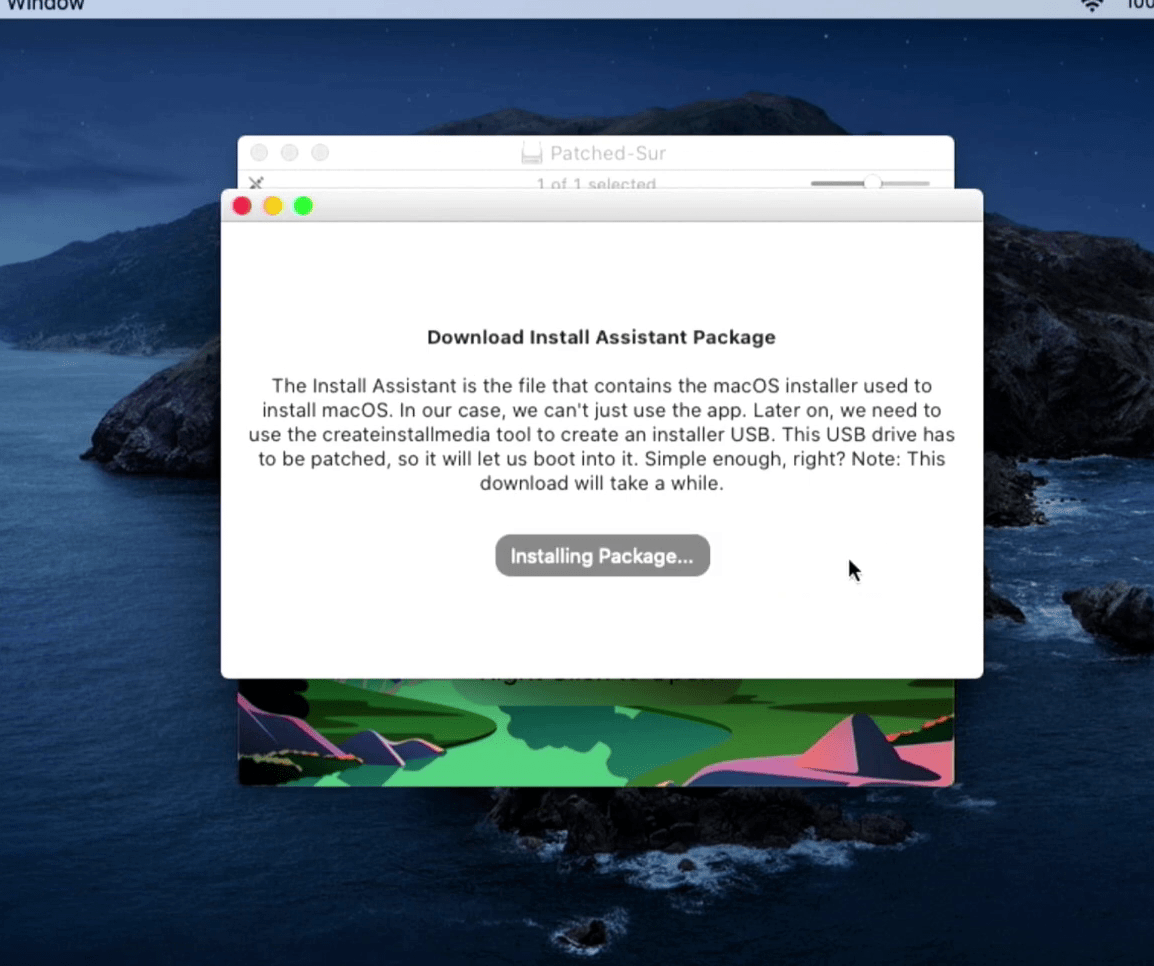
Now wait until it should install the package, it may cover a short time.
And now attach the 16GB USB pen drive then click on the refresh option to appear the USB drive. Once the USB appeared in the list select it and click continue.

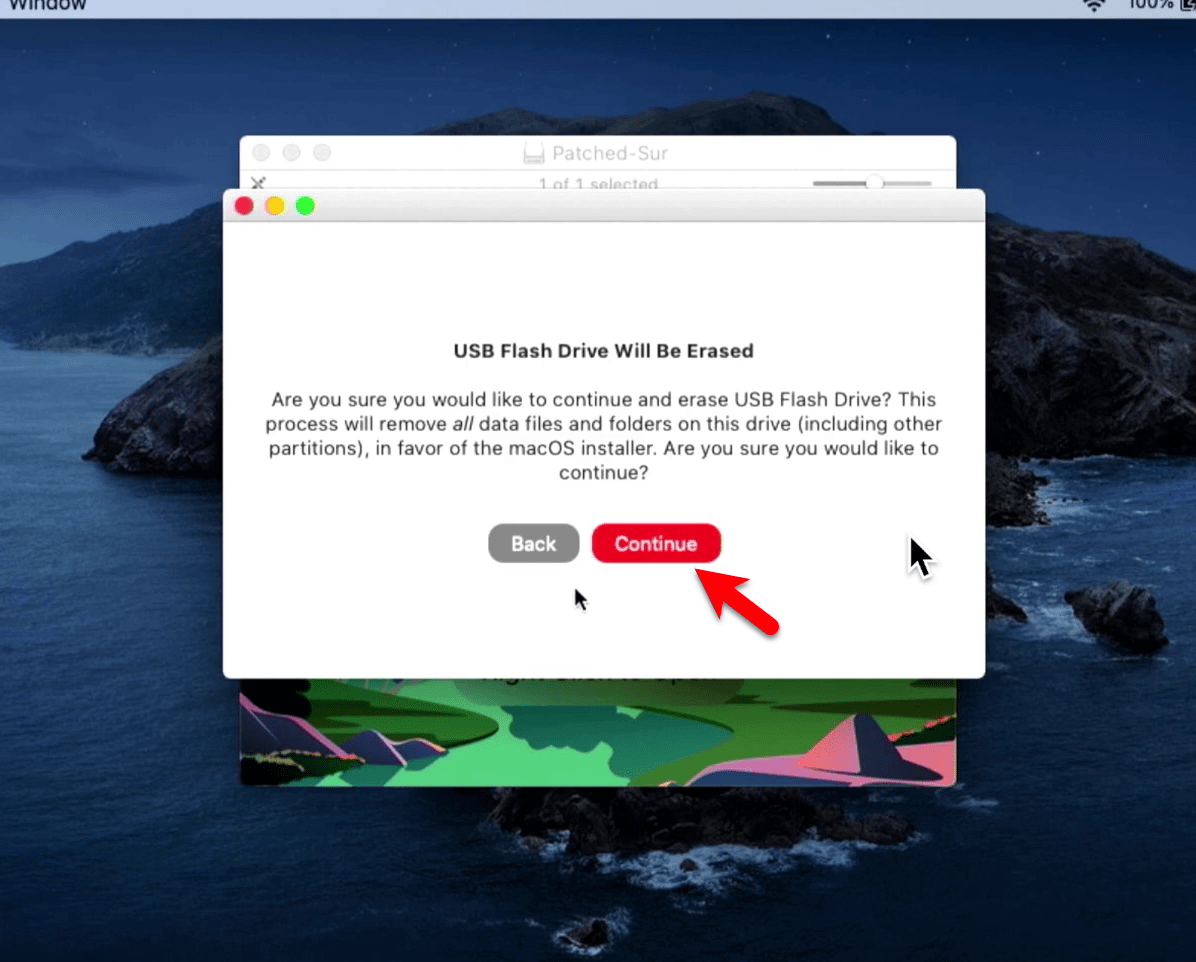
Are you sure you would like to continue and erase the USB flash drive? this process will remove all the data files and other folders on this drive (including other partitions), in favor of the macOS installer. Are you sure you would like to continue, click Continue to go ahead?
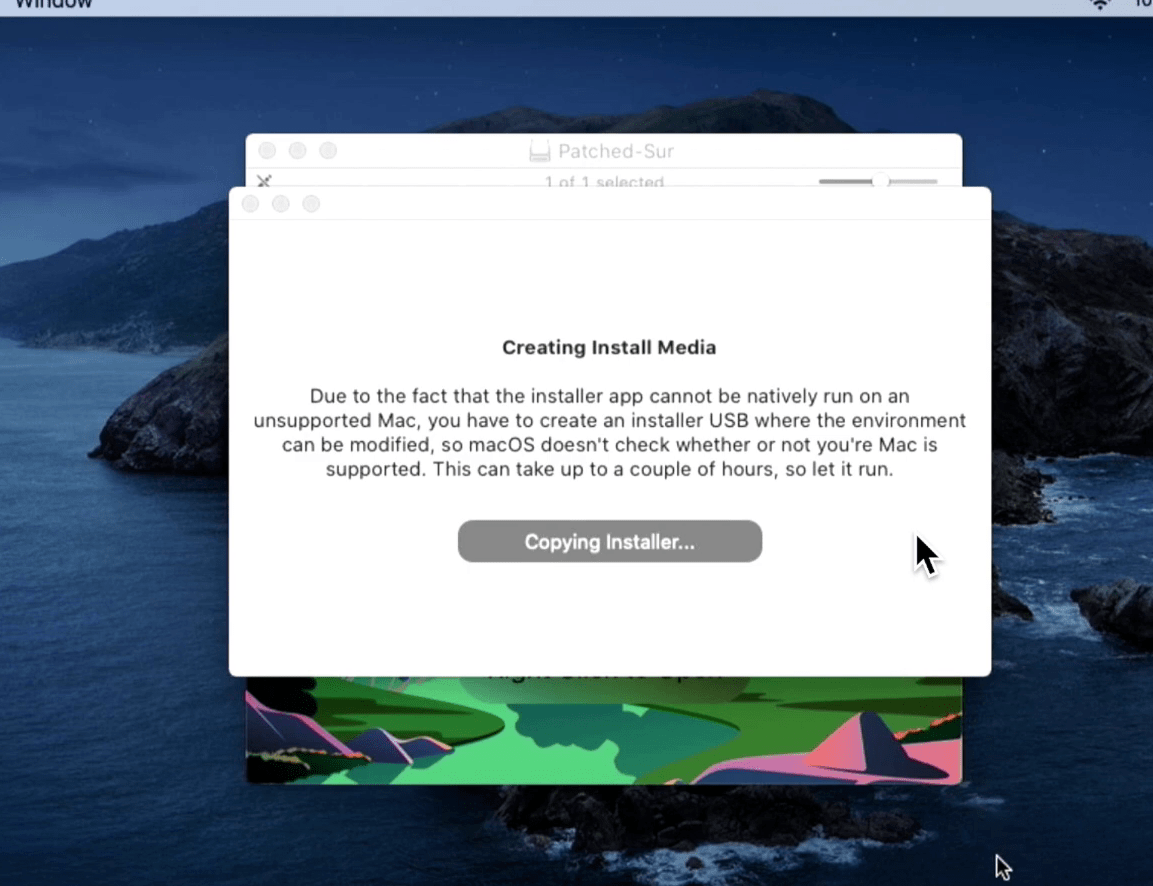
Due to the fact that the installer app cannot be natively run on an unsupported Mac, you to create an installer USB where the environment can be modified. So macOS doesn’t check whether or not you’re Mac is supported. This can take up to a couple of hours, so let it run. So, wait until it should erase the USB drive.
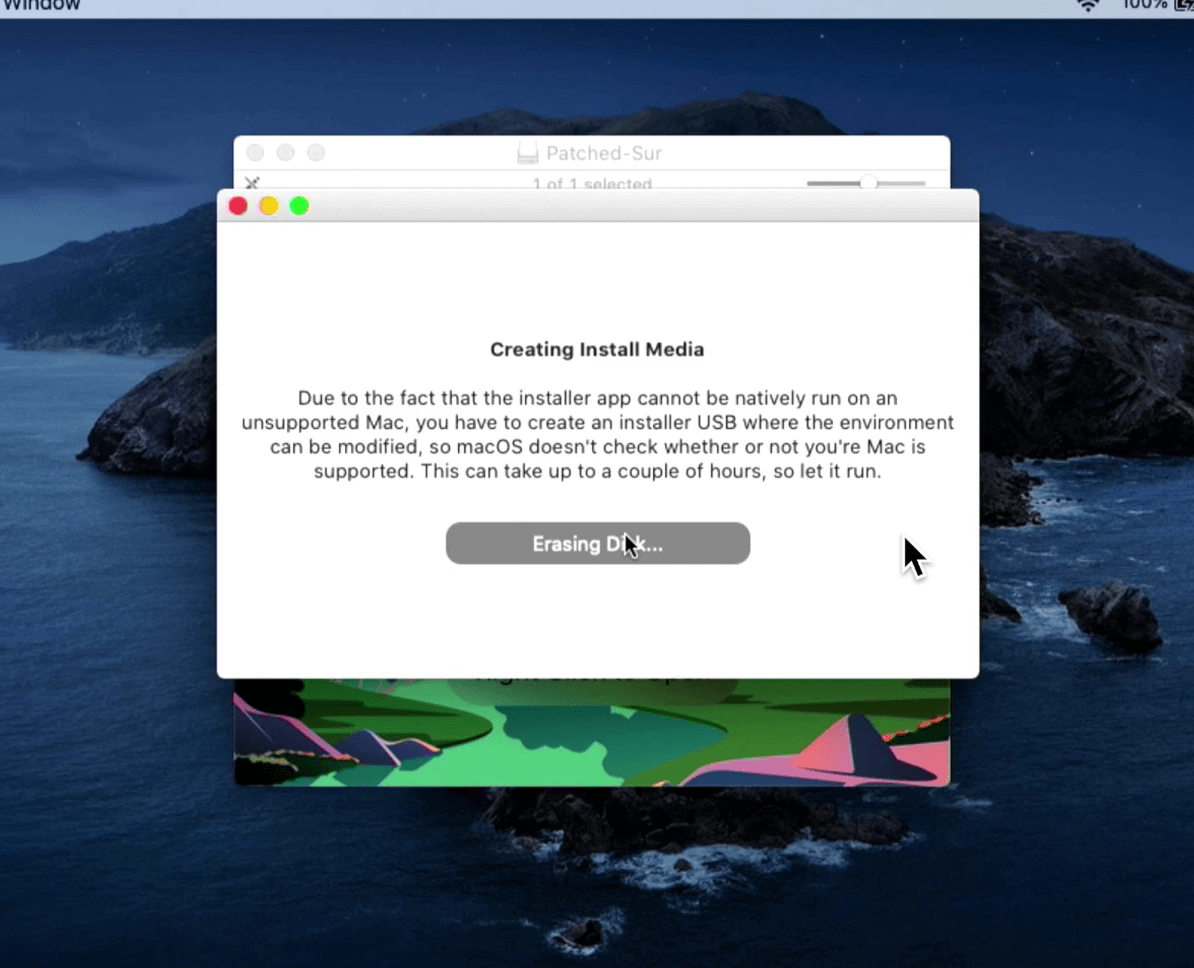
Once the disk erased automatically it will start copying the macOS Big Sur installer files to the USB flash drive.
Restart and Install macOS Big Sur
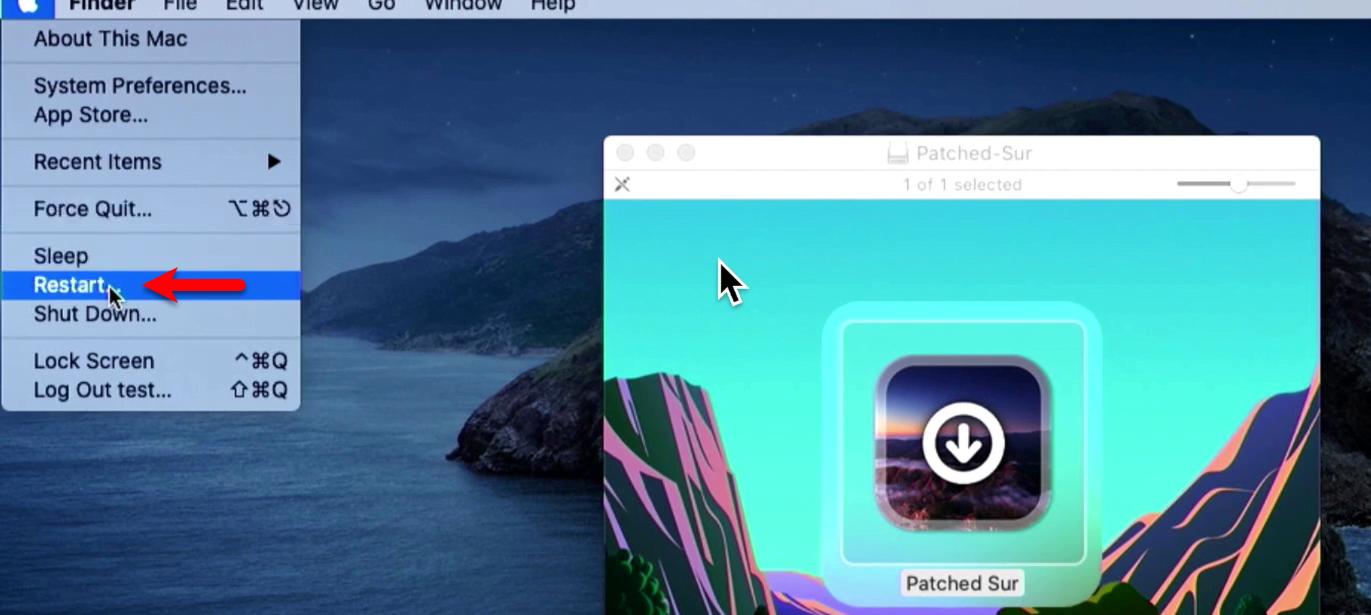
It’s last but not list, we have done the important steps for installing macOS Big Sur on Unsupported Macs. But the main part is remaining and that’s the main part of installing macOS Big Sur on a Mac. Therefore, for that purpose, you need to attach the USB drive and restart your Mac PC. If you don’t know how to restart the Mac move your mouse cursor to the left-handed of the window then click on the Apple logo and click restart.
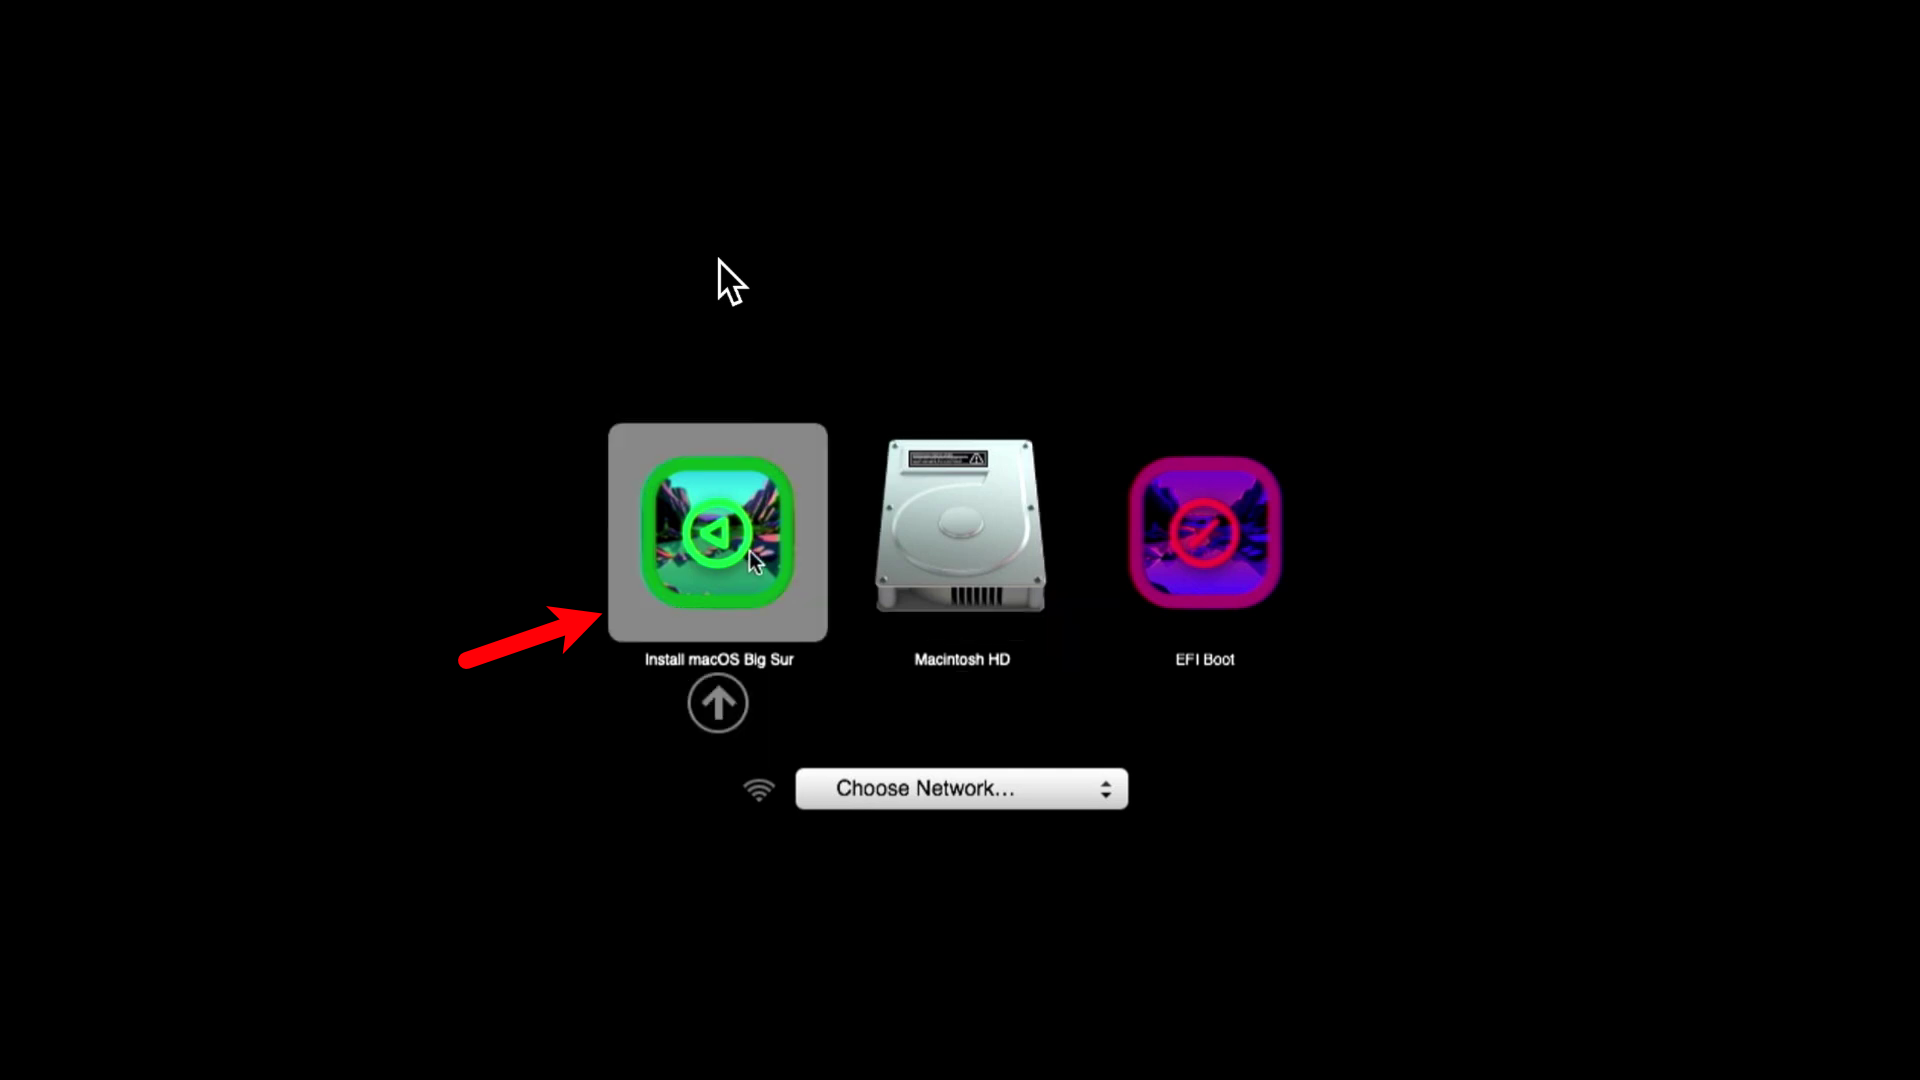
Once your computer restarted press and hold the boot menu key. While the boot menu appeared select “Install macOS Big Sur” and click on the arrow option.
- Wait for the Apple logo
- Once you reached the recovery window, there you don’t need to touch the drive or create any partition. Directly you will install or upgrade the existing operating system to macOS Big Sur. So, for that click on the “Install macOS Big Sur” option.
- To set up the installation click continue.
- Agree with terms and conditions of macOS Big Sur.
- Select the disk and click continue.
- And now you have to wait until the macOS Big Sur should be upgraded.
While you successfully signed up for macOS Big Sur on your Mac. Head over to the Patched Sur for installing some required files.
Note: Patching the Kexts get you WiFi, USB, and many other things working on your Big Sur installation. Without these Kexts, your Mac would not be at its full potential on Big Sur, and several things would not work. Makes sense right?
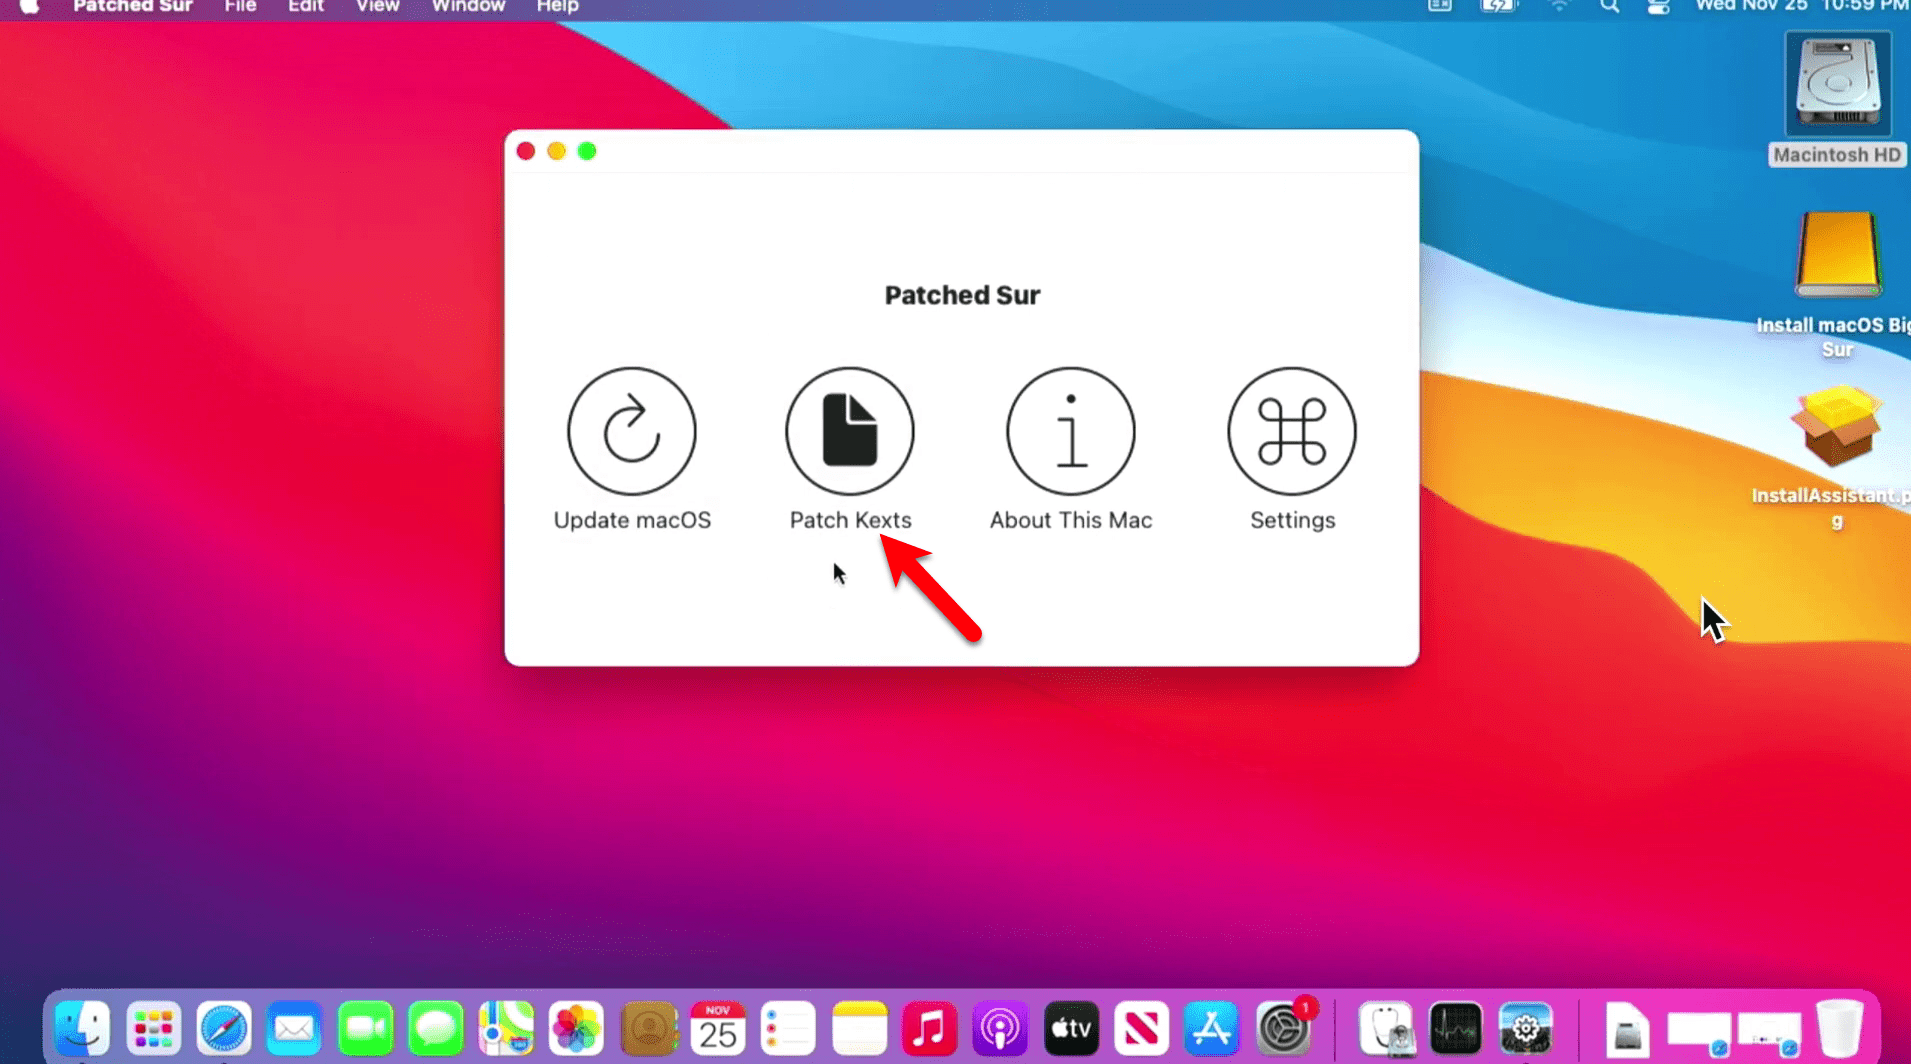
While the Patch Kexts successfully done restart your computer, and check all the settings should work properly.
Related: