Microsoft is newly launched at the market with its latest new features, the features including this time in Windows operating system New Start Menu, New Task Bar, and new icons. However, if you are looking for a solution how to install Windows 11 without TPM 20.0 and Secure on PC, then you are at the right place. Because here I will guide you step by step on how to make it happen.
Windows 11 22000.1 is now available in the insider preview and you can download or update your Windows 10 PC to Windows 11. On the other hand, if your PC can’t support Windows 11 the TPM 2.0 then you have to follow this article. Windows 11 is not yet in the full version, soon you will have the ISO file of Windows 11 image in your hand.
If you want to update your Windows 10 PC to Windows 11 operating system then you have to follow the below down guide. While you are facing the error that “This PC Can’t Run Windows 11”, then you have to follow the below down guidelines on how to fix it.
And manually, if you want to run the installation of Windows 11 on your PC or Laptop, then you have to follow the below the down guidelines on how to fix the error of “This PC Can’t Support Windows 11”. Using the below down guide, firstly you need to create a Bootable USB flash drive for Windows 11 on your Windows 10 PC. After that, follow the below down steps on how to install it perfectly.
How to Install Windows 11 Without TPM 2.0 and Secure Boot on PC?
Once you have created a Bootable USB Flash drive, then restart your computer. Like you are installing Windows 10, with the same process we will go ahead and install Windows 11 on PC. Once the PC restarted simply press and hold the Boot menu key. After that, select the USB drive for the Boot and press to enter the installation.
- When the installation launched on the first screen select your language & Country then click next.
- Click on the Install button to proceed with the installation.
- Click on I don’t have a product key and click next.
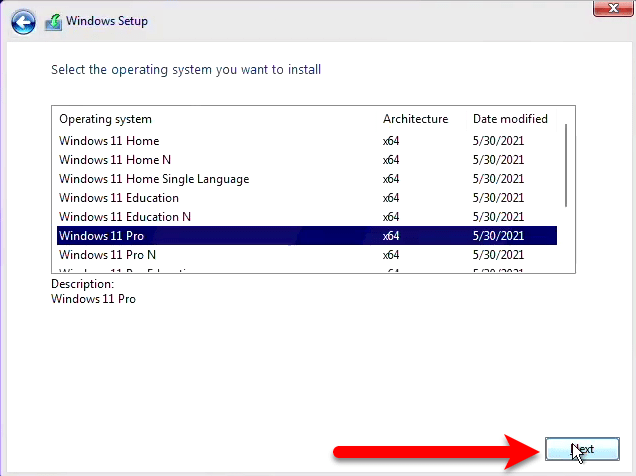
- Select your Windows 11 version and click next.
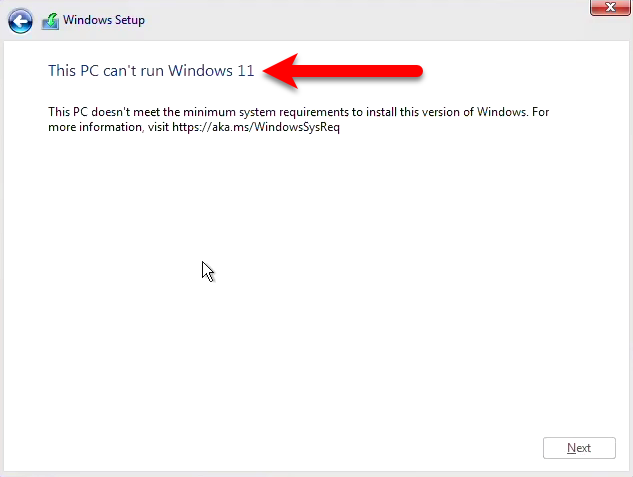
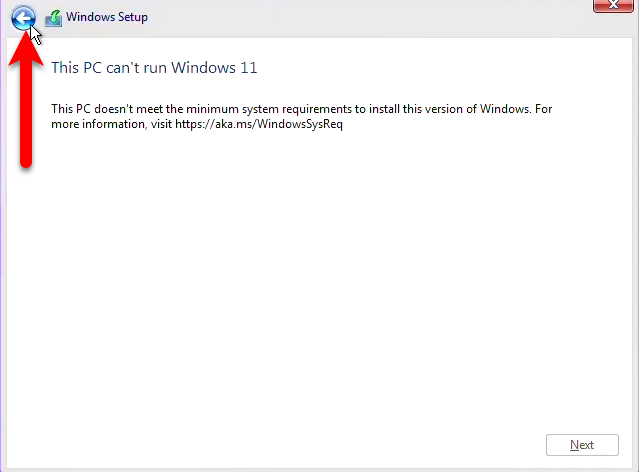
- Once this window appeared you will see the error “This PC Can’t Run Windows 11”.
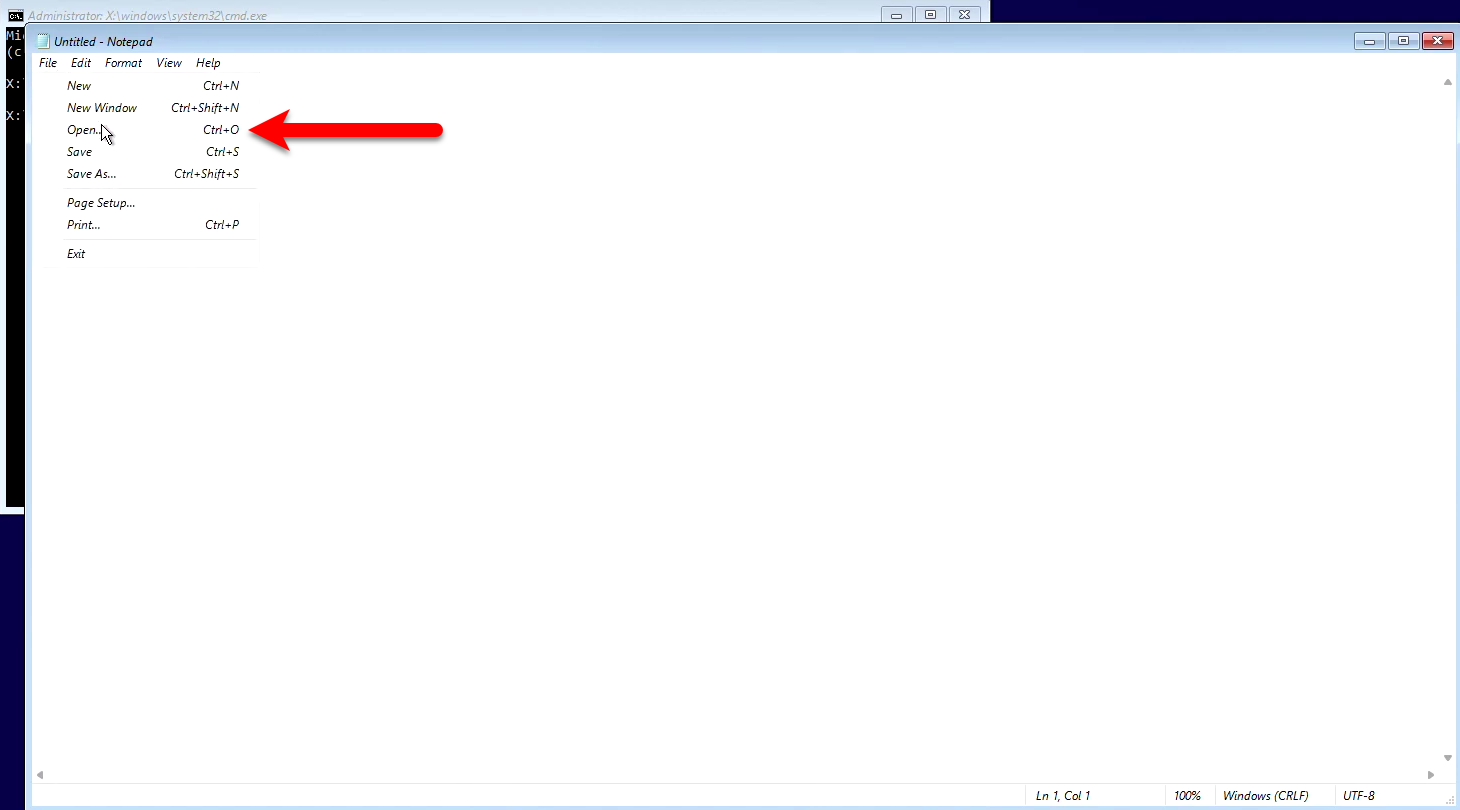
Once you face this error what you need to do is to open the command prompt “CMD” and Notepad window to fix the error. For opening the Command Prompt window press and hold the Shift+F10 key to open the Command prompt.

When the notepad window opened from the left-handed side click on File>Open.
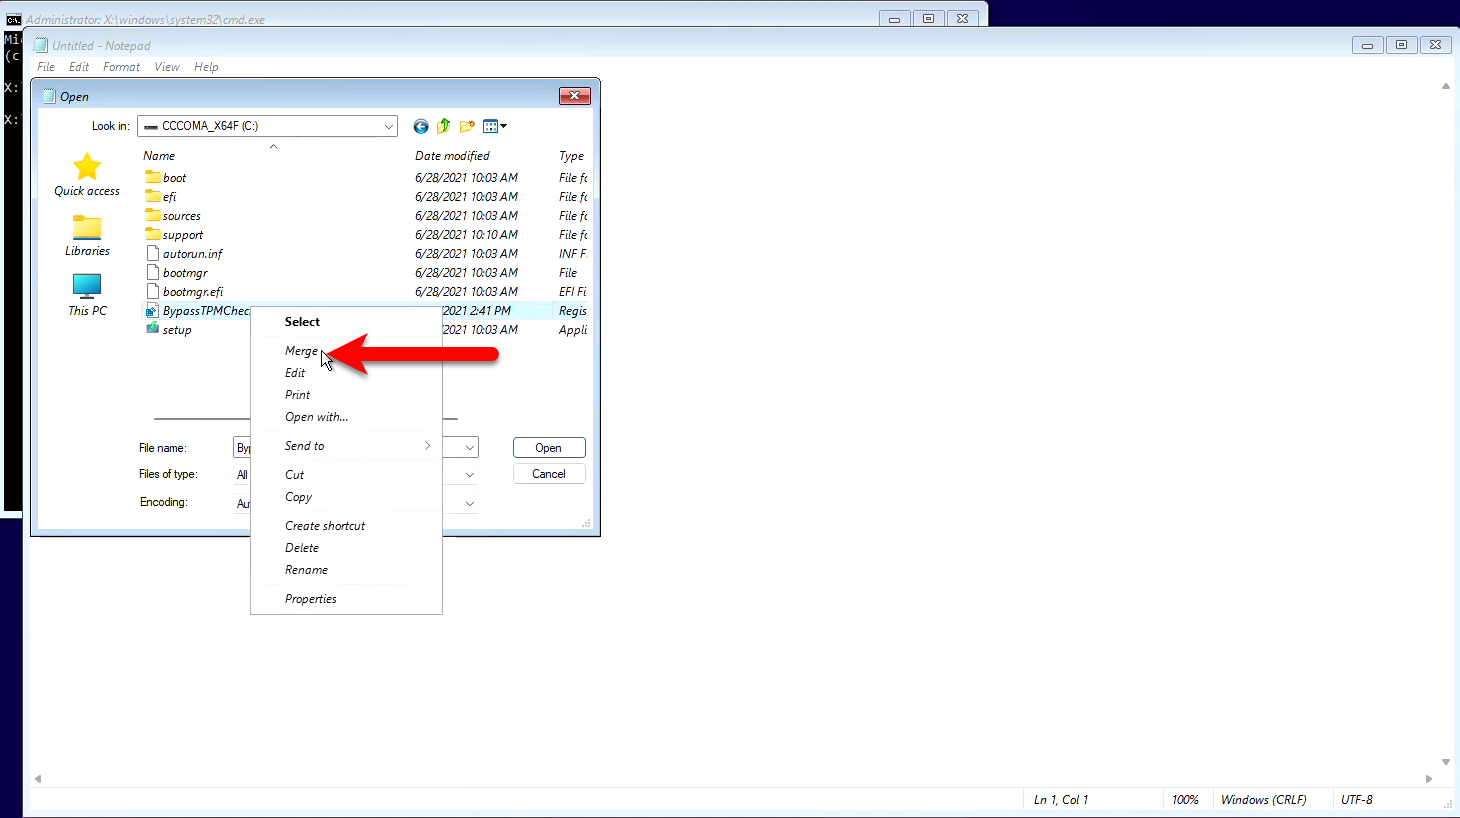
Now click “This PC”, select USB flash drive and select the “TheBypassTPMCheck&Secure.Reg”. Then right-click and select “Merge”.
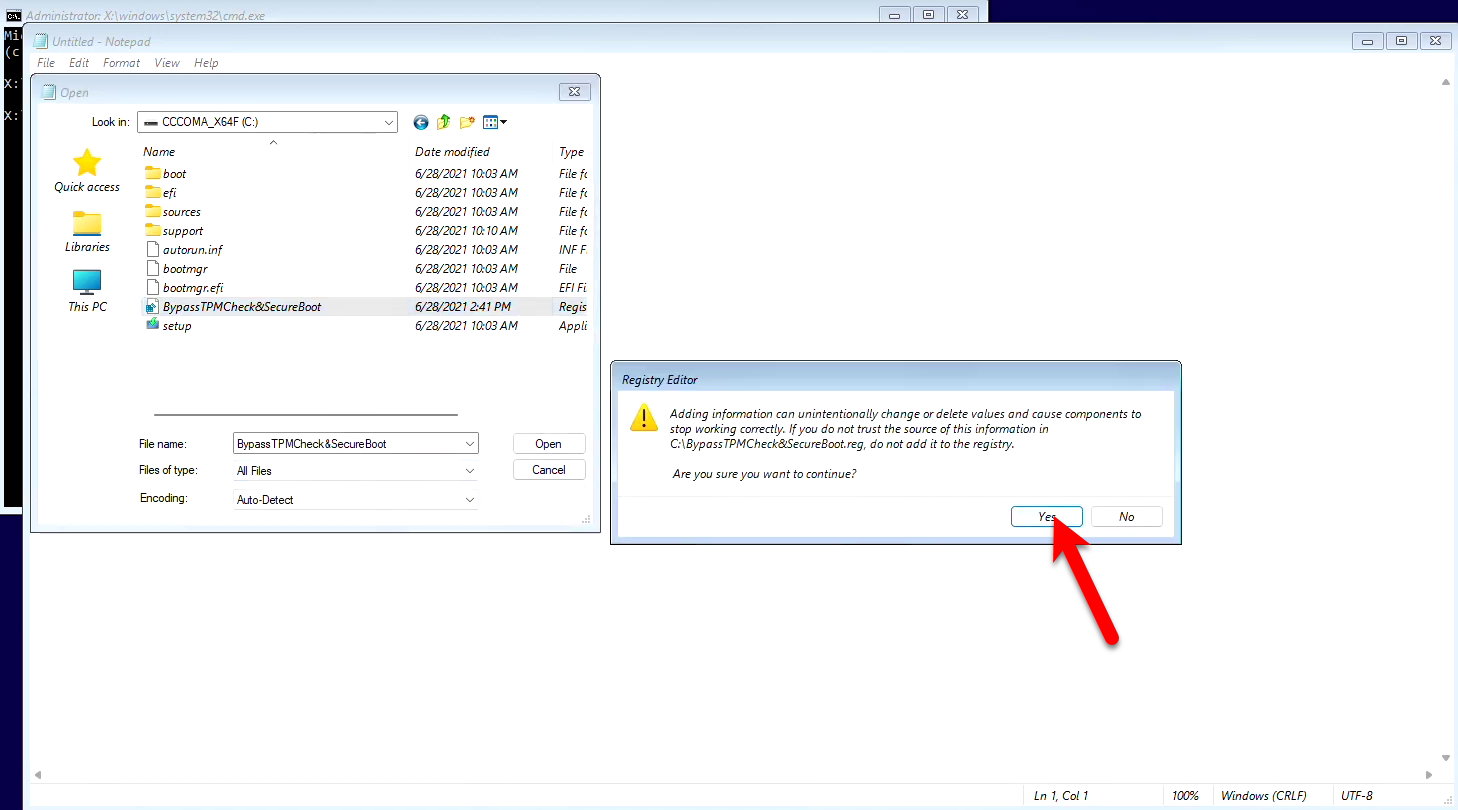
Note: Adding information can unintentionally change or delete values and cause components to stop working correctly. If you do not trust the source of this information in C:/ByPassTPMCheck&SecureBoot.reg, do not add it to the registry.
To continue click Yes.
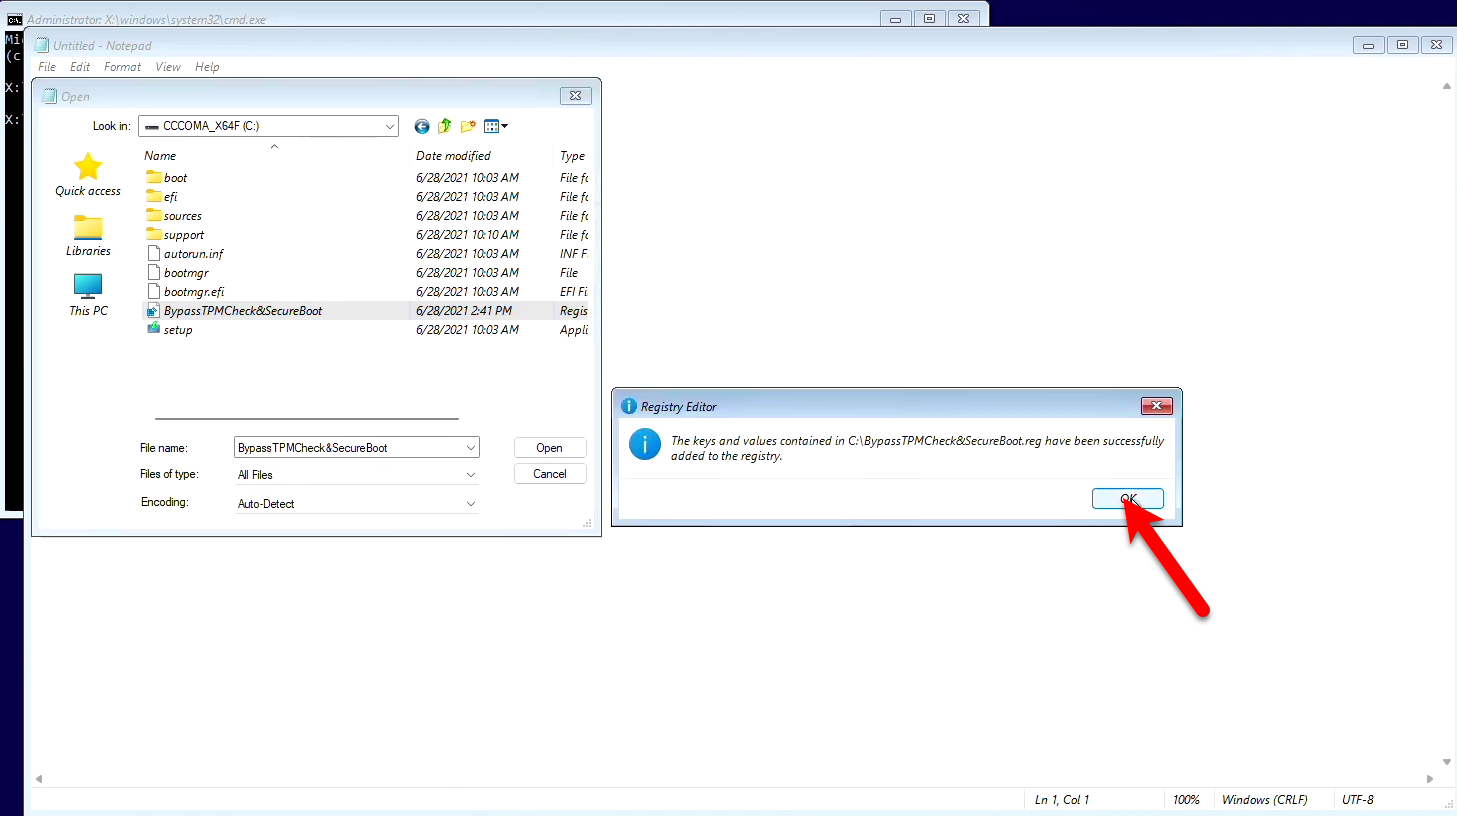
The keys and values contained in C:BypassTPMCheck&secureboot.reg have been successfully added to the registry. So, click OK to proceed.
Close the notepad window and command prompt window, then follow the installation process in the below down screenshots
When the process successfully completed click on the back window.
Once again select the version of Windows 11 and click Next.
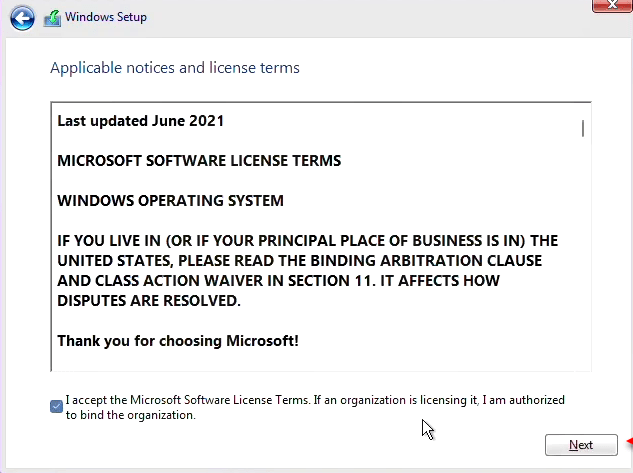
Click the box of agree with the terms and conditions of Windows 11 and click Next.
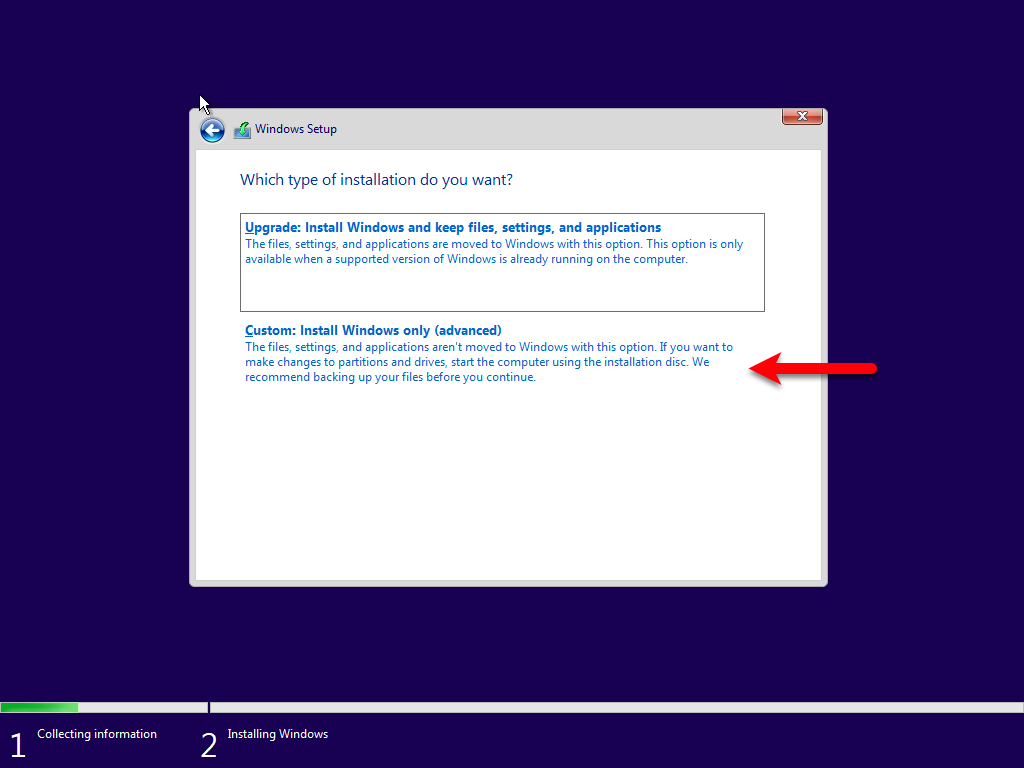
Select Custom: Install Windows Only (Advanced).
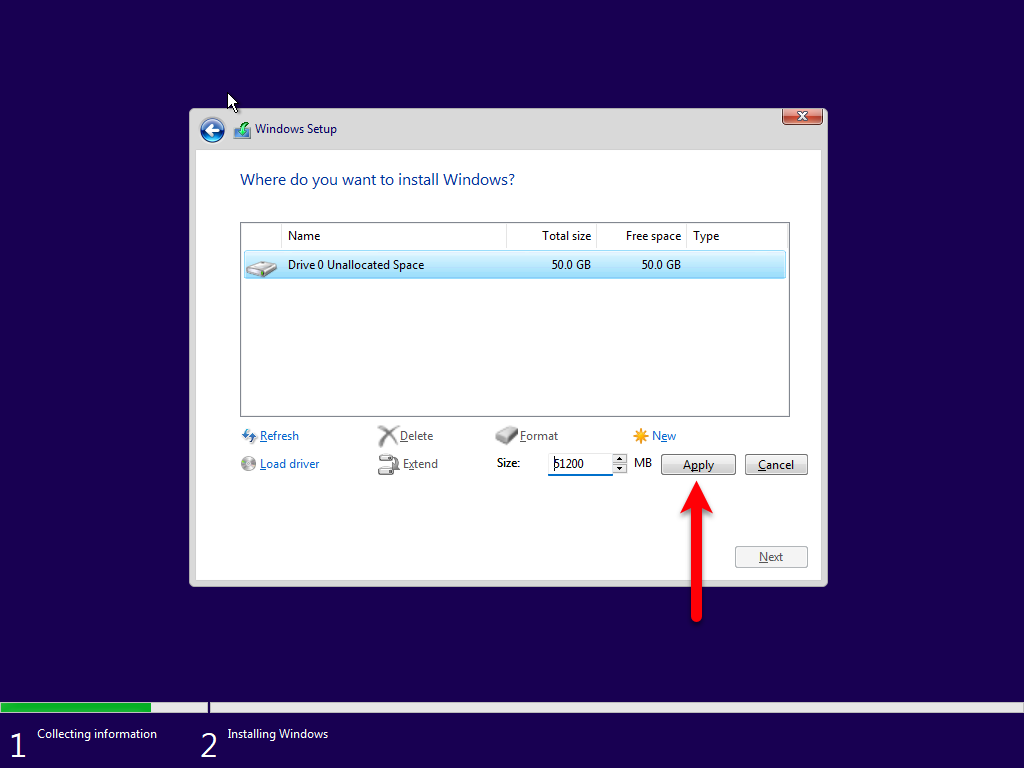
Select the disk where or format the disk which previously Windows was available there and click format. Or simply create a disk for the installation of Windows.
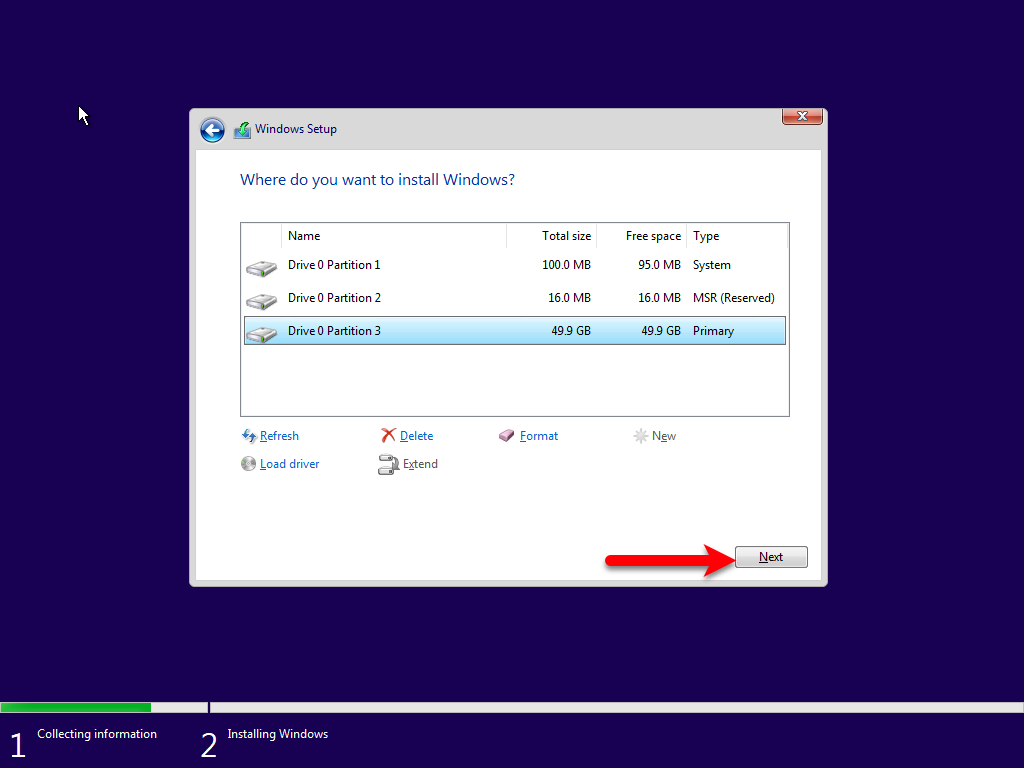
Now select the disk where you want to install Windows 11 and click next.
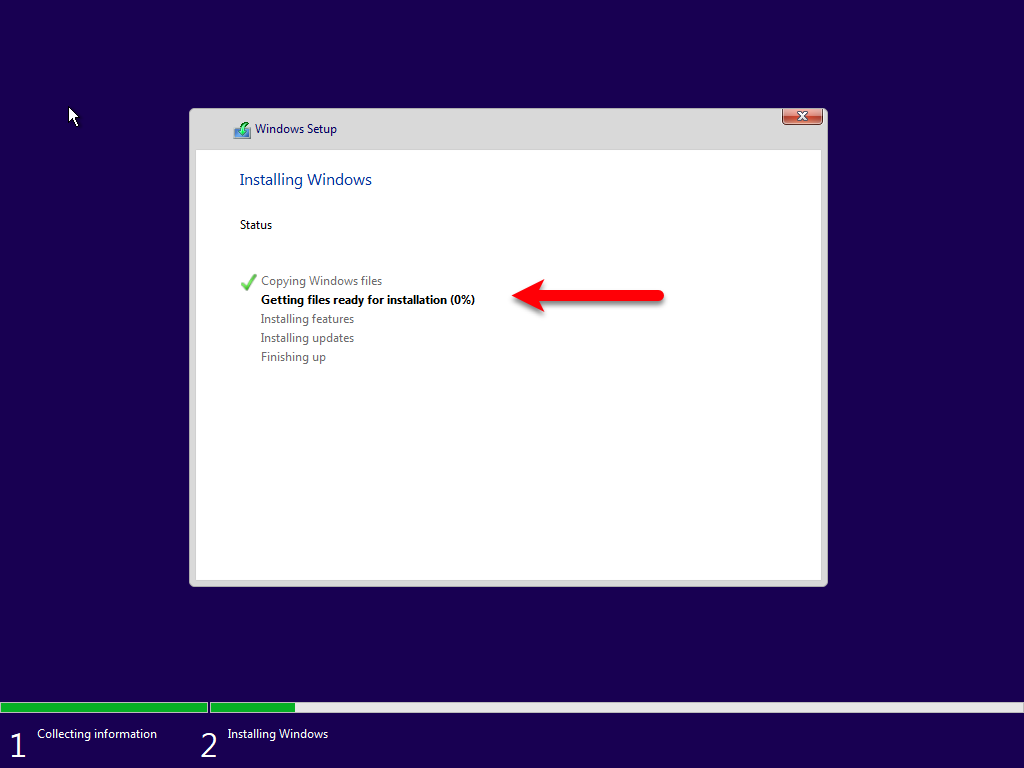
Wait for the installation until it should be completed, after the installation completed your computer will restart.
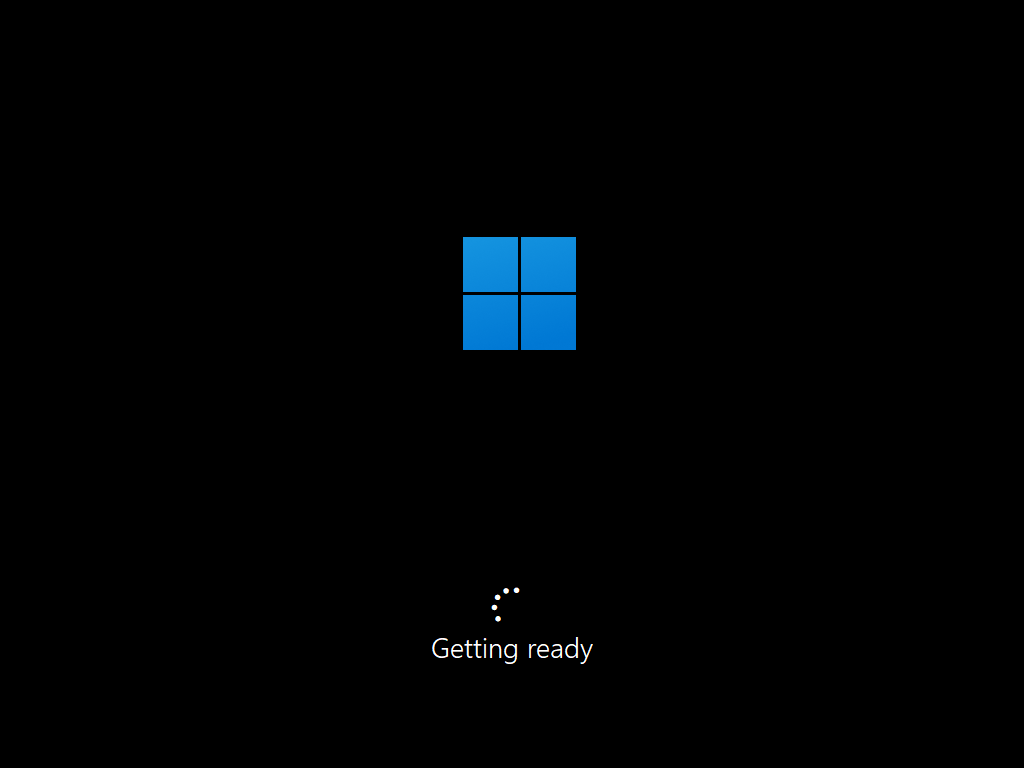
After restarting wait while it should get ready the Windows 11 for the first use.
Complete the Basic Settings
- Once the Windows gets ready you will require to complete the basic settings, if you don’t know check out the below down slideshow.
- At the first screen select your country and click Yes.
- Select your keyboard layout and click Yes.
- If you want to add any keyboard layout so click on Add Layout if you don’t want simply click Skip.
- Now, wait it should check for the update.
- Select set up for personal use and click next.
- Enter your Microsoft account, if you don’t have one then click on create and create a Microsoft account step by step.
- Click Create a PIN.
- Enter your PIN or Password and click next.
- On the Privacy, setting window click next.
- Accept the privacy.
- Click Skip.
- Select Store only files on this device and click next.
- And finally, wait until the Windows should get ready for the first use. Once it gets ready the Windows 11 window will pop up.
- At last, enjoy using Windows 11 on VirtualBox on Windows PC.
[metaslider id=5729]
Activate Windows 11 Without Product Key
Still, Windows 11 is in Beta mode you might face problem to activate Windows 11 for free without any product key. But there is no worries you can check the ways to activating Windows 11 for free in the below down link. More then that you can’t find out the solution of activating Windows 11 on the internet, as I researched too much and final find out the tool to activate Windows 11 for free.
Install Windows 11 on VMware & VirtualBox
If you want to test or install Windows 11 on Virtulization tool then you can check the below links how to do that. Most the users still they are not sure about the security of Windows 11, therefore, they want to test it on Virtulization platforms such as VMware and VirtualBox which I did. VMware & VirtualBox is the best platform which allows you to test different kinds of operating system on it. Even if you are a Mac user then you can simply install the VirtualBox or VMware Fusion and starts installing the Windows 11 operating system.
- How to Install Windows 11 on VirtualBox on Windows PC?
- How to Install Windows 11 on VMware on Windows PC?
Final Point
The above procedure will allows you to install the Windows 11 operating system manually on your PC or Laptop without any issues. Therefore, if you faced any kind of problem feel free to share with us in the below down comment section box. If you got the article important so share it with your friends and share your nice feedbacks about the article. Also, stay with us to see more articles about Windows 11 on this platform.