While installing the new Microsoft operating system Windows 11 on your PC or laptop, you might be encountered with the following error “This PC can’t run Windows 11”. On the other hand, some of the users successfully installed the latest Windows OS on their PC or laptop. This time Microsoft build Windows 11 with the TPM 2.0 compatibility support.
Unfortunately, most computers were compatible with Windows 10 or any older versions of the Windows operating system. But now those PC is not compatible with Windows 11. As my computer is HP 8th Generation, but I wasn’t able to enable the TPM feature on the BIOS menu. I don’t know what is the main issue, but again I figured the solution how to bypass the TPM 2.0.
However, in the previous article, we wrote something about how to Fix this Windows 11 error this PC can’t run Windows 11. After, creating a Bootable USB drive for Windows 11 you won’t be able to run manually the installation of Windows 11 on your laptop or PC. But this new method will work pretty fine as I have tested it on the Laptop that worked perfectly for me.
This new method is a code that you will create by yourself and replace or copy to the Bootable USB Drive of Windows 11. The new method code is founded by our team on the GitHub website, and successfully experimented and worked perfectly for us. So, I recommend if the first method didn’t work for you then check this method to fix the Windows 11 error installation TPM 2.0.
First Method: How to Fix Windows 11 Error the PC Must Support the TPM 2.0?
How to Fix this PC Can’t Run Windows 11 – New Method
1. Create a Bootable USB Drive for Windows 11
For creating Windows 11 you need its ISO image file which we have created and uploaded to MediaFire cloud storage. You can easily download its ISO image file from the below down-link free of cost. Once you have downloaded the ISO image file, then click on the second link and check out how to create Windows 11 Bootable USB Drive.
- Download Windows 11 ISO Image file – Latest Version
- How to Create Windows 11 Bootable USB Flash Drive?
Step 1. Now follow the steps one by one on how to fix the error of Windows 11, while installing on your PC through the USB flash drive. Navigate to GitHub’s official website, or click in the below down-link to redirect you to the main window.
- GitHub Commands
[HKEY_LOCAL_MACHINE\SYSTEM\Setup\LabConfig]
"BypassTPMCheck"=dword:00000001
"BypassSecureBootCheck"=dword:00000001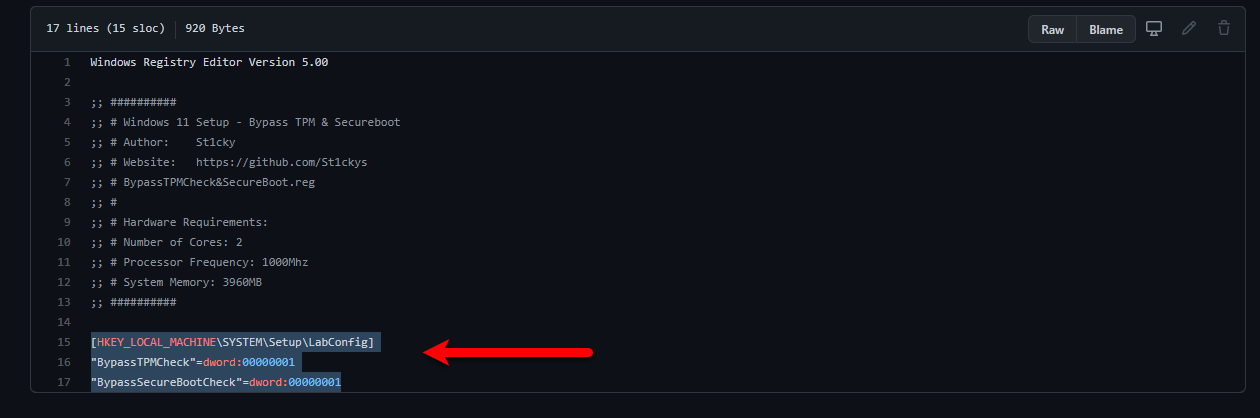
Step 2. Navigate to Windows Start menu type there Run and press enter to open, or simply type notepad.

Step 3. Now copy the commands and paste them into notepad, then click on the top on File>Save As.
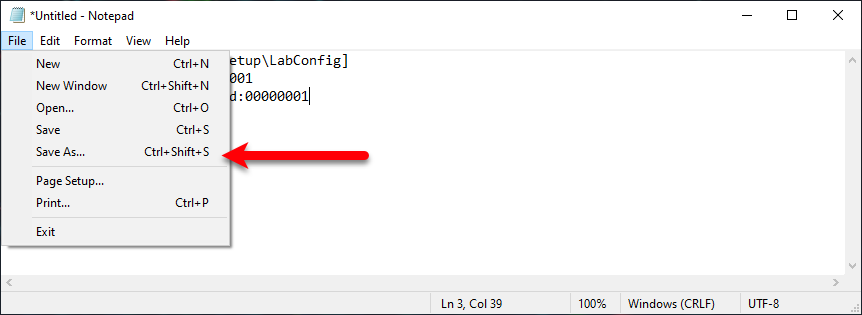
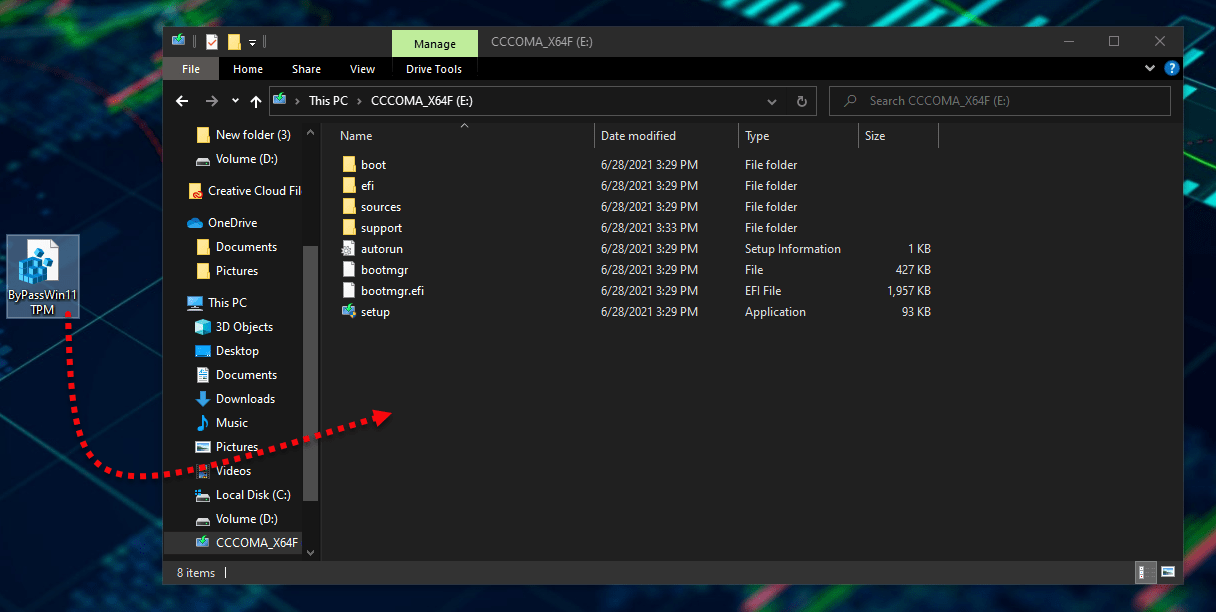
Step 4. Type any name for the file, as “Bypasswindows11.Reg” and press save
Note: Don’t forget to type Reg at the end of the name which you want to type

Step 5. Once the file saved simply move the file to the Bootable USB Drive of Windows 11.
Install Windows 11 Without TPM 2.0 & Secure Boot on PC
Final Point
Once the process completed restart your computer then press the Boot menu and run Windows 11 from USB Drive, and continue the installation. I hope the new method worked fine for you, if this method didn’t work for you then you can try the first method. The link is mentioned in the above description. If you got important this article then doesn’t forget to share your nice thoughts in the below down comment section.