Since Windows 10 was released in the year 2015 Microsoft said that we will not release any other version of the Windows operating system after Windows 10. For more than six years Microsoft keeps updating Windows 10, brought many changes to the interface features of Windows 10. Several days ago the version of Windows leaked on the internet called Windows 11. And after that, Microsoft tweeted and confirmed the Windows 11 operating system.
Microsoft will have a conference on 24th June 2021, for the release of its biggest operating system Windows 11. Windows 11 is having bunches of new and best features. But some of the features are similar to Windows 10 operating system.
Windows 11 current features are added on leaked version are new Task Bar, Start Menu, Search Bar, New Animations, A new Way to multitask with Windows, Improved touch controls, Fresh new sounds, Dark Mode, Rounded Corners, Refreshed Action Center, New Icons, New Ways to manage virtual desktops, Widgets, and bunches of other features will scope on 24 June. However, these are the features that Windows 11 has in the leaked version.
We have tested out the latest Windows 11 OS on VMware Workstation on Windows PC. And also, updated the Windows 10 PC to Windows 11 without any issues. So, in this article, I will guide how to install Windows 11 on VirtualBox on Windows PC.
During updating Windows 10 Windows 11 some of the users faced an error. But there are no worries we figured out the solution how to fix the error. I think there missing file in the operating system which needs to be fixed by replacing and adding another file. If you faced the same error then check out the below down-link on how to fix it.
Read Also:
How to Install Windows 11 on VirtualBox on Windows PC?
As in our previous post we recommended testing the leaked version of Windows 11 on Virtualization platforms such as VMware Workstation/Player or VirtualBox. On the other hand, if you are a Mac user then using VMware Fusion or VirtualBox you can install Windows 11 on your Mac PC.
Because it’s the Beta version and needs to be clarified all the issues after releasing its Public version on 24 June. But if you want to test the leaked version on VMware or VirtualBox, then follow this article on how to install it.
Steps to Install Windows 11 on VirtualBox
- Download Windows 11 ISO image file
- Download and Install VirtualBox on your Windows PC
- Create a New Virtual Machine for Windows 11
- Customize the Virtual Machine
- Perform a clean installation of Windows 11 on VirtualBox
- Complete the Basic settings of Windows 11
Required files:
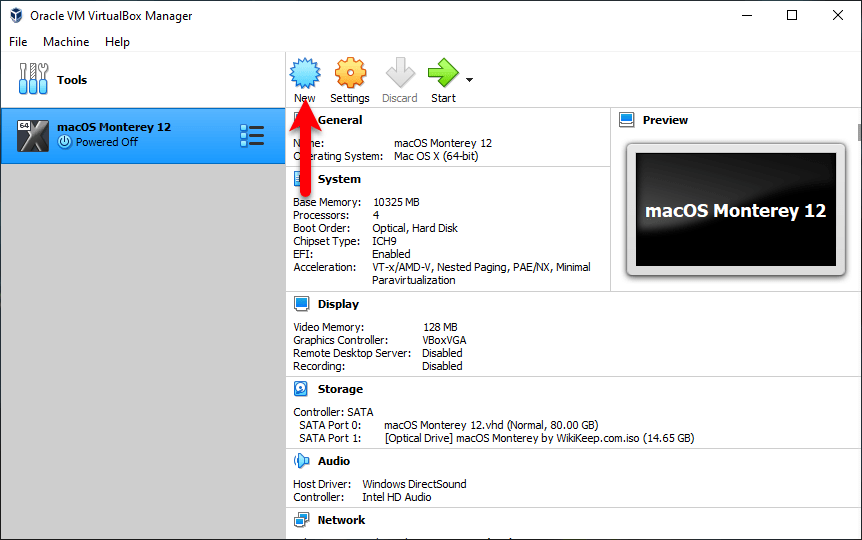
Step 1. Create A New Virtual Machine
The process of installing VirtualBox on Windows PC is easy with few clicks you can install it. So, I didn’t make it important to provide you the screenshots. When the VirtualBox successfully created you have to create a new virtual machine. So, open up the VirtualBox on the main screen click on the New option.
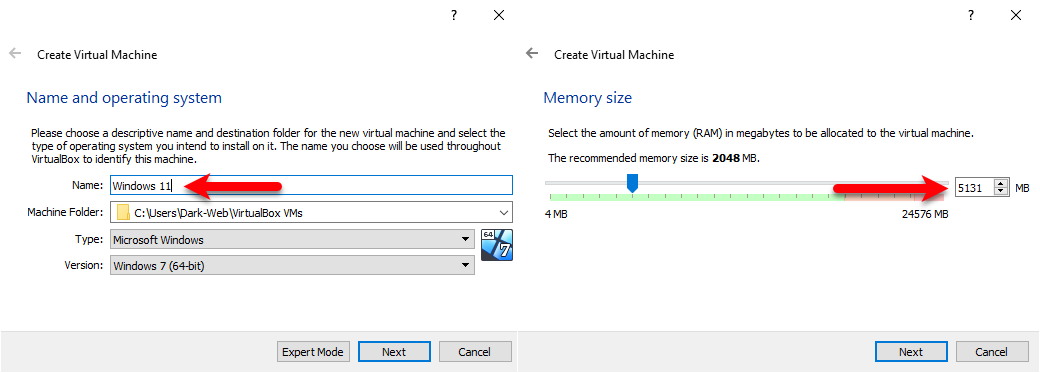
Once the next screen opened type Windows 11 the rest of the settings will select automatically and click Next. Increase the Memory Size and click next.
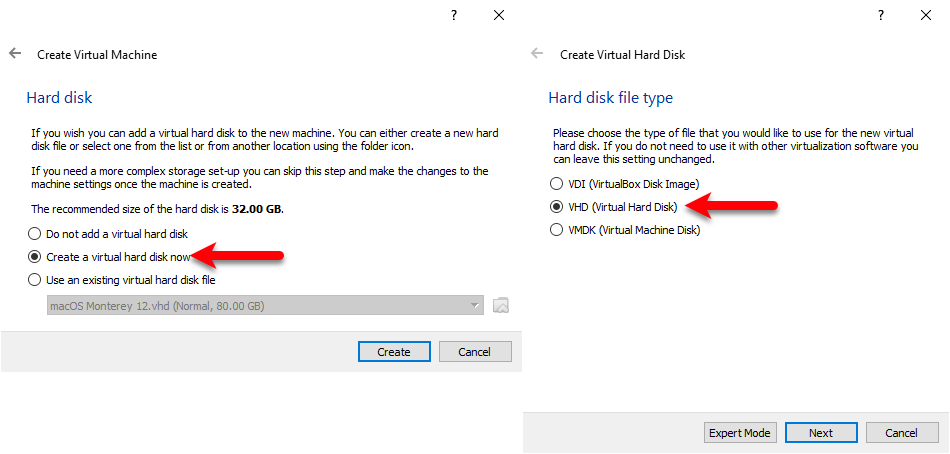
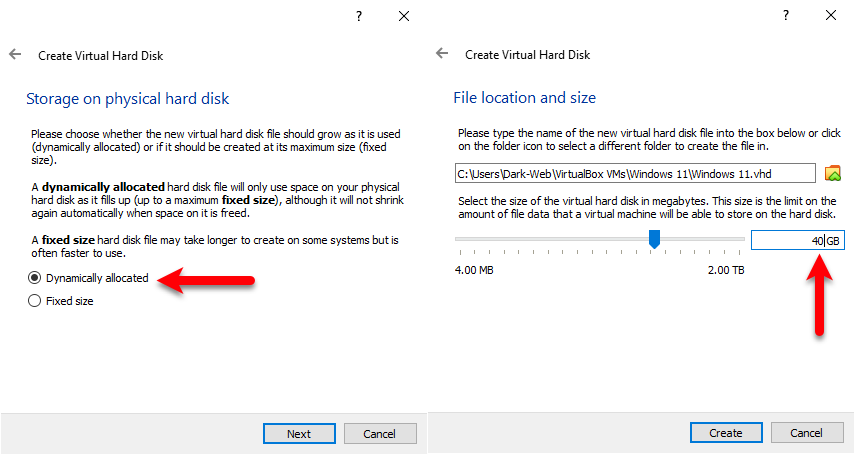
Select Create a Virtual Hard Disk now and click Create. Select VHD (Virtual Hard Disk) and click Next.
Select Dynamically allocated and click Next, select the hard disk size and click Create.
Step 2. Customize The Virtual Machine
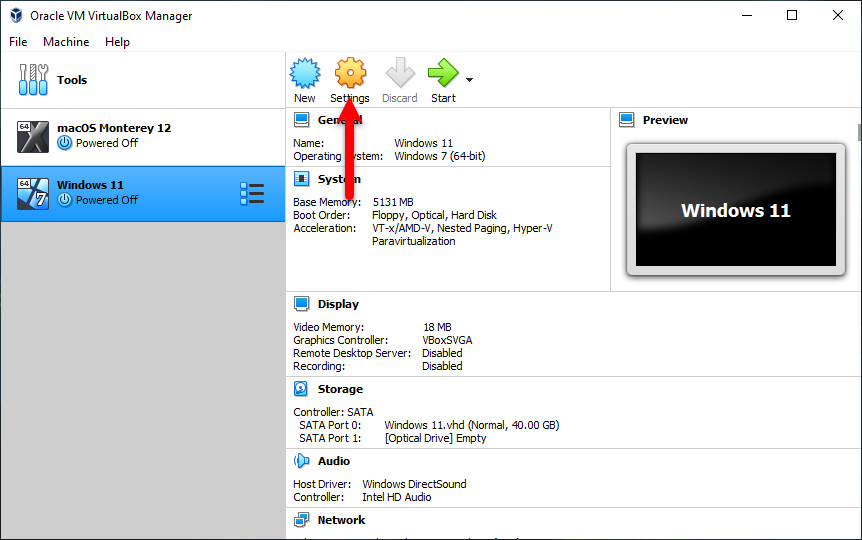
Once the virtual machine created for Windows 11, for better performance you need to customize a few settings. So, select Windows 11 and click on Settings.
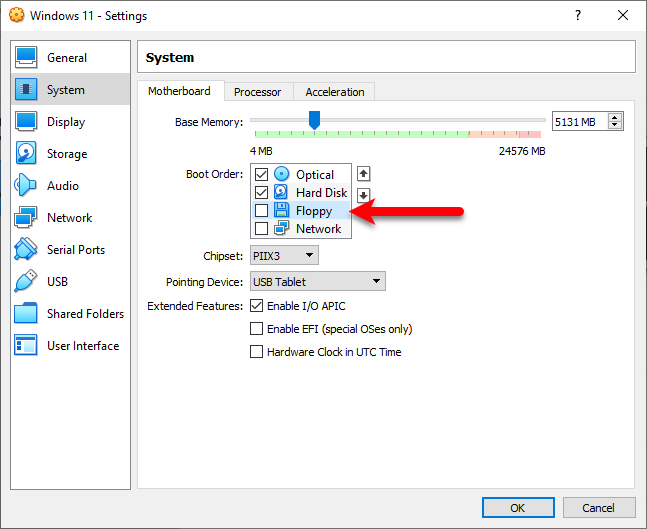
When the settings window opened from the left-handed side select the System tab and under the motherboard, the tab unchecks the Floppy disk.
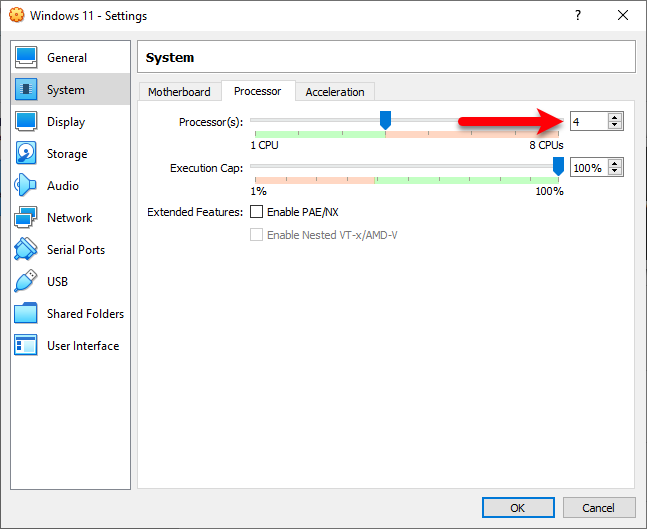
Select the Processor tab, and increase the number of processors.
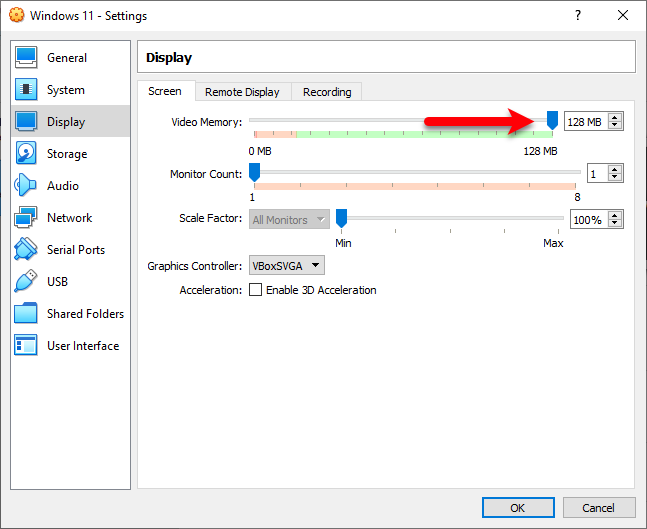
Select the Display tab, increase the video Memory up to 128MB.
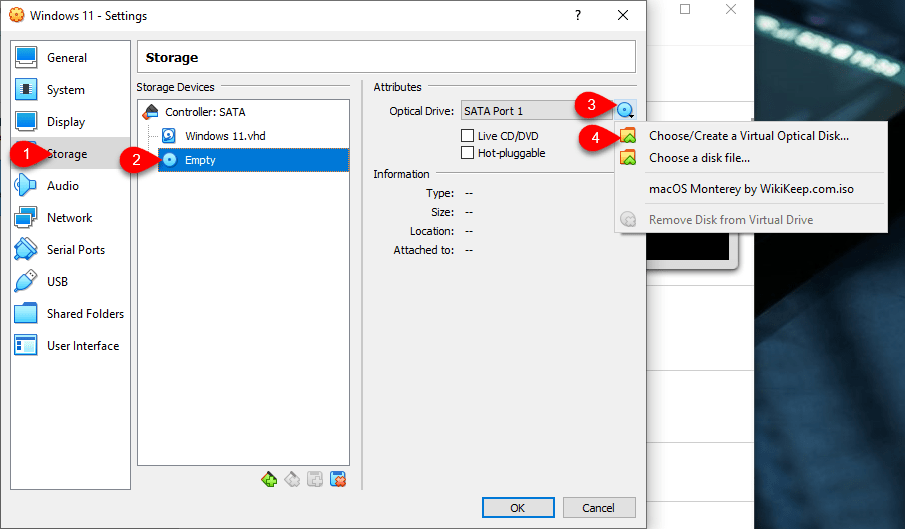
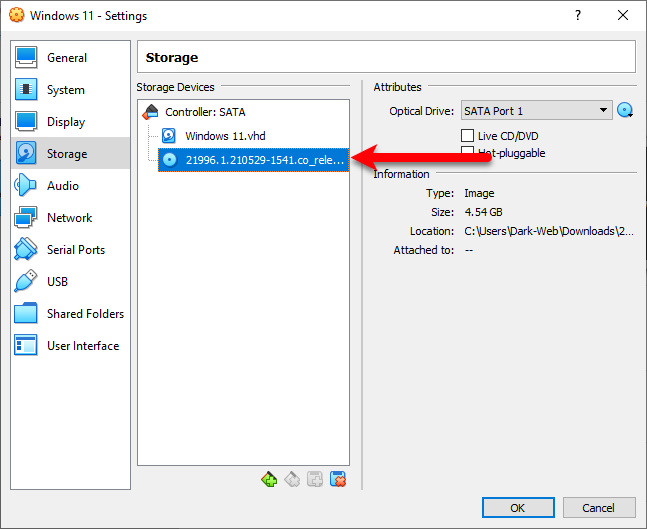
Select the Storage tab, click on the Empty icon, click on the blue disk icon, and click Choose/Create a Virtual Optical Disk.
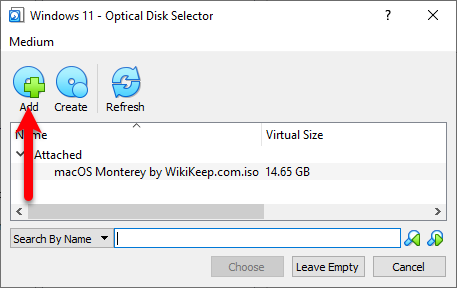
Once this window opened click on Add option.
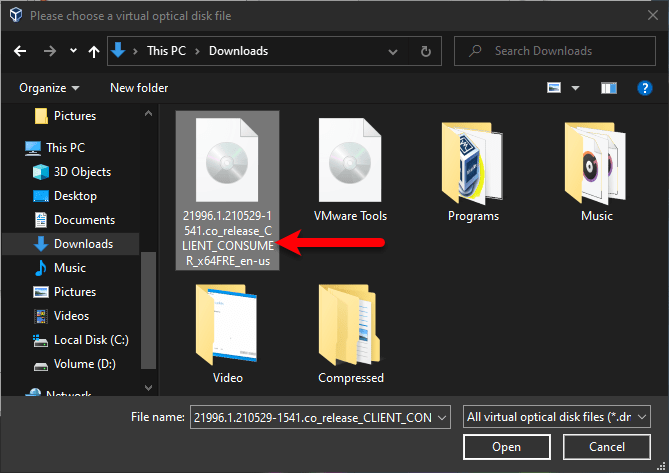
Now choose Windows 11 ISO image file and click Open.
Be sure that Windows 11 ISO image file is added then click on Choose option.
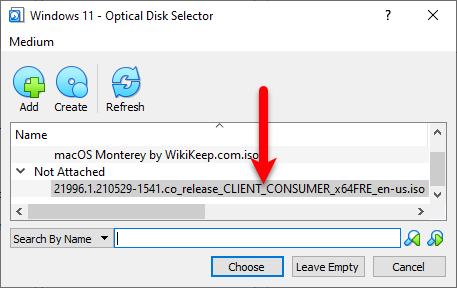
As you can see in the below down screenshot the Windows 11 ISO image file is added in the window.
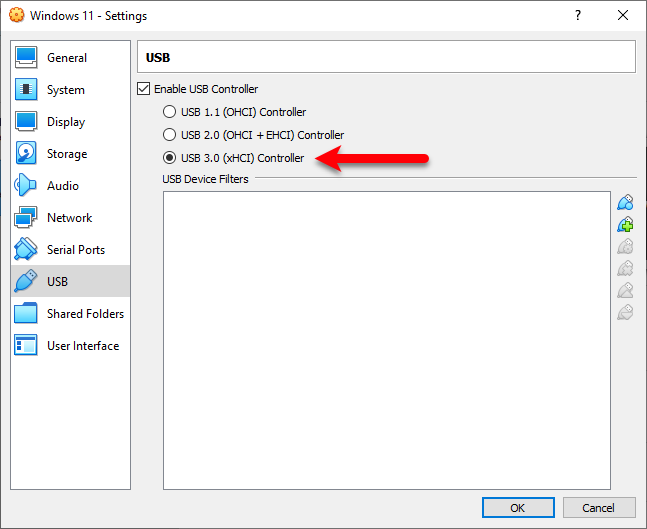
The last option is the USB tab, select it then select USB 3.0 (xHCI) Controller and click OK to make changes.
Step 3. Perform A Clean Installation of Windows 11 on VirtualBox
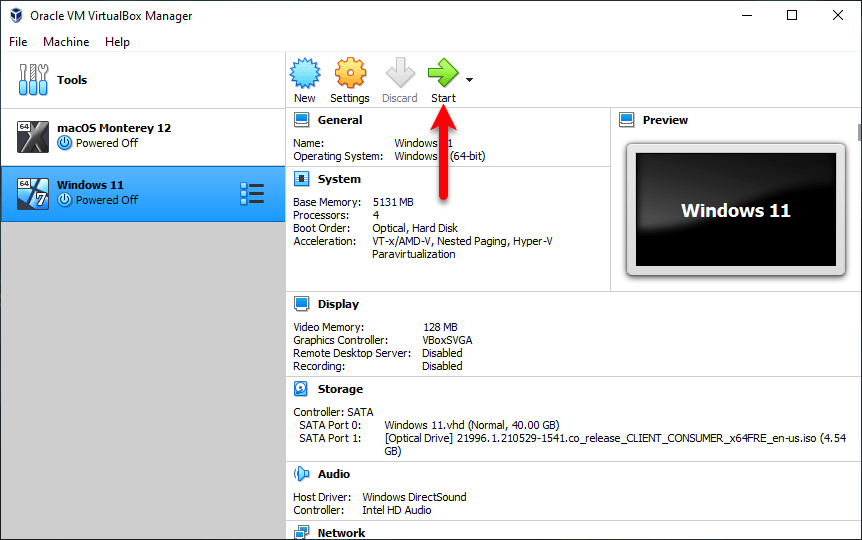
And finally, we are here to perform a clean installation of Windows 11 on VirtualBox on Windows PC. Each and every step are successfully done, so now select the Windows 11 virtual machine and click on Start to run the installation.
- Once the installation launched wait for few moments to open up the main wizard.
- When the main installation window opened select your language, date and time format, your country, and click next.
- Click on Install
- Click on I don’t have the product key.
- Choose your Windows 11 version and click Next.
- Click on “I accept the Microsoft software license terms. If an organization is licensing it, I am authorized to bind the organization” and Next.
- Choose Custom: Install Windows only (Advanced).
- Click on New and enter the hard disk size and click Apply.
- When the notification appeared click on OK.
- While the hard disk created click on Next to proceed with the installation.
- Wait until the installation should be completed, when the installation completed automatically the virtual machine will restart.
- After restarting wait for it to get ready the Windows 11.
[metaslider id=5663]
- Once the Windows gets ready you will require to complete the basic settings, if you don’t know check out the below down slideshow.
- At the first screen select your country and click Yes.
- Select your keyboard layout and click Yes.
- If you want to add any keyboard layout so click on Add Layout if you don’t want simply click Skip.
- Now, wait it should check for the update.
- Select set up for personal use and click next.
- Enter your Microsoft account, if you don’t have one then click on create and create a Microsoft account step by step.
- Click Create a PIN.
- Enter your PIN or Password and click next.
- On the Privacy, setting window click next.
- Accept the privacy.
- Click Skip.
- Select Store only files on this device and click next.
- And finally, wait until the Windows should get ready for the first use. Once it gets ready the Windows 11 window will pop up.
- At last, enjoy using Windows 11 on VirtualBox on Windows PC.
[metaslider id=5729]
Final Point
It was about how to Install Windows 11 on VirtualBox on Windows PC. If you faced any kind of problem feels free to share with us in the below down comment section box.