
The new operating system causes different kinds of errors. While upgrading to Windows 11 may create lots of issues for most of the users. If you are looking to upgrade your Windows 10 or current operating system to the latest operating system Windows 11. When there will be a range of problems while upgrading. If you want to upgrade your Windows 10 to Windows 11 then there is a problem you may face. And the error is “This PC Can’t Run Windows 11”, the computers which are having the latest generation with TPM 2.0 easily can support Windows 11. But older computers can’t support Windows 11, in case you need to add some files to bypass the TPM 2.0 and secure boot.
Here I have explained two different methods which can help you to bypass the TPM 2.0 and secure boot while installing Windows 11 on your computer.
- How to Fix This PC Can’t Run Windows 11 – New Method
- How to bypass TMP 2.0 and Secure Boot on Windows 11
How to Enable TPM 2.0 & Secure Boot on BIOS Settings
Before enabling the TPM 2.0 on the BIOS settings make sure that your PC can support Windows 11. Therefore, Microsoft for this purpose-built a tool that allows you to check your computer compatibility. And you can get the tool from the below down-link.
Method 1:
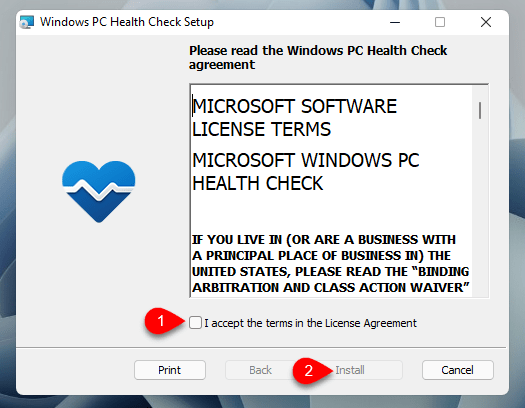
Download the tool and launch the installation process by double-clicking, once the installation launched on the wizard screen check the box “I accept the terms and license agreement” and click Install.
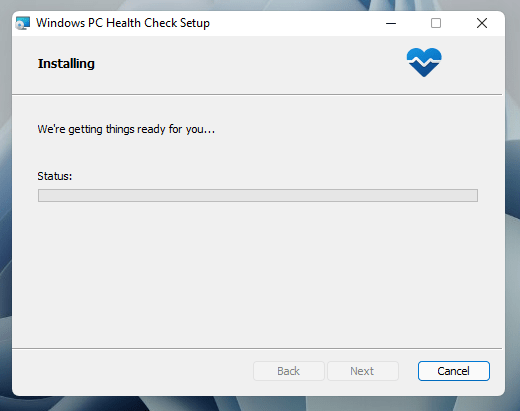
Now click on the Install button and wait for the installation to complete.
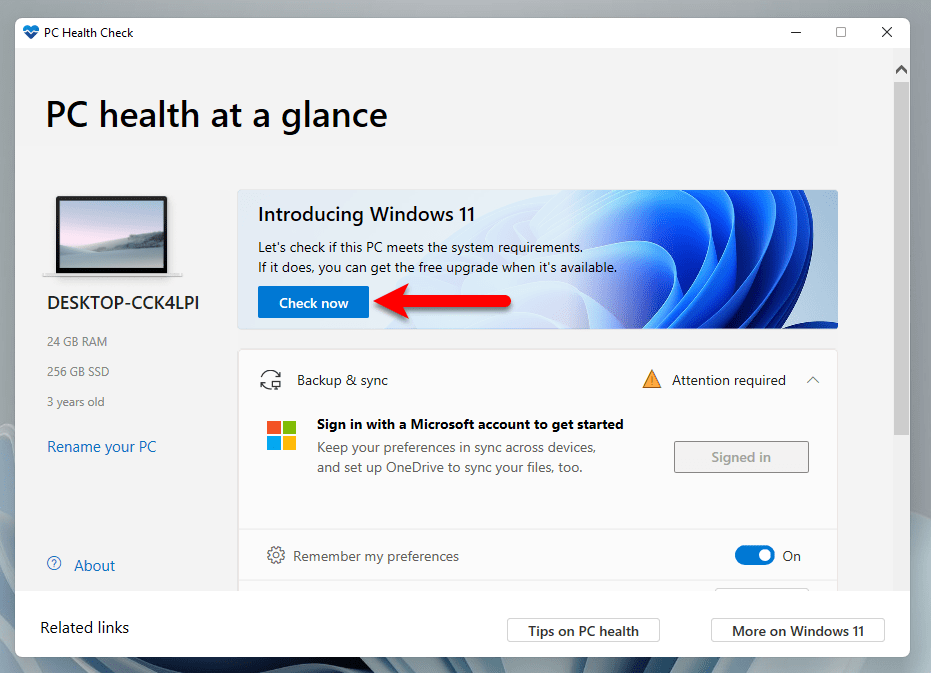
While the tool successfully installed simply run the tool and click on Check Now.
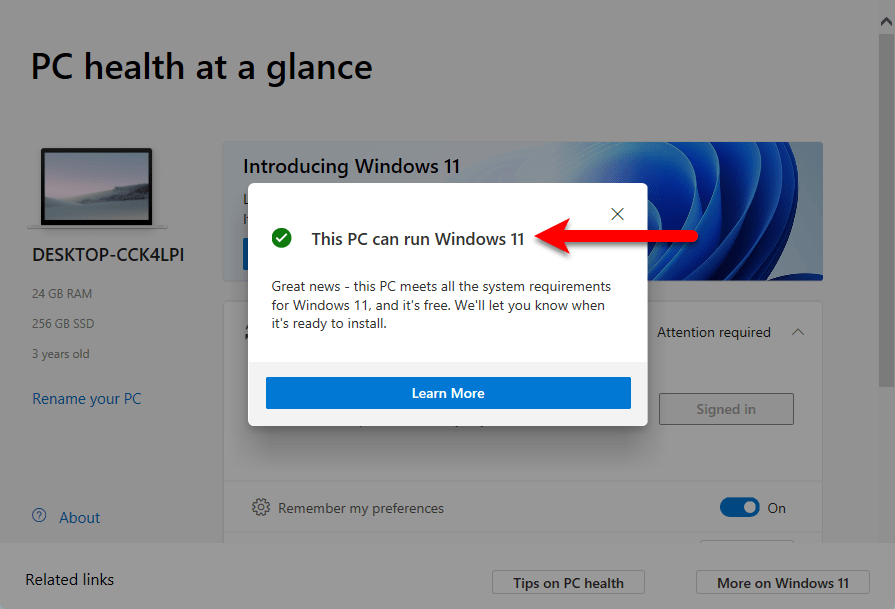
After checking the notification will pops-up that “This PC Can Run Windows 11”, or if the PC isn’t compatible with Windows 11 then you will see the following error “This PC Can’t Run Windows 11”.
Method 2:
There is another method by which you can test your PC whether it can run Windows 11 or not. Simply navigate to the Windows start menu type there “Run” and press enter. Also, you can press the Windows+R button to open up the Run window. Once the Run window opened on the search bar type “TPM.MSC” and press enter.
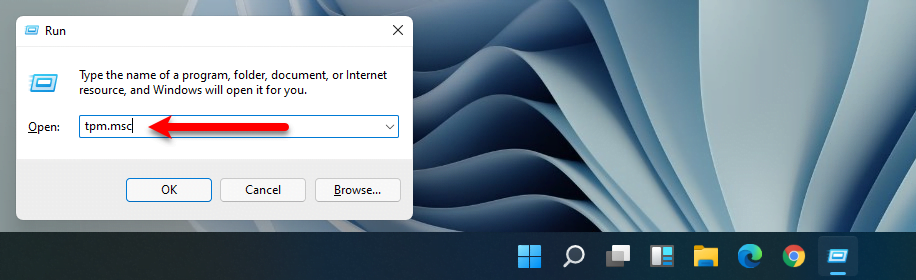
If your PC can run Windows 11 then you will see the below down screenshot.
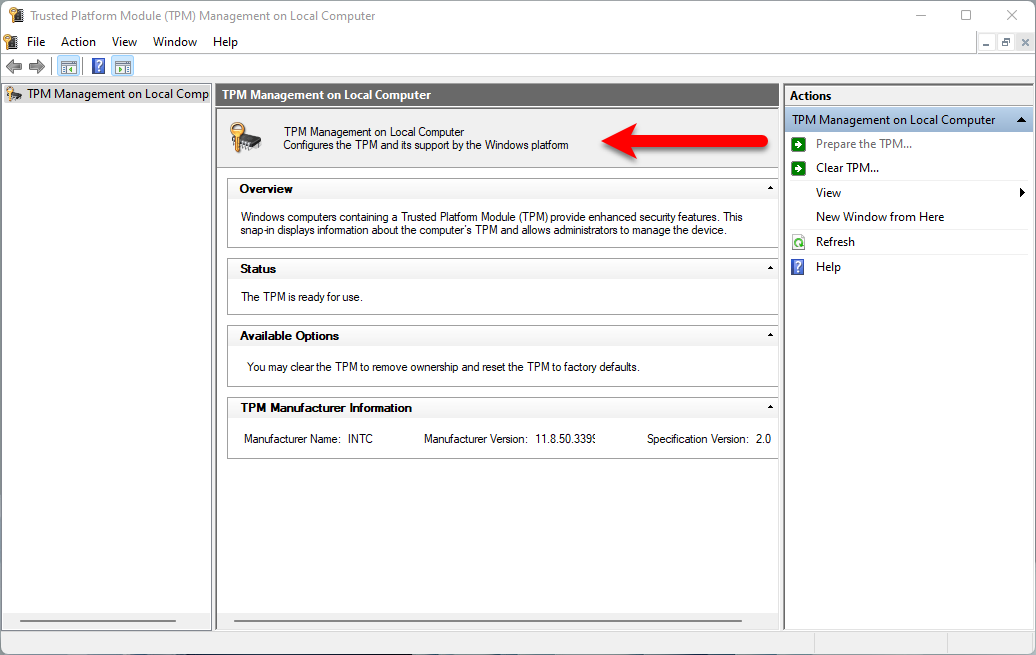
Enable TPM 2.0
Once you make sure that your PC can run Windows 11, then for enabling TPM 2.0 on BIOS settings simply restart your computer. When your computer restarted press and hold the BIOS Settings key. While the BIOS settings window opened choose the Security, select TPM Devices to press enter, and select the “Available” option. Then select TPM State, press enter, and select “Enabled”.
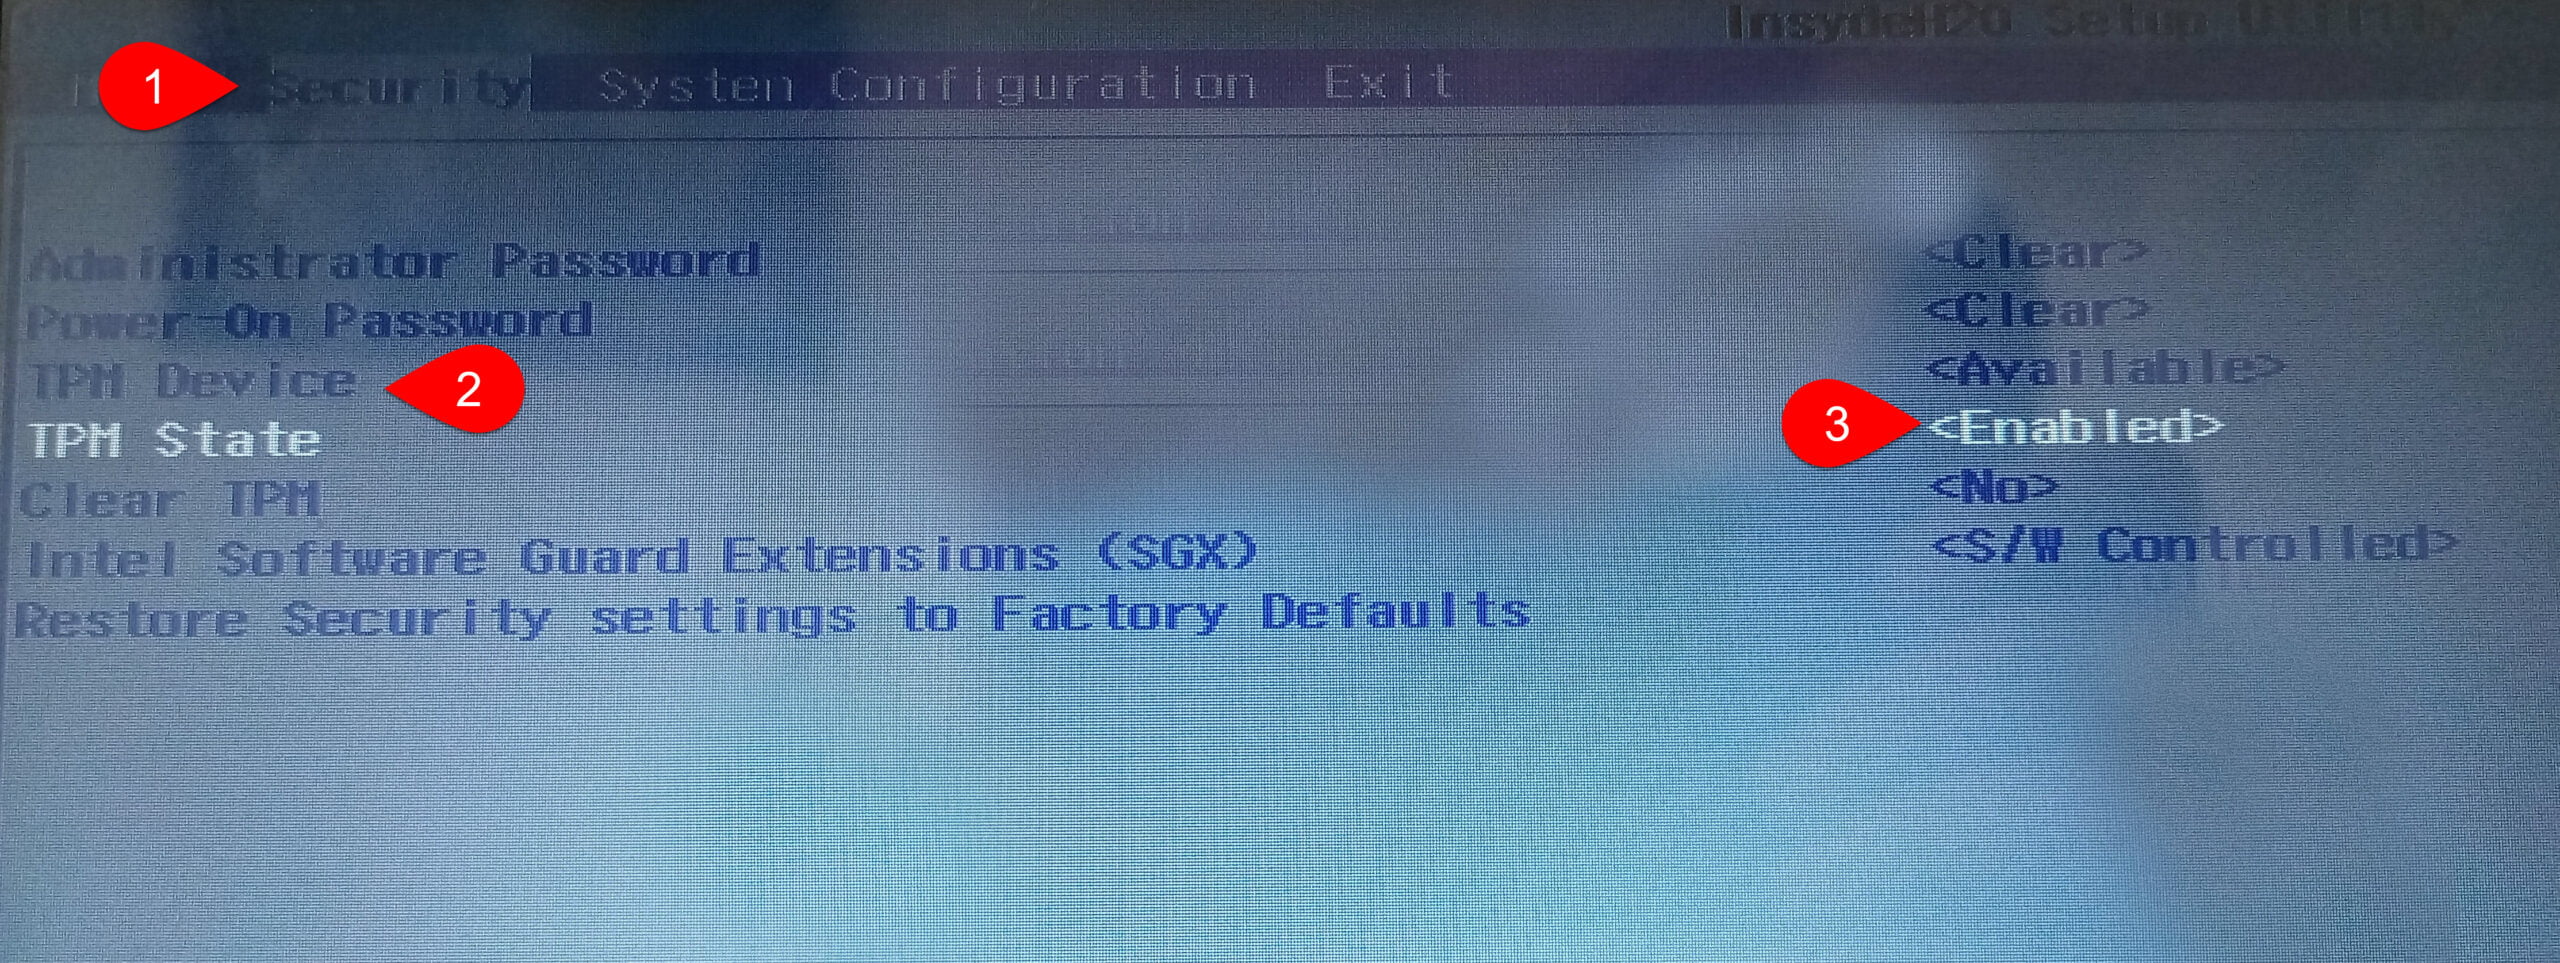
When the TPM 2.0 successfully enabled in the BIOS settings, simply press the ESC key and press save & Changes then restart your computer.
Read Also:
- How to Install Windows 11 Without TPM 2.0 and Secure Boot on PC?
- How to Activate Windows 11 Without Product Key For Free?
- Download Windows 11 ISO Image file – Latest Version
Conclusion
If you faced any kind of problem-related to the new Windows 11 operating system, then feel free to share with us via the comment box section.