Windows is one of the most popular operating system for desktop computers, over a billion active PC is running Windows 10 now. Microsoft long time ago that keeps working hard to release operating systems including Vista, Windows XP, Windows 7, Windows 8, Windows 8.1, and finally Windows 10. Like they have added bundles of state art such as touch input, Voice-based virtual assistant, face login, and a bunch of other extra tools like taking screenshots. Windows 10 is available in our hands for about a few years with the beautiful interface look and other things. Windows 10 is an operating system that includes dark mode, and the best other features. On the other hand, a few months ago Microsoft released the latest update of Windows 10 that called Windows 10 2H2. This update of Windows 10 includes of highlighted features such as a slicker Start menu, and other worthwhile tweaks.
Microsoft introduced the 2H2 update that consists of features to improve performance and quality. 2H2 is the 10th major update of Windows since its original release. If you are a Windows user then you might get the update notification of Windows 2H2 which is optional for you in the list of Update & Security. It means it doesn’t require to be installed or update your older version to Windows 10 2004.
Windows 10 latest features
- Windows 10 20H2 (October 2020 Update) introduces a new Start menu design.
- Taskbar comes with a more personalized layout for new accounts.
- Notifications are now less intrusive.
- New refresh rate settings are now available in Display.
- Windows 10 20H2 lets you copy device info in the About settings page.
- Tablet mode no longer shows a notification to select mode when detaching the keyboard.
- Microsoft Edge tabs now appear in Alt + Tab.
That was a short summary about Windows 10 and about its latest update which is now available online in the Update & Security window. Our main purpose here we wanted to test out Windows 10 on macOS Big Sur. There is a big point which required to be noticed for macOS users that if you like Windows 10 much enough. Then under different circumstances, you can install Windows 10 on your Mac computer. Also, if you are using Windows operating system then also there are options that offer you to install macOS operating system on Windows 10 PC.
If you don’t know how to make it happen then you can check the below downlinks in the description.
- How to Install macOS 11 Big Sur on VMware on Windows PC
- How to Install macOS 11 Big Sur on VirtualBox on Windows PC
- How to Install macOS Catalina 10.15 on VMware on Windows PC
- How to Install macOS Catalina 10.15 on VirtualBox on Windows PC
- How to Install macOS Mojave 10.14 on VMware on Windows PC
- How to Install macOS Mojave 10.14 on VirtualBox on Windows PC
Install Windows 10 on macOS Big Sur Via VMware Fusion
Required files:
What is VMware Fusion? VMware is a company that developed VMware Workstation for Windows 10, and VMware Fusion for macOS to Hypervisor another operating system on the actual operating system. At the same time, VMware allows you to run more than two operating systems on your computer. Mostly, it can run Windows, Linux, macOS, and Android OS.
VMware Workstation can be found as open-source software on different websites without any charges. But you can’t find VMware Fusion freely, to use VMware Fusion with complete features you need to purchase it and pay about $79 per year. On the other hand, after the installation, it gives you the ability to use it for 30Days trial. For its installation, you need a system to have at least 4GB of RAM, 750MB of disk space, and 5GB of extra space disk for each virtual machine. But the latest operating system is more than 5GB.
Learn how to install VMware Fusion on macOS Big Sur.
Create New Virtual Machine for Windows on macOS Big Sur
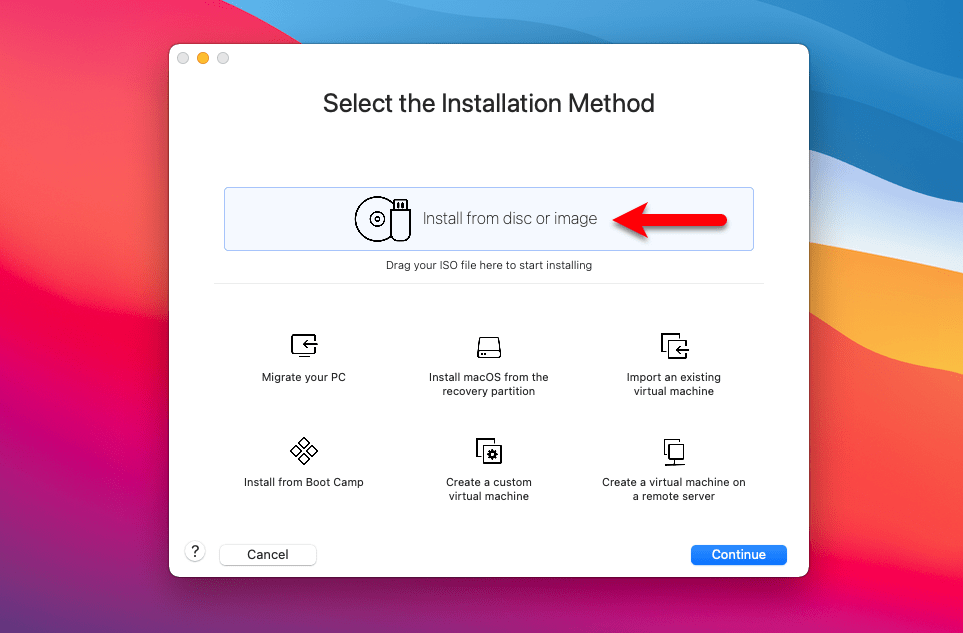
Once you have successfully installed the latest VMware Fusion on your Mac computer, then let’s begin to create a fresh virtual machine for Windows 10. To do that open up the VMware Fusion, once it opened select the option “Install from disc or image” and click continue.
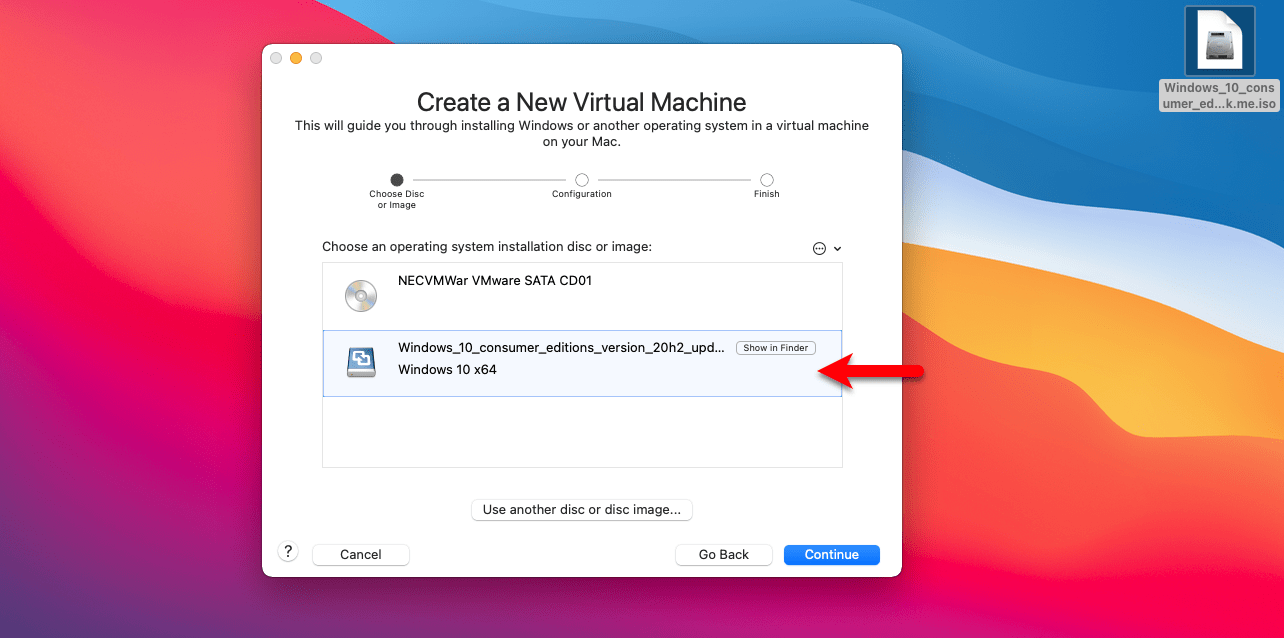
Now drag and drop the Windows 10 image file into the virtual machine and click continue.
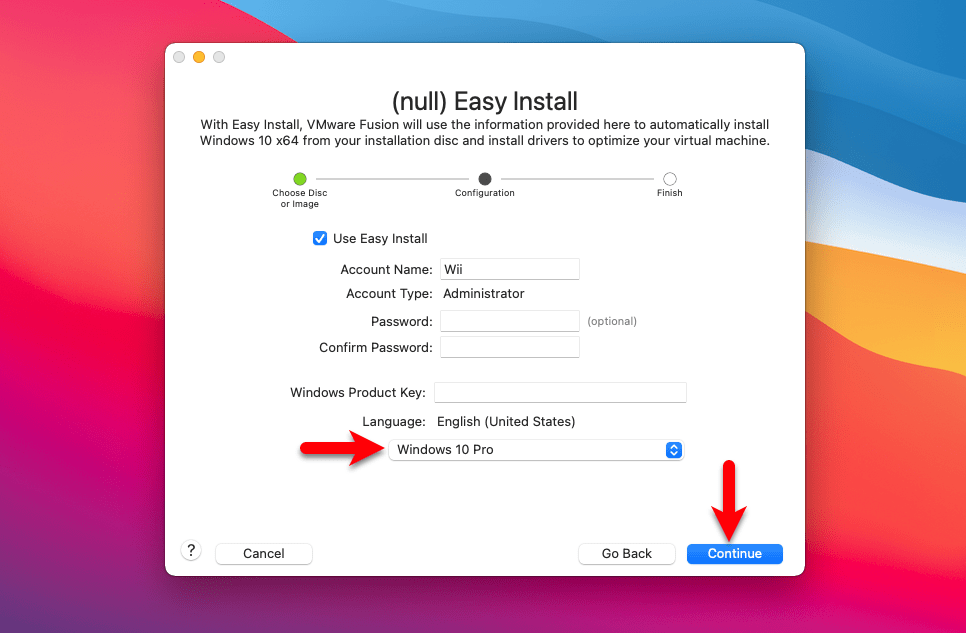
Select Windows 10 version and click continue.
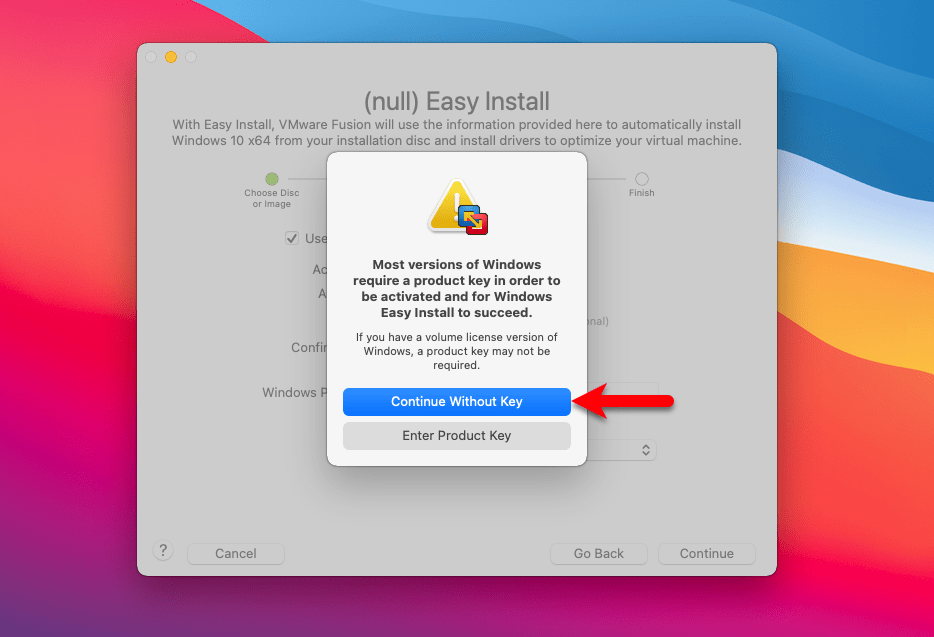
Another warning window will pop up that requires you to enter Windows 10 product key. But here we need to continue the installation without a product key.
Select the “More Seamless” option and click continue.
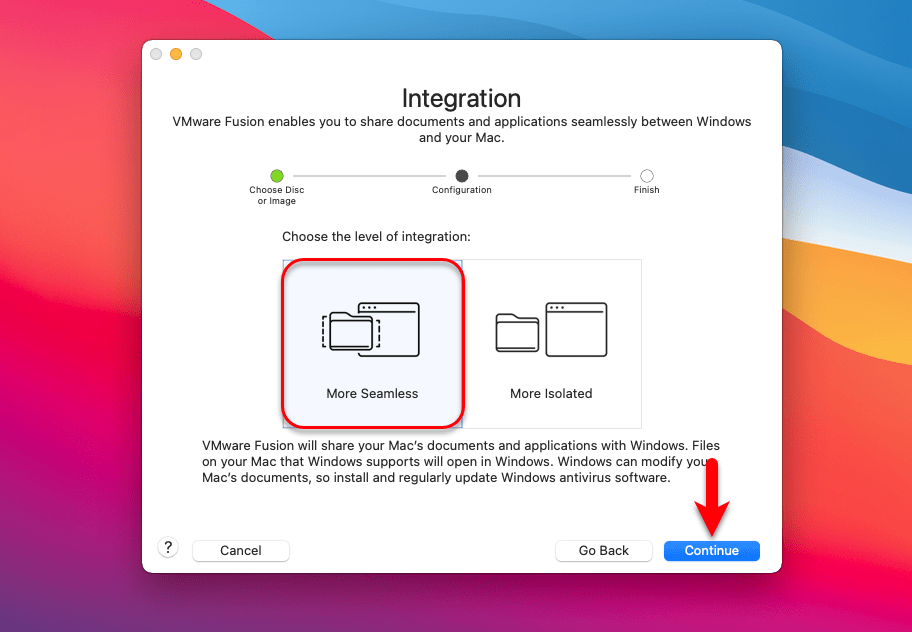
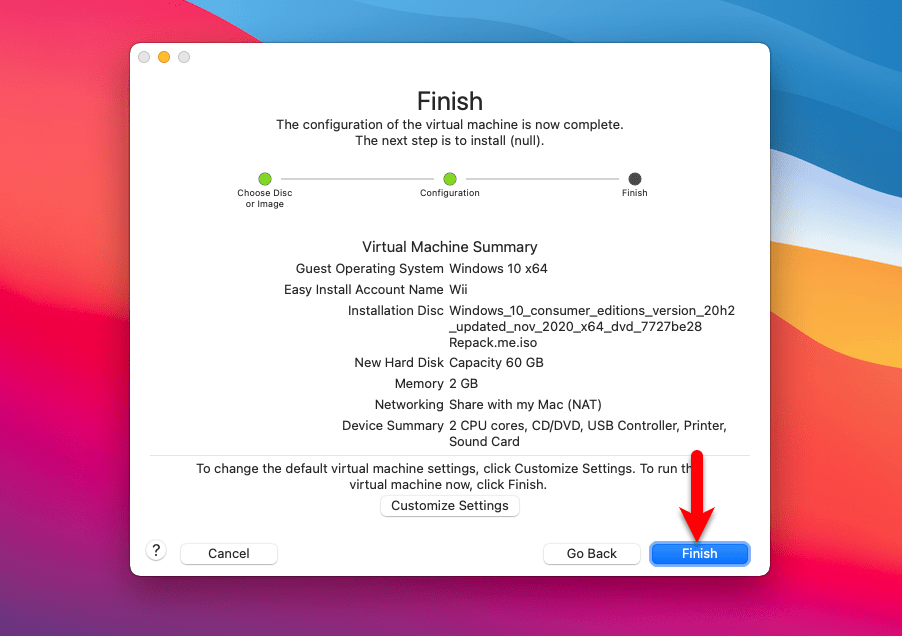
Once you reached the final step of creating a virtual machine, you need to customize the settings. Such as increasing the Memory size, Disk Space, and others, once that’s done click Finish to create the virtual machine.
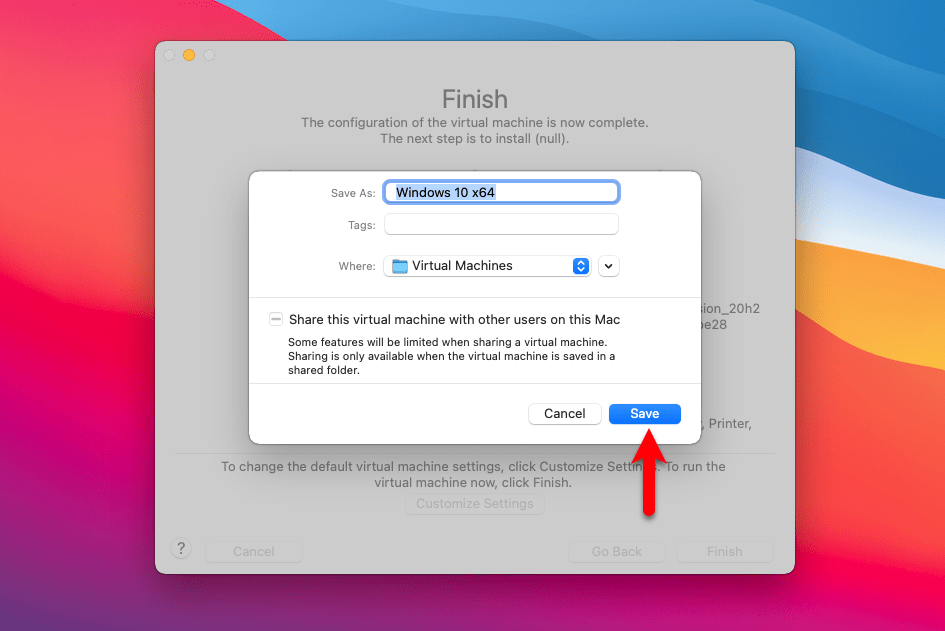
Click Save to close the window.
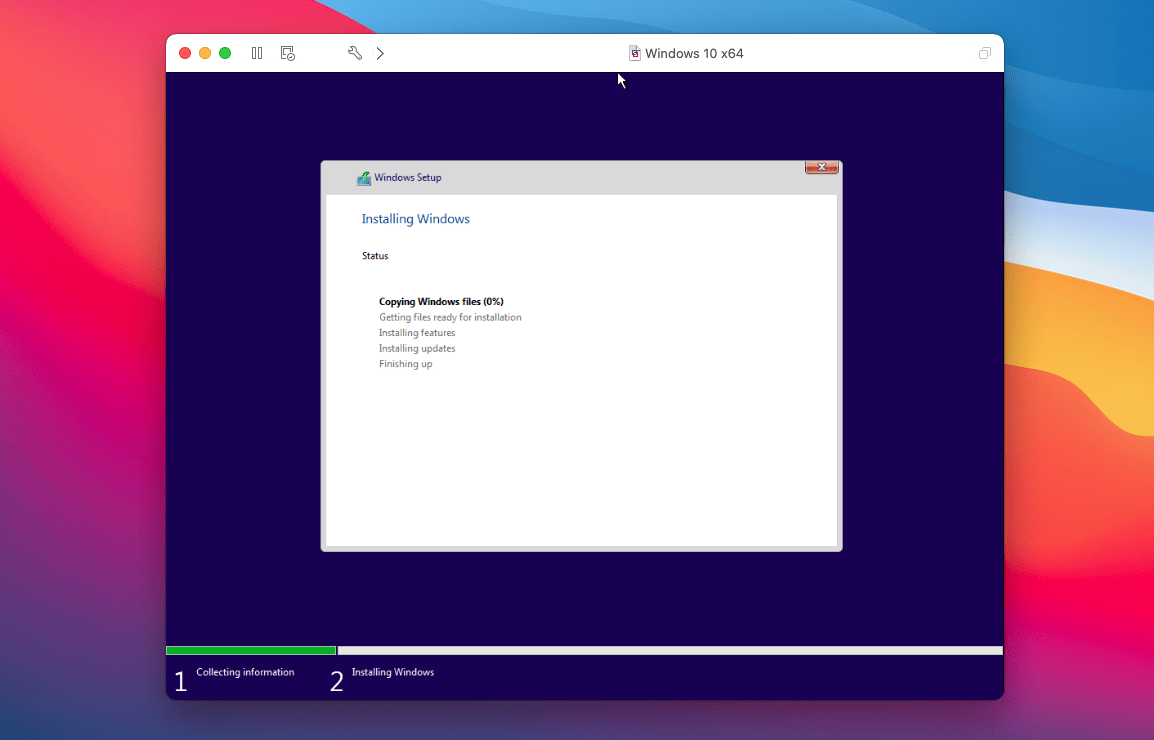
Once you click save after that, the installation will start automatically, don’t do anything keep it to continue the installation.
While the installation successfully completed the virtual machine will restart and will complete the basic settings automatically. And now the beautiful Windows 10 screen view appears on VMware Fusion on macOS Big Sur. So, keep enjoying Windows 10 on macOS Big Sur or any other version of macOS operating system.
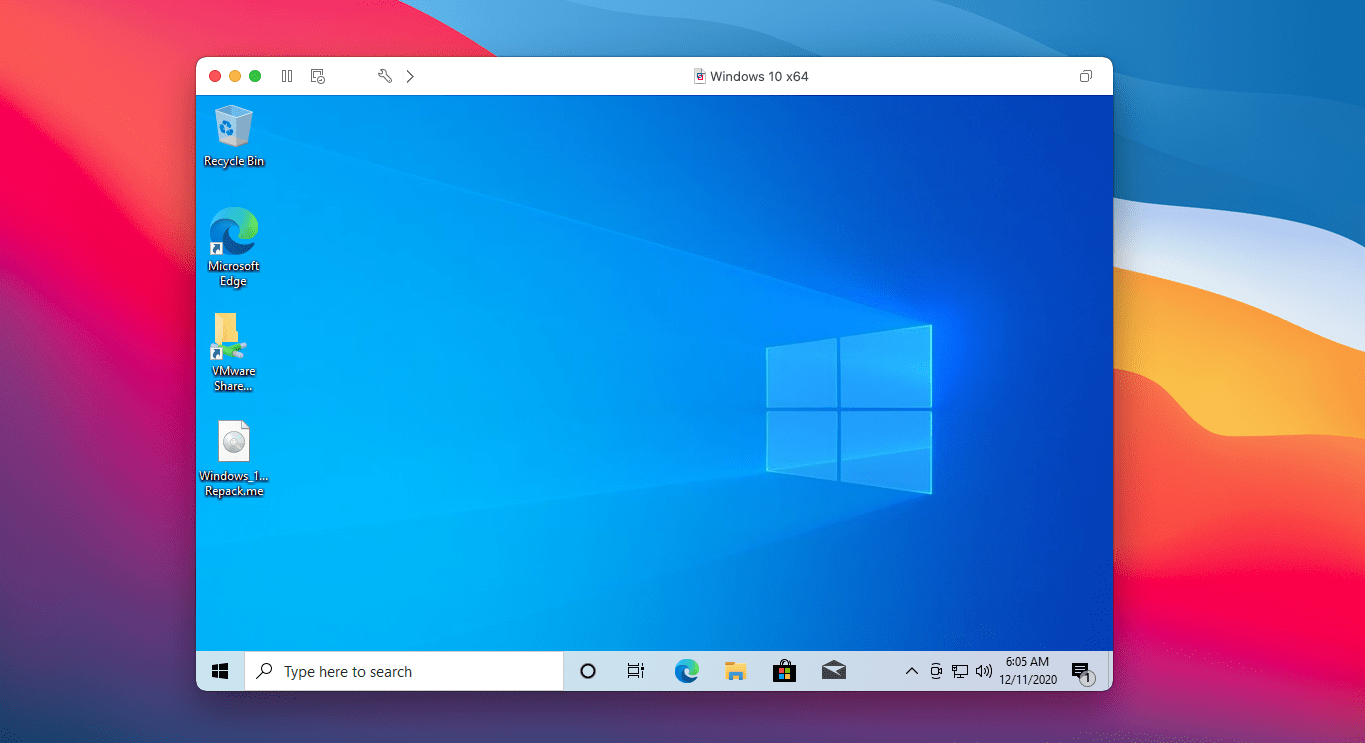
The only thing that has remained in the part of installation is to enter full screen-mode of Windows 10 on macOS Big Sur on VMware Fusion. And that is installing the VMware tools, by installing the VMware tools you will be able to enter full screen-mode of Windows 10 on VMware Fusion and VMware Workstation.
VMware tools is a small tool that allows the user to enter full-screen mode of any operating system on VMware Fusion, or VMware Workstation and VMware Player. Alongside, entering the full screen-mode the VMware tools will bring other hidden features also on the VMware. So, it depends on you whether you are using the operating system with a full screen or not.