macOS Ventura was unveiled in one of the biggest Apple events which is known as WWDC “Worldwide Developer Conference” on June 6, 2022. The new macOS desktop operating system gives the whole experience to Mac users. Stage Manager gives an all-in-one way to focus in front of them seamlessly switching between apps and Windows. Continuity Camera uses the iPhone as a webcam which is completely a new experiment for the new users. Users can easily start a phone call on their iPhone and iPad and pass it over there macOS Ventura. Mail and messages with new features which looks more improved. The Safari browser looks more interesting and advanced ever than before.
However, through this article, you will learn how to install macOS Ventura on VirtualBox on Windows PC. As experimenting with macOS Ventura on different virtualization platforms such as VMware Workstation/Player, VirtualBox, and VMware Fusion is very interesting. So, Virtual machines like those nominated allow you to test several operating systems on a single machine through the virtual machines. Also, if you are a Windows user then the virtual machines allow you to test the macOS Ventura with a few easy steps on VirtualBox or VMware.
Also Read:
Steps to Install macOS Ventura on VirtualBox on Windows PC
To install macOS Ventura on VirtualBox on Windows PC you have to follow the below down steps to get a clean installation.
- Enable Virtualization Technology from the BIOS of your computer.
- Download the latest version of VirtualBox and its extension Pack.
- Install the VirtualBox on your computer and its extension Pack.
- Download macOS Ventura ISO Image file or its VMDK.
- Create a new Virtual Machine for macOS Ventura on VirtualBox.
- Edit the Virtual Machine settings for macOS Ventura.
- Apply the Commands that configure the macOS Ventura on VirtualBox.
- And start installing macOS Ventura on VirtualBox.
Step 1. Enable Virtualization Technology From BIOS
To install macOS Ventura on VirtualBox on Windows PC, your computer must support the VT-X (Intel Virtualization Technology) or AMD-V Standard, However, this is one of the most important settings that you have to enable it from the BIOS of your computer. If the Virtualization Technology is disabled in the BIOS then you won’t be able to install the macOS Ventura on the VirtualBox.
To check whether the Virtualization Technology is enabled or disabled on your computer. Simply head over to Task Manager>Performance Tab>CPU. You can check the Virtualization status through this method easily. And the next method is you have to restart your computer, then press and Hold on the BIOS Menu key then find out the Virtualization Technology option and enable it there.
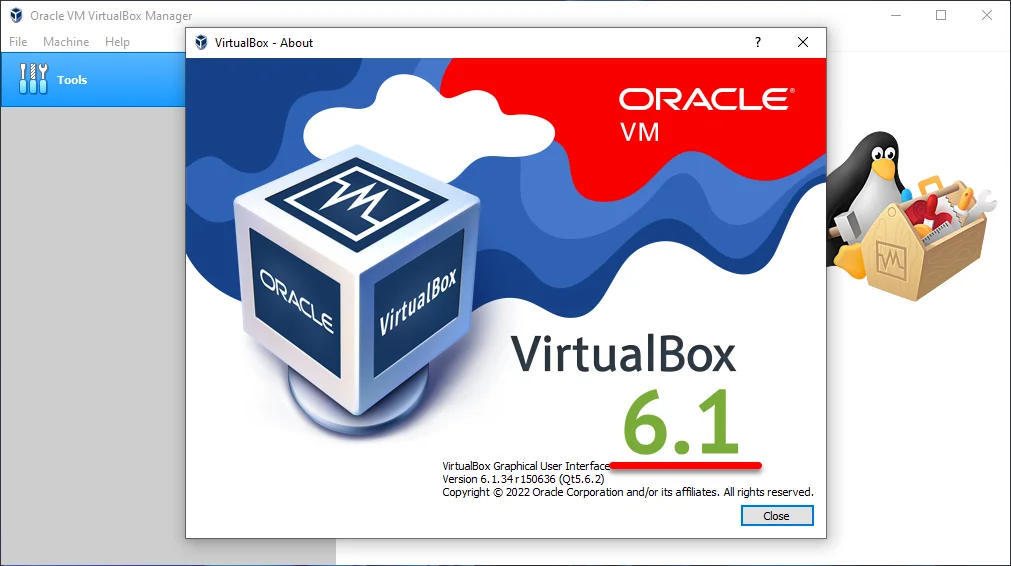
Step 2. Install VirtualBox and its Extension Pack on Windows PC
VirtualBox is an open-source application for Windows, macOS, and Linux operating systems that you can run multiple operating systems on a single machine by creating separate virtual machines. For example, if you are a Windows user, then you can create a virtual machine on VirtualBox and run macOS. Also, if you are a macOS user then using VirtualBox you can run Windows OS.
To install VirtualBox on Windows PC, you have to navigate to the official website of VirtualBox. Once you reached there download the latest version of VirtualBox and all its supported packages such as the extension Pack. When you have downloaded the VirtualBox open up the VirtualBox to install its extension Pack.
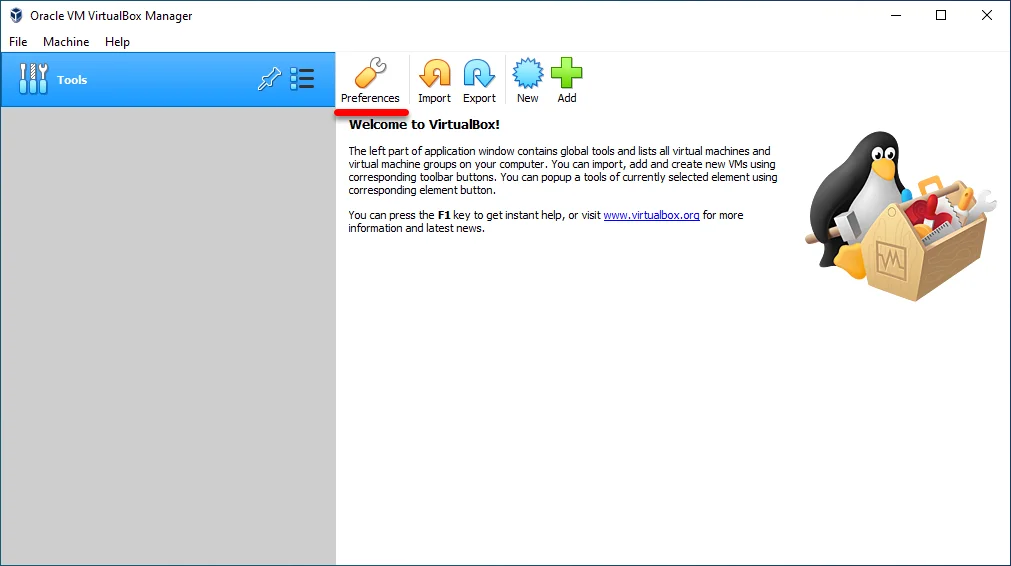
To install VirtualBox Extension Pack open up the VirtualBox, on the main window click on Preferences.
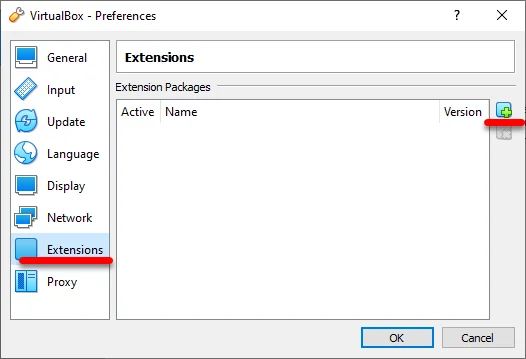
When the preferences window is opened click on the Extension tab, then click on the (+) icon for adding the extension Pack of VirtualBox.
Now click on the Install button to proceed with the installation.
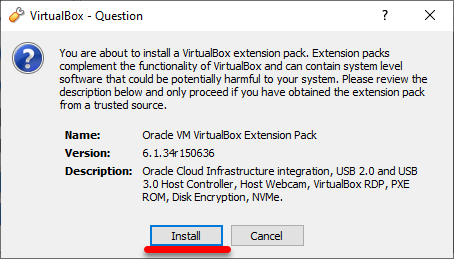
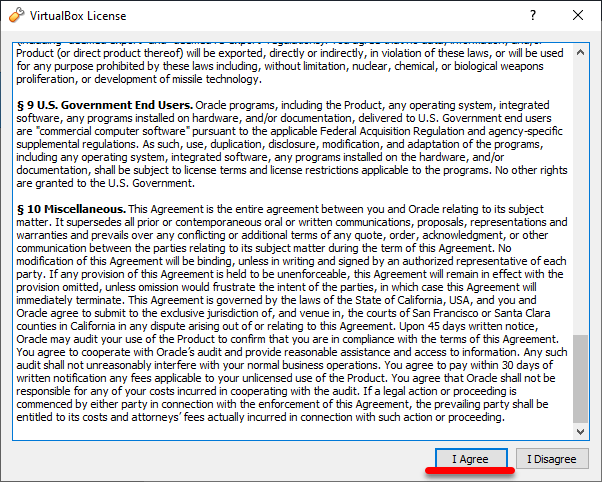
Scroll down and click on Agree button.
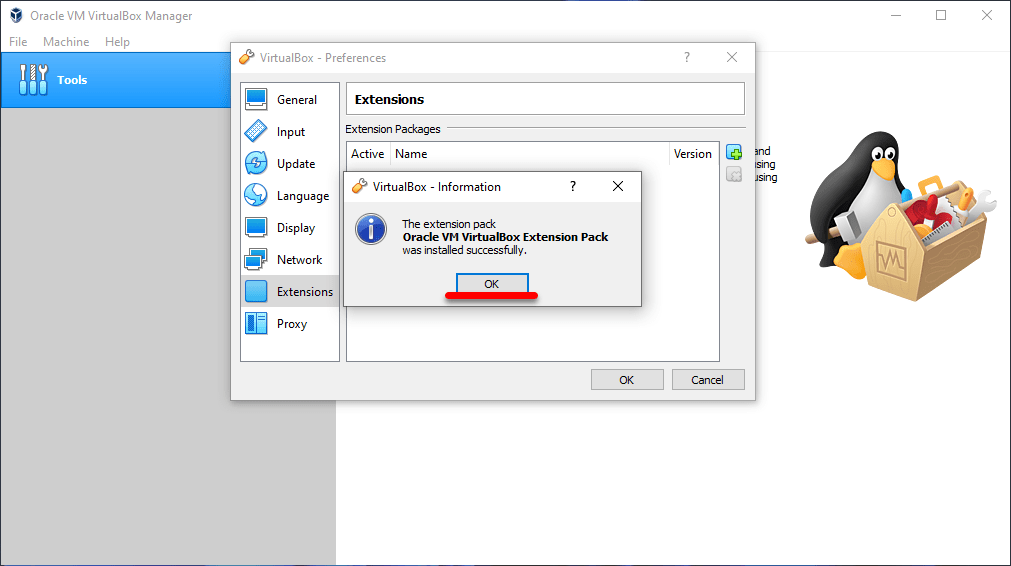
And finally, VirtualBox Extension Pack is being installed on VirtualBox.
Step 3. Download macOS Ventura ISO Image file or VMDK
For downloading macOS Ventura I will provide its download link, without that you can create yourself its ISO image file or its VMDK file. The method is pretty much easy you have to download the AssistatantPackagerInstaller.file. Then download the macOS 13 Beta version, run the terminal and apply the commands to create the ISO image file. If you don’t know how to create the macOS Ventura ISO Image file I will provide you with the method.
- Download macOS Ventura ISO, DMG, VMDK File
- Download macOS Ventura ISO Image For VMware & VirtualBox
- How to Create macOS Ventura ISO File for VMware & VirtualBox?
Step 4. Create a New Virtual Machine for macOS Ventura on VirtualBox
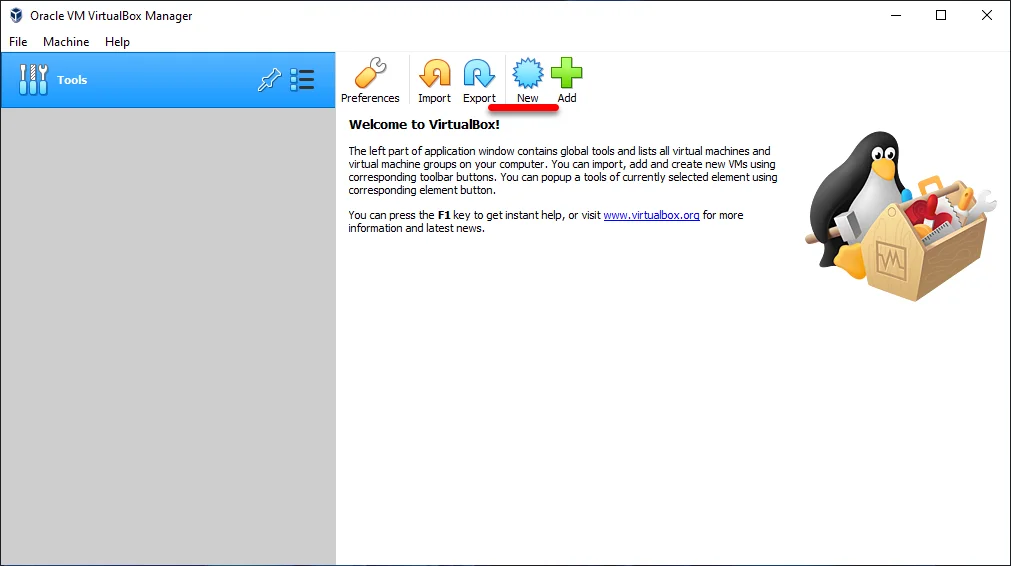
While everything is perfectly done, therefore, you have to proceed with the next step to create macOS Ventura Virtual Machine. Simply open up the VirtualBox on the main window and click on the New option.
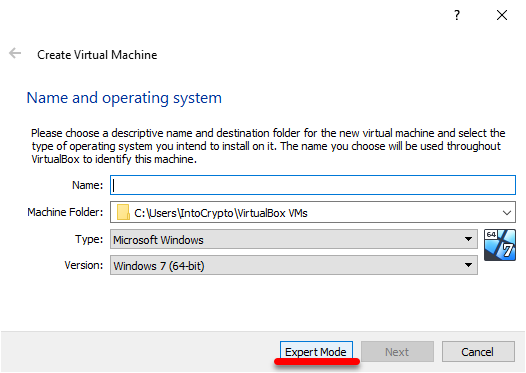
When the next window is opened click on Expert Mode.
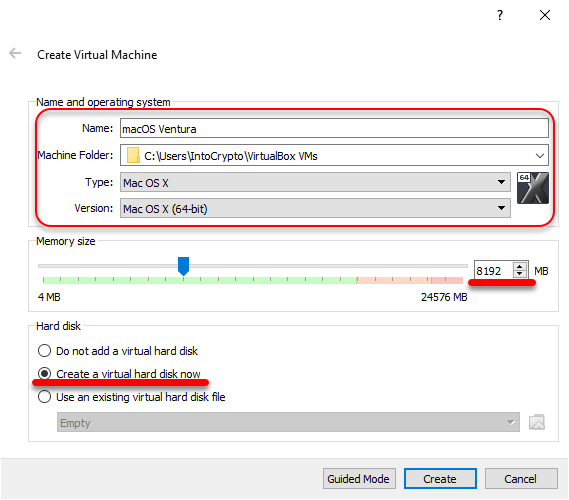
Now type the name of Virtual Machine, Specify the machine folder, and select the Type and Version. Increase the memory size, select Create a Virtual hard disk now option, and click on Create.
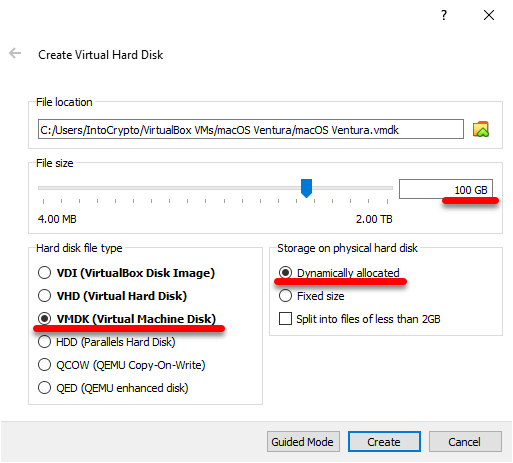
Choose the file for macOS Ventura, select the option VMDK (Virtual Machine Disk), select (The dynamically Allocated) option and click create.
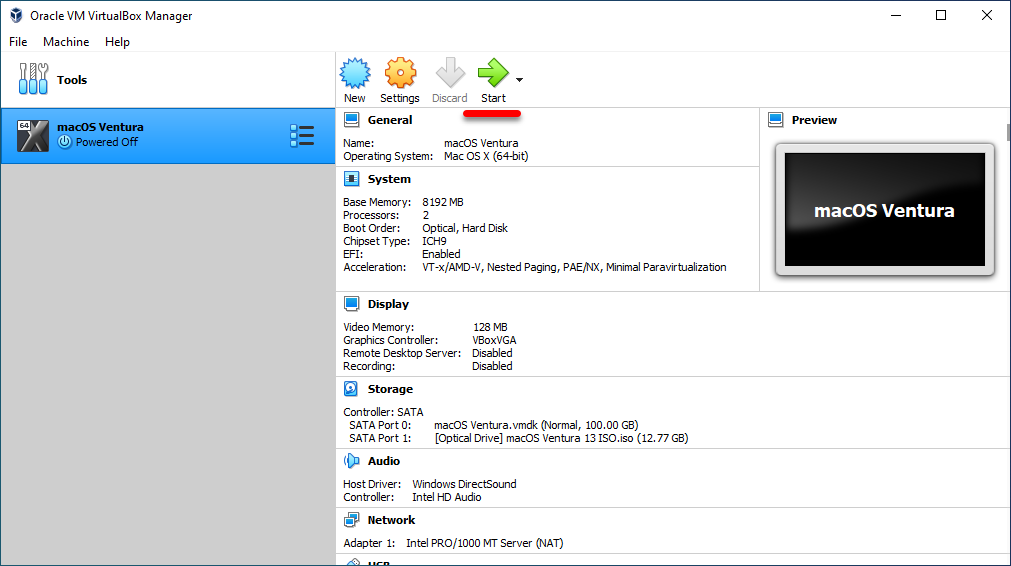
Step 5. Edit the macOS Ventura Virtual Machine Settings for a Better Performance
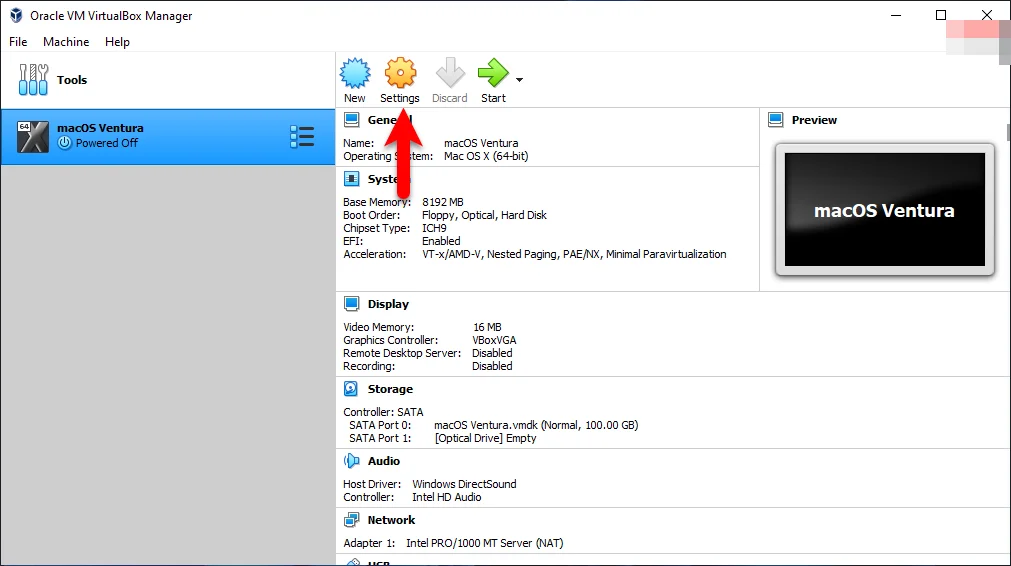
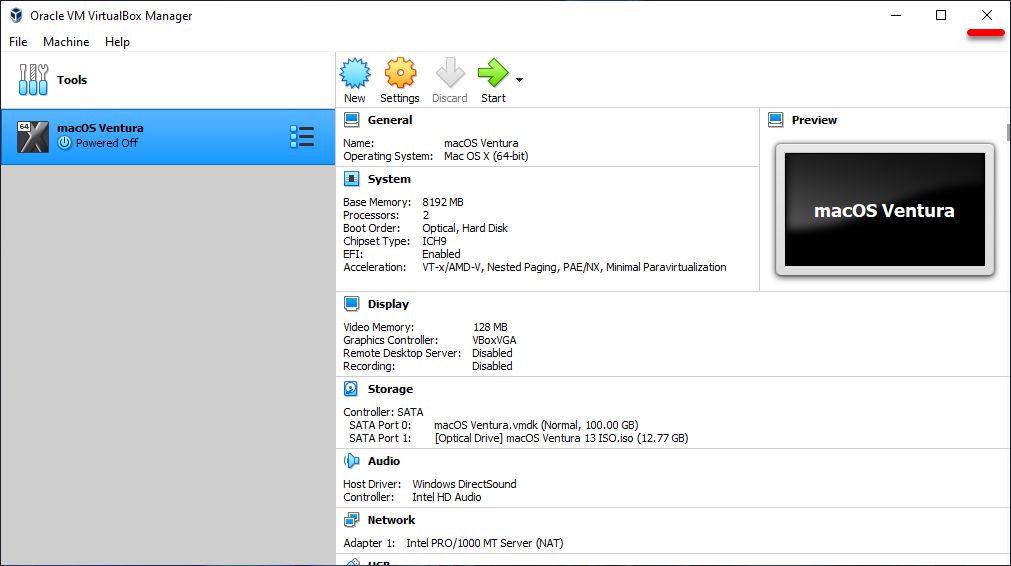
Once you reached this step you have to edit the Virtual machine settings to get the performance. To edit the virtual machine settings, simply select the created virtual machine and click on Settings.
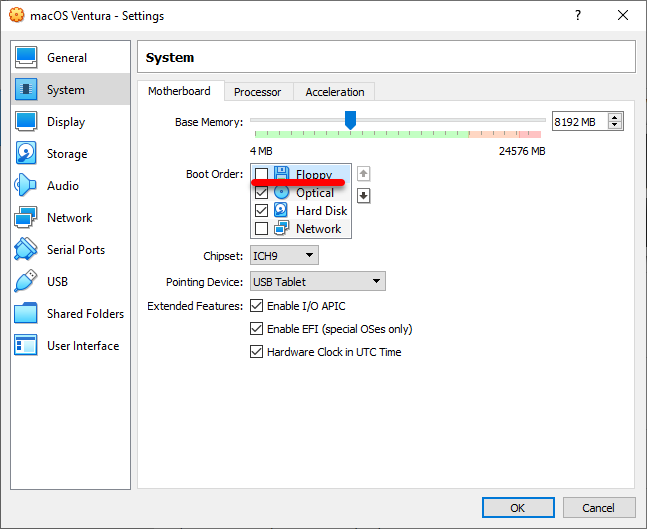
When the settings window opened from the left-handed window side select the system tab>Motherboard>Uncheck the Floppy disk.
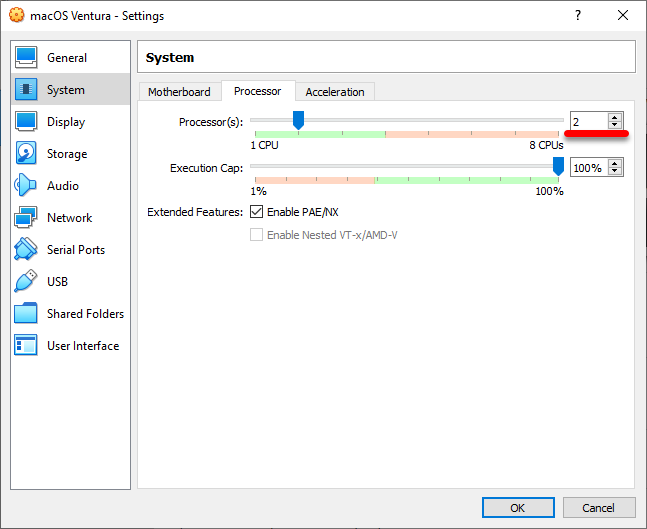
Select the processor tab, and increase the number of processors.
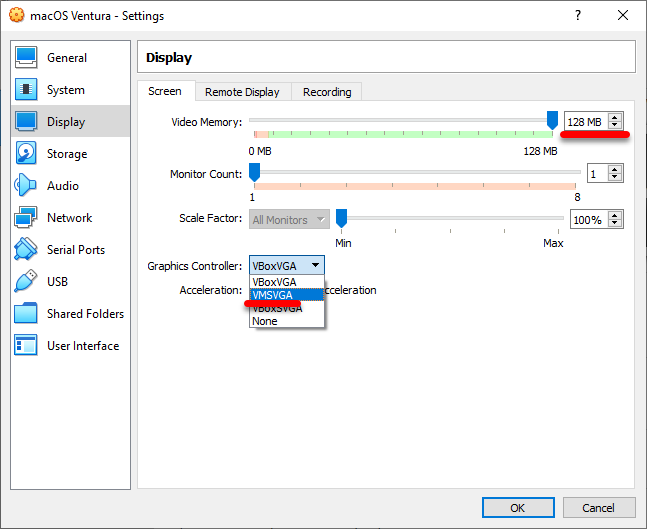
Select the Display tab>Screen>Increaser the video memory up to 128MB. On the graphics controller option select the option (VMSGA).
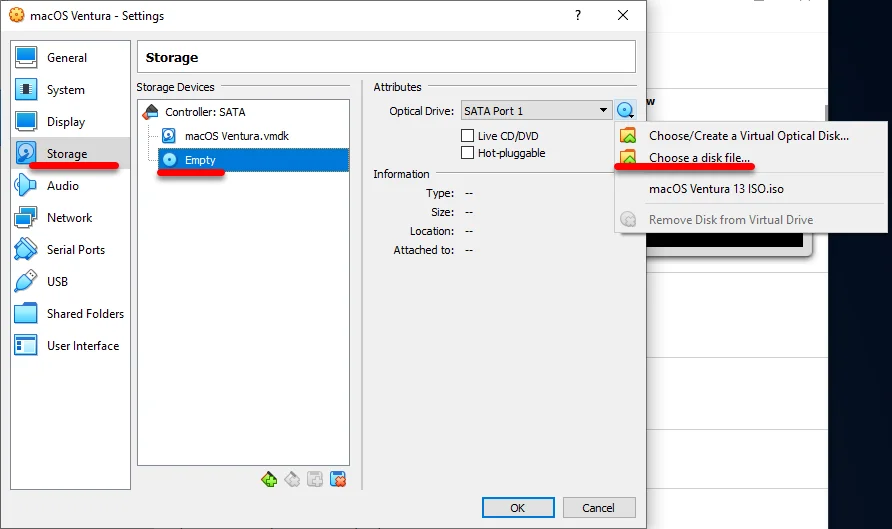
Now it’s time to insert the macOS Ventura ISO Image file, for the insertion select the Storage tab>Empty>Choose a Disk file.
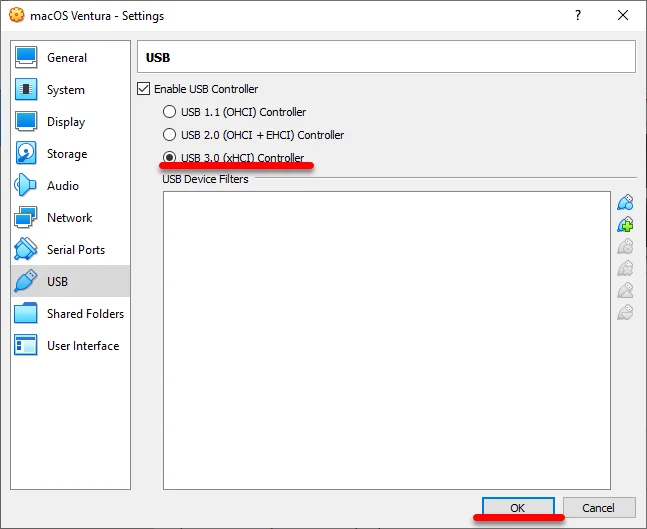
At last select USB Tab>Select the USB 3.0 (xHCI) Controller> and at last click OK to make changes to Virtual Machine.
Step 6. Configure the Virtual Machine to Run macOS Ventura 13
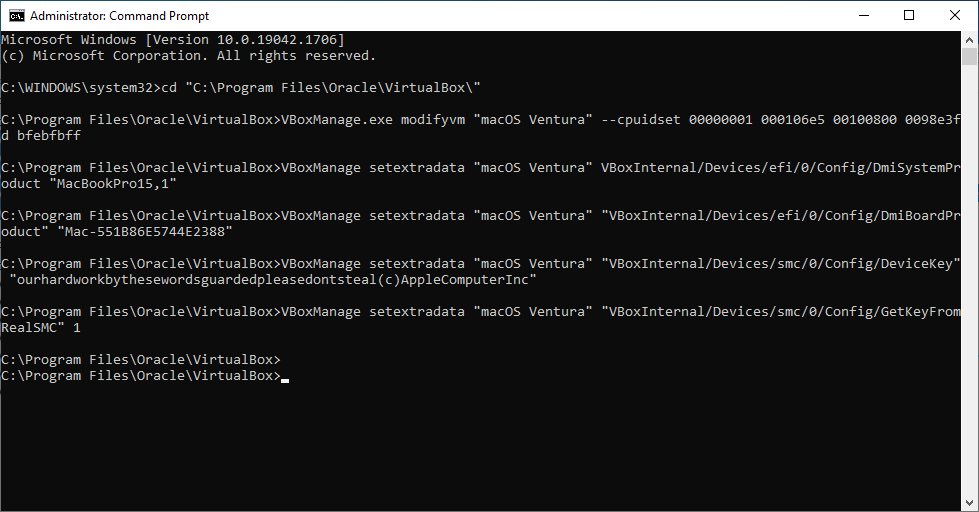
Now you have to execute some important commands through the CMD command prompt to configure the Virtual machine. Before installing the macOS Ventura on VirtualBox applying this command is a must, you have to follow and edit the commands according to the below down screenshots.
Before Applying the commands into the command prompt window you have to close the VirtualBox completely from the background.
Now copy the below down commands and paste them into notepad and change VM Name> With the name of macOS Ventura Virtual Machine.
cd "C:\Program Files\Oracle\VirtualBox\"
VBoxManage.exe modifyvm "VM Name" --cpuidset 00000001 000106e5 00100800 0098e3fd bfebfbff
VBoxManage setextradata "VM Name" "VBoxInternal/Devices/efi/0/Config/DmiSystemProduct" "iMac19,3"
VBoxManage setextradata "VM Name" "VBoxInternal/Devices/efi/0/Config/DmiSystemVersion" "1.0"
VBoxManage setextradata "VM Name" "VBoxInternal/Devices/efi/0/Config/DmiBoardProduct" "Iloveapple"
VBoxManage setextradata "VM Name" "VBoxInternal/Devices/smc/0/Config/DeviceKey" "ourhardworkbythesewordsguardedpleasedontsteal(c)AppleComputerInc"
VBoxManage setextradata "VM Name" "VBoxInternal/Devices/smc/0/Config/GetKeyFromRealSMC" 1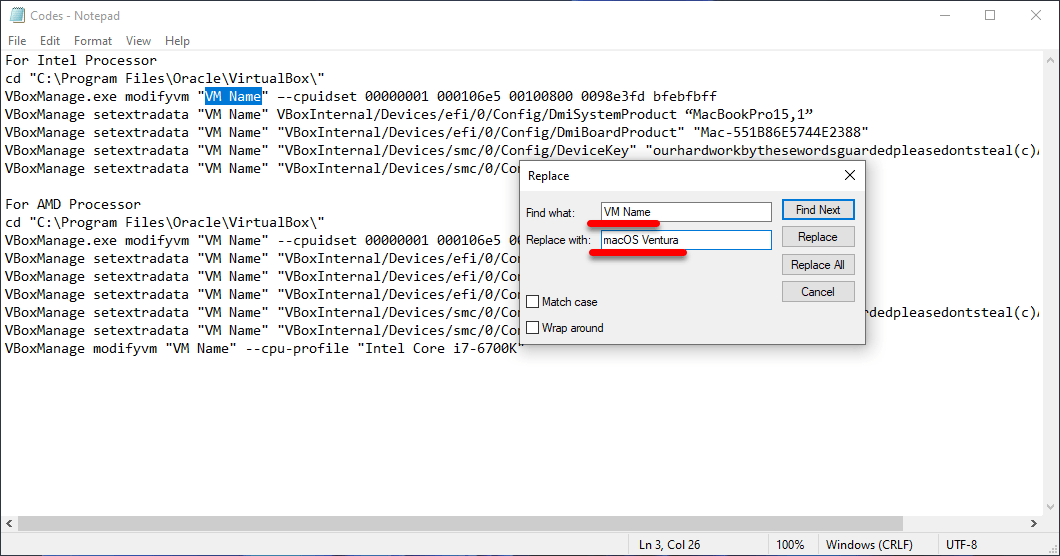
Now navigate to the Windows start menu and search for CMD and Run it As Administrator.
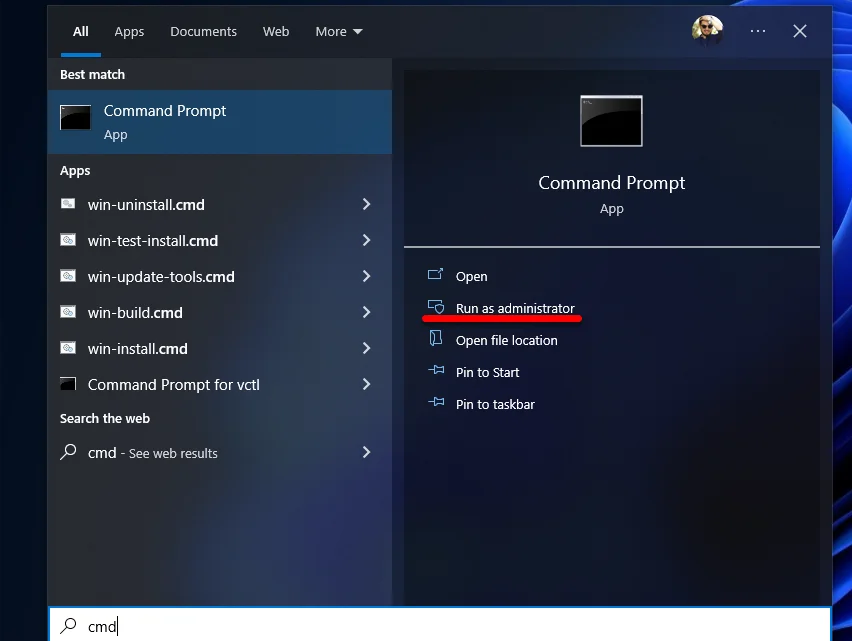
Once the CMD is opened copy all commands and paste them into the CMD window and press the enter key.
Step 7. Install macOS Ventura on VirtualBox on Windows PC
Now it’s time to install macOS Ventura on VirtualBox on Windows PC, to install the macOS Ventura re-open the VirtualBox. Once the VirtualBox is opened select the macOS Ventura Virtual machine and click on the Start button.
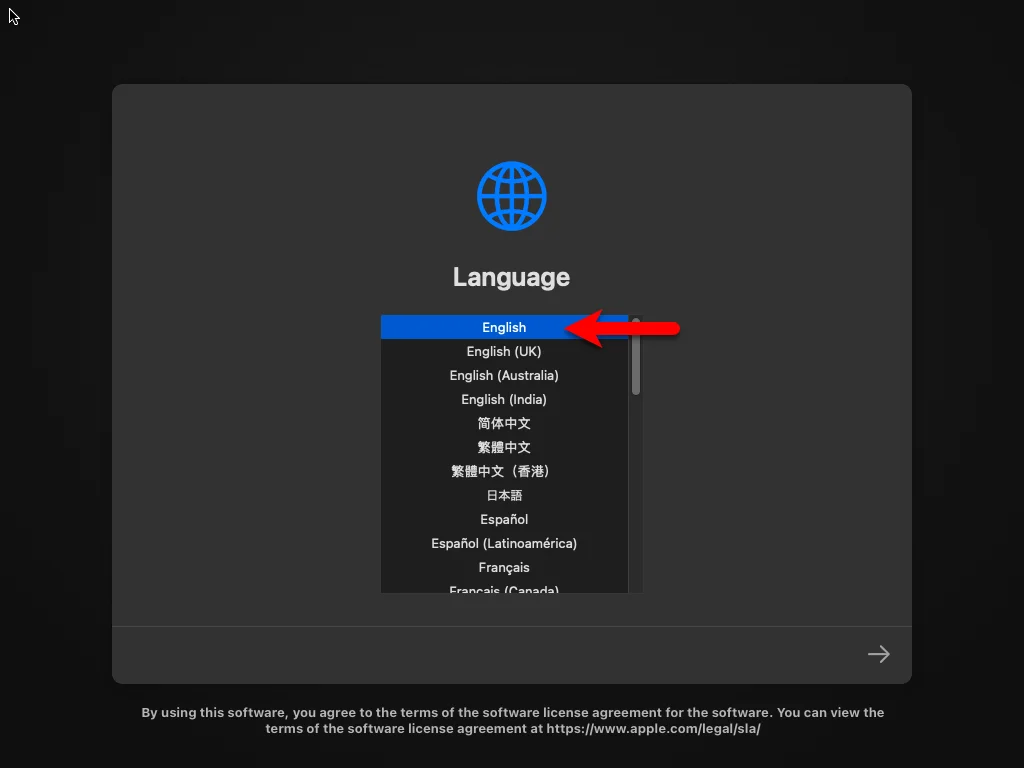
Once the virtual machine started the installation wait for the Apple Logo.

Select the language for macOS Ventura which you want to continue the installation with it.
On the recovery, the window selects the Disk Utility and clicks continue.
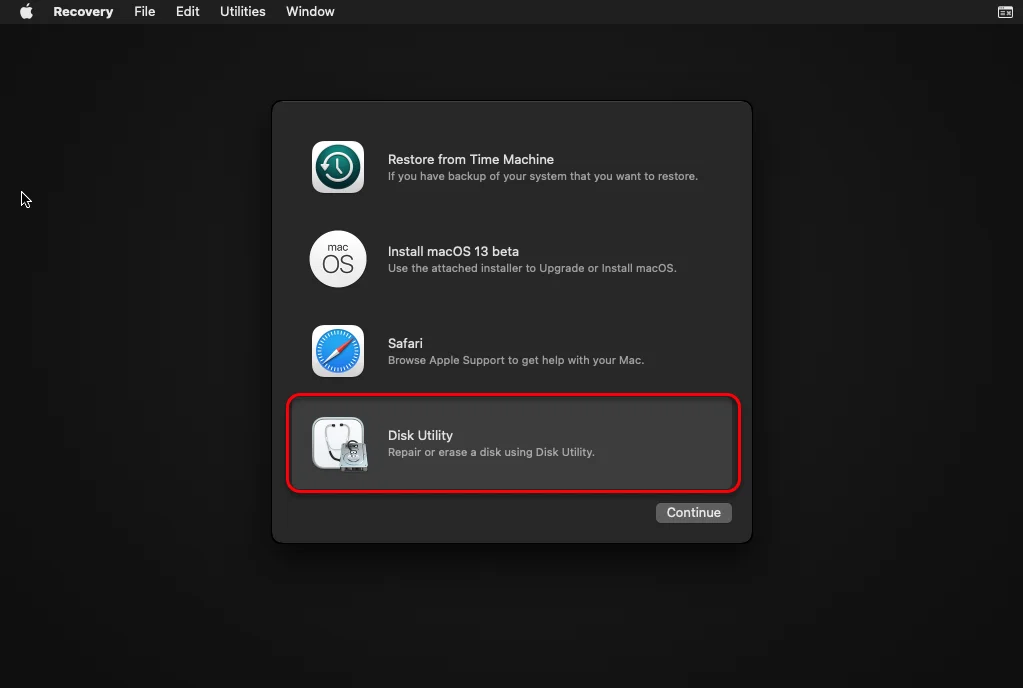
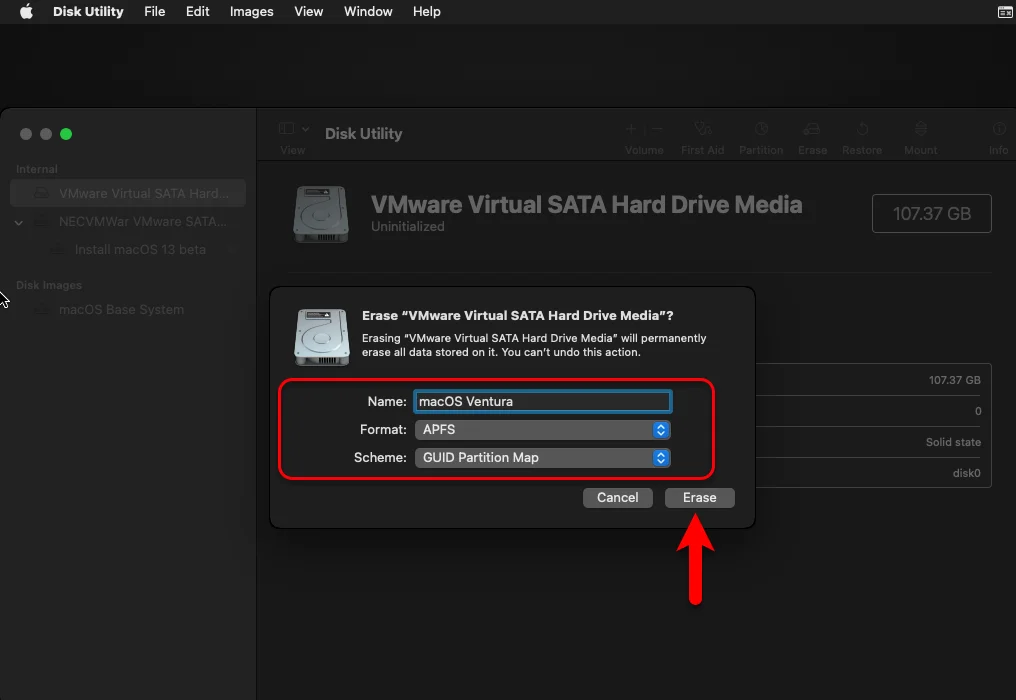
On the Disk Utility window from the left-handed window side select “VMware Virtual SATA Hard Disk Media”. Then click on Erase window, rename the drive to macOS Ventura, select APFS and GUID Partition Map, and click on Erase option.
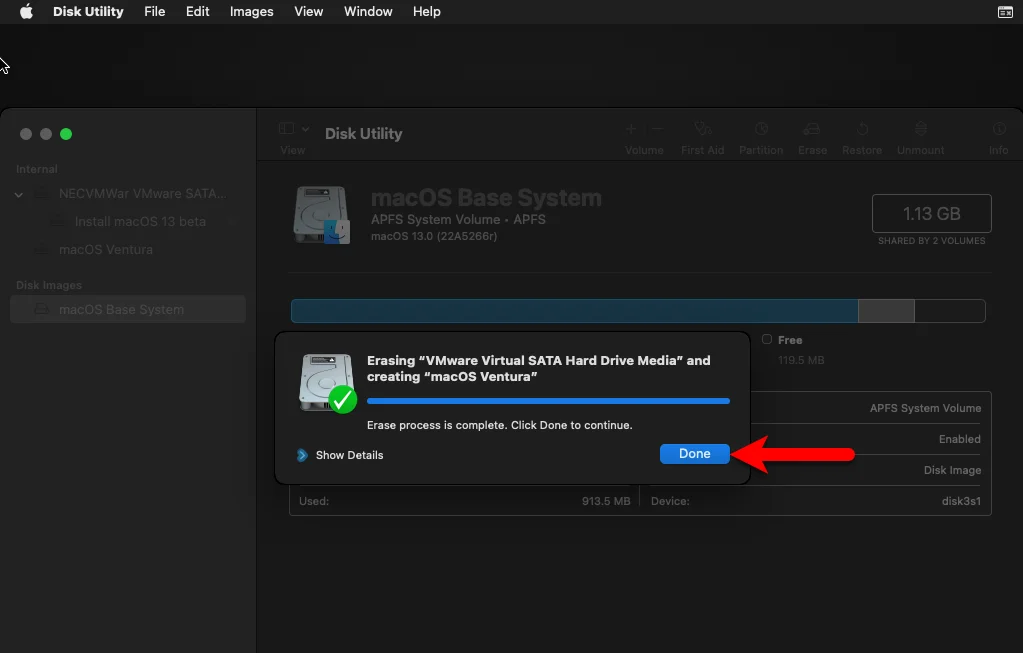
Once the virtual disk is successfully erased click on the Done option and close the Disk Utility.
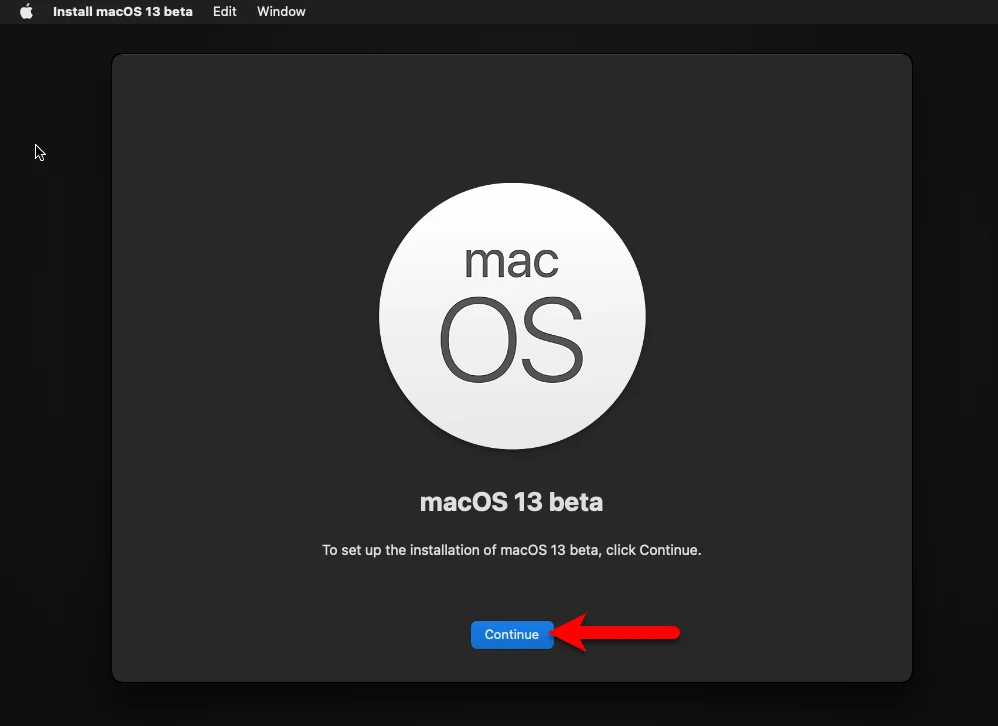
Again on the Recovery window select the install macOS 13 Beta and click Continue.

To set up the installation of macOS 13 Beta click on Continue.
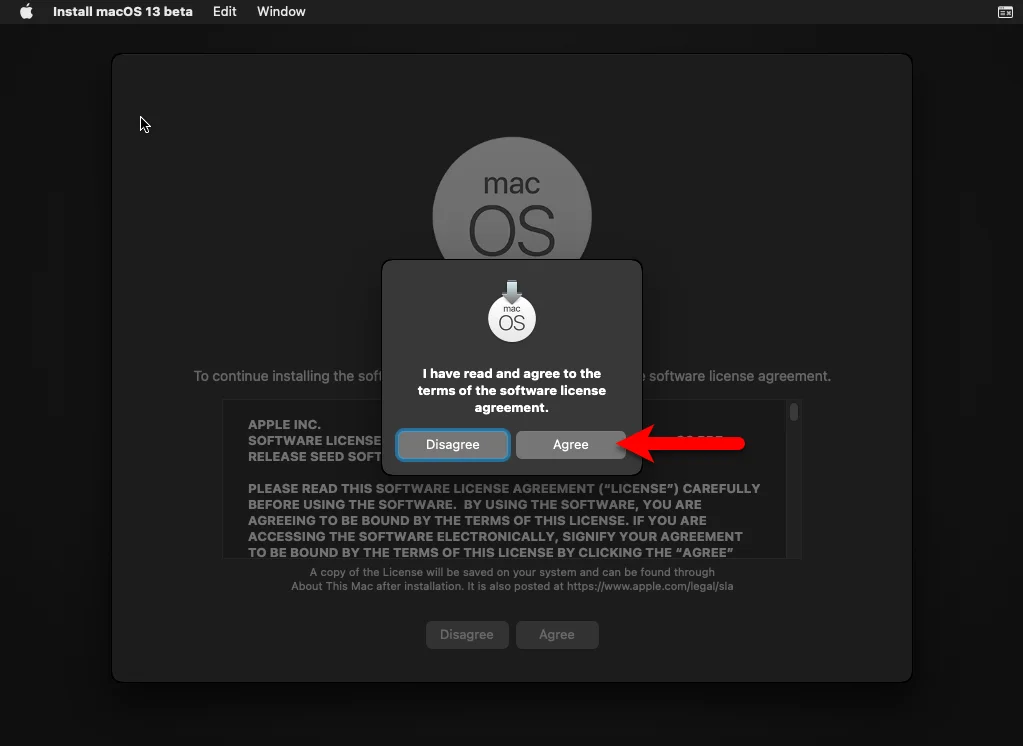
Agree with the terms and conditions of macOS Ventura.
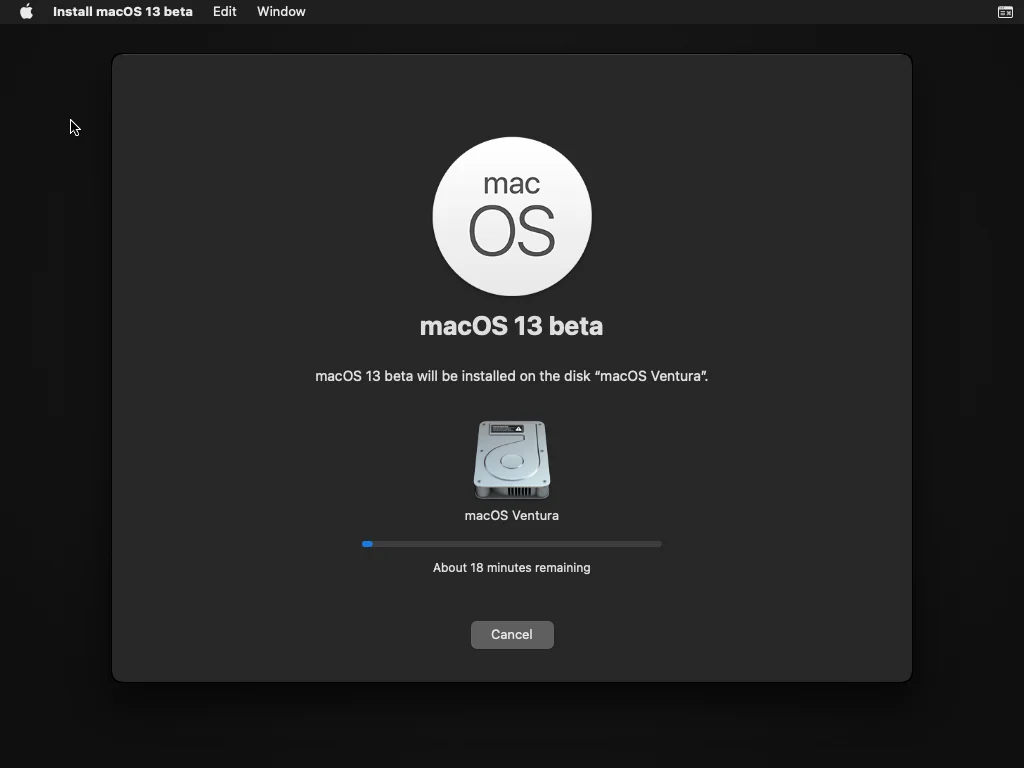
Now select the disk where you want to install macOS Ventura and click on continue.
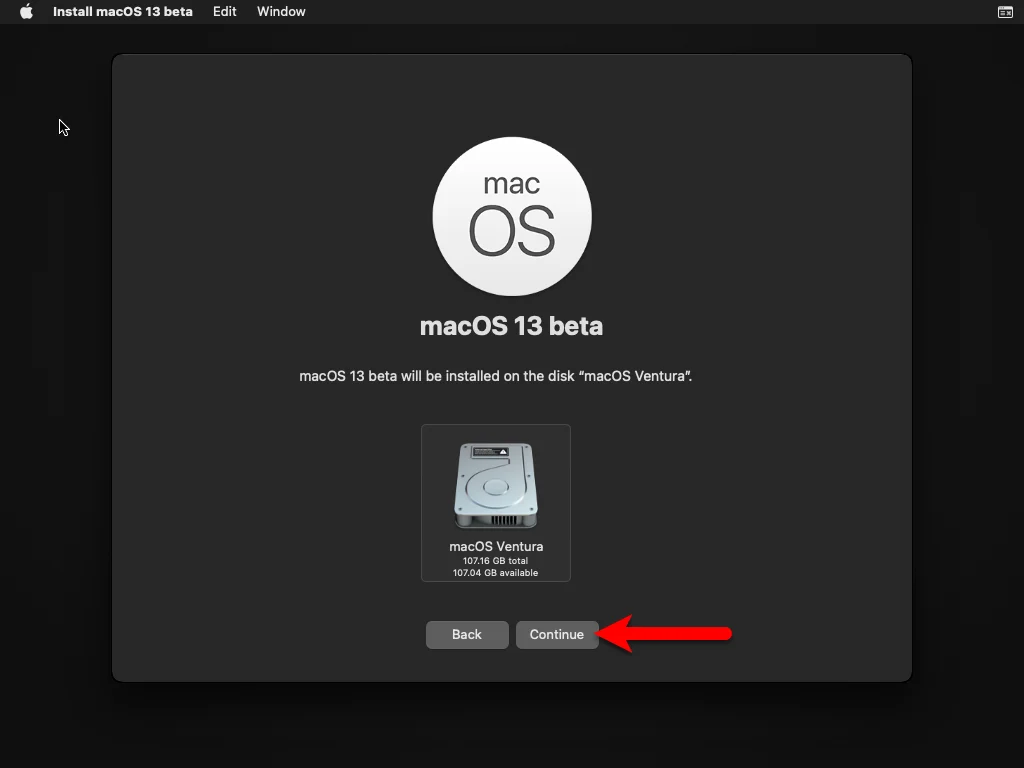
Now the macOS Ventura starts installing on VirtualBox approximately it will take up to 30 Minutes. And the Virtual machine will restart several times during the installation so don’t do anything.
Step 8. Complete the Basic Settings of macOS Ventura on VirtualBox
- After the installation is completed you need to complete the basic settings, on the first window select your country and region and click continue.
- Select your written and spoken language.
- On the Accessibility simply click on Not Now.
- Select the option “My computer doesn’t computer to the internet” and click continue.
- On the Data & Privacy click continue.
- On the Migration Assistant window click on Not Now.
- Agree with the terms and conditions of macOS Ventura.
- Create a computer account for macOS Ventura on VirtualBox.
- On the Enable Location services window click Continue.
- Select your time zone and click continue.
- On the Analytics window click continue.
- On the screen, the time window clicks on Sign up later.
- Select the mode of macOS Ventura.
- And finally, macOS Ventura is being installed on VirtualBox on Windows PC.
[metaslider id=6903]
Conclusion
Wow just installed macOS Ventura version 13 on VirtualBox on Windows PC without any issues and errors. I hope you have also installed the macOS Ventura on VirtualBox on Windows PC. If you faced any kind of problem feels free to share with us via the comment section box.