In this article, I will show you how to create a macOS Ventura VMDK file for Virtual Machines. You can create macOS Ventura 13 on your actual macOS PC and your VMware & VirtualBox which currently running any macOS operating system on that. Therefore, for creating macOS Ventura 13 VMDK file I am using VMware to create the VMDK file. Indeed creating a VMDK file is pretty much easy firstly you have to install any other macOS Operating system on your Virtual machine such as VMware. VMDK file is usually well known as a Virtual machine disk image that people are using for VMware, but fortunately, we can use it on VirtualBox also.
Install an Extra macOS on VMware or VirtualBox
For creating a macOS Ventura VMDK file you need to have access to a macOS PC or the macOS that is pre-installed on VMware. The process can be done on any operating system such as Windows, macOS, Linux, or an actual Mac Machine.
For example, if you are not in touch with macOS Ventura on Virtual Machine. Then you can use the other macOS operating systems such as macOS Sierra, High Sierra, Mojave, Catalina, Big Sur, and Monterey. Simply, complete the installation of the macOS nominated above then create the VMDK File of macOS Ventura 13 on it.
Overall, creating a VMDK file using VMware Workstation makes your task much easy. And it won’t cover much time, on the other side, if you should use any actual Mac machine then creating the disk inside macOS might be complicated. For this reason, I am recommending using any macOS operating system on Virtual Machine to create the macOS Ventura VMDK file.
Download macOS Ventura 13 Installer File
So, to create a macOS Ventura VMDK File firstly you need to download the macOS Ventura Installer file which is completely available for free. Also, if you are a part Apple Developer Program then you can get the macOS Ventura 13 Beta or its assistant Installer Package from there. You can get access to the macOS Ventura installer by its packages. And the macOS Ventura isn’t available on the App Store so you should download it.
You can get access to macOS Ventura 13 installer file through the below downlink. Simply download it from the below downlink and install it on your macOS on VMware. Once you installed it you will get the “Install macOS 13 Beta” on the Applications Directory.
Create a Separate Hard Drive on macOS Ventura on VMware to Create VMDK File
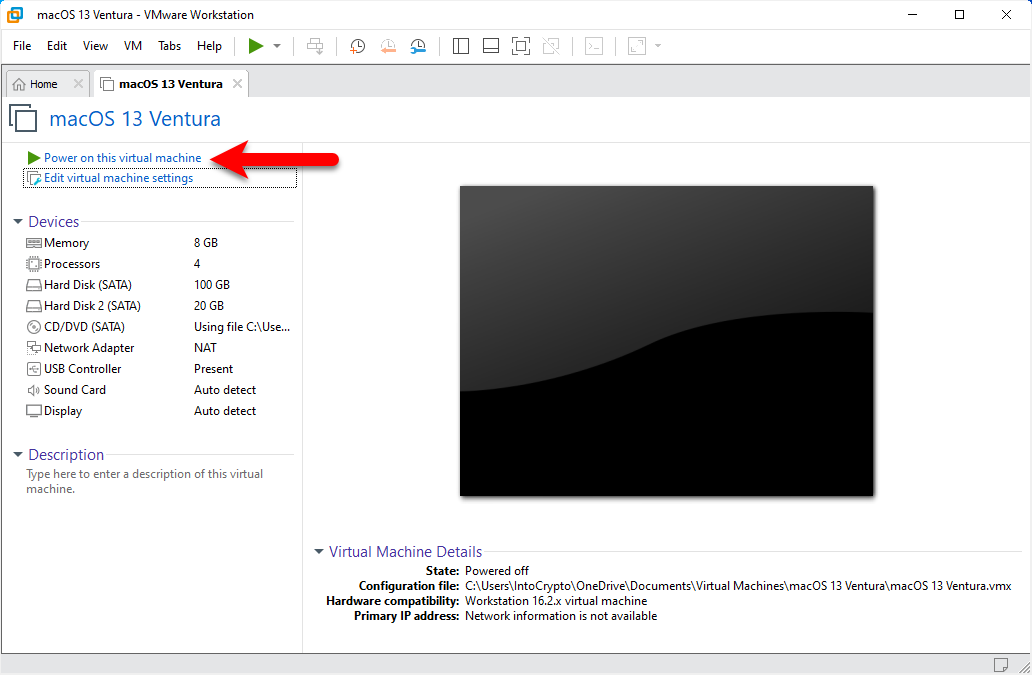
To create macOS Ventura 13 VMDK File on VMware completely turn off the virtual machine if it’s running in the background. When the virtual machine is turned off, click on “Edit Virtual Machine Settings” for adding another extra Hard drive.
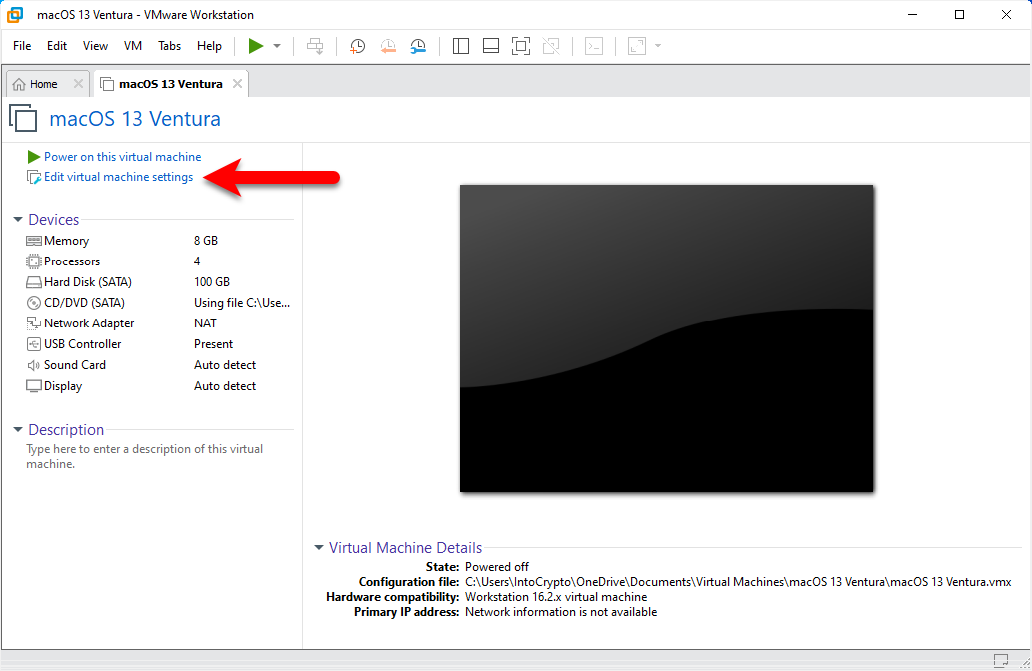
Once the virtual machine settings window opened on the Hardware tab click on Add option.

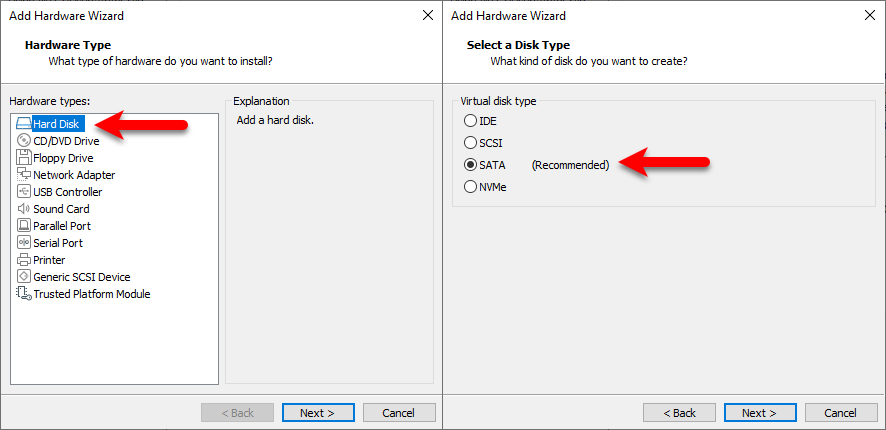
In the Hardware, type window selects the Hard Disk, and click next. Select a Disk Type so you continue it by default (SATA) Recommended and click next.
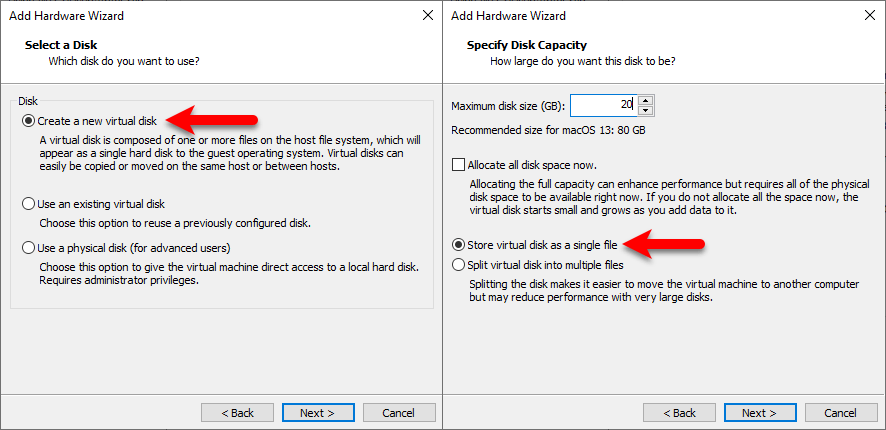
Choose the first option Create a New Virtual Disk and click Next. Now you have to specify the disk capacity indeed for creating the VMDK file you need at least 20GB. Specify the disk size according to your wish and select the option “Store Virtual Disk as a signal file” and click next.
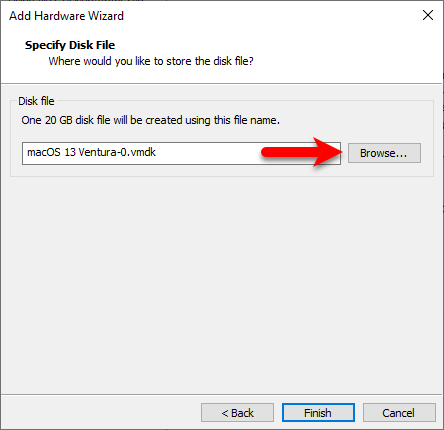
Now you have to specify the disk location where you want to save the VMDK File there which you can easily get access to that. So, for specifying click on the Browse option.
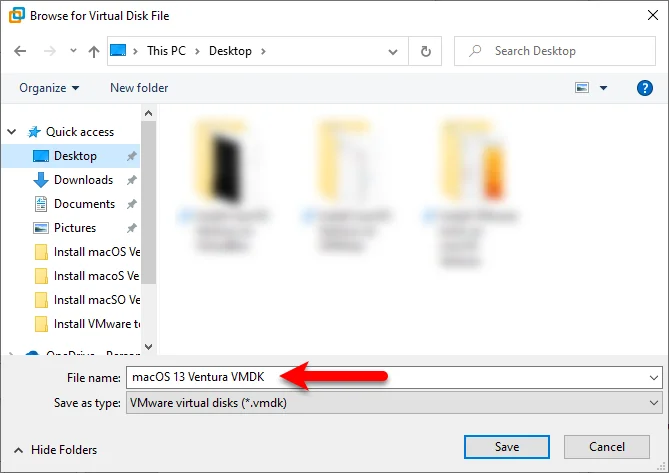
Now place the file location where you want to save and give a name for the file then click Save.
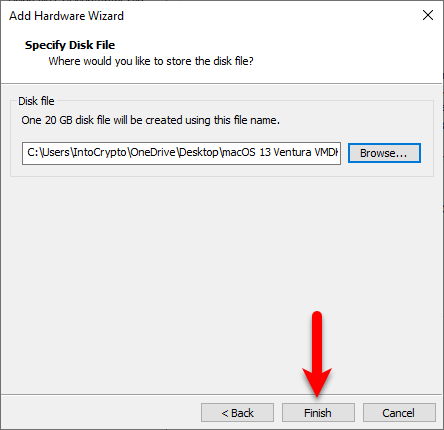
Once you save the location of the disk file, finally click on the Finish option to make changes and create the Hard disk.
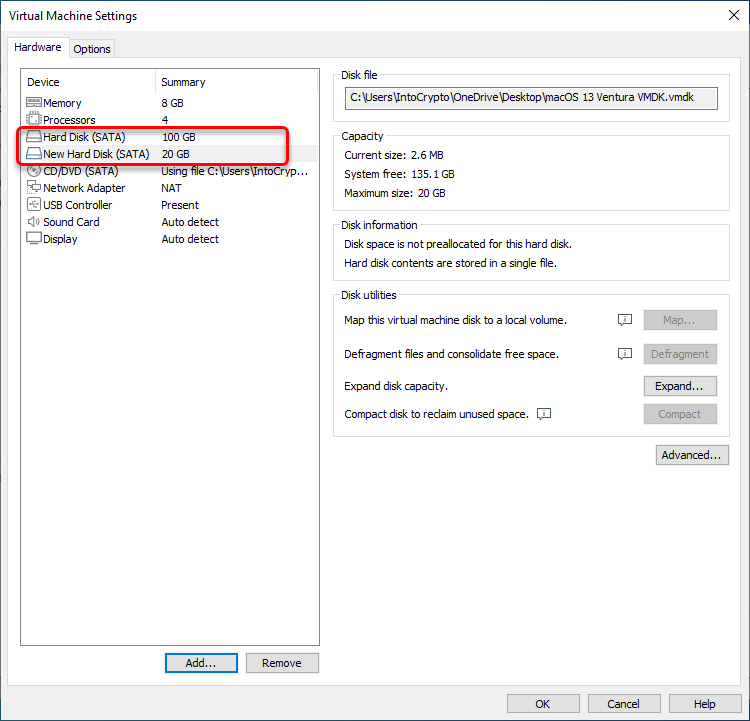
Now on the Virtual Machine settings window, you can check that, there is two Hard Disk drive created is one the actual disk for installed macOS. And the second Hard Disk is for macOS Ventura 13 VMDK file to create.
So once the hard disk created power on the virtual machine.
Erase the Hard Disk Through Disk Utility
Once you turned on the virtual machine, suddenly you will face an error on the screen that the macOS Cannot open the Hard drive. Simply, you can click on the Intiliaz option to open Disk Utility. On the other hand, if the error won’t appear on the screen simply go to search spotlight and search for “Disk Utility” and open it then format the hard disk.
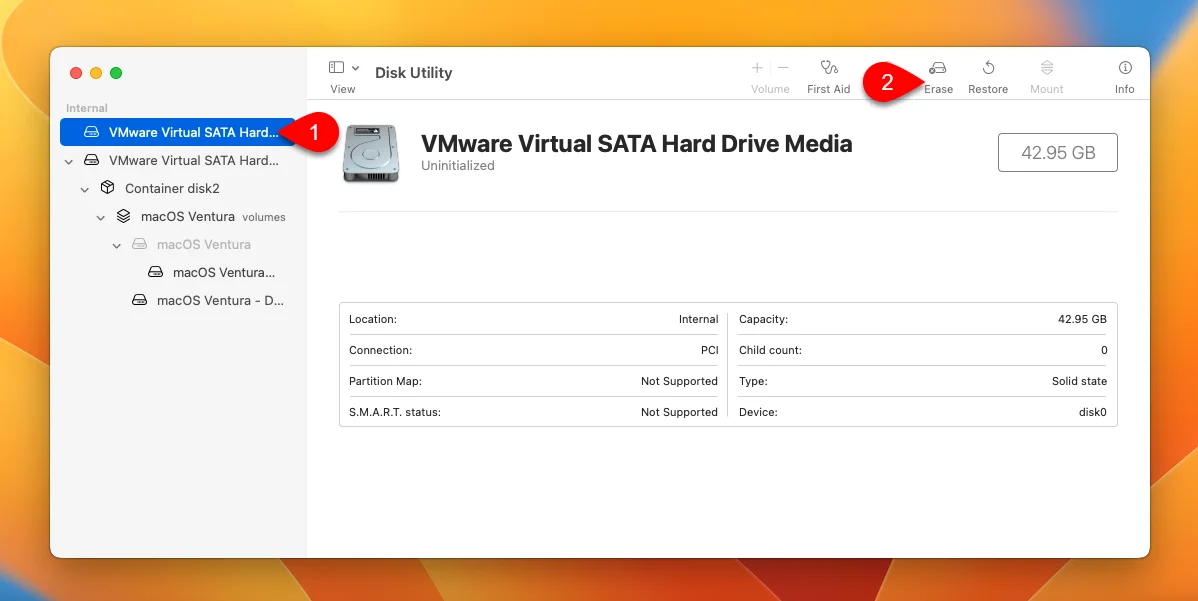
Once the Disk Utility opened from the left-handed window side “VMware Virtual SATA Hard disk” and click on Erase option.
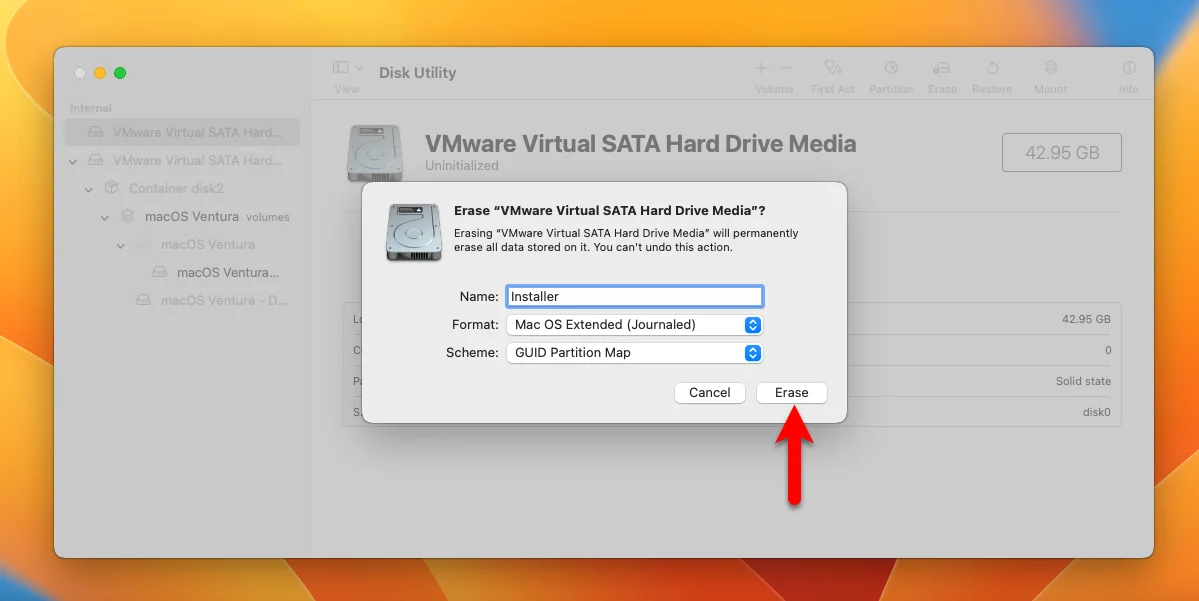
Now format the disk under the below-down parameters.
- Name: Installer
- Format: Mac OS X Extended (Journaled)
- Scheme: GUID Partition Map
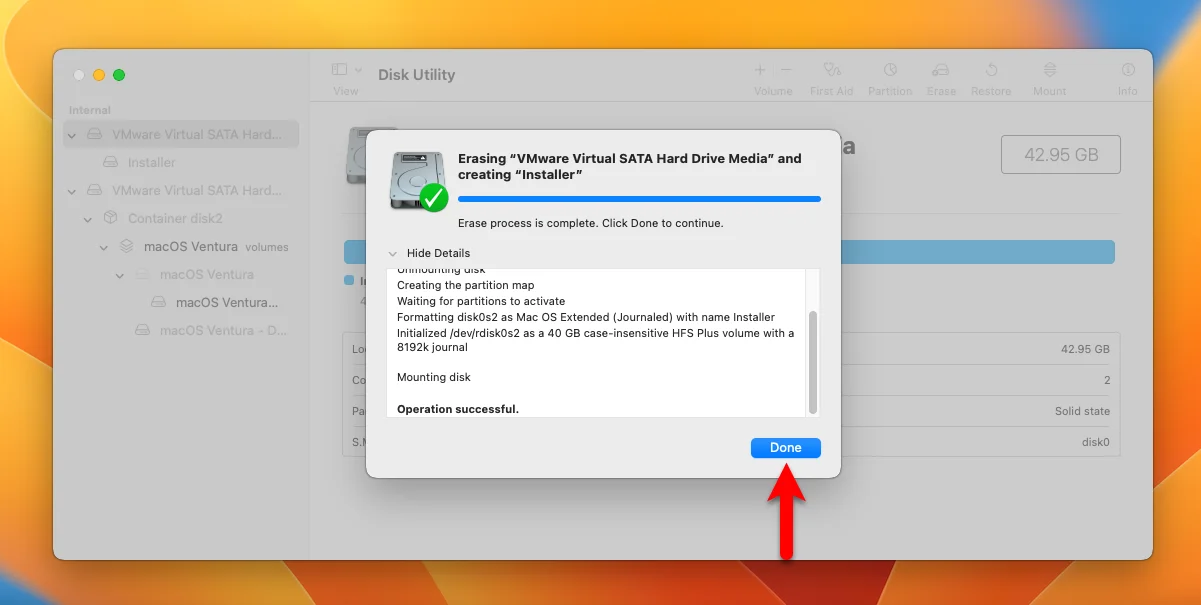
Once the disk is formated successfully click on the Done option and click the Disk Utility.
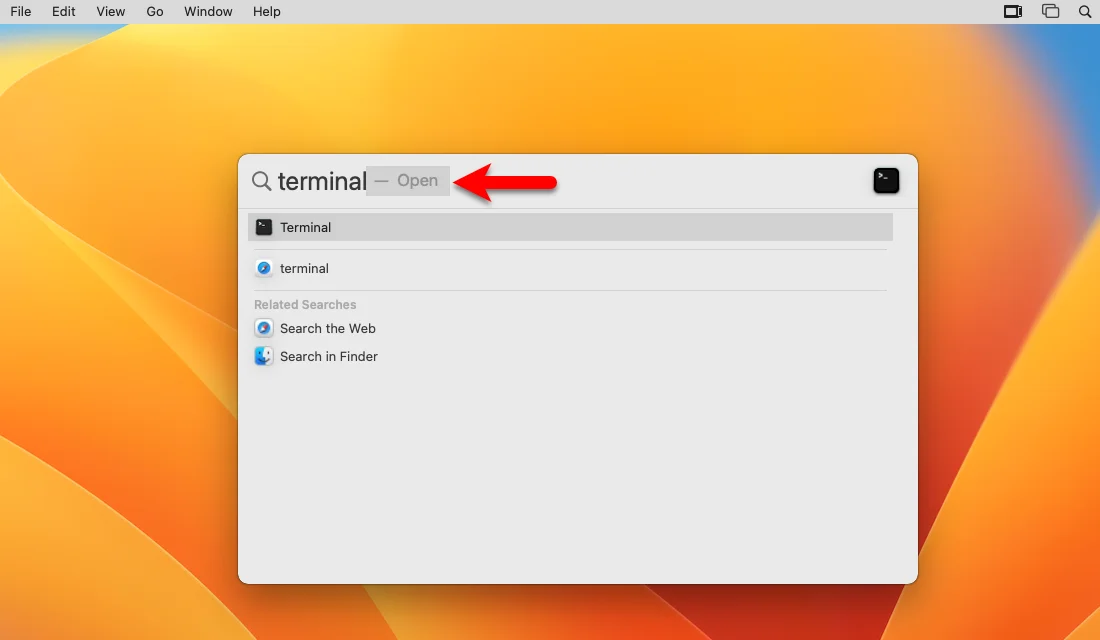
When the Hard Disk is Successfully formatted with Disk Utility, now you have to create the macOS Ventura 13 Installer. For that, simply navigate to Search Spotlight and type “Terminal”, once it appeared hit enter to open.
Once the terminal opened to apply the below down commands, after you entered the commands you will be asked to enter your username password. So, enter the password and hit enter then wait for the process to create the macOS Ventura VMDK Installer file.
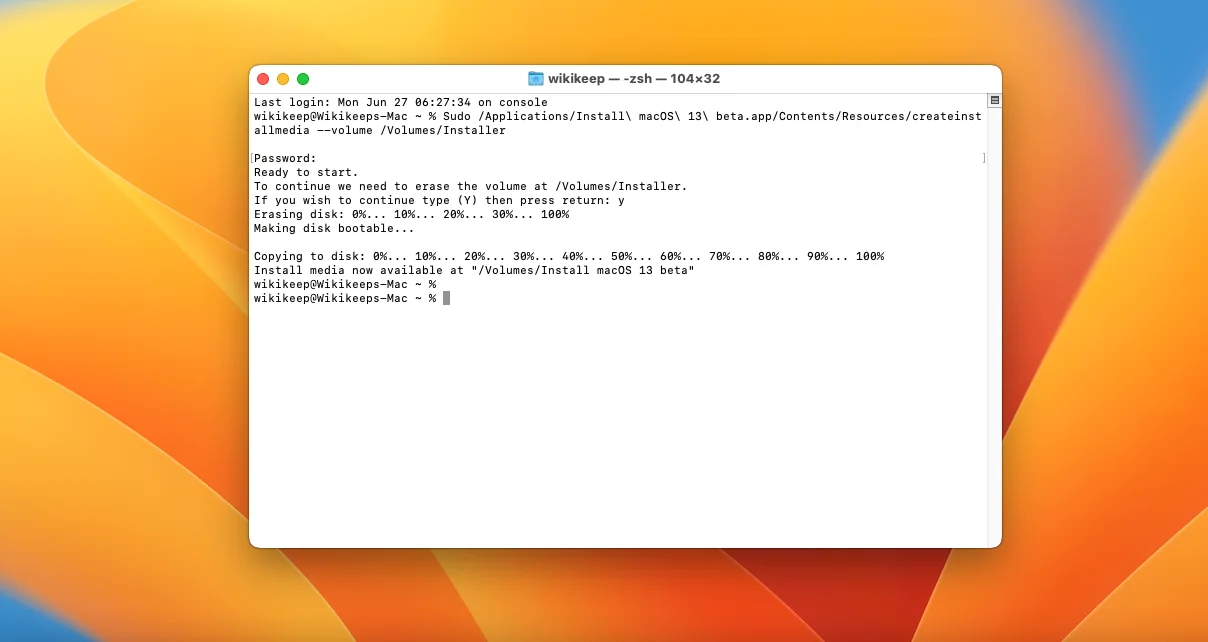
The process of creating the installer file of macOS Ventura 13 will take a few minutes. Such as after applying the commands it will start erasing a disk. Once the disk is erased it will start copying the installer file to the disk.
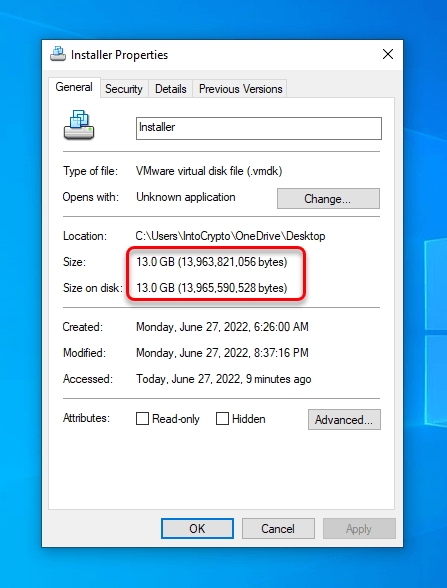
Once the VMDK file is successfully created you can have a look at it. Like macOS Ventura 13 Beta is at least 13GB.
Also Read:
- How to Install macOS Ventura on VirtualBox on Windows PC?
- How to Install macOS Ventura 13 on VMware on Windows PC
Conclusion
Creating macOS Ventura was much more interesting than creating the macOS Ventura ISO image file. Because at the first you only need to create an extra Hard Disk on VMware Virtual Machine. And the second thing is you need to download the macOS Ventura Installer file. You perform this process by creating a macOS Ventura ISO image file too. And the next thing is creating a macOS Ventura VMDK file takes less time than creating a macOS Ventura ISO Image file. Overall, I enjoyed experimenting with creating the macOS Ventura VMDK file than the macOS Ventura ISO image file. So, if you faced any kind of problem feels free to share with us via the comment box section.