The new Intel Comet Lake 10th Gen PC is one of the biggest products for gaming and other works. It was about May 2020 that the companies want to roll out the latest PC for gamers with high hardware specifications. The Intel Comet 10th Gen PC is the first PC for gaming that has 10-core desktop processors. The Core i9 10900K, it’s more interesting ever, alongside this you have to thank AMD for this happening. Finally, Intel released the latest desktop PC with a new processor.
However, installing the macOS operating system on Intel Comet Lake 10th Gen PC is possible. But after the installation, you need to fix the Audio, Video, Graphics, Bluetooth, WiFi. Unfortunately, the current EFI fixes files are unstable with the macOS operating system especially macOS Big Sur. Most of the macOS Big Sur has tested successfully on the Intel-Based processors PC. But the Intel Comet Lake 10th Gen PC is not supported by the old EFI files. Therefore, for that, you need to create the OpenCore EFI File.
For creating OpenCore EFI for Comet Lake PC you need the below-down required files.
Related:
Create OpenCore EFI for Comet Lake PC
For installing macOS Big Sur 11.0 latest version on Comet Lake PC you need to create an OpenCore EFI file for the system hardware fixes. The fixes include a bunch of drivers, such as Bluetooth, WiFi, Sound, Graphics and etc.
OpenCore Generation X is a Utility to create a pre-structured EFI Folder to the Desktop Based on the selection of the user.
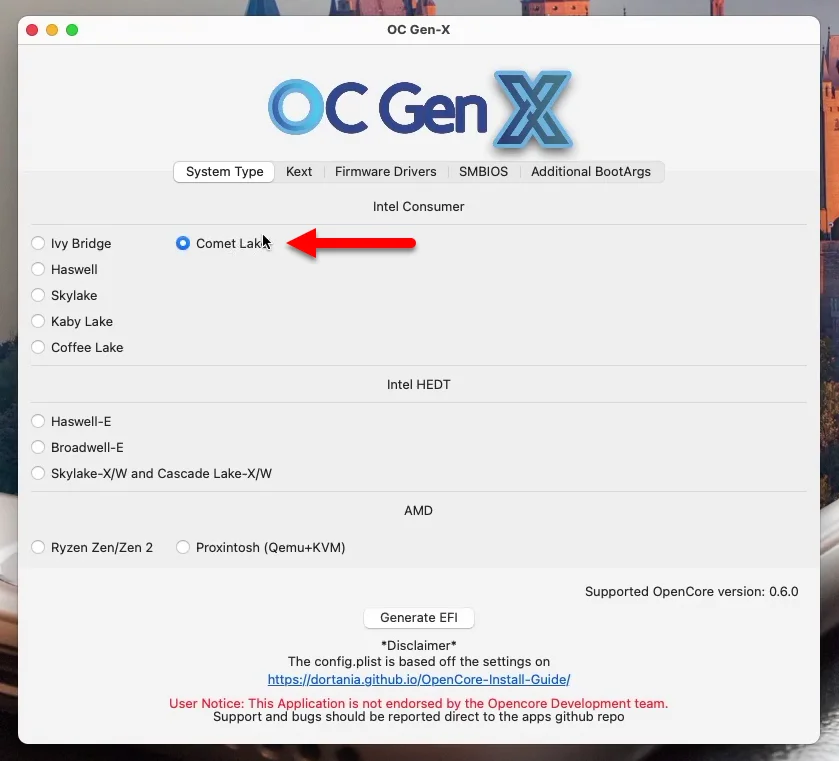
Step 1. For creating the OpenCore EFI file download the above-required files. When the file download, first of all, open the “OC Gen X”, in the welcome wizard select the “System Type” tab, and select the “Comet Lake” option.
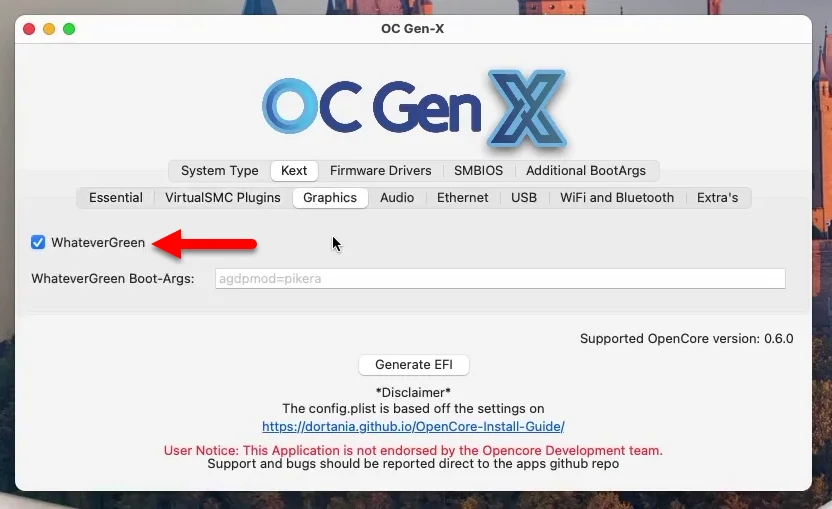
Step 2. Now select the Kext tab, and select the Kexts which required for your system. Select “Graphics” option and enable the “WhateverGreen” option.
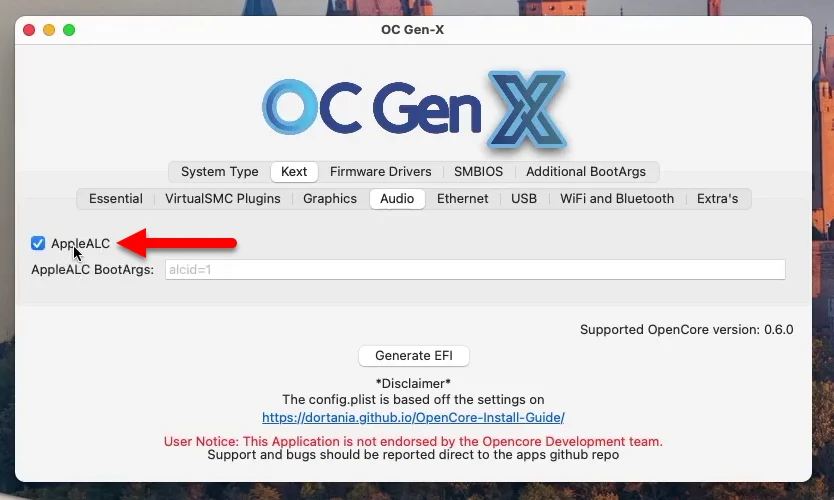
Step 3. Select the “Audio” option and enable the “Apple ALC” option.
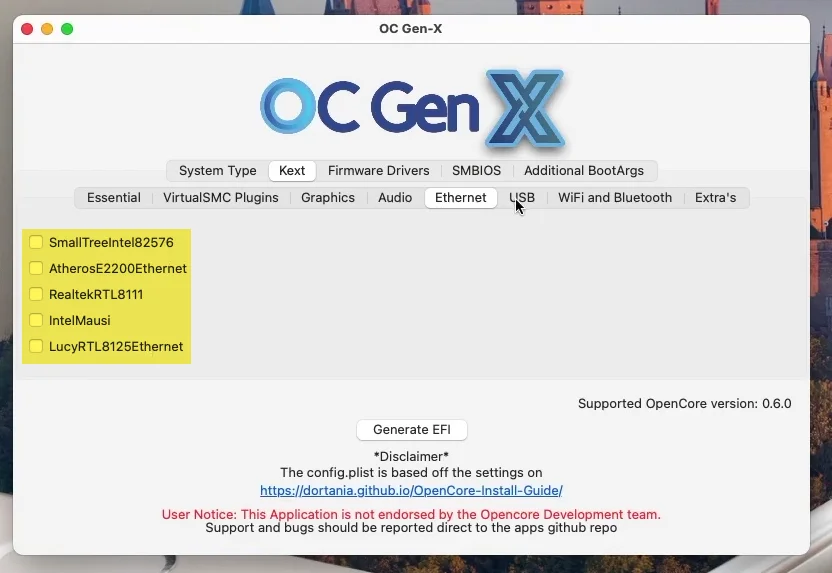
Step 4. Select the “Ethernet” option and enable the options required for your PC.
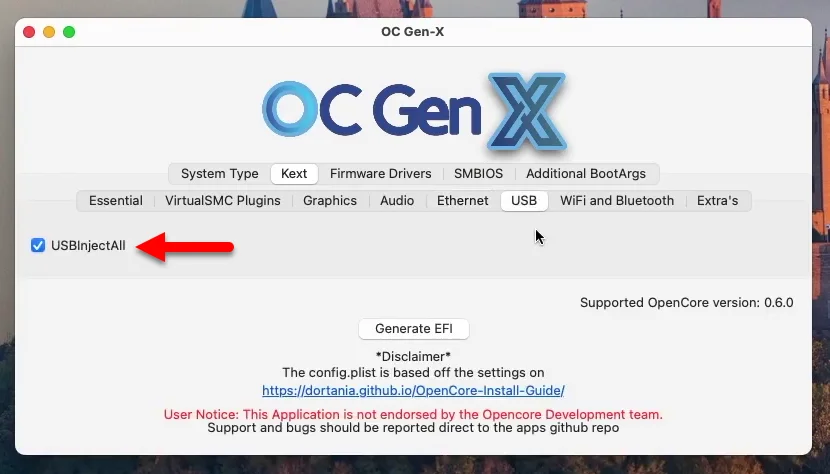
Step 5. Select the “USB” option and enable the “USBInjectAll” option.
Step 6. Select the “WiFi and Bluetooth” option and select the options according to your system card.

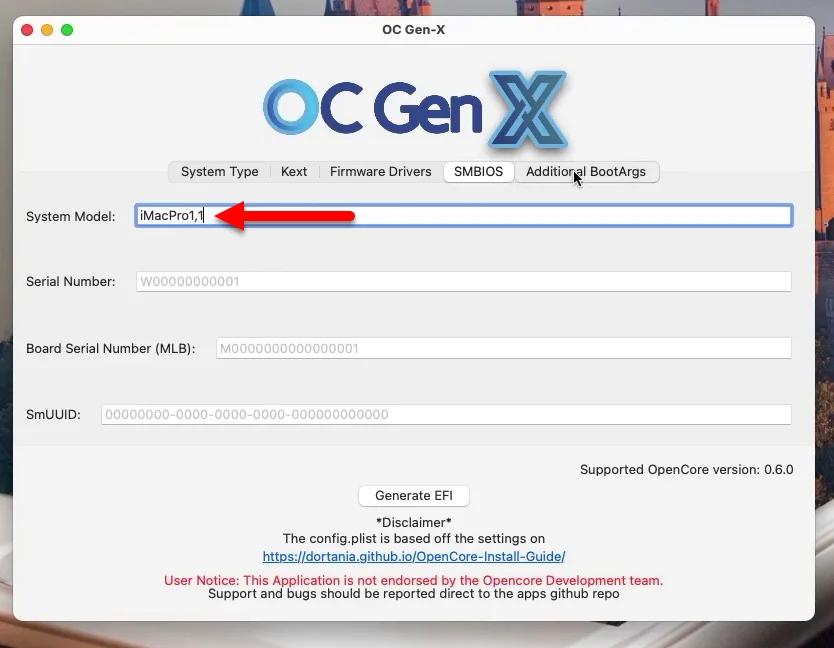
Step 7. Select the “SMBIOS” tab and enter your “System Model” as my system model is “iMacPro1,”.
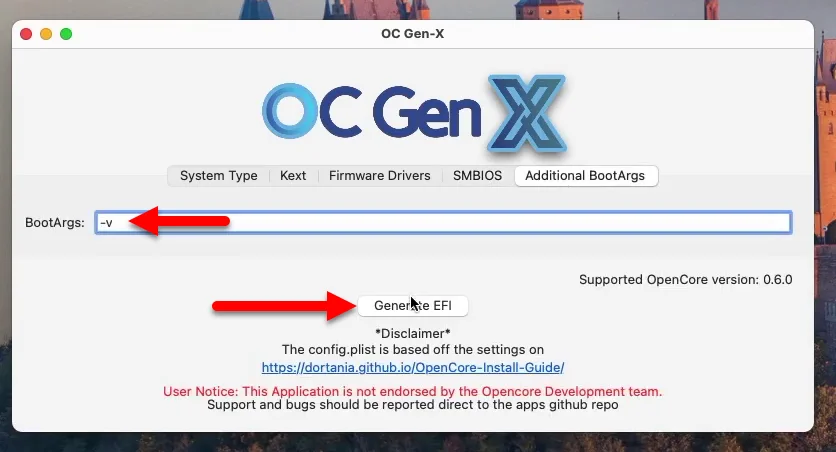
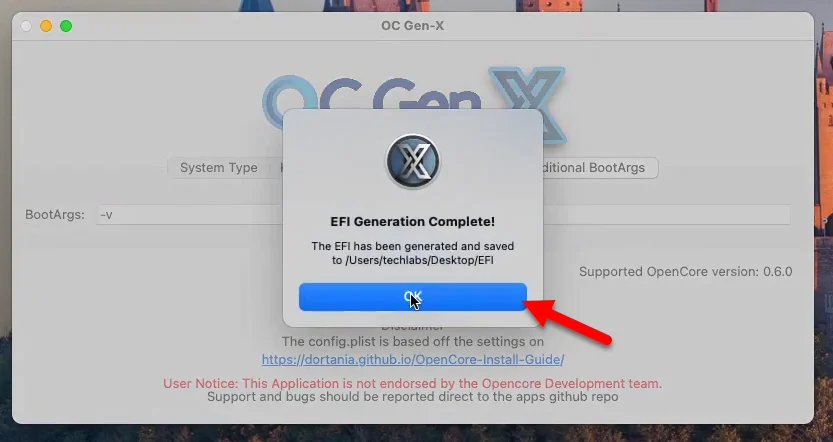
Step 8. Now here you need to bring changes to the last step which is “Additional BootArgs”. Here enter the BootArgs “-V” and click on the “Generate EFI” option.”
Step 9. And here it is the EFI is being successfully generated.
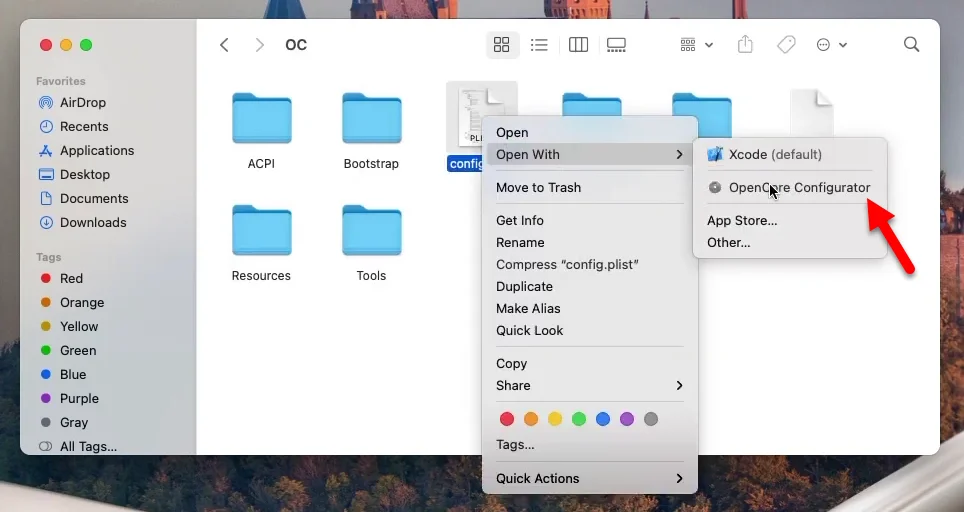
Step 10. When you have created the EFI file, the EFI folder automatically will appear on your desktop. Therefore, head over and open the EFI folder, open OC> then open Config.plist with OpenCore Configurator.
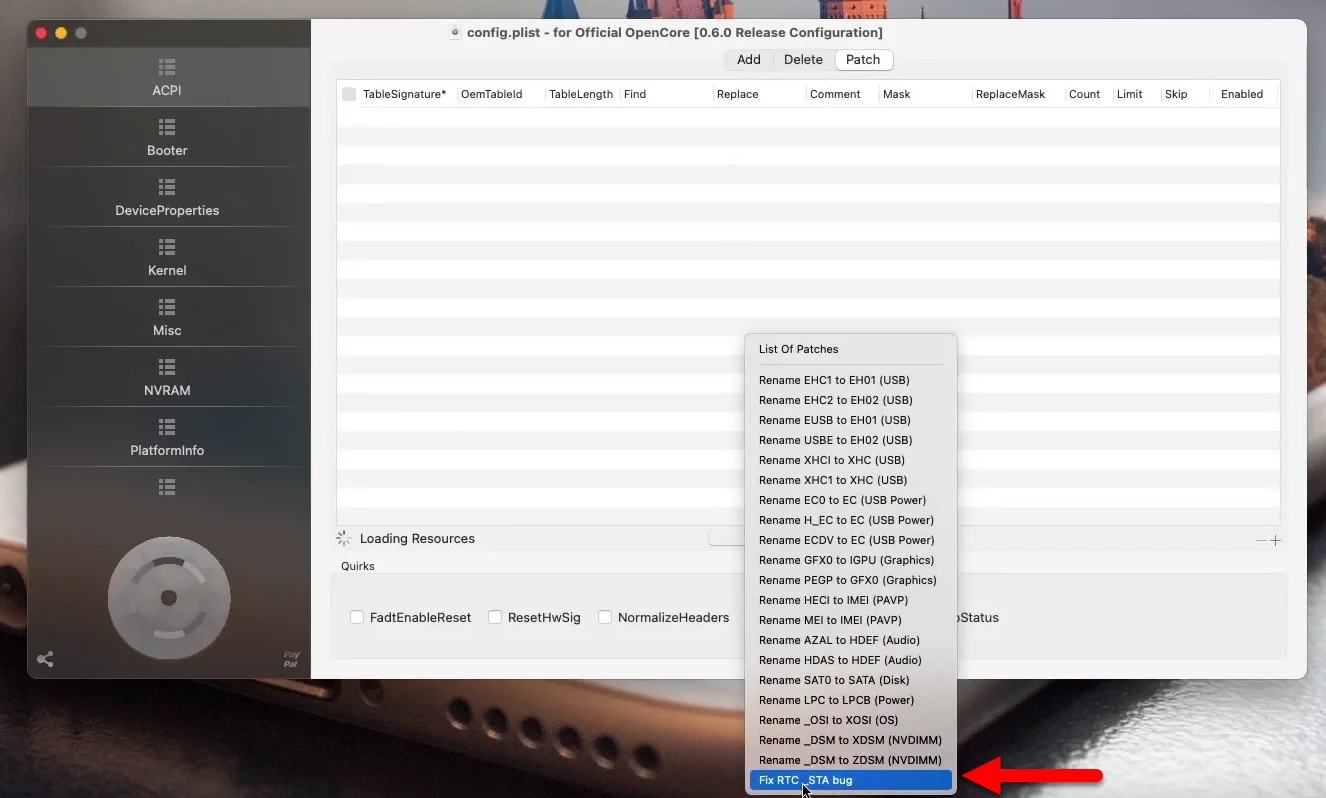
Step 11. When the OpenCore Configurator opened, select the “ACPI” tab, then select the “Patch” option. Select the “RTC” patch from the drop-down list.
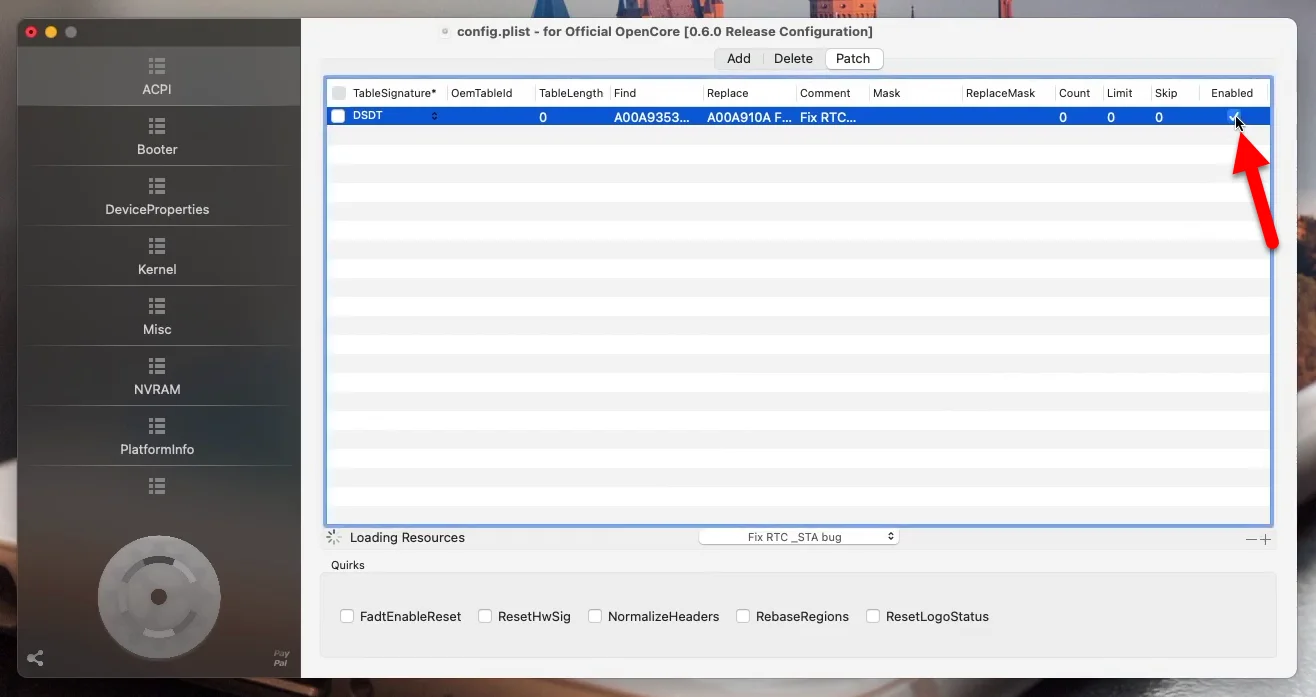
Step 12. When the patch added don’t forget it to enable it.
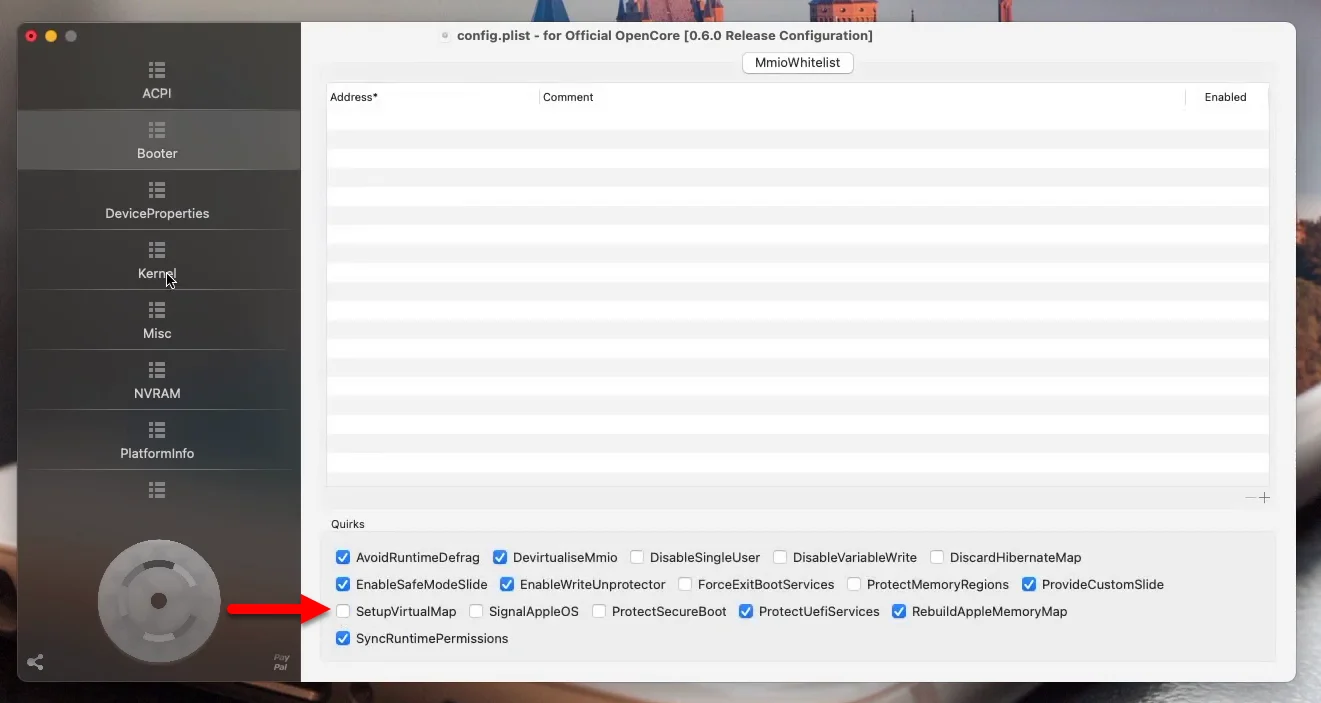
Step 13. Select the “Booter” tab and deselect the “SetupVirtualMap” option.
Step 14. Now select the “Kernel” tab and add the CPU ID from the below down Kexts.
Cpuid1Data = EB60800 00000000 00000000 00000000
Cpuid1Mask = FFFFFFF 00000000 00000000 00000000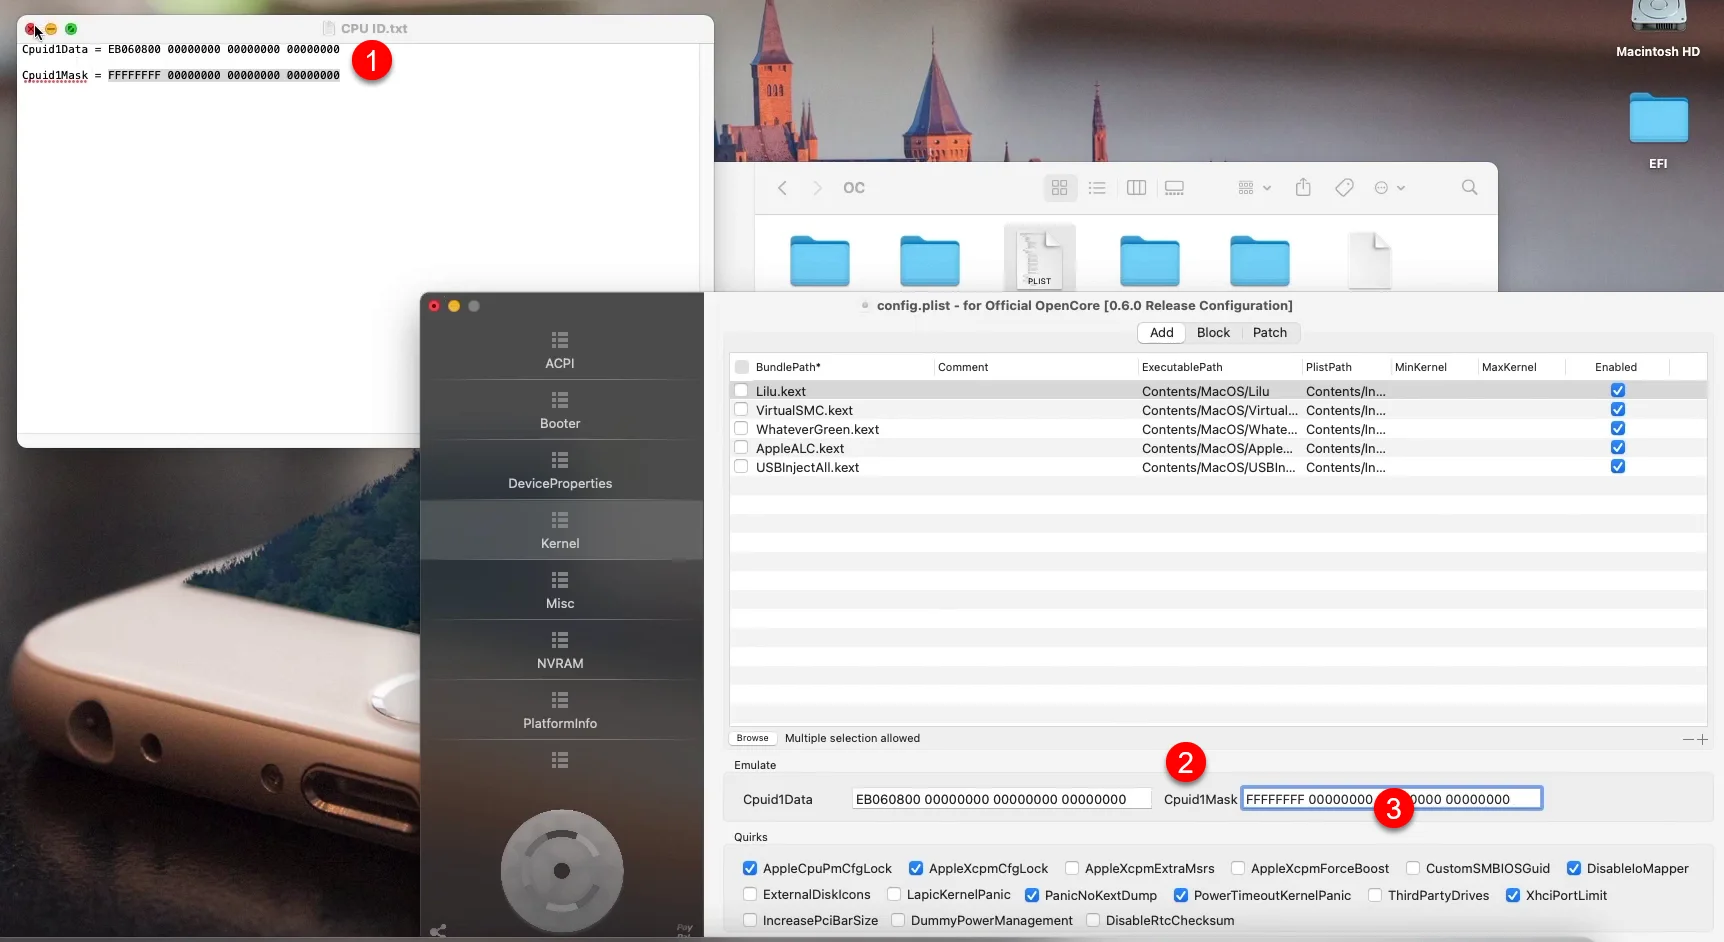
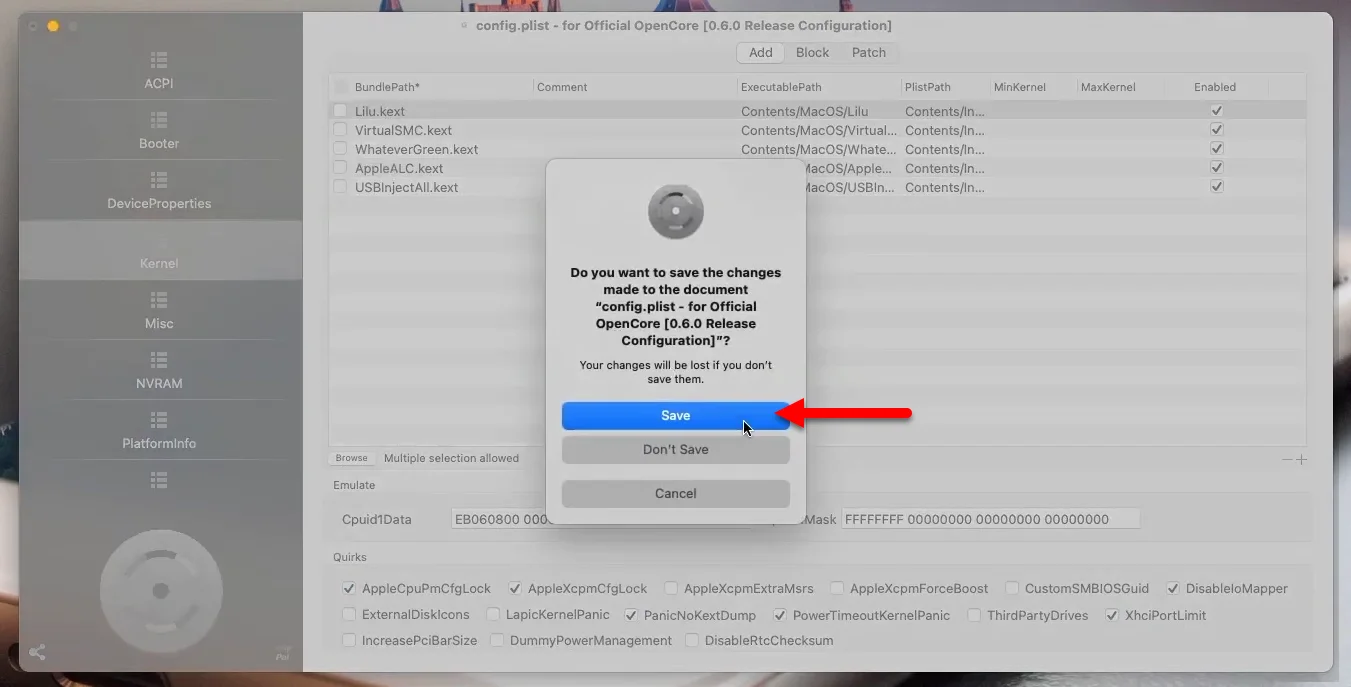
Step 15. And now the basic EFI file for the Comet Lake PC or the 10th Generation PC has been created. So, close the OpenCore Configurator and click Save.
It was about creating OpenCore EFI for Comet Lake PC 10th Generation, further if you faced any kind of problem use the comment section below down. Or if you are interested in this kind of article then read also the below down guides also.