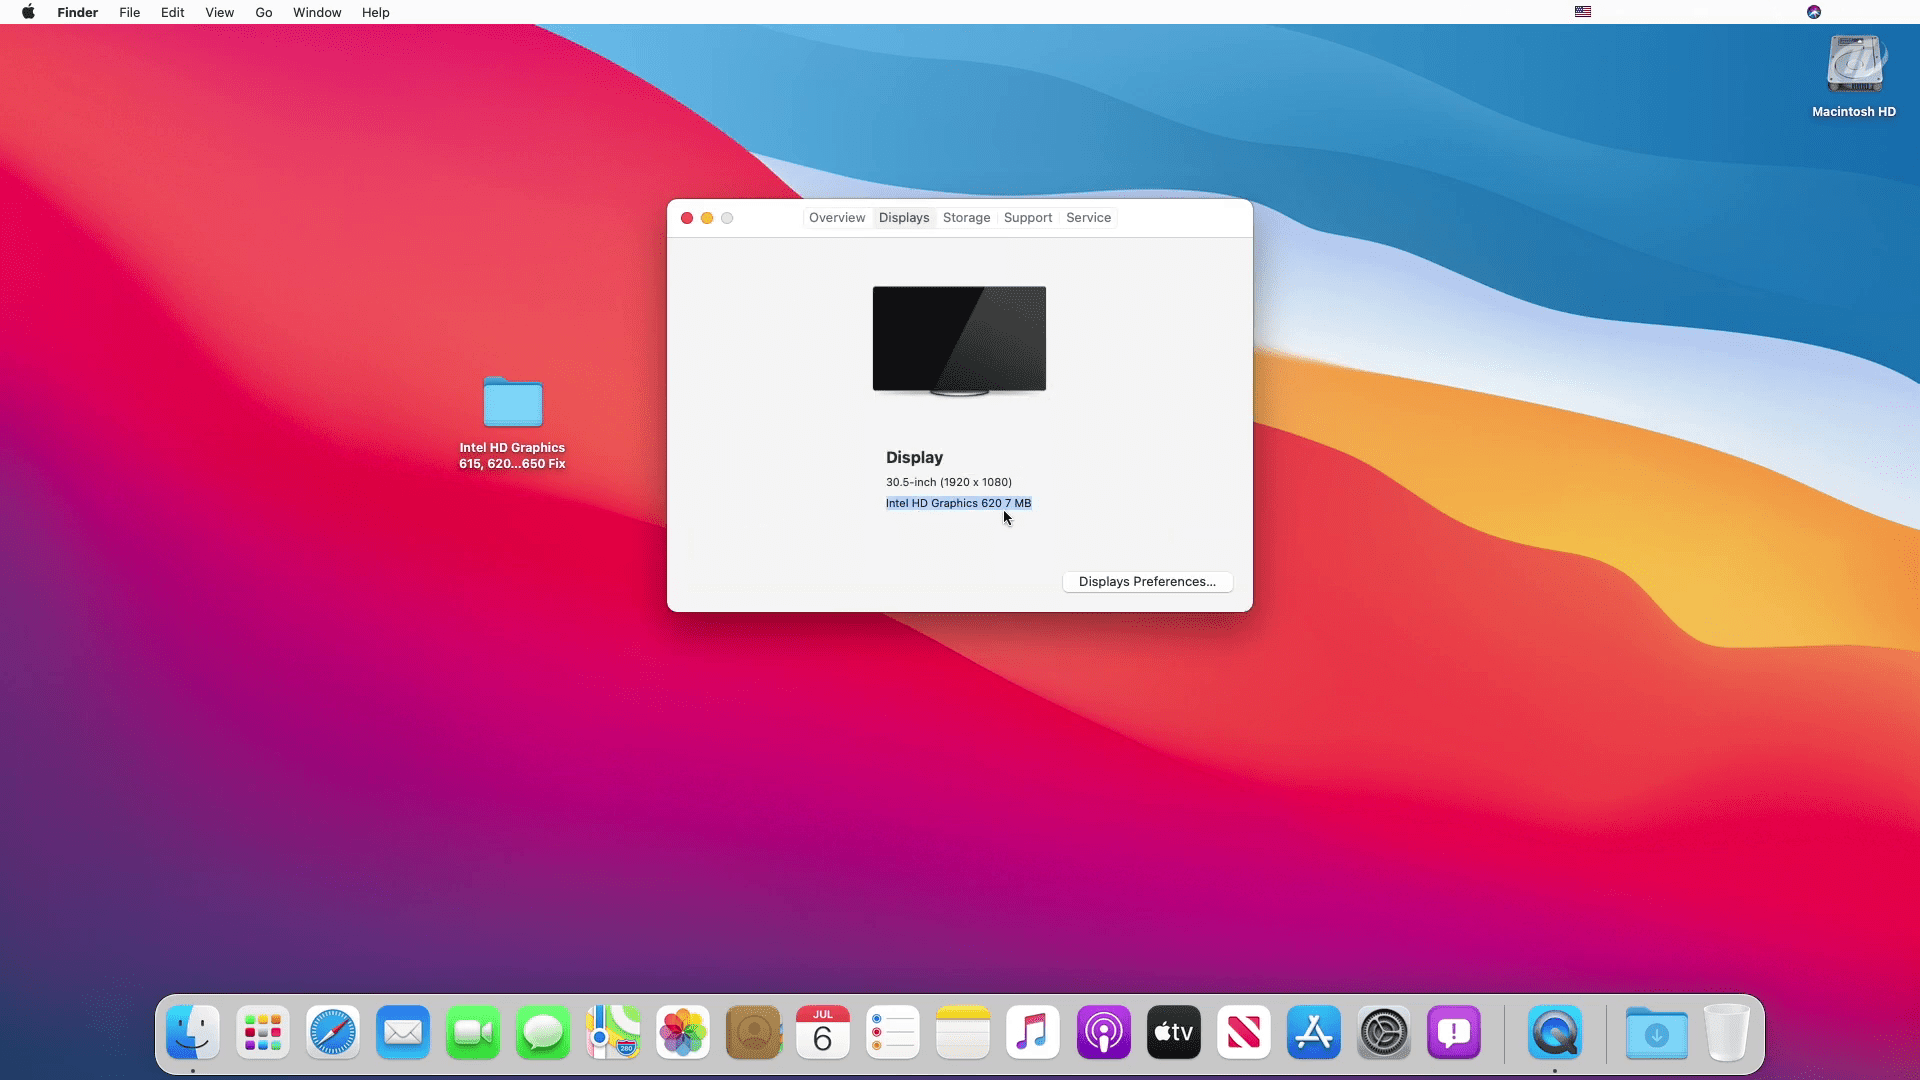
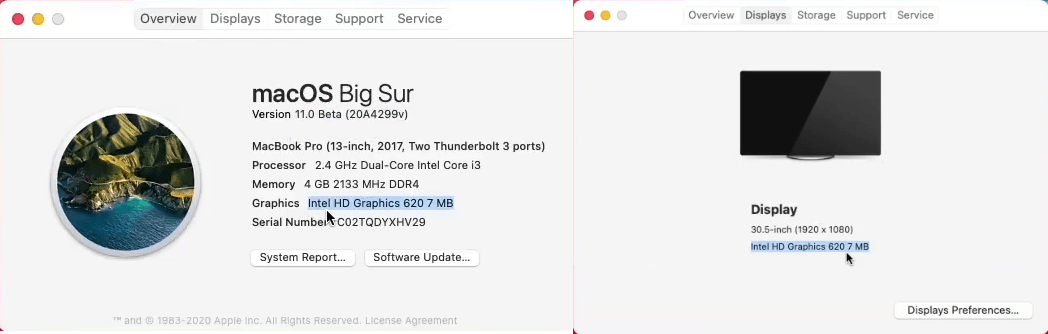
I have installed macOS Big Sur 11 on my Assur laptop, but the graphic is displayed on the “Overview” tab shows 620 with 7MB. Also, the same on the “Display” show with 620 and 7MB. In fact, with low graphic display, my computer mouse cursor is lagging too much, and the dock isn’t transparent. macOS Big Sur is the latest operating system of Apple for Macintosh computers. Therefore, it’s the first Apple operating system that runs on the Intel processor. Alongside this, Apple is now building the ARM-Based Silicon Processor. Which has the Intel processor, it means after this you can run macOS operating systems on Intel processors.
But before installation, it’s important to find the solution to its high performance. To accelerate the performance of macOS Big Sur on Intel processor. I will show you through this guide how to Fix Intel HD Graphics 615, 620, 630, 640, and 650 On Big Sur. On the other hand, using those graphics display into the 1920×1080 HD screen display will bring lots of changes to your computer speed performance.
Related:
Fix Intel HD Graphics on macOS Big Sur 11
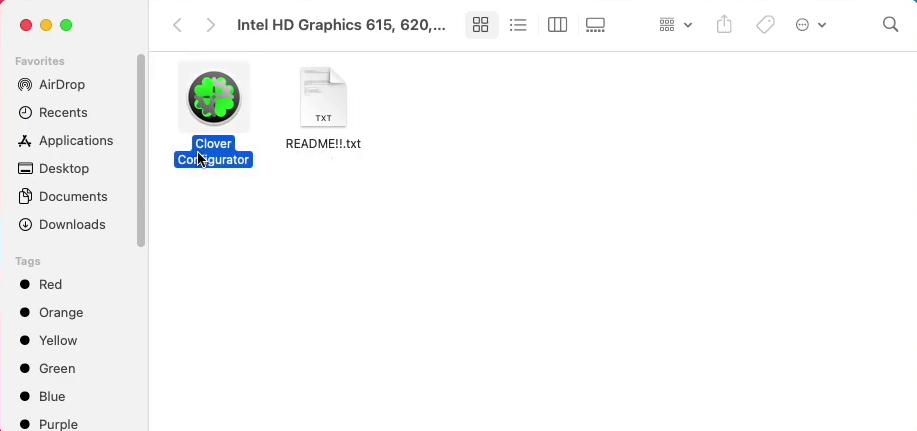
Through this guide, we don’t need any kind of driver. And we will fix the issues thought the Clover Configurator. The Clover Configurator allows you to mount the partition of hard disk drive. After that, the driver’s file will be visible for you to fix it. In case, if you faced the driver’s problem not working properly then download the requirements from below down-link.
- Download Intel HD Graphics
Once the file downloads open it, then open the Clover Configurator.
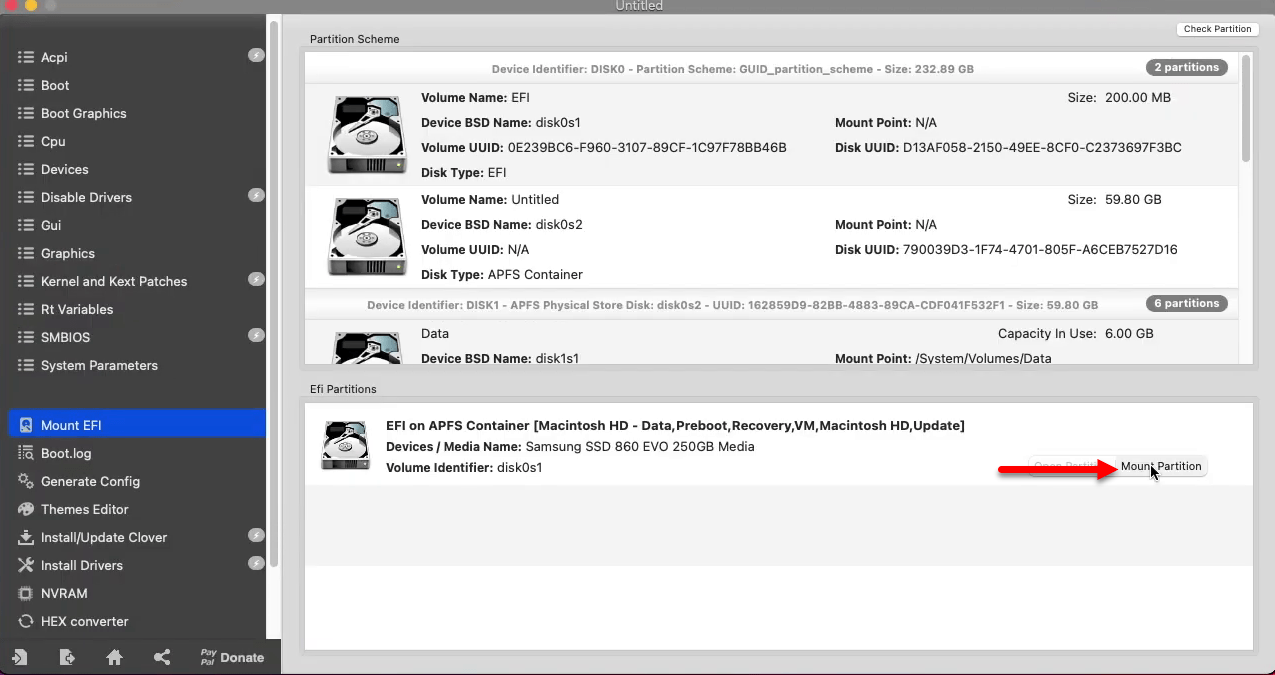
When the clover configurator opened, mount the EFI partition your system drive. Right-click on “Mount EFI” from the left-handed tab, and click on “Mount Partition” then enter your password and click OK. Once the partition mounted the disk will create on your desktop.
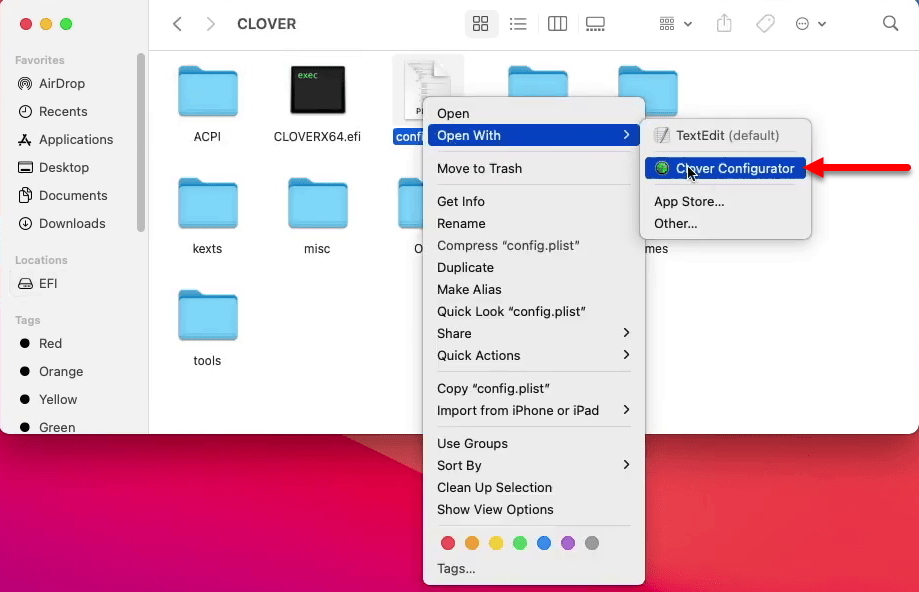
Now open the mounted partition, double-click on EFI>Clover right-click on Config.txt, and open with Clover Configurator.
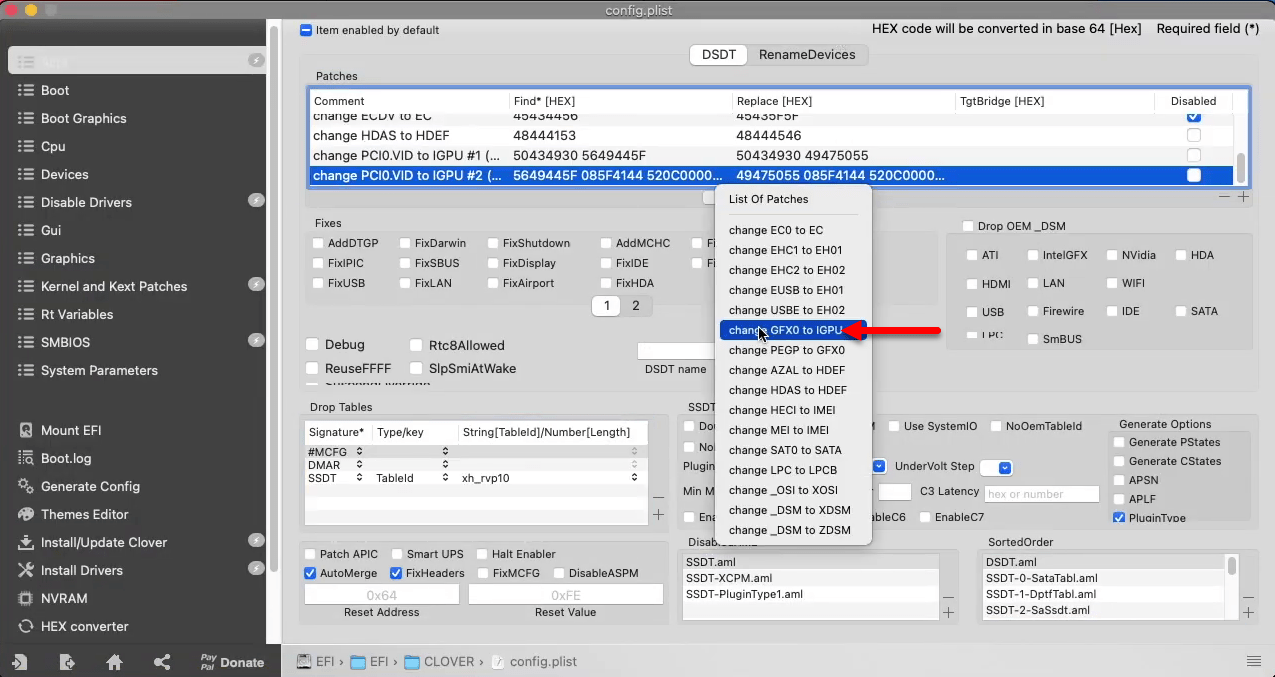
Now select the “Accept” tab from the left-handed menu bar, click on the “list of Patches” and select the “Change GFX0 to IGPU” option.
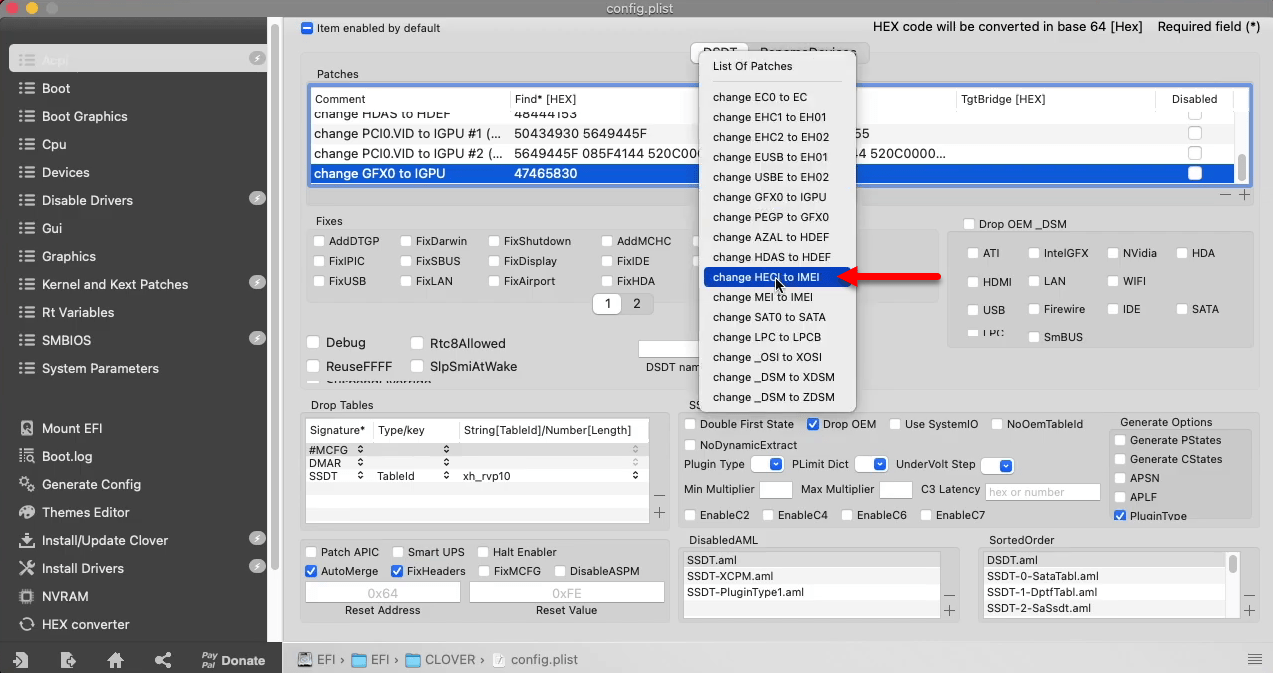
Select the “Change HECI to IMEI” option
Now select the “Boot” tab, and add a Bootark, type “disablegfxfirmware” and press enter.

Now go to the “Devices” tab, and add fake id and intel gfx for example (-0x59160000).

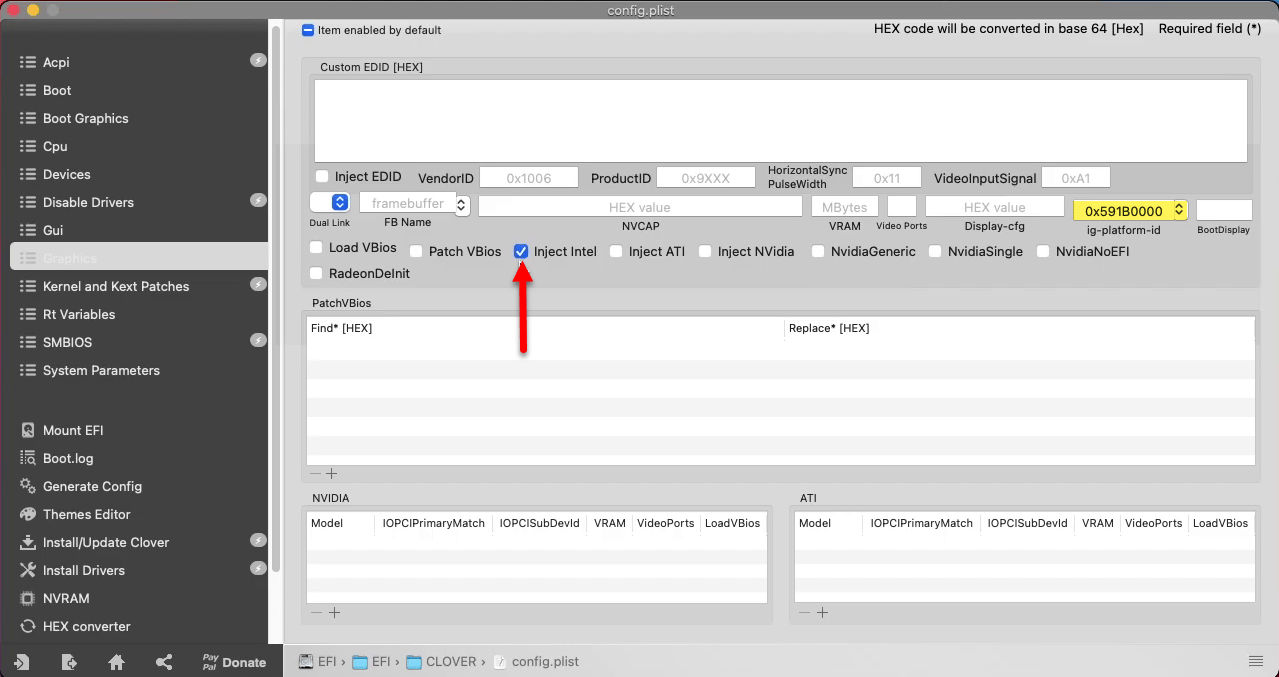
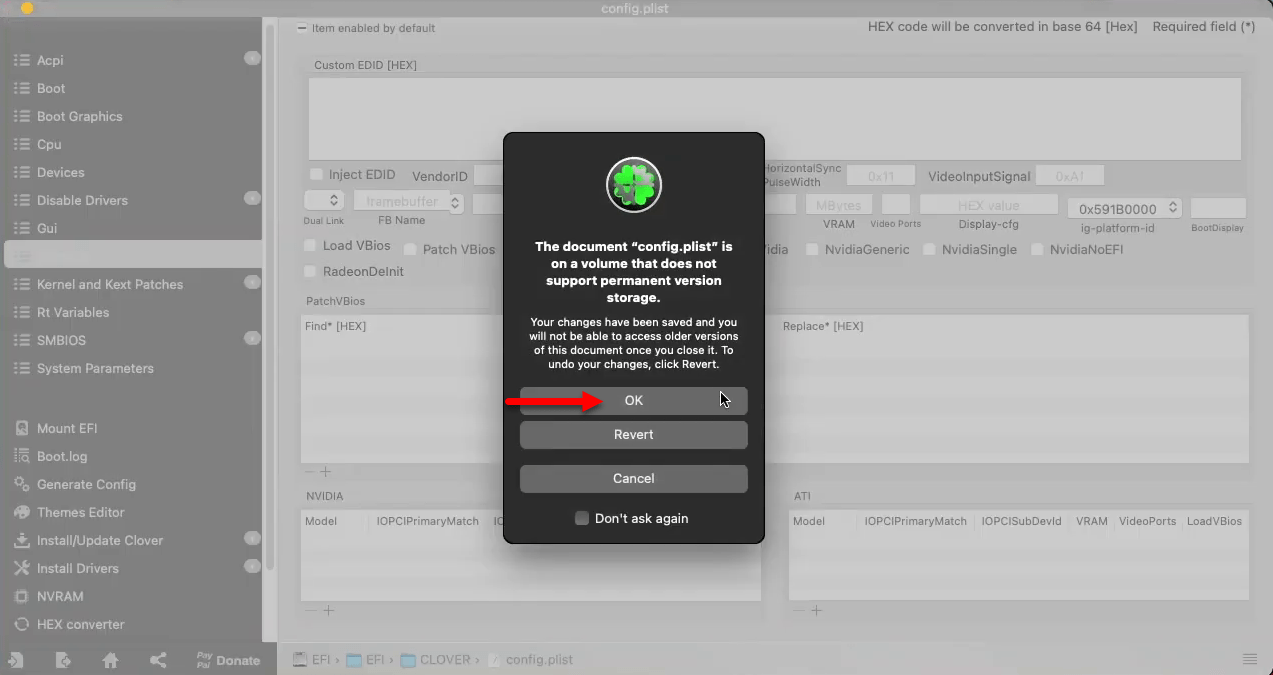
Select the “Graphics” tab and add ig platform id “0x591B0000” and also check the box of “Inject Intel”.
Now close the clover configurator and save the config.plist.
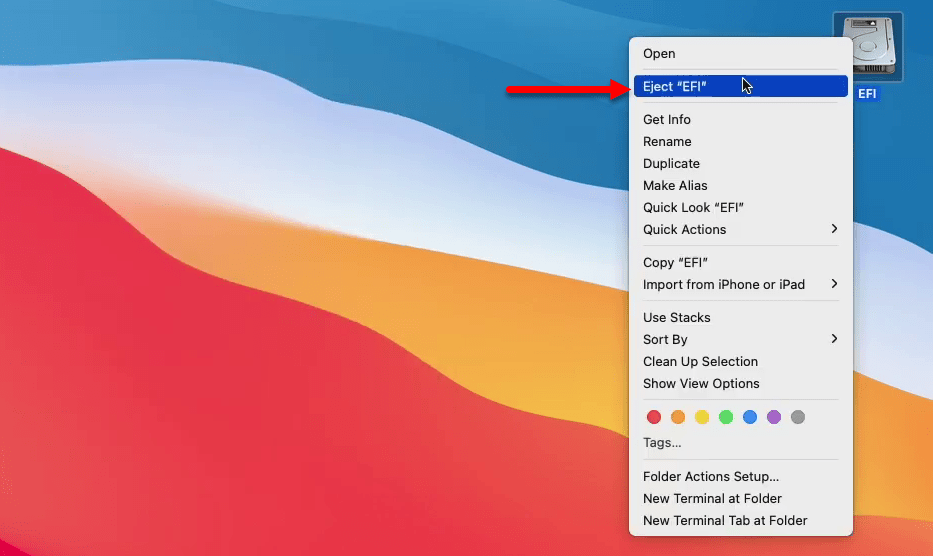
Once the clove configurator closed, over ahead to mounted EFI partition and eject that.
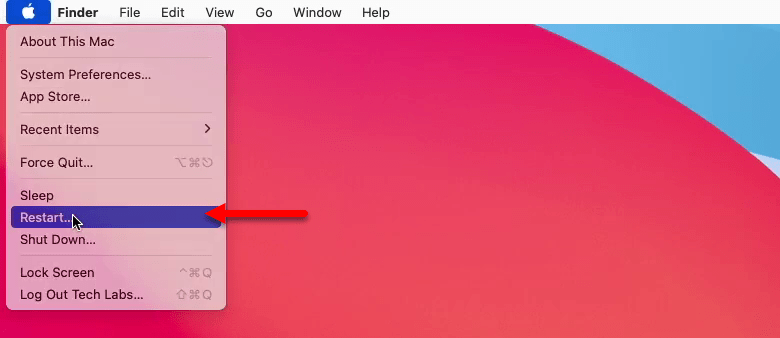
To make changes to your PC graphics you have to restart, navigate to left-handed corner click on “Apple Logo” and click Restart.
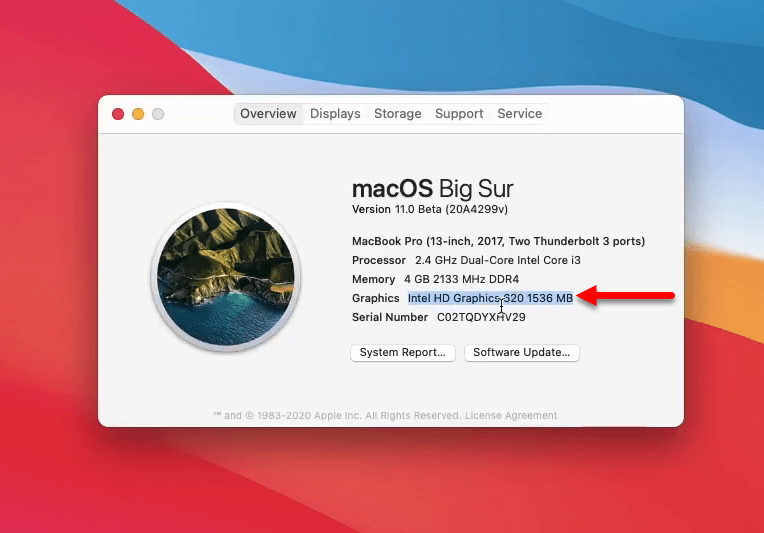
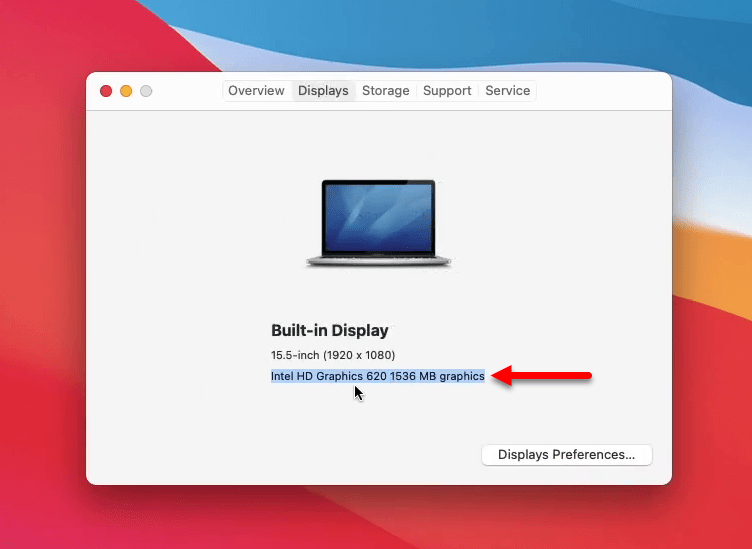
When your computer restarted click on “Apple Logo” and select “About this Mac” option. You will see the changes of 7MB graphic display 1536MB. It perfectly worked and now the dock is showing transparent and smooth.
Click on the “Display” tab and there is also a 1536MB graphic display.
Click on the “Overview” tab, and click on the graphic “System report”, from this tab you can check all the reports of your PC graphic display.

Finally macOS Big Sur graphic moved from 7MB to 1536MB graphic display. If you faced any kind of problem feel free to share with us via the comment section.