macOS Mojave 10.14 is one of the biggest releases after macOS High Sierra that brought the first Dark mode look in the operating system. Alongside of dark mode on macOS Mojave 10.14, it brought lots of love and brings iOS apps like news and stock to our Mac to end over experience with that. Now its era of macOS Catalina 10.15 and macOS Big Sur and you can still use macOS Mojave on your Mac or upgrade it to one of the latest releases of macOS operating system.
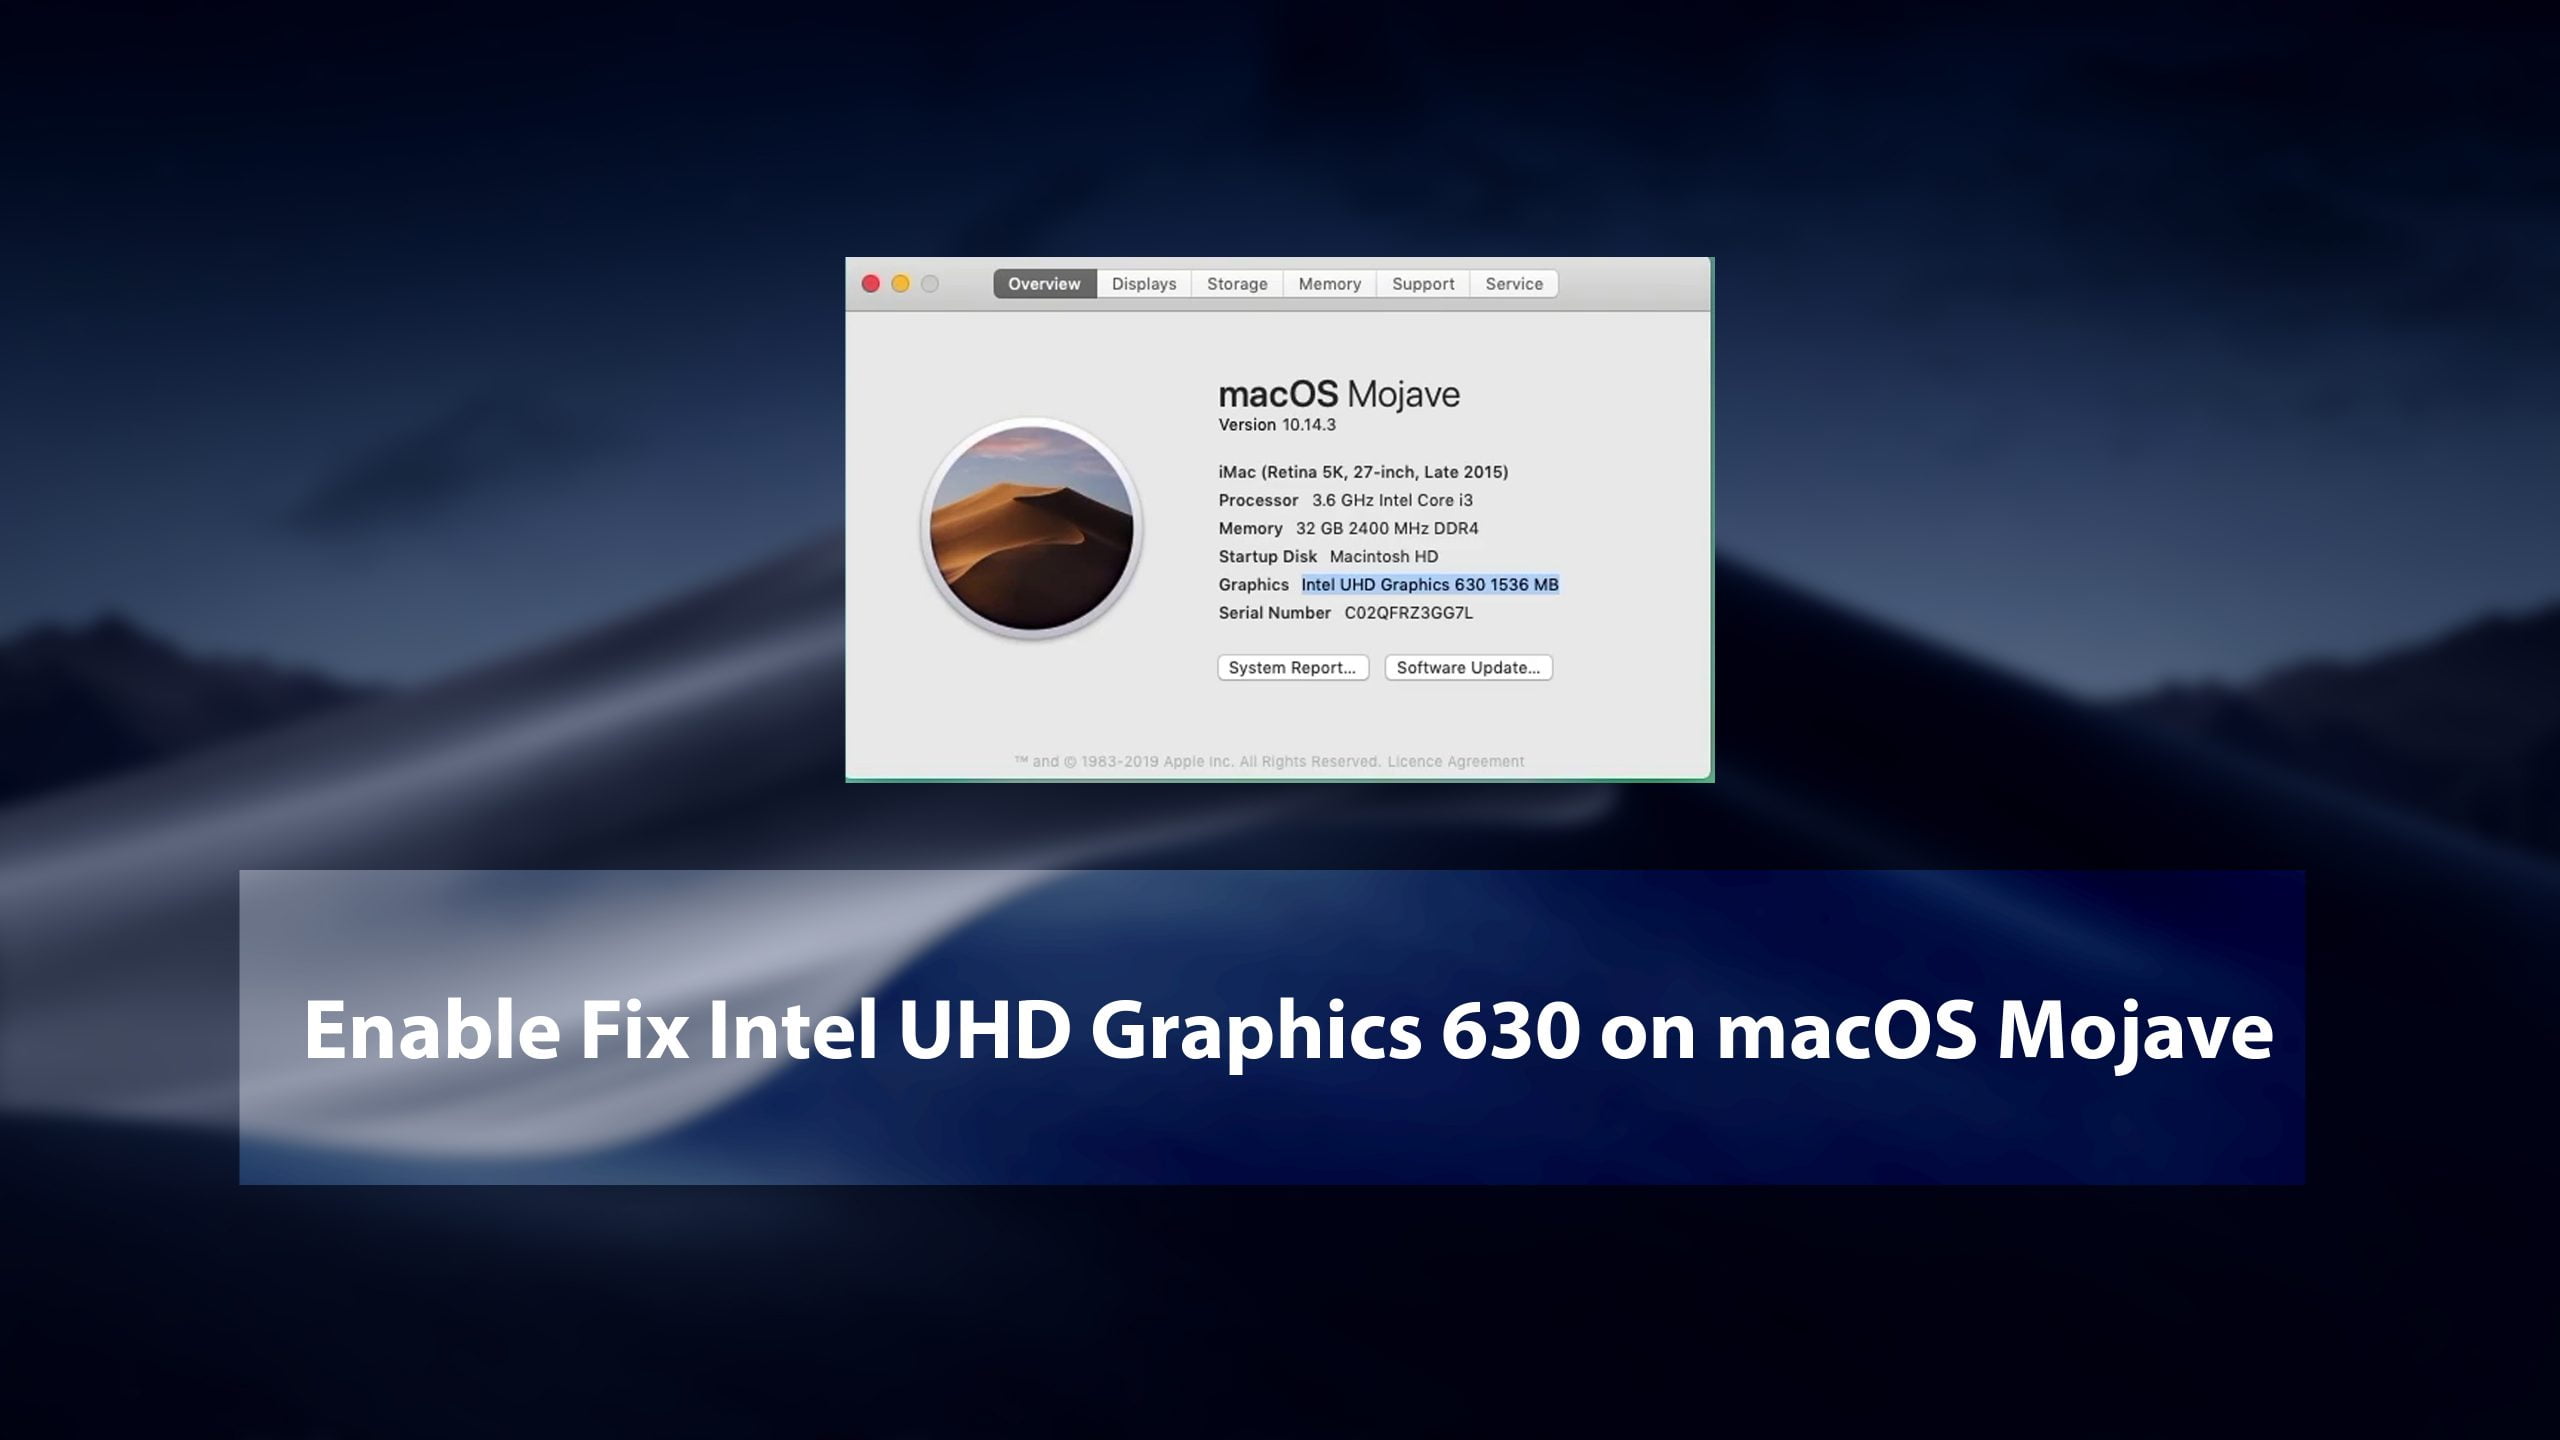
However, after that, I successfully installed macOS Mojave 10.14 on Mac I faced the problem of how to fix the UHD graphic of macOS Mojave. Therefore, after lots of experiments, I get succeed and found the solution to how to Enable Fix Intel UHD Graphics 630 on macOS Mojave. The exact resolution and graphic display of macOS Mojave on Mac has to be 1536 MB, but after the installation, you will see the resolution display is 7 MB only.
Related:
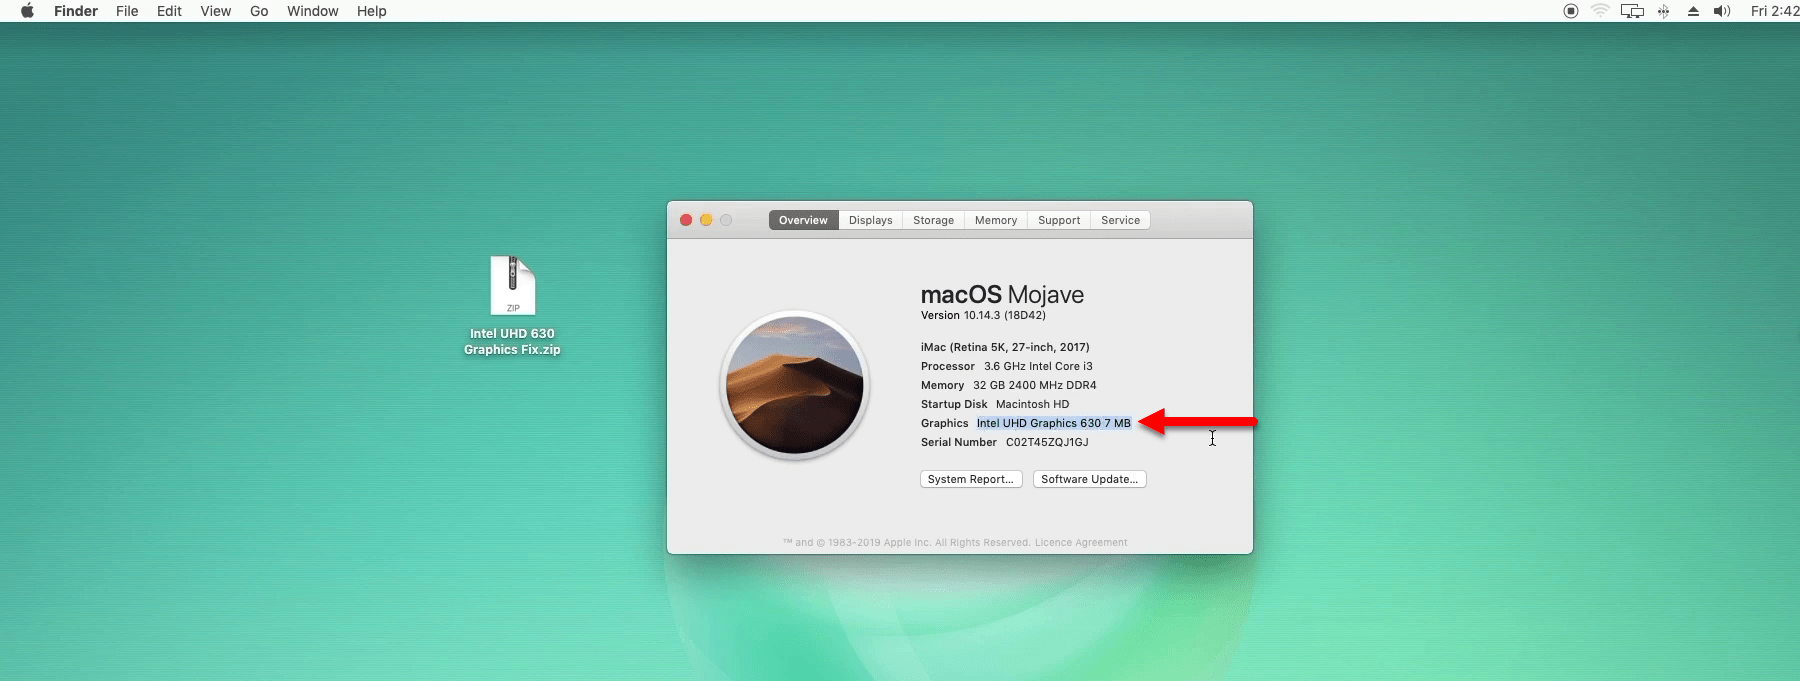
You will be able to get the full acceleration, you can check the full acceleration if the dock is transparent. Or if you didn’t see the dock is not transparent, it means the graphic display is not working in full resolution acceleration. Also, the same on the display tab you will find the new HD Intel-graphics is Six-30 with 7MB only. If you are using the old fixes files for macOS Mojave then you need to download the latest fixes files from below down.
Enable Fix Intel UHD Graphics 630 on macOS Mojave
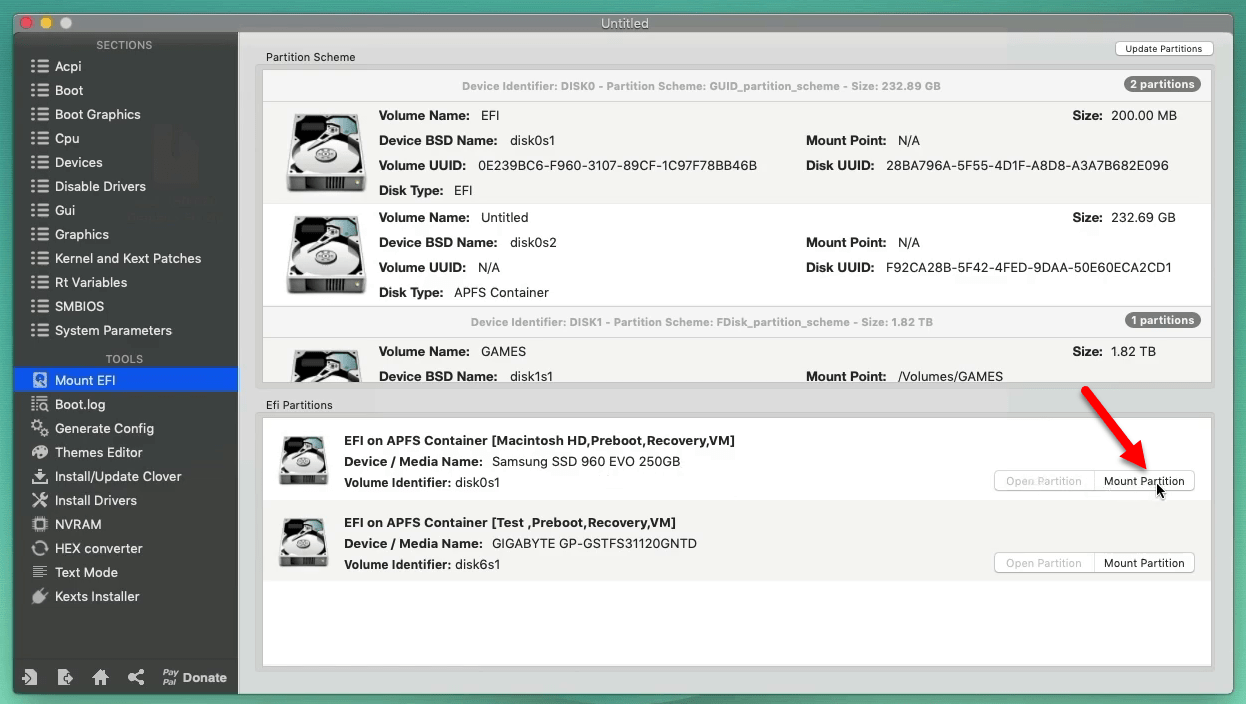
Once you have downloaded the above files, head over move it to the desktop then double-click to extract the files. Including the Clover configurator is available in the folder, using the Clover configurator you can Mount the EFI partition of USB drive or system drive. So, open up the folder and open the Clover Configurator for mounting the EFI partition of system drive. When the Clover configurator opened click on Mount EFI option from left-hand and click on Mount Partition option, then enter your password and press OK.
When the EFI partition created on the desktop, double-click on that to open. Open the EFI Folder>Open Clover folder. If you didn’t installed Clover Bootloader then install, if already that exists in the EFI folder don’t do anything. Right-click on the Config.plist and run as Clove Configurator.
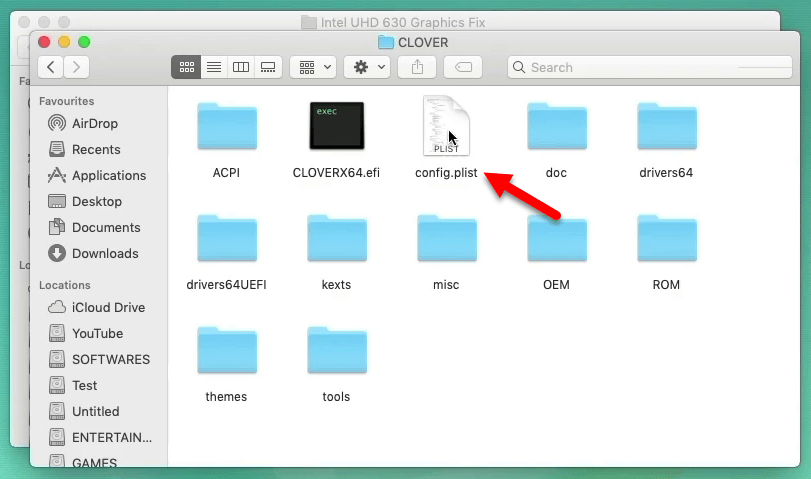
When the config.plist opened via the Clover configurator, select the “ACPI” tab and add the renames. For adding click on (+) button and bring changes with below down codes, or check the below screenshot.
     Comment               Find* [HEX]           Replace [HEX]
Change GFX0 to IGPU         47465830               49475055
Change HECI to IMEI         48454349               494D4549
Change MEI to IMEI          4D45495F               494D4549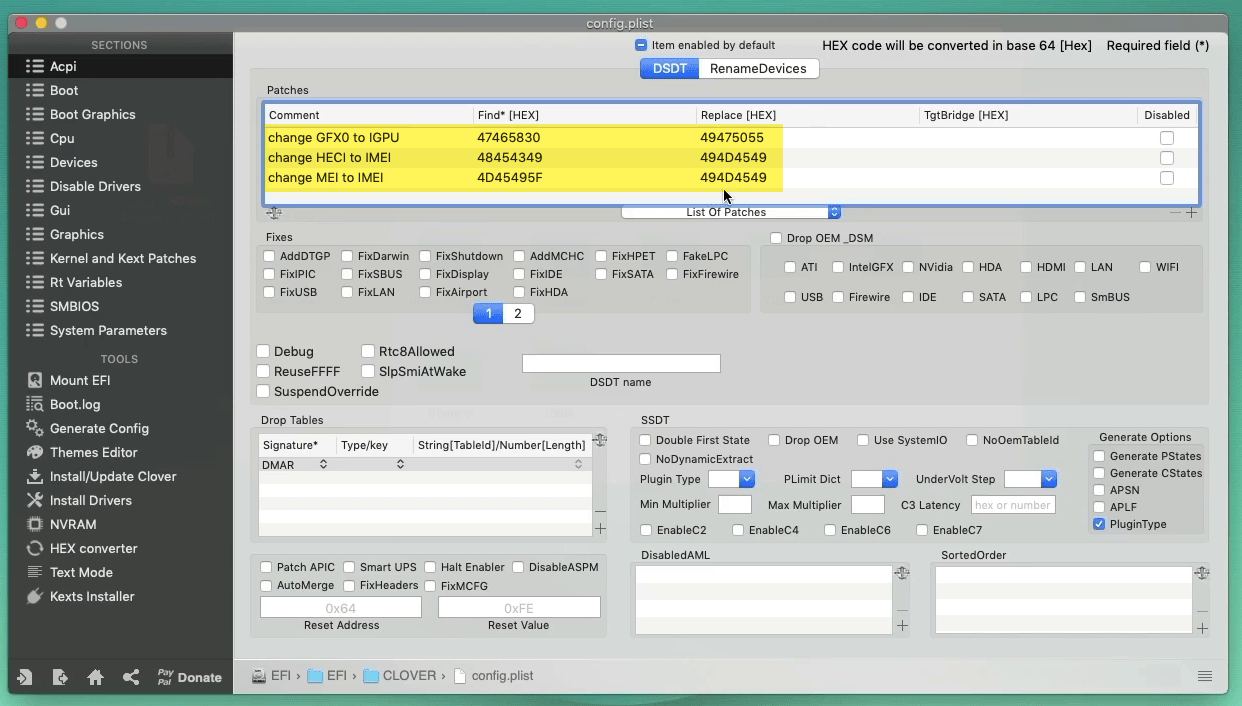
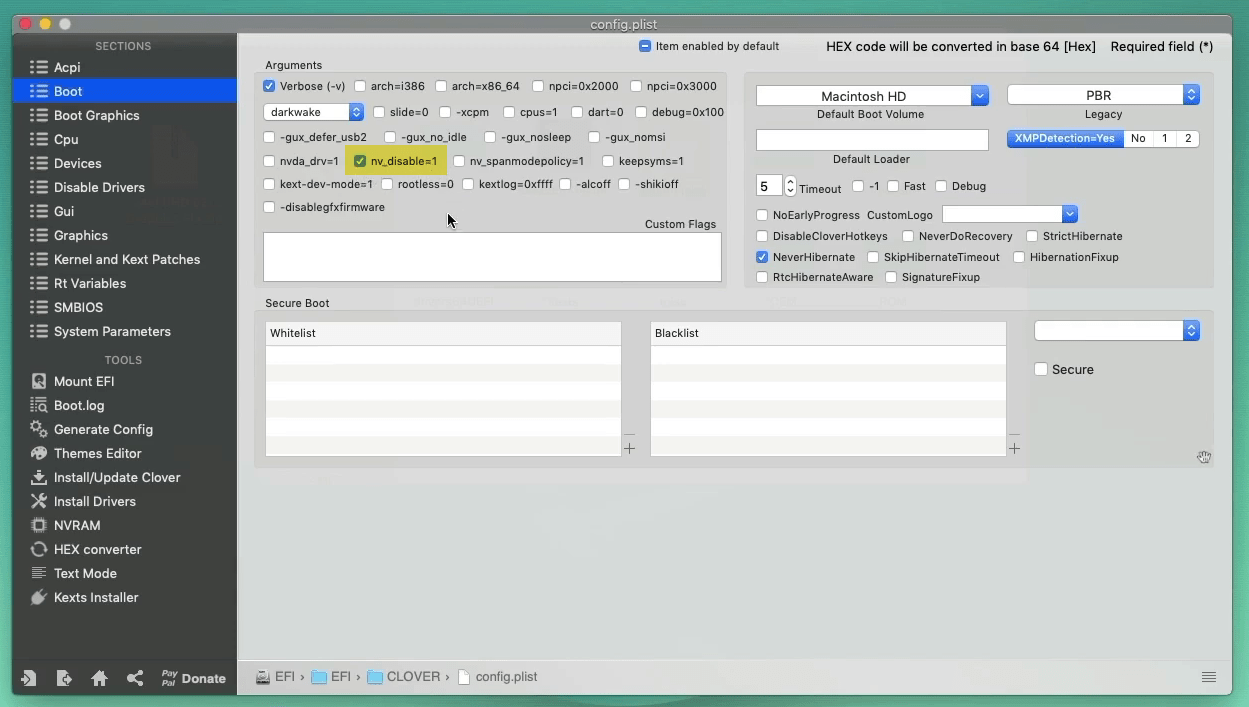
Under the “ACPI” tab select the “Boot” tab and enable the “NV_Disable=1” option. After selecting this option it will disable all rooting of Nvidia drivers, as you are using Intel graphics, but I recommend using the “Botox”.
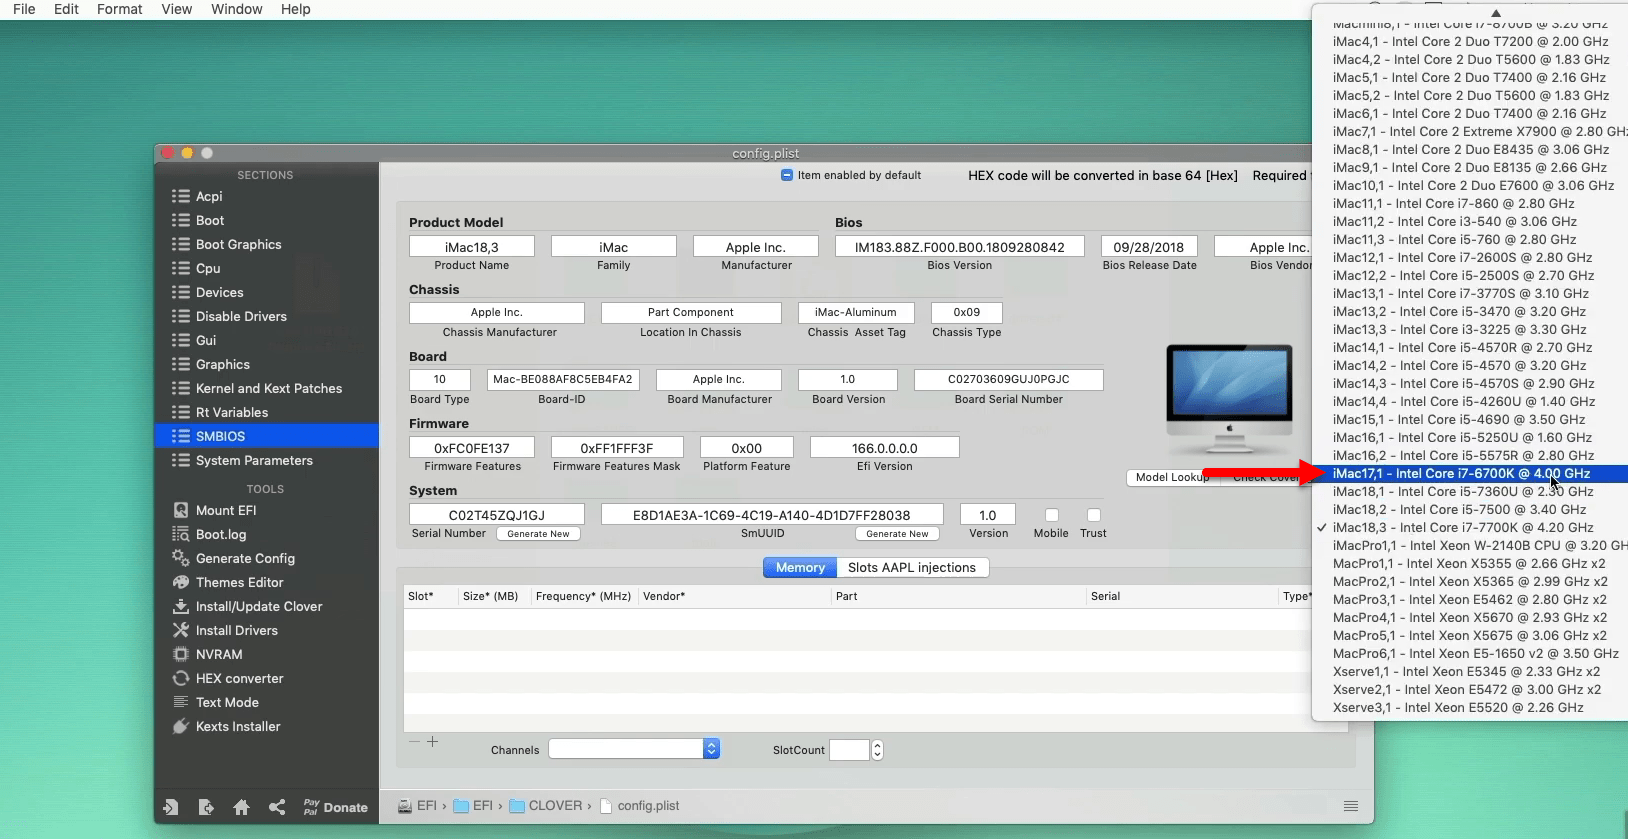
Go to the “SMBIOS” tab and the current CPUs Intel Core i3 8 Point W pitch buzzes until you HD graphics six-30. As you see the current “SMBIOS” is iMac 18,3. In this case, you fill face issue like pink screen issue or RGB issue. I suggest you to use fix “SMBIOS” for it, you can change it from the option which mentioned in below down screenshot.
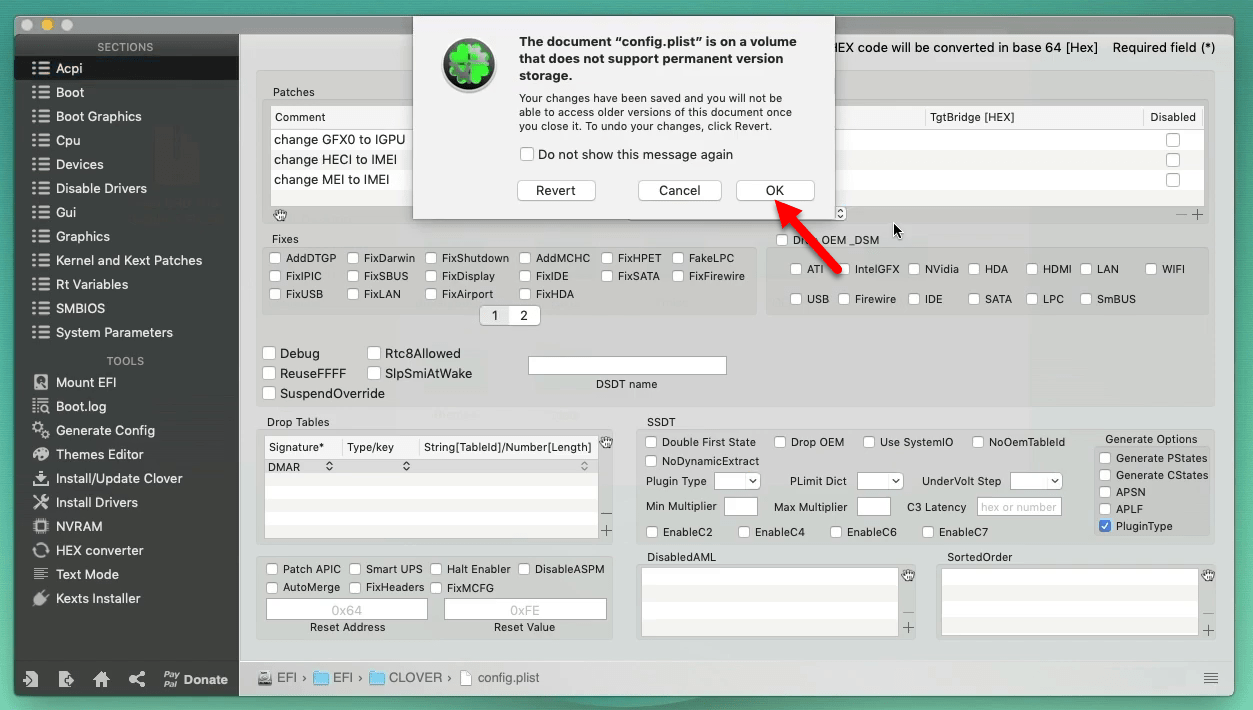
There is nothing more to do, so close the Clover Configurator and click OK to save changes.
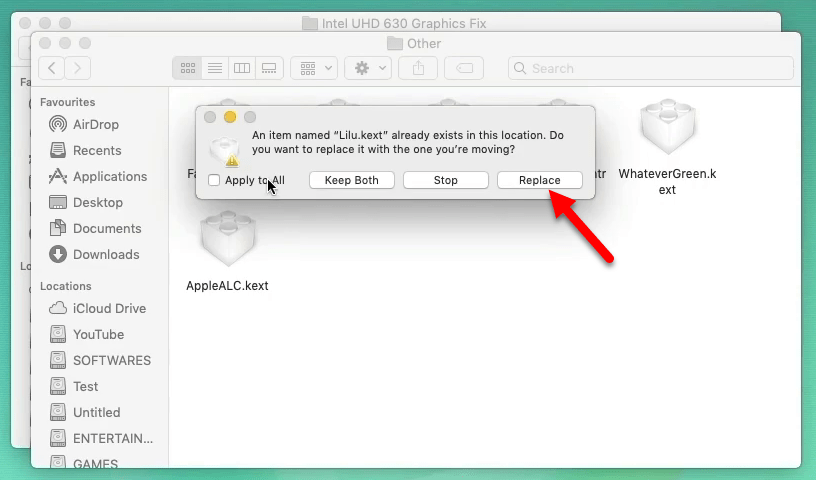
Now go to Kexts folder> Open “Other” and make sure you are using the Lilu file and WhateverGreen. So, copy the latest Lilu and WhateverGreen file which you have downloaded from the download section, and Replace it with the old one.
When everything changed successfully navigate to the left-handed of window, click on “Apple Logo” and click “Restart”. When your PC restart press the delete key to enter the BIOS setting window. When the BIOS window appeared, go to the “Chipset” tab, select “Internal Graphics” press enter, and select “Enabled”. Select “DVMT Total GFx Mem” press enter and select “64M”.
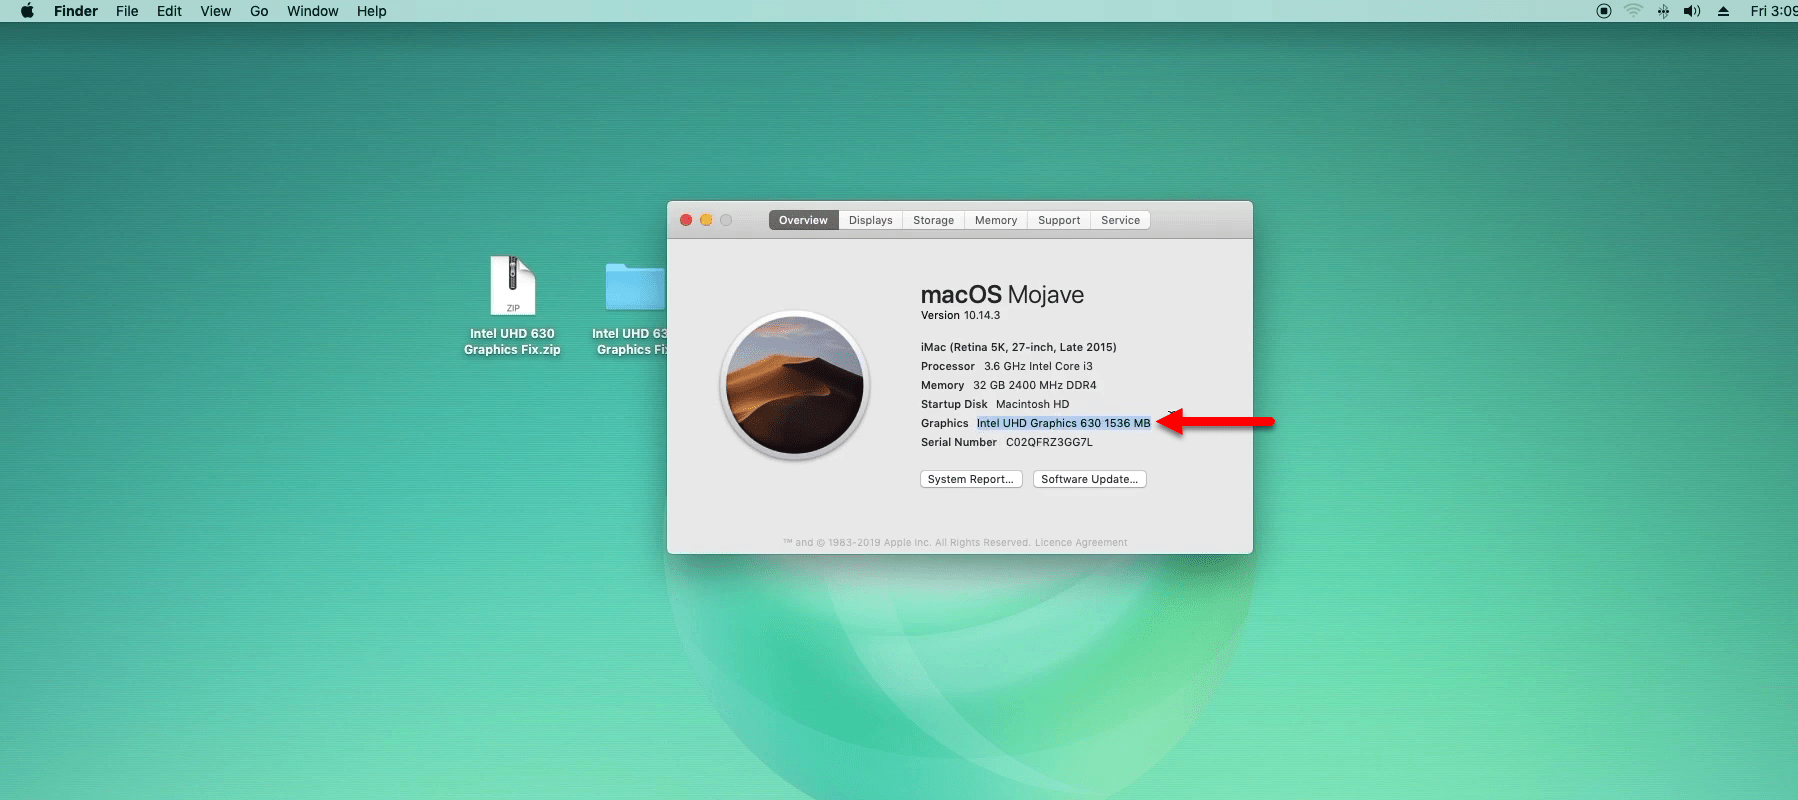
When the system restarted head over to the Apple Logo and click on “About this Mac” to check the graphic resolution is fixed on macOS Mojave or no.

Now as you see that “Graphics Intel UHD Graphics 630 1536 MB”, and the method is successfully worked. We moved the graphic resolution from 7MB to 1536 MB on macOS Mojave.
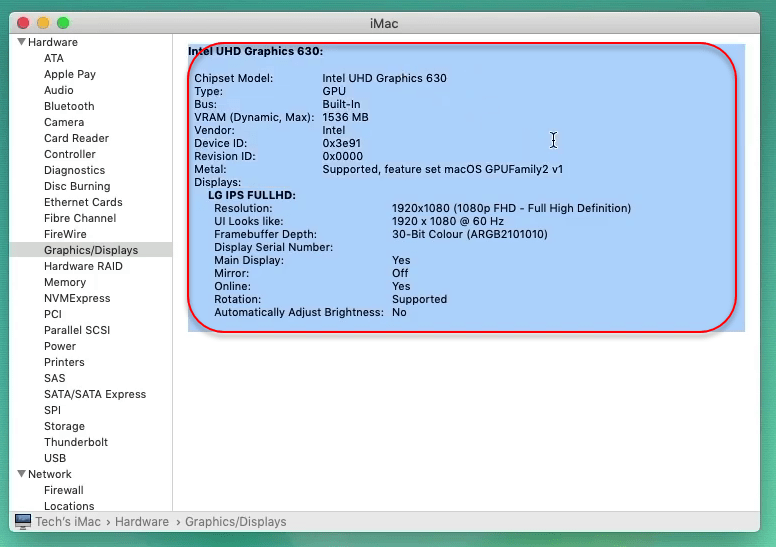
And now click on the “System Report” option and check all the status of graphic resolution from here also.
Related: