macOS Big Sur 11.0 is the most recent updated operating system of Apple Inc which introduced a month ago. Overhaul it inspired by iOS 14 and iPadOS 14 internal features, totally all macOS Big Sur features are interesting and unique. Usually, Apple introduced the macOS Big Sur operating system for the Intel-Based Silicon processor, which now the Macintosh computers are under construction and soon will be launched with an Intel-Based Processor.
However, from the time of macOS Sierra, till now that we are using macOS Big Sur on our system. Most of the users are facing the Intel HD graphics 630. The only operating system that was successful is macOS Catalina 10.15, that we didn’t face the HD graphics 630.
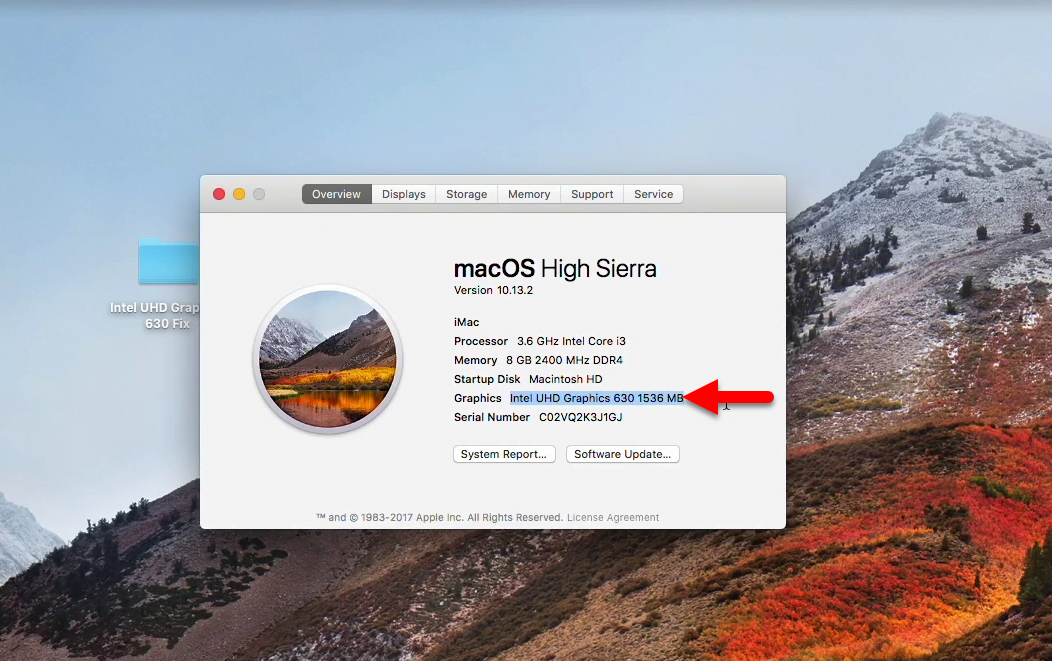
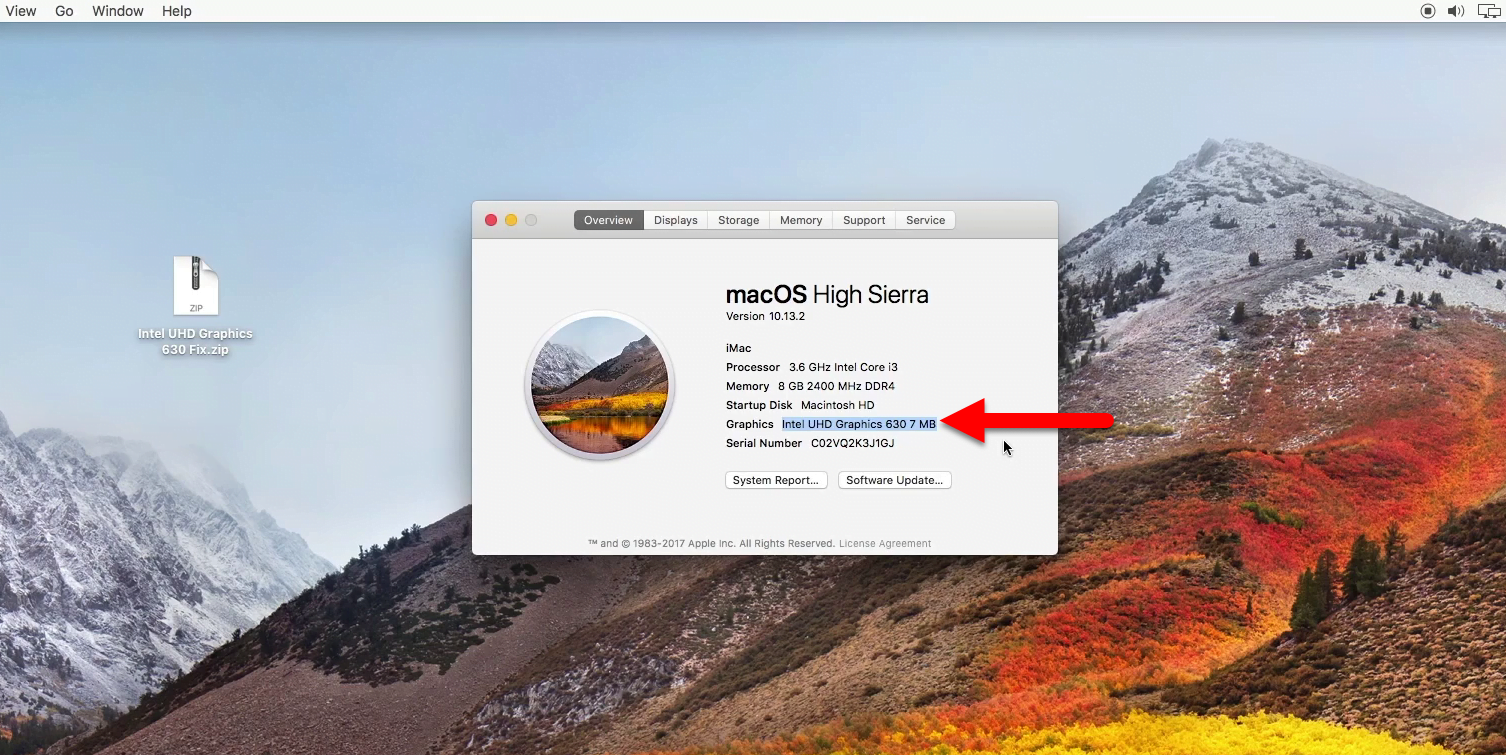
One of the most recent issues is I faced in macOS Big Sur is that Intel Wifi Bluetooth was not working properly in macOS Big Sur. The same Intel UHD graphics 630 on macOS Mojave, macOS Big Sur 11.0. Also, yesterday I have installed macOS High Sierra on my computer, and I faced the graphics was showing 630 with 7 MB display resolution. The exact display resolution must be 1537 MB on every macOS Operating system.
But there are now worries have sorted out the ways on How to Enable Fix Intel UHD Graphics 620 and 630 on macOS High Sierra. Related to macOS Mojave Preview and Quick Look, macOS Mojave Intel UDH graphics, and macOS Big Sur UHD Graphics. Check out the below guide with a complete step by step guide.
- How to Fix Preview and Quick Look issues on macOS Mojave
- How to Enable Fix Intel UHD Graphics 630 on macOS Mojave
- How to Fix Intel HD Graphics on macOS Big Sur 11
- How to Fix Intel Wifi and Bluetooth on macOS Big Sur
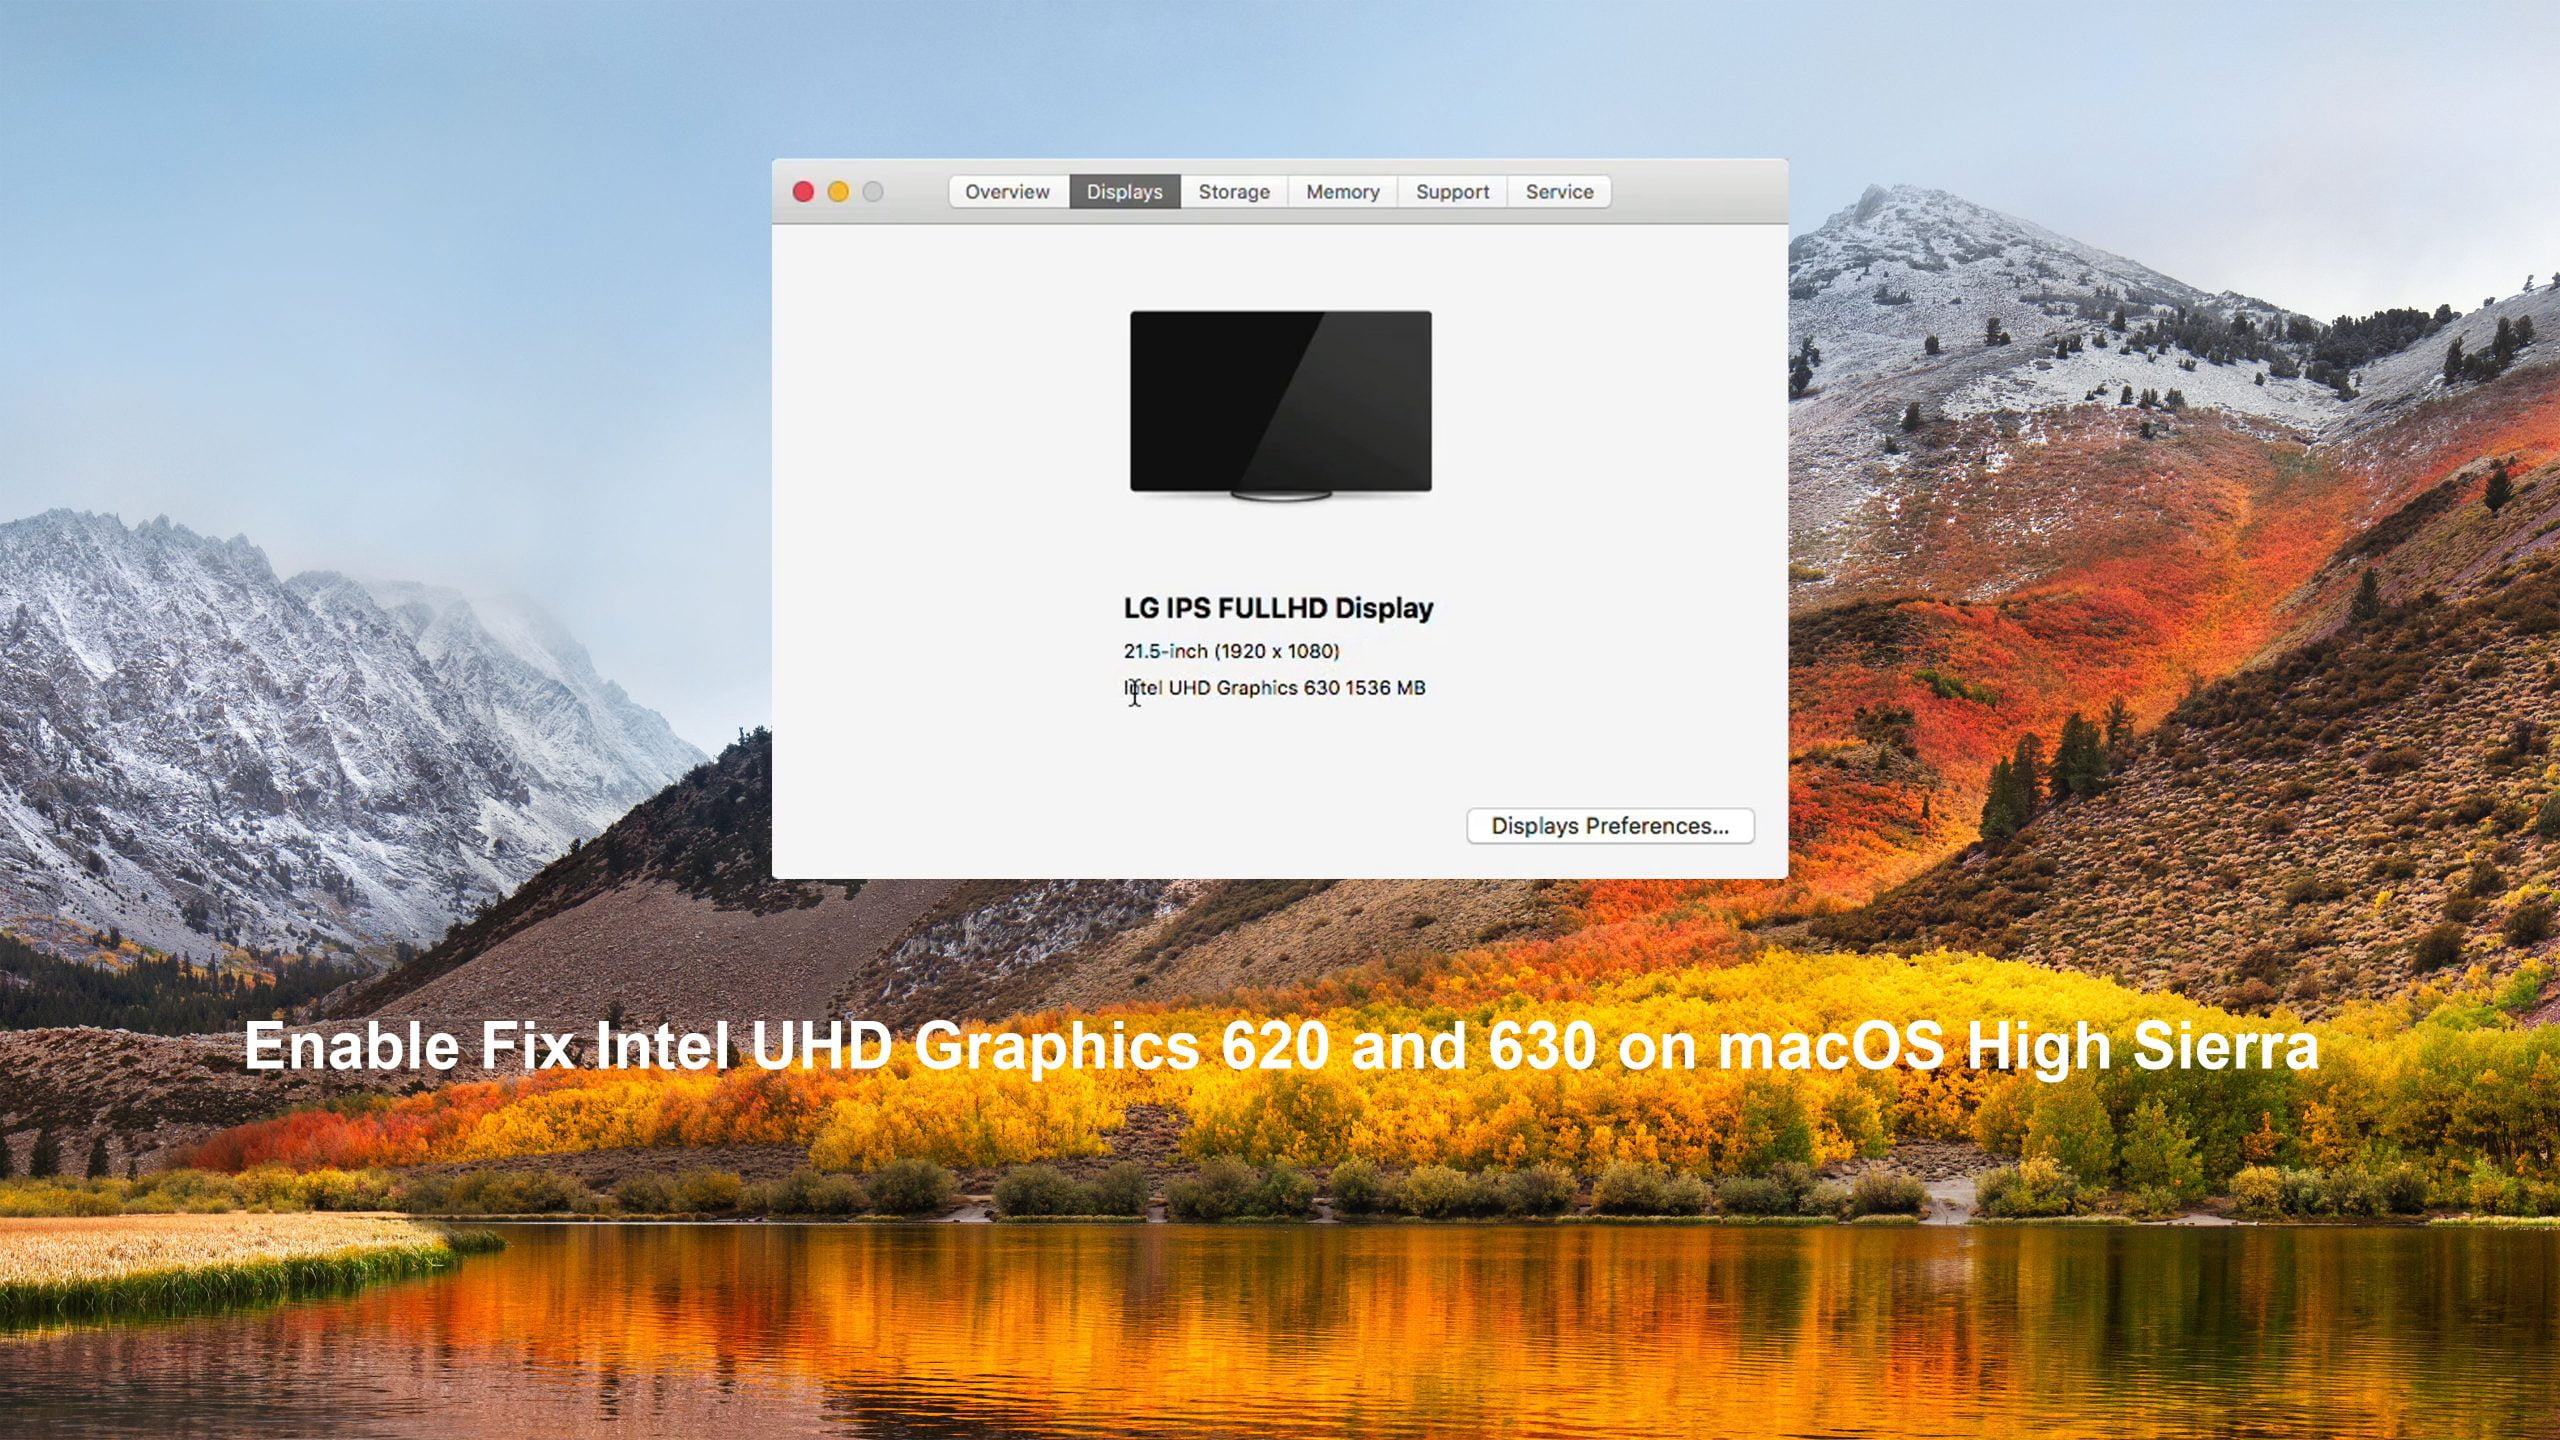
Enable Fix Intel UHD Graphics 620 and 630 on macOS High Sierra
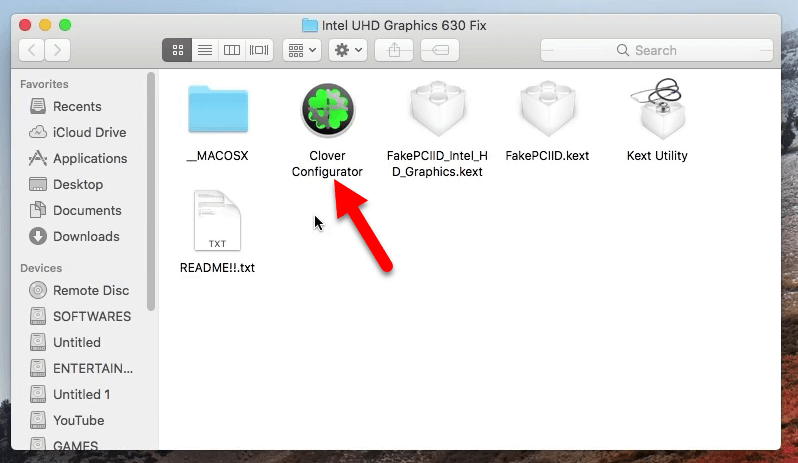
Let’s make it happen to fix Intel UHD Graphics 620 and 630 on macOS High Sierra. To proceed with this you need to download some required files from the below down-links. The files contain the latest update of the graphics driver.
All the download files are available in the above links, when the file downloaded double-click to extract that. Open up the folder and double-click on Clover Configurator to open.
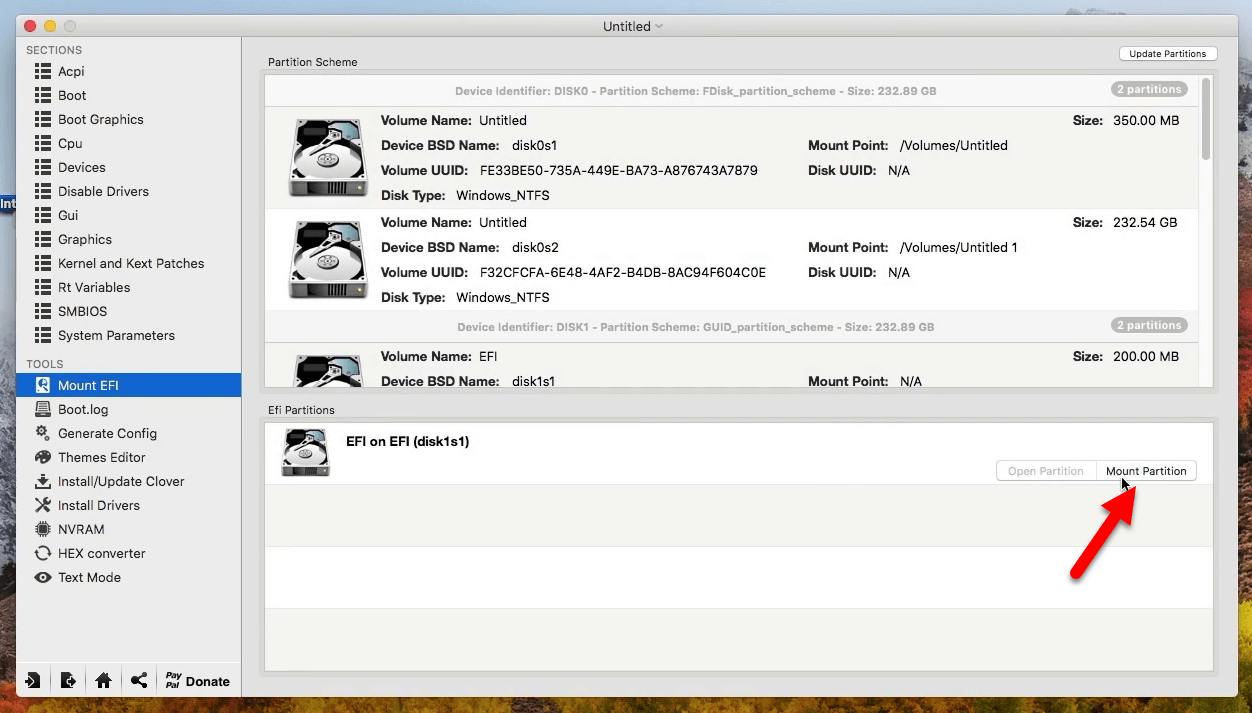
When the Clover Configurator opened click on the “Mount EFI” option, and mount the EFI partition of the system drive.
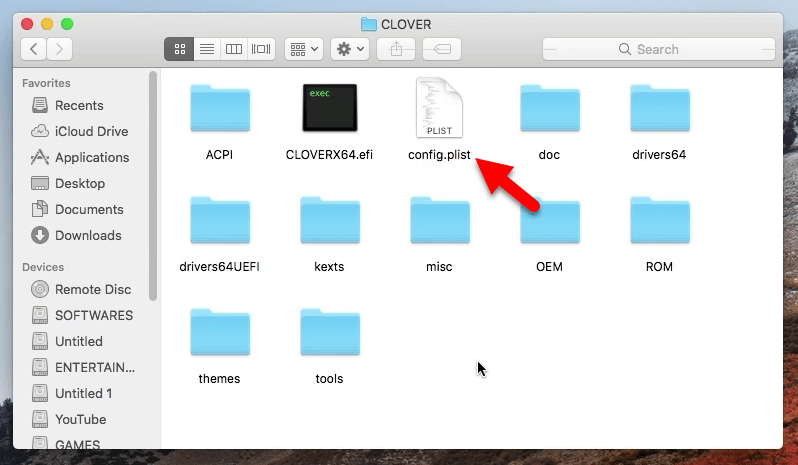
When the System EFI partition mounted on your desktop, double-click to open it. Double-click on EFI>Clover folder, and one thing make sure that if you haven’t installed Clover Bootloader then install it. All things you need to do open “Config.plist” file.
When the file opened go to the “ACPI” section, then select “DSDT’ then click on (+) button. After that, you need to add some DSDT patches in the blank. Also, for the graphic, you need to add the below commands or codes.
       Comment                Finx* [HEX]         Replace [HEX]
Change GFX0 to IGPU            47465830             49475055
CHange HECI to IMEFI           48454349             494d4549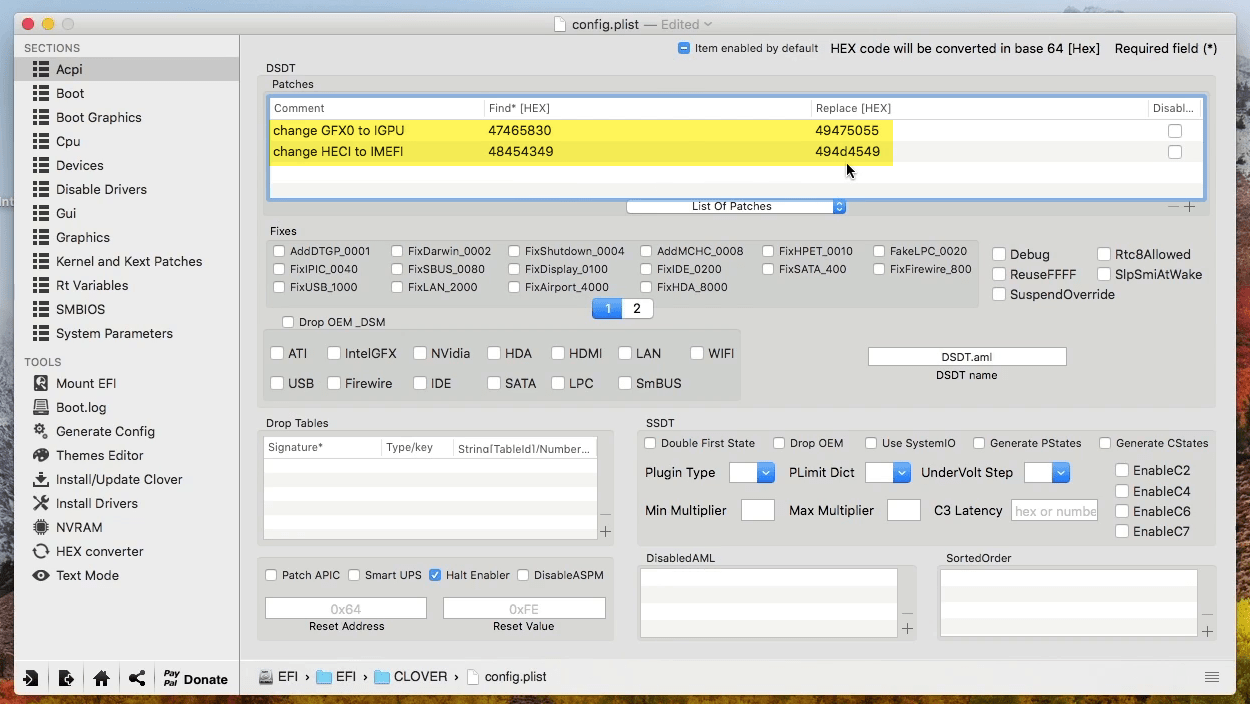
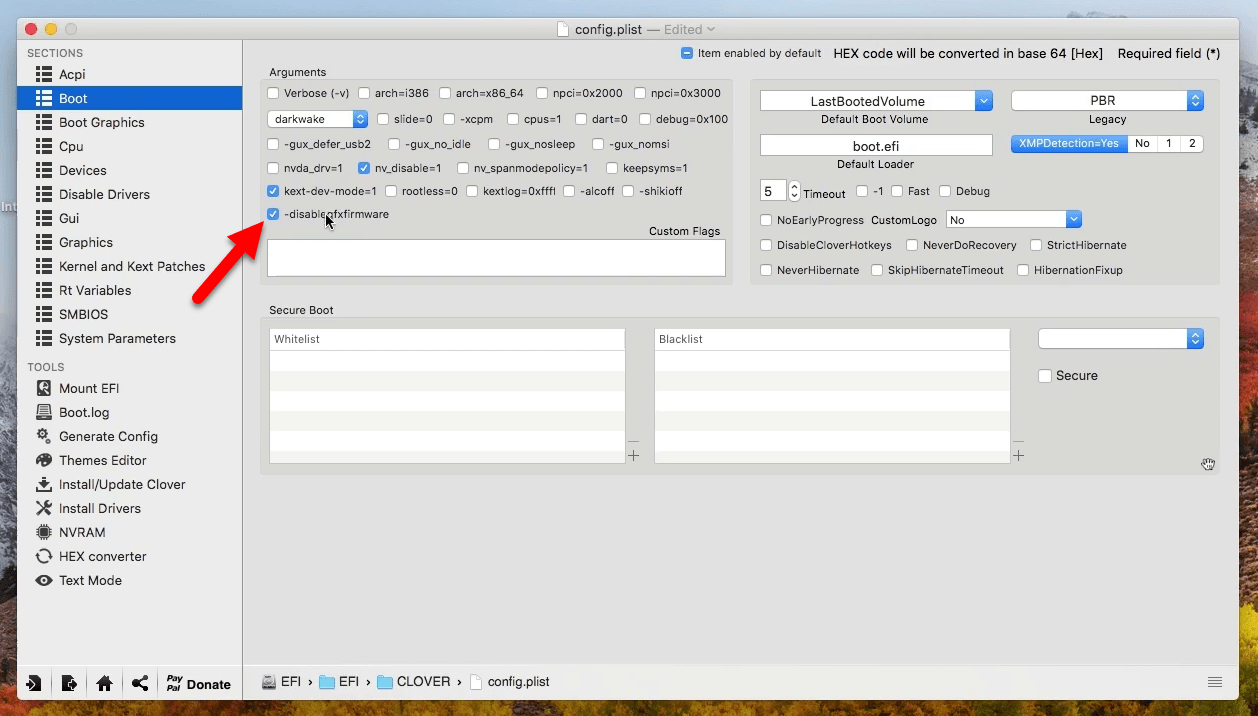
Select the “Boot” tab and select “-Disablegfxfirmwar” option, and make sure “Kext-dev-mode=1” is also enabled.
Select “Devices” tab, then go to “Fake ID” section and add the following code in the “IntelGFX” column.
0x59168086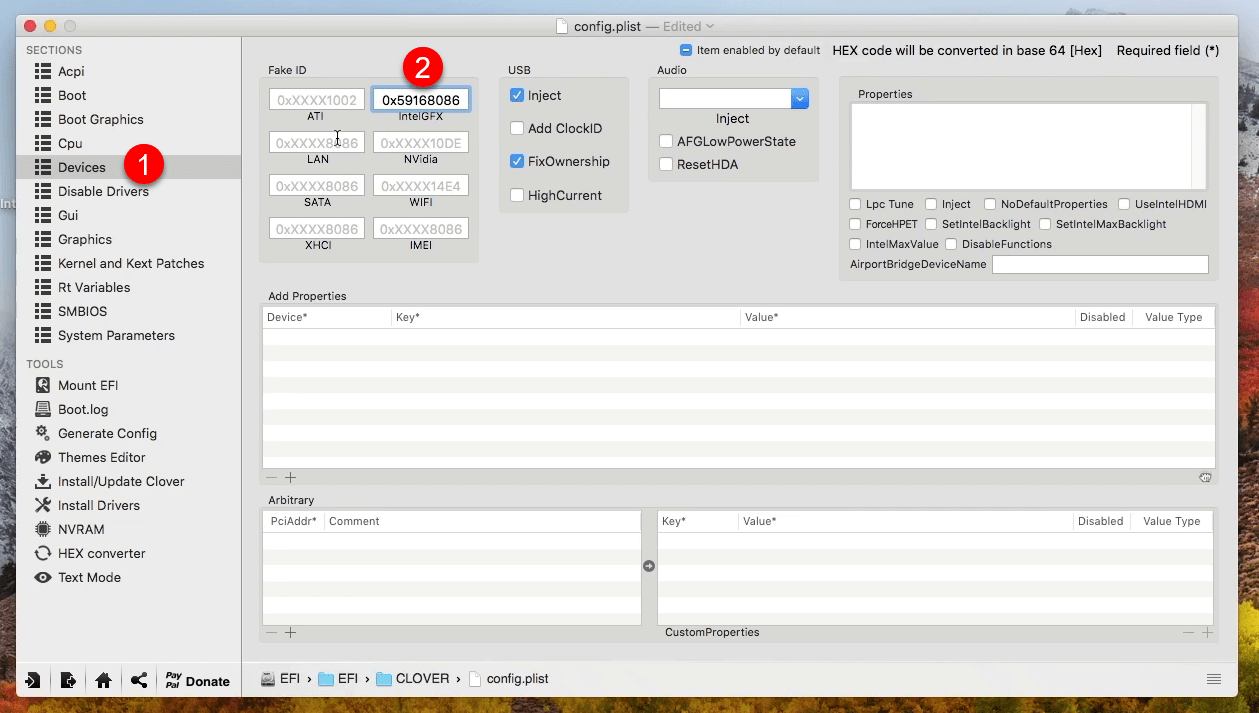
Select the “Graphics” tab, enable the “Inject Intel” option, also add the below code into the “ig-platform-id” column.
0x59120000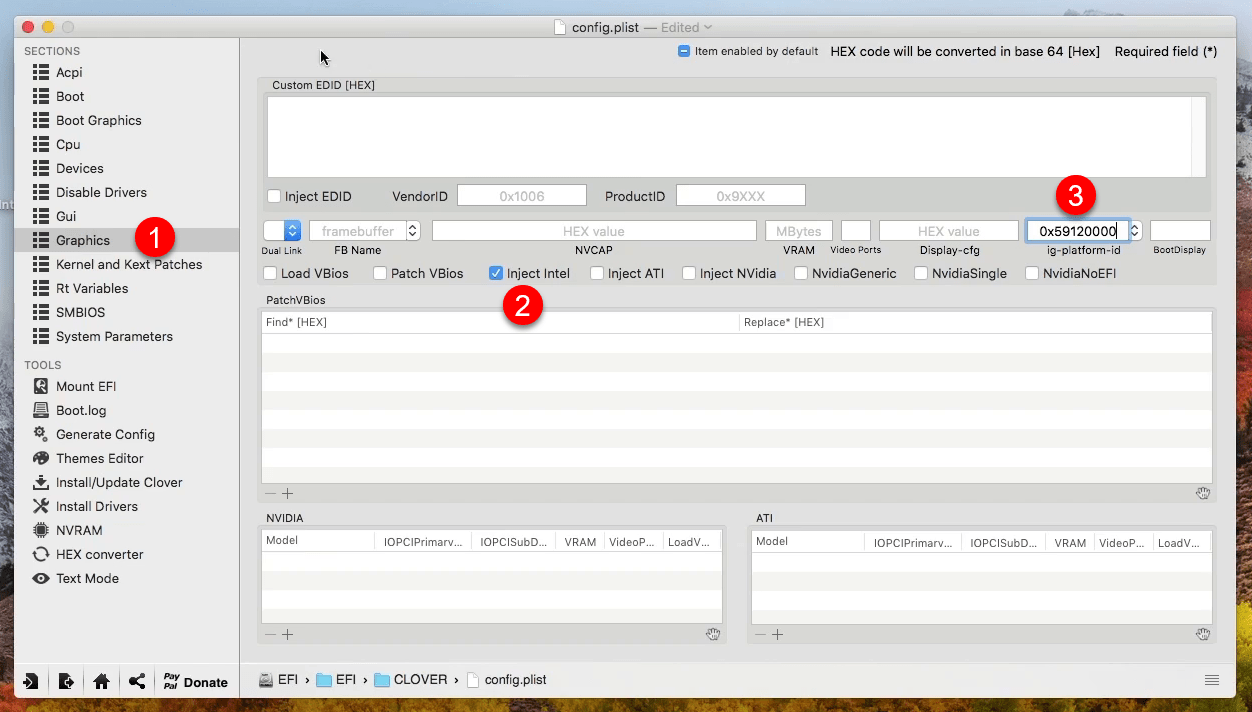
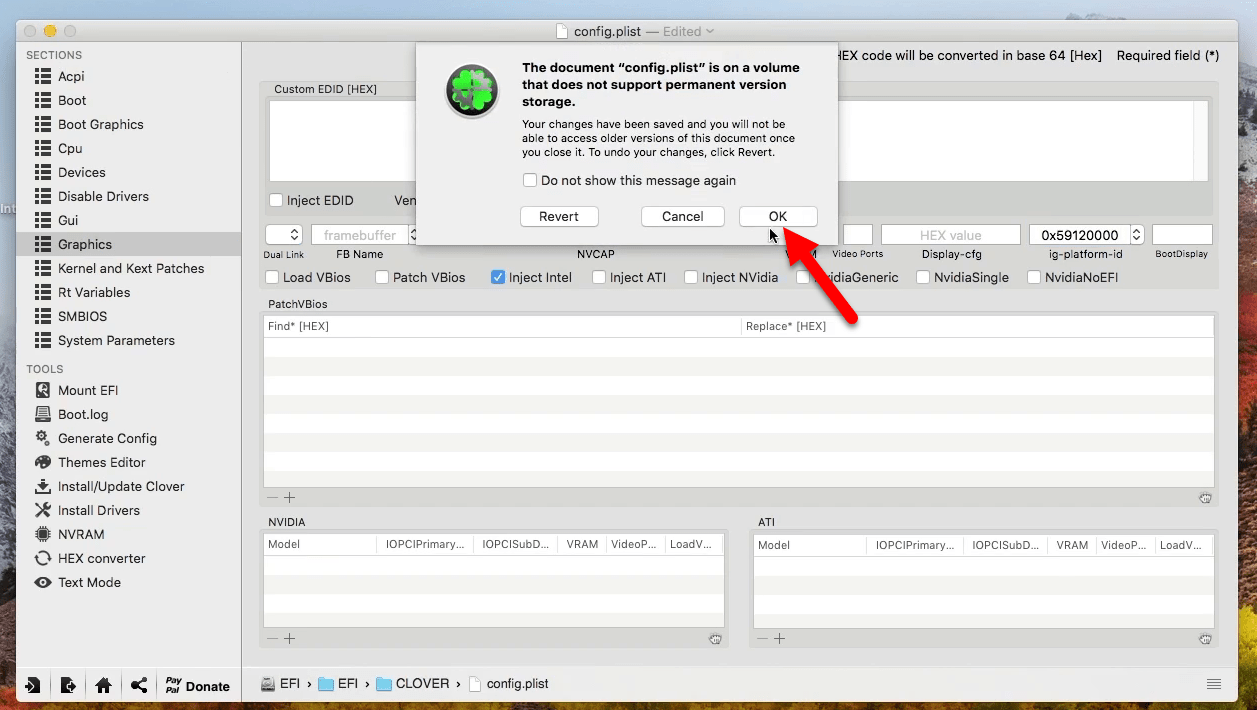
Once everything successfully changed close the window and click the “OK” button to save changes and exit.
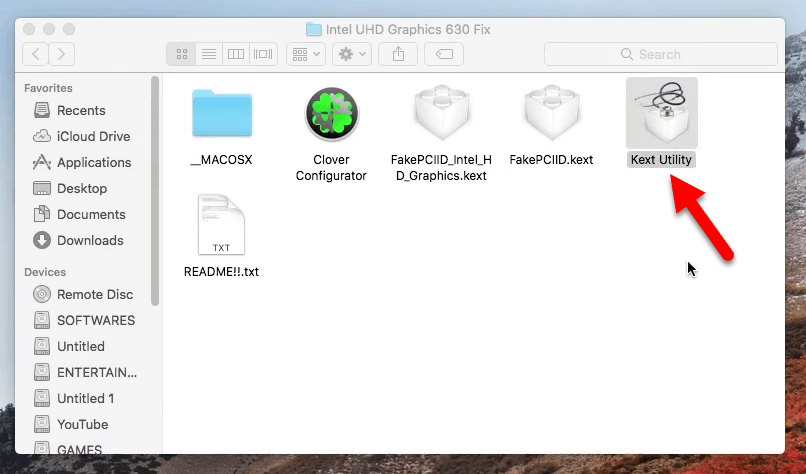
Now you need to install the main driver in Kext Utility, so open up the fixes folder double-click on Kext Utility to open.
- Now enter your username password and press enter, and wait for some minutes to built the catches.
Now move the latest Kext to the Kext Utility window, for the confirmation enter your password and press OK.
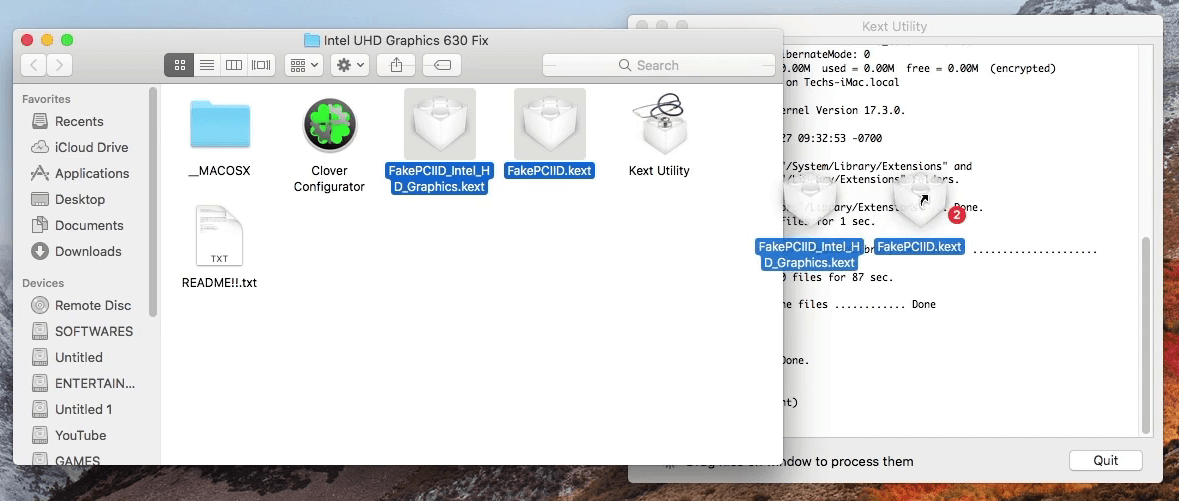
Now wait for a few seconds to install the latest Kexts, when the installation completed quit the window.
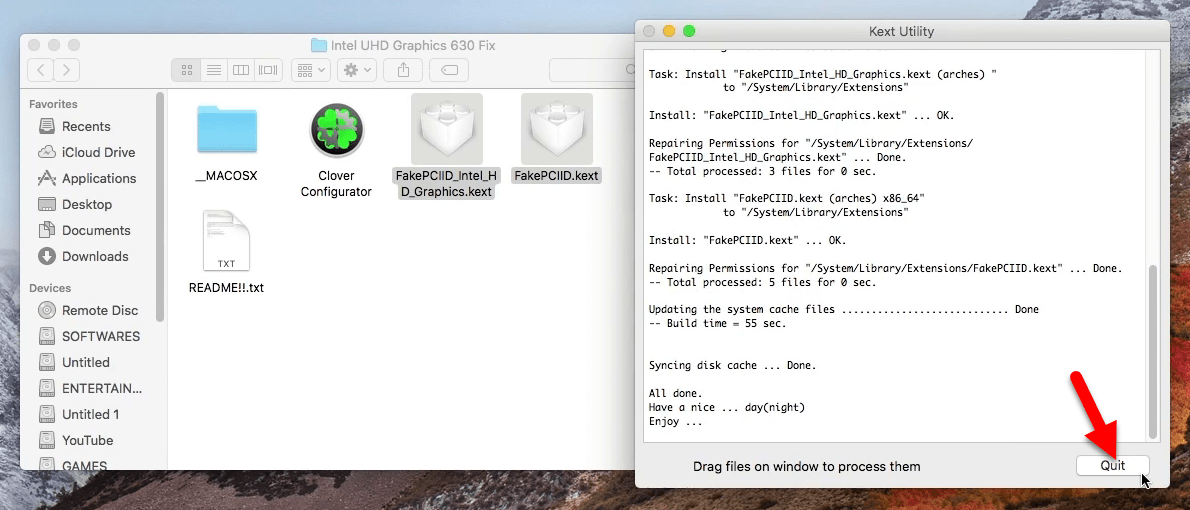
OK, when everything is done successfully close all folders, files and restart your PC. To check graphic display resolution navigate to left-handed Apple Logo and click on “About this Mac”. And as you see macOS High Sierra Intel UHD graphics is being fixed and now it is 1536MB.