Linux Mint is a community-driven Linux distribution based on Ubuntu which itself is based on Debian and bundled with a variety of free and open-source applications. It can provide full out-of-the-box multimedia support for those who choose (by ticking one box during its installation process) to include proprietary software such as multimedia codecs.
The Linux Mint project was created by Clément Lefèbvre and is actively maintained by the Linux Mint Team and community
Linux recently released its long term support (LTS) version of its popular desktop, Linux Mint 20. This version of Linux based on Canonical’s Ubuntu 20.04, is the best operating system Linux desktop distribution. The Linux Mint based on three different versions Cinnamon, Mate, Xfce. And the version of Linux Mint is Cinnamon that is preferred by the users.
Linux Mint is one of the lightest version of the Linux operating system that can run the PCs from 2000. The requirements of Linux Mint for the installation required at least 2GB of RAM and 30GB of Storage. One more thing that you can’t run Linux Mint on the 32-Bit processor.
However, Linux Mint is an open-source operating system that you can install on your computer. On the other hand, it requires less PC with following fewer specifications which is pretty interesting for everyone. Indeed it developed for a physical computer, but through this guide, I will show you how to install Linux Mint on VirtualBox on Windows. If you are using Windows PC then without any issues you can install Linux Mint on Virtual machines.
The latest version of Linux Mint has the following below down features.
- Linux Mint’s Core difference is its user’s interface and ease of interactivity.
- Like typical distributions, Linux Mint includes an integrated and pre-installed application suite and provides the ability to search, download and install additional applications through its application package manager utility.
- The design of Linux Mint is very comfortable and easy to use at the same time, it is also powerful and configurable.
- Everything is done to make the user experience better. User feedback is essiantial it is used to consistently improve the quality of Linux Mint.
- Linux Mint provides long-term support LTS release which are normally supported for a duration of 5 years.
For installing the Linux Mint Linux distribution operating system on VirtualBox on Windows PC follow the below down guides.
Install Linux Mint on VirtualBox on Windows
First of all, you need to download the required files including VirtualBox, and Linux Mint. You can download all the required files from the below down descriptions.
#Create Virtual Machine
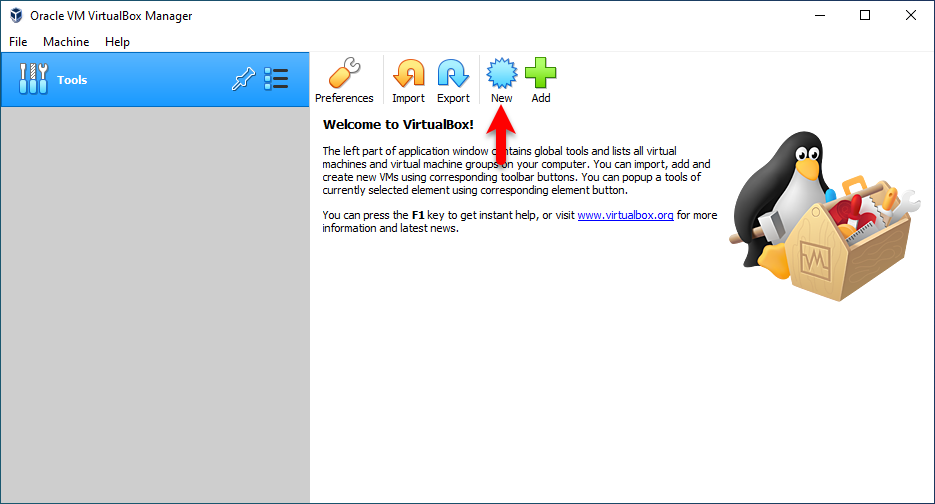
Once the required files successfully downloaded firstly install the VirtualBox on your Windows PC. After the installation completed open-up the VirtualBox and create a new virtual machine for Linux Mint.
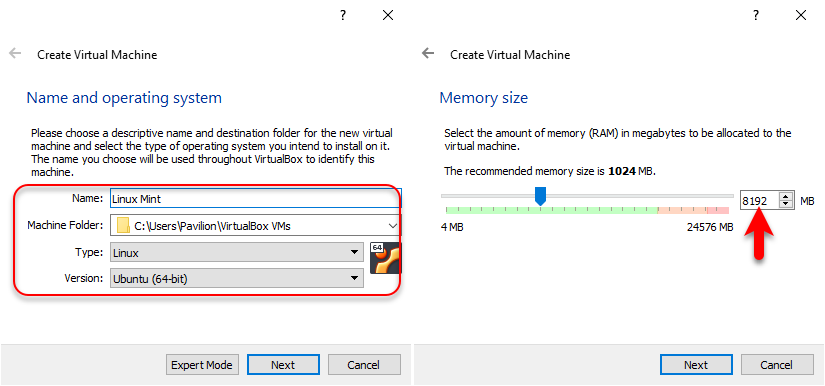
In this step type the virtual machine name (Linux Mint), Machine folder, select the type (Linux), Version (Ubuntu 64-Bit), and click next. On the next step increase the memory size and click next.
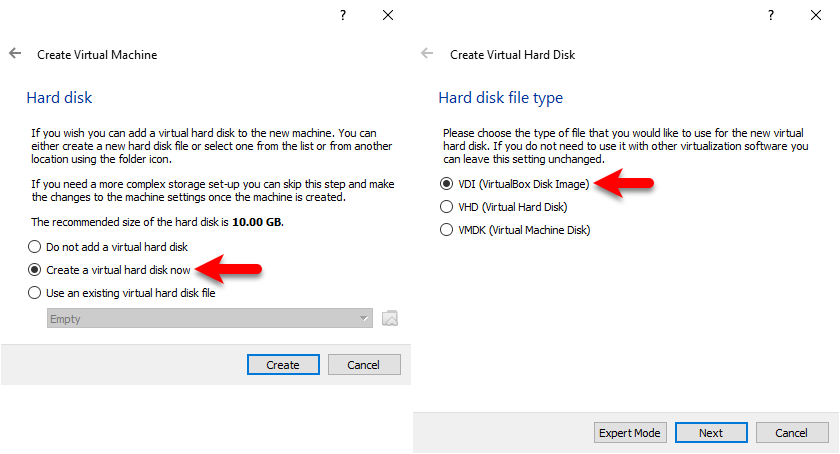
Select the option (Create a virtual hard disk now) then click create. Select VDI (Virtual Disk Image) and click next.
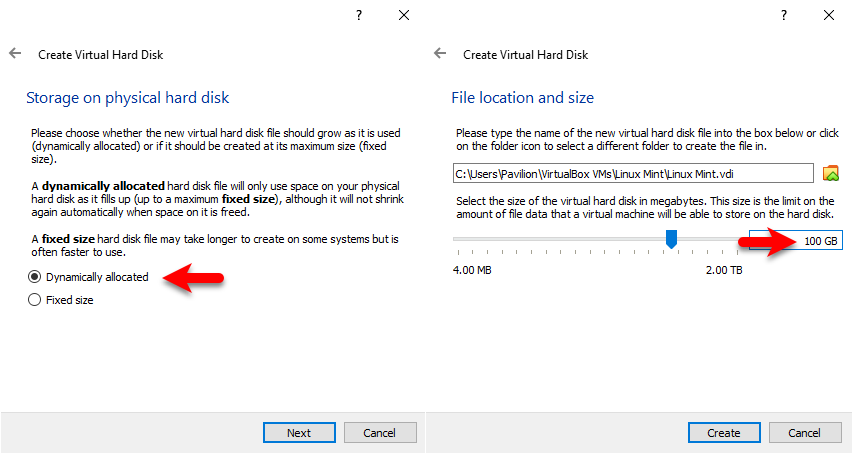
Select (Dynamically Allocated) then click next, increase the space for Linux Mint and click next.
#Edit Virtual Machine Settings
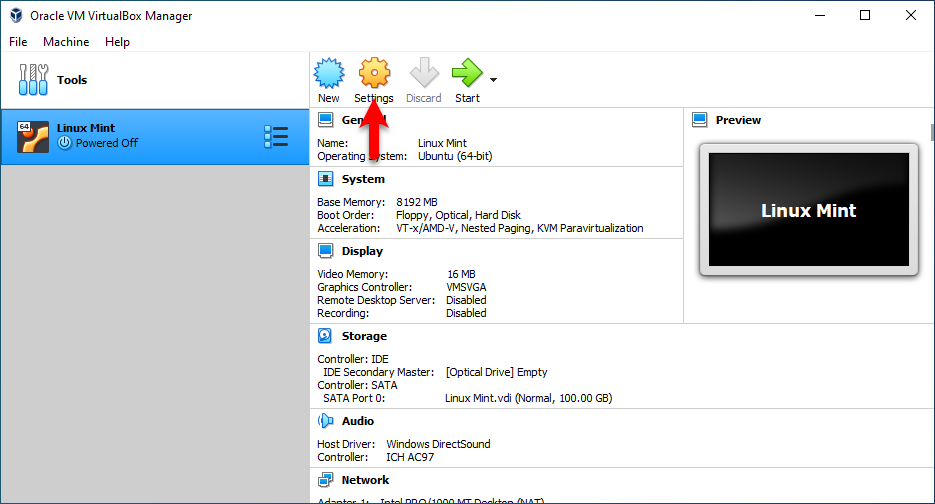
When the virtual machine created for better performance you need to edit some settings. So, select the virtual machine then click on the Settings option.
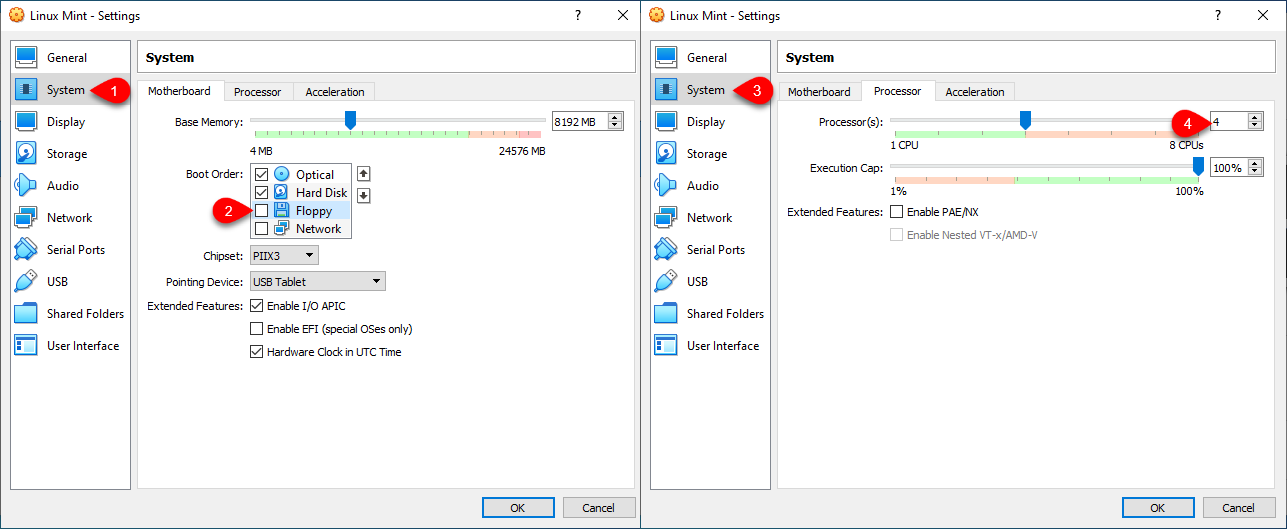
When the settings window opened from the left-handed side select the System tab, from the motherboard tab uncheck the floppy disk. Click on the processor tab, and increase the processor.
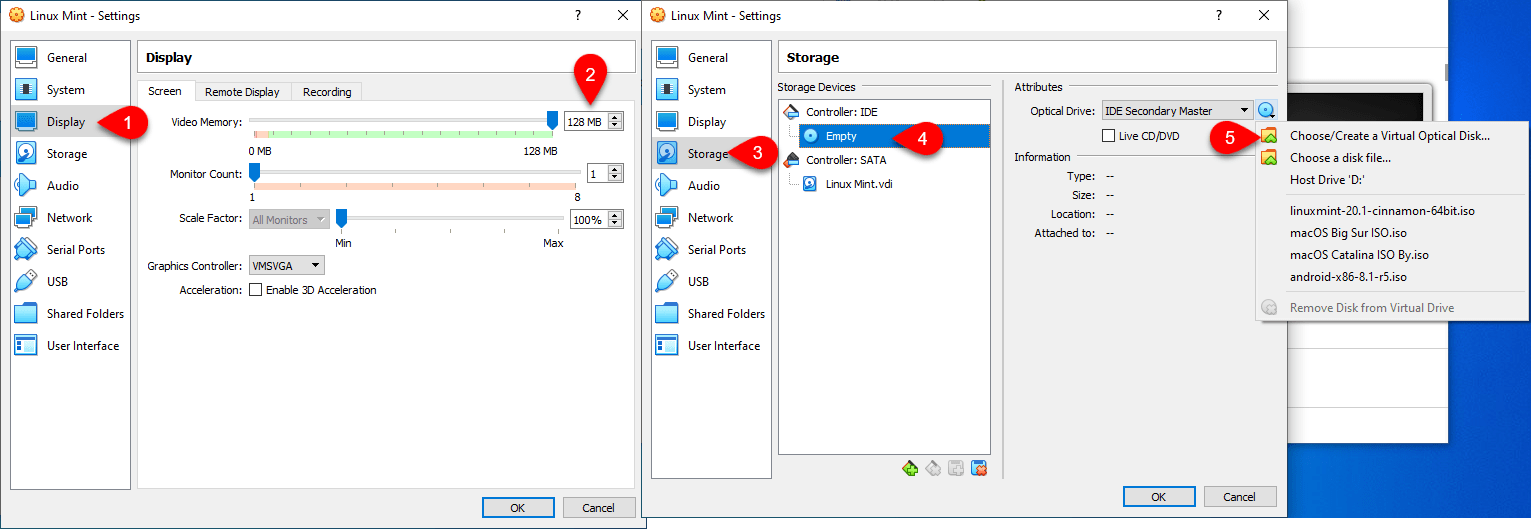
Select the display tab, from the screen tab increase the Video Memory up to 128MB. Select the Storage tab, click on Empty then click on the Disk icon and click on the first option.
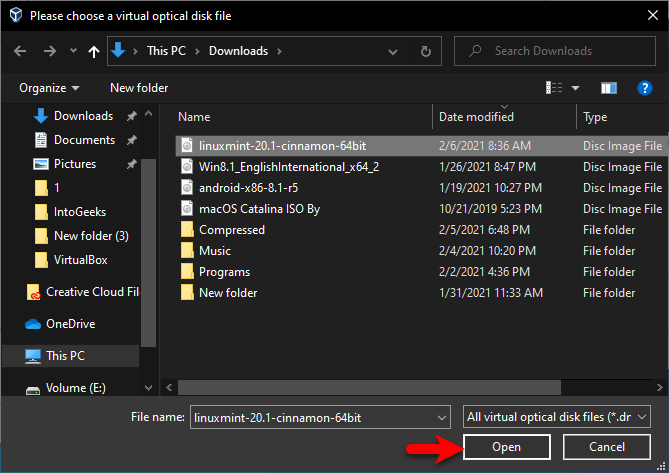
Now navigate to the location where you have saved the Linux Mint ISO image file, then select that image and click Open.
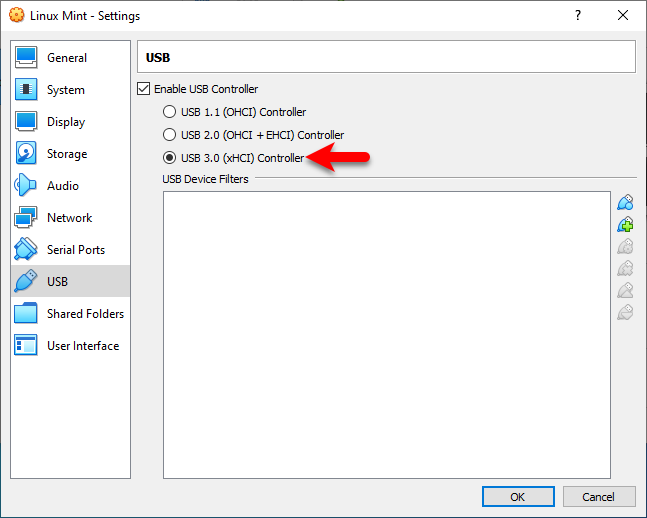
Select the USB tab, then select the (USB 3.0 (xHCI) Controller) option. Once everything is perfectly done click on the OK button to save changes.
#Install Linux Mint on VirtualBox
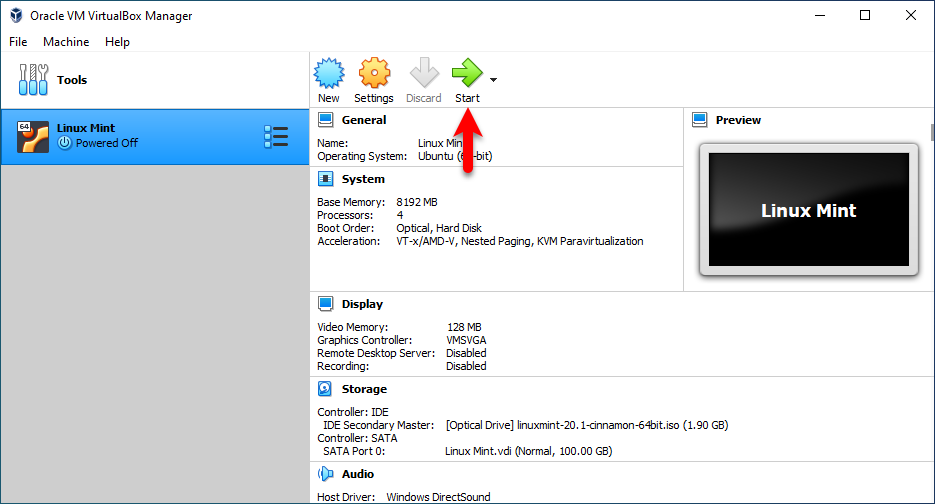
Now you are at the step to install Linux Mint on VirtualBox on Windows. The virtual machine is perfectly ready and you are here to install the Linux Mint. So, select the Virtual machine and click on the Start button.
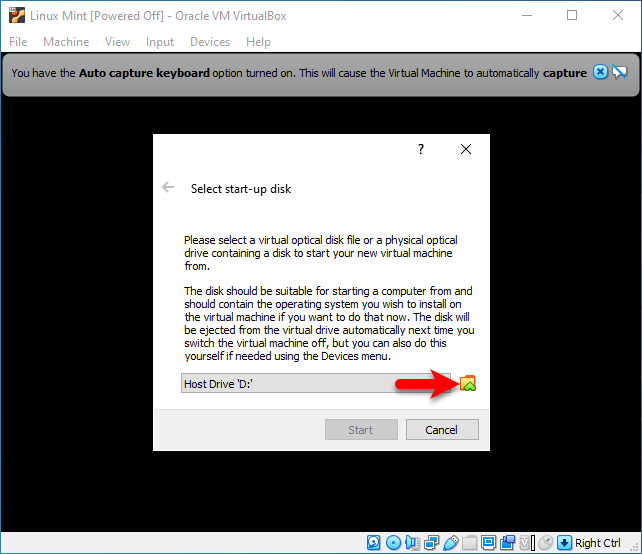
When another window opened click on the Folder icon.
Select Linux Mint image and click on the choose option.
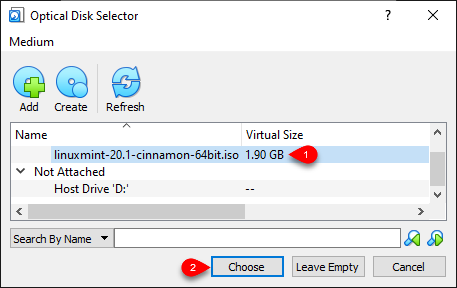
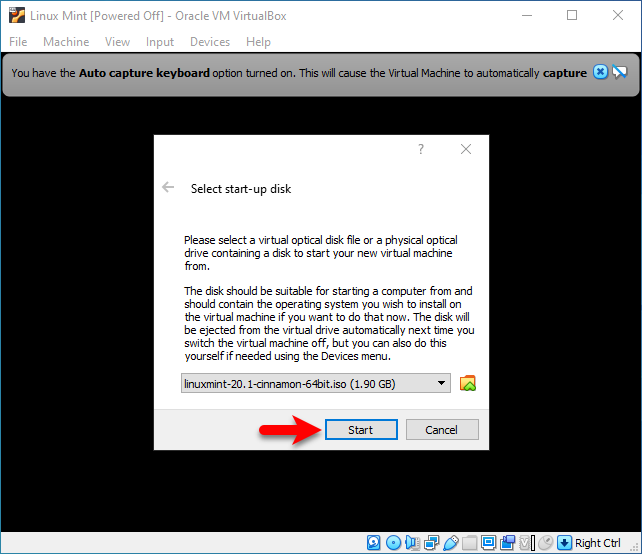
Once the Linux Mint image inserted click on the Start button.
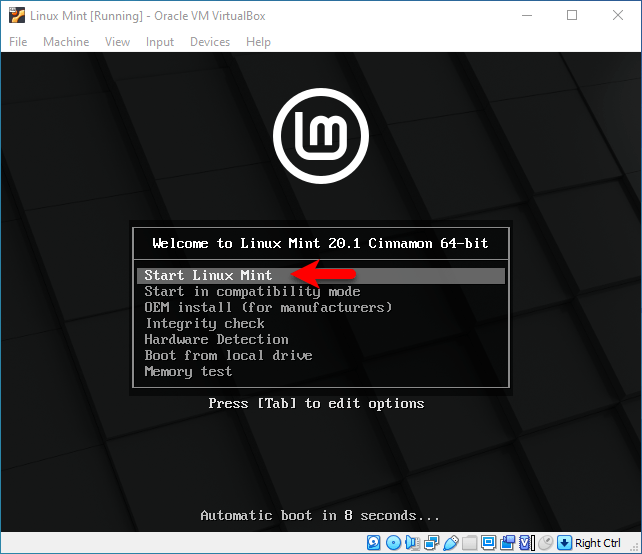
When the Linux Mint launched select the first option and press the enter key.
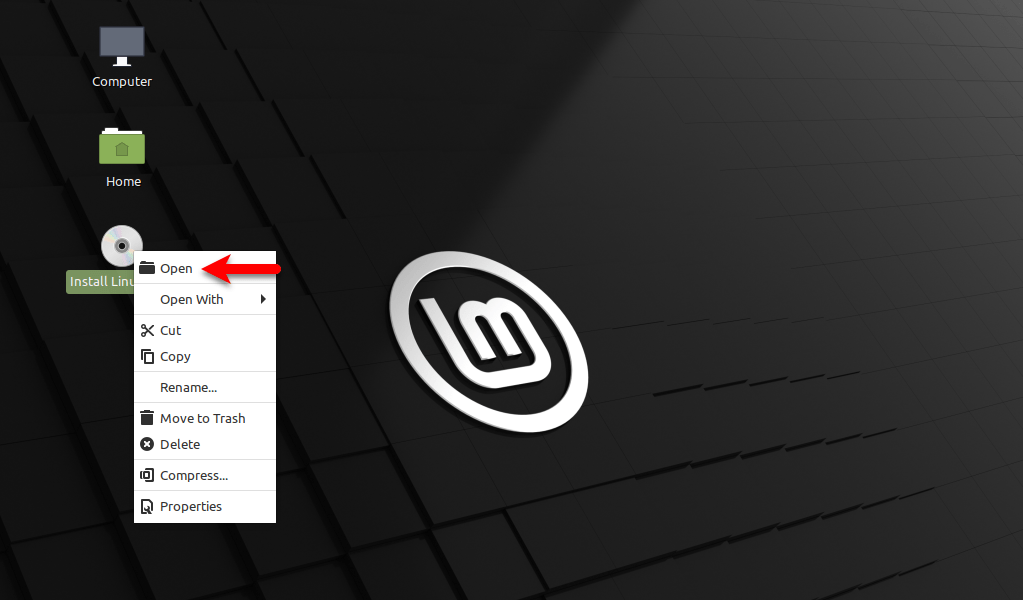
Now Linux Mint window successfully launched so still you need to continue with the installation. To install right-click on Install Linux and click Open.
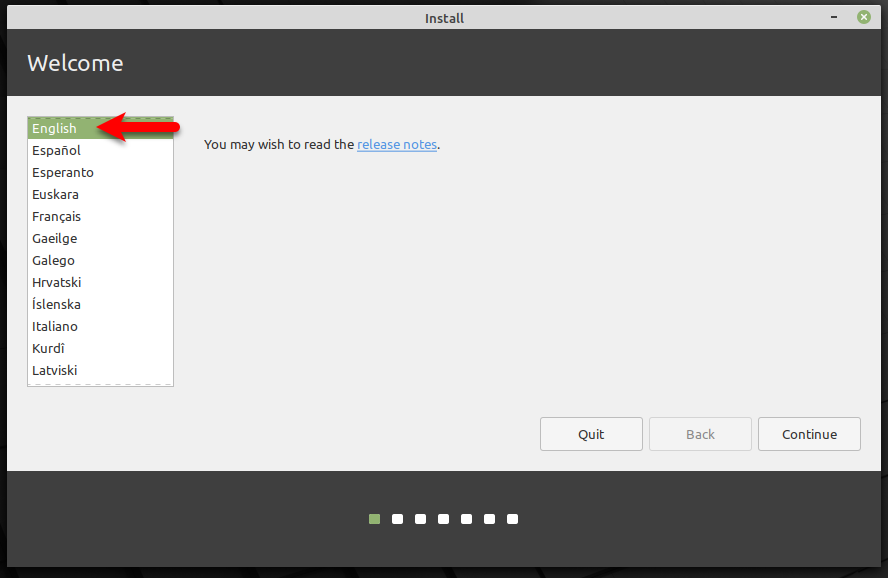
On the welcome screen select your language and click continue.
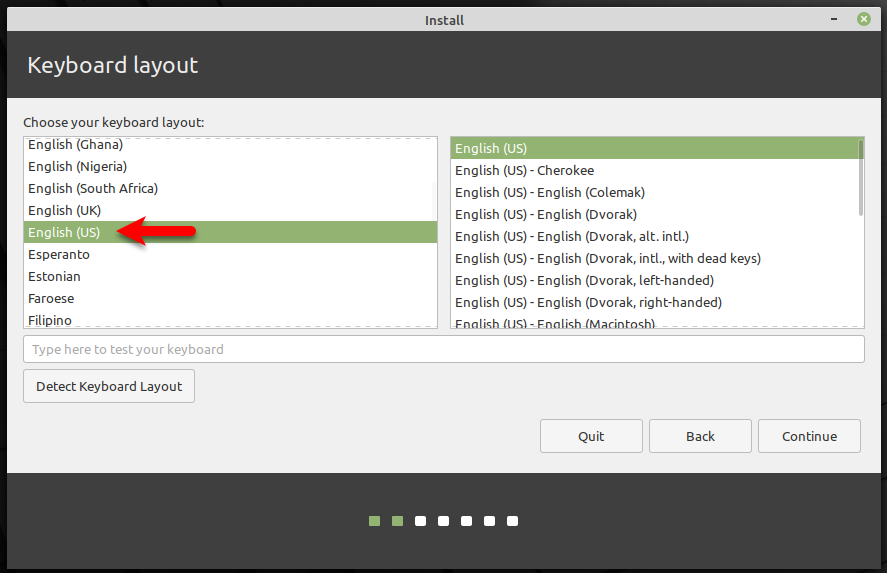
Select your Keyboard layout and click continue.
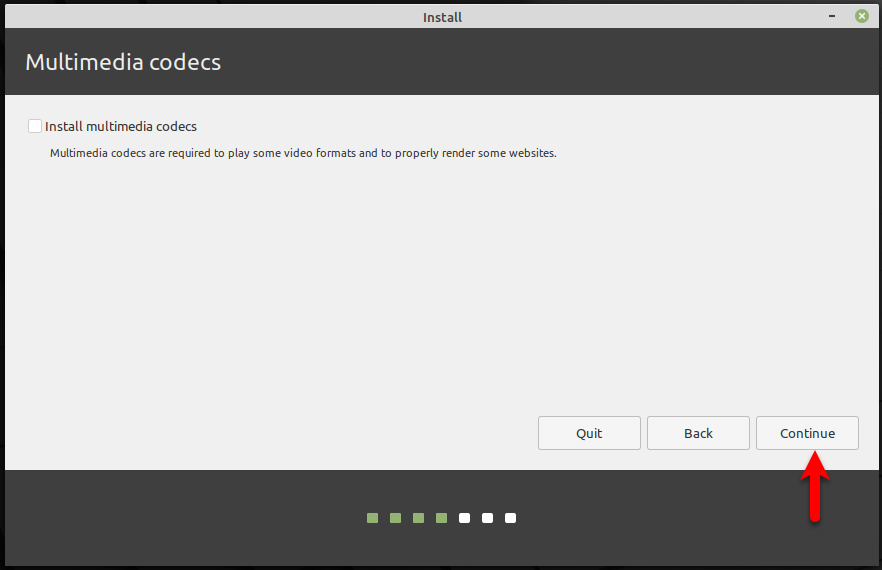
On the Multimedia codes window simply click continue.
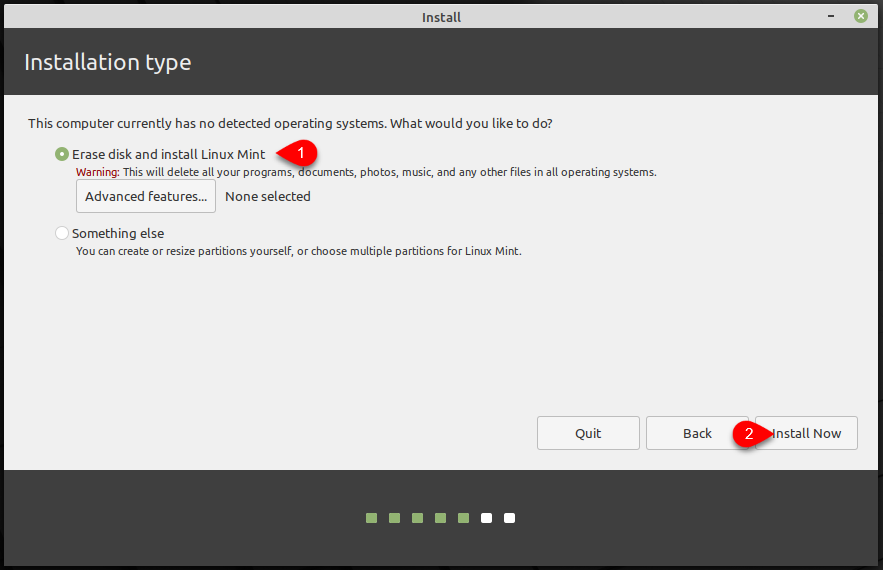
In the installation type window, select the first option (Erase disk and install Linux Mint) then click Install Now. It may take few moments to erase the disk.
If you continue, the changes listed below will be written to the disks. Otherwise, you will be able to make further changes manually. Click continue to make changes to the existing disk.

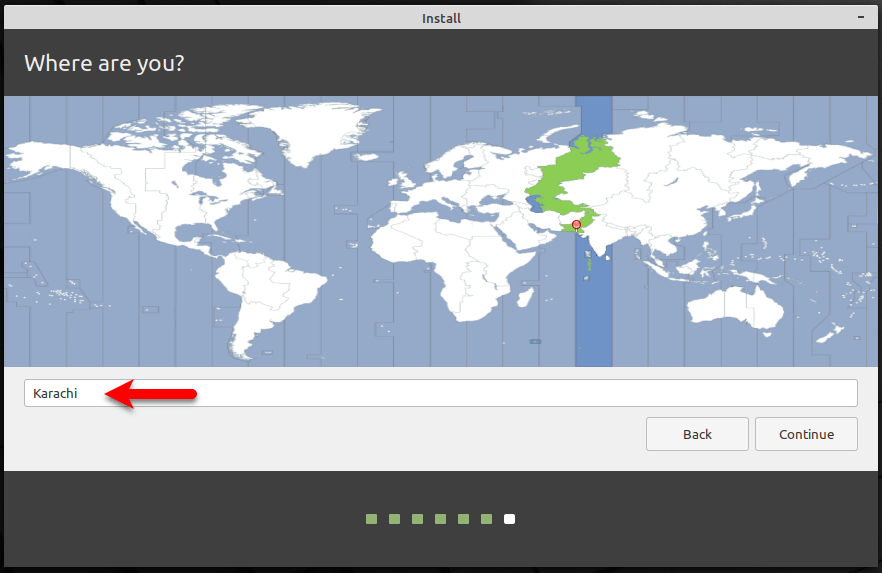
Select your location and click continue.
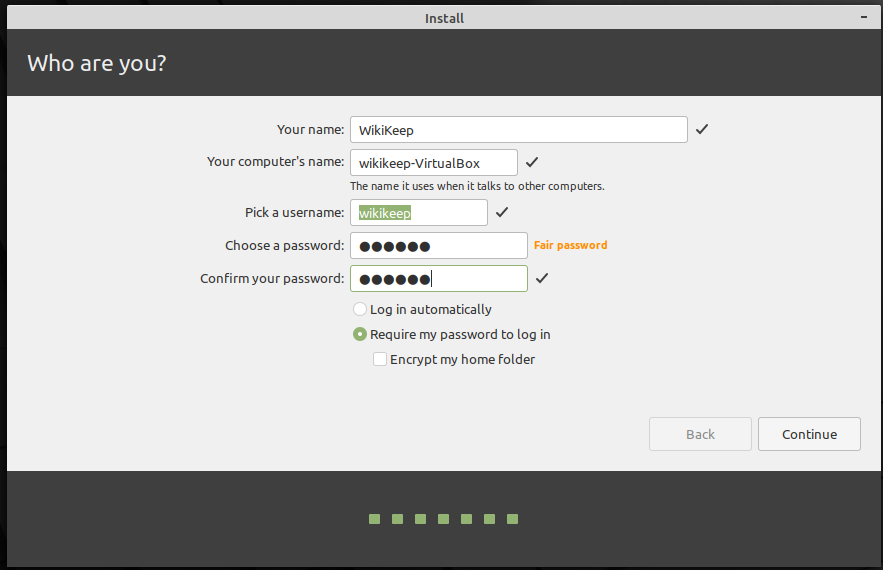
Create your computer account, such as Your Name, Computer Name, User Name, Password, Confirm Your Password, then click continue.
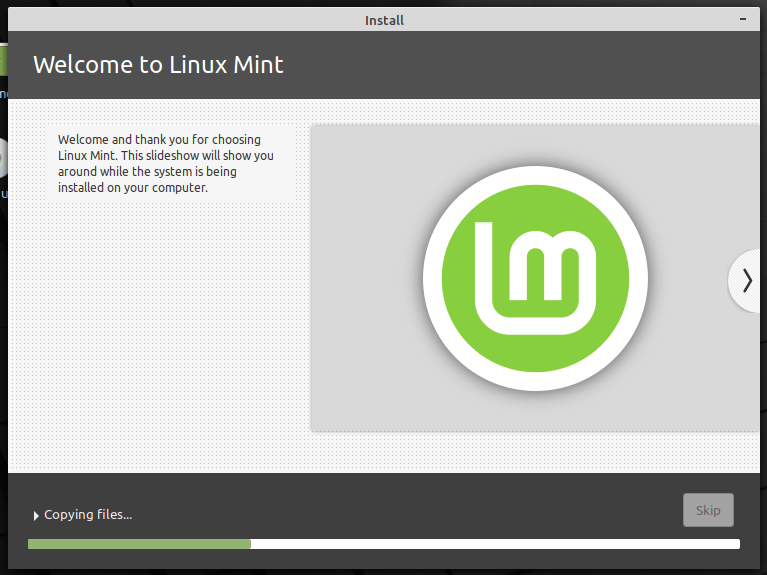
Now it starts installing Linux Mint, so it may take some time to be installed. Once the installation completed your virtual machine will restart and will take you to the login screen.
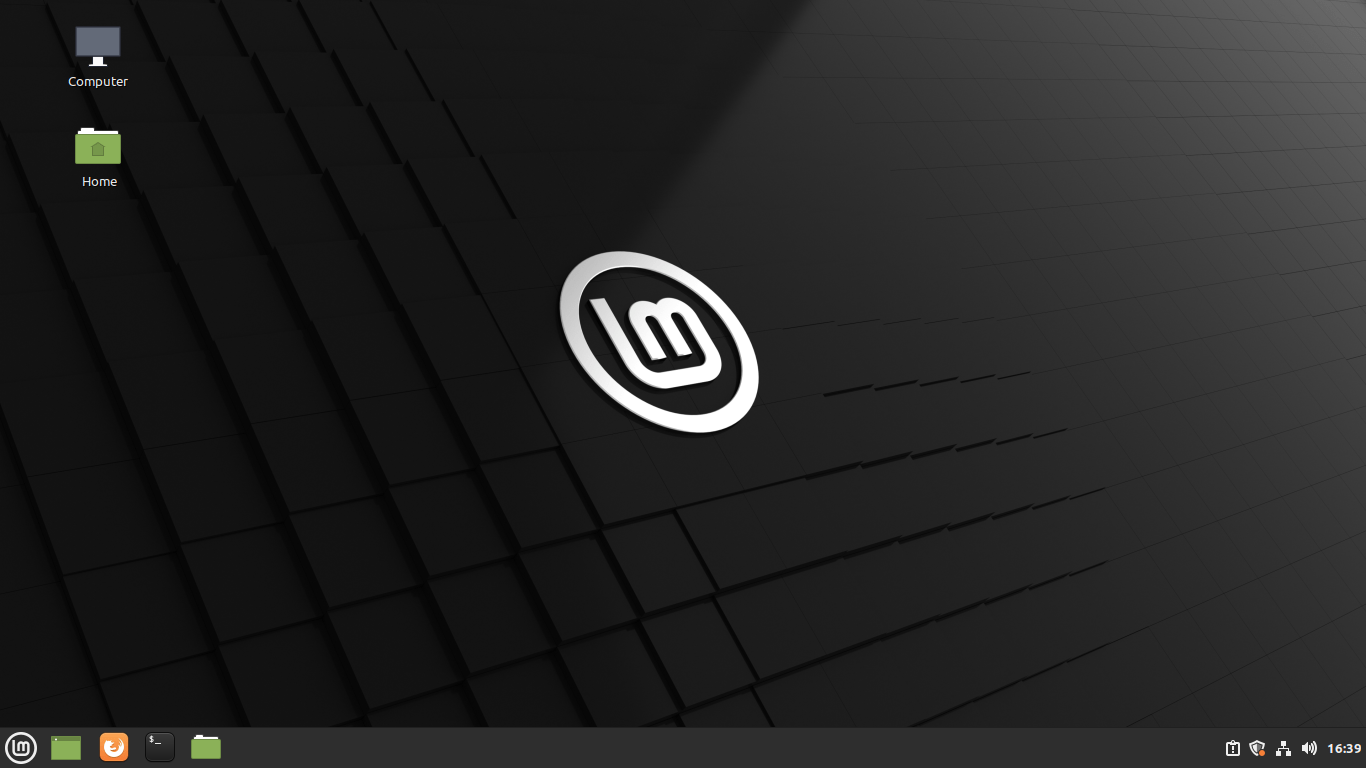
Enter your login password and press enter, and successfully Linux Mint is being installed on VirtualBox on Windows.
Related:
