
Kali Linux new latest version is out for everyone, they can take its experience on their PC, or using Virtual Machines. You know that Kali Linux is a clear object and well known operating system, that developed for penetration testing/hacking purposes. Even if you are a Windows user also you can easily dual-boot Kali Linux on single SSD/HDD. We tried many solutions for testing Kali Linux 2020 on any of the platforms. As you know when it comes to the world Virtualization testing platform. Then there is two most popular Virtualization machine which gives you the ability to test different kinds of the operating system. Like Windows 10, macOS, Android OS, Linux all versions.
For the first time Kali Linux operating system developed by security firm Offensive Security. Mostly Kali Linux operating system using for ethical hacking and for controlling a country server database. Simply Kali Linux packed out with advanced security tools to target network and computer security.
So, through this guide, I will walk you through how to install Kali Linux on Windows 10 using VMware Workstation. The installation process of Kali Linux on VMware Workstation is a bit complicated for everyone. But for the procedure, you need a bit of effort to handle it.
- http://How to Dual Boot Kali Linux with Windows 10 on a single SSD Drive
- Install Kali Linux on Windows 10 using VirtualBox
Install Kali Linux on Windows 10 using VMware Workstation
Interesting Facts about Kali Linux
Ever Kali Linux has become of the popular security platform that can catch many reasons for it. The first thing is Kali Linux includes most advanced and modern penetration testing, such as tools. The origin of Kali Linux created from the replacement of earlier BackTrack. Also, BackTrack was one of the professional penetrating testing tools was based on Knoppix. Usually, Kali Linux knew of the most simple operating system that can be used by everyone. Kali Linux is specially developed for those who work in security offices. Also, it can be used by home users, which includes an easy interface with professional tools.
However, you can install Kali Linux operating system x86-x64 Bit, and ARM platforms. Kali Linux is an open-source operating system which Kali.org provides it’s download link freely for everyone. Both Virtual machines can support it’s ISO image file, whether that should be VirtualBox or VMware Workstation/Player. When it comes to Kali Linux environments, then Kali Linux has consisted of a beautiful interface environment. Installing Kali Linux on your PC can cost very nice hardware pieces of equipment. For having a better speed performance.
Step 1. Download Kali Linux
Navigate to Kali.org once you reached click on the top menu bar on the “Downloads” option.

To install Kali Linux on Virtual machines, you need to download Kali Linux 64-Bit (Installer) ISO file.

Step 2. Install VMware Workstation
Before going to create a new virtual machine for Kali Linux on VMware Workstation/player. You have to download it from the internet.
- Navigate to VMware Workstation download center and download it.
- Also, you can Download VMware Workstation sepratly for Kali Linux and Windows version.
- Once you pointed there click Download.
- When VMware Workstation setup files downloaded simply launch it.
- On the first screen click next.
- Read about License and Agreement of VMware Workstation, then click next.
- On the “Users Experience Settings” again click next.
- In the “Custom Setup” screen click next.
- Also, do you want to create a shortcut on the desktop, or start menu then click next.
- Wait for the installation process. Once the installation completed click Finish.
Step 3. Create a New Virtual Machine
Creating a new Virtual machine for Kali Linux is pretty easy. Everyone can create this, but again I got it important to do not miss any portion.
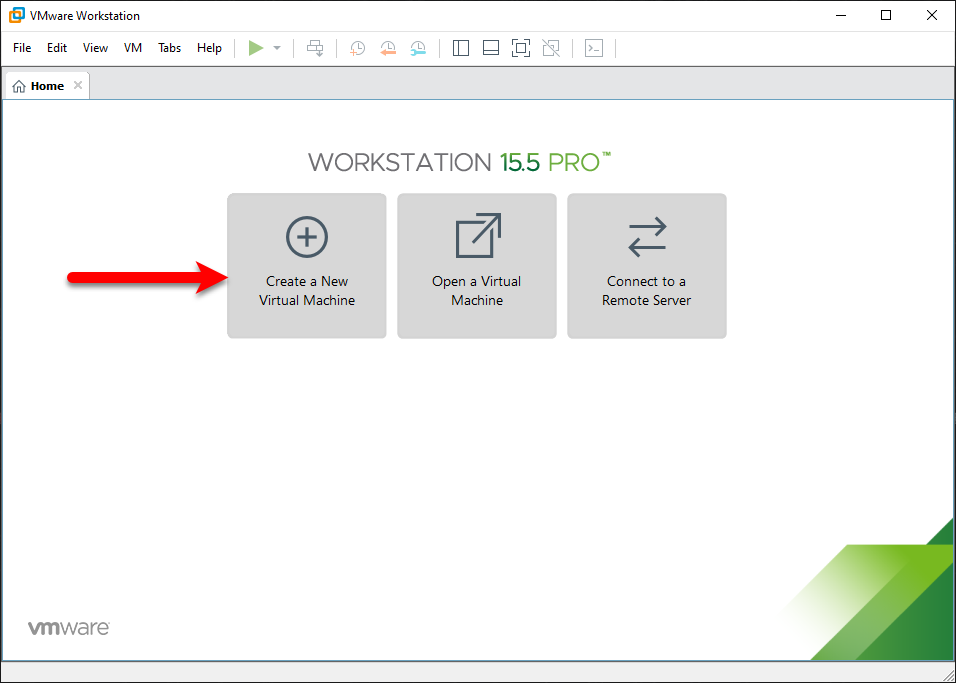
Open up VMware Workstation on Windows 10 for creating a new virtual machine. Once the VMware Workstation opened click on “Create a new Virtual Machine”.
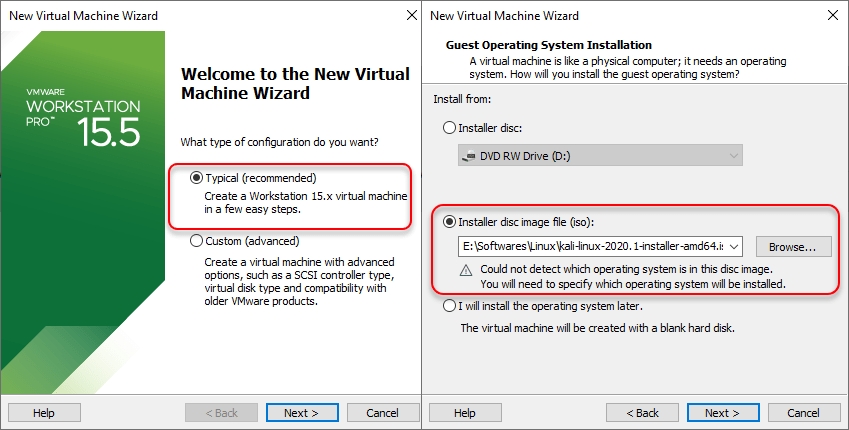
- On the new virtual machine, wizard select “Typical (Recommended)” and click next.
- Choose the option “Installer disc image file (ISO)”, then click “Browse”. Once another window appeared, select the Kali Linux ISO file and click OK. Once the ISO file imported click next.
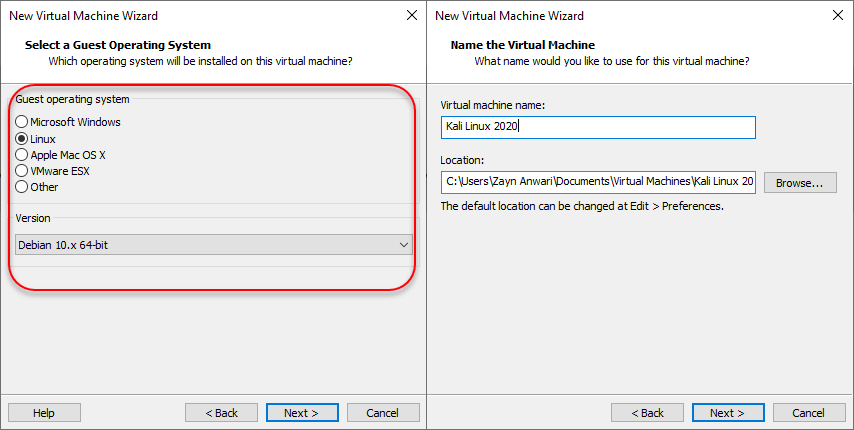
- Select the guest operating system “Linux”, select the version “Debian 10.x 64-Bit” and click next.
- Choose a name for the current virtual machine, then specify the location where you want to place it. After that, click next.
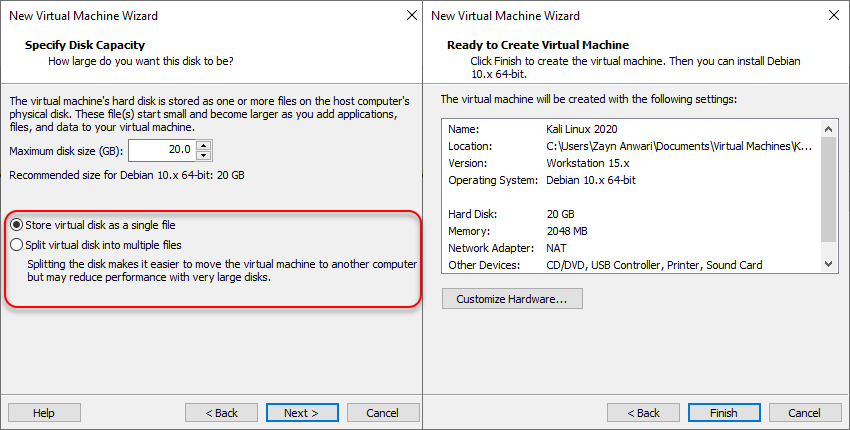
- Specify the disk capacity for Kali Linux, then select the option “Store virtual disk as a single file” and click next.
- Now the virtual machine is ready to create, click Finish to end the process of creating.
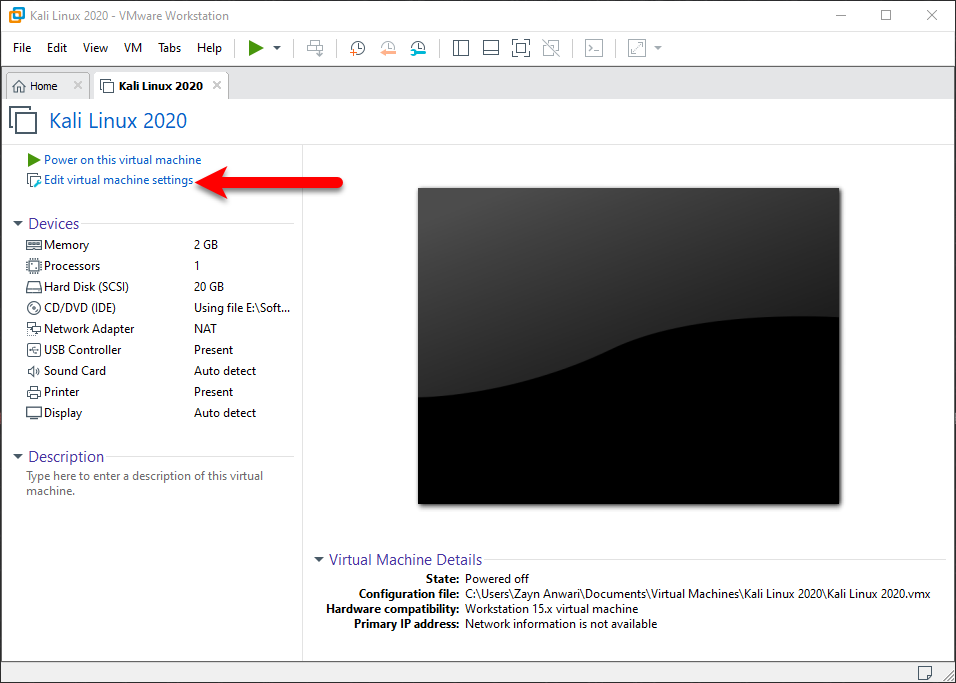
- Once the Virtual machine created for Kali Linux. After that, you need to configure settings for Kali Linux for better performance. To do that click on “Edit Virtual Machine Setting”.
- When the Virtual machine settings open, navigate to the top tab and click on “Hardware”. From the hardware tab click on “Memory”, then increase the memory size.
- Click on the “Processors” tab and increase the number of processors and the number of core processors. Once that is done click OK to save changes.

Install Kali Linux on Windows 10 using VMware Workstation
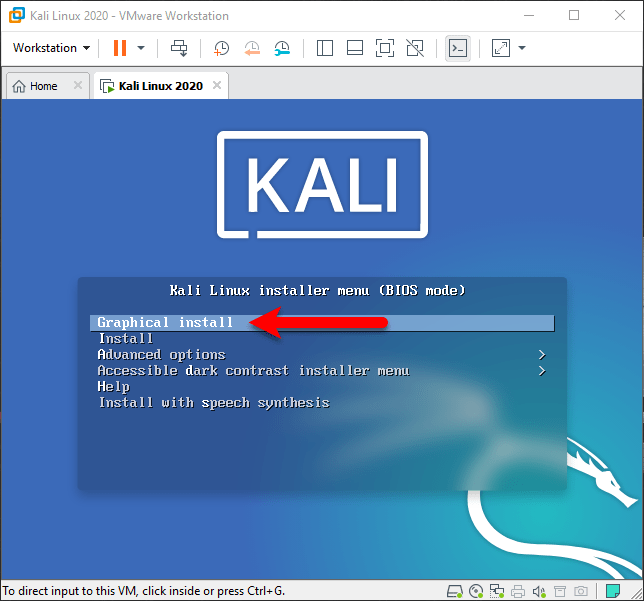
Now everything is up and Kali Linux is ready to install on VMware Workstation on Windows 10 PC. Therefore, click on “Power on this virtual machine. Once the installation started on the first window select “Graphical Install” and press enter.
- On the first screen choose your language and click continue.
- Select your country where you live and click continue.

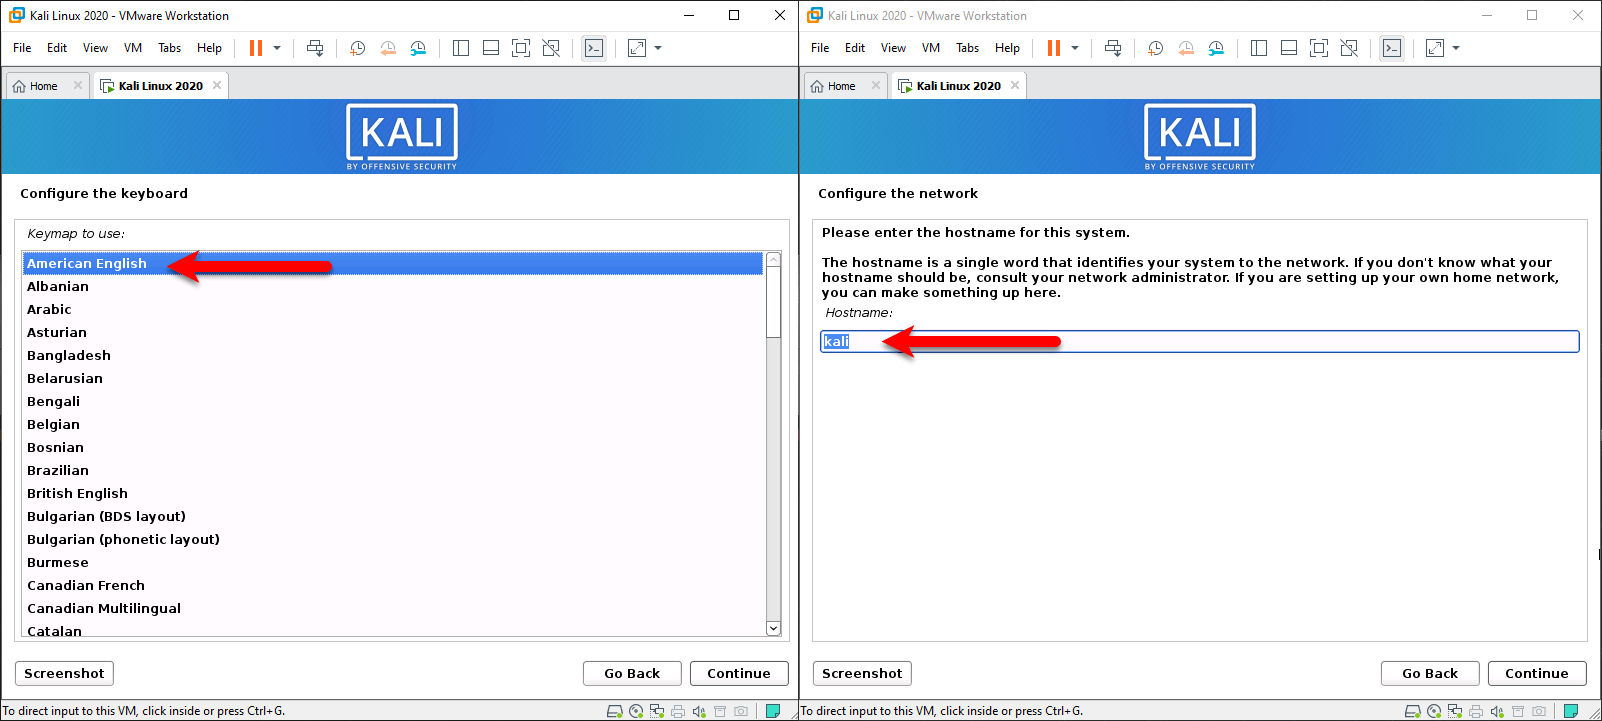
- Configure your keyboard layout and click continue.
- Choose a hostname for Kali Linux and click continue.
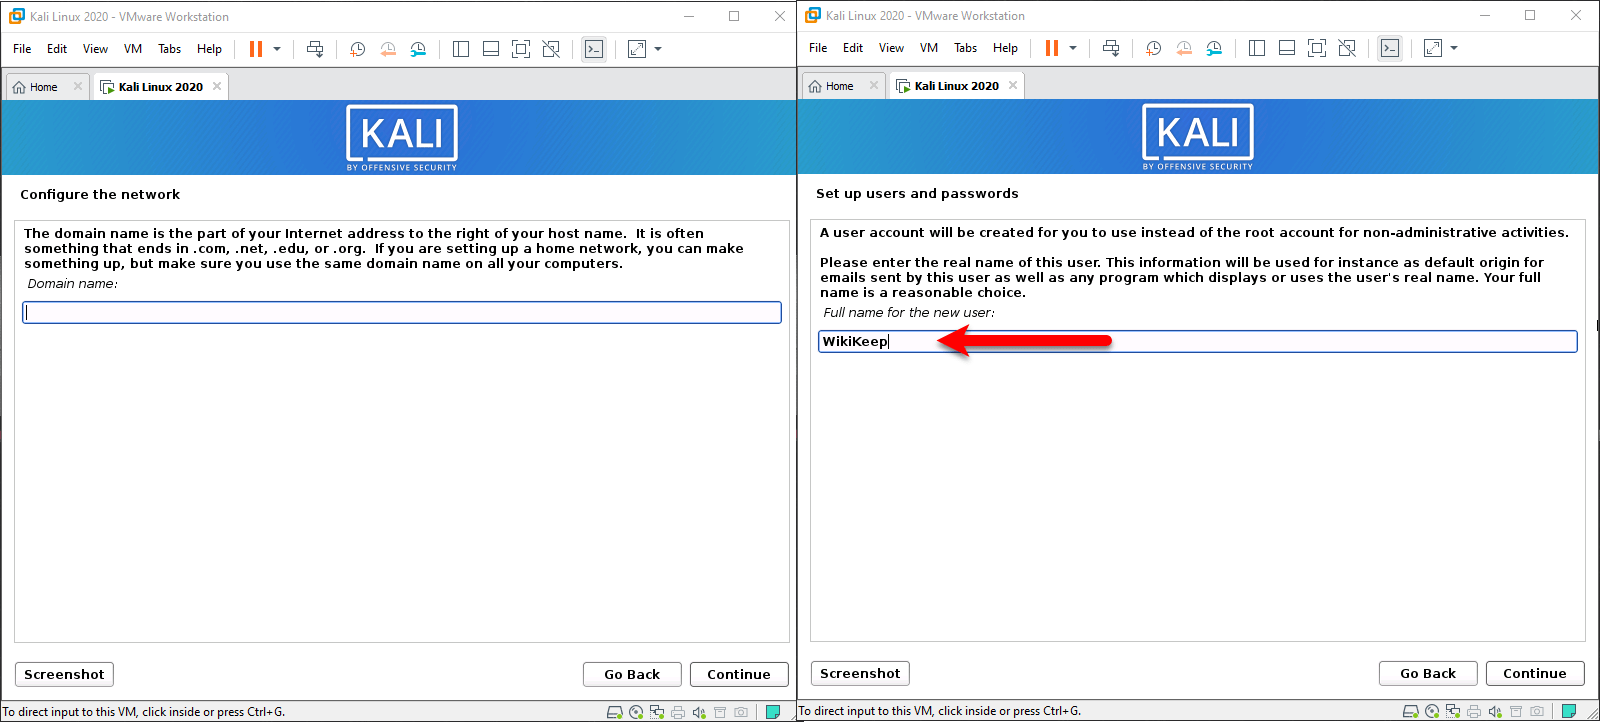
- The domain name is optional, leave it as a default by clicking continue.
- Enter the full name for the new users, and click continue.
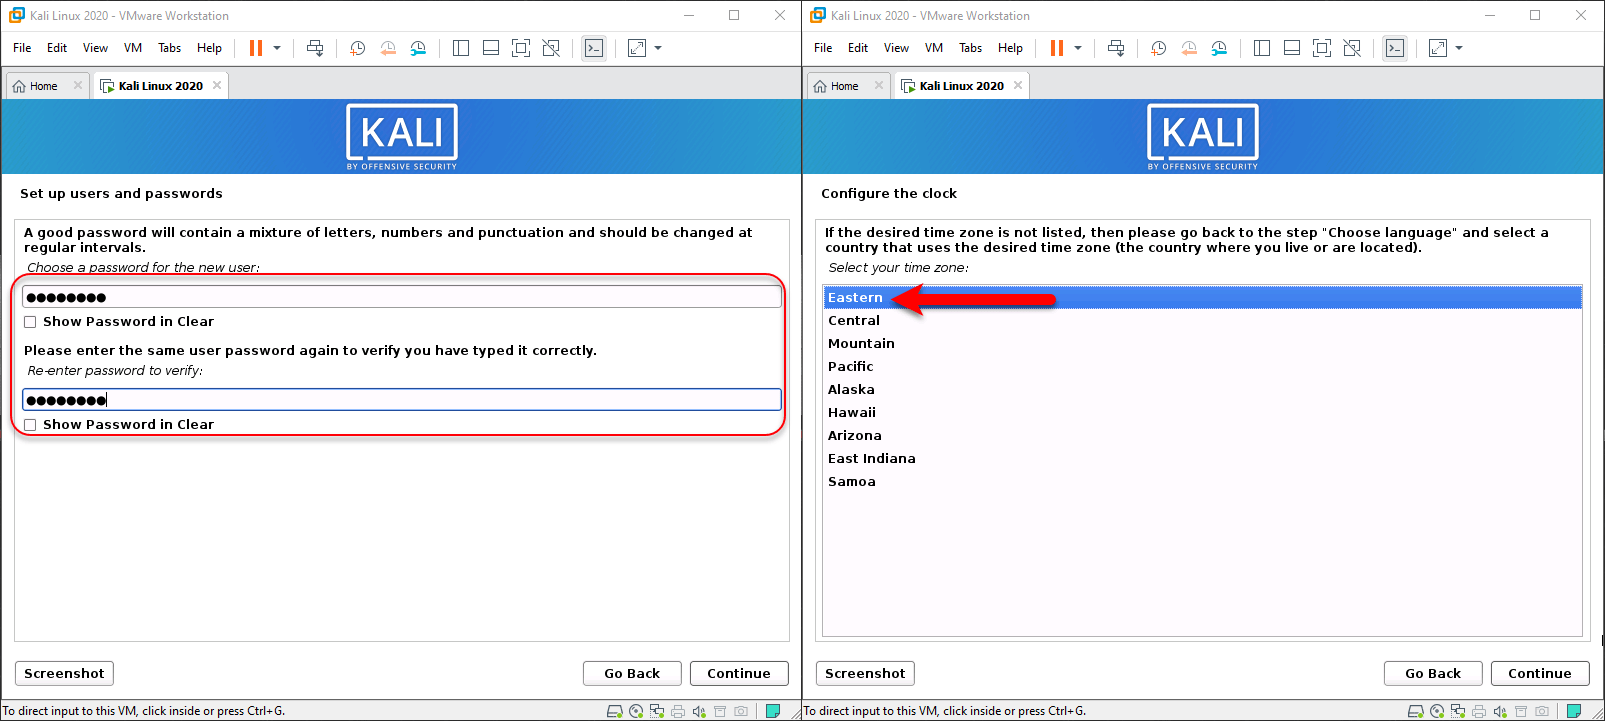
- Choose a heavy password Kali Linux and click continue.
- Configure the clock and click continue.
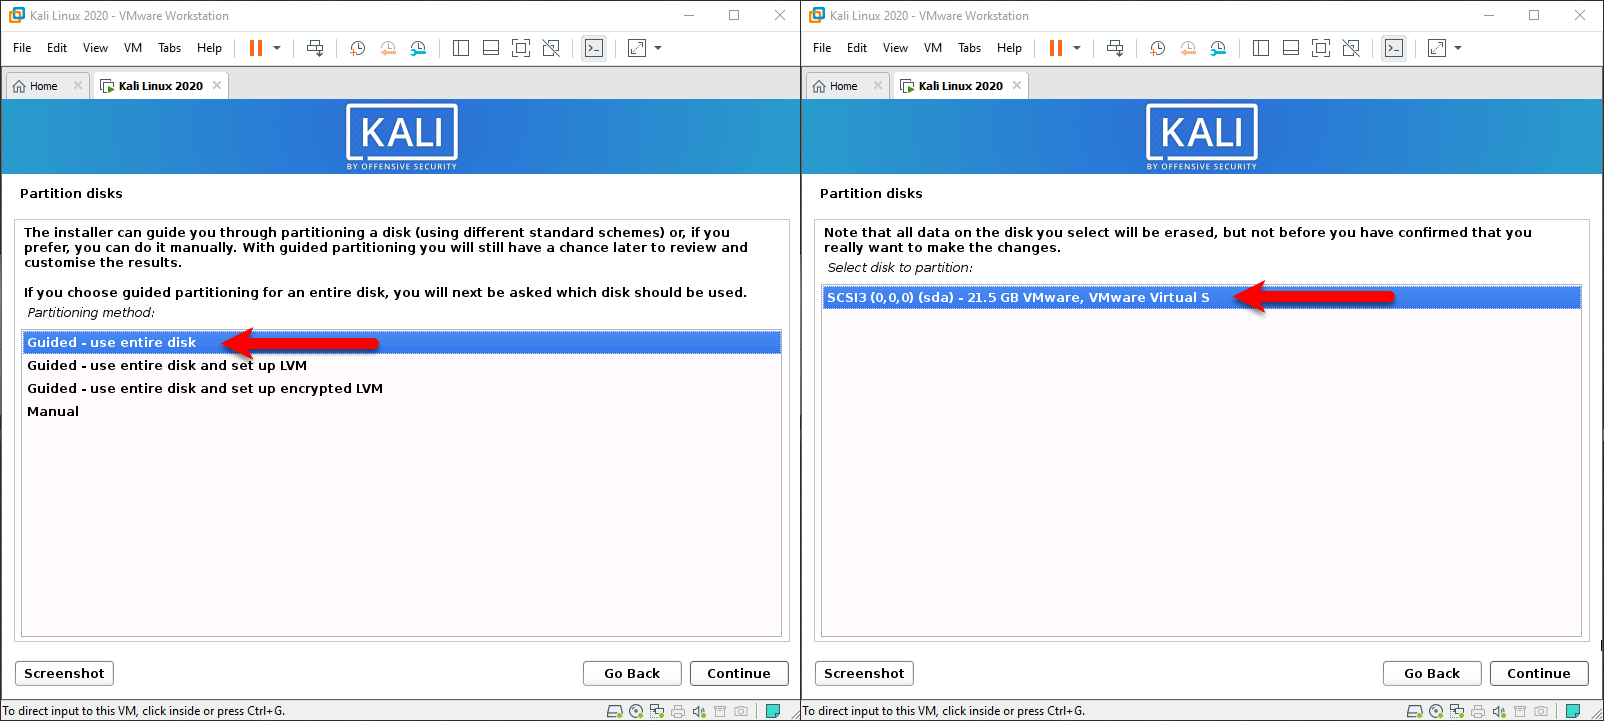
- On the partitions, disk window select “Guided – use entire disks” and click continue.
- In the next screen leave it as default and click continue.
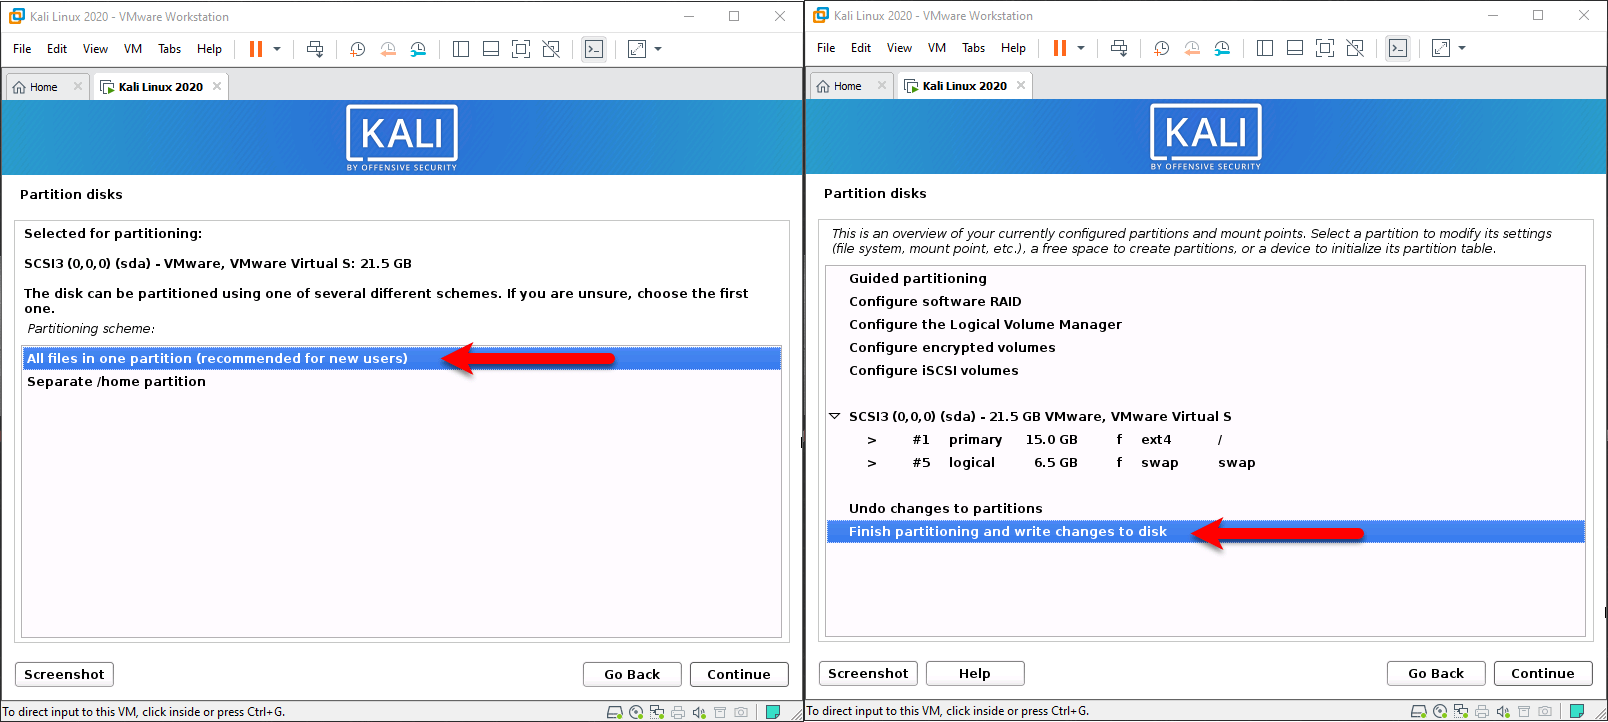
- Select the option “All files in one partition (Recommended for new users” and click continue.
- Choose “Finish partitioning and write changes to disk” and click continue.
- Select the “YES” option and click continue. Wait for the installation of Kali Linux.
- In the next screen leave it as a default and click continue.
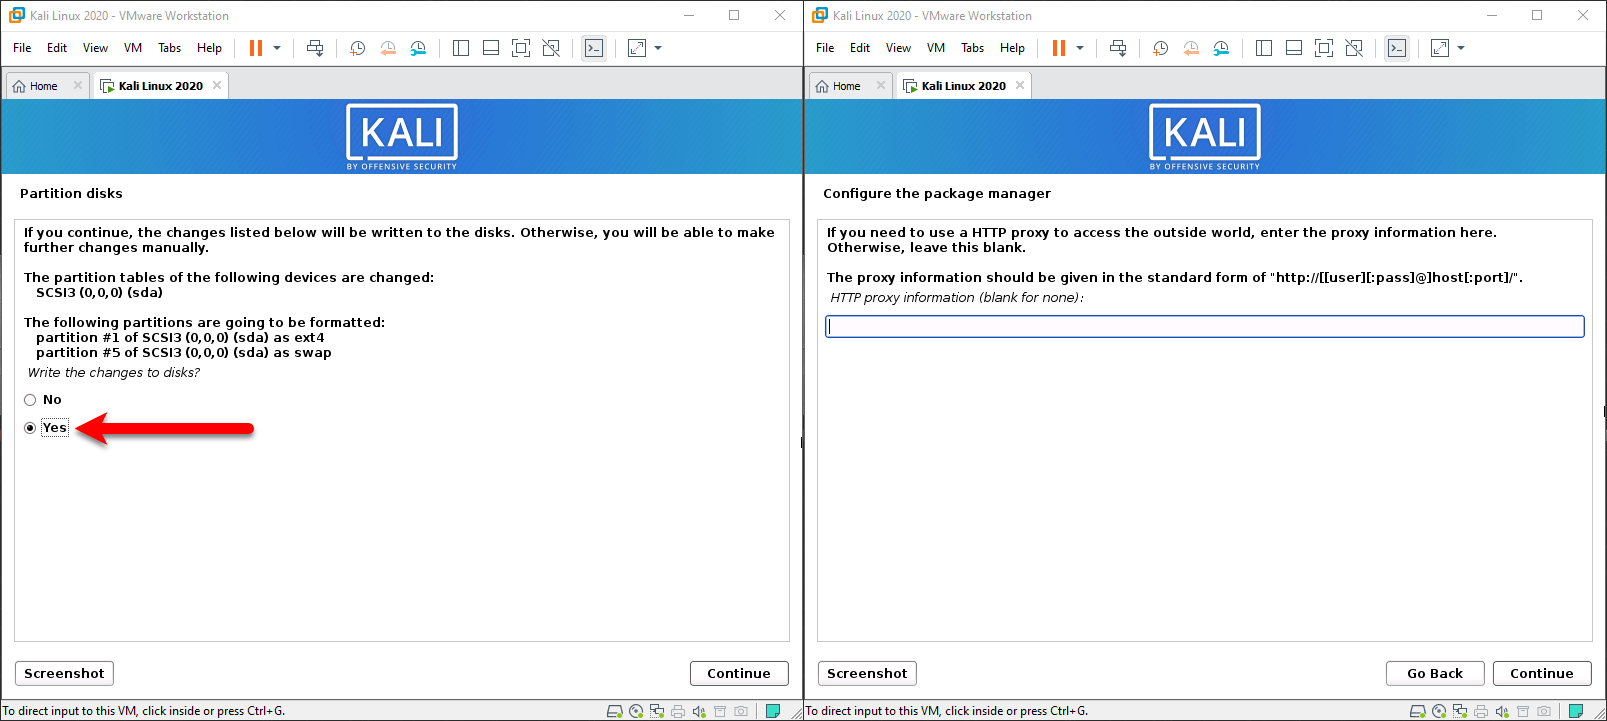
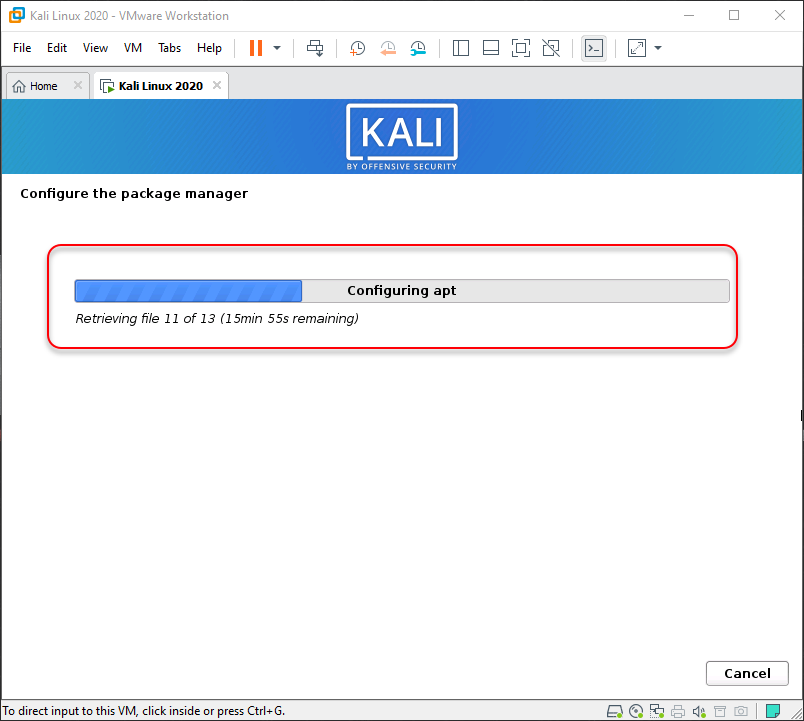
- Wait until it should configure the package manager.
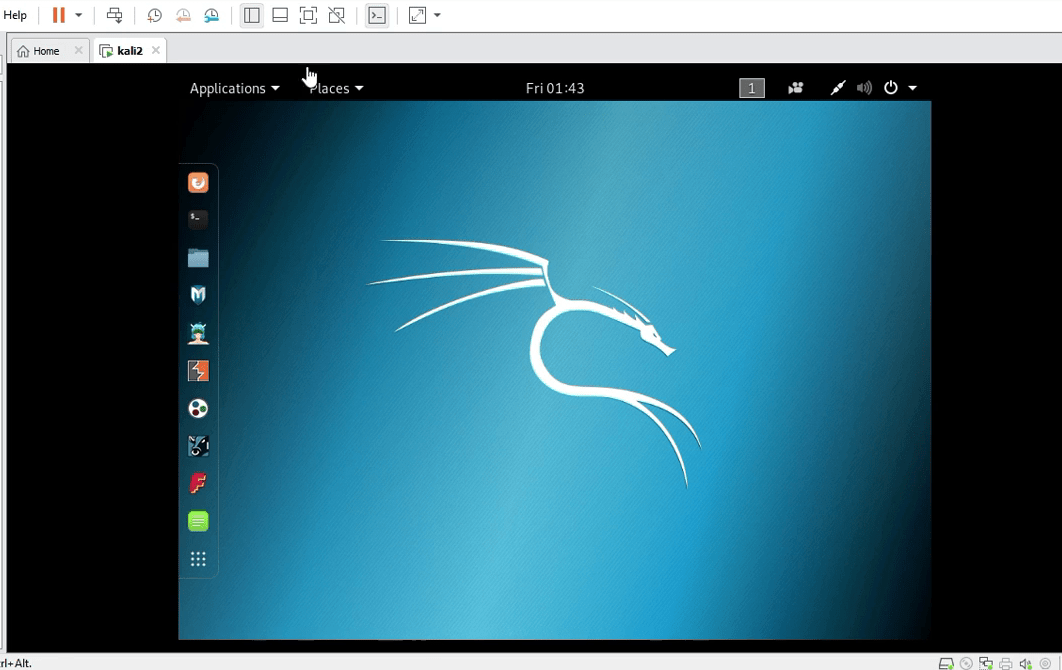
Kali Linux has been successfully installed on VMware Workstation.
Install VMware Tools
To use Kali Linux full-screen resolution on VMware Workstation. You need to prepare to install VMware Tools on it in order to use the full screen. VMware tool is a small piece of tool which helps you to use whether Kali Linux, Windows, macOS full screen on VMware Workstation.
- Navigate to VMware Workstation top menu bar then click on “VM”, and click below down on Install VMware tools.
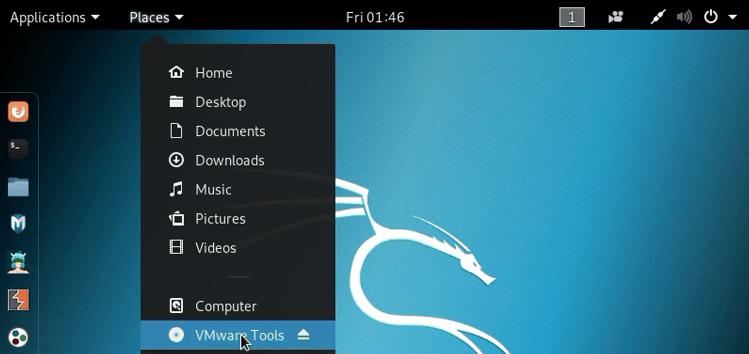
- Again click on “Places” and click down on “VMware tools”.
- Once the VMware tools folder opened, move the VMware tools file to the desktop. Then start extracting it, once extracted install that.
- When the VMware tools installed on Kali Linux, click on VMware’s full-screen view option.

- How to Activate YouTube Dark Mode on Browser, Android, iPhone devices
- Reset Windows 10 Forgotten Password – 100% Working
- How to Activate WhatsApp Dark Mode on Android, iOS, & Web
That’s it if you faced any kind of problem feels free to share with me below in the comment section.