Kali Linux is the operating system that mostly used for penetration, and still using. Beside that Kali Linux is using for Cyberattacks, all the government server is controlling under Kali Linux operating system. Due to that Kali Linux is preinstalled over 600 million devices now. Kali Linux has become one of the popular operating system for security reasons. With every season of Kali Linux Security Offensive are trying there best to import useful features, tools to the operating system. In fact, Kali Linux wasn’t developed for hacking, but there are some other cool tools you have to know about it. If you are not an ethical hacker, but you are a professional webmaster. But there is some perfect tool in Kali Linux to utilize the web pages.
Indeed some of the tools are preinstalled with Kali Linux, but some of them are missing. Therefore, manually you have download those tools and install it. The tools are Nmap, Lynis, WPscan, Aircrak-ng, Hydra, Wireshark, Metasploit Framework, Skifish, Maltago, Nessus, BeEf, Apktool, sqlmap, John the Ripper, Snort, Autopsy Forensic Browser, King Phisher, Nikto, Yersinia, Social Engineering Toolkit (SET). The tools has been developed alongside of ethical hacking for those who are professional webmaster. However, the purpose of this post is to dual boot Kali Linux with Windows 10 on a single SDD drive. Before getting started with let’s know some hint about Microsoft Windows 10 operating system also.
- The recommended hardware for a smooth installation Kali Linux is
- 25GB hard disk space
- At Least 4GB of RAM
- SSD recommended for better performance
- Graphics card AMD, or Nvidia
There have been several versions of Windows operating systems, like Windows 7, 8, 8.1. But Windows 10 OS is one of the successful operating system between the other OS of Microsoft. Windows 10 is a series of Microsoft developed and published. After Windows 8.1 the succeed major release of Microsoft is Windows 10. Windows 10 was released on July, 5 2015, Windows 10 has consisted of many significant features. Due to that in July, 5 2015 Windows 10 received many post views from users side. After that, Microsoft decided to release its latest update. For the passage of time Microsoft is working on the updates to bring something cool to its operating system.
And now May, 2020 is nearly to come in the market. Also, Microsoft selected a separate code for its upcoming update, and that is 20H1. As the complete code 2004, this update of Windows 10 is much bigger than November 2019 update. On April, 16, 2010 Microsoft wanted to release its latest update. But for different circumstances they have postponed it. Windows 10 latest update features are the following.
- More control over optional updates
- A new Cortana experience with typing
- Cortona loses support for smart Home skills
- Cloud down for reinstalling Windows
- Bandwidth limits for Windows updates
- WSL 2 with a Linux Kernel
- A faster Windows search experience
- Disk type in the task manager
- GPU temperature in the task manager
- FPS in the Xbox Game bar
- Windows lets you (Make your device passwordless)
- Renaming virtual desktops
- Improved network status information
- Built-in support networks cameras
- Better control over restarting Apps in Sign-in
- Disk cleanup won’t delete your download folders
- Paint and Wordpad is optional features
- A header in Windows setting Apps
- Quick search in search home
- Bluetooth swift pear improvements
- Text cursor indicator
- Drag & drop with your eyes
- Language setting improvements
- A new tablet experience
- Notepad update through App store
- Better (Your Phone) app
- Online file search in file explorer
The recommended hardware elements for Windows installation is
- 20GB of hard disk space
- At least 8GB of RAM
- SSD recommended for better speed performance
- Graphic is the last suggestion whether Nvidia or AMD
Dual Boot Kali Linux with Windows 10 on a single SSD Drive
For dual-booting Kali Linux with Windows 10 on a single SSD drive, you need several jobs to do. The first one is you need to prepare the ISO file Kali Linux, prepare at least 16GB USB Pendrive, make the USB Bootable, Shrink the Volume for Kali Linux on Windows 10. After that, follow each of the steps for dual booting it.
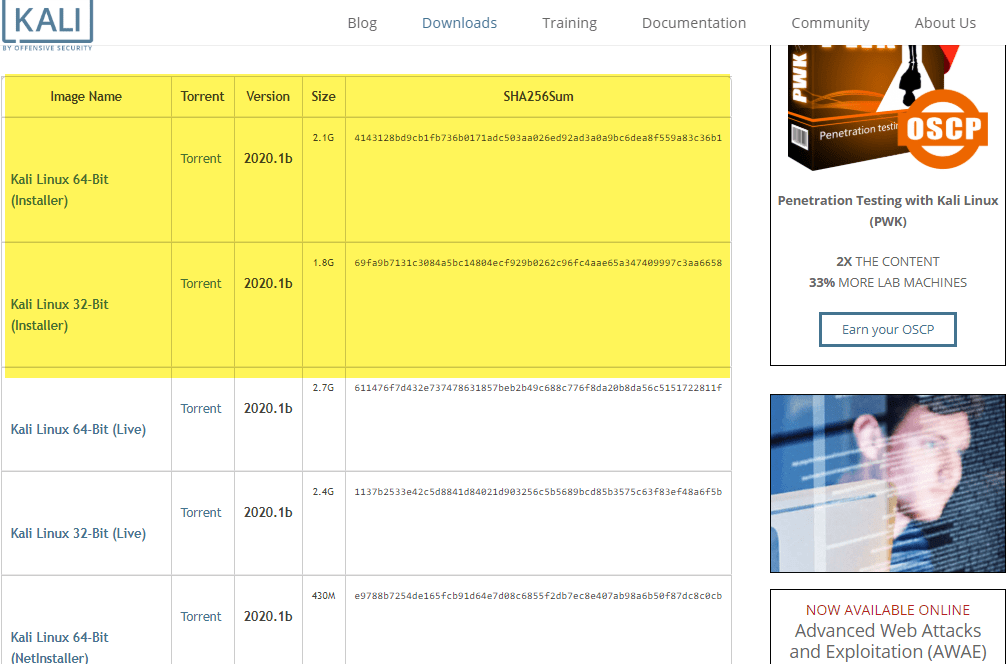
For downloading the ISO file of Kali Linux navigate to its official website. Once you reached there you will see the installer ISO files. One is 64-Bit and the other is 32-Bit, so it depends on you which one you will install. You can download it using any download manager, or download it using the uTorrent application.
Create a Bootable USB Drive for Kali Linux
There are several ways of creating a Bootable USB Pendrive for Kali Linux using Windows 10. Therefore, for creating a Bootable USB drive here I want to use it (Rufus). Rufus is a simple portable tool that allows you to create Bootable USB for Kali Linux, Ubuntu, Windows 10, and other operating systems. Rufus an open-source portable tool for Microsoft Windows to format the drive and create a bootable USB drive. Rufus officially designed as a modern open-source replacement for the HP USB disk storage format tool for Windows. But now it’s a piece of good news for users that they can create a bootable USB drive for Linux OS also.
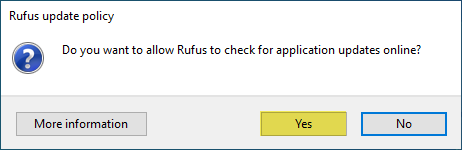
OK, to do this navigate to Rufus official website and download the software. Once downloaded launch it on the first screen you will see Rufus update privacy. And it will ask you (Do you want to allow Rufus to check for application updates online?), so click Yes to agree.
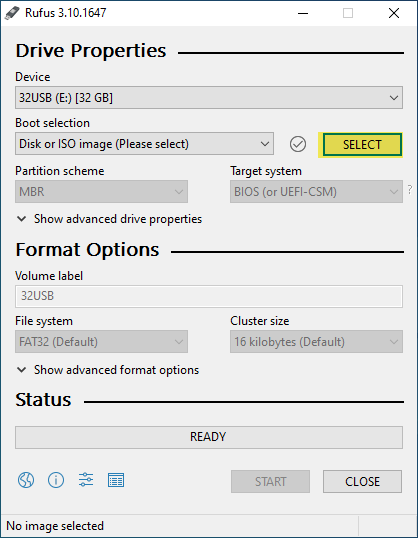
When Rufus opened from right-handed click on (Select) option for inserting the ISO file of Kali Linux.
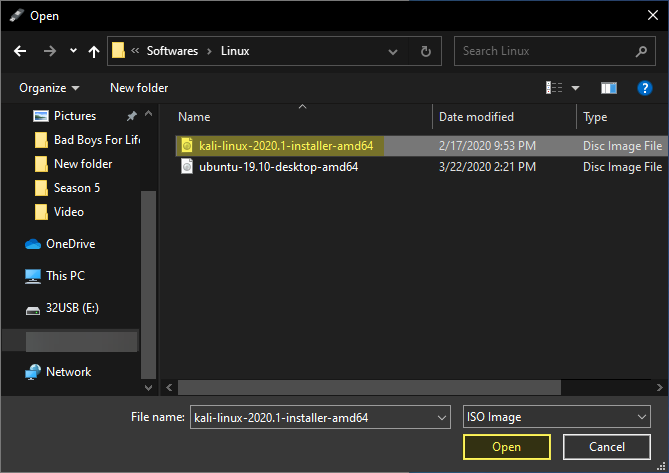
Now select the ISO file of Kali Linux and click Open.
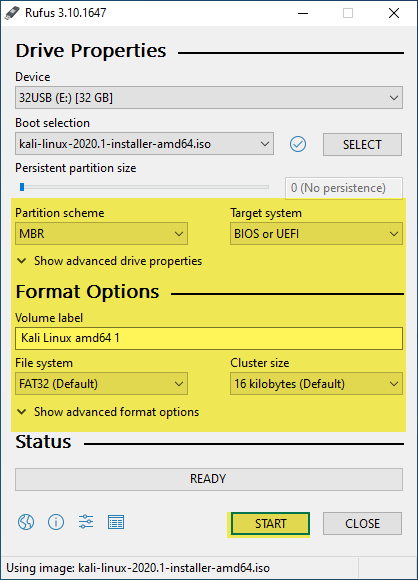
When the ISO file of Kali Linux inserted to Rufus, then check out the below down screen settings of Rufus for creating bootable USB for Kali Linux. While all the settings cleared click Start option.
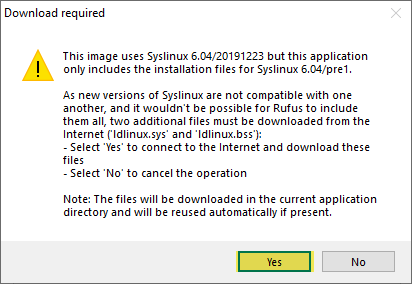
In this step you will face a warning, and the warning is (This image uses Syslinux but the application only includes the installation files for Syslinux), so click Yes to go ahead.
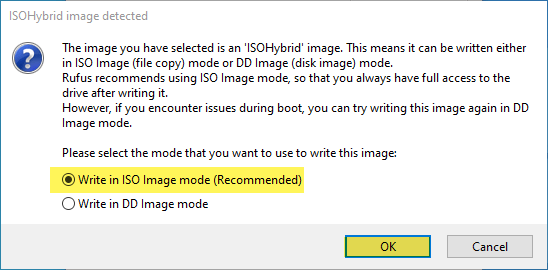
The image you have selected is an (ISOHybrid) image. This means it can be written either in ISO image (file copy) mode or DD image mode. However, choose the Write in ISO image mode (Recommended) option and click OK.
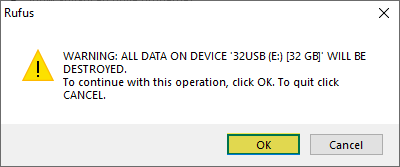
Again you will see a warning from formating the disk side. And the warning is all data on the device will be destroyed. To continue with this operation, click OK.
Now the Rufus will get started, to write the ISO file of Kali Linux to the USB drive. This process will take some time, wait until it should be completed.

Shrink Volume for Kali Linux
Once the Kali Linux bootable USB drive created, after that, you need to create or shrink a separate volume for Kali Linux on Windows 10. Remember that you can’t install Kali Linux and Windows 10 on the same drive. For dual boot purposes you need to create separate drive.
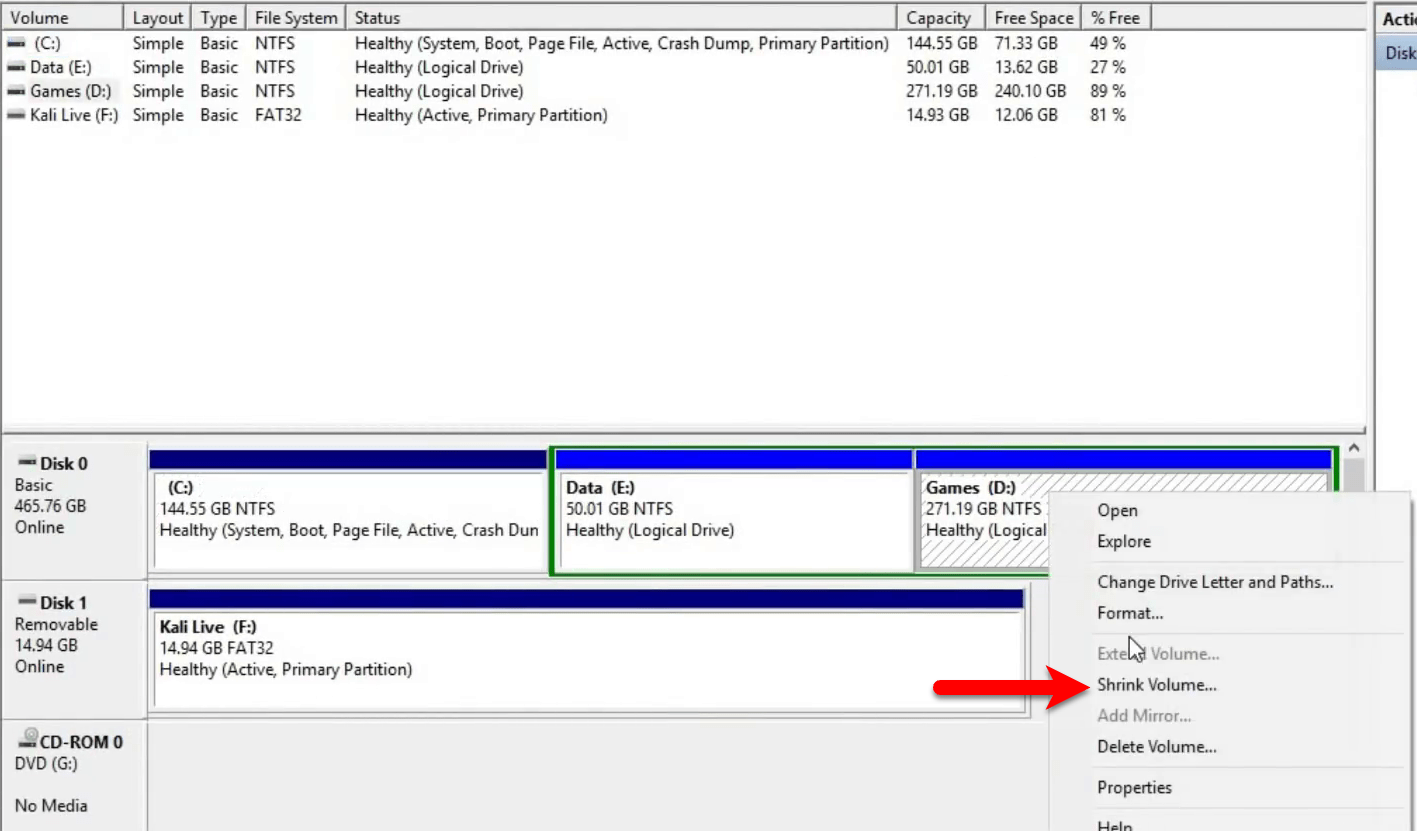
To shrink volume right-click on (My Computer) and select Manage option.

Once the computer management window appeared, select the drive that you want to shrink. So, right-click on the drive and select (Shrink) option.
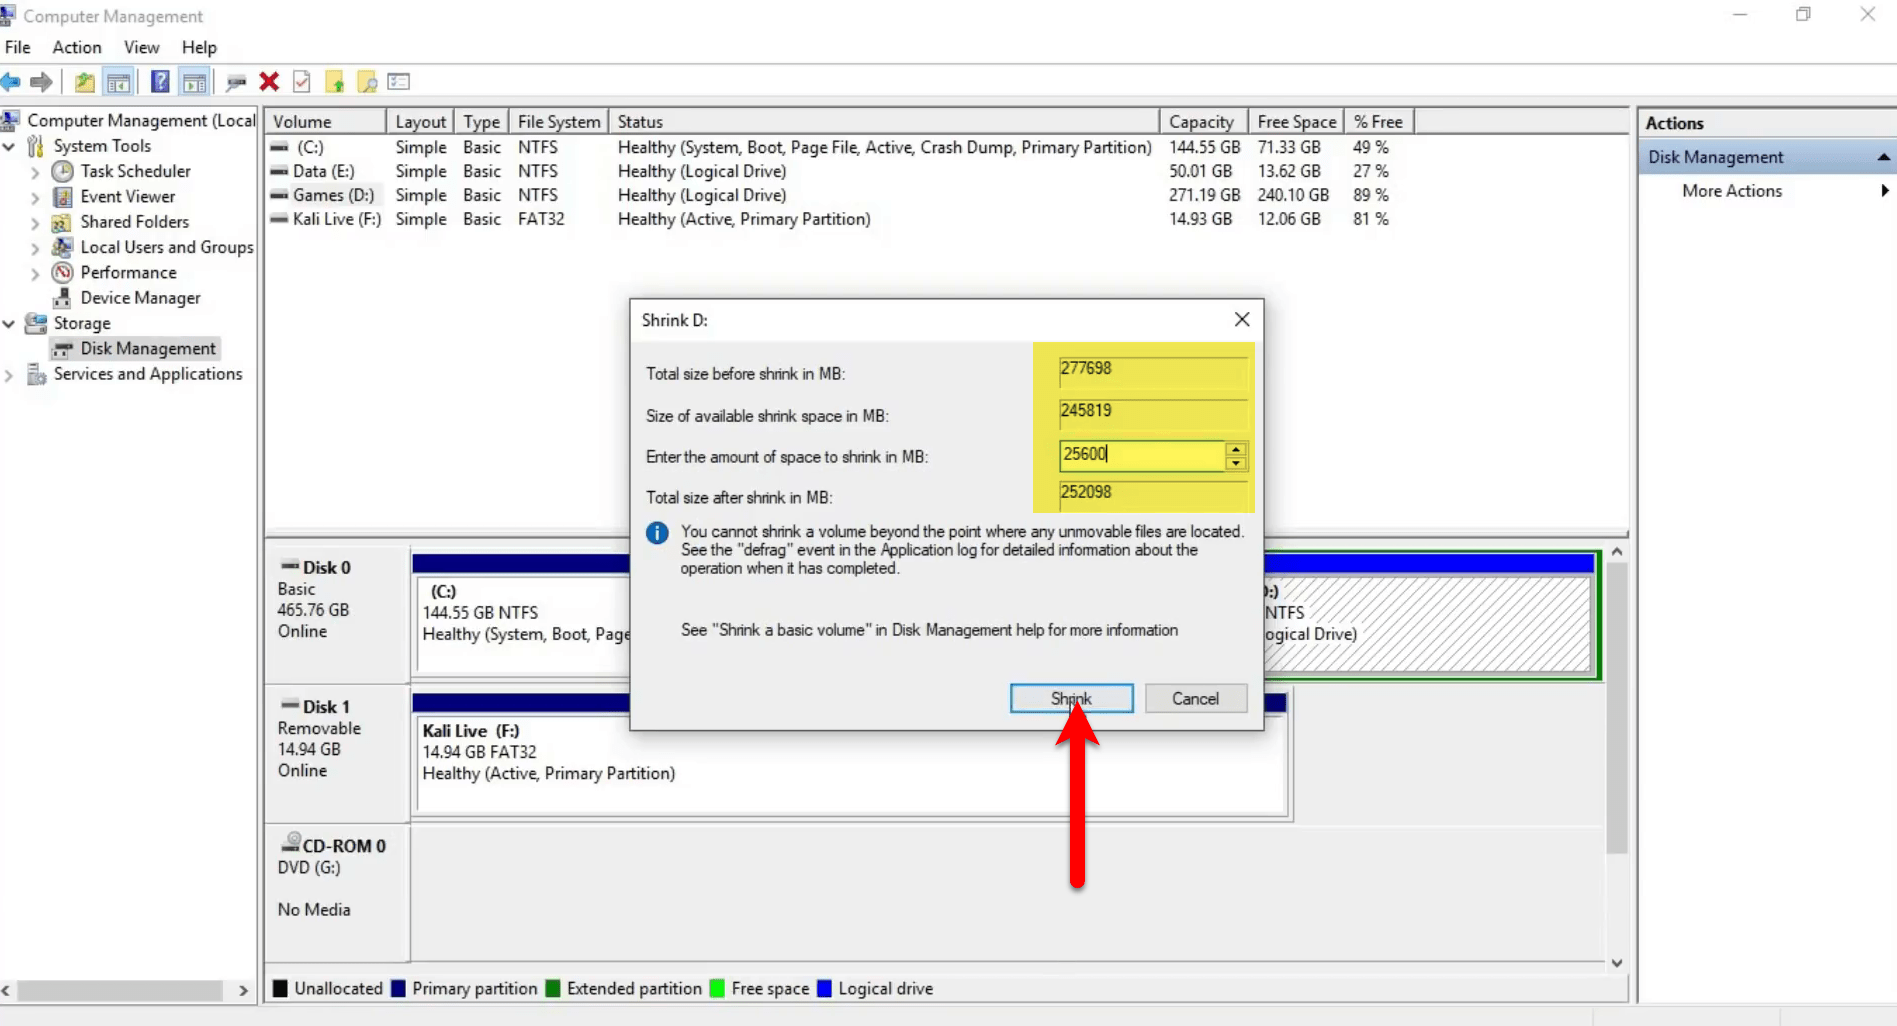
When this window opened, enter the amount of space you want to shrink, and click Shrink option.
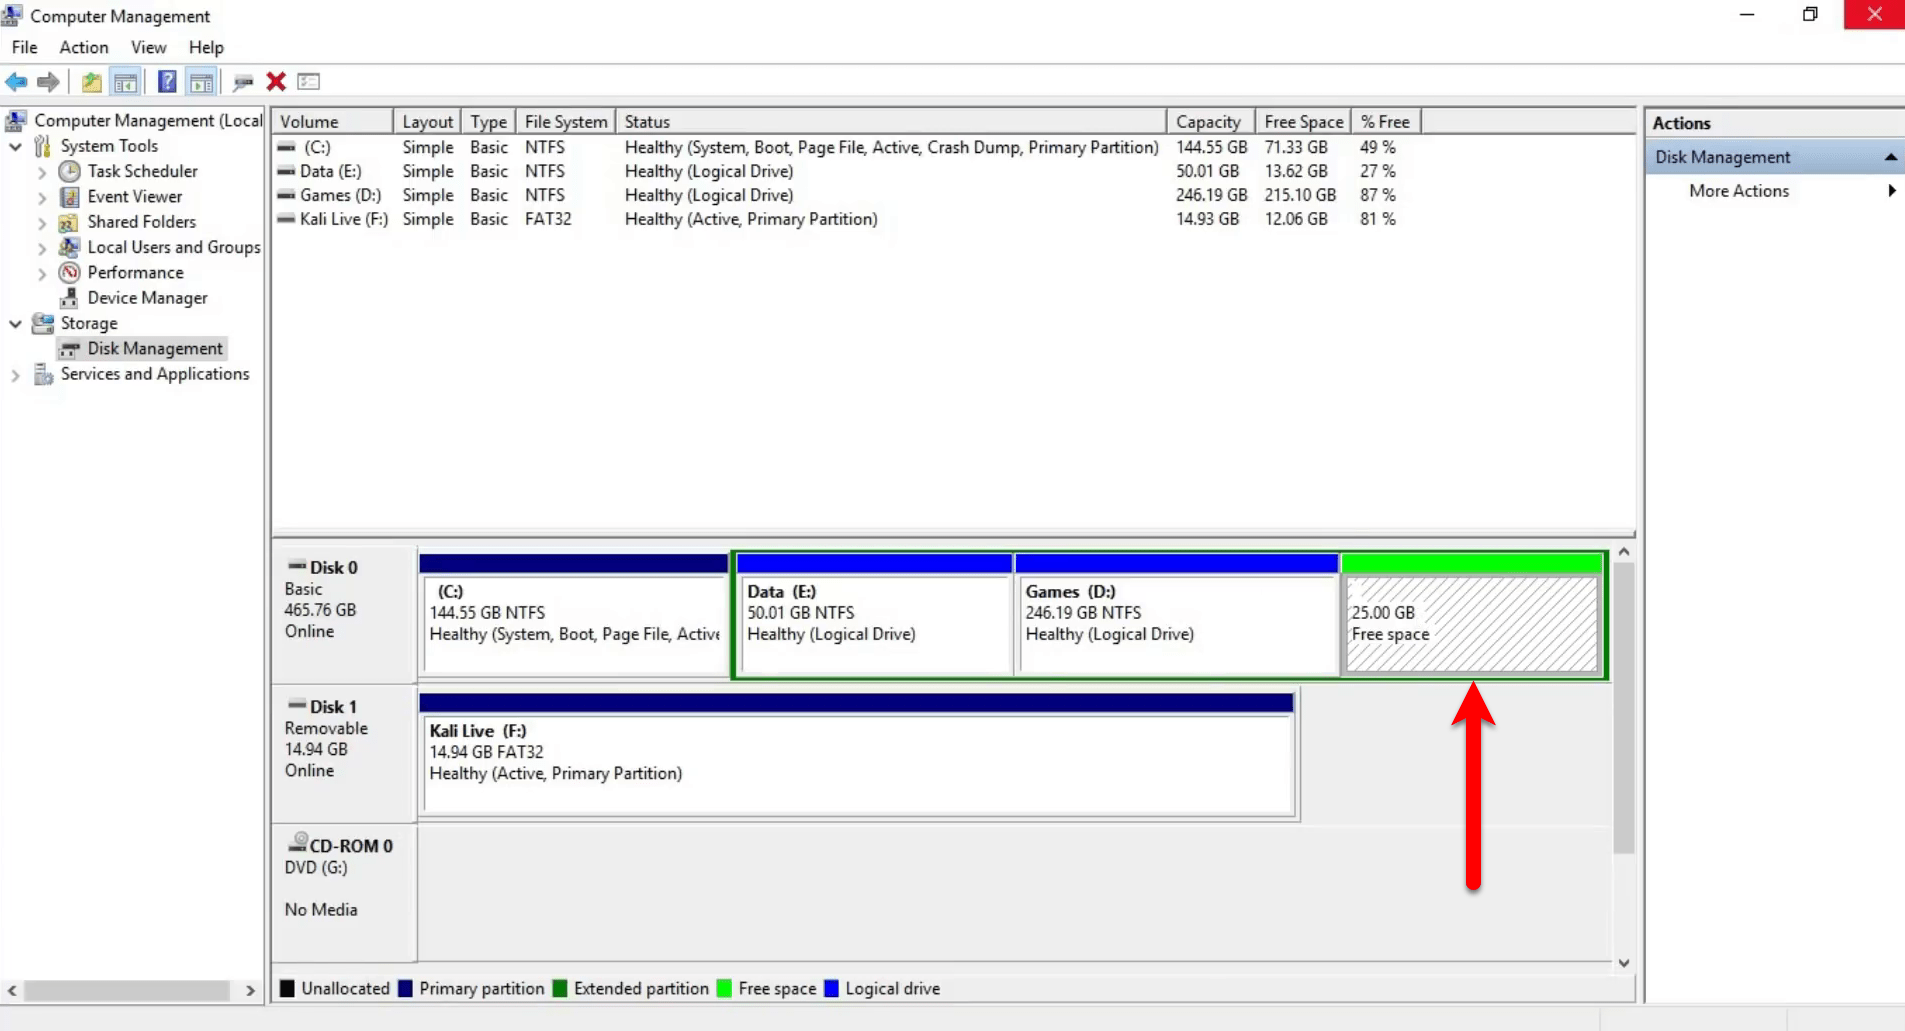
When the volume shrank be sure that the volume should be created as a free space.
Dual Boot Kali Linux with Windows 10
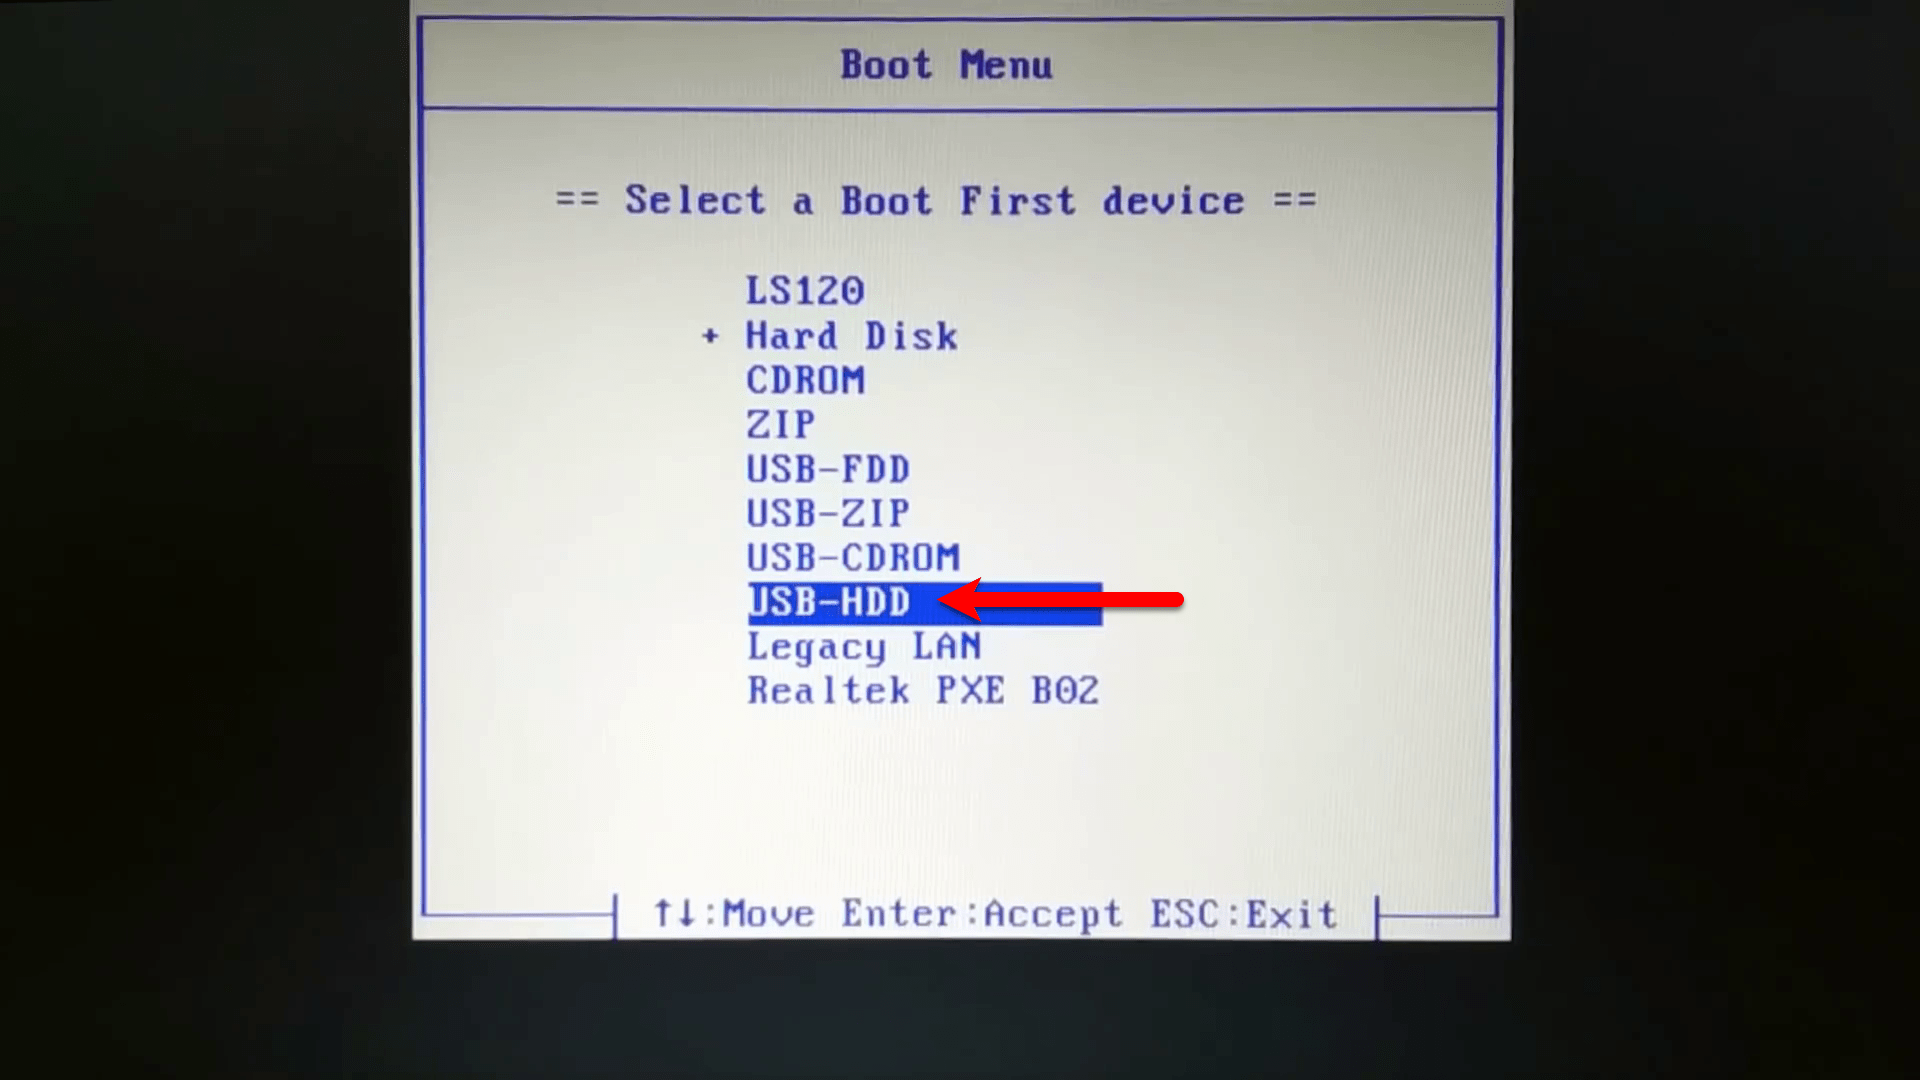
It’s time to perform a clean installation of Kali Linux alongside Windows 10. Everything is ready the USB bootable drive is ready, and the volume is created. Therefore, let’s begin the installation of it. To do that restart your computer. When your computer restarted press and hold the Boot Menu key, while the boot option appeared select the option (Boot from USB Drive) and press enter.
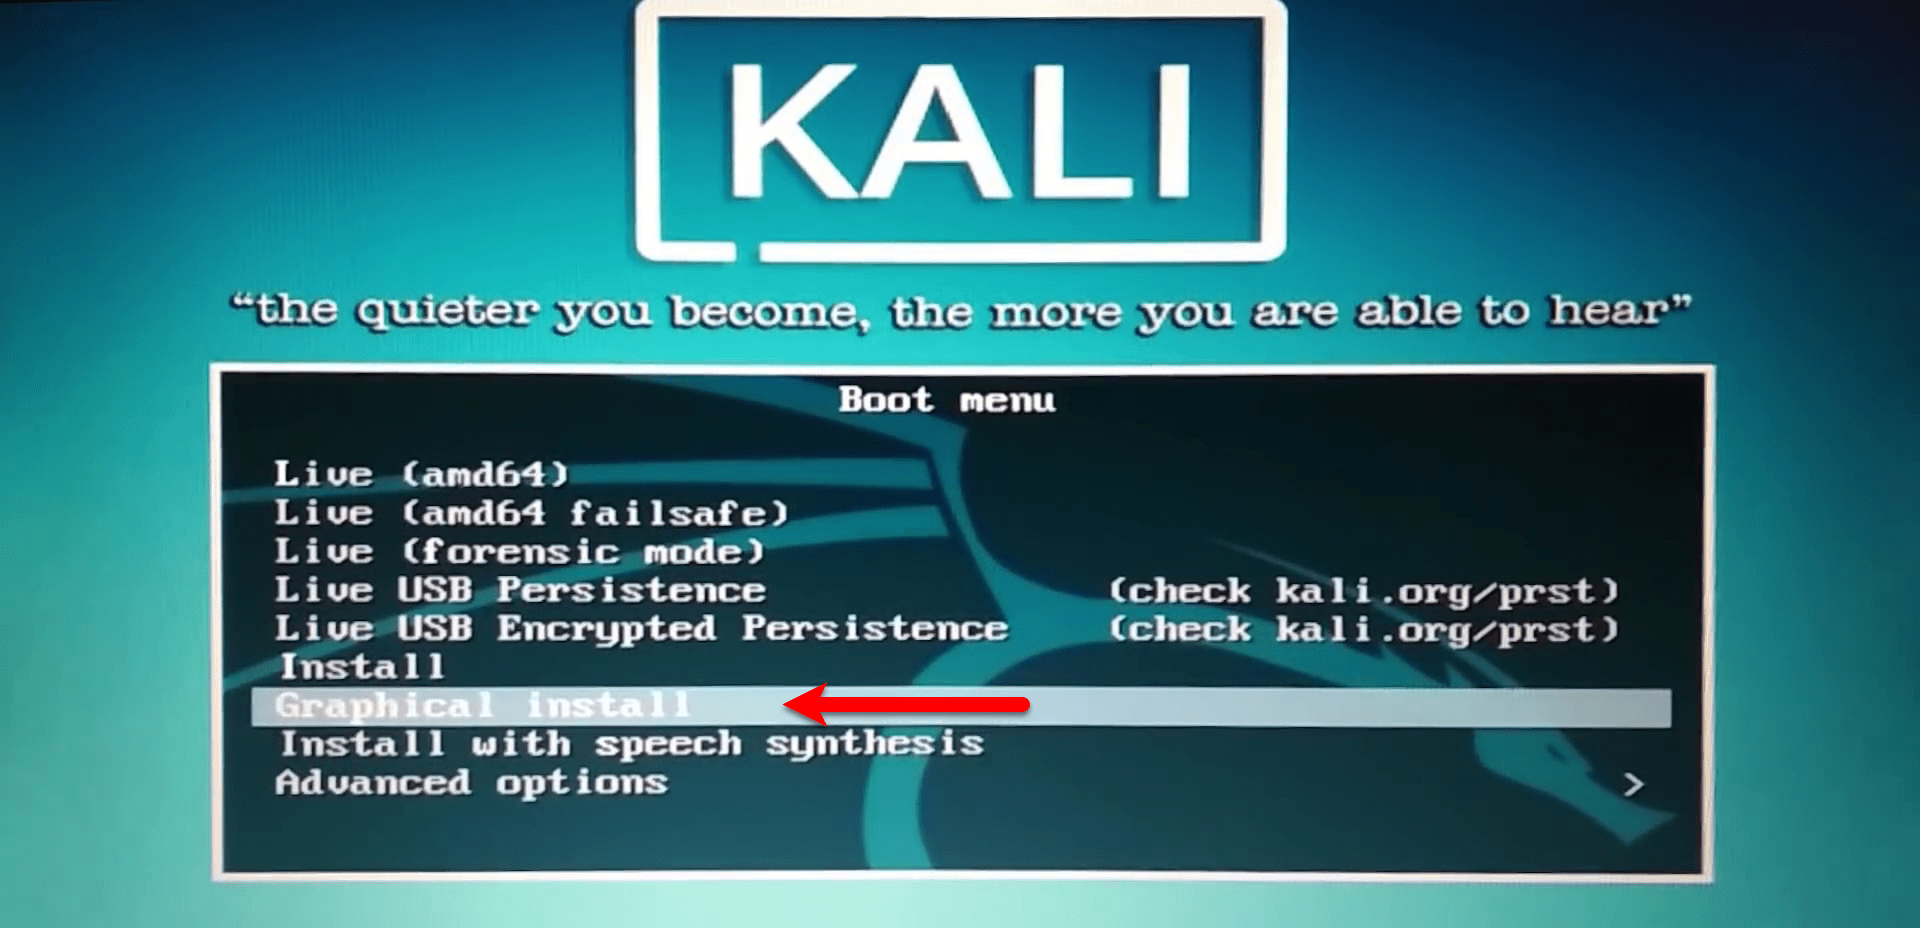
When the USB drive boot to Kali Linux setup, select the (Graphical Install) and press enter.
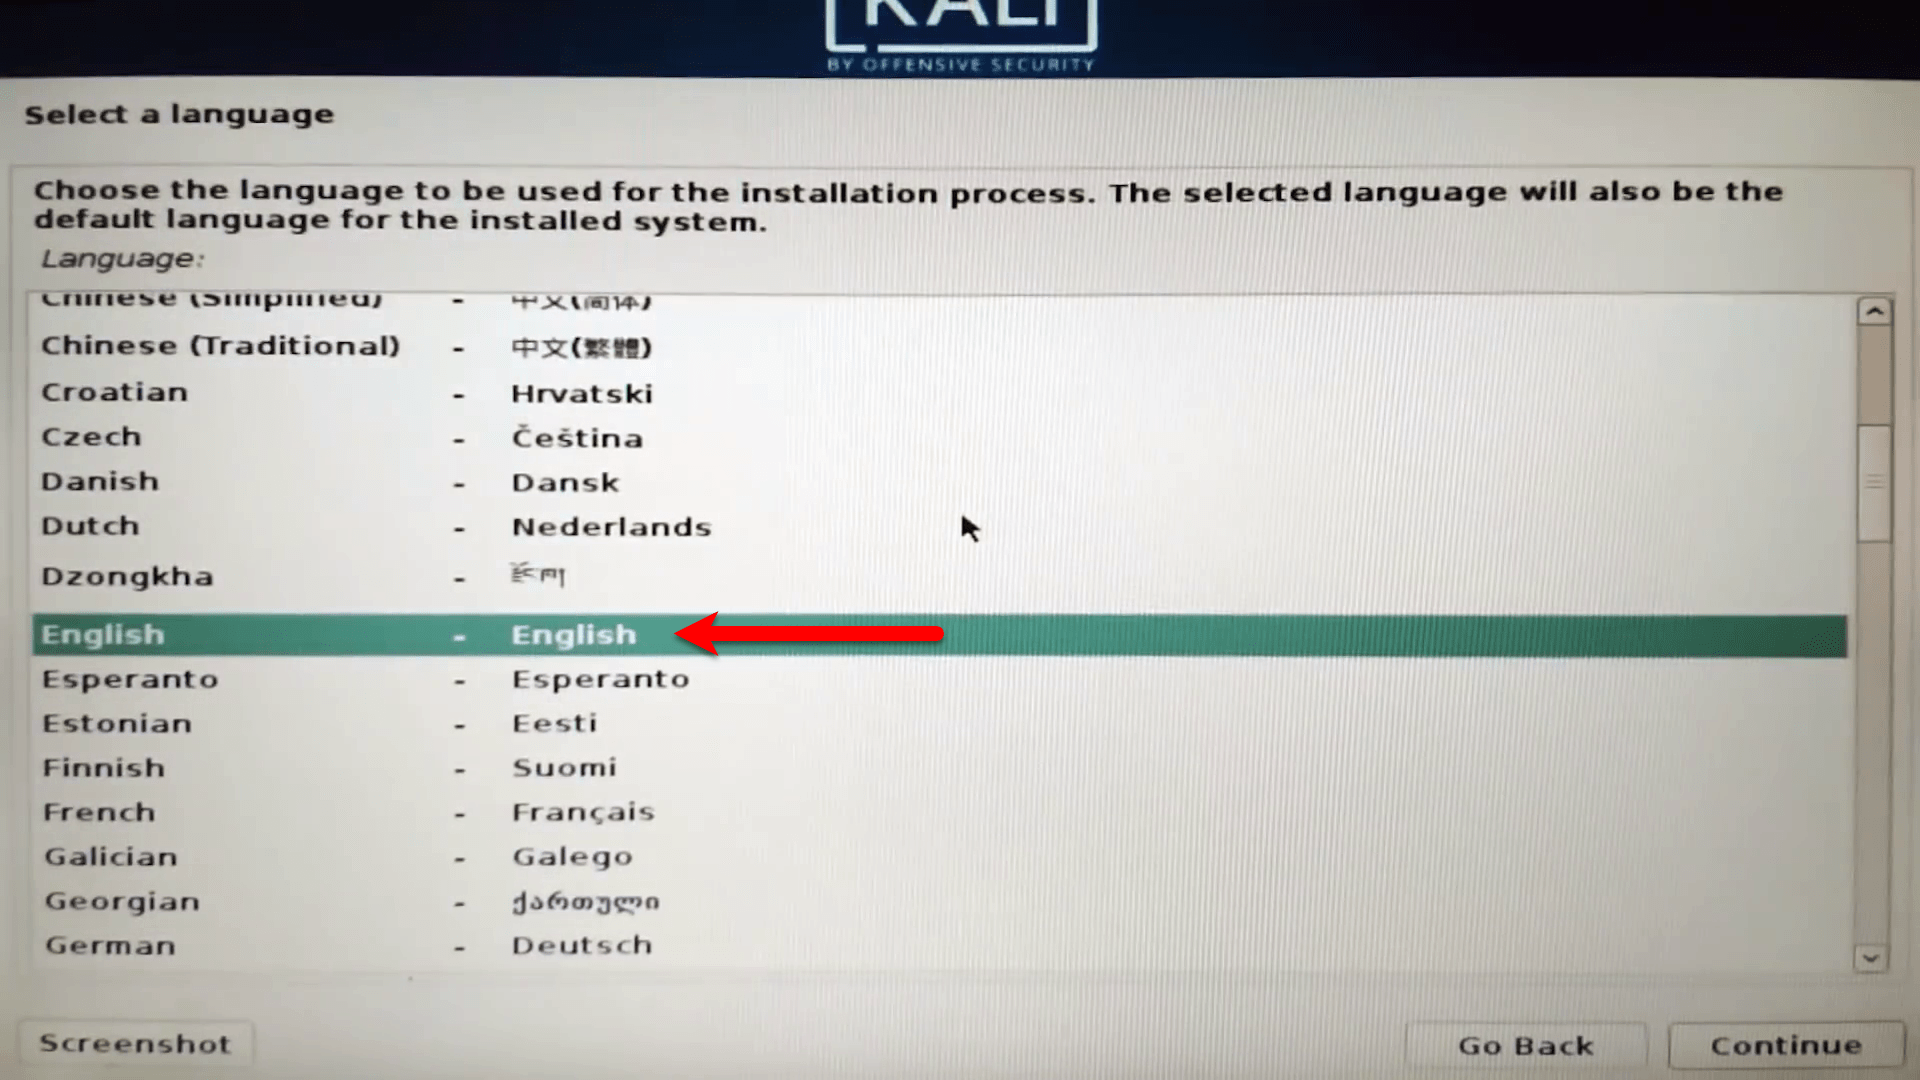
Select your language then click continue, On the next screen select your location where you live and click continue. Again in the next screen configure the keyboard layout and click continue.
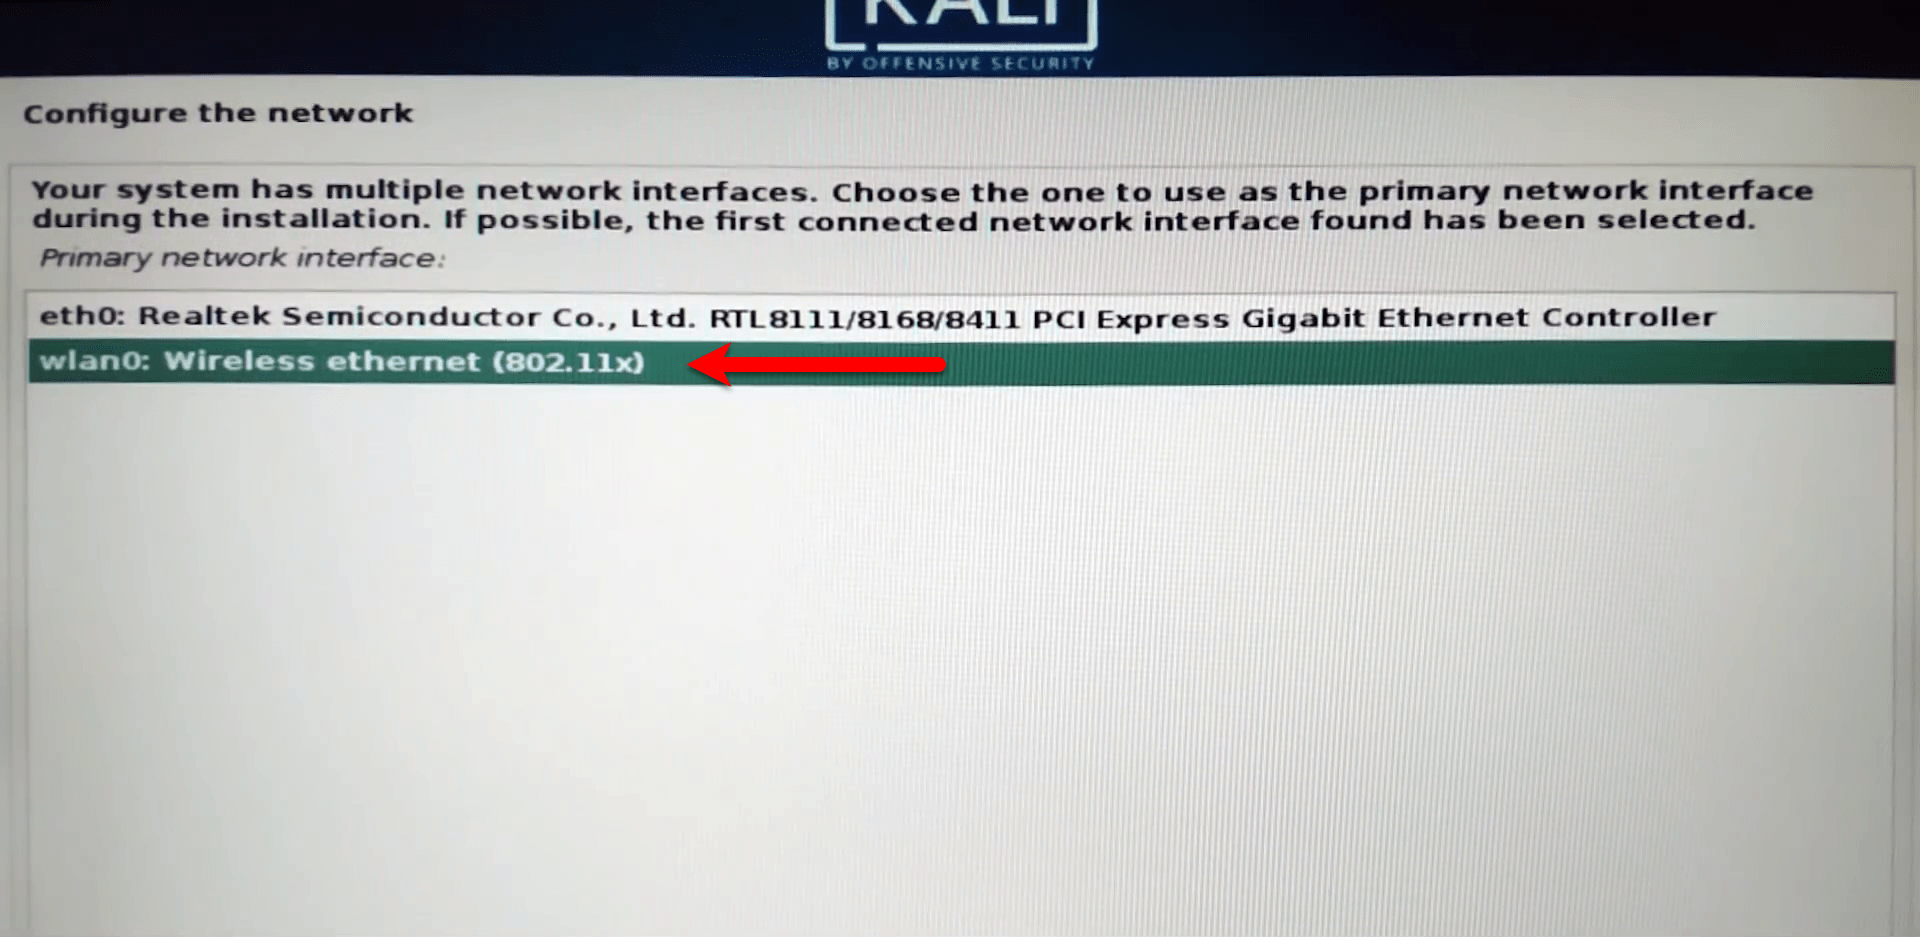
Configure the network, your system has multiple network interfaces. Choose the one to use as the primary network interface during the installation. If possible, the first connected network interface found has been selected. So, select the network for the configuration and click continue.
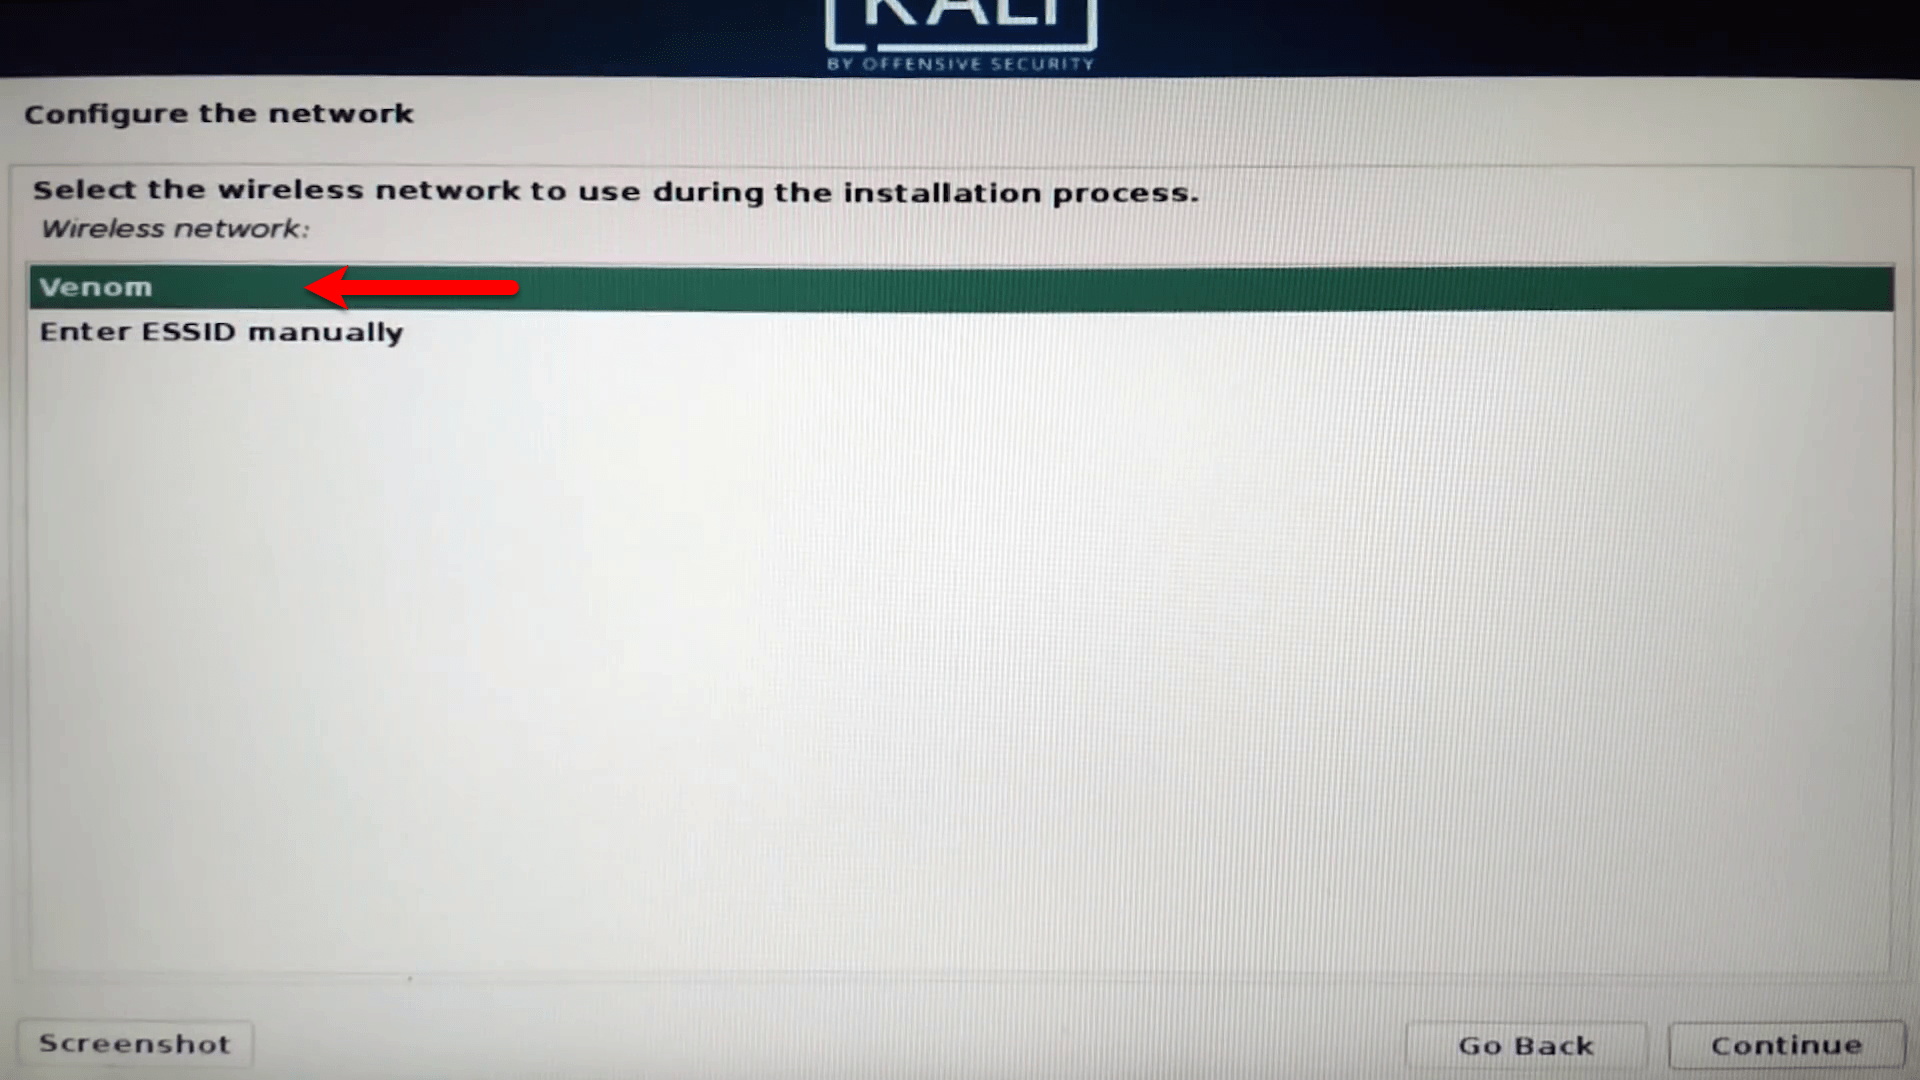
Select the wireless network to use during the installation process, once selected click continue.
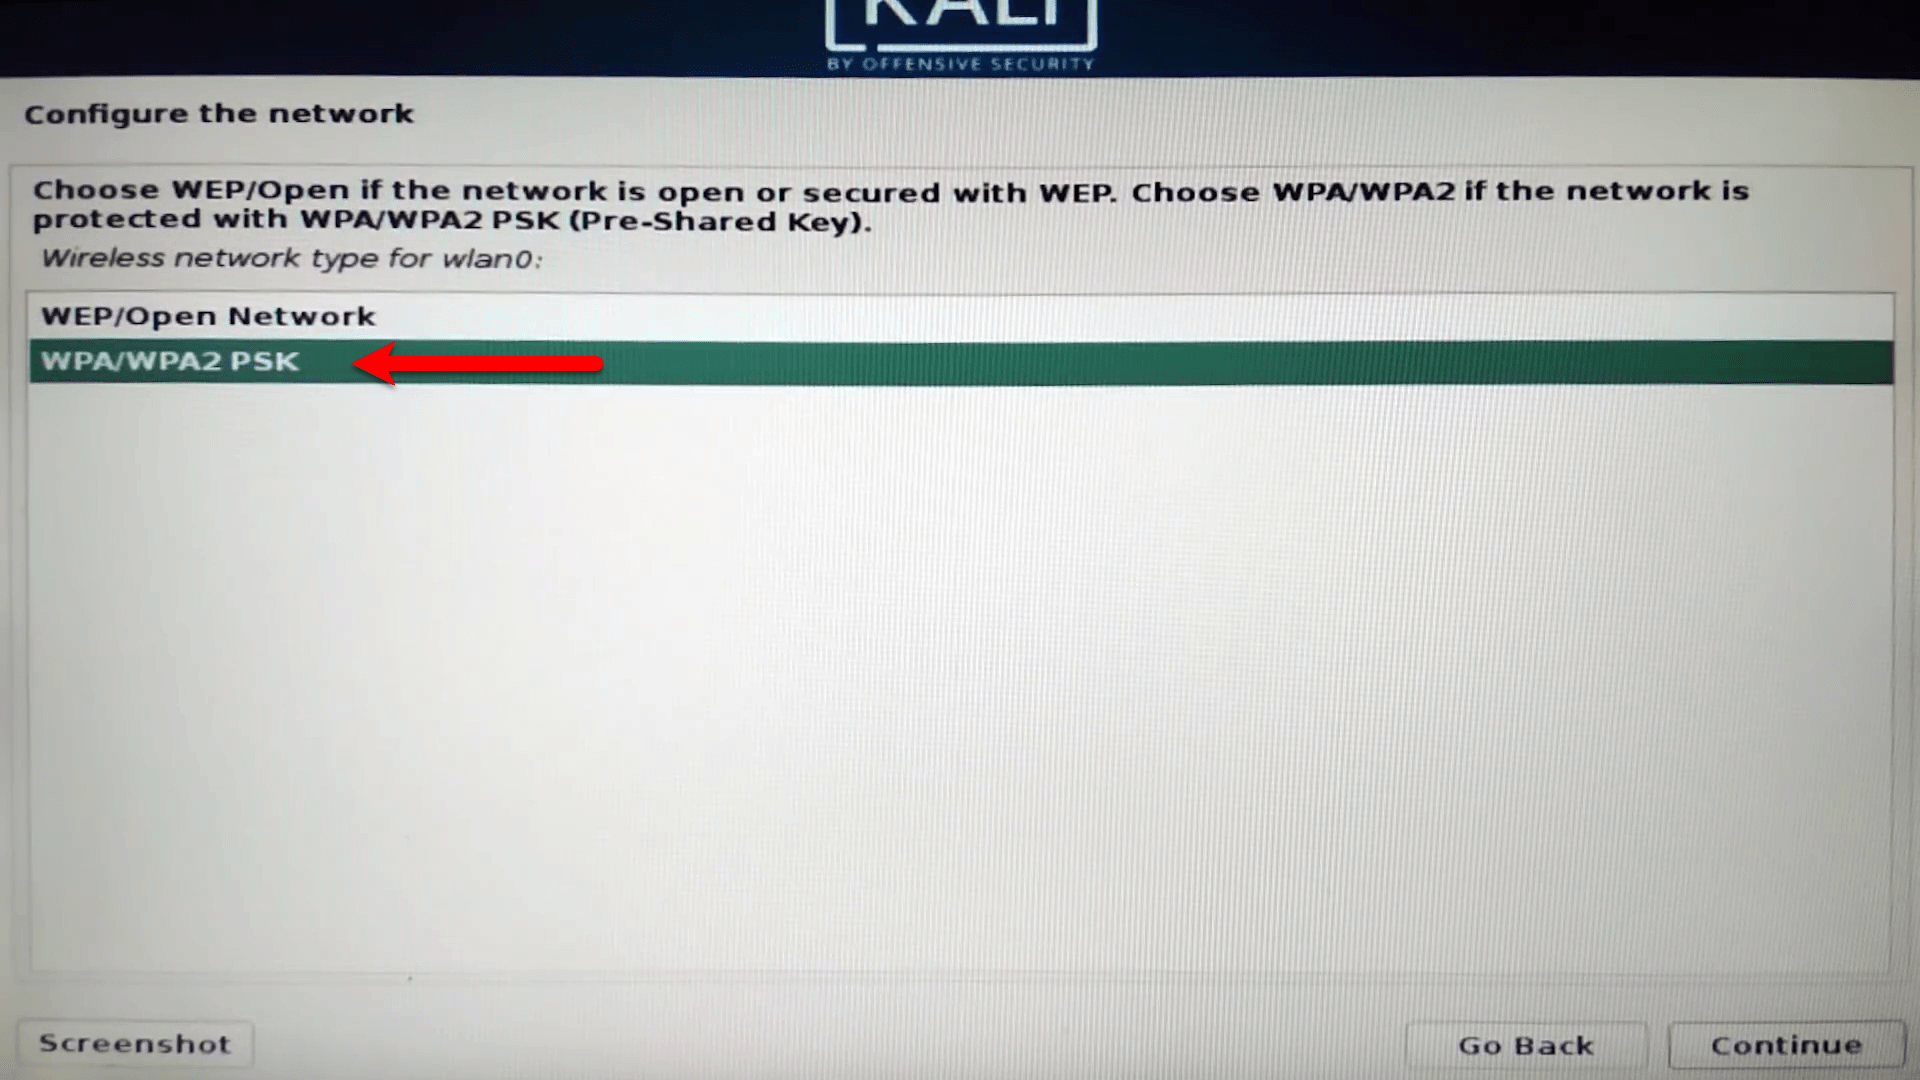
Choose WEP/Open if the network is open or secured with WEP. Choose WPA/WPA2 if the network is protected with WPA/WPA2 PSK (Pre-shared Key). The recommended option is WPA/WPA2 PSK select that and click continue.
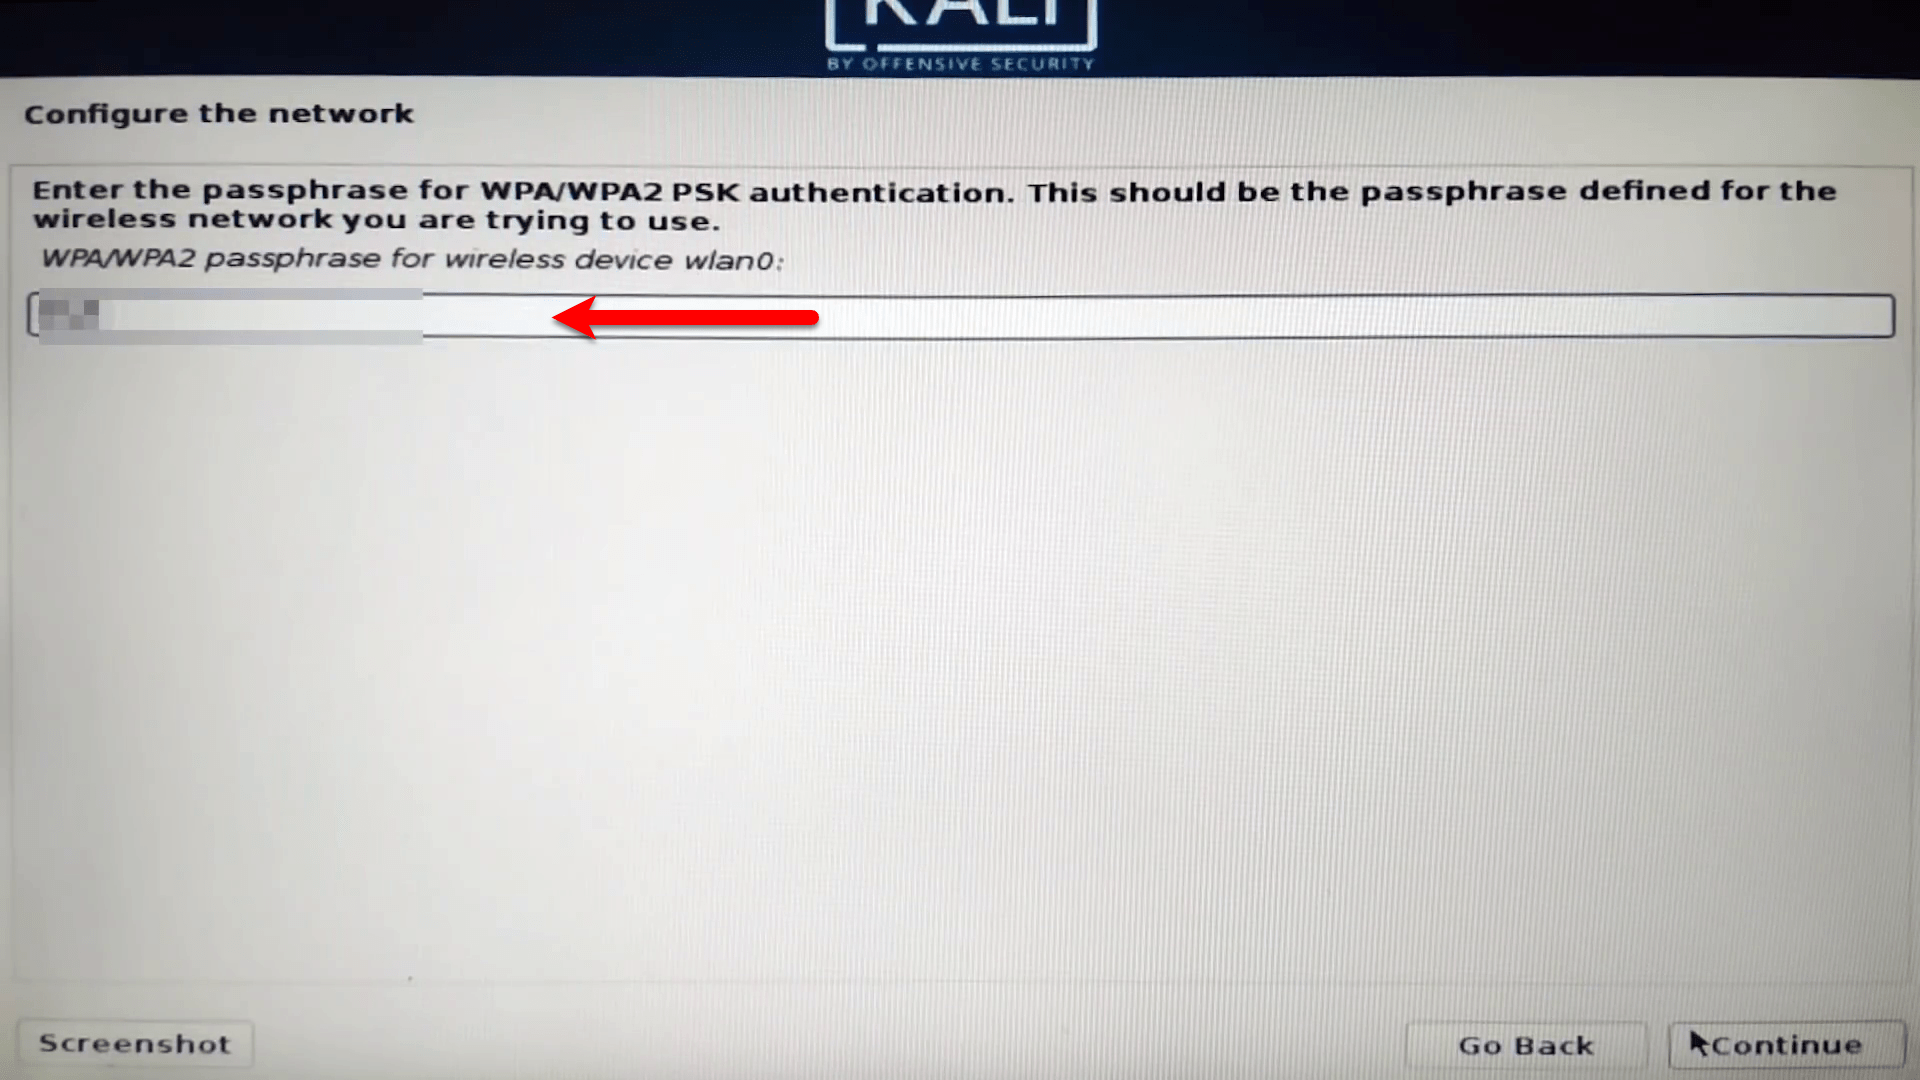
Enter the passphrase for WPA/WPA2 PSK authentication, and click continue.
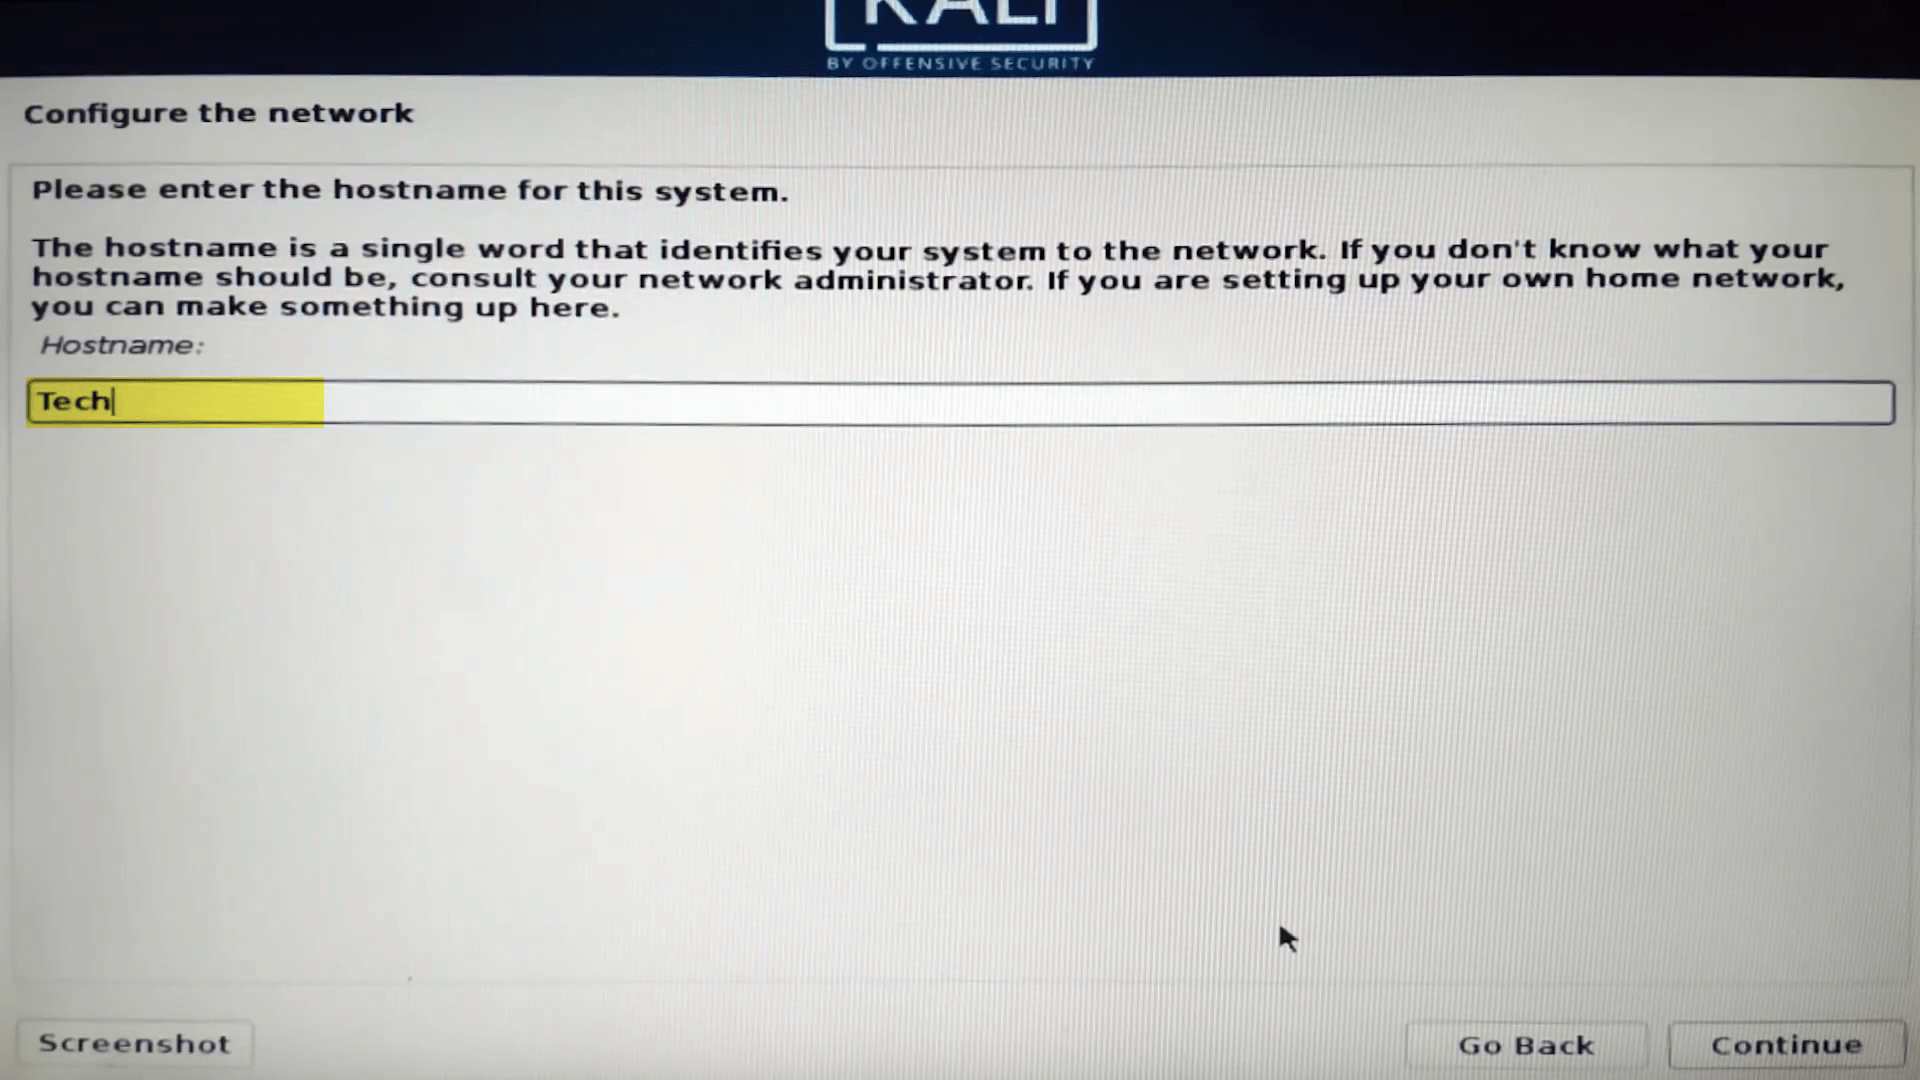
Please enter the hostname for this system. The hostname is a single word that identifies your system to the network. If you don’t know what your hostname should be, consult your network administrator. If you are setting up your own home network, you can make something up there.
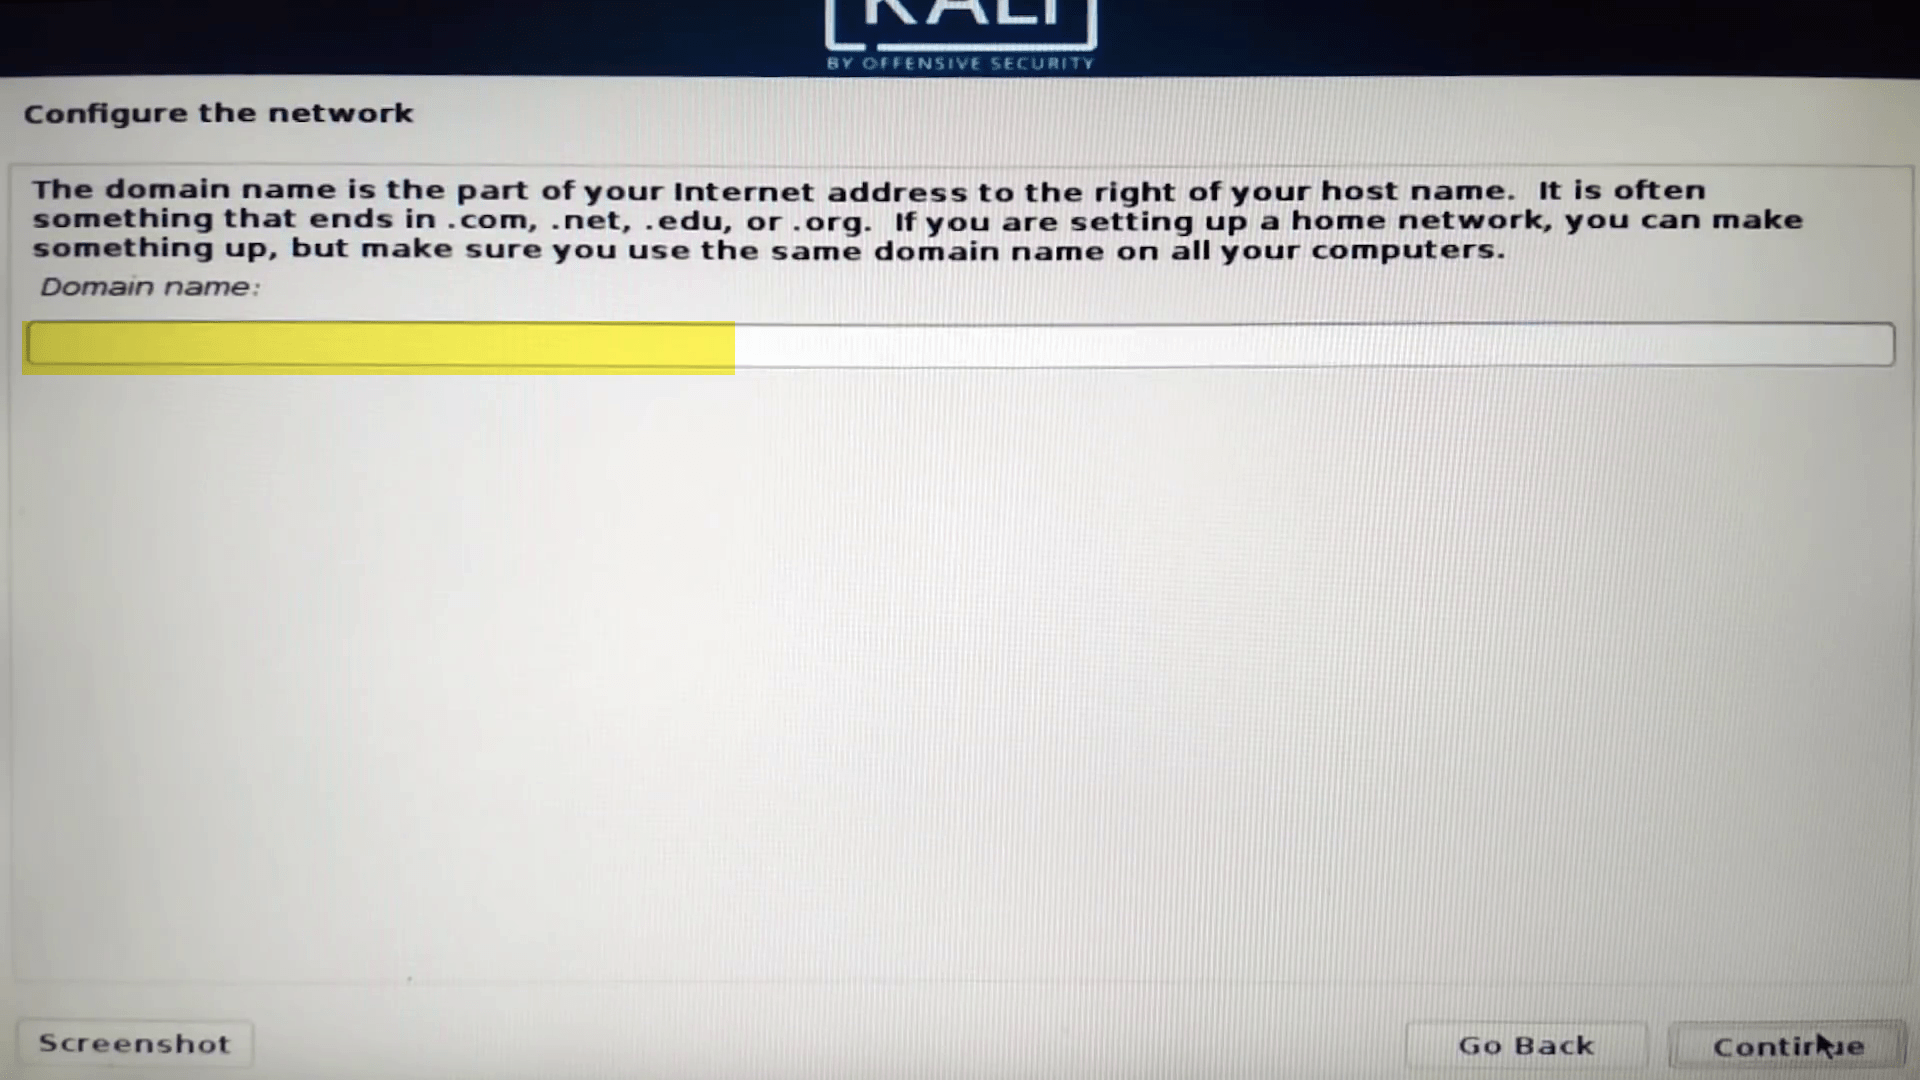
Please enter the domain name, the domain name is the part of your internet address to the right of your hostname. It is often something that ends in .com .net…
Once you reached here, you will be required to create a password. Remember a good password includes a mixture of letters, numbers, and punctuation and should be changed at regular intervals.

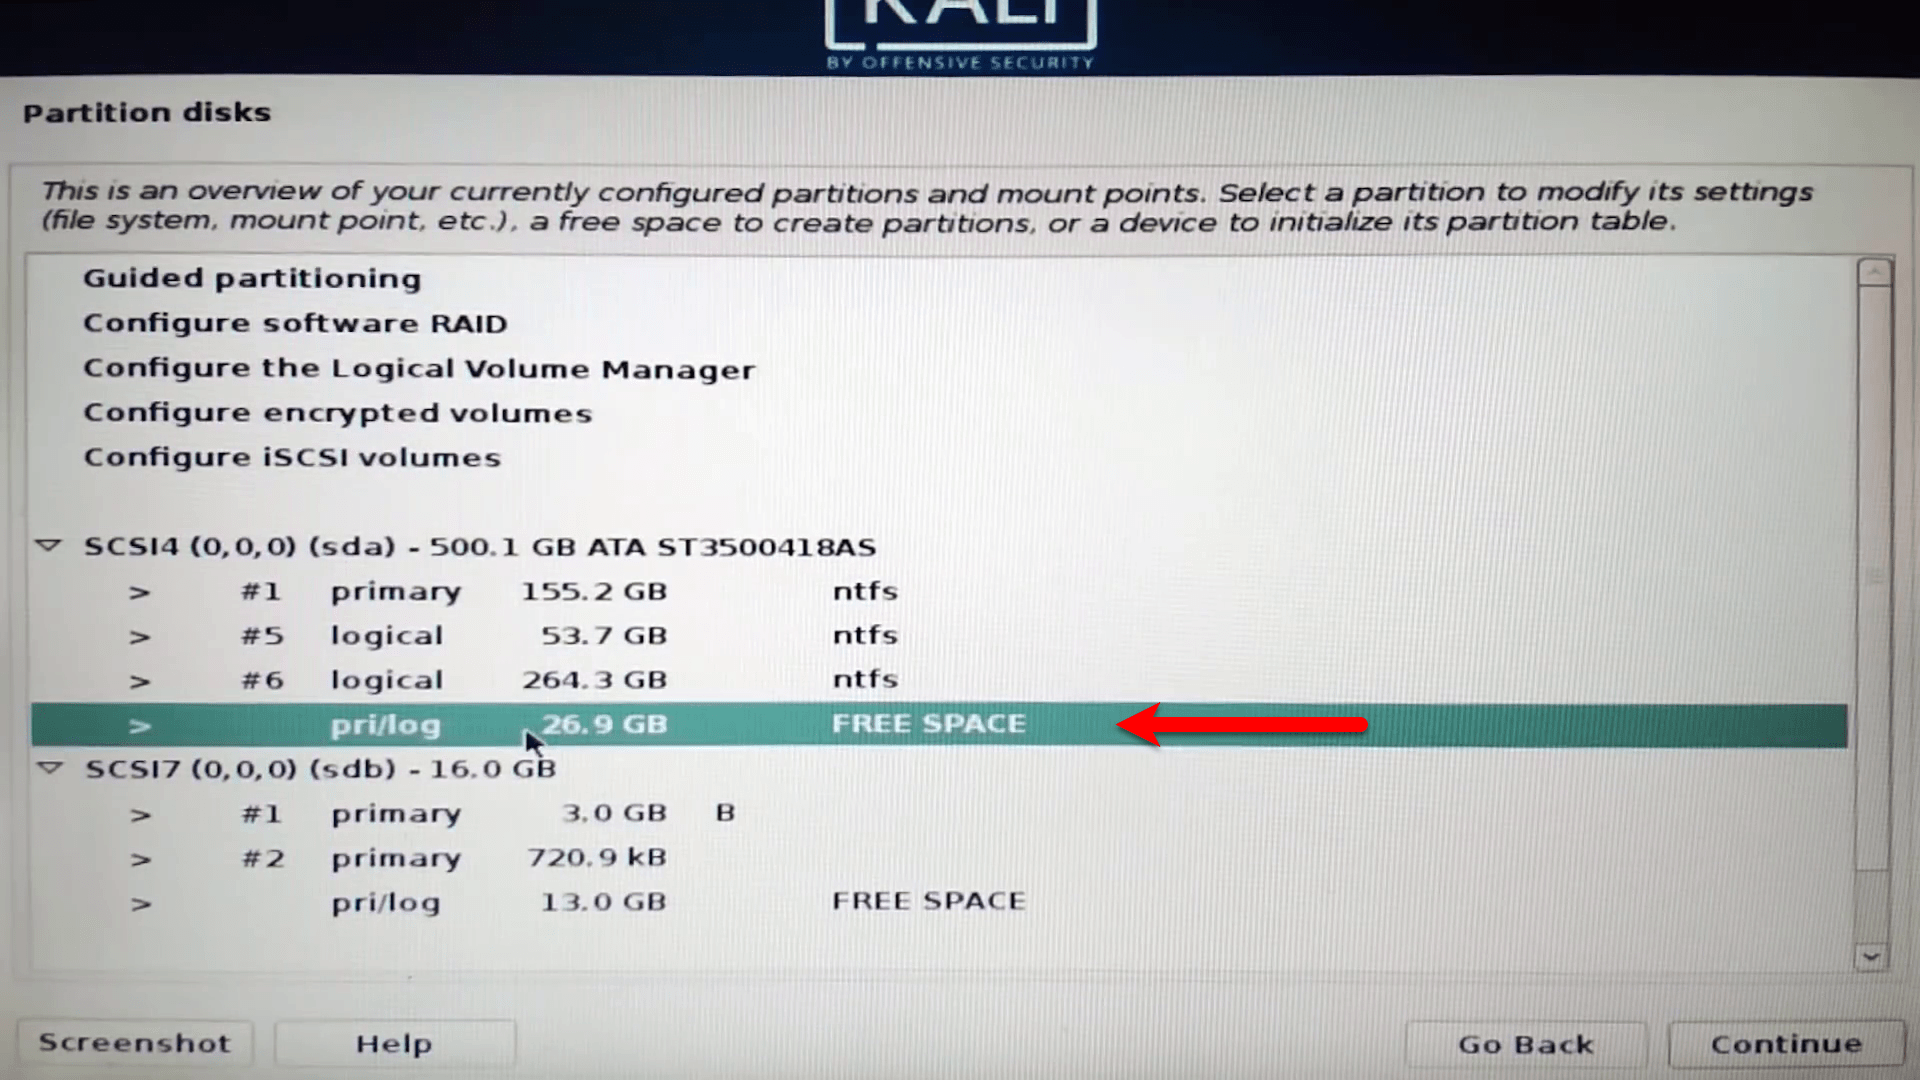
Now select the (Free space) which created for Kali Linux installation, and click continue.
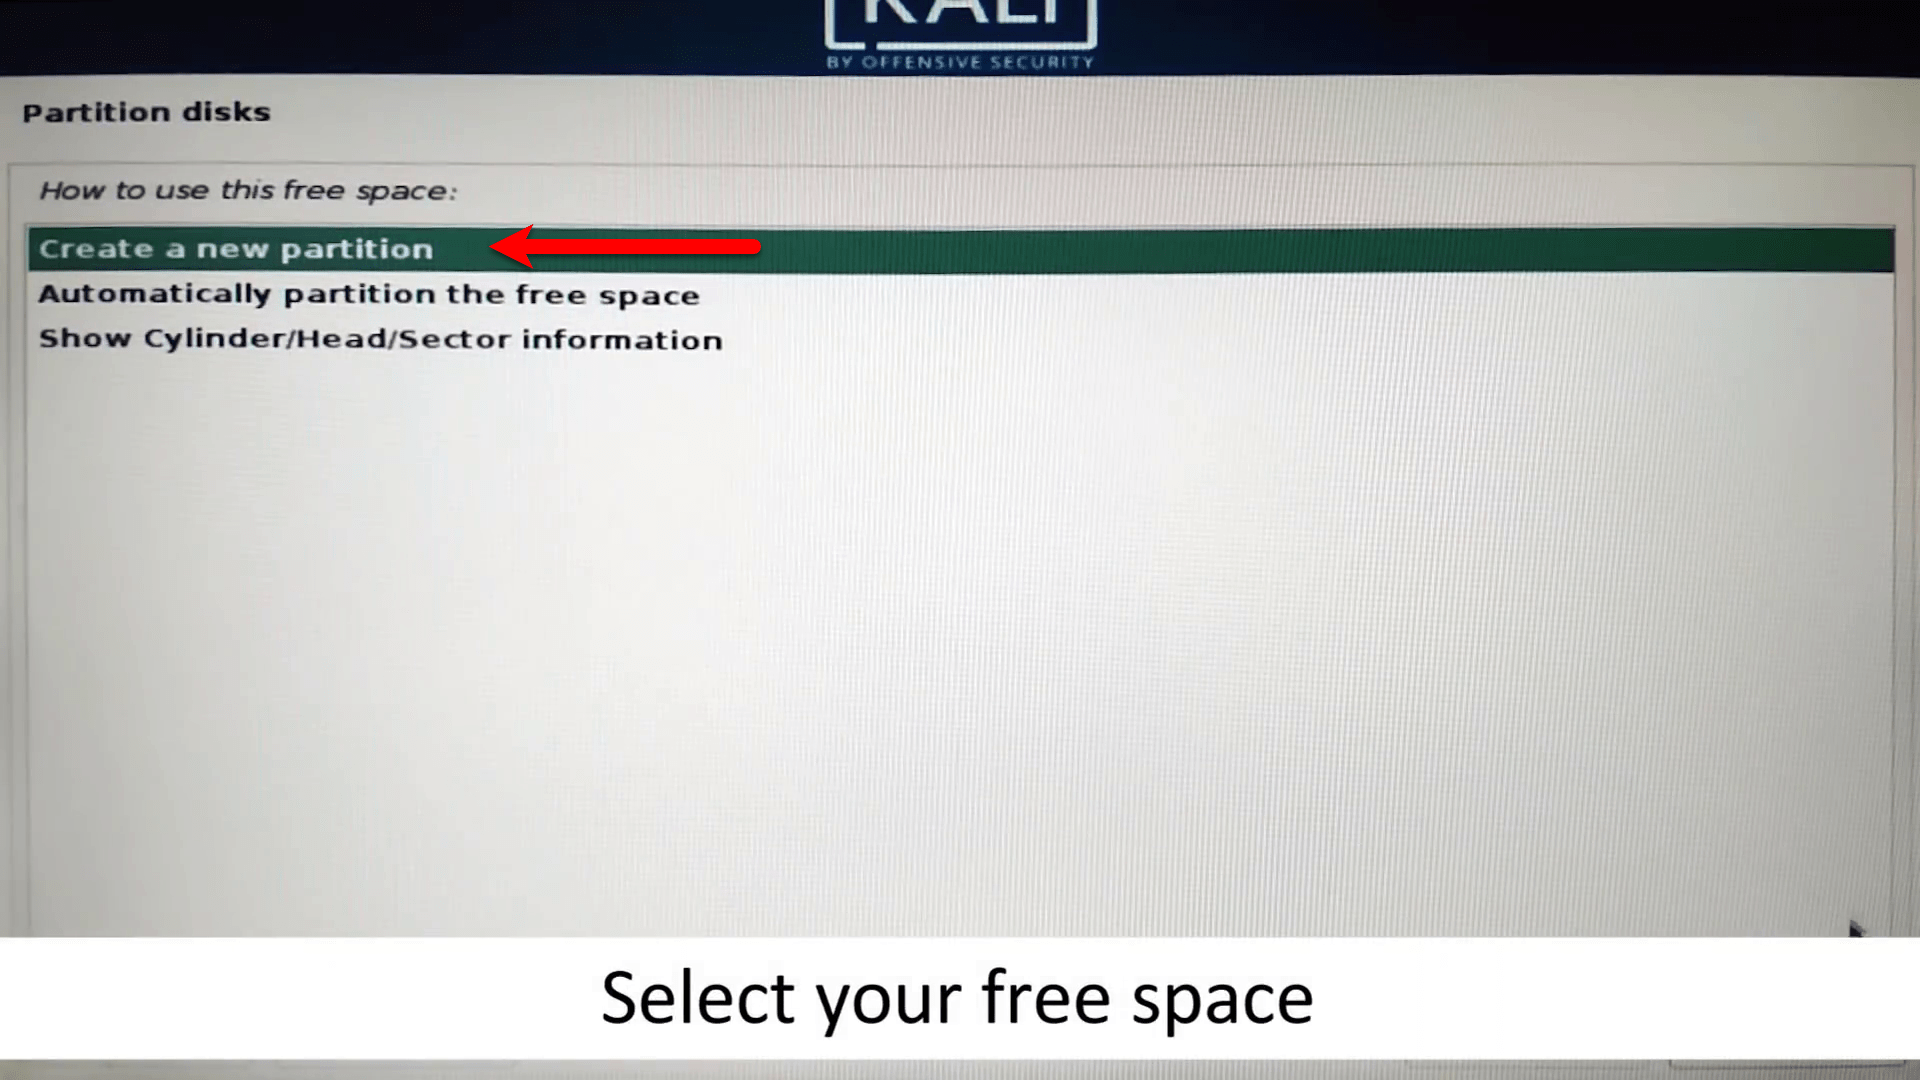
Select the option, create a new partition, and click continue.
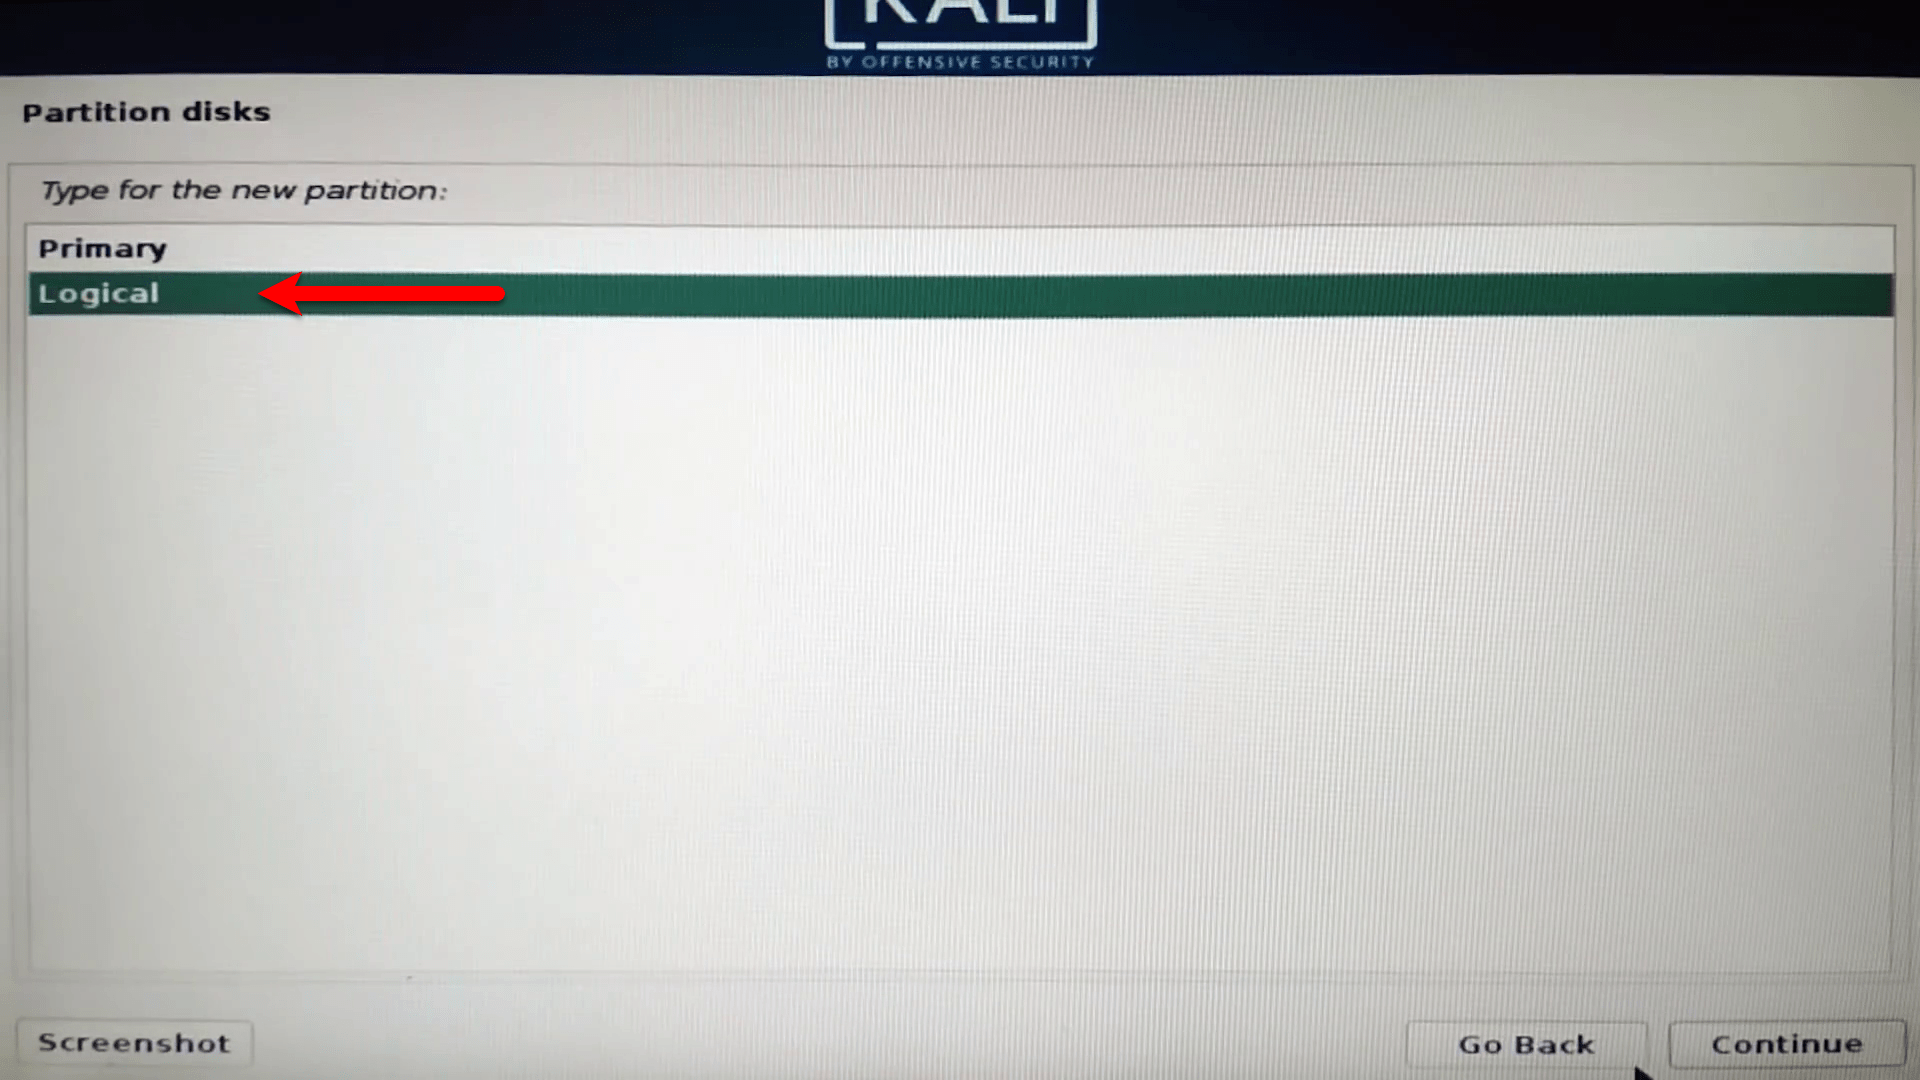
Select the logical option and click continue.
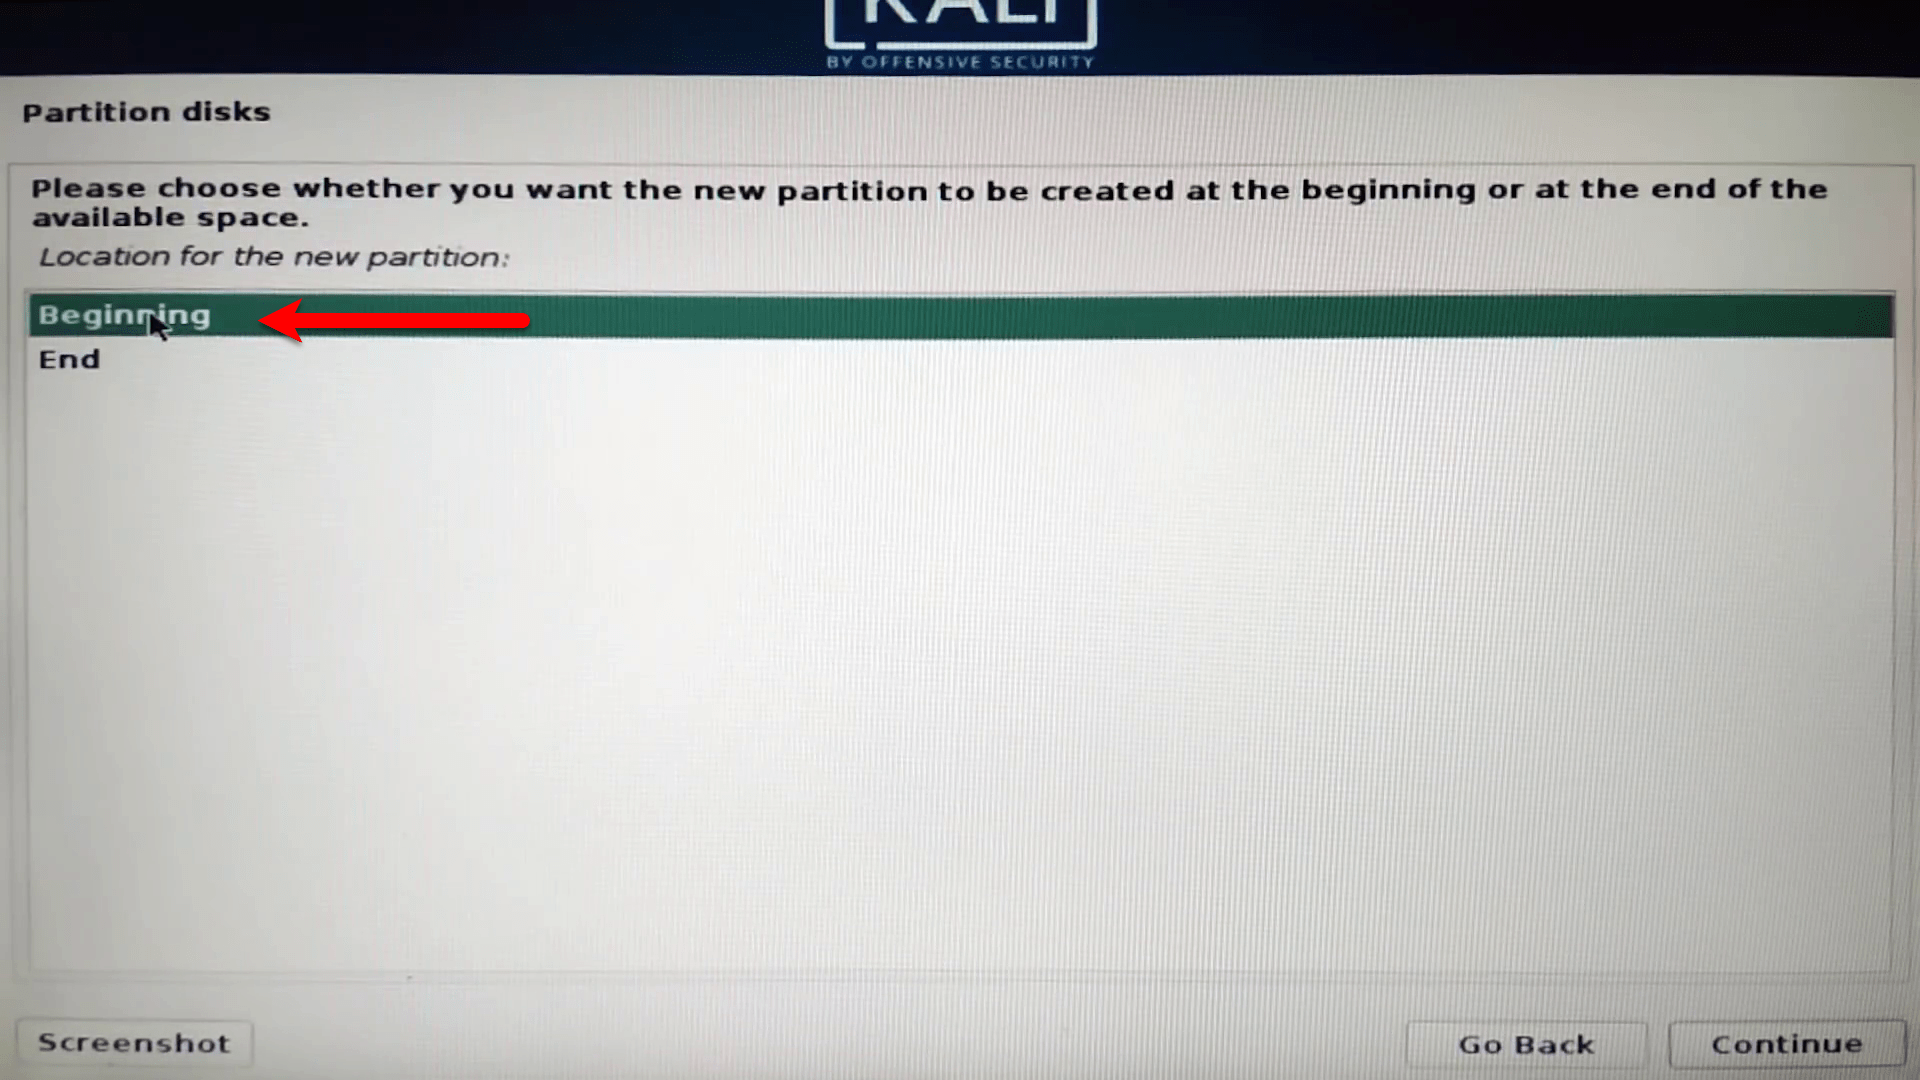
Please choose whether you want the new partition to be created at the beginning or at the end of the available space. So, select the Beginning option and click continue.
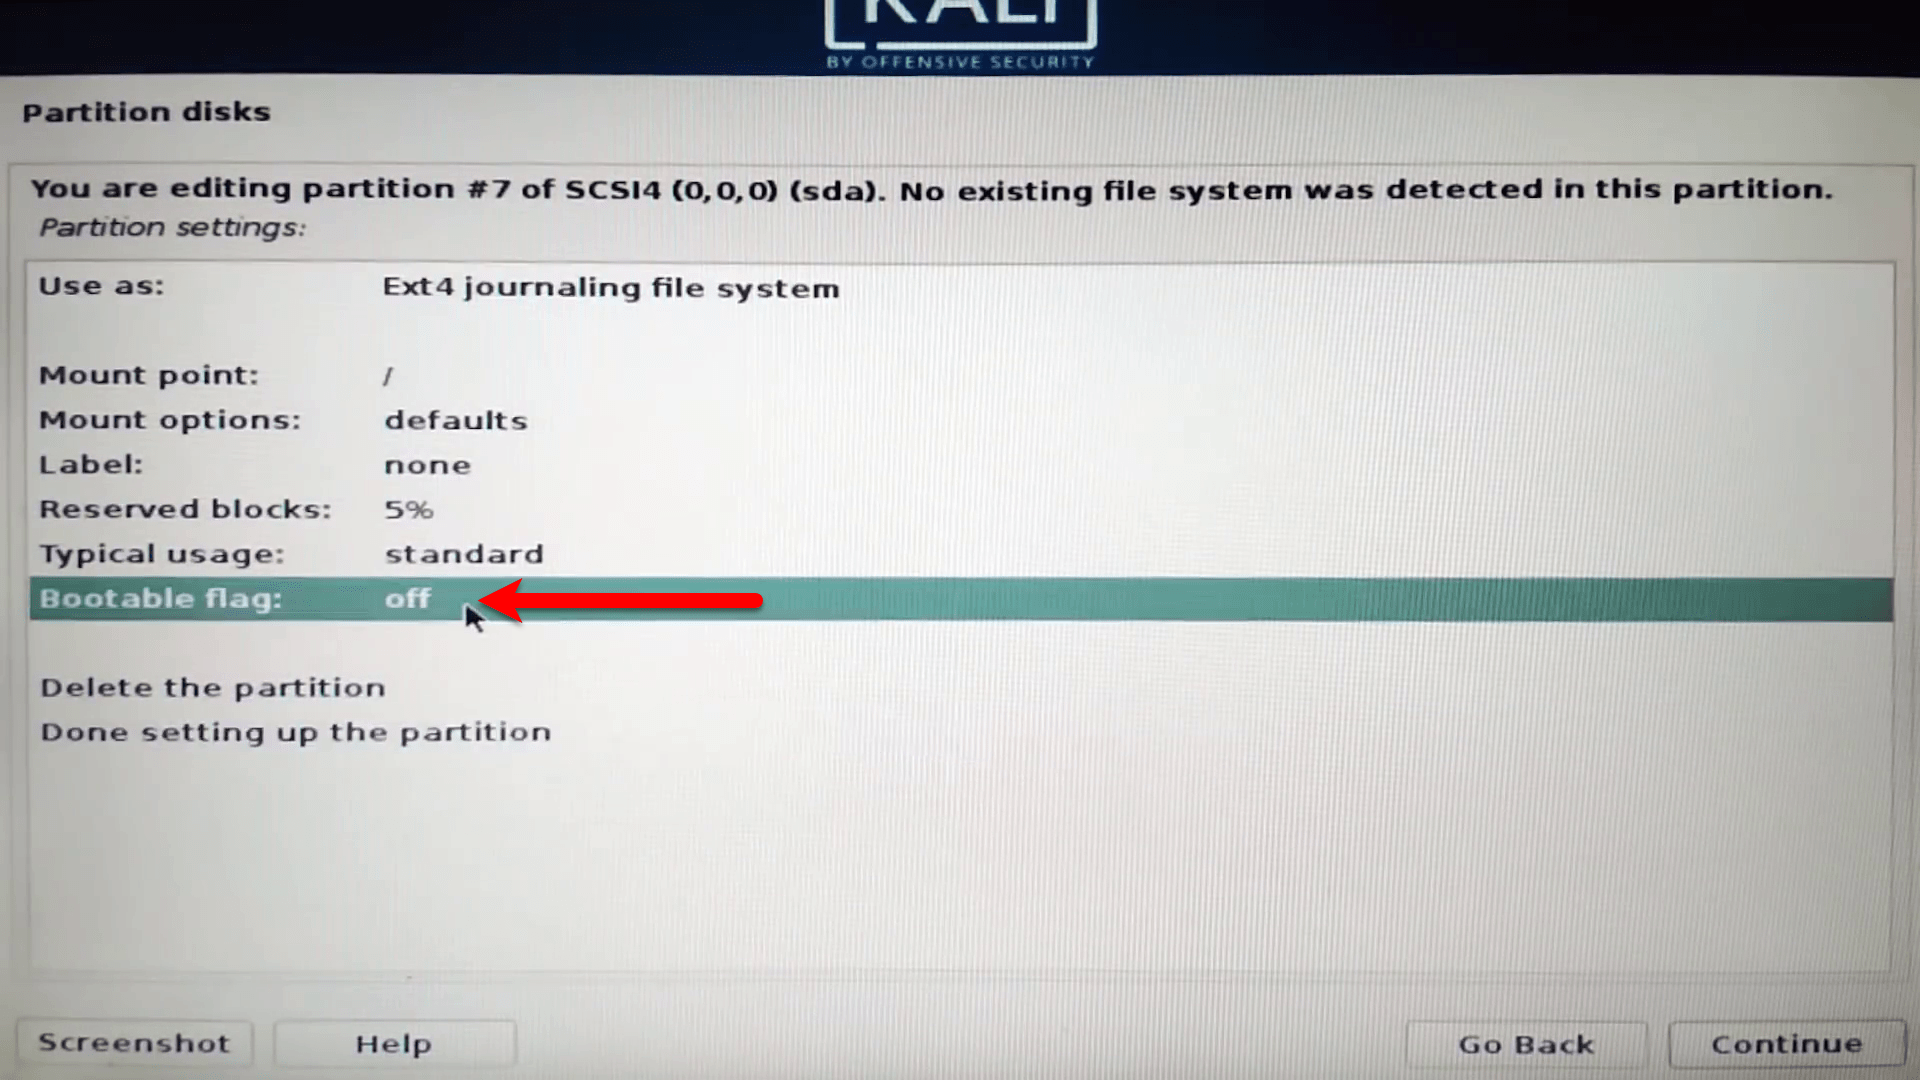
Once you created the drive for Kali Linux, then for dual booting you need to turn on the Bootable flag also. To do that double click on Bootable flag option.
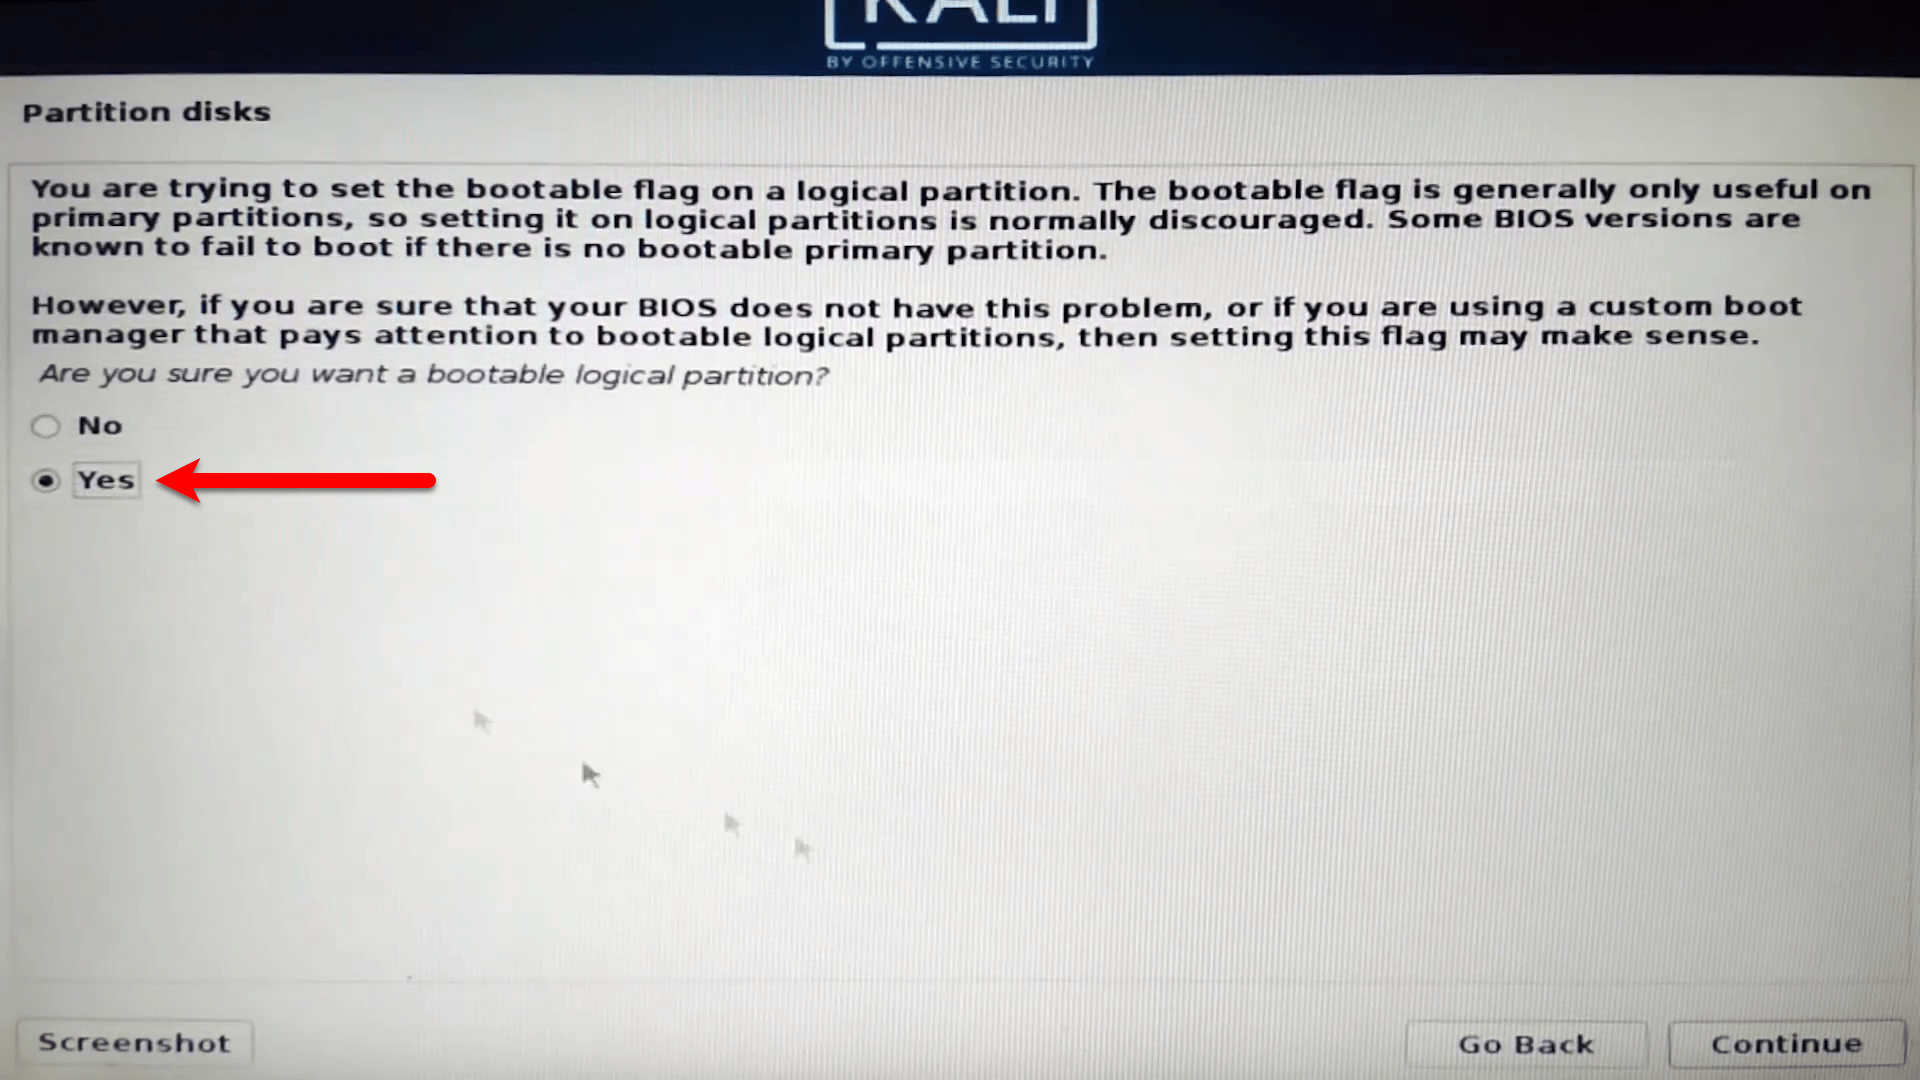
Now in this window, select (Yes) option and click continue to turn on the bootable flag.
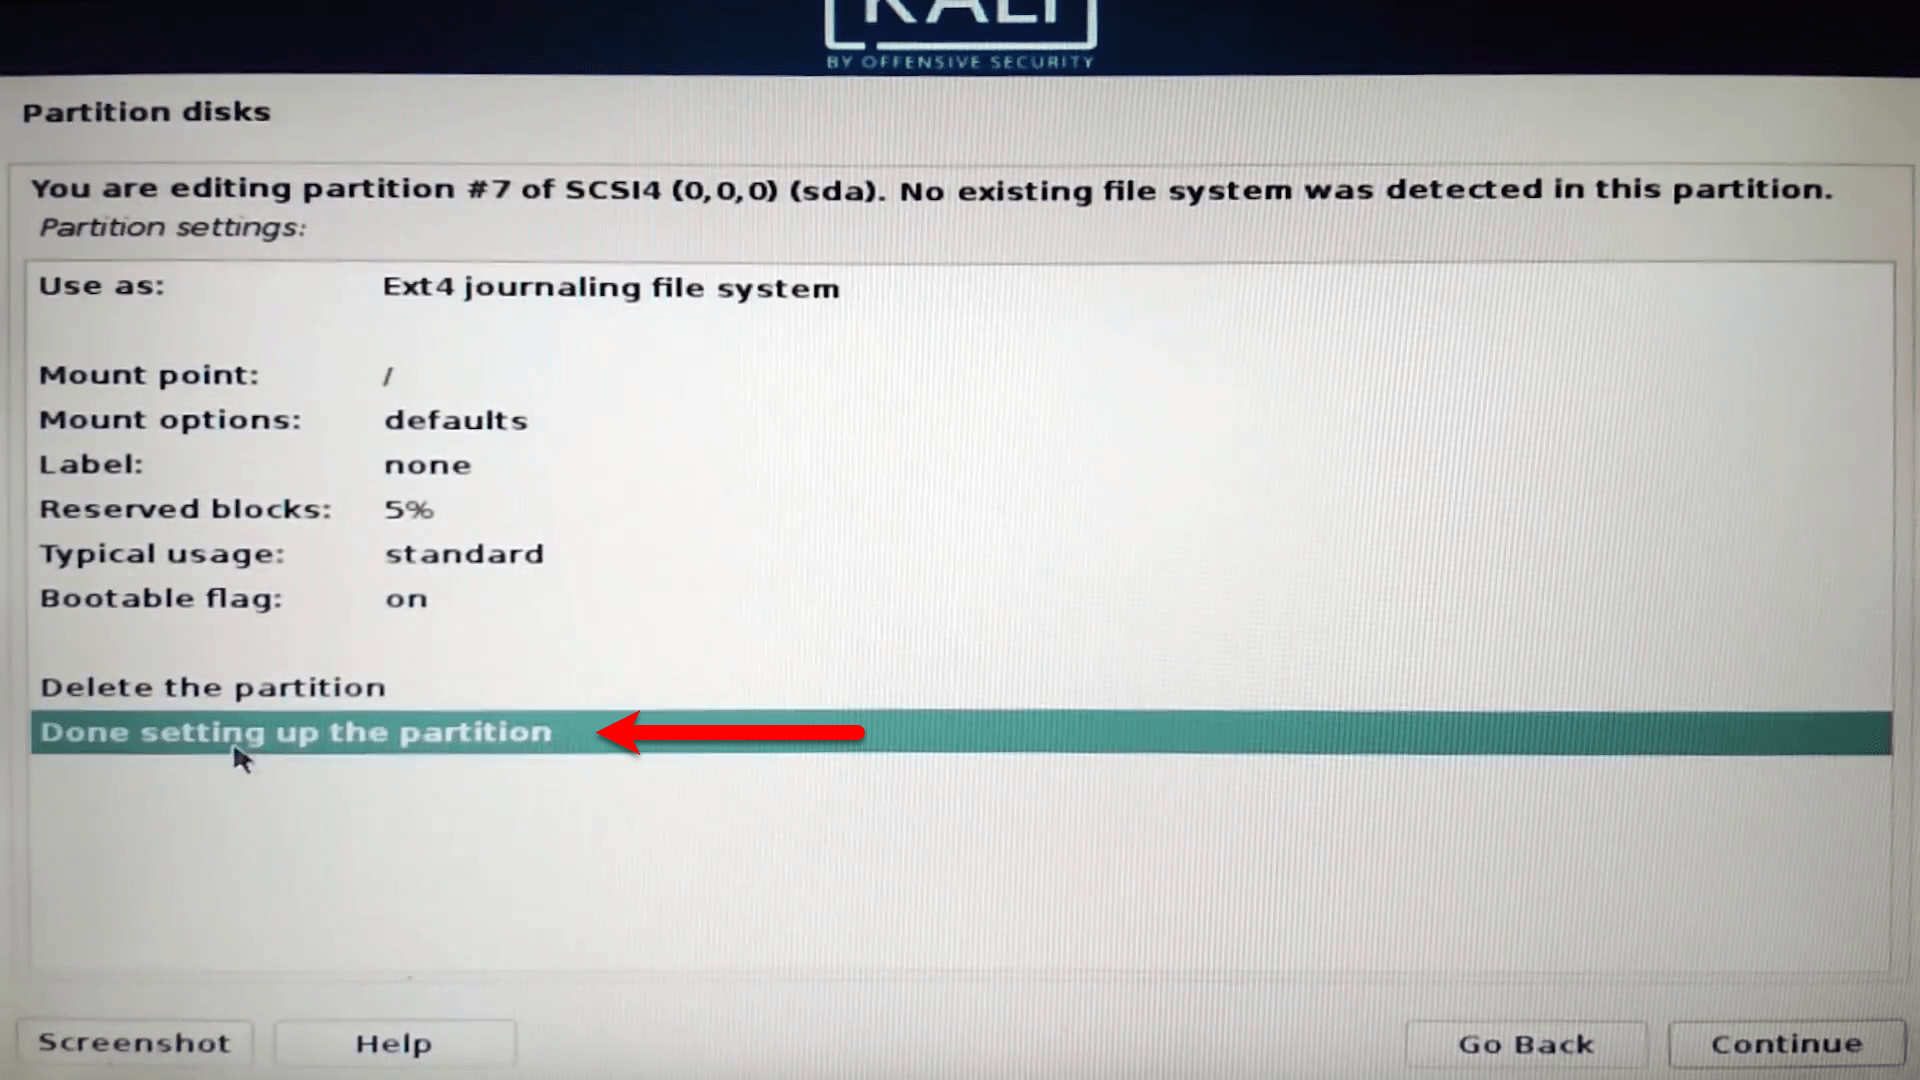
When the bootable flag turned on, select the (Done setting up the partition) option and click continue.
- Once all those steps are done, you need to create a Swap area. Double click on the free space drive.
- On the next screen select the option (Create a new partition) and click continue.
- 4GB free space is enough for the Swap area, but it depends on you how much you will choose. Once selected click continue.
- In the next window select (logical) option and click continue.
- Now select the Ext4 journaling file system and click continue.
- When you reached to this step select (Swap Area) option and click continue.
- While the Swap area created select (Done setting up the partition) option and click continue.
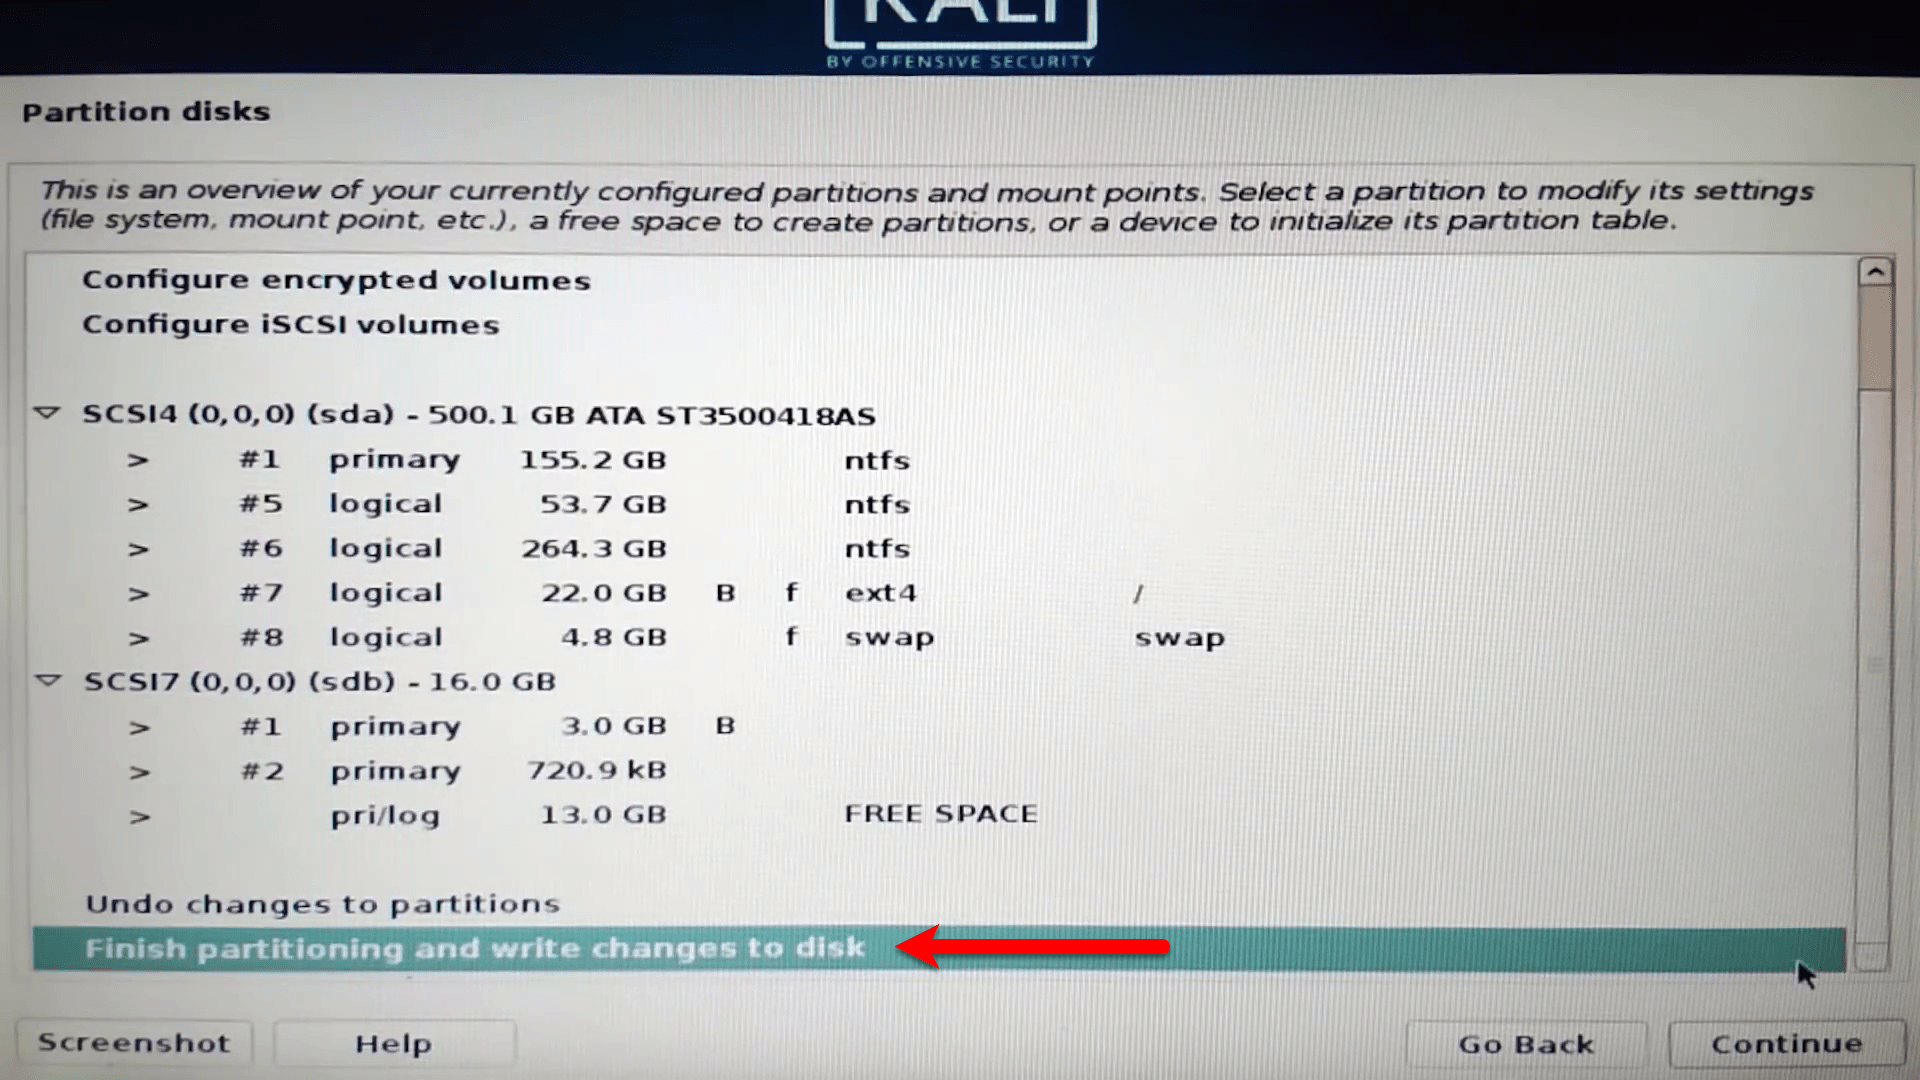
When everything gets ready, select the (Finish partitioning and write changes to disk) option and click continue.
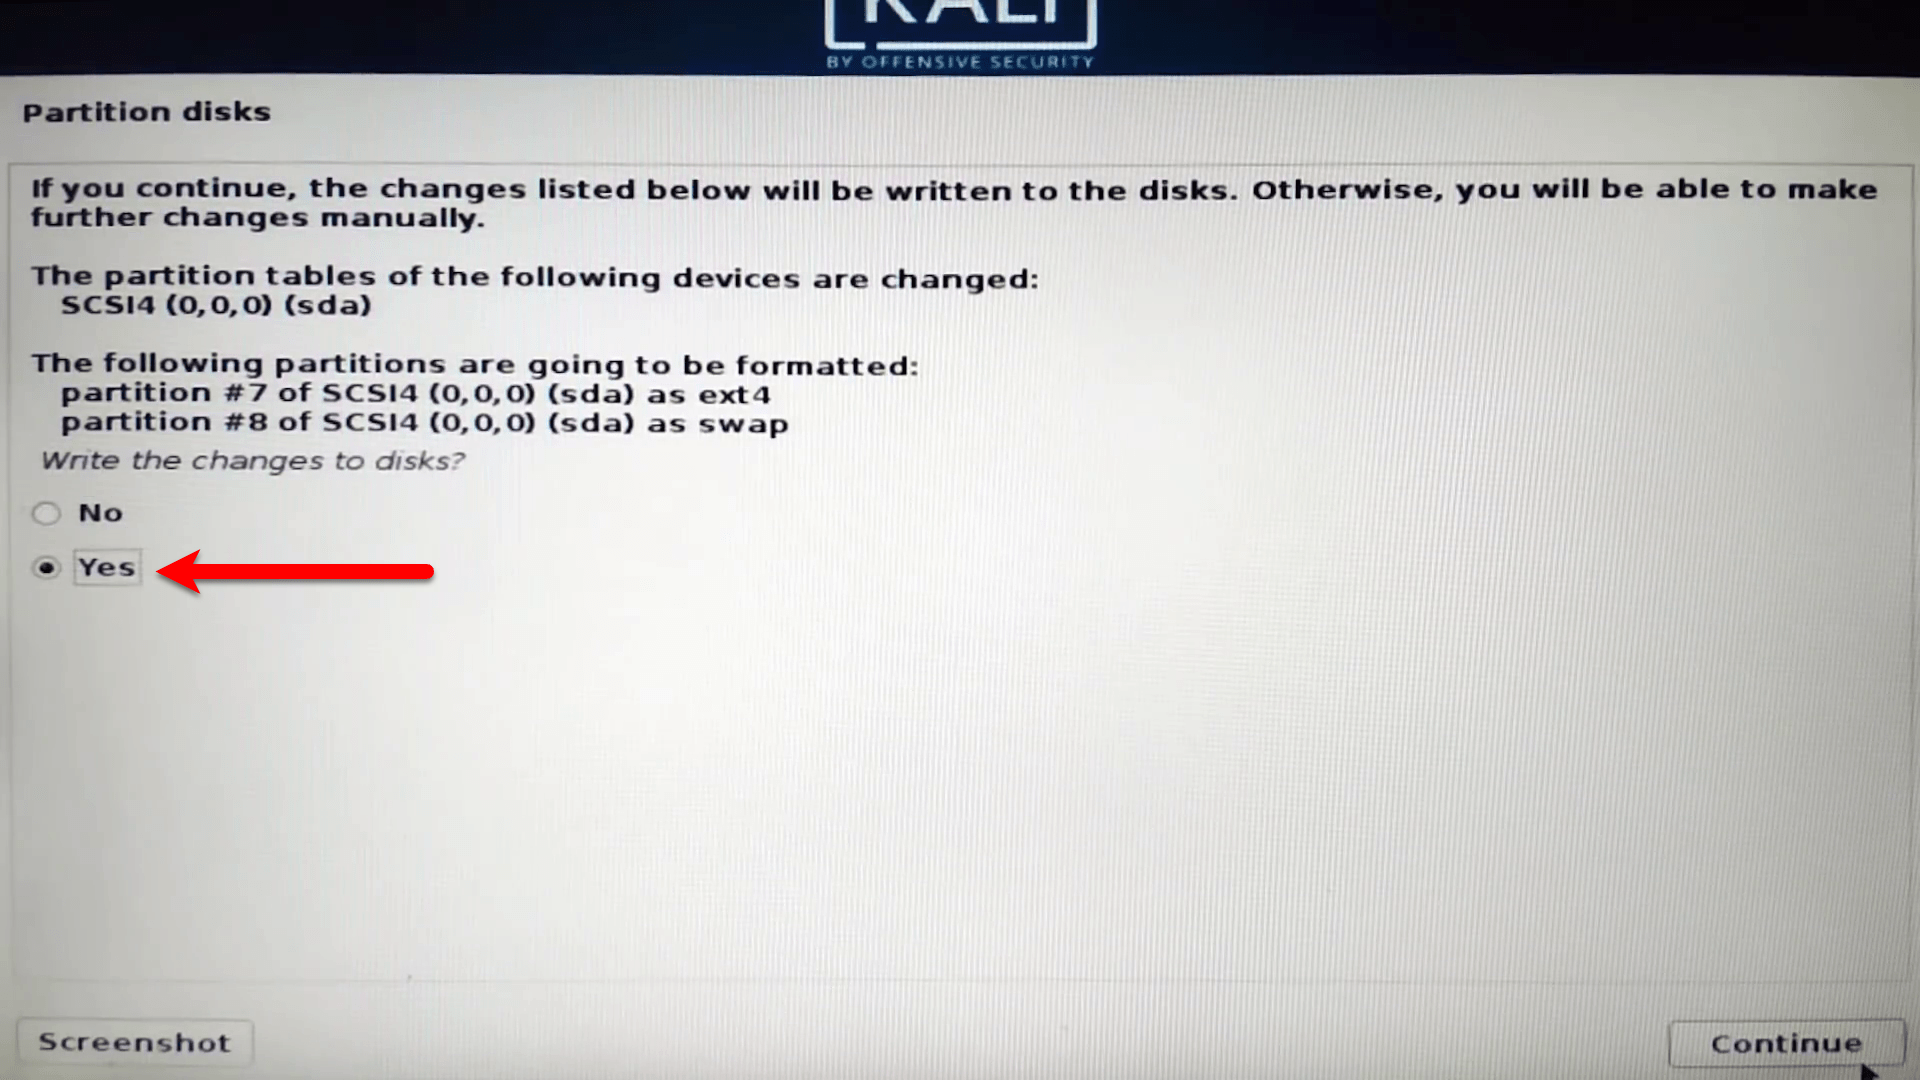
If you continue, the changes listed below will be written to the disks. Otherwise, you will be able to make further changes manually. So, select (yes) option and click continue.
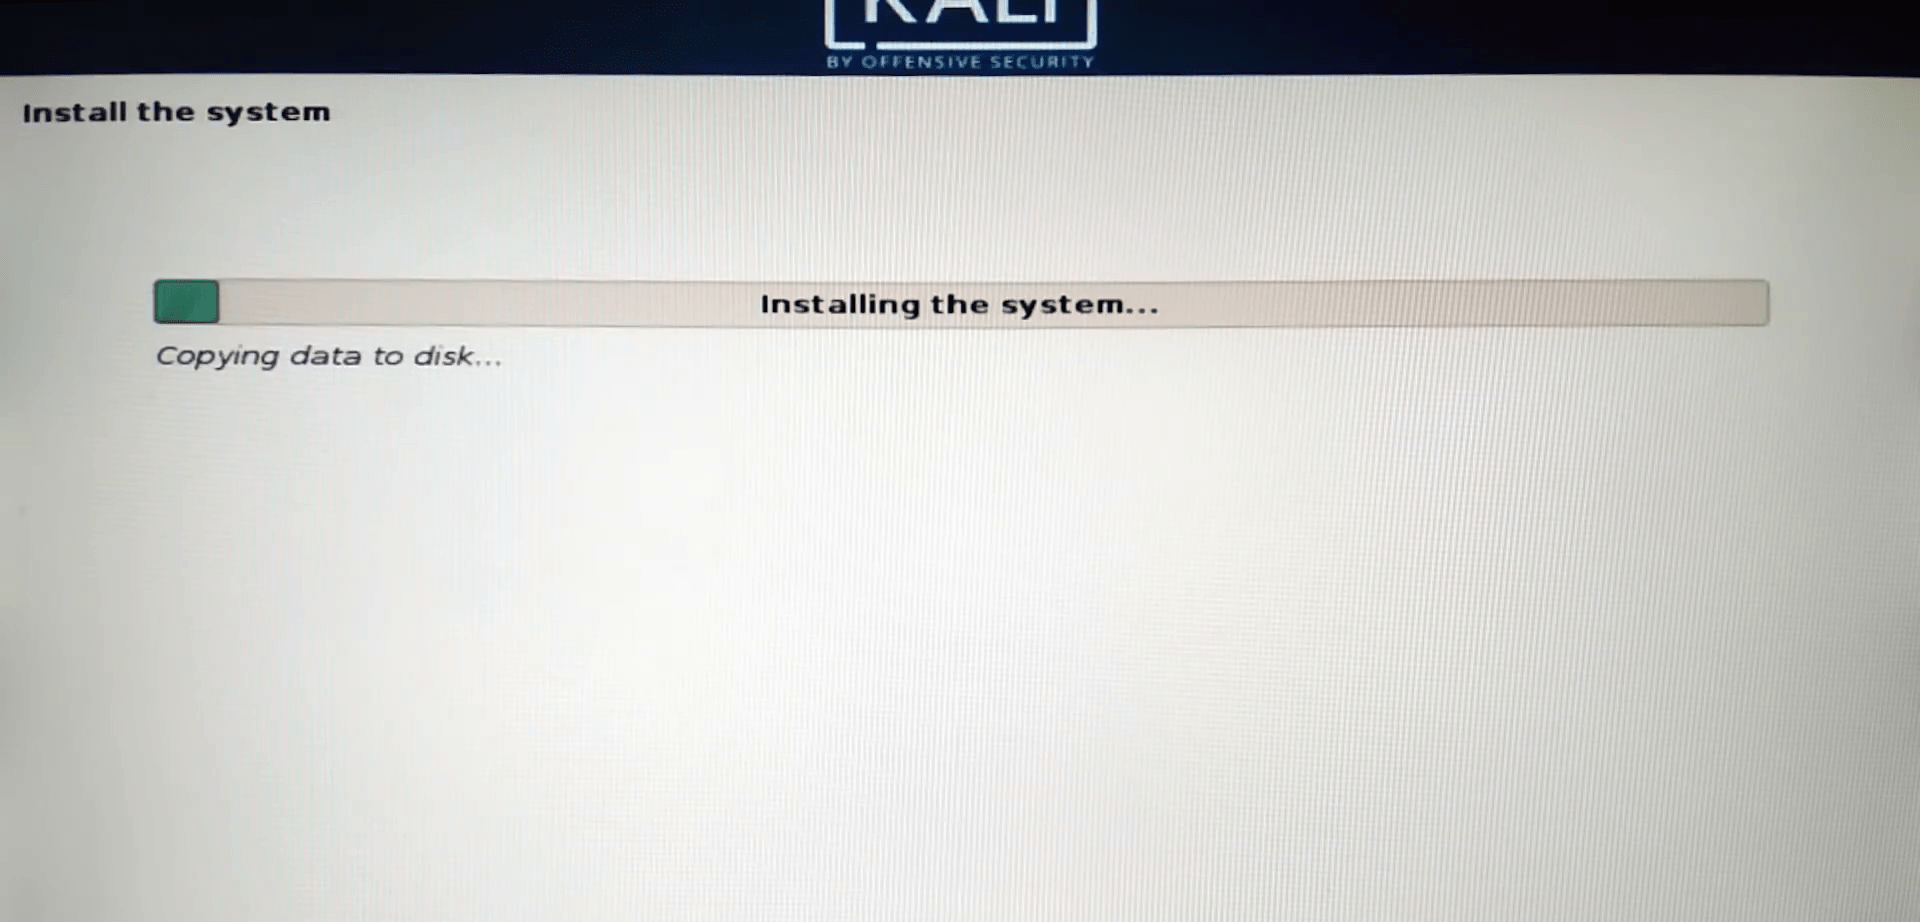
After you clicked continue, the installation will start installing Kali Linux. And it will take some minutes.
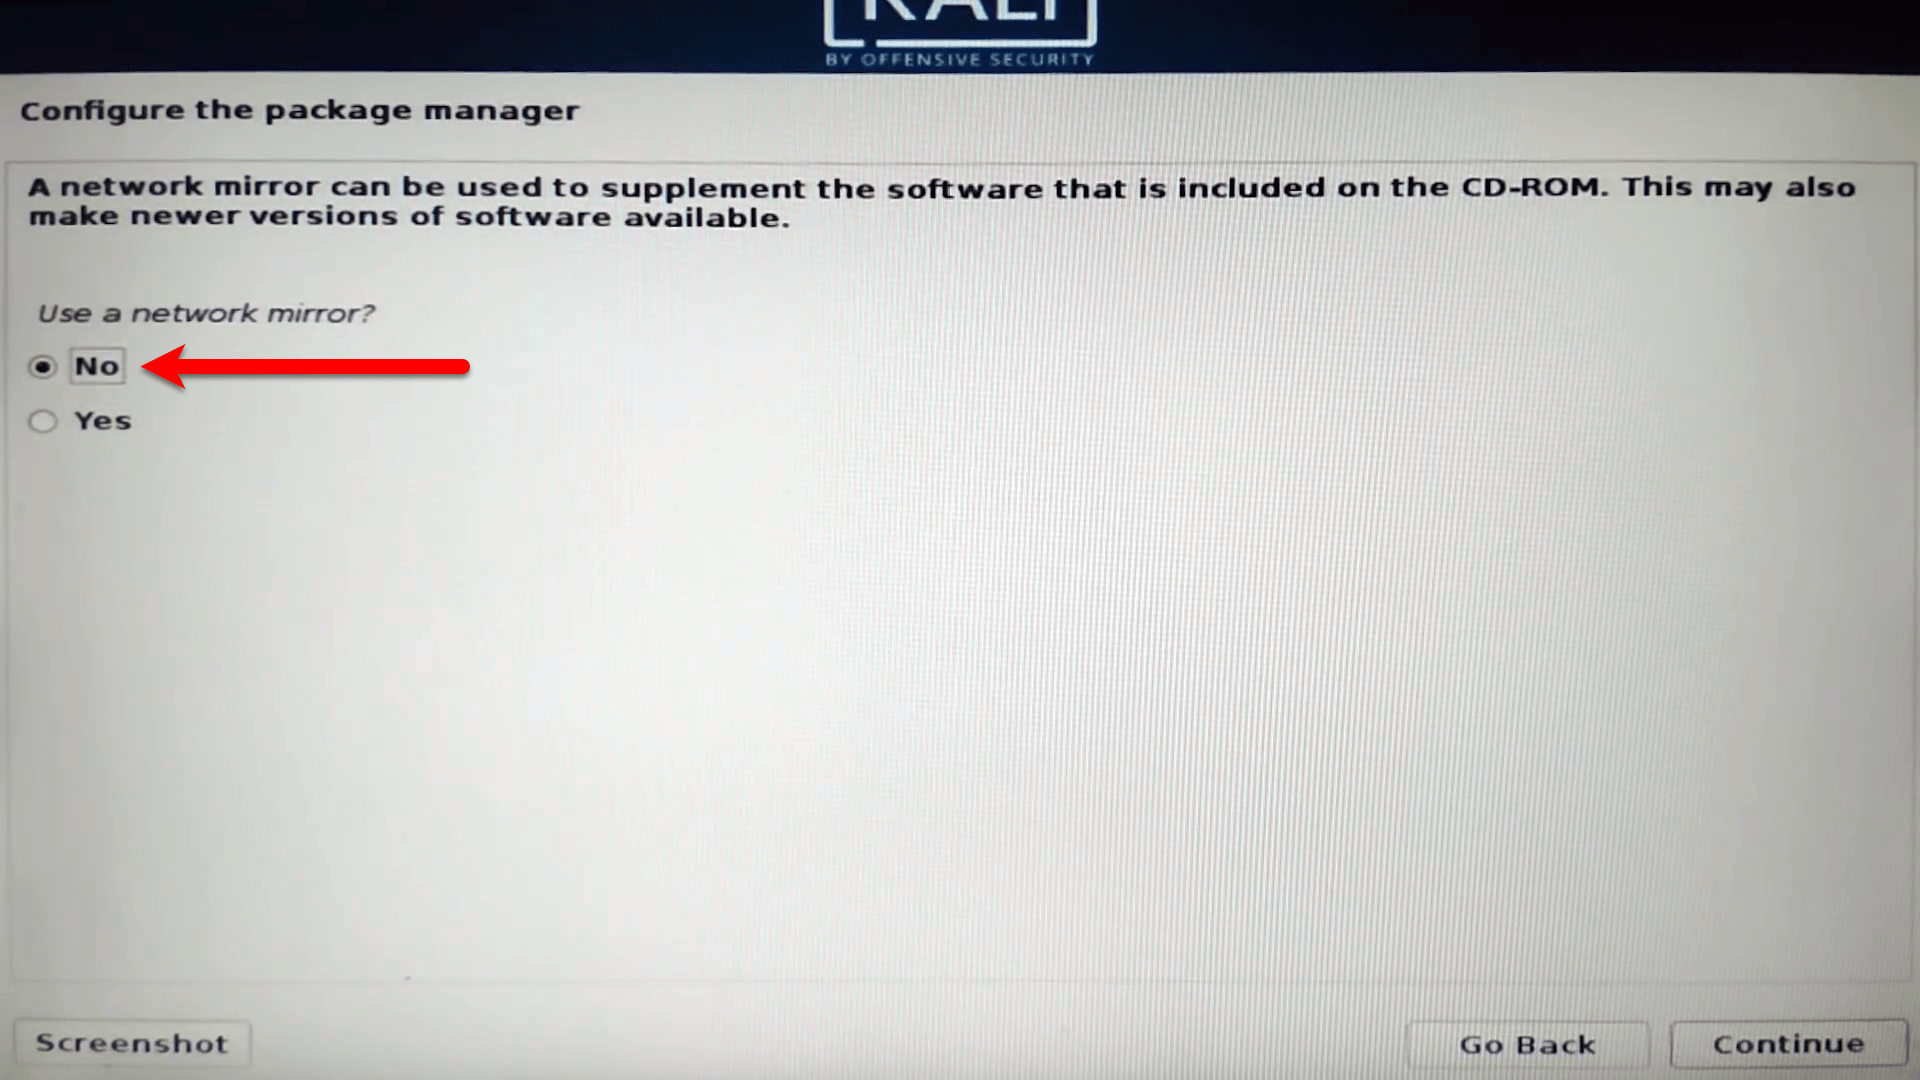
During the installation this window will come, asking about the network mirror. A network mirror can be used to supplement the software that is included on the CD-ROM. This may also make newer versions of software available. So, click No and click continue.
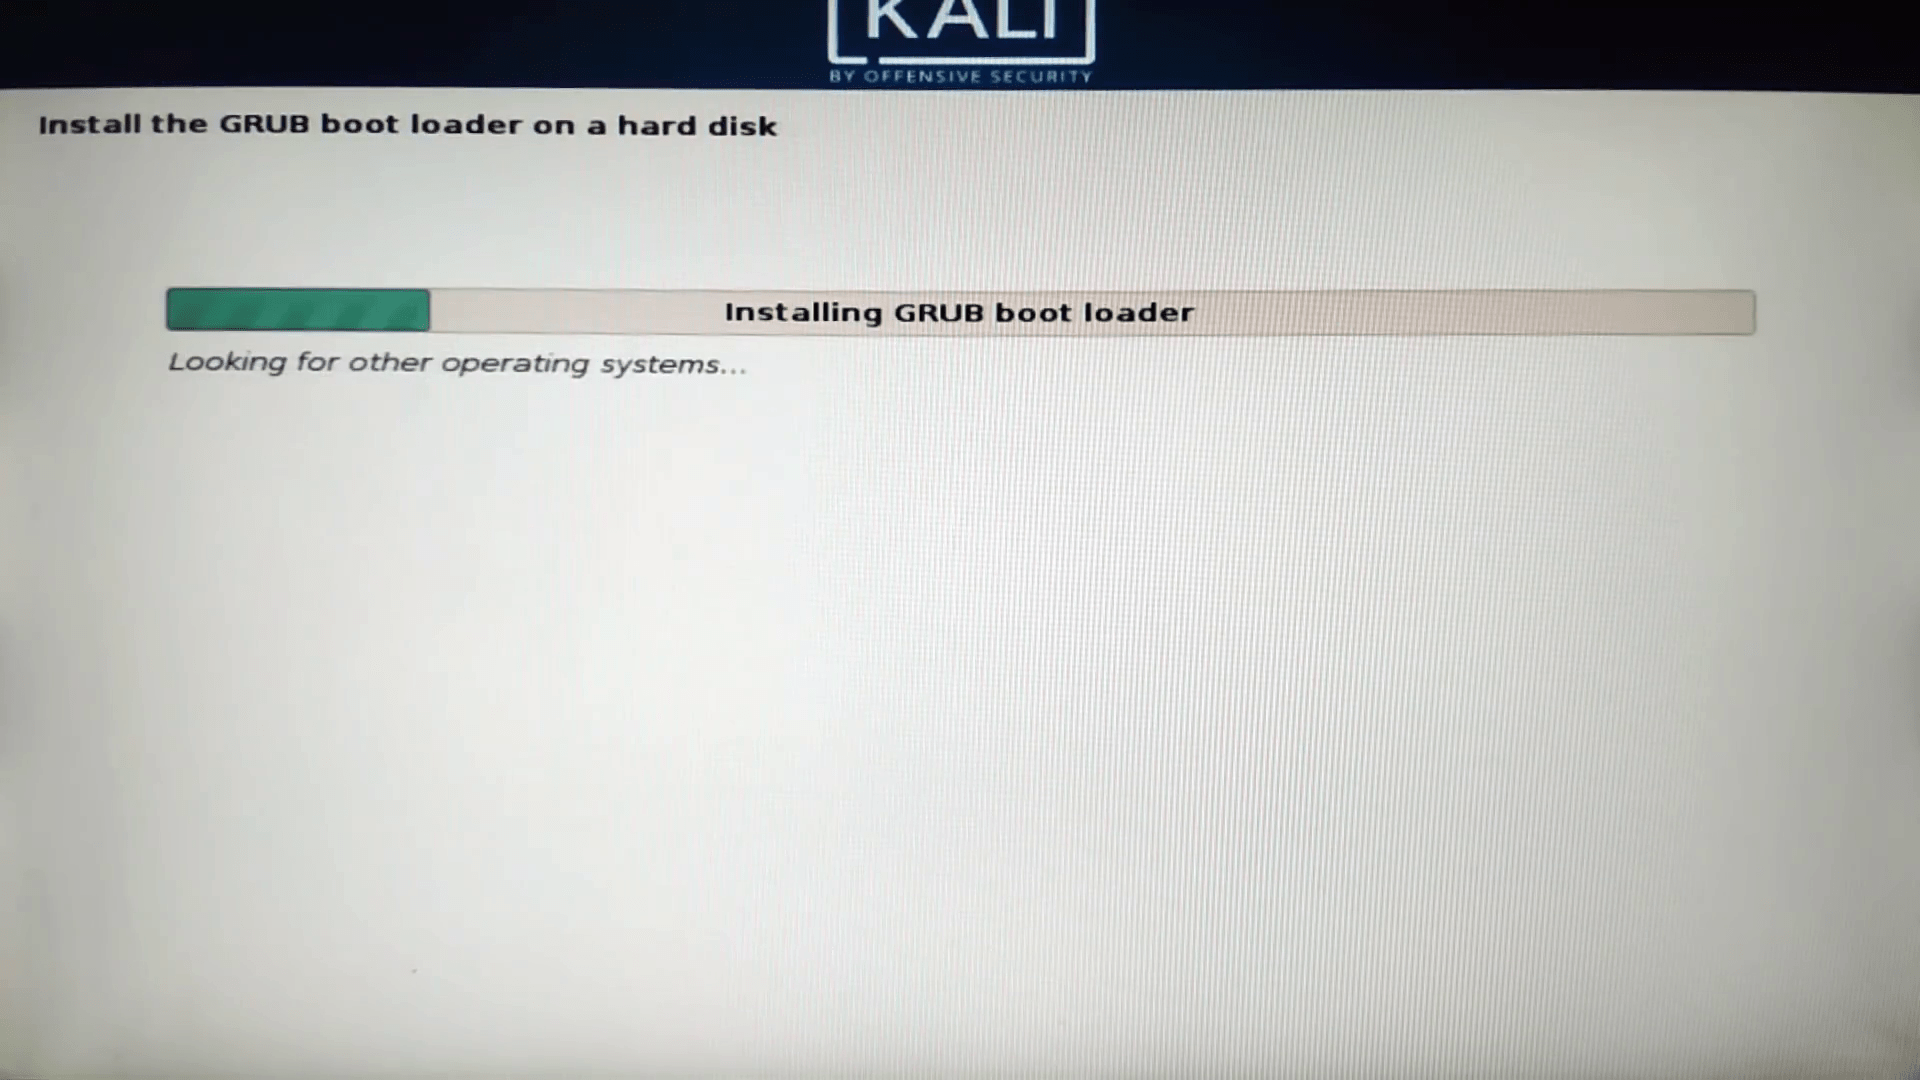
Now wait for the GRUB bootloader installation on the hard disk.
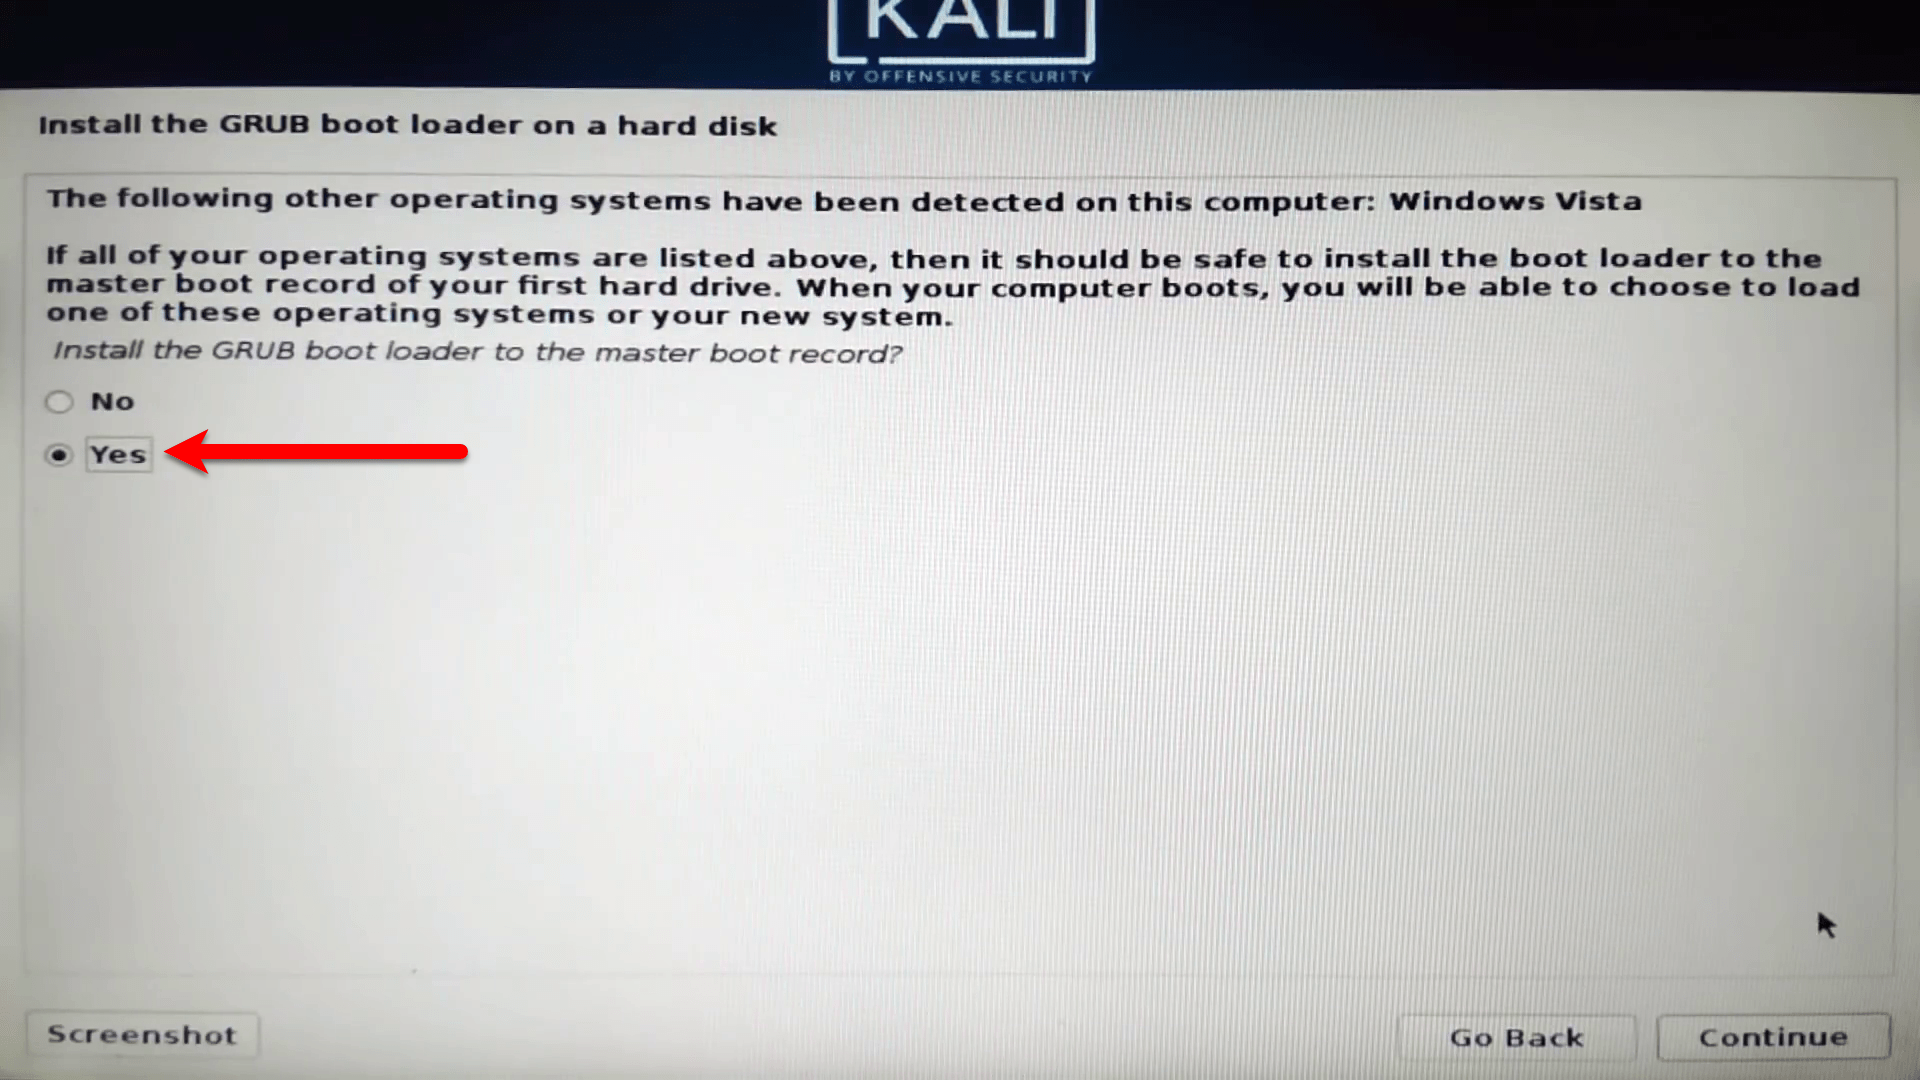
If all of your operating systems are listed above, then it should be safe to install a bootloader to the master boot record of your first hard drive. When your computer boots, you will be able to choose to load one of these operating systems or your new system. Here you will be asked to install GRUB bootloader so select (Yes) option and click continue.
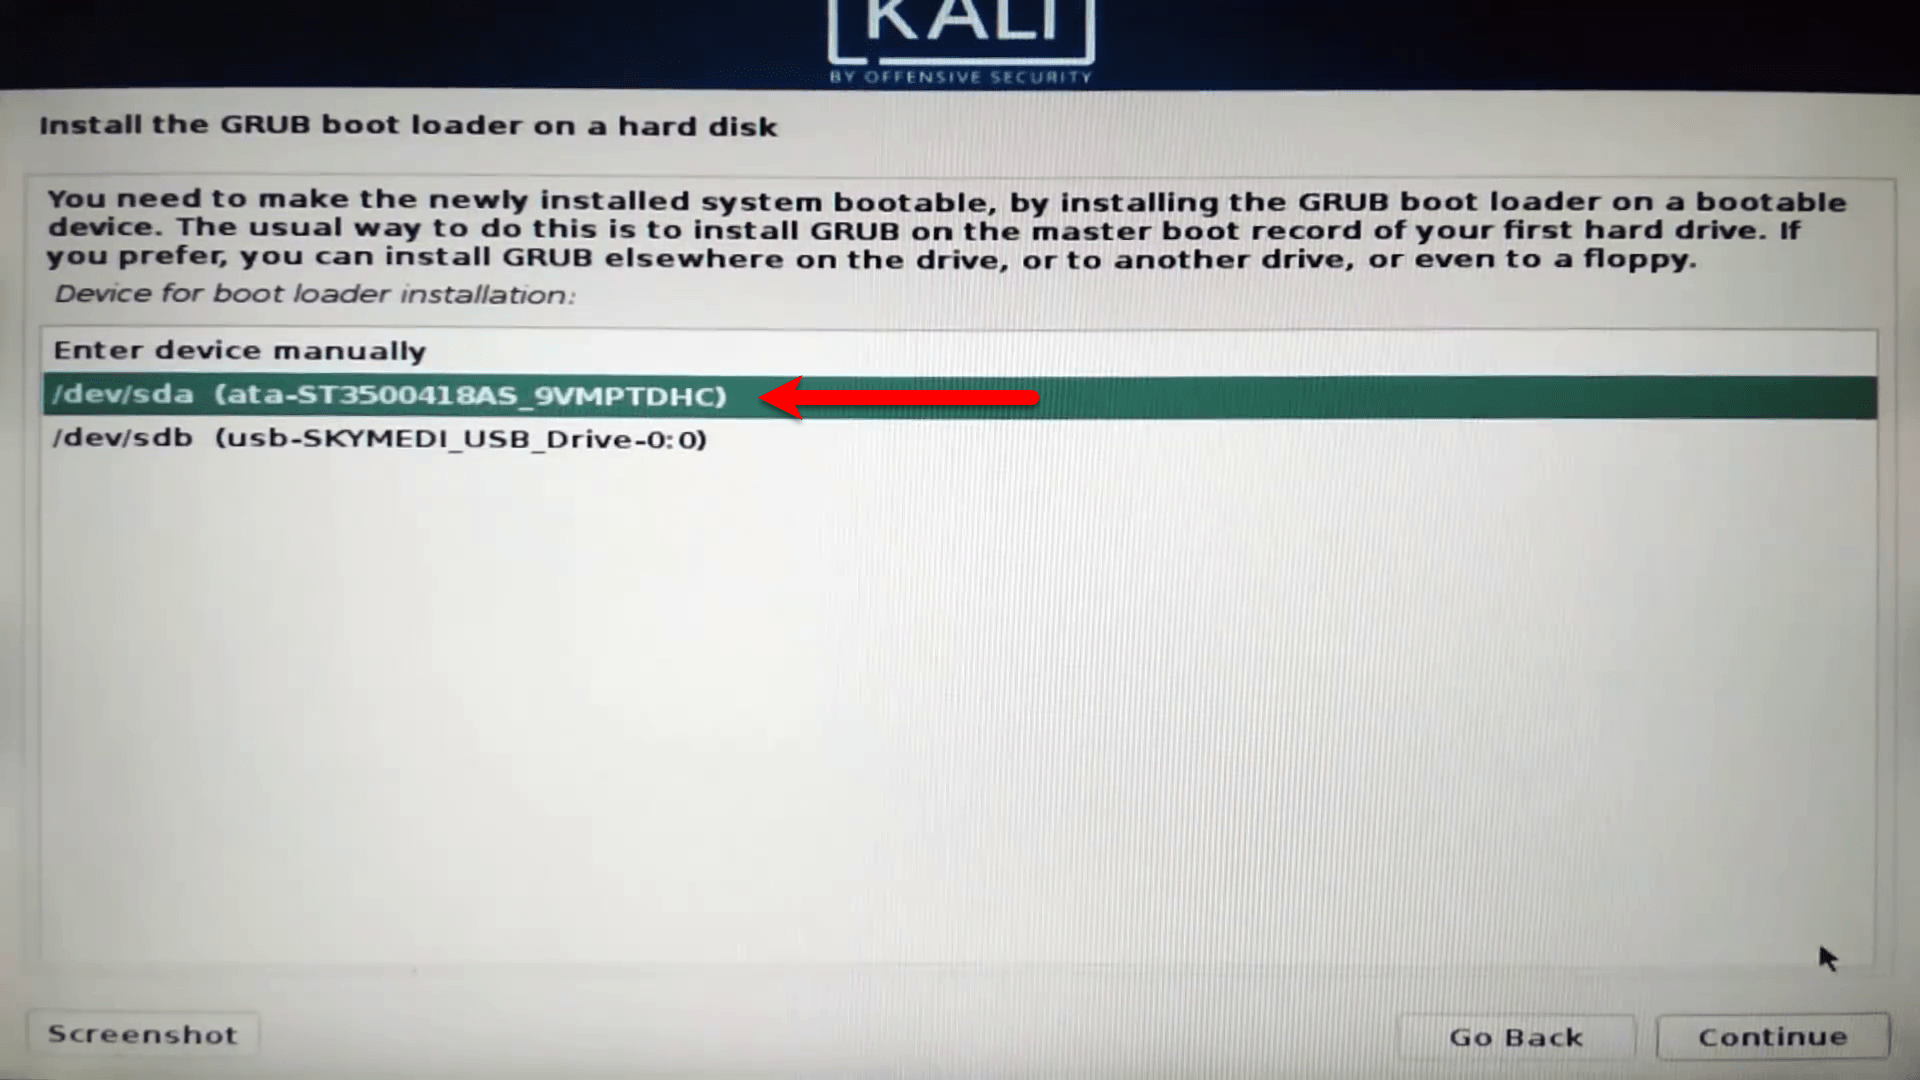
Again here the option /dev/sda (ata-ST3500418AS_9VMPTDHC) and click continue.
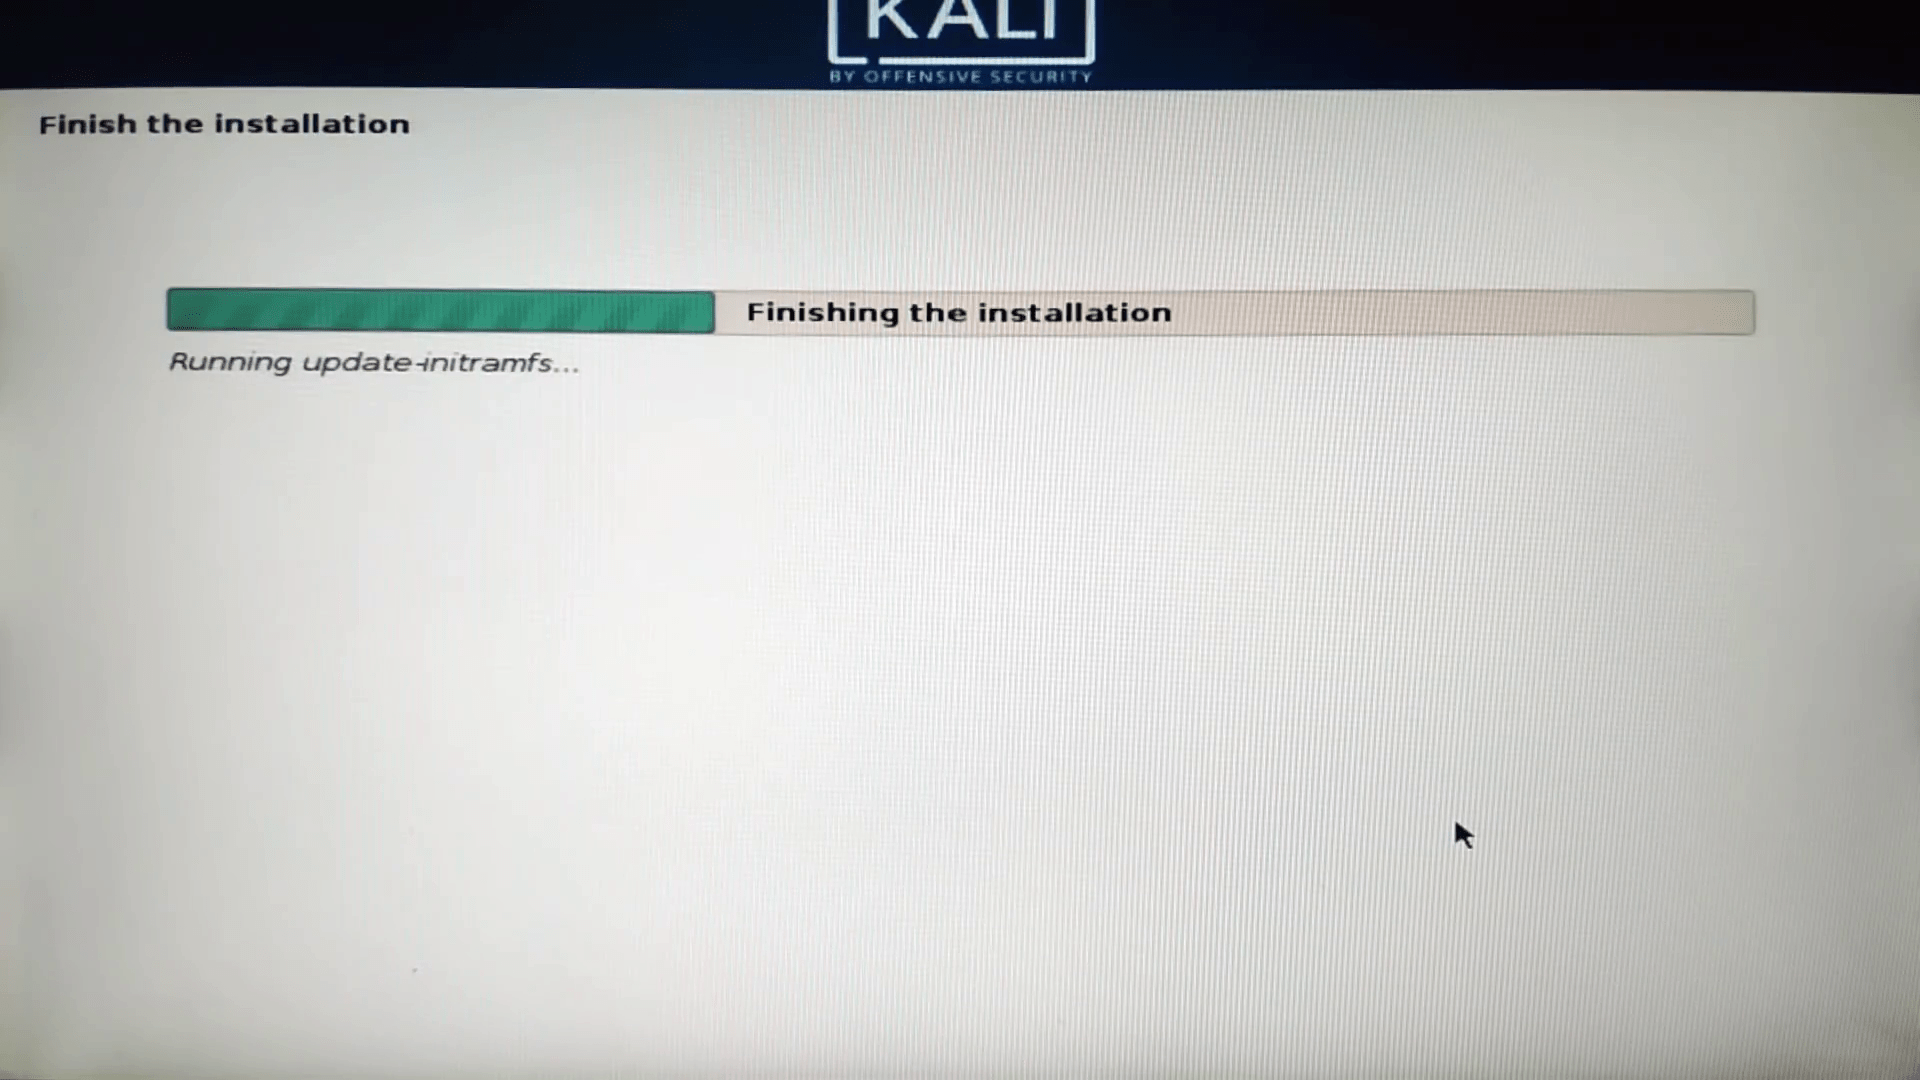
Wait until the finishing installation of Kali Linux.
When the installation successfully completed the system automatically will restart. So, on the boot screen you will see the operating system will appear, one is Windows 10 and the other is Kali Linux. Choose the operating system in which one you want to boot. And procedure of dual-booting Kali Linux with Windows 10 is the above steps. And finally, Kali Linux successfully installed alongside Windows 10 on a single SSD drive.
Furthermore, if there is another way to install Kali Linux on Windows 10 PC. You have better opportunity alongside of dual-booting. And that is using VirtualBox and VMware Workstation. VirtualBox or VMware allows you to install a different OS on it, and one of them is Kali Linux.
- Install Kali Linux on Windows 10 using VirtualBox
- Install Kali Linux 2020 on Windows 10 using VMware Workstation
That’s all about how to dual boot Kali Linux with Windows 10 on a single SSD drive. Additionally, if you faced any kind of problem feel free to use below comment section for sharing your problem.