Kali Linux knows as BackTrack operating system in the past based on Debian for network security. Also, Kali Linux mostly nowadays the users are using for penetrating tests. The professional hackers currently in touch with Kali Linux operating system. Indeed Kali Linux is one of the best and safe operating systems in the world. In fact, Kali Linux is using for the country sever security, to keep there file documents safe out of the hackers. However, Kali Linux over 600 million Pre-installed penetration-testing programs, as it is used currently one of the best-operating systems for security.
So, it is the world of virtualization lets test it out on Virtual machine platform that known VirtualBox. Do you have information about VirtualBox? VirtualBox is an open-source platform in which you can test any kind of operating system on it. The procedure is pretty easy everyone can do it. For this procedure, you need a better computer environment where you have to test it. Take it out which kind of hardware accessories you need to install Kali Linux on VirtualBox on Windows 10 PC.
Before getting started on how to install Kali Linux on Windows 10 using VirtualBox. You need some important things to know about that. The first one is your computer requirements. The second one is the Kali Linux Image. The third one is VirtualBox platform software where you have to perform a clean installation of it on your Windows 10 PC.
- How to Dual Boot Kali Linux with Windows 10 on a single SSD Drive
- Install Kali Linux 2020 on Windows 10 using VMware Workstation
System Requirements:
- 4GB of RAM for Better performance
- 20GB of Hard Disk capacity
- 2GHz core processors
- Nvidia or AMD graphics card (Must)
- Kali Linux ISO file
- VirtualBox or VMware Workstation
Install Kali Linux on Windows 10 using VirtualBox
Step 1. Install VirtualBox
You can download VirtualBox from its official website VirtualBox.org. Once the software downloaded go ahead and perform a clean installation.
- Double-click to launch the setup file
- When the installation wizard opened simply click Next.
- Specify the location where you want to install VirtualBox.
- If you want to create a shortcut on the Windows start menu, or desktop check the box.
- On the next screen again click next
- Now VirtualBox is ready to install, so click Install option.
- Wait until the installation should be completed, when the installation is done click Finish.
Step 2. Create Virtual Machine for Kali Linux
Once the installation of VirtualBox is successfully done on Windows 10 PC. Then go ahead create a Virtual Machine.
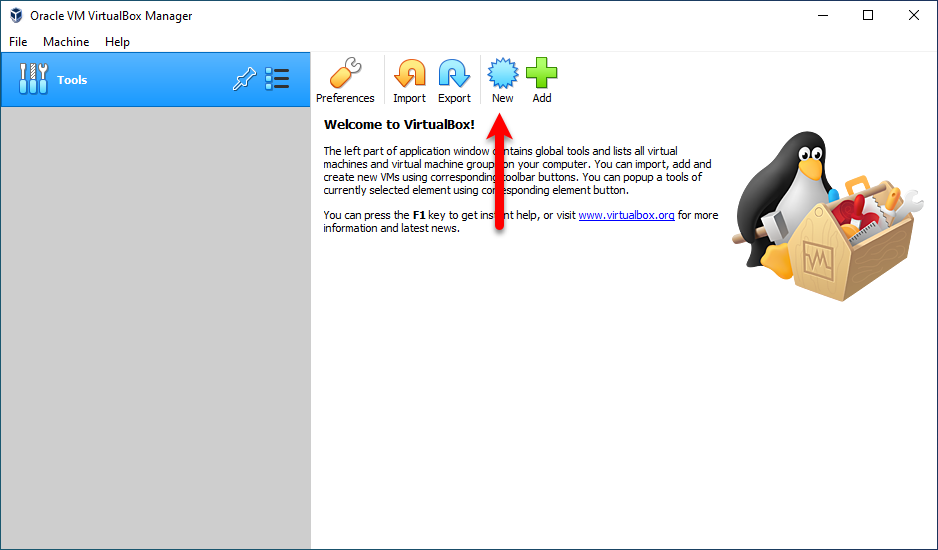
Open up the VirtualBox, on the VirtualBox screen click on the “New” option.
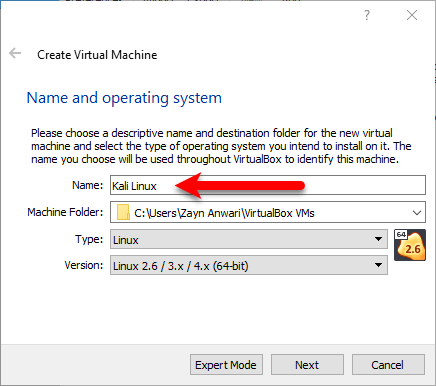
Type “Kali Linux”, here it will automatically detect the “Type” and “Version” of Linux then click next.
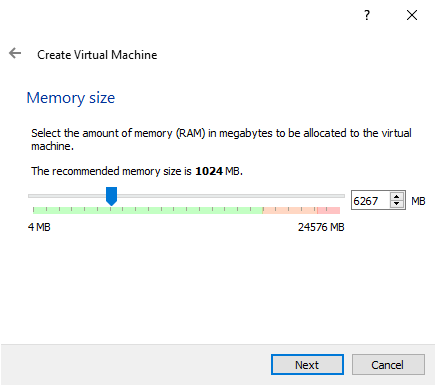
Increase the Memory Size and click next.
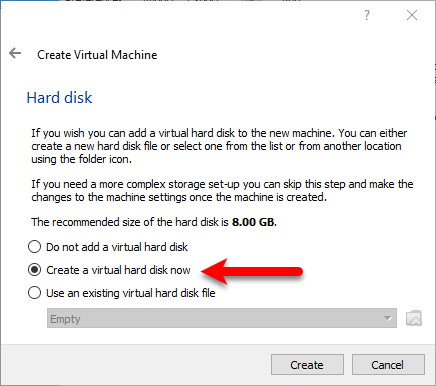
Select the option “Create a virtual hard disk now” and click next.
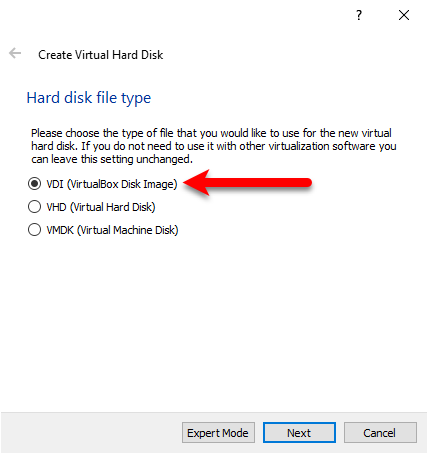
Choose a Hard disk file type so the recommend type is “VDI (VirtualBox disk image”.
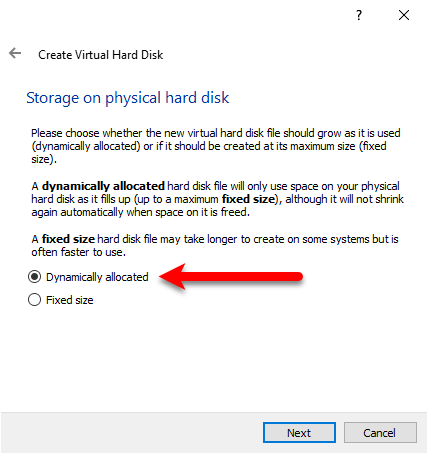
Select the option “Dynamically allocated” option for Storage on the physical hard disk.
Select the hard disk capacity for Kali Linux, and manage the location where you want to install it.

Step 3. Configure the settings for Kali Linux
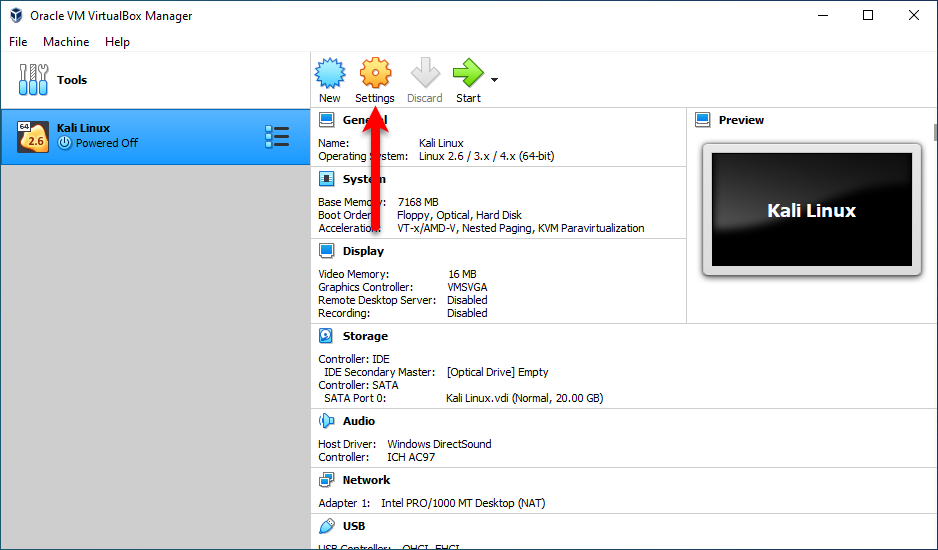
For better performance of Kali Linux on VirtualBox, you need to bring some changes to the settings. So, to do that simply click “Settings”.
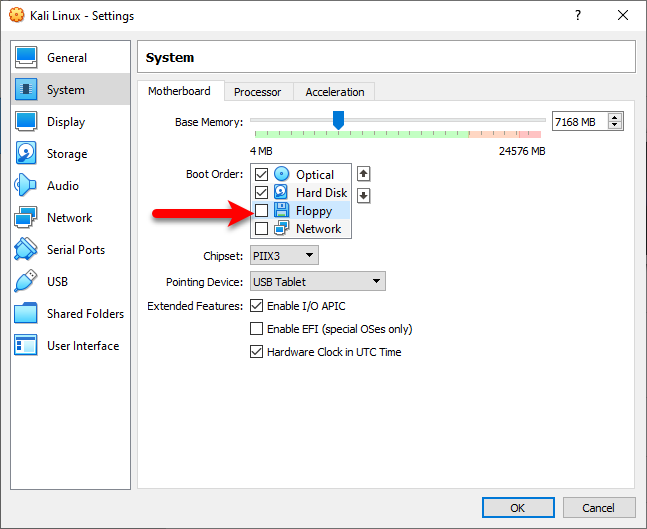
On the setting window, select the “System” from left-handed. On the motherboard option uncheck the “Floppy disk”.
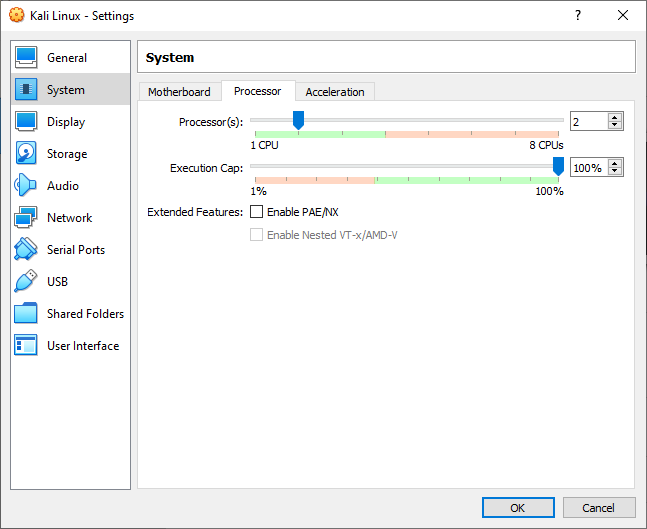
Navigate to the “Processor” tab and increase the size of the processor.
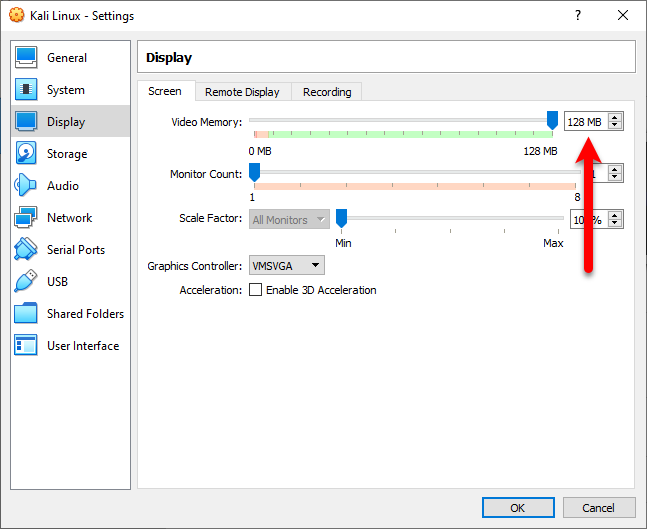
Now select the “Display” tab, then select “Screen” and increase the size of Video Memory.
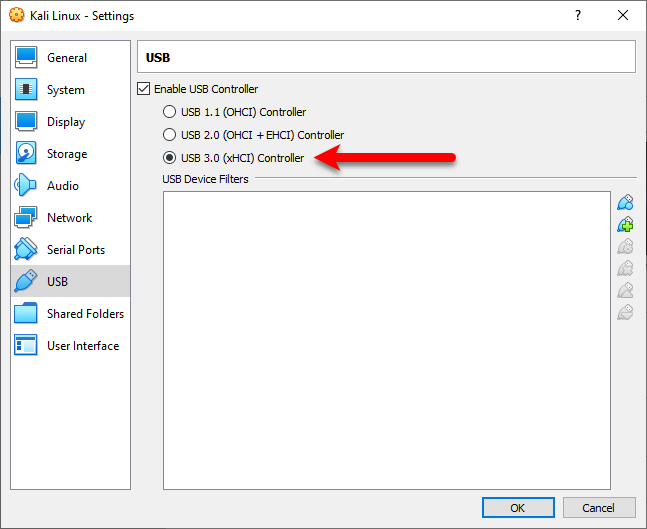
Select below down the “USB” option, and select “USB 3.0 (xHCI) Controller. Once the settings cleared click OK to save changes.
Step 4. Install Kali Linux on Windows 10 using VirtualBox
When the VirtualBox installation completed, and you have created a new virtual machine for Kali Linux. After that, the configuration successfully is done, then its time to install Kali Linux on VirtualBox on Windows 10 PC. Remember that follow each of the following the guidance of installation. Otherwise, you will face any issue during the installation process.
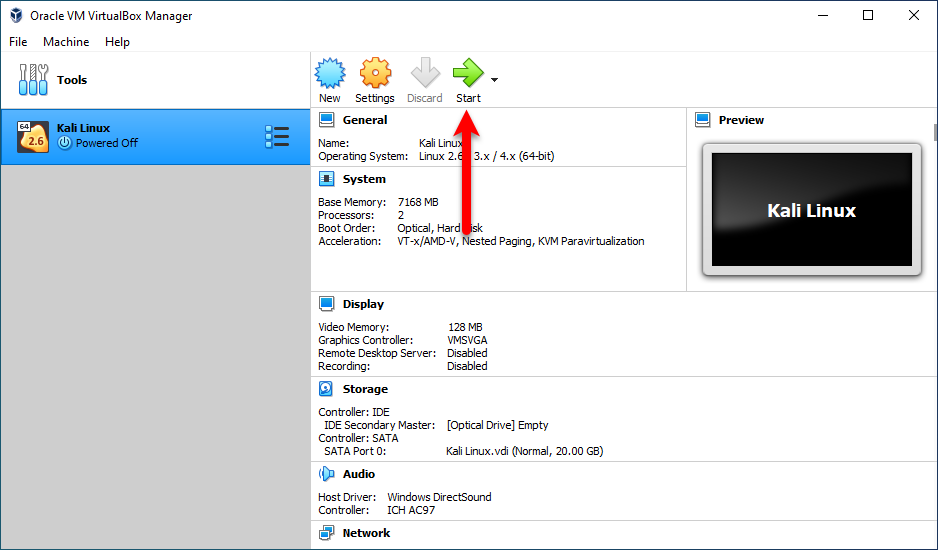
So, once everything is up on VirtualBox click the “Start” button to start up.
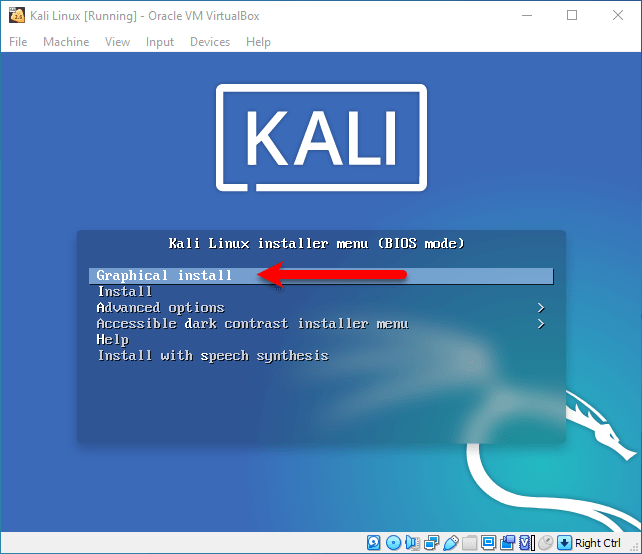
On the welcome screen of Kali Linux select “Graphical Install”.
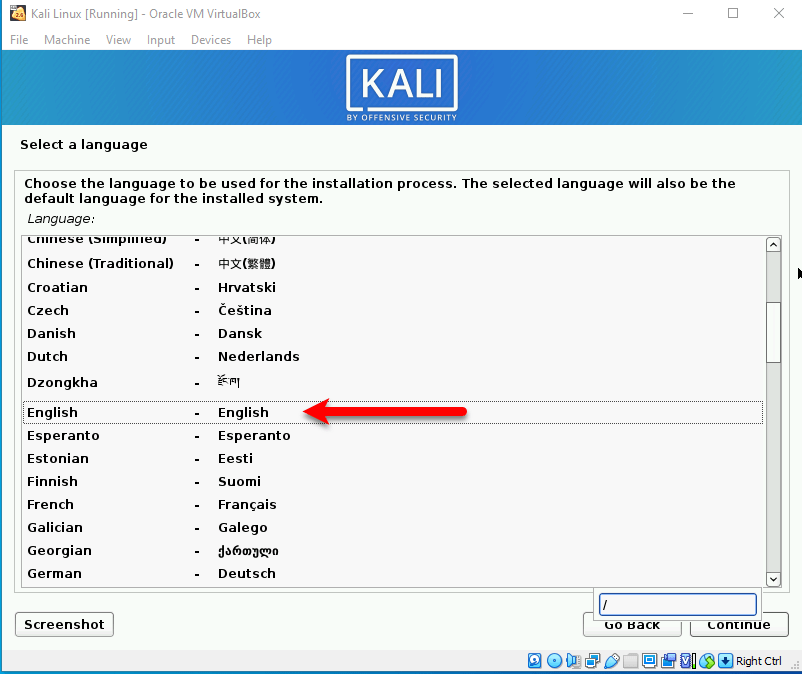
Select your input language and click continue.
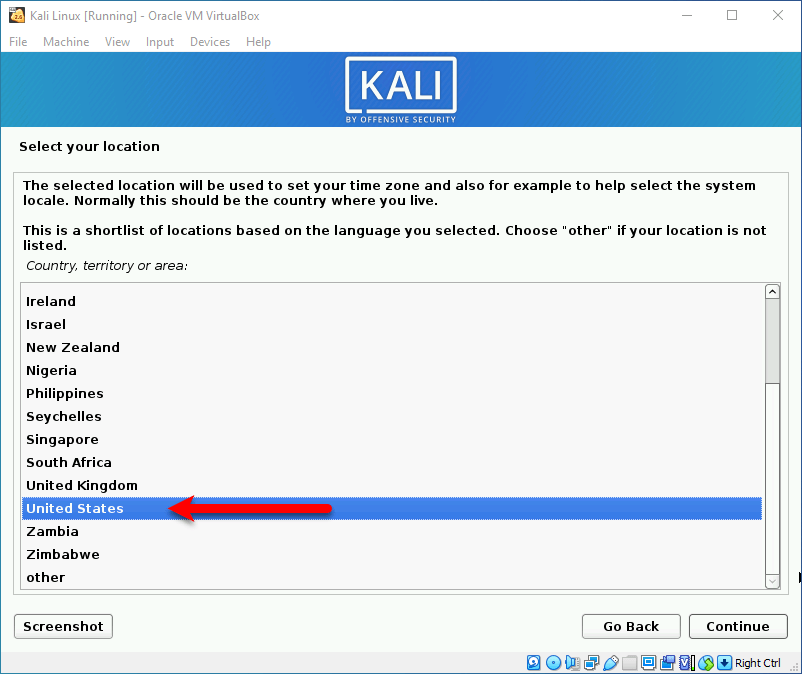
Choose your country where you live and click continue.
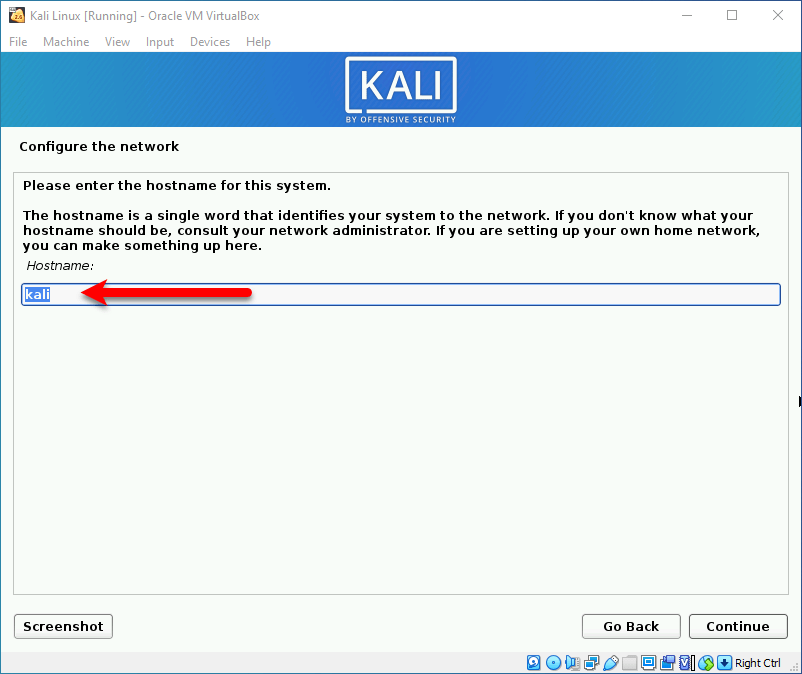
Please enter the hostname for this system. The hostname is a single word that identifies your system to the network. If you don’t know what your hostname should be, consult your network administrator. If you are setting up your own home network, you can make something up here. However, it will detect the hostname automatically but you can enter your favorite hostname too. Once the hostname entered click continue.
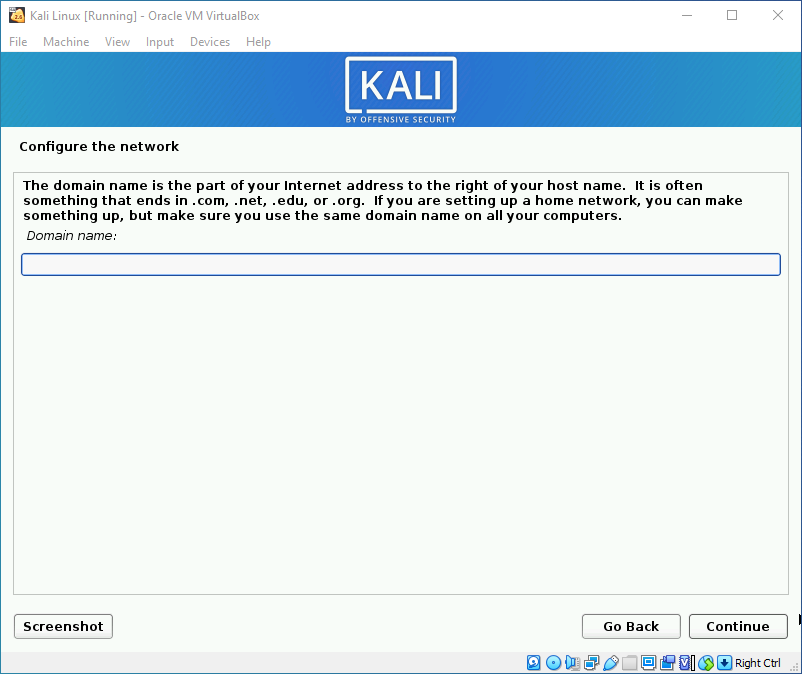
Configure the network, the domain name is the part of your internet address to the right of your hostname. I recommend you to leave it empty and click continue.
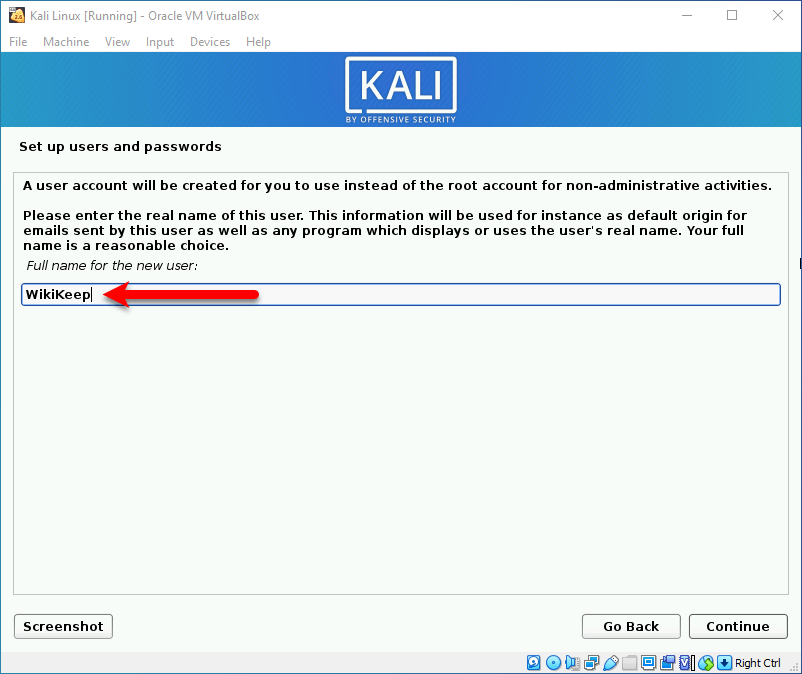
Set up your user and password, a user account will be created for you to use instead of the root account for non-administrative activities. The user name is optional you can enter anything you want and click continue.
- If you are installing Kali Linux on your actual computer, then you have to enter a heavy password. On the other hand, for testing on the Virtualization platform, it doesn’t matter whether you should enter a heavy password or not.
- When you approached the next screen select there “Guided – use entire Disk” then click continue.
- In this window, select “All files in one partition (Recommended for new users), then click continue.
- Select “Finish partitioning and write changes to disks” and click continue.
- If you continue, the changes listed below will be written to the disks. Otherwise, you will be able to make further changes manually. So, if you want to make changes to disk select (YES) and click continue.
- Wait until the base system installation should be completed.
- On the next screen, the recommended software will be installed automatically.
- Once the installation completed the Virtual machine will restart automatically. When you back to Kali Linux enter your password and hit enter.
Step 5. Fix Kali Linux Screen Resolution on VirtualBox
Once the installation completed, then the only thing is remaining. That is entering the full-screen resolution of Kali Linux on VirtualBox. There is a small tool that you download from VirtualBox.org. That called “Guest Tool”, insert the guest and complete the installation to enter the full-screen resolution.
That’s it if you faced any kind of problems then feel free to share with me below in the comment section.