
When it comes to the world of Virtual machines. VMware Workstation is the best option to test any kind of operating system on it. VMware Workstation is a publicly-traded application company listed on the “NYSE” under the stock sticker. So, when we talk about Workstation. VMware Workstation is separated from VMware, now VMware is having its Cloud space also. So, VMware Workstation has hosted a hypervisor that runs on x64 of Windows and Linux operating system. Indeed VMware Workstation is an open-source platform where you can create virtual machines to test any other OS on it. While installing a different operating system they work differently than the actual operating system on your PC.
Through this guide, I will walk through how to install Ubuntu 19.10 on Windows 10 using VMware Workstation. Through this post, you will learn the easiest way of Ubuntu installation on VMware Workstation. I might be beginner’s guide for you but for new users its important to get it to step by step. However, if you own Windows, macOS, Linux then easily you test it on VMware Workstation or VMware Fusion on macOS.
What is Ubuntu? Ubuntu is an open free source operating system Linux distribution based on Debian. Currently, you can find Ubuntu in three versions Desktop, Server, and Core. Each of the versions can be installed individually on a computer or Virtual Machines. Also, Ubuntu is a popular operating system for Cloud computing. And now the latest version of the Ubuntu version is 19.10.
- Install Kali Linux on Windows 10 using VMware Workstation
- Install Ubuntu 19.10 on Windows 10 using VirtualBox
Ubuntu has included many interesting features, it offers you the easy option and fastest installation if you want to upgrade it right now.
- Nvidia drivers on the ISO
- ZFS file system support
- Faster boot speed
- 32-Bit App support changes
- The best of GNOME 3.34
- See USB icon on Ubuntu Dock
- Theming and wallpapering changes
- New Linux 5.3 kernel and Toolchain
- Core software updates
Install Ubuntu 19.10 on Windows 10 using VMware Workstation
Before getting started with the installation you need to know about some requirements of Ubuntu. If you want to install Ubuntu on an actual computer then check the below requirements components.
- 2 GHz Core processors
- 4GB of RAM
- 25GB of Hard disk space
- Graphic card required for better performance
- Ubuntu ISO file
For installing on Virtual machine then you need the following requirements for a perfect installation.
- Ubuntu ISO file
- VMware Workstation, or VirtualBox
- Windows 10 Pre-installed
Install VMware Workstation on Windows 10
Navigate to VMware Workstation official website and download its latest version on your PC. Remember that VMware Workstation can found in two different versions. VMware Workstation Free trial, and Pro version. To use VMware Workstation you need to purchase its Pro version.
- Once you downloaded the VMware Workstation setup double click on setup to launch it.
- When the installation wizard appeared simply click next.
- Accept with terms and conditions of VMware Workstation and click next.
- Specify the VMware Workstation location where you want to install, then click Next.
- On the user experience set up simply click next.
- Manage you want to create a shortcut on Windows start menu and desktop then click next.
- When the VMware Workstation gets ready for installation, click install.
- Wait until installation should be completed, once the installation completed click Finish.
- After the installation has successful, open VMware Workstation. And enter the license key to activate it.
Create a New Virtual Machine for Ubuntu 19.10
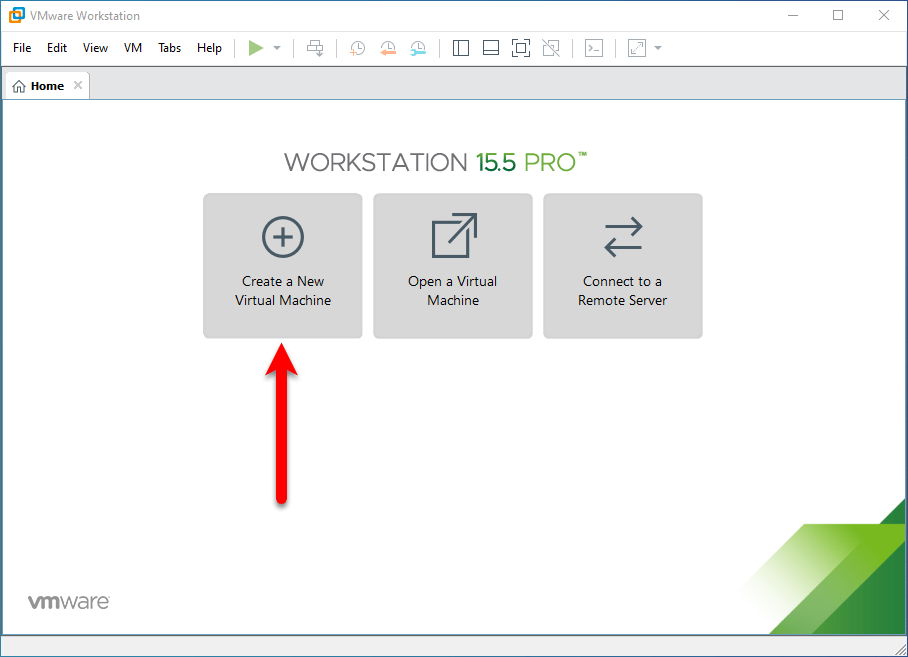
Once the installation completed open up the VMware Workstation. On the VMware, Workstation window click on the “Create a New Virtual Machine” option.
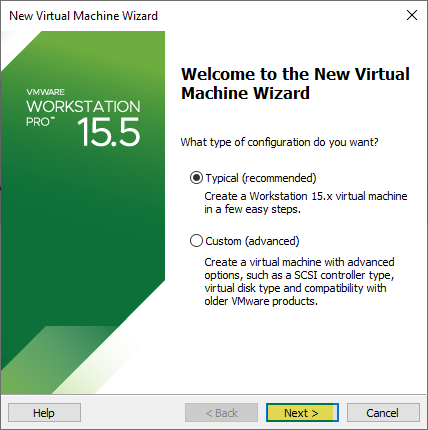
When the virtual machine wizard appeared, select “Typical (Recommended) and click next.
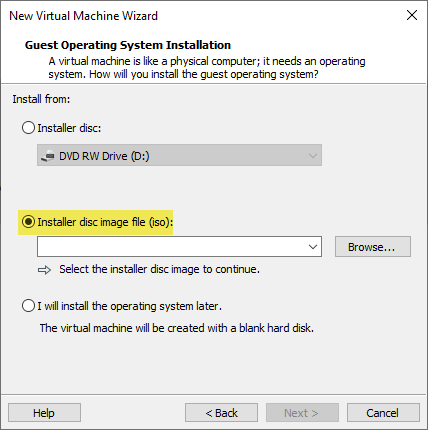
In this step, select the second option “Installer disc image file (ISO)”. And click the “Browse” option, then another window will appear, select the Ubuntu ISO and click Open.
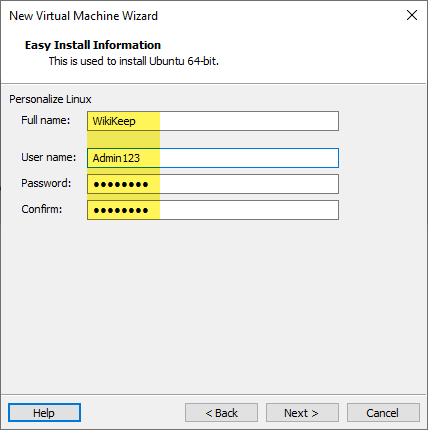
Here you need to enter your Full Name, User Name, Password, and Confirm the password then click next.
Select a name for a virtual machine, manage the location where you want to place Ubuntu then click next.

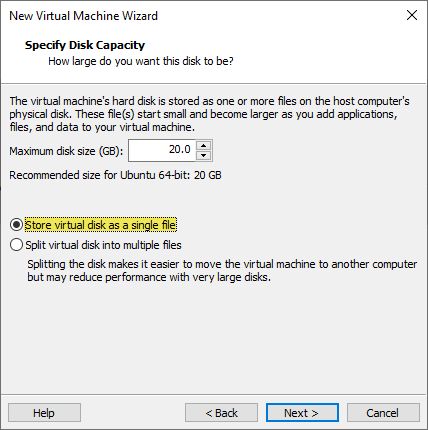
Specify the hard disk space for Ubuntu, then select “Store virtual disk as a single file” and click next.
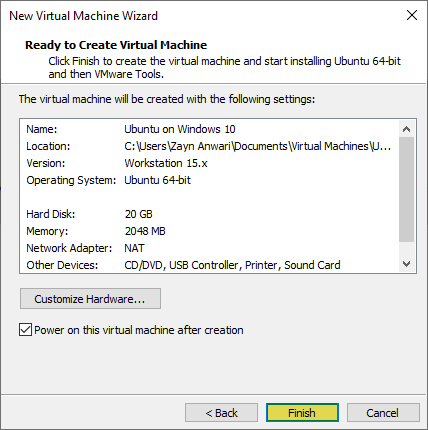
Now the virtual machine is ready so click Finish.
Install Ubuntu 19.10 on Windows 10 using VMware Workstation
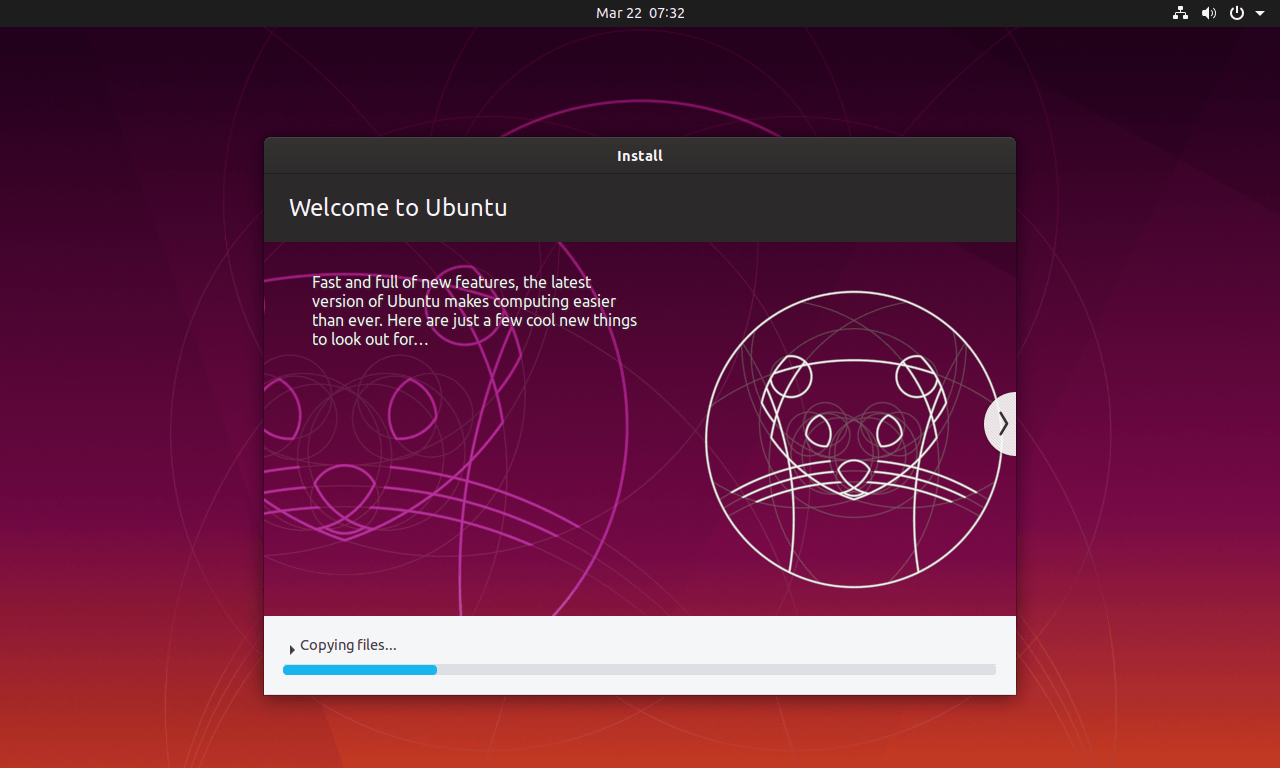
When the virtual machine created for Ubuntu 19.10 on VMware Workstation. After clicking the finish option automatically the installation will starts.
Wait for the welcome screen of Ubuntu window

Wait until it should install the files, remember if your computer connected to the internet. It will download automatically the language packages and some other required files.
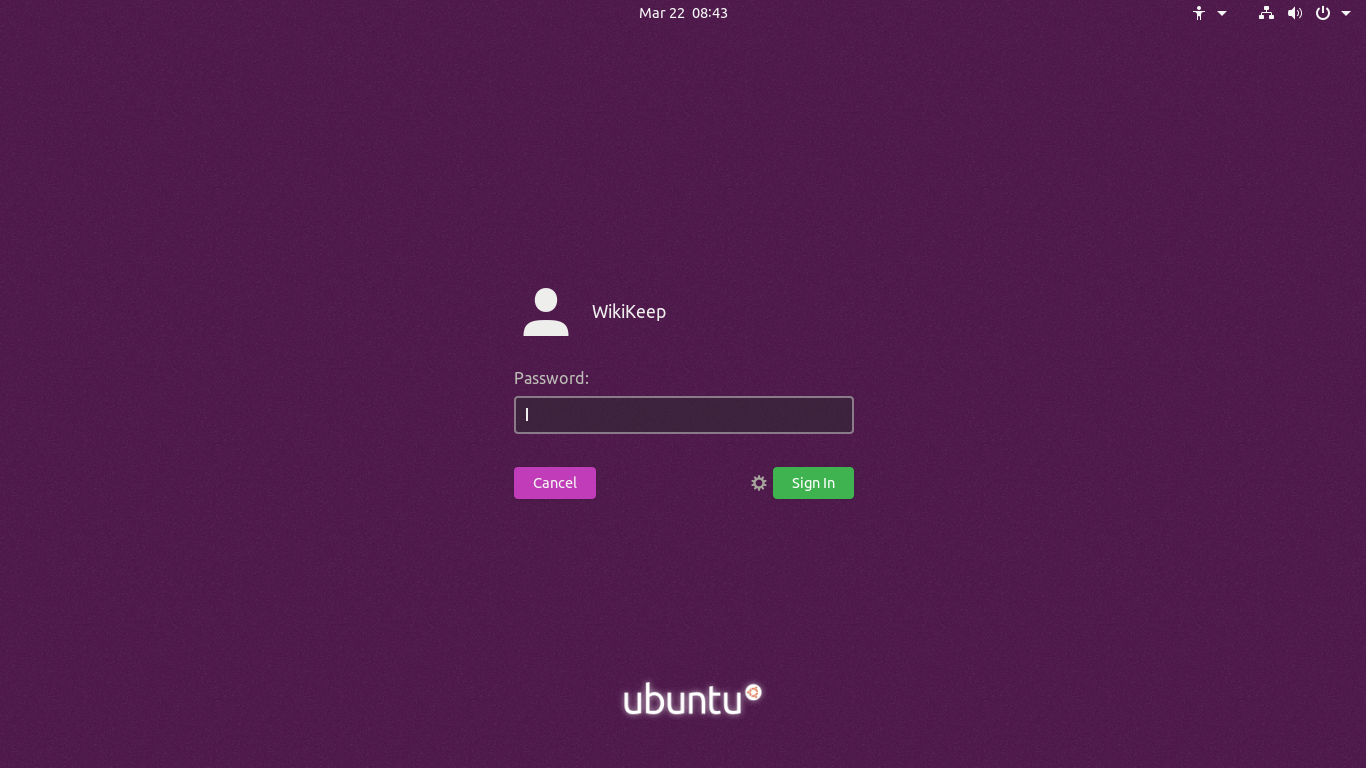
Once the installation completed virtual machine will restart. On the first step enter your login password and press enter.
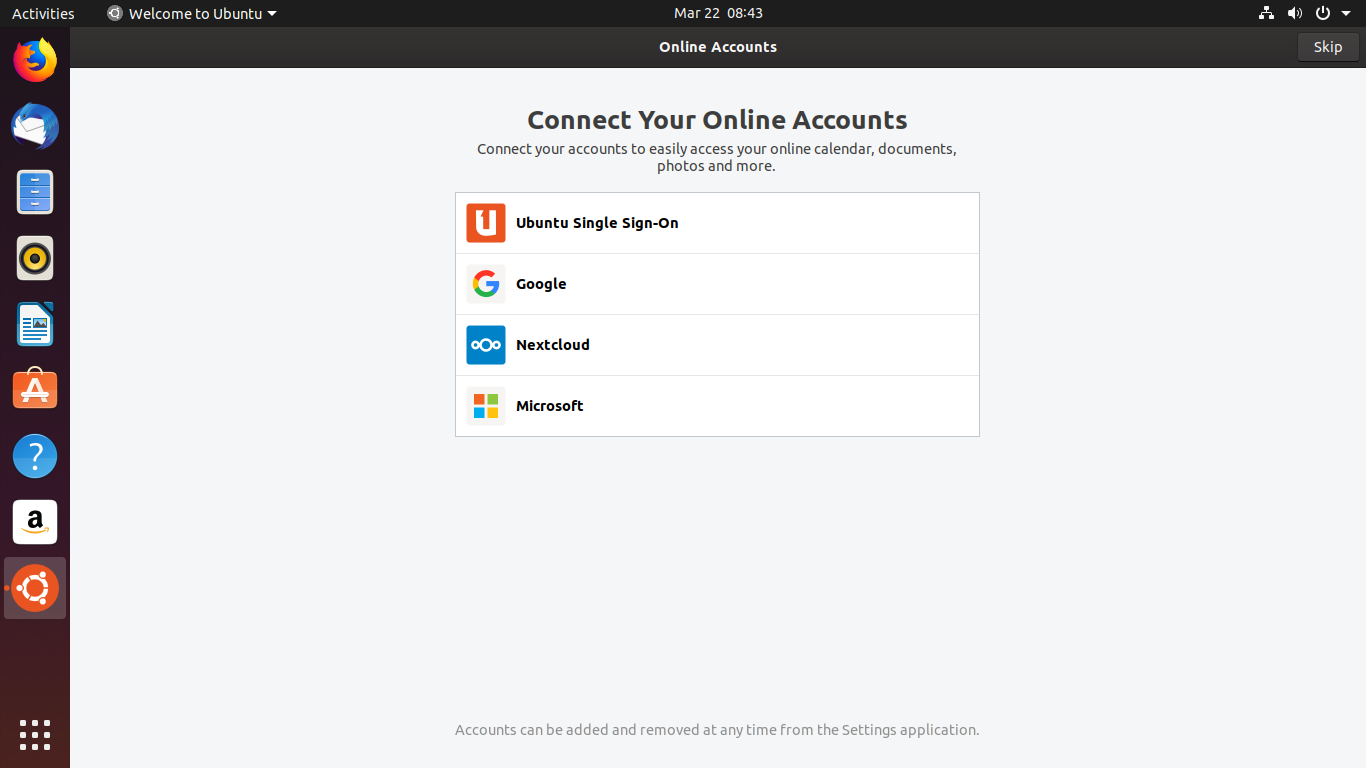
When you logged in to Ubuntu, you connect your accounts Ubuntu single sign-on, Google, Nextcloud, Microsoft account, if you don’t have simply click Skip.
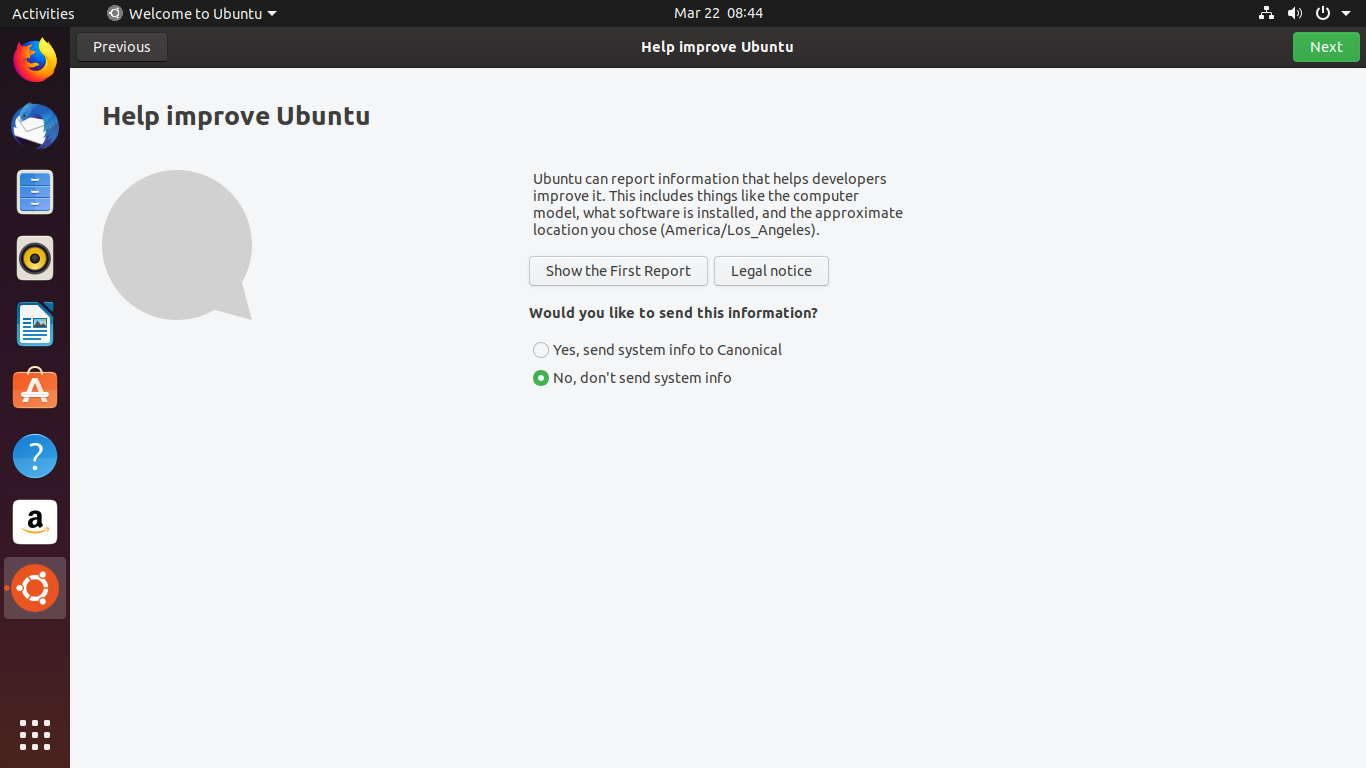
Select the second option “No, don’t send system info” then click next.
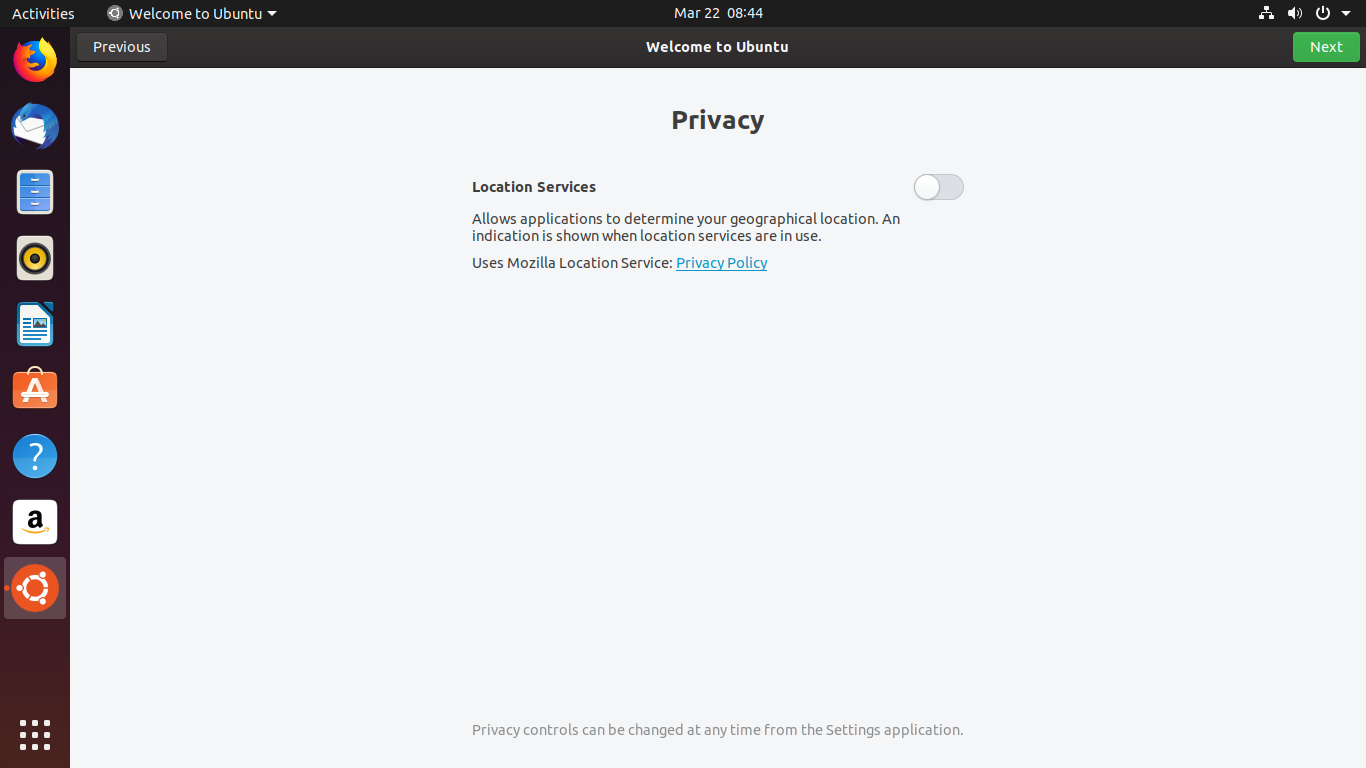
On the privacy, window click next
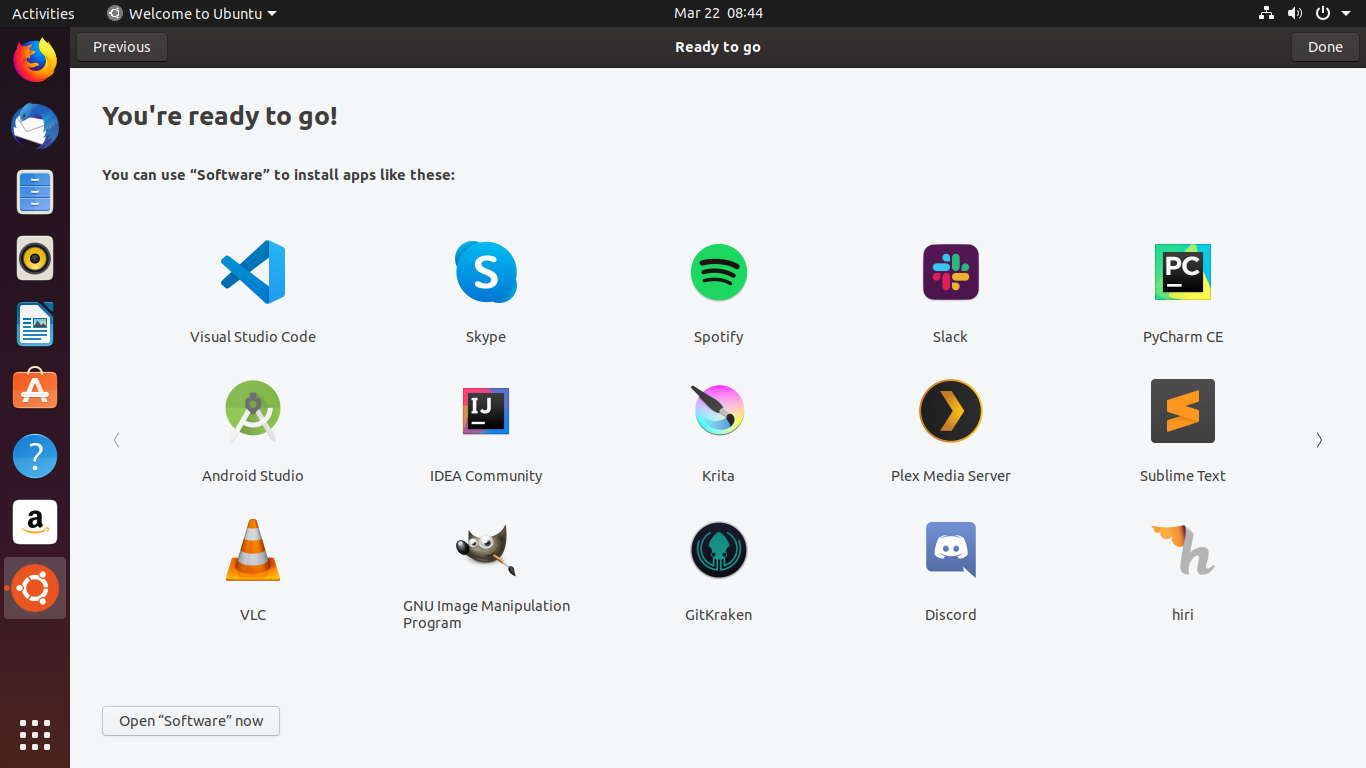
Now you are ready to go with Ubuntu so click next.
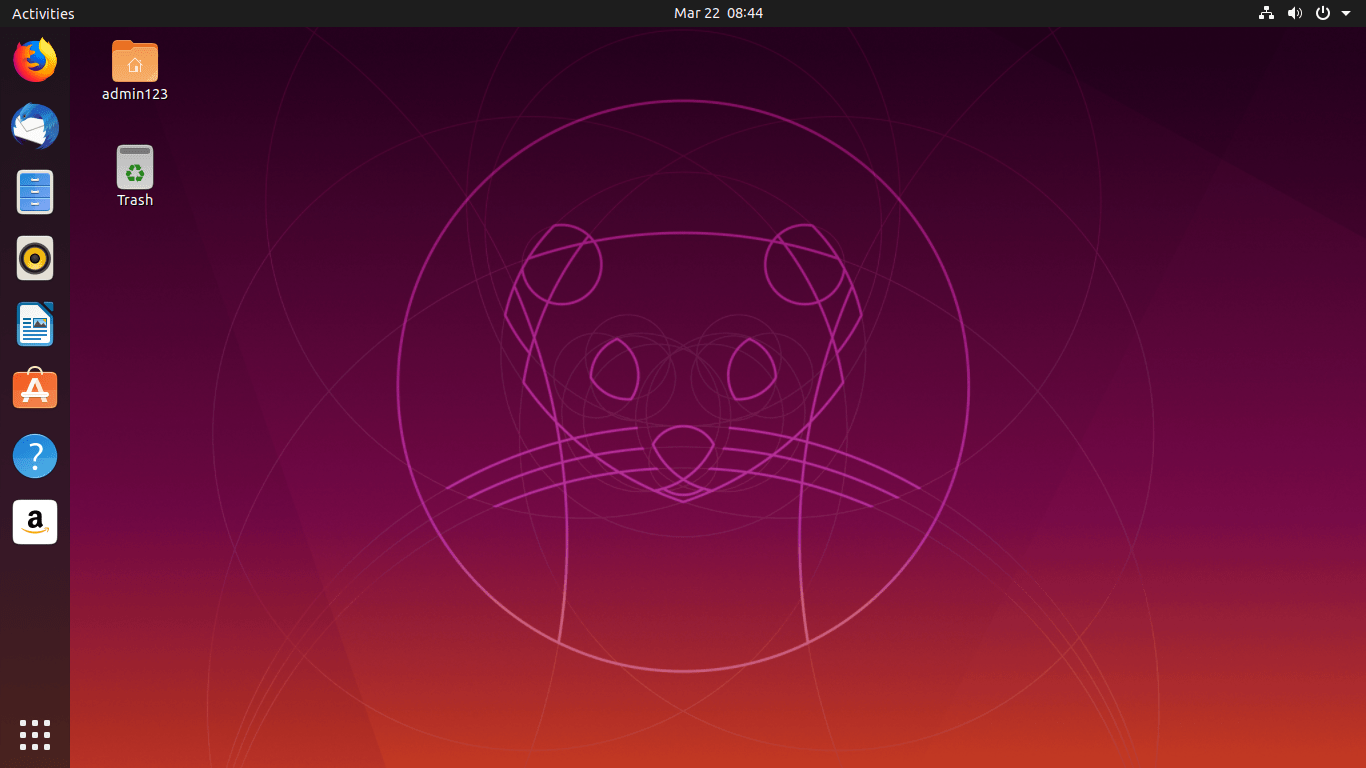
Here it is Ubuntu 19.10 successfully installed on VMware Workstation.
That’ all on how to Install Ubuntu 19.10 on Windows 10 using VMware Workstation. If you got any problems, feel free to share it below down in the comment section.