Currently, technology is in progress, and day by day we see a revolution on technology platforms. Whether it should be the operating system, Laptop, Smartphones, and many other things. When we see those changes we become motivated to add something extra alongside those pretty changes. However, when talking about the Virtualization platform, we see lots of changes from the past. And one of the best progress is now on VirtualBox, that most of the developers make their tasks easy in the VirtualBox world. Like they are testing different operating system applications OS on VirtualBox. Most of the advanced and professional programmers developers are using VirtualBox, for testing OS, networks.
Indeed with the help of Virtual machines, whether VMware Workstation or VirtualBox. You will be able to test different kinds of operating systems. In fact, VirtualBox acts like other applications on your actual operating system on your computer. The process of installing VirtualBox is much easy like other Software’s after installation you will ma a creating of a Virtual machine platform to test OS. Through this guide, I will walk you through how to install Ubuntu 19.10 on Windows 10 using VirtualBox
What is Ubuntu?
Ubuntu is a Debian-based operating system and now its latest version in your hand. So, why not to test it on VirtualBox first. The latest update of Ubuntu has many features and functionalities that preferred by most of the reviewers. And Ubuntu 19.10 was released on October 17, 2020. If you remember that old version of Ubuntu didn’t support Nvidia driver. But Ubuntu 19.10 is the first version of the operating system that can support Nvidia drivers on the ISO image. Due to most expectations of Nvidia users now they brought changes on their hardware interface to support Nvidia drivers. Graphics card plays one of the biggest roles in our computer performance and speed. And now Ubuntu makes the users build up their computer speed if they are using the Ubuntu operating system.
Usually, there are other changes in the features of Ubuntu 19.10 that newly added in the OS. Are includes ZFS file support, Increased Boot speed, Dark Theme, MySQL 8.0 and PHP 7.3. Those changes are superb to install it now on our computers.
Install Ubuntu 19.10 on Windows 10 using VirtualBox
Step 1. Required Files
To install Ubuntu on VirtualBox or VMware, and on your computer. You need the following required files and hardware pieces of equipment.
- 2GHz core processors
- 4GB of RAM
- Graphics Card for better performance
- 20GB of hard disk space
- SSD recommended
- Ubuntu Image file
- VirtualBox or VMware Workstation
Step 2. Install VirtualBox on your Windows
VirtualBox is one of the best technology that offers users to test different kinds of OS. Alongside, VirtualBox is an open-source platform that you can install it on every operating system. Such as Windows, macOS, Linux, and others. Navigate to VirtualBox.org and download the recommended version for your computer.
- Once the file downloaded double-click to launch the setup.
- On the welcome wizard of VirtualBox click next.
- Again in the custom setup click next.
- Do you want to create a shortcut of VirtualBox on Windows start menu and desktop?
- VirtualBox is ready to install, so simply click install.
- Once the installation completed click Finish.
Step 3. Create a Virtual Machine for Ubuntu 19.10
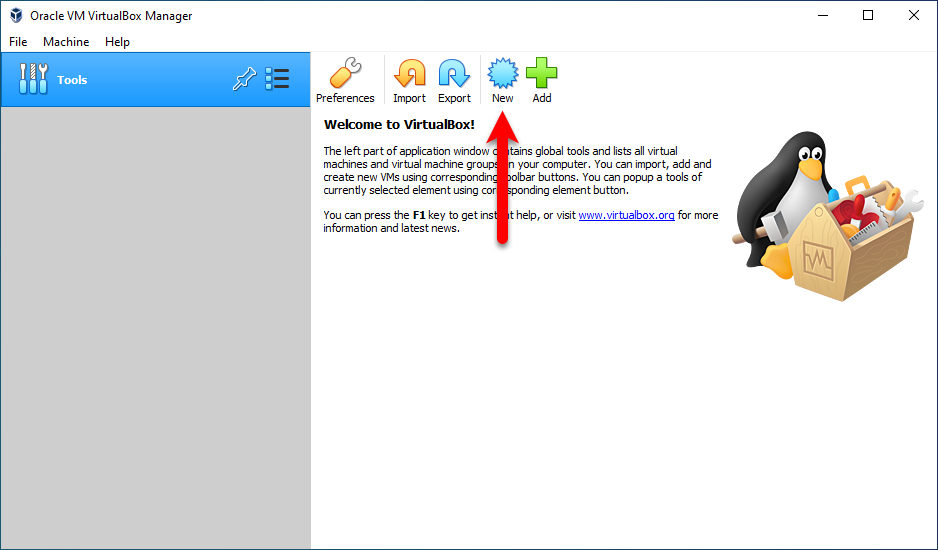
However, once the installation of VirtualBox performed on Windows 10. Go ahead and launch it. When VirtualBox opened on the main window click “New”.
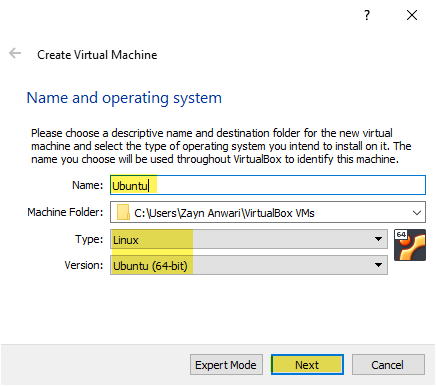
Type Ubuntu name it will automatically detect the “Type” and “Version”, once that’s done click next.
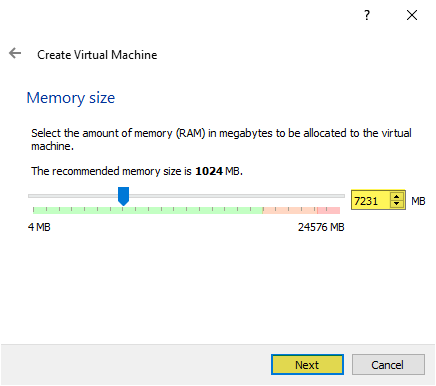
Specify the “Memory Size” for Ubuntu installation then click next.
On the hard disk window, select the second option “Create a virtual hard disk now” and click next.

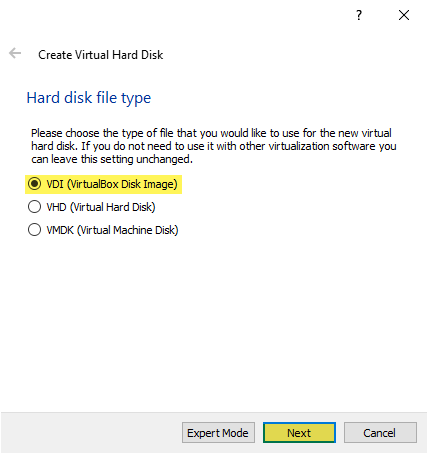
Select the VDI (VirtualBox Disk Image) option for the hard disk file type.
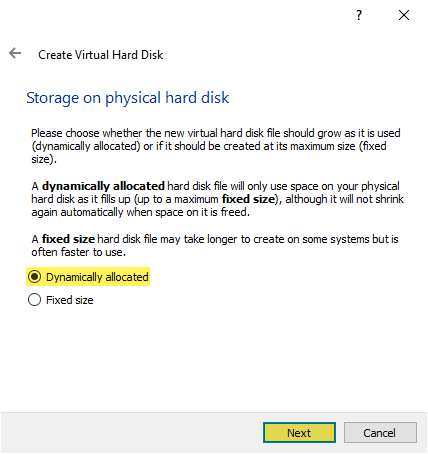
Select “Dynamically allocated” option then click next.
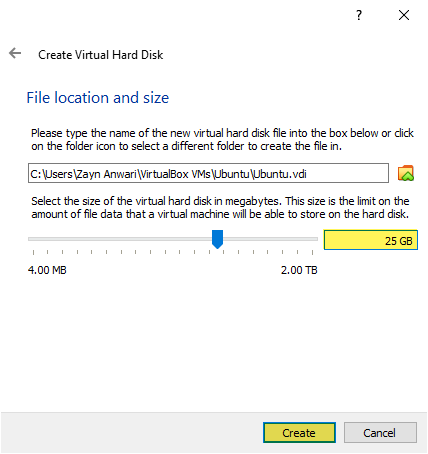
Manage the hard disk size for Ubuntu, then select the location where you want to install it and click create.
Step 4. Configure the Settings
For better speed performance of Ubuntu 19.10 on VirtualBox. You need to configure some important settings.
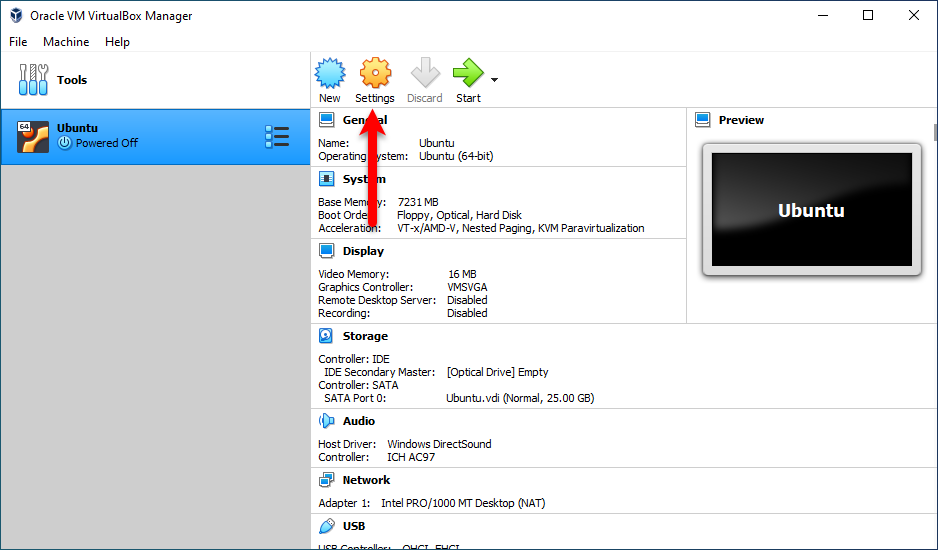
When the Virtual machine created, go ahead and select the created virtual machine then click “Settings”.
Once the settings window opened, navigate to left-handed and click on the “System” tab. From the system window select “Motherboard” and uncheck the “Floppy disk”.
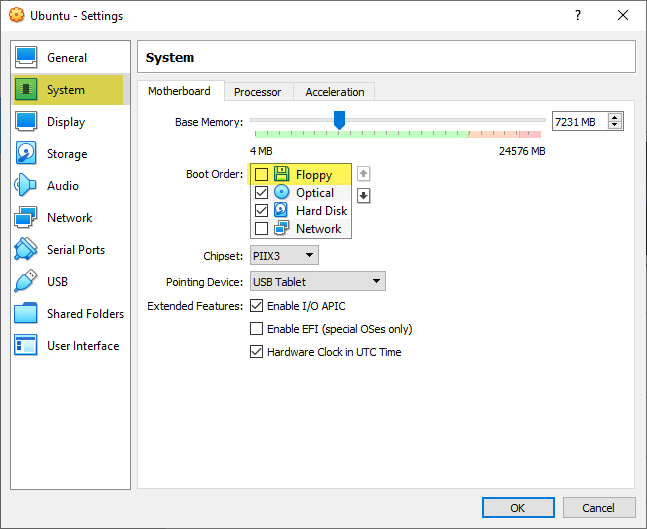
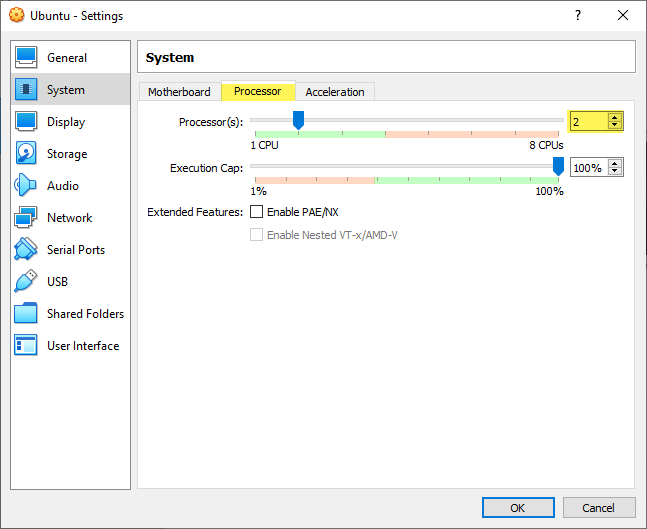
Navigate to the “Processor” option and increase the number of processors.
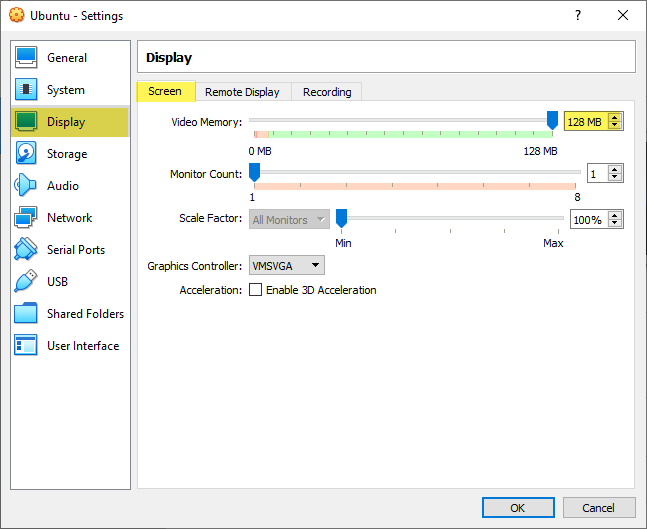
Click on the “Display” tab and increase the Video Memory up to 128MB.
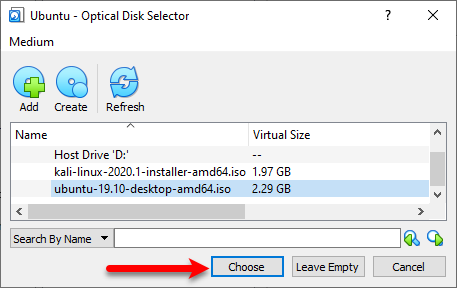
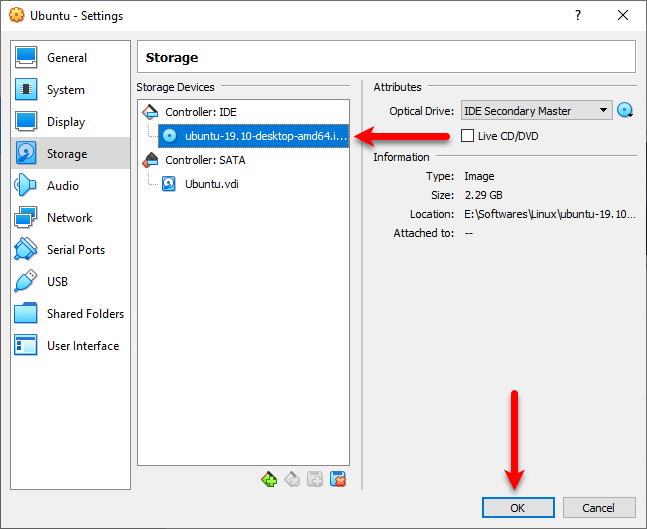
To insert the Ubuntu Image file click below down on the “Storage” tab. When the storage window appeared, click on “Empty” then click on “Disk icon” and select “Choose/create a virtual optical disk”.

Select the Ubuntu Image file, then click on the “Choose” option.
When the Ubuntu image inserted you will see like below screen, after that, click OK to save changes.
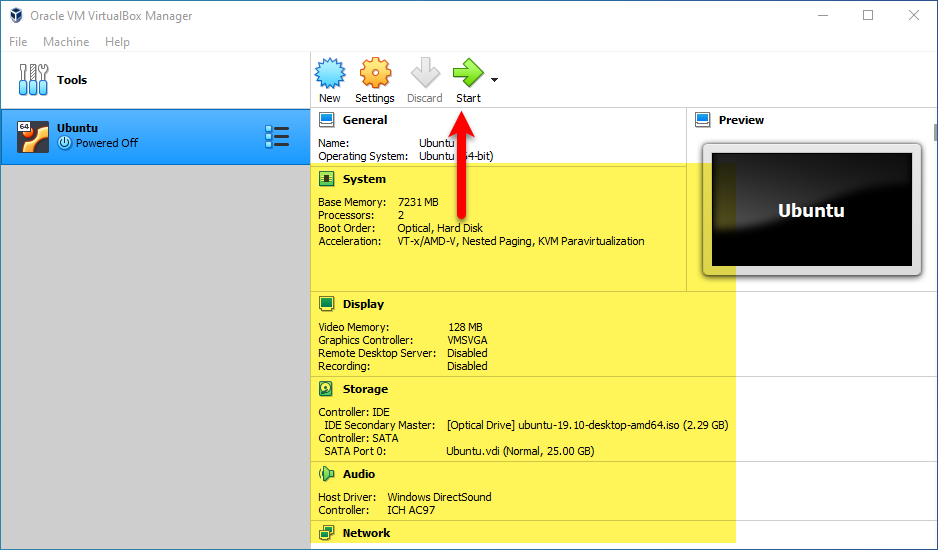
Step 5. Install Ubuntu 19.10 on Windows 10 using VirtualBox
When everything is ready so let’s get started. Select the created virtual machine of Ubuntu and click “Start”.
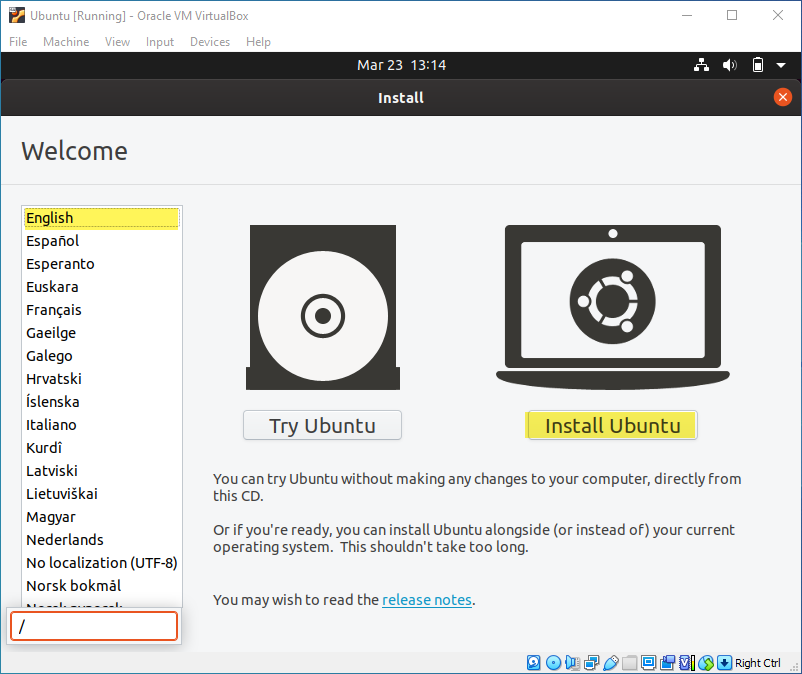
When the Ubuntu welcome screen appeared, select your language and click “Install Ubuntu”.
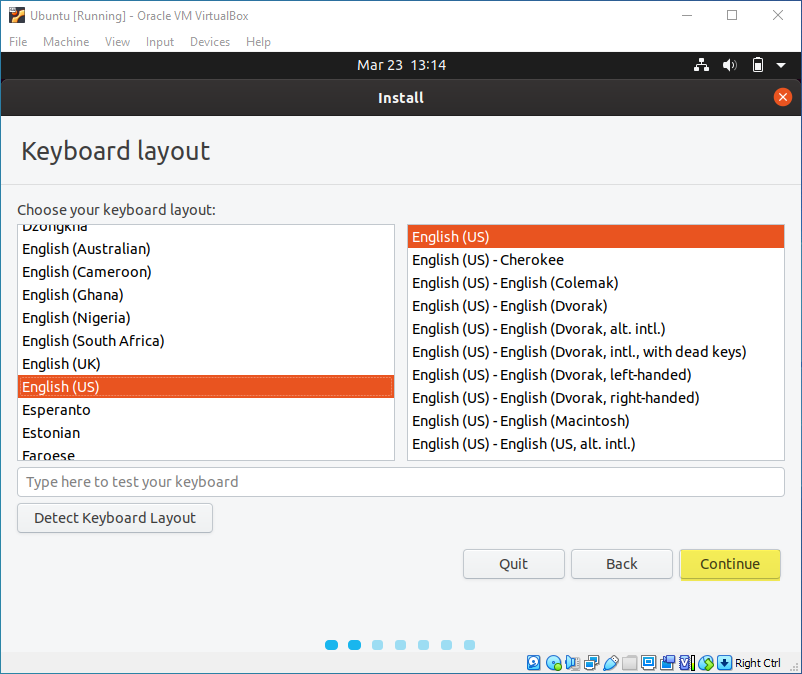
Select your keyboard layout and click continue.
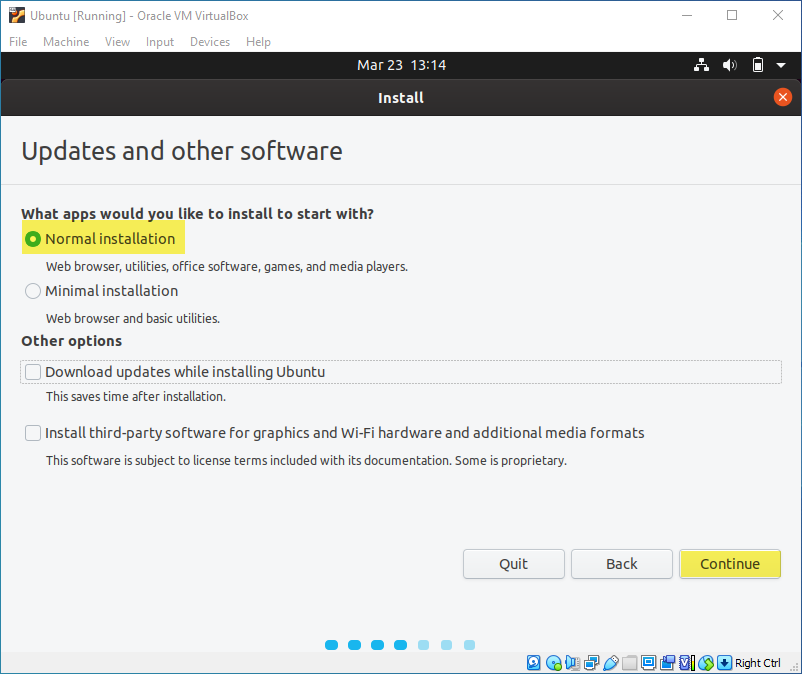
Ubuntu installation on VirtualBox required you to “Download updates while installing”. Or “Install the third party Softwares for graphics WiFi hardware and additional media formats”. I recommend you to uncheck them because it will take much time. Also, select the “Normal Installation” on the VirtualBox.
Select the option “Erase disk and install Ubuntu” and click continue.
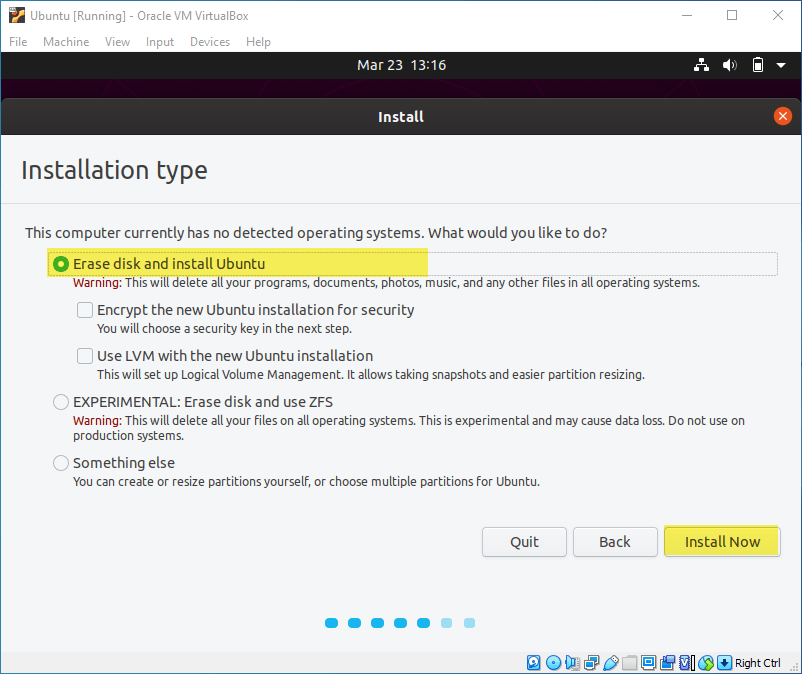
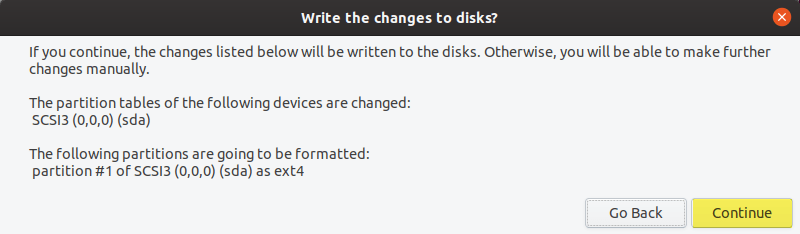
When you clicked continue, you will face a warning simply click continue on that.
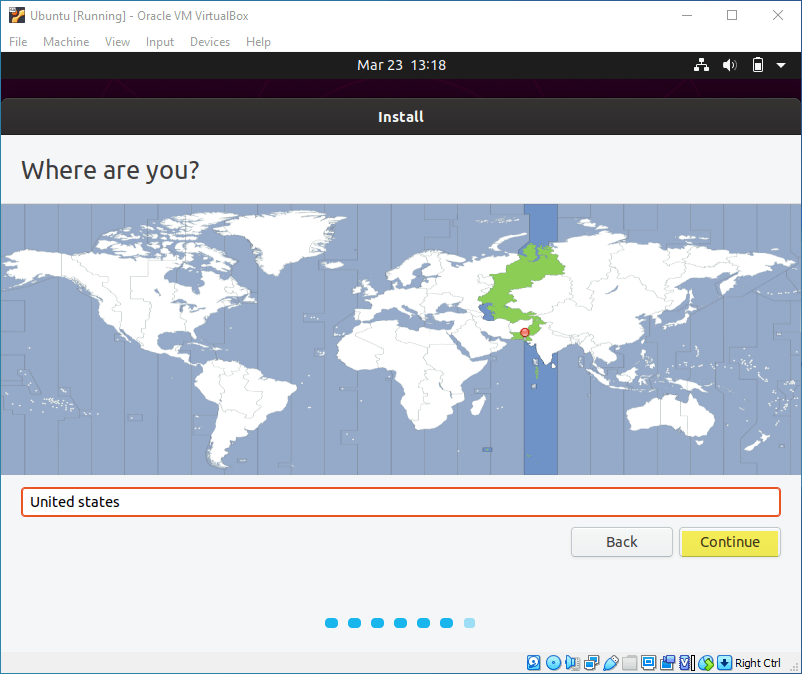
Select the location where you live and click continue.
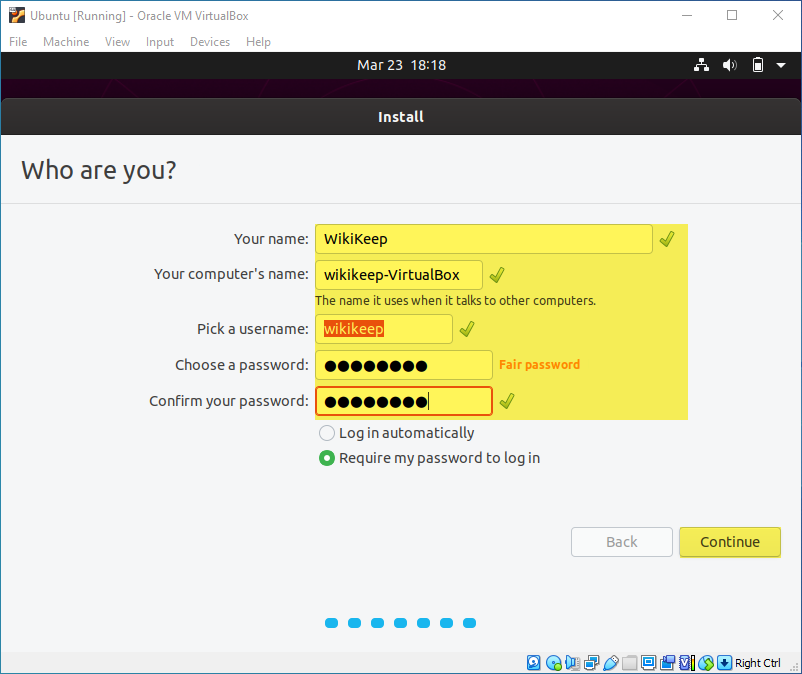
Enter Your Name, Your computer’s name, pick a username, choose a password, confirm the password and click continue.
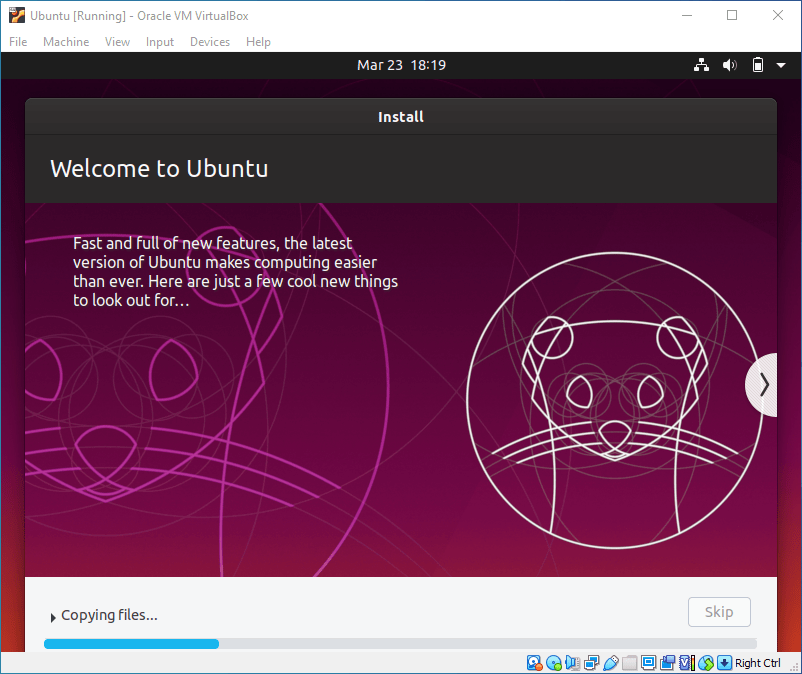
Wait until the installation should be completed, once the installation completed your virtual machine will restart automatically.
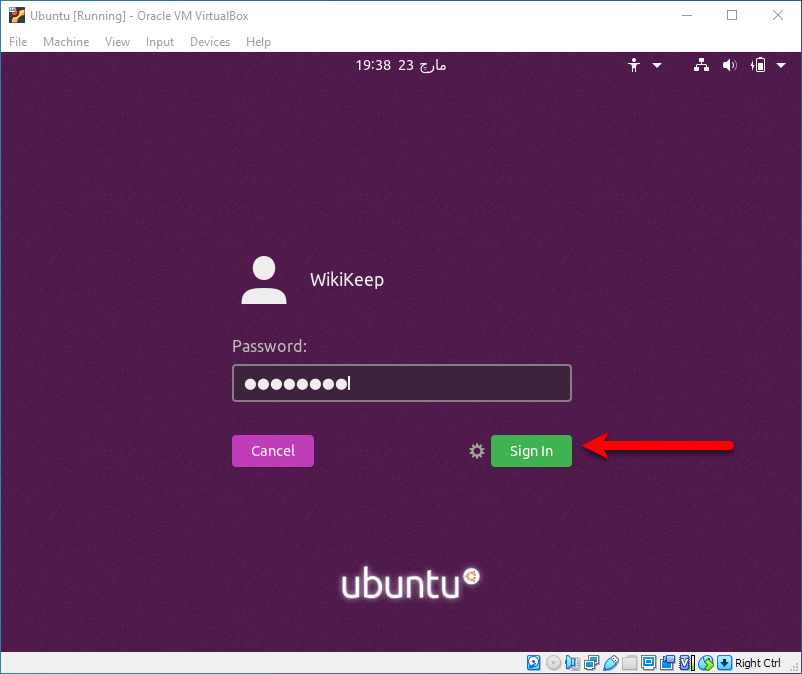
When you get back to Ubuntu, enter your password and hit enter.
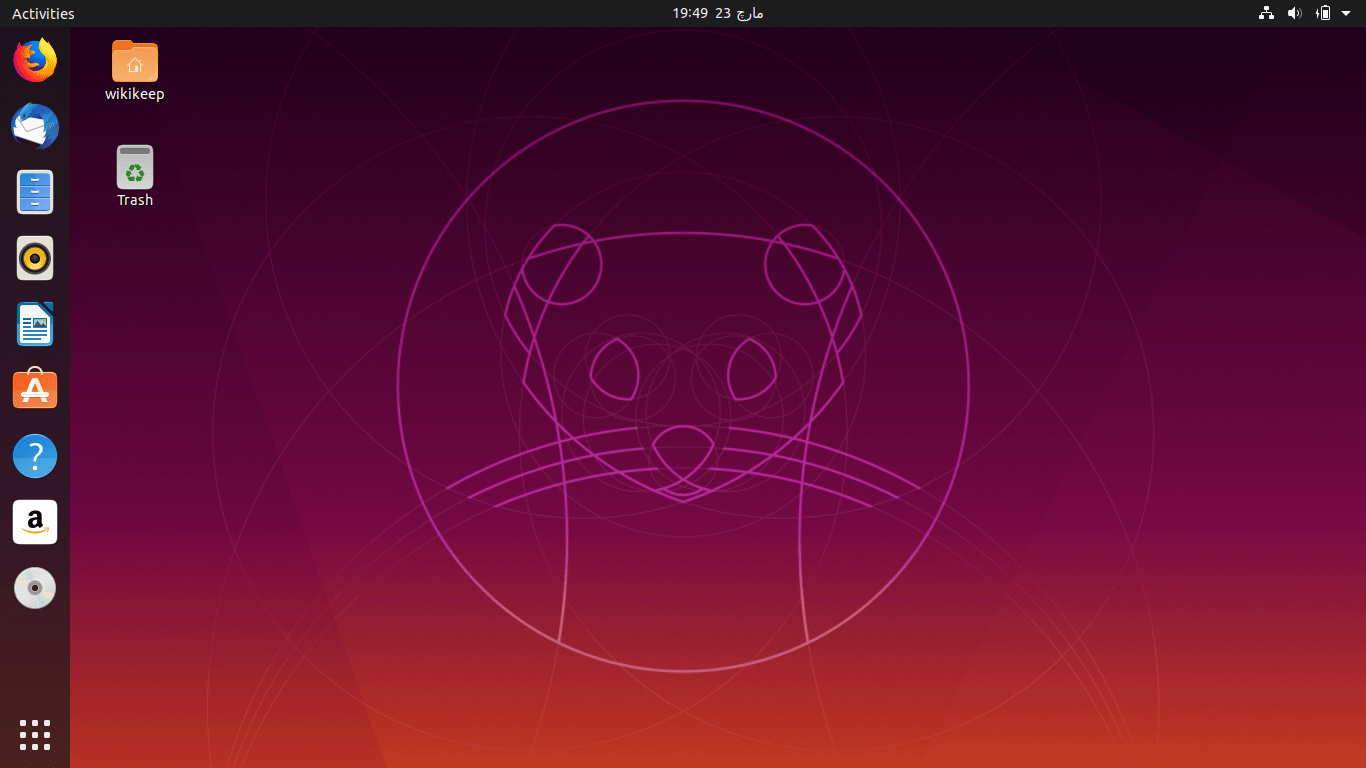
And that’s it Ubuntu successfully installed on VirtualBox with a few clicks.
Step 6. Enter Ubuntu Full-screen Mode
Now we approached the last step and that is entering Ubuntu full-screen mode on VirtualBox. To that. simply click on the top menu bar on “Devices” then select ‘Insert Guest additional CD Image”.

- When the Virtual Guest appeared click Run.
- Enter your password and click “Authenticate”.
- Wait for the guest installation tool.
That’s it if there is remaining something feels free to share with me below down in the comment section.