One of the most common error that after updating to Windows 11 Insider Preview build 22000.65, that we are encountered the search is not working. After bypassing the TPM 2.0 and secure boot during the installation, again in the 22000.65 update of Windows bundles of problems is being fixed. But again unfortunately most of users are complaining about the search bar is not working properly while search for any application.
This is common issue its normal that every user while installing the latest version of the operating system they are facing the problem on many portion of Windows or any other Microsoft OS. If we navigate to the internet and search for the information of fixing the problem the problem. Then we will find bunch of solutions for fixing the error.
However, through this guide I will show you step by step how to Fix Windows 11 Search is not working. Also, if you want to update your Windows 11 build 22000.51 to Build 22000.65. Simply navigate to Windows start menu>click on Settings>from left-handed window side click on Windows update>and Check for Update. Once the update appeared simply download and install it.
If you want to update Windows 10 to Windows 11 then you might face error of TPM 2.0 and Secure Boot. However, you can check the below links for fixing all the problems which are related to Windows 11 installation on your PC or Laptop.
- How to Enable TPM 2.0 & Secure Boot on BIOS Settings
- How to Install Windows 11 Without TPM 2.0 and Secure Boot on PC?
- How to Fix This PC Can’t Run Windows 11 – New Method
How to Fix Windows 11 Search Bar Not Working?
Step 1.
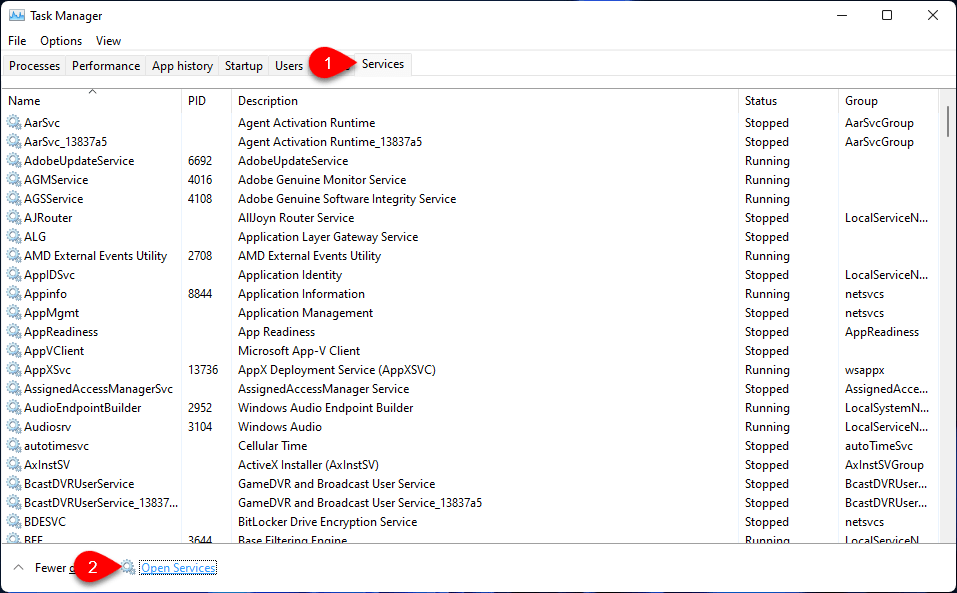
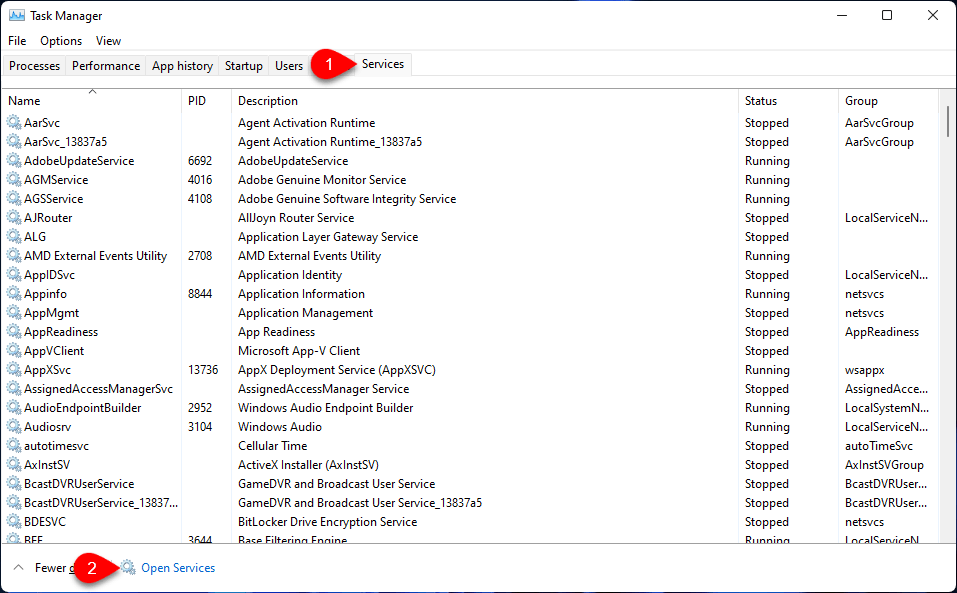
There are bunches of method which you can find on the internet, but the method which I am explaining below down will work pretty fine. Simply press and hold up the “Ctrl+Shift+ESC” button to open the Taskbar menu. When the Taskbar opened click on the Services>and click Open Services.
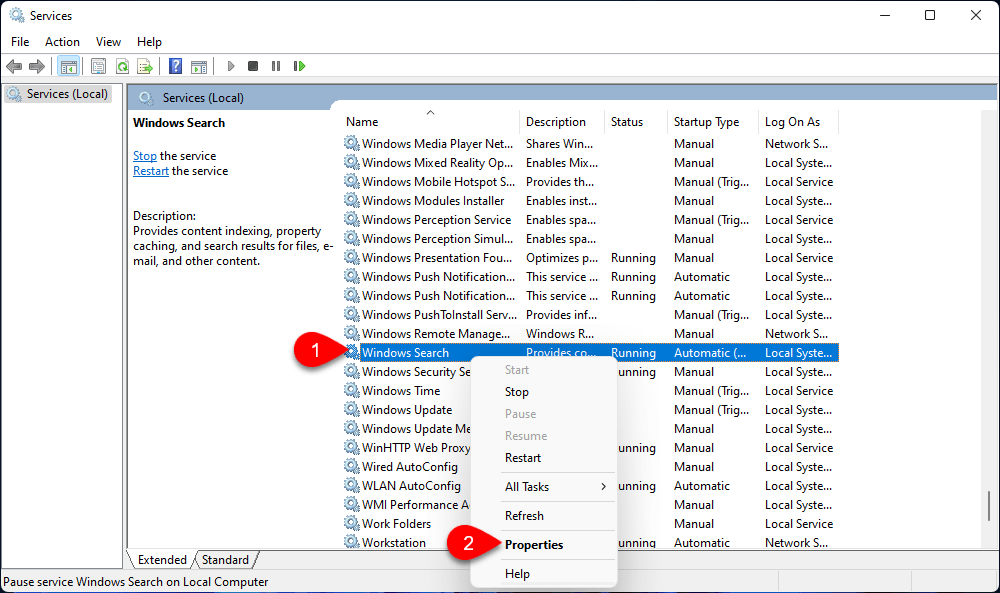
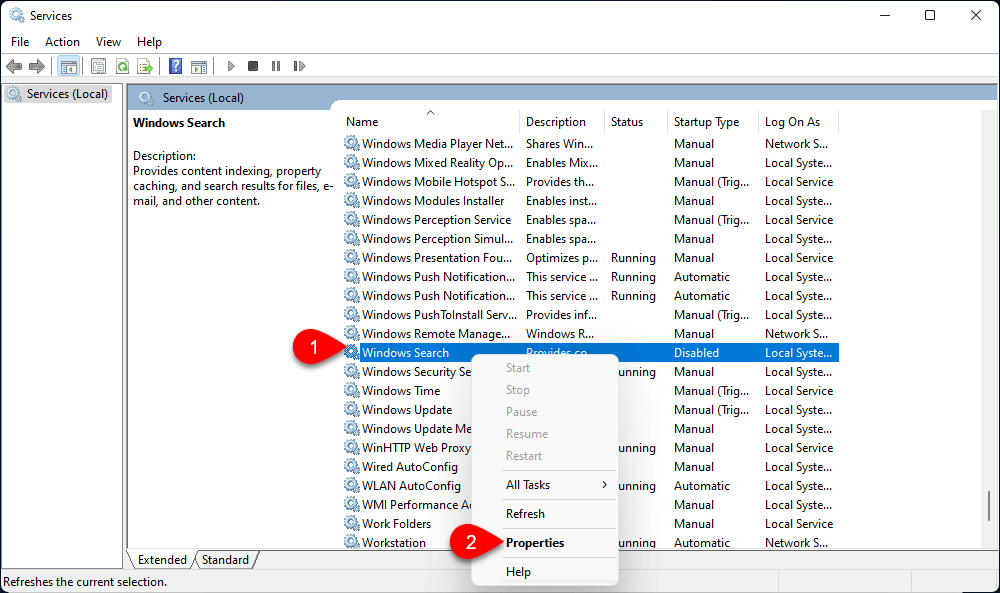
When the services opened scroll down and find out the “Windows Search” option, right-click on Windows search and select Properties.
On the Windows search properties click on Stop button.
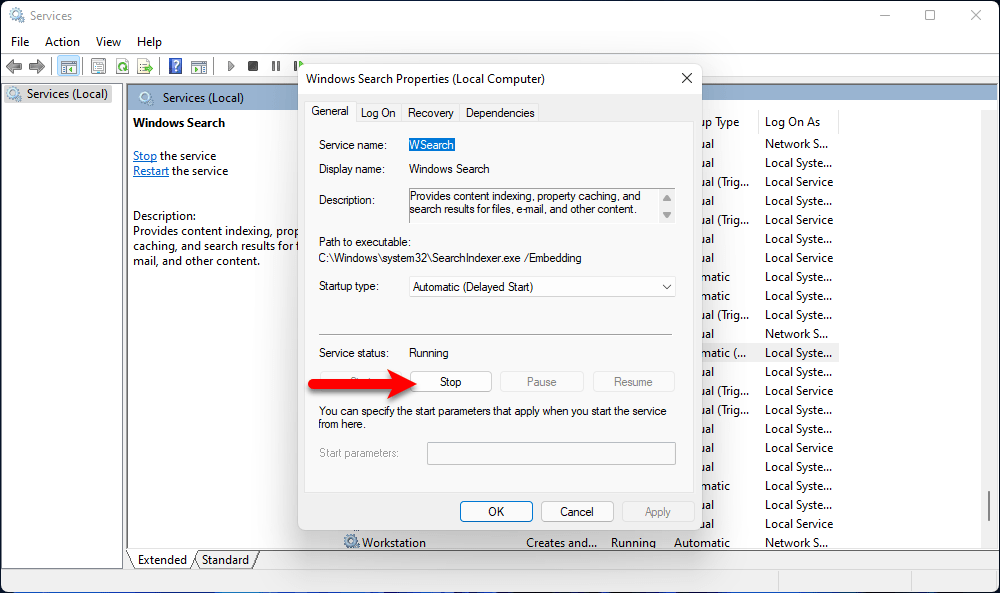
Now on the Startup type select Disabled then click Apply and click OK.
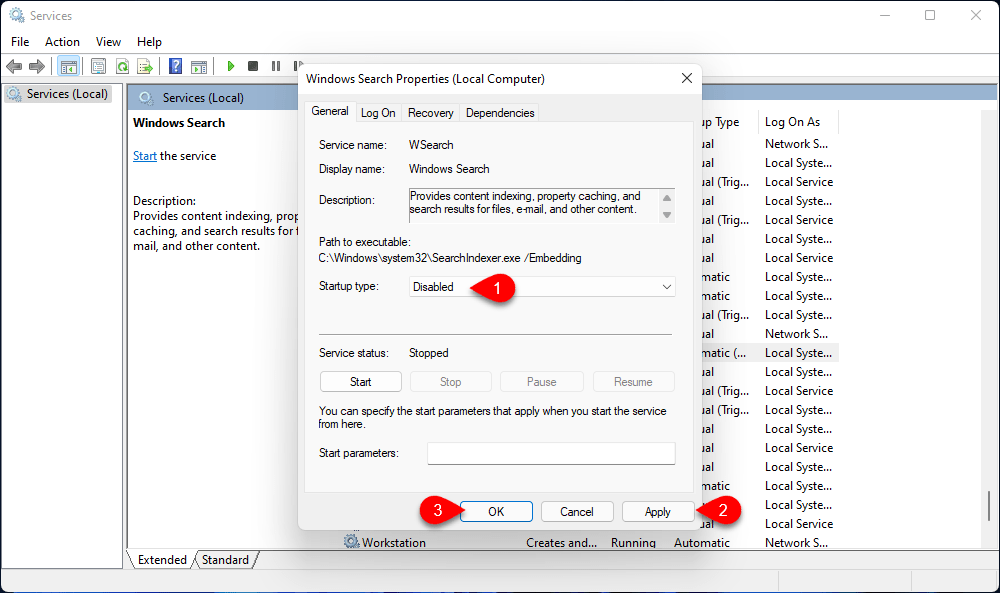
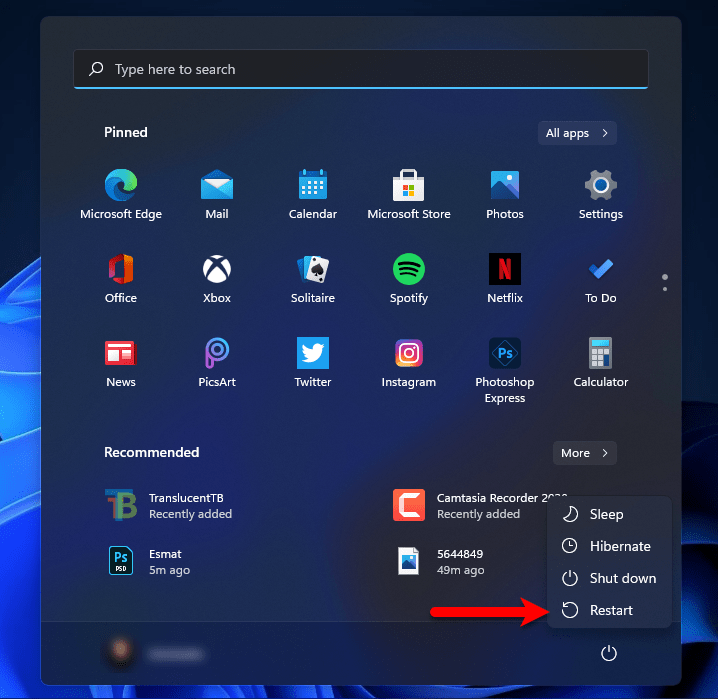
Once the changes made navigate to Windows start menu click on the Power button and Restart your computer.
Step 2.
When your computer successfully started again coming back to main windows. Once again click “Ctrl+Shift+Esc” key to open up the taskbar window. Again click on Services and click Open Services.
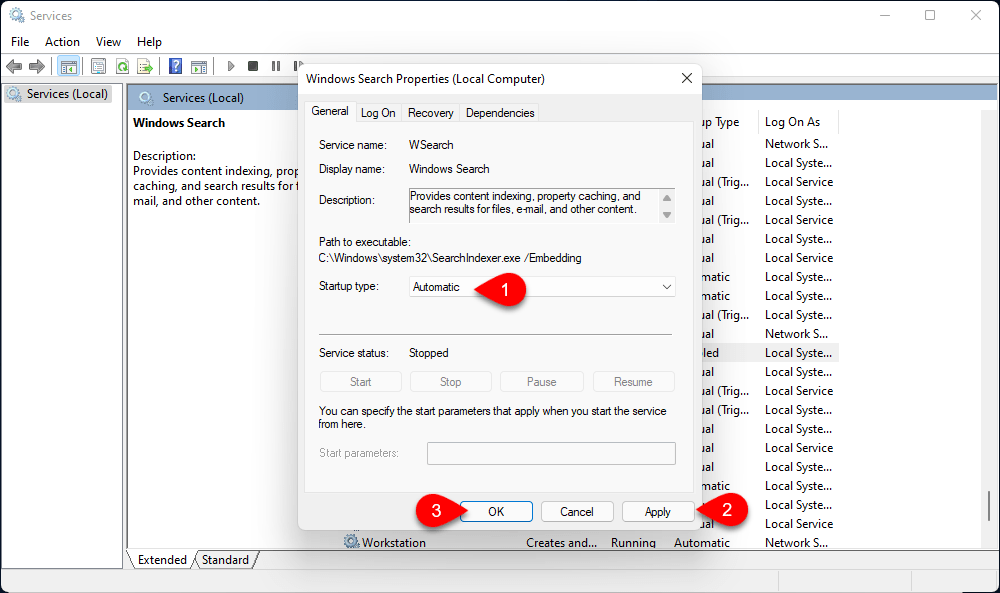
When the services window opened find out the Windows Search option then right-click and select Properties.
Now again on the Startup Type option select the “Automatic” option then click on Apply and click OK.
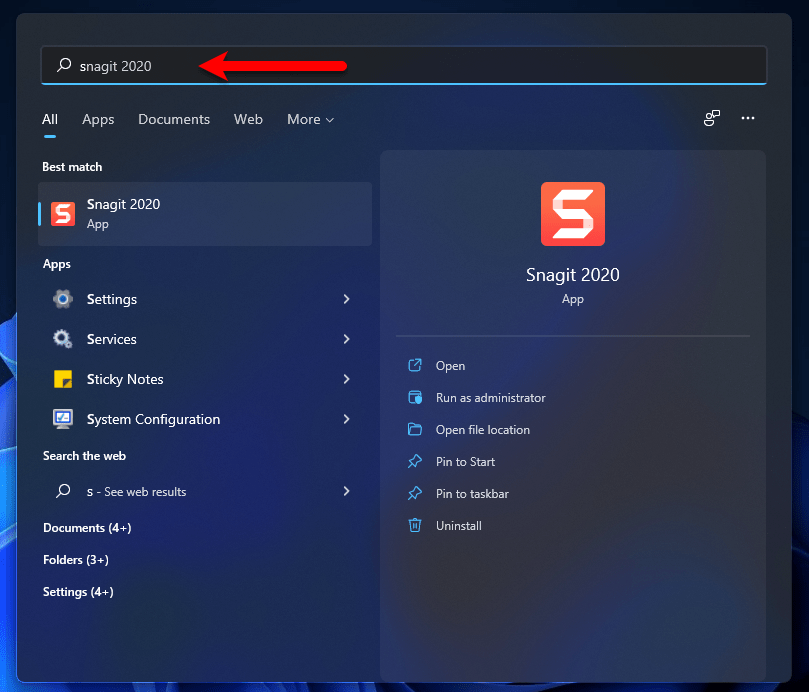
Now go to Windows start menu search for anything and check out that whether its working or no.
- How to Download Windows 11 ISO Without Being An Insider
- Download Windows 11 ISO Image file – Latest Version
- How to Create Windows 11 Bootable USB Flash Drive?
Final Point
I hope you fixed the error of Windows 11 search bar, if you faced again the problem feel free to share it with us via the comment box section.