There are several virtual machines in this era, but the inside built virtual machine is much interesting. Because it won’t be counted as third-party software. However, if you want to test third-party software of virtual machines, there is VMware Player, VMware Workstation, VirtualBox. But you might have information about the Hyper-V, which is available in every version of the Windows operating system above Windows 7. Mostly, the Hyper-V is the insider build application virtual machine for Windows users that allows testing several operating systems on it.
While installing the operating system on your computer, the Hyper-V features are not enabled. Therefore, you need to move your mouse and make a few clicks in order to enable the Hyper-V. On the other side, with the same features that VMware or VirtualBox has. Also, the Hyper-V is having that, like you will create a new virtual machine for the new guest OS, then run the installation and install the Guest OS on it.
The Hyper-V is a free built-in feature that you can enable it, to run or test different operating system on it. So, in this article, I will guide step by step how to enable Hyper-V on Windows 11 PC. If you are new to Windows 11 operating system, then you may want to install it on third-party applications called a virtual machine. So, there are no worries we have covered each and everything in the below down-links how to install Windows 11 on VMware and VirtualBox.
- How to Install Windows 11 on VirtualBox on Windows PC?
- How to Install Windows 11 on VMware on Windows PC?
How to Enable Hyper-V on Windows 11 PC?
Have you ever noticed in Windows 10 PC, that after upgrading to its latest update Microsoft just moved some features to the Settings window? Previously on the older version of the Windows operating system, you might find out the Hyper-V features in the control panel window. But now most of the features are moved to the Settings window including Hyper-V.
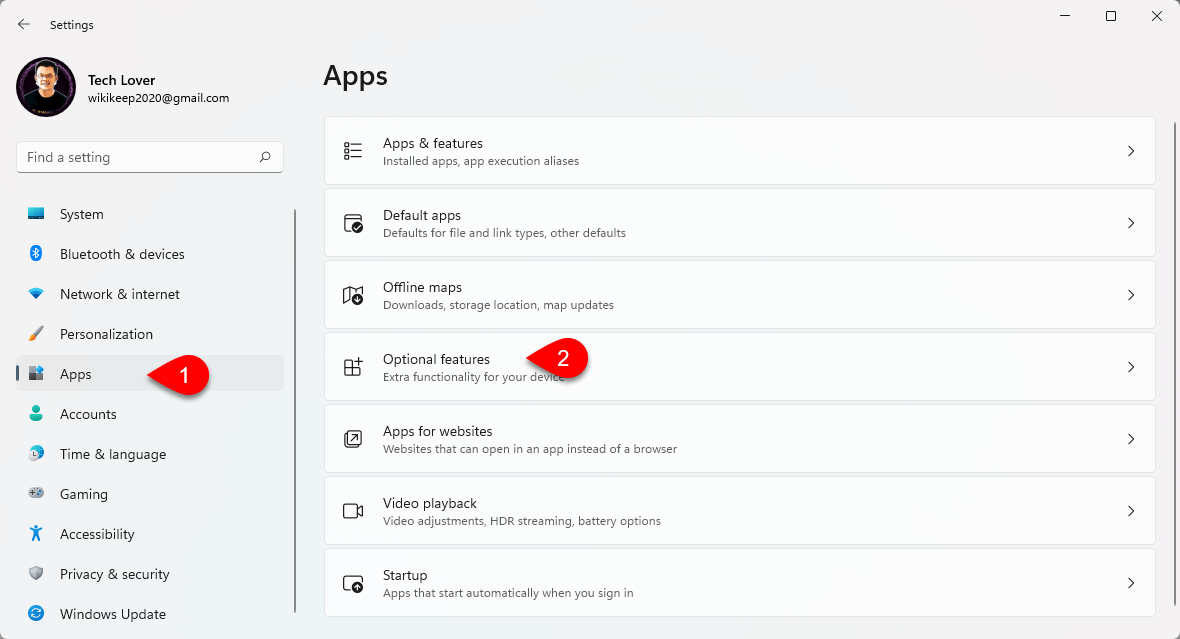
Step 1. For enabling the Hyper-V feature on Windows 11, press and hold up the Windows+I Key to open the Settings window. When the Settings window opened simply click from the left-handed side click on the Apps and find out the “Option Features”.
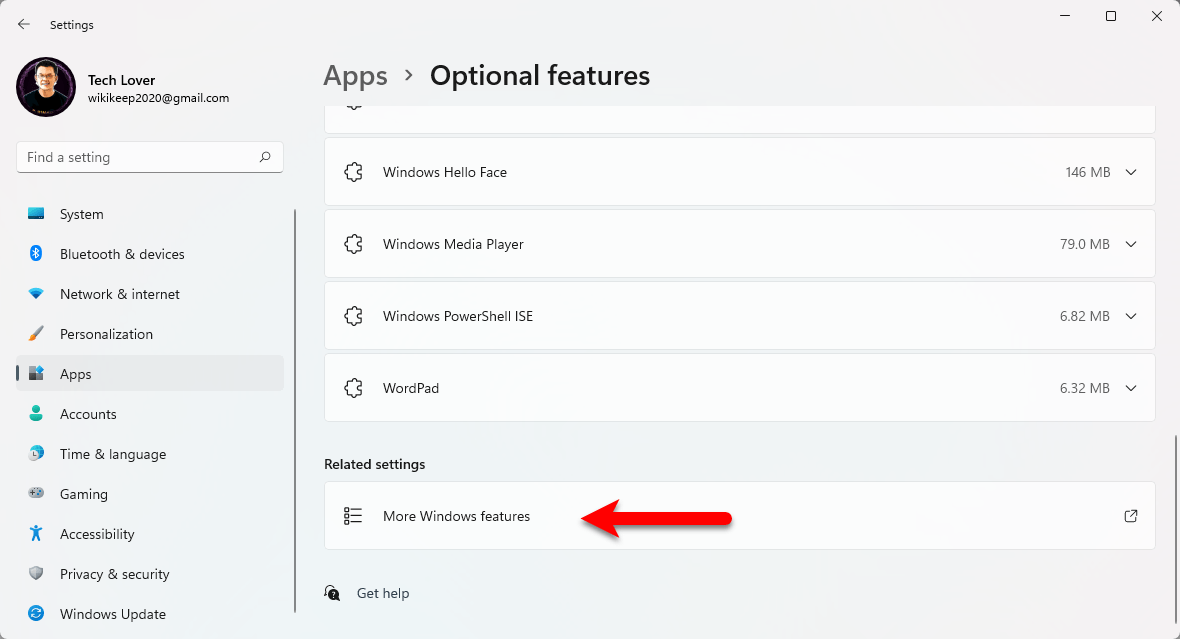
Step 2. On the optional features window scroll down and under the related settings click on the “More Windows Features”.
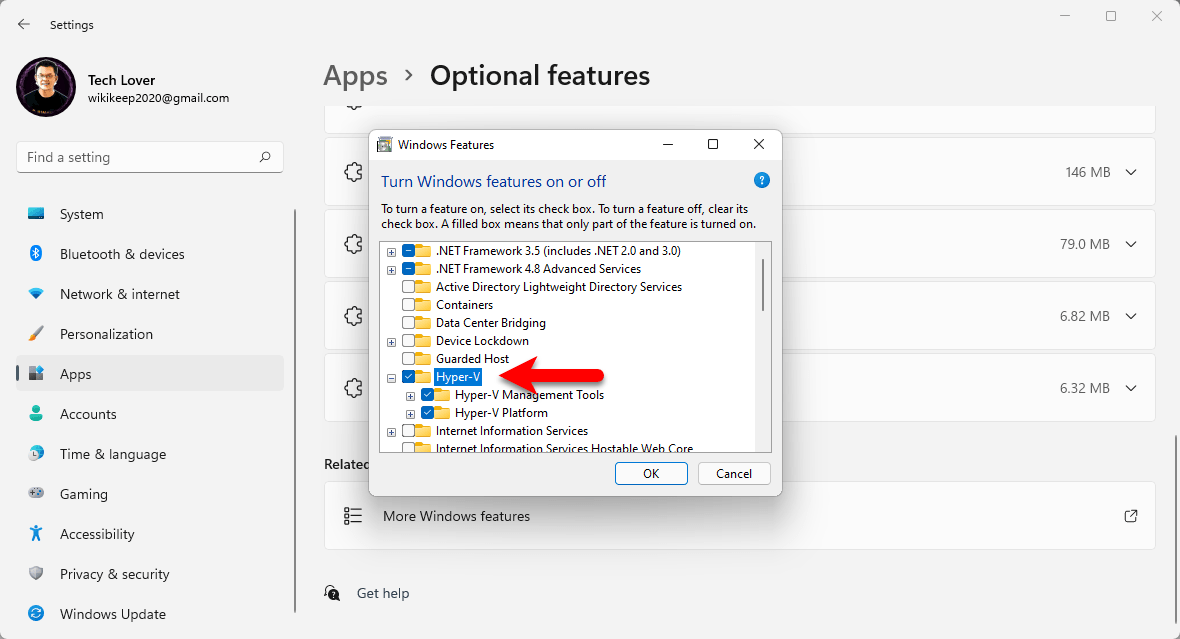
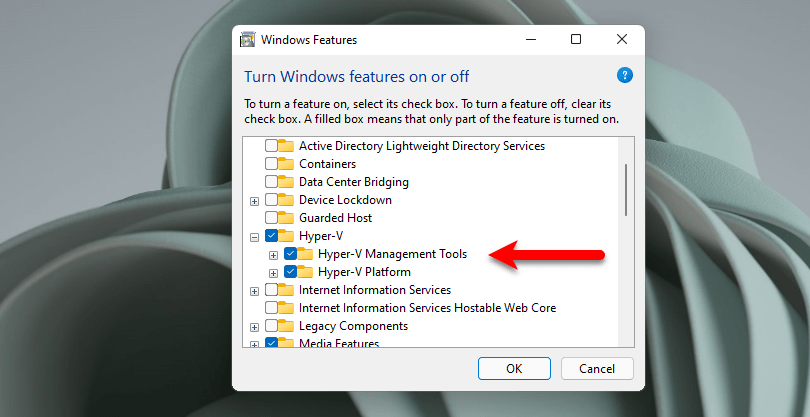
Step 3. When the Windows Features window opened again scroll down and find out the “Hyper-V” option. Simply check the box of Hyper-V to enable it.
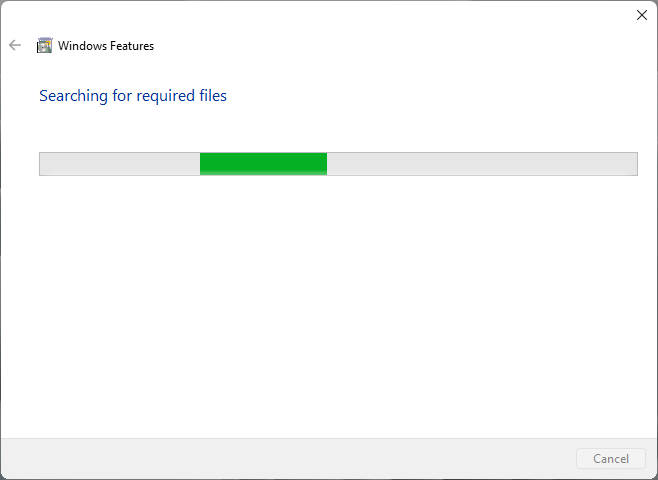
Step 4. After enabling the Hyper-V, wait for it, it will install a few important features of the Hyper-V.
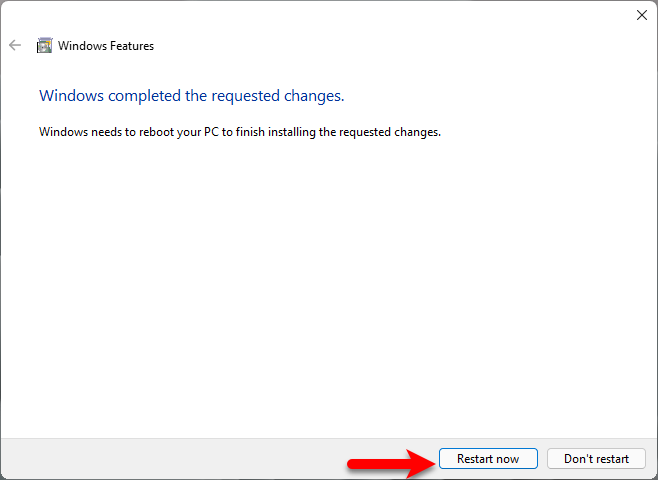
Step 5. After installing the required features you will be asked to restart your computer. So, simply click on the restart now option.
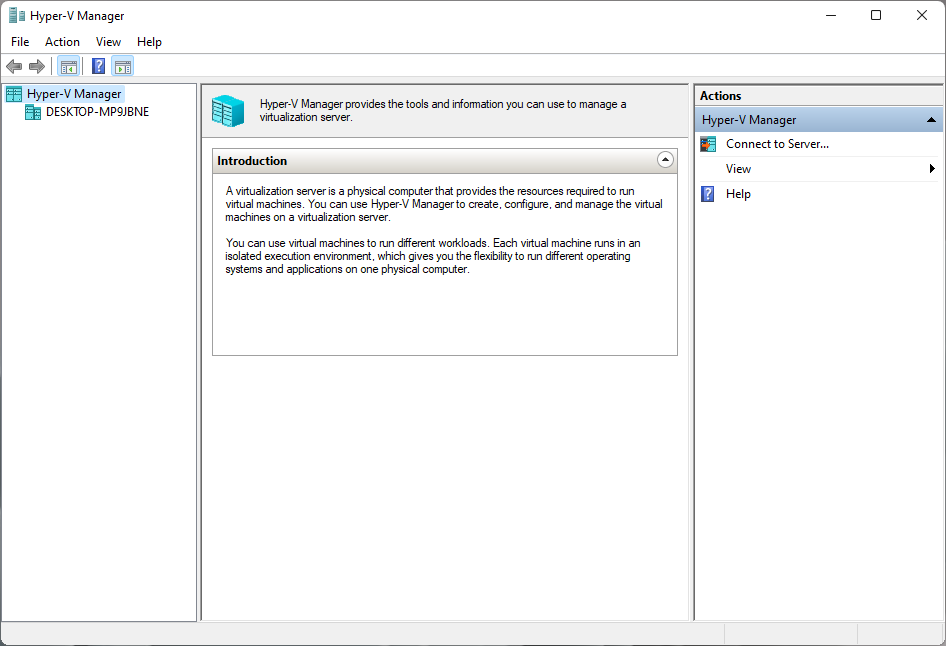
Step 6. After your computer restarted go to Windows 11 start menu type there Hyper-V. And press enters to launch the Hyper-V.

Step 7. Now you can see the Hyper-V is launched on Windows 11, enjoy using Hyper-V on Windows 11.
Try Another Method of Enabling Hyper-V on Windows 11
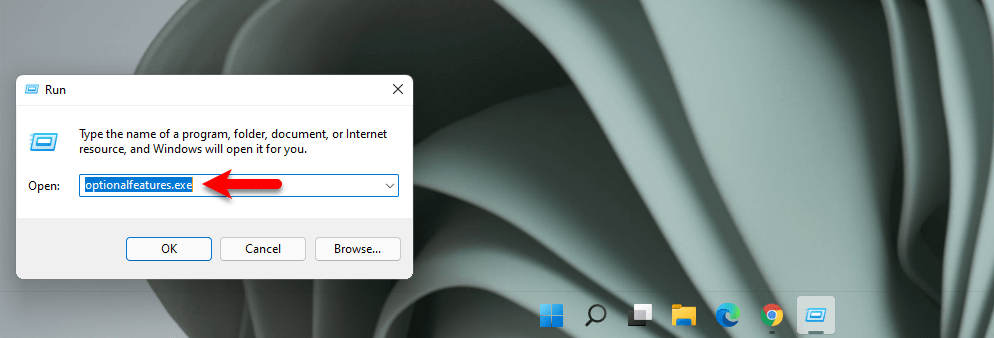
This method of enabling the Hyper-V feature on Windows 11 or any other operating system is pretty much easy. Simply, press and hold the Windows+R to open the Run window. Once the Run window opened on its search bar type “optionalfeatures.exe” and press enter.
Now scroll down find out the Hyper-V and enable the Hyper-V.
Final Point
If you faced any kind of problem feels free to share with us via the comment section box. Also, follow our website our next target will be the installation procedure of Windows 11 on Hyper-V.