Windows 11 is the latest operating system which was released several weeks ago, if you are a Windows user then you can upgrade your machine to Windows 11 for free. If you are using Windows 10, then it’s a free opportunity to test out the latest update of Windows OS that is called Windows 11. In the era of Windows 11, Microsoft brought some interesting changes based on security options. Like if you want to install Windows 11 on your machine, so your machine should support the TPM 2.0 chip. If you are using the latest laptops or custom PCs then you can easily install Windows 11.
Windows 11 is still in the Insider Preview mode, so it means the final update of it is on the way soon it will be available in our hands. On the other side, Microsoft promised to make that update complete and will release its final update soon later this year. Also, the update procedure is pretty much easy if you want to update your Windows 10 to Windows 11 then it’s free of cost. And you can easily update it without any charges. So, if you want to update your Windows 10 to Windows 11 then you have to register for the Windows 11 Insider program through the Windows Settings>Insider Program option.
However, in this guide, I will show you step by step how to install Windows 11 on Hyper-V on Windows PC. Have you ever tested the method of installing the Windows operating system on Virtual machines like VMware or VirtualBox if yes? then also have a look at the below down-link on how to install Windows 11 on VMware and VirtualBox on Windows PC.
- How to Install Windows 11 on VMware on Windows PC?
- How to Install Windows 11 on VirtualBox on Windows PC?
- Download Windows 11 ISO Image file – Latest Version
What is Virtual Machine?
Virtual Machine is a platform that allows every user to run several operating systems at the same time on a single machine. Like if you are a Windows user then you can run Windows, macOS, Linus, Android OS, on your Windows PC machine using a Virtual machine. On the other side, if you are a Mac user then you can run Windows, macOS, and Android on the virtual machine on the macOS PC.
However, there are bunches of virtual machines like VMware Workstation/Player, VirtualBox, VMware Fusion, Hyper-V. So, the above title mentioned installing Windows 11 on Hyper-V virtual machine. Hyper-V is also an inside built-in platform that allows Windows users to test different OS at the same time.
What is Hyper-V?
Microsoft Hyper-V codenamed Viridian and briefly known before its release as Windows Server Virtualization, is a native hypervisor. It can create virtual machines on 32-Bit and 64-Bit systems running Windows. For the first time, Microsoft launched the Hyper-V inside the Built-in platform in 2016, At that time most of the users were testing the operating system on other platforms such as VMware, and Oracle VirtualBox.
How to Install Windows 11 on Hyper-V on Windows PC?
For installing Windows 11 latest operating system on Hyper-V virtual machine on Windows PC. You have to enable the Hyper-V features on your Windows PC. Because the Hyper-V is a feature that is not enabled in all Windows, so for creating and install other operating systems on it you have to enable the Hyper-V feature. If you don’t know how to enable it then check the below down-link.
Create a New Virtual Machine on Hyper-V
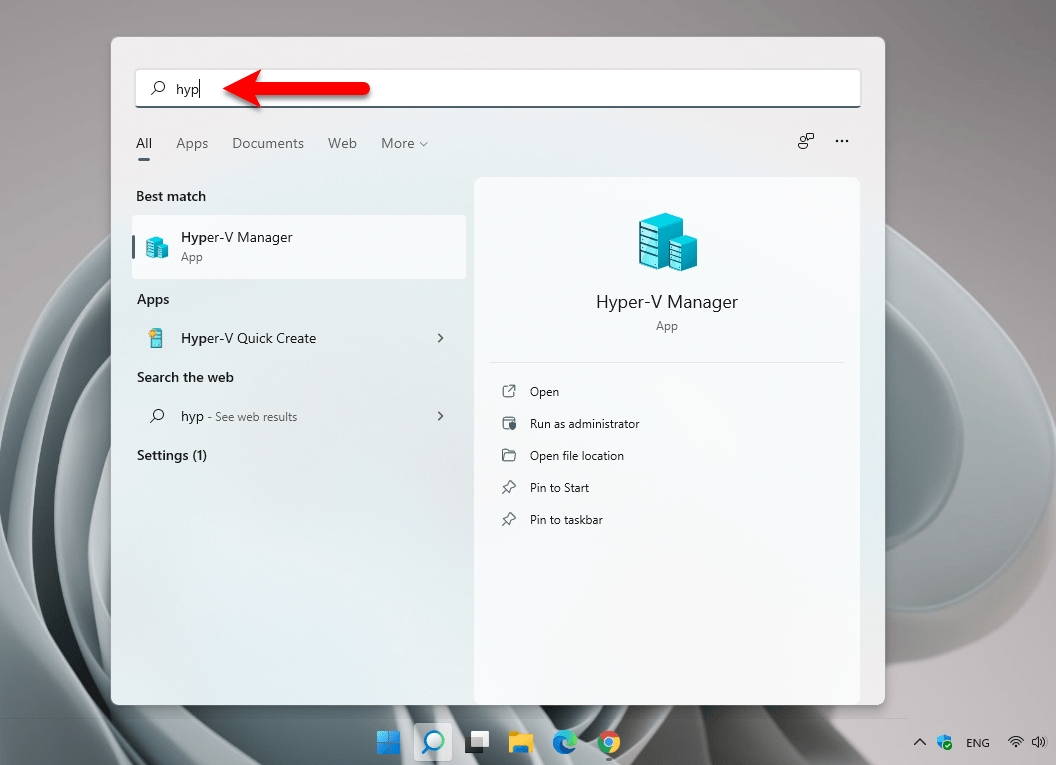
Once you have enabled the Hyper-V feature on your Windows, then you have to create a new virtual machine. For creating a Virtual machine navigate to the Windows start menu click type “Hyper-V”, once it appeared press enter to launch.
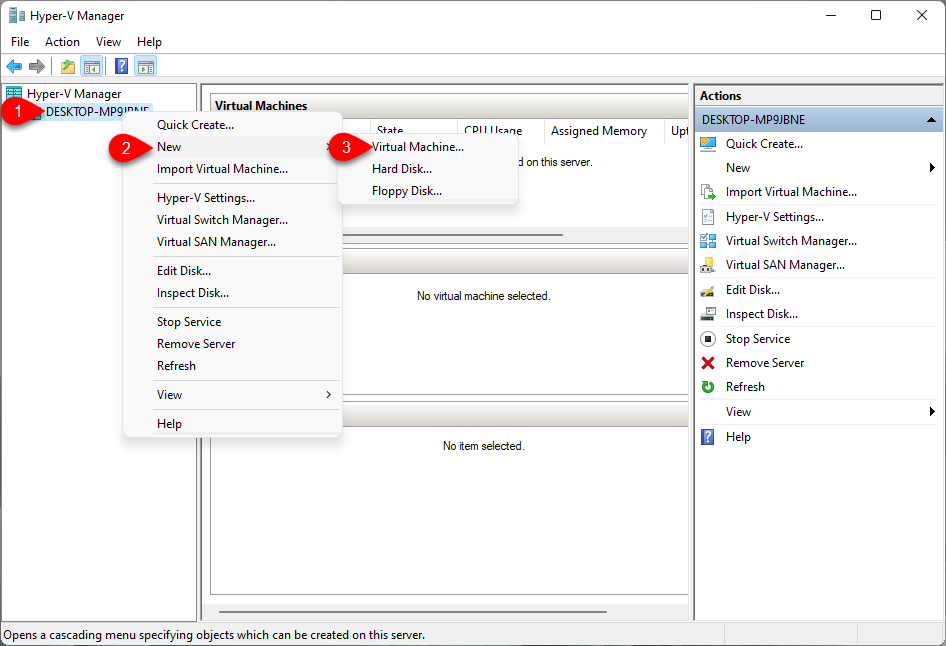
When the Hyper-V opened from the left-handed side, right-click on the “Hyper-V Manager”, click New>and click virtual machine.
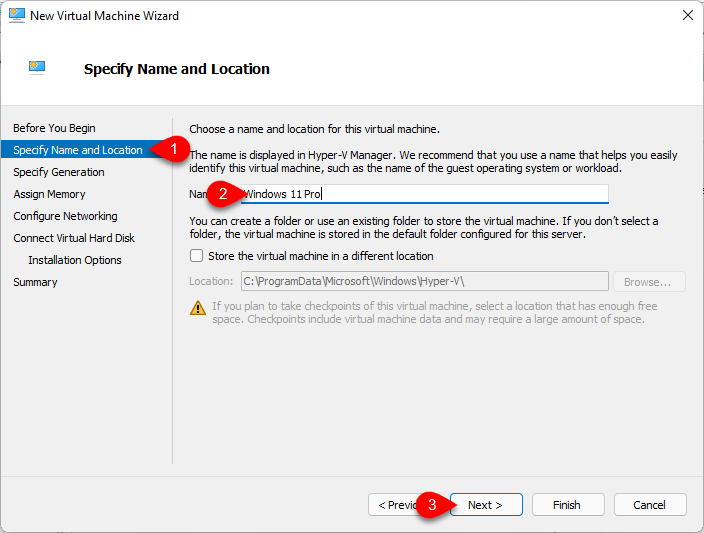
When another window opened at the first wizard screen click next without any changes.

Specify name and location then click next.
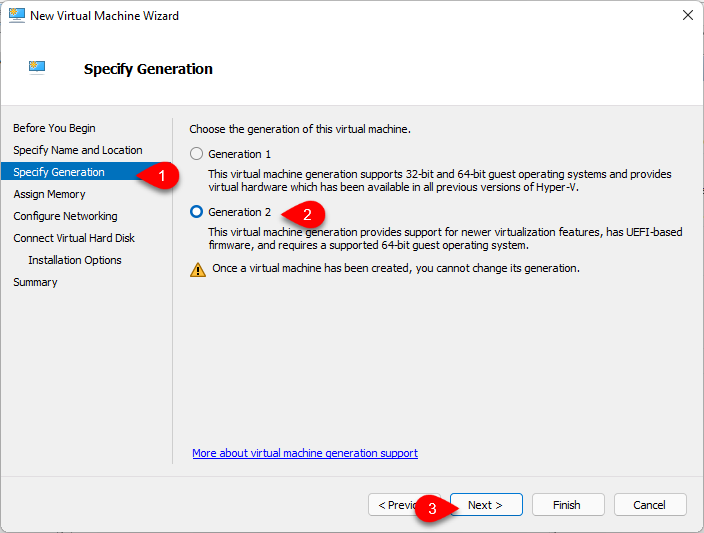
Specify the Generation, so select “Generation 2” and click next.
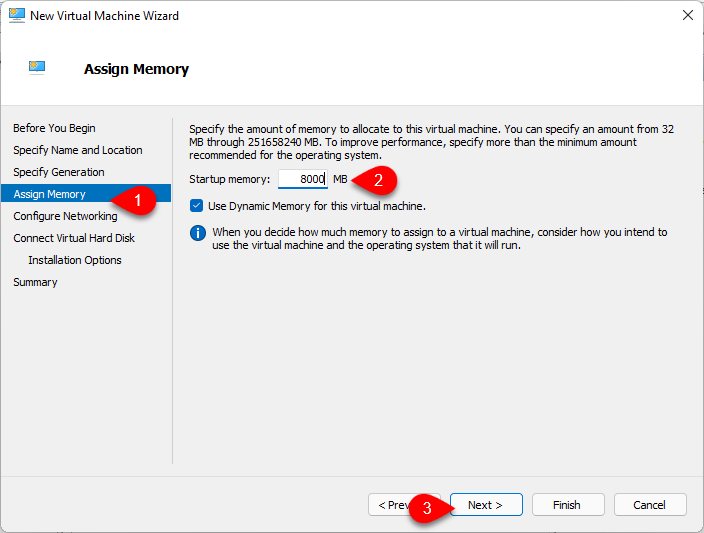
Assign the Memory, you have to select the memory size according to the memory installed on your PC, then click next.
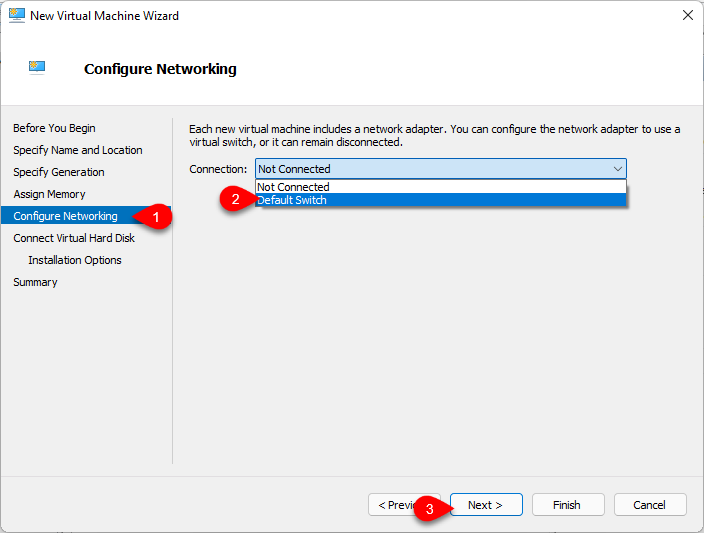
Configure Networking, click on the connection option and select the “Default Switch” option, and click next.
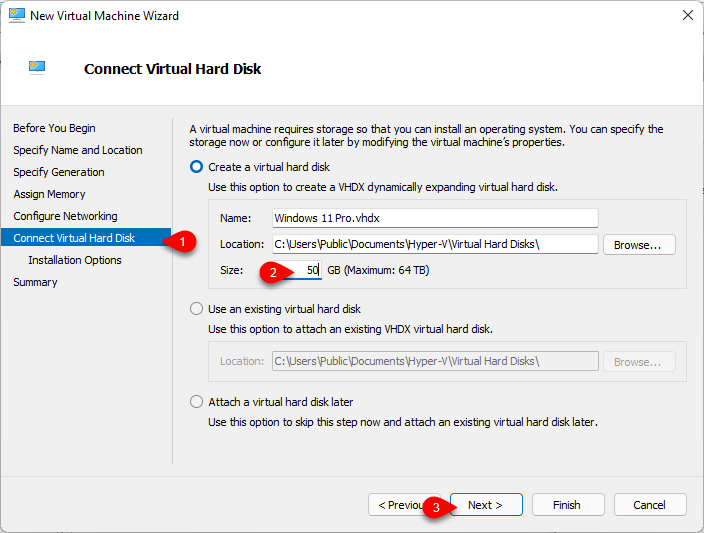
Now connect Virtual hard disk, click on Create a Virtual Disk option, specify the disk size, and click next.
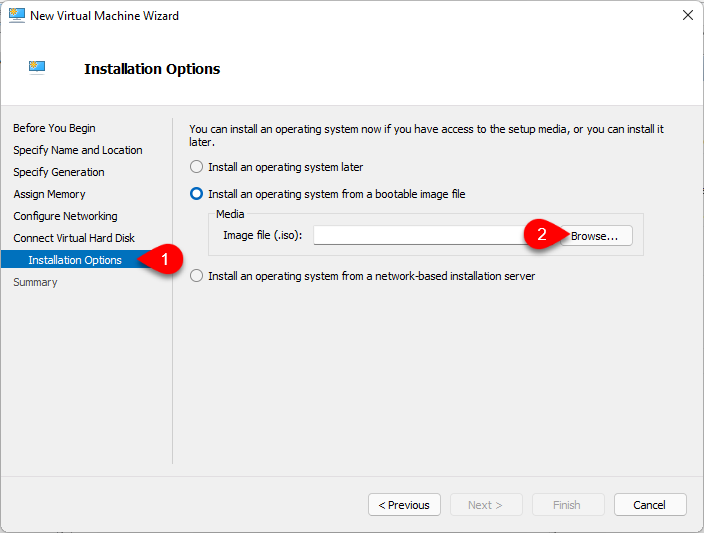
Select the installation options, choose the “Install an operating system from a bootable image file”, then click on the Browse option for inserting the ISO image file of Windows 11.
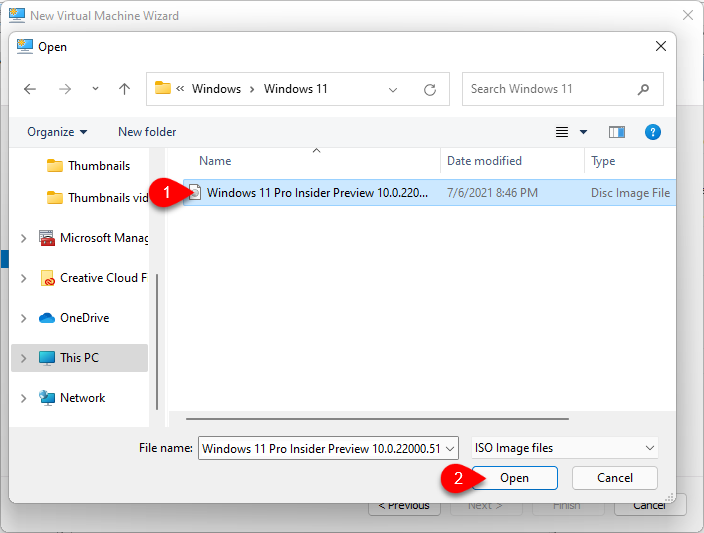
Select Windows 11 ISO image file and click Open.
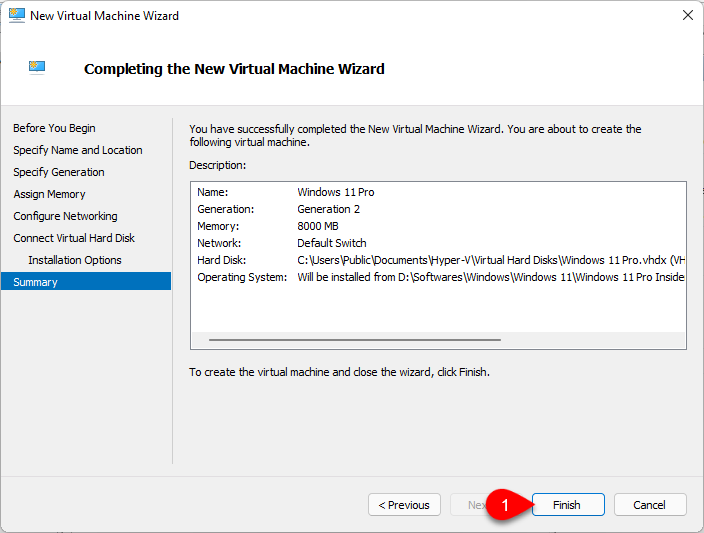
Once the Windows 11 ISO image file is inserted in the Summary window click Finish.
Edit the Hyper-V Virtual Machine Settings
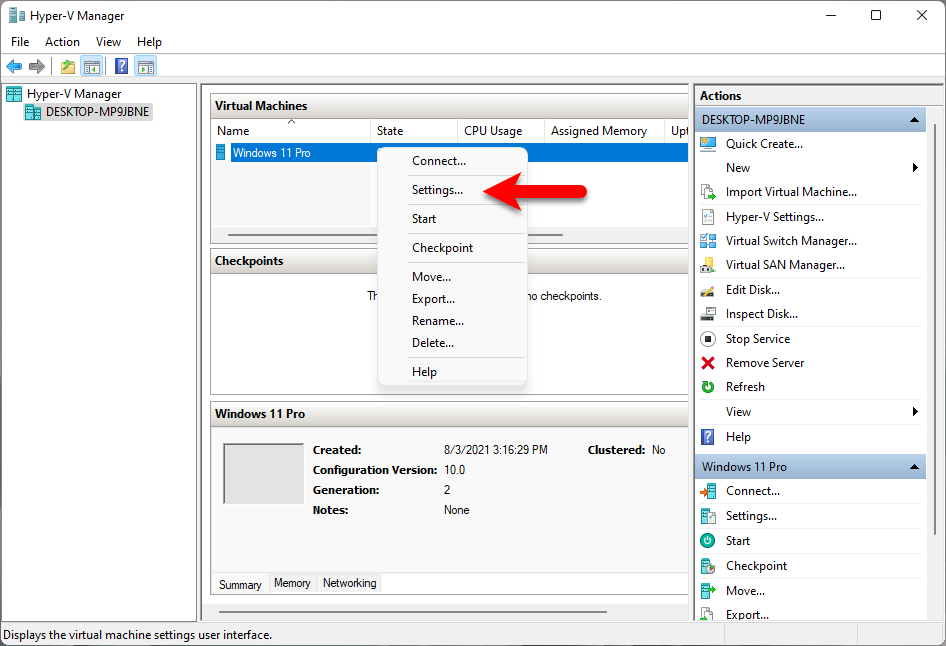
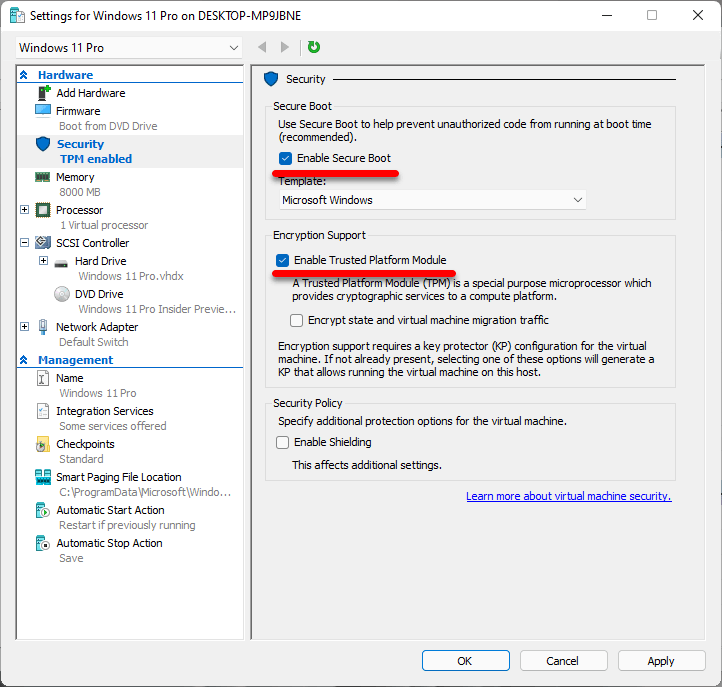
Indeed if you have known that for performing a clean installation of any operating system on VMware, or VirtualBox you need to perform some settings in order to have better performance. So, now for the best installation of Windows 11 on Hyper-V, you have to bring a few changes in the settings. Right-click on the created virtual machine and select Settings.
Once the settings window opened from the left-handed window side select the “Security” tab. Enable the Secure Boot, Enable Trusted Platform Module. And click on Apply and OK to make changes.
Steps to Install Windows 11 on Hyper-V on Windows PC
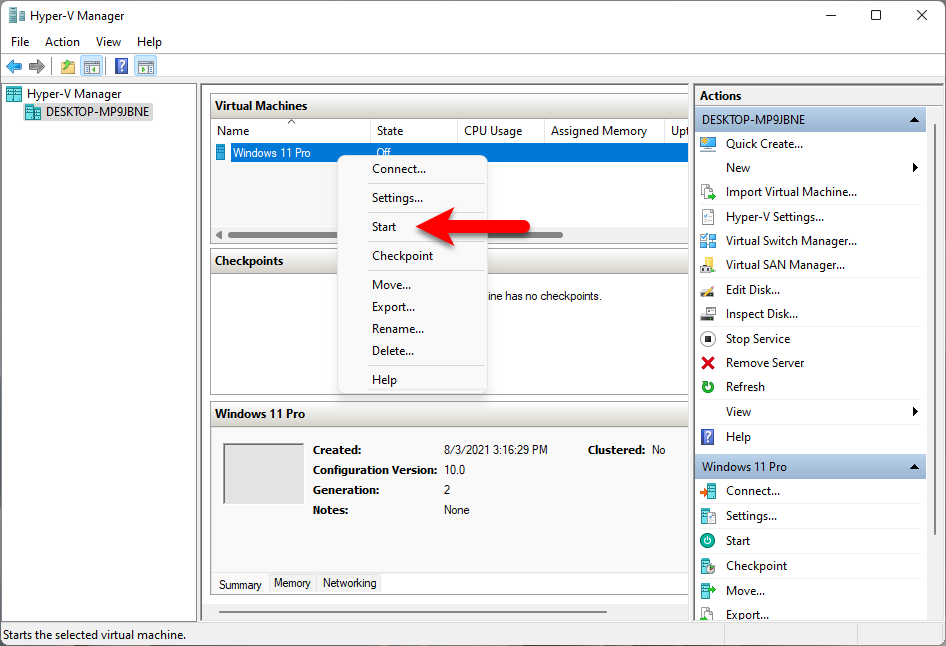
When the settings successfully completed, right-click on the created virtual machine of Windows 11 and click Start.
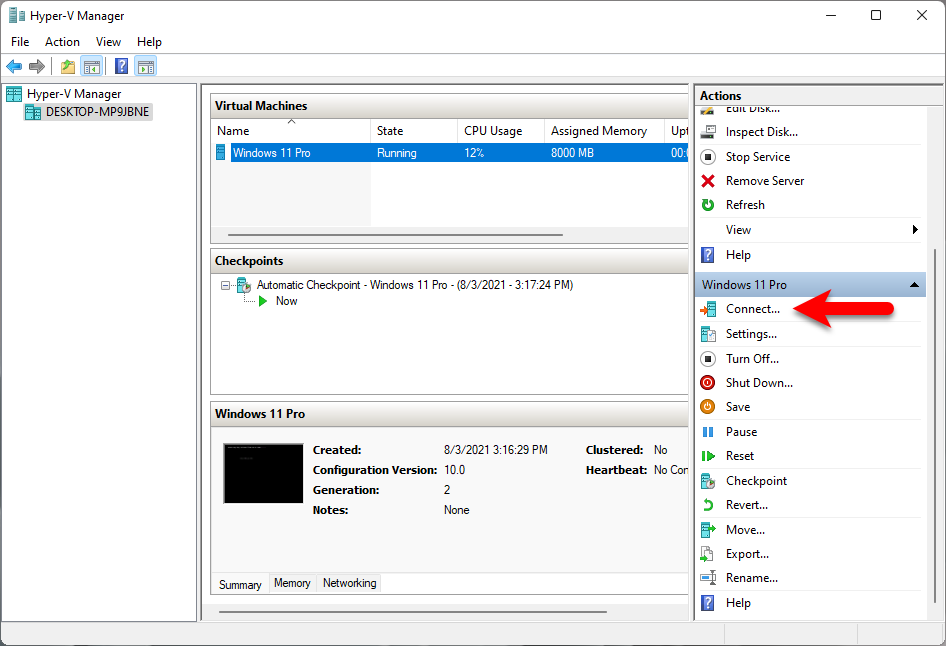
Now click on the Connect option to launch the Windows installation.
Note: Most of you might face the error that Windows won’t be able to boot into the installation. But there are no worries simply follow the below down steps and the above settings to make a clean installation of Windows on Hyper-V.
When the below down window prompt-up simply click on the Revert option and click on Start to launch the Windows installation.

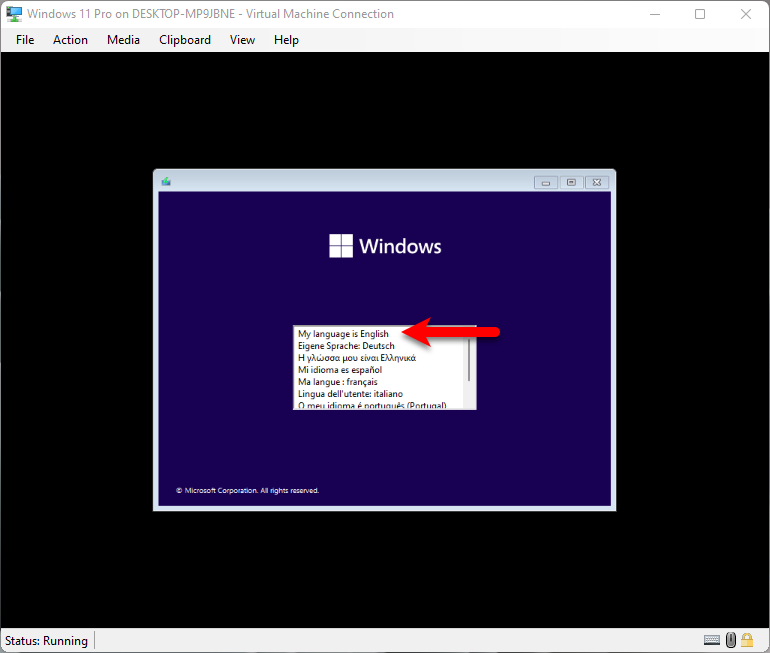
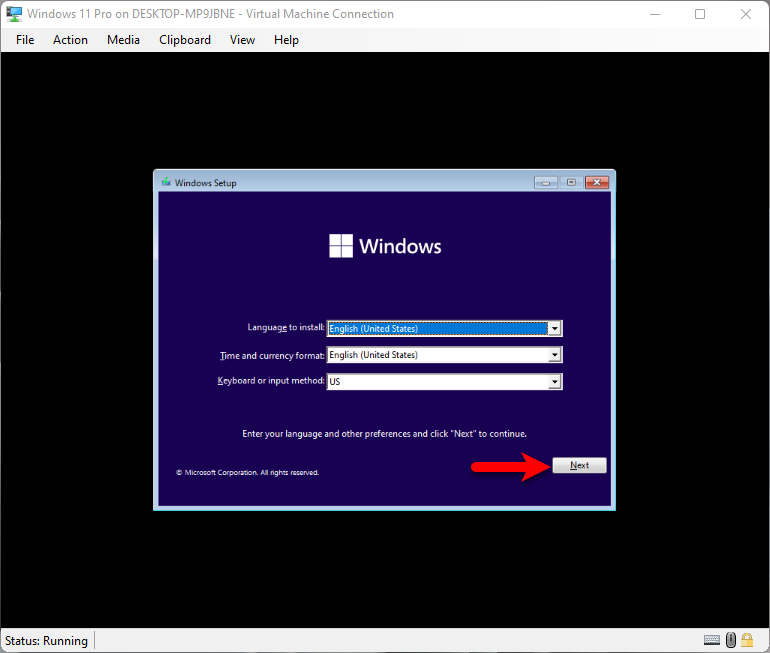
When the installation is successfully launched at the first screen select your Windows language and click continue.
Select your language, Time, and currency format, Keyboard input method, and click next.
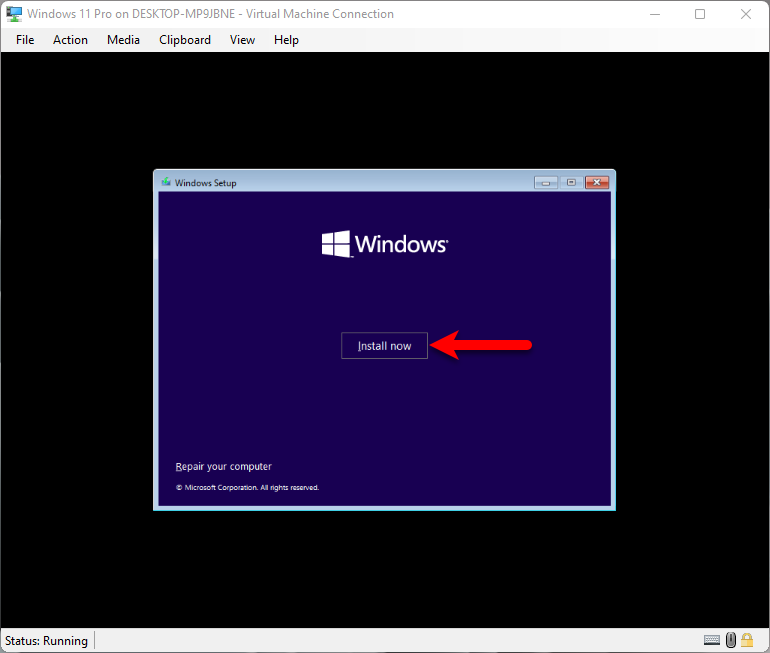
Now click on the Install button.
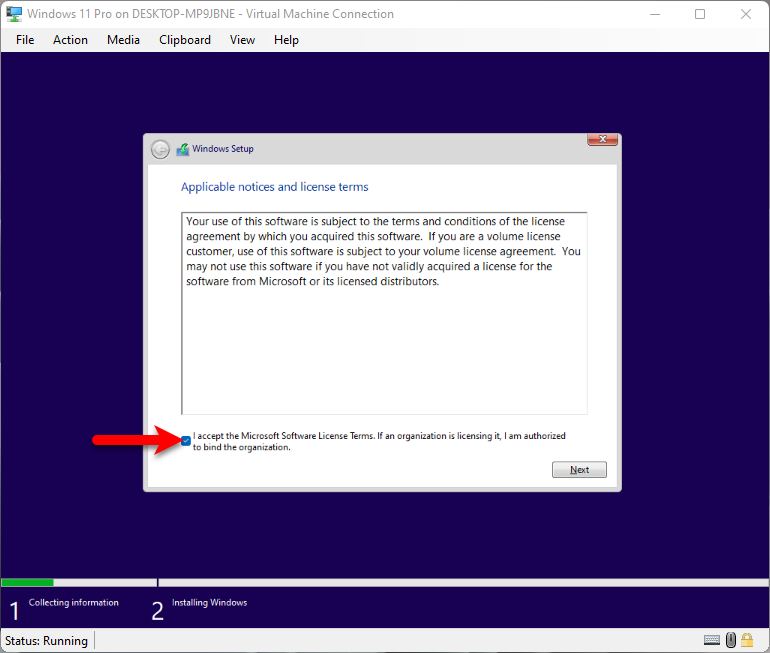
Check the box of “I accept Microsoft Software license terms. If an organization is licensing it, I am authorized to bind the organization.” and click Next.
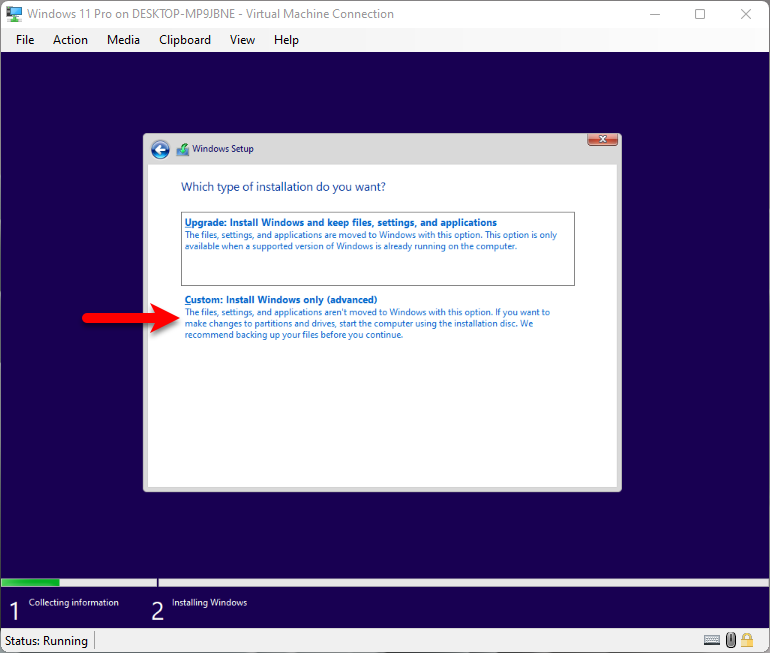
Select Custom: Install Windows only (Advanced).
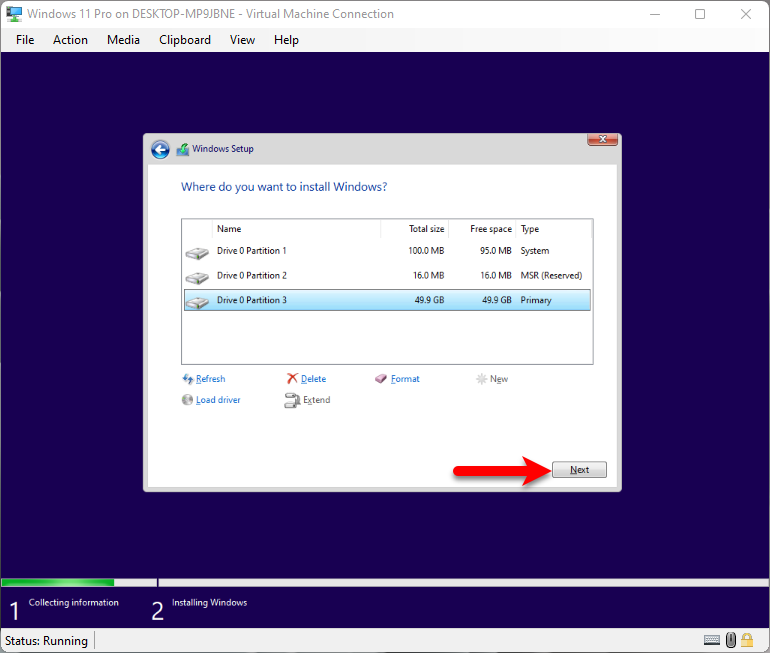
Now you have to specify your disk where you want to install Windows 11, to specify click on “New” then enter the amount of disk size and click on Apply.

Once the disk is created select the disk and click Next.
Wait for the installation until it should be completed, the installation process may take some time. When the installation successfully completed the Virtual machine will restart automatically, and you will face the window to complete the Windows 11 basic settings.
Complete Windows 11 Basic Settings on Hyper-V
- After the installation is successfully completed, you need to complete some basic settings in order to use Windows 11 on Hyper-V. In the first, select your country and click Next.
- Select your keyboard layout and click Next.
- If you want to add another keyboard layout simply click on Add layout, if you don’t want then simply click on Skip.
- Click on I don’t have internet.
- Click on continue with the limited setup.
- Enter your username and click next.
- Enter your password, then click next, then confirm your password and click next.
- Add the three security questions and click next.
- Click next and agree with the terms of service.
[metaslider id=6055]
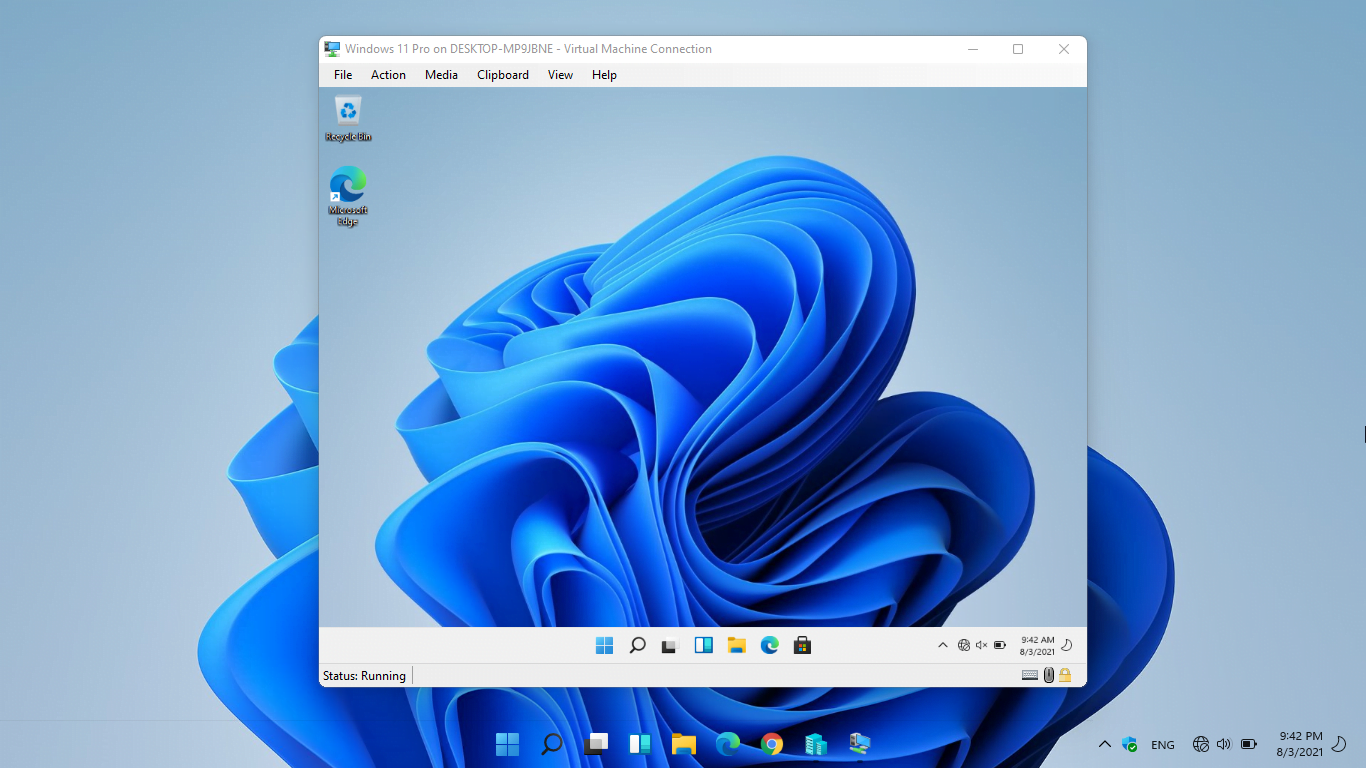
And finally, Windows 11 is being installed on Hyper-V without any issue, enjoy using Windows 11 operating system on Hyper-V.
Final Point
If you are facing any kind of problem related to the above article, then feel free to share with us via the comment section. However, if the article was useful don’t forget to share it with your friends on social media platforms.