The most awaited features are now available in macOS Mojave 10.14 operating system. Due to that its the time of macOS Catalina 10.15, nearly the upcoming months may be Apple Inc should release the macOS 10.16 in Developer conference. There is more love about macOS Mojave 10.14 operating system, it brings iOS 13 like news stock to our Macs.
As well as the incredible feature like wide dark mode that boosted in macOS Mojave. It can be a huge surprise for those who are using macOS Mojave, but its time to upgrade to macOS Catalina. Again most of the users sticking with this older version of macOS. Overall, macOS Mojave still one of the safest operating system for Macs. Without any security issues, you can install it on your Mac computer.
In this article, I will explore the two different ways to create macOS Mojave Bootable USB installer Drive on Windows. As we have a variety of ways that makes us able to create an installer USB flash drive for macOS. And you might have the idea about creating a Bootable USB Installer drive for macOS High Sierra or older version of macOS. Still, we can use our own Mac PC to for creating installer drive, but I think which I have experienced the Windows option is the best ever.
Do you have an idea about TransMac or Terminal? the fully optimized method for creating macOS Bootable USB installer Drive is TrasnMac and terminal now. For those who are using the macOS and Windows operating system, they can install TrasnMac on their PC to create Bootable USB. Or the next option using some commands in the terminal, you can create a Bootable USB drive for macOS.
Related:
- How to Create macOS Catalina 10.15 Bootable USB Installer Drive
- How to Create Windows 10 Bootable USB on macOS
Required Files:
- macOS Mojave 10.14 DMG file
- 16GB USB PenDrive
- Terminal Commands
- WinRAR
Create macOS Mojave Bootable USB installer Drive on Windows
– Download macOS Mojave 10.14 DMG file:
For downloading the macOS Mojave 10.14 files you can have two individual and separate options. The first one is if you have a Mac PC, then you can download it from the Mac App Store. The second option is you can install macOS Mojave 10.14 on VMware or VirtualBox in order to download macOS Mojave 10.14 from App Store. Again there is the third option which below I will provide the macOS Mojave 10.14 direct download links. If you don’t know the ways of installing macOS Mojave 10.14 on VMware and VirtualBox, so check out the below links to get the idea.
- How to Install macOS Mojave 10.14 on VirtualBox on Windows PC
- How to Install macOS Mojave 10.14 on VMware on Windows PC
– Install TransMac on Windows
TransMac is a third-party software that allows the Windows users to Create a Bootable USB installer drive for macOS Sierra, macOS High Sierra, macOS Mojave, and macOS Catalina. Specifically, TransMac is developed for Windows OS for creating a Bootable installer drive for macOS. You can download install TransMac on Windows 10 freely for 15 days. But to use permanently you need to purchase its pro version. The download link and process of installing TransMac is below down.
- Download TransMac
When you have downloaded TransMac then navigate to downloaded folder. Check out the TransMac there then right-click to launch the installation. The installation procedure is pretty much easy, therefore, there I got no need to provide its screenshots.
- When the installation wizard opened click next.
- On the next screen agree with the terms and conditions of TransMac then click next.
- Specify the location where you want to install TransMac.
- In this screen, you will be asked to create shortcuts.
- Again here simply click next.
- When the TrasnMac got ready to install click the install button.
- Once the installation completed simply click Finish to close the window.
– Create macOS Mojave Bootable USB Installer Drive
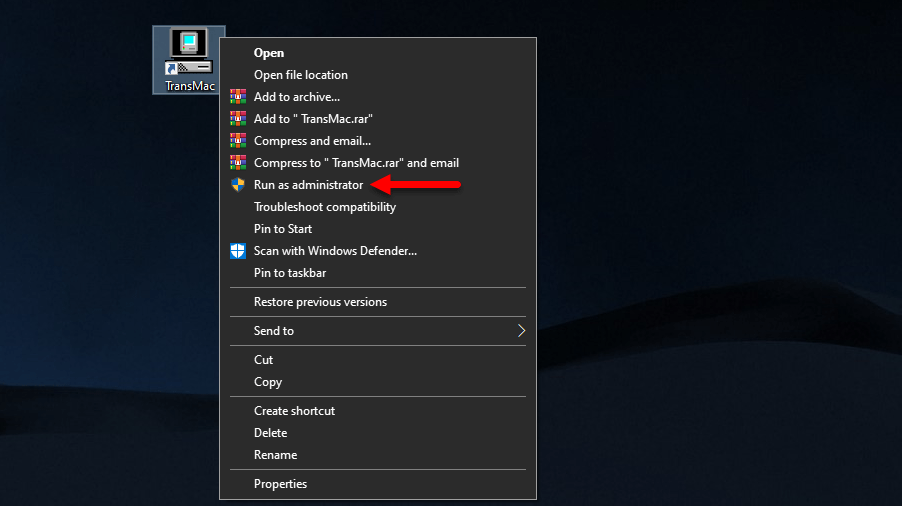
When you installed TransMac on your Windows PC attach the 16GB USB Pendrive to your computer. While the USB detected by your computer, after that, you will be ready to create Bootable USB installer Drive. Over ahead to TransMac then right-click on its icon and select “Run As Administrator”.
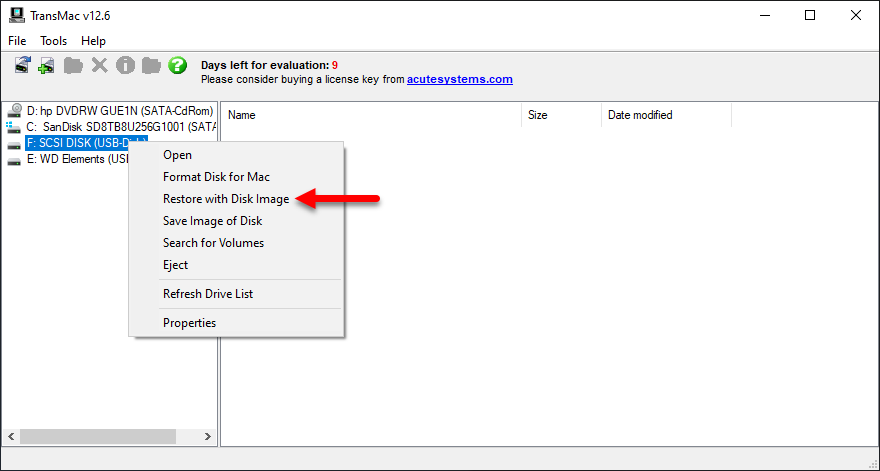
When the TransMac opened, from the left-handed menu bar you will see the list of connected USB Drive. Right-click on the USB drive which you want to create that Bootable, then select “Restore with disk image.
After clicking on the restore with disk image, here you will face a warning from the TransMac side. The disk may contain mounted PC volumes, Restoring will be overwritten them so click “Yes” to continue the process.

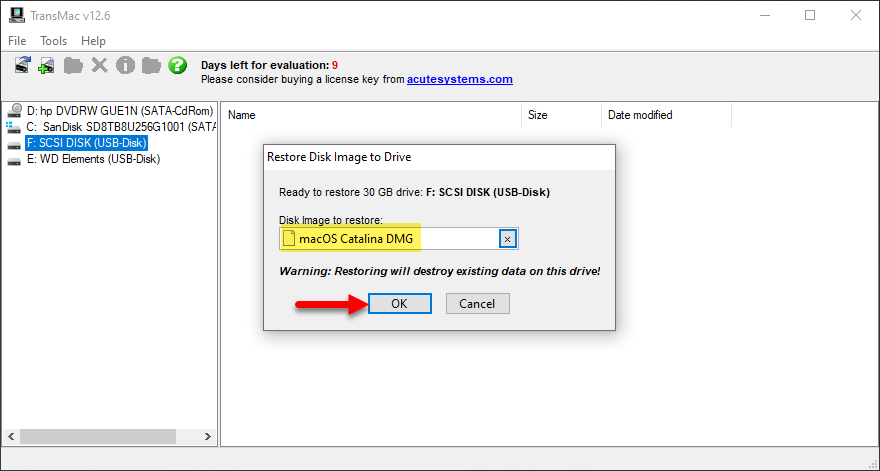
In this window, you have to insert the macOS Mojave 10.14 dmg file. For inserting the dmg file click on three dotes, after that, select the dmg file of macOS Mojave where you have stored that. When you get sure about the inserting of dmg file click OK to go ahead.
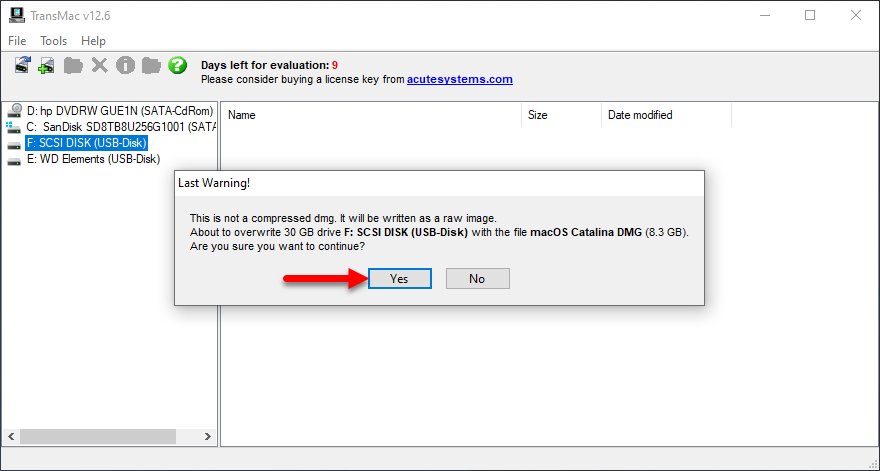
So, this will be the last warning from the TransMac side about overwritten of the USB drive, click “Yes” to continue the process.
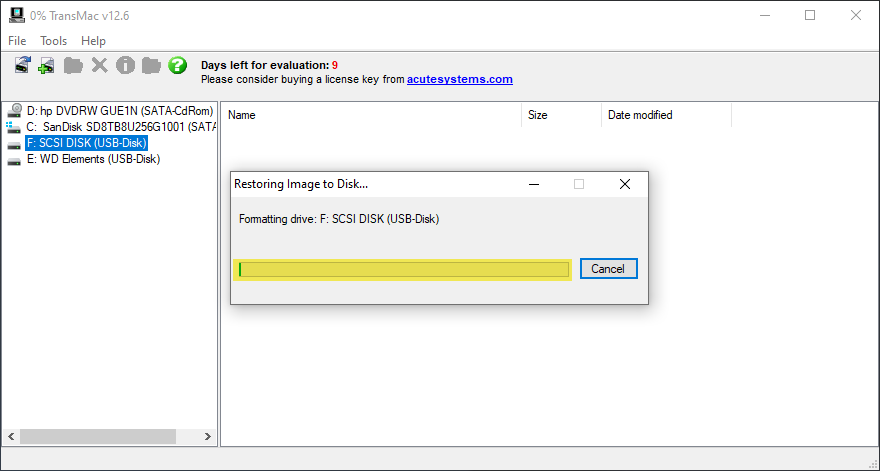
After clicking on the yes option, the TransMac will start copying the macOS Mojave 10.14 dmg file to the USB drive. Wait until the macOS Mojave 10.14 dmg file should be copied to the USB drive. This process may take some time so be patient.
Create macOS Mojave Bootable USB Installer Drive Using Terminal
For this process of creating macOS Mojave Bootable USB Installer Drive also you need to prepare the macOS Mojave 10.14 dmg file. For this procedure, you need to have a macOS preinstalled operating system on the following platforms such as Mac PC, VMware Workstation, or VirtualBox. After that, connect the USB drive to your computer. When the USB drive connected you have to Erase the USB drive.
- Attach the USB Drive to your PC
- Over ahead to finder, open Utilities folder then open from there the Disk Utility.
- Or navigate to search spotlight type Disk Utility, when appeared press enter to open.
- When the Disk Utility window opened from the left-handed bar select the USB drive which you connected.
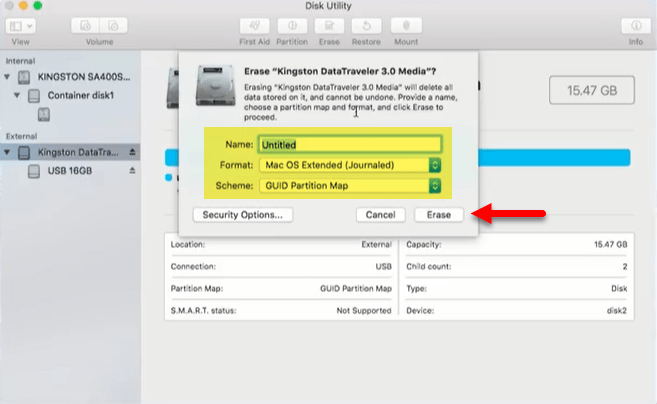
After that, you selected the USB Drive for erasing follow the below down instruction.
- Name is optional
- Format Mac OS X Extended (Journaled)
- Scheme GUID Partition Map
- Once the set the settings of Disk Utility according to the above guide then press the Erase button.
- When USB Drive erased press done option and close the Disk Utility window.
When the USB Drive successfully erased, alongside be sure the macOS Mojave 10.14 dmg file exists in the Applications folder. After that, by applying some commands to the terminal you will create a Bootable USB drive for it.
- Over ahead to search spotlight search for terminal
- When the terminal appeared press enter to open
- While the terminal opened copy and paste the below commands and paste to the terminal.
sudo /Applications/Install\ macOS\ 10.14\ Beta.app/Contents/Resources/createinstallmedia --volume /Volumes/Untitled —applicationpath/Applications/Install\macOS\ 10.14\ Beta.app —nointeraction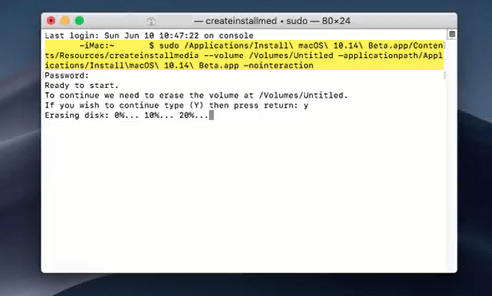
When you applied the commands in terminal then press the enter key. After that, it will ask you to enter the user password to confirm the commands then press enter. After that, again you will be asked for confirmation to enter the “Y” key for yes, again press “Y” and press the enter key. Wait until the it should copy the macOS Mojave installer file to the USB drive.