Since macOS Big Sur released users are counting it as one of the biggest releases of Apple this year. Indeed it’s of an advanced operating system with a newly added bunch of incredible features, especially the interface look of macOS Big Sur is pretty beautiful. Therefore, all the internal settings of macOS Big Sur is renowned than the previous operating system of Apple. macOS Big Sur is being inspired by the iOS 14, which recently kicked out by Apple with the release date of macOS Big Sur and other products of Apple at the event of the “WWDC” Worldwide developer conference.
As macOS Big Sur is new for most of the users and it there might be lots of changes in taking backup or restore its data back. Therefore, I wanted to prepare an article related to its backup and restore functions. There are a bunch of applications for taking backup on macOS operating systems, but the “Time Machine” is an easy and not complicated application. Time machine is an inside-built application which gives you the opportunity to take backup on any macOS.
How to Backup and Restore Data on macOS Big Sur via Time Machine
Taking backup of your files required an external hard drive or Pendrive, but it depends on the size of the files. If your file size is small then you can use Pendrive, incase, if the size of your files is large then you have to use any external Hard Drive.
- Open up your macOS Big Sur,
- Attach your USB or Hard drive.
- Navigate to the top menu bar and click on Go>Utilites.
- When the Utilities window opened, double-click on Disk Utility.
- From the left-handed menu select the drive, and click on Erase button.
- Once the options appeared format the drive according to the below down settings.
- Name: Optional
- Format: Mac OS X Extended (Journaled)
- Scheme: GUID Partition Map
7. Once the drive successfully erased click Done, and close the Disk Utility>Utilities.
#Open System Preferences
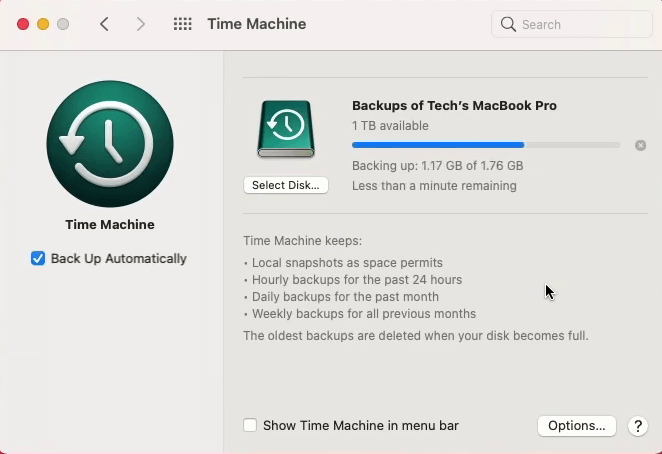
- Now it’s time to take the backup of your files on the erased hard drive, for that click on “System Preferences” and open Time Machine.
- When the Time machine opened click on “Select Backup Disk”, on the next window select your erased hard drive.
- After selecting the hard drive, click on “Use Disk” and wait it will starts automatically to take backup.
- It will start taking backup of your files, it will take some time but it depends on the size of your files.
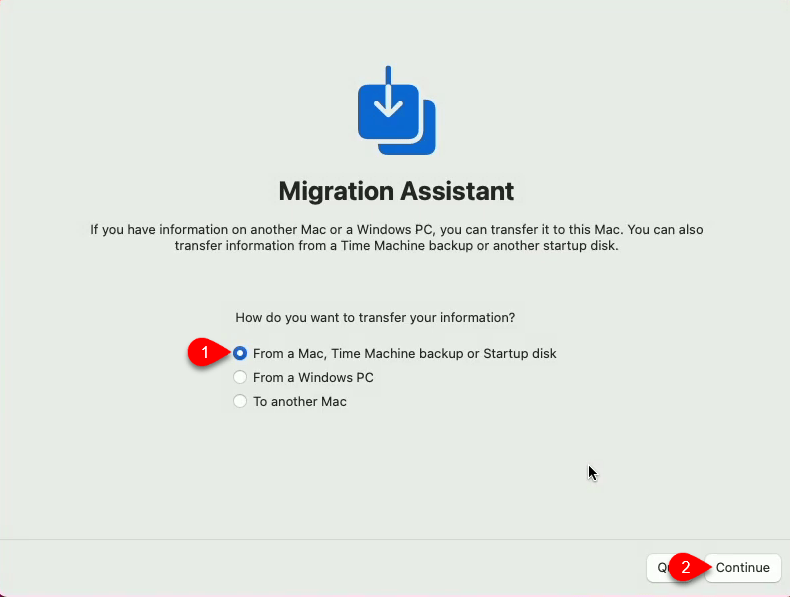
- 5. When the backup is done, open the “Migration Assistant”, at the first window click continue and enter your username password.
- Select the option, “From a Mac, Time machine backup or startup disk”, then click continue.
- Select the time machine drive and click continue.
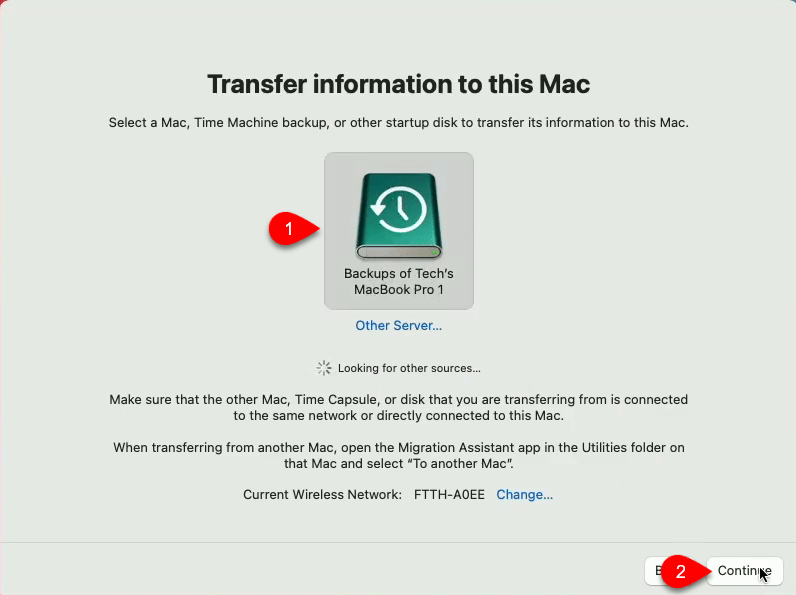
- If you want to restore your previous data then select the disk, and click continue.
- Now select the information you want, and click continue.
- Set a password for your Mac and click continue.
- Now wait until it should restore the files, it will take some time.
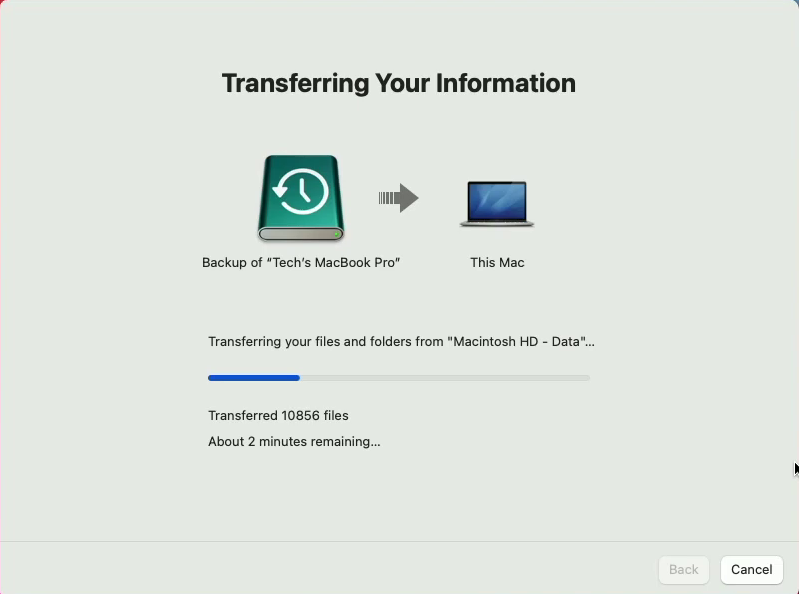
When the restoring completed automatically your computer will restart. Once the computer restarted complete the basic settings of your macOS Big Sur on your MacBook. However, if you faced any kind of problem feel free to share your problem via the comment section.