macOS Sierra is the thirteenth major release of Apple, macOS Sierra is the desktop and server operating system for Macintosh. It was the first version of the macOS operating system that released under June 2016 rebranding as macOS. Sierra name has taken from Sierra Nevada mountain located in California. It includes the latest features that concern Continuity, iCloud, and Windowing. macOS Sierra is the first Apple operating system that support Apple Pay, and Siri.
Now it’s the time of the macOS Big Sur 11.0 operating system, but I am in love to test all macOS operating systems on my PC. Including from macOS Sierra, macOS High Sierra, macOS Mojave 10.14, macOS Catalina 10.15, and macOS Big Sur 11.0. I have tested all macOS operating systems on my computer in order to provide valuable and essential article posts for my viewer.
Most of the users are having a problem with Intel UHD graphics 630 on macOS operating system only without macOS Catalina 10.15. The same I faced this critical problem on macOS Sierra, after the installation I have installed the fixes files. But again I faced the Intel UHD graphics 630 on it. After researching on the internet I figured out the solution on how to Enable/Fix Intel HD Graphics 520,530, 620, and 630 on macOS Sierra.
Related:
- How to Enable Fix Intel UHD Graphics 620 and 630 on macOS High Sierra
- How to Fix Intel HD Graphics on macOS Big Sur 11
- How to Enable Fix Intel UHD Graphics 630 on macOS Mojave
- How to Fix Intel Wifi and Bluetooth on macOS Big Sur
Enable Fix Intel HD Graphics 520, 530, 620, and 630 on macOS Sierra
To fix Intel HD Graphics 630 on macOS Sierra you need to download the below-required files. After that, to proceed follow step by step below down guide.
To proceed with complete instructions you need to read the below down notes.
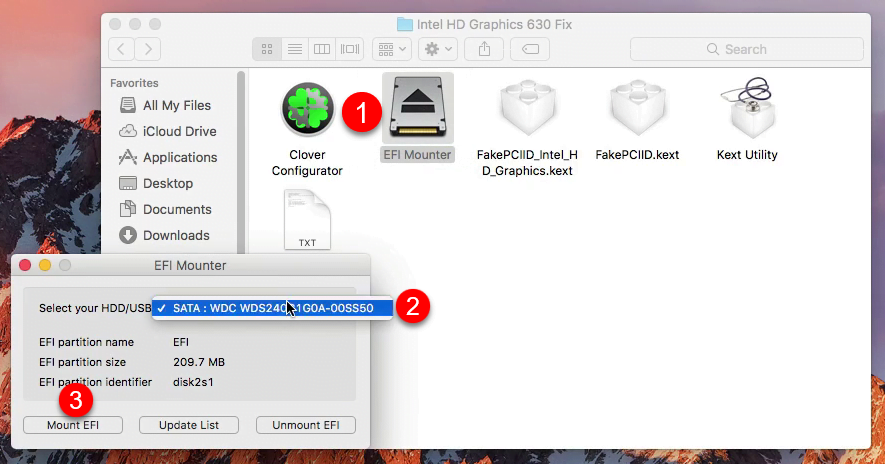
Step 1. For mounting the EFI partition of system drive, you have to download “EFI Mounter”. Also, the EFI Mounter is available in the above download file. When the files downloaded double-click on that to extract the file. Now open up the EFI Mounter, select your hard drive and click on “Mount EFI”.
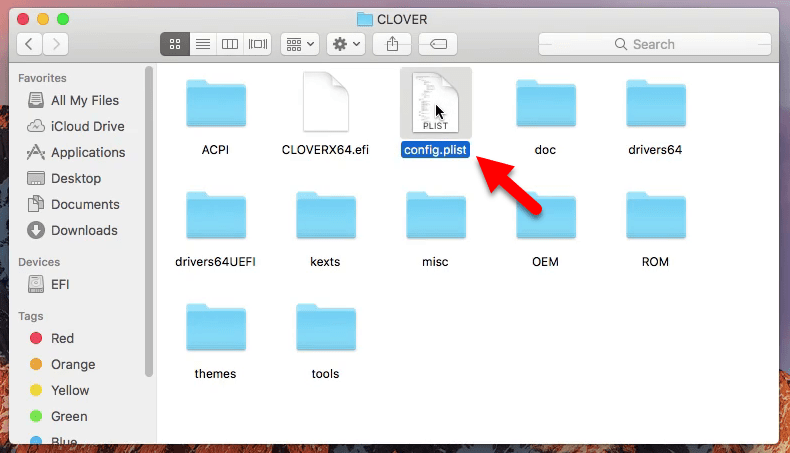
Step 2. After mounting the EFI partition the EFI folder will create on your desktop. So, open up the EFI folder, open Clover. One else if you haven’t installed the Clover Bootloader, then make sure to install it. If your setup required to edit or configure the Config.plist you need to install the Clover Bootloader. Double-click on Config.plist to open it.
Step 3. Select the “Devices” tab and go to the “InteGFX” column, then edit the code with the following “0x19168086”. Now click on (+) add button, then add the following code according to the below screenshot.
Device           Key            Value       Value Type
IntelGFX    AAPL,GfxYTile     OAAAAAOO         Data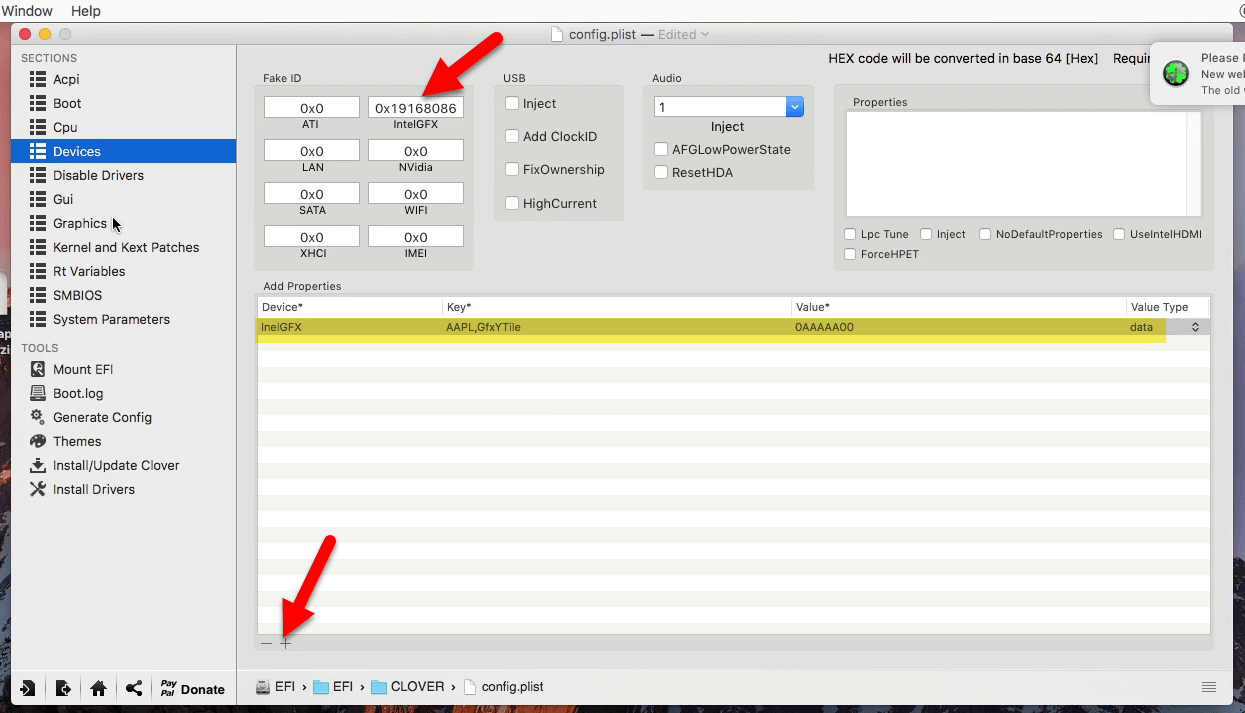
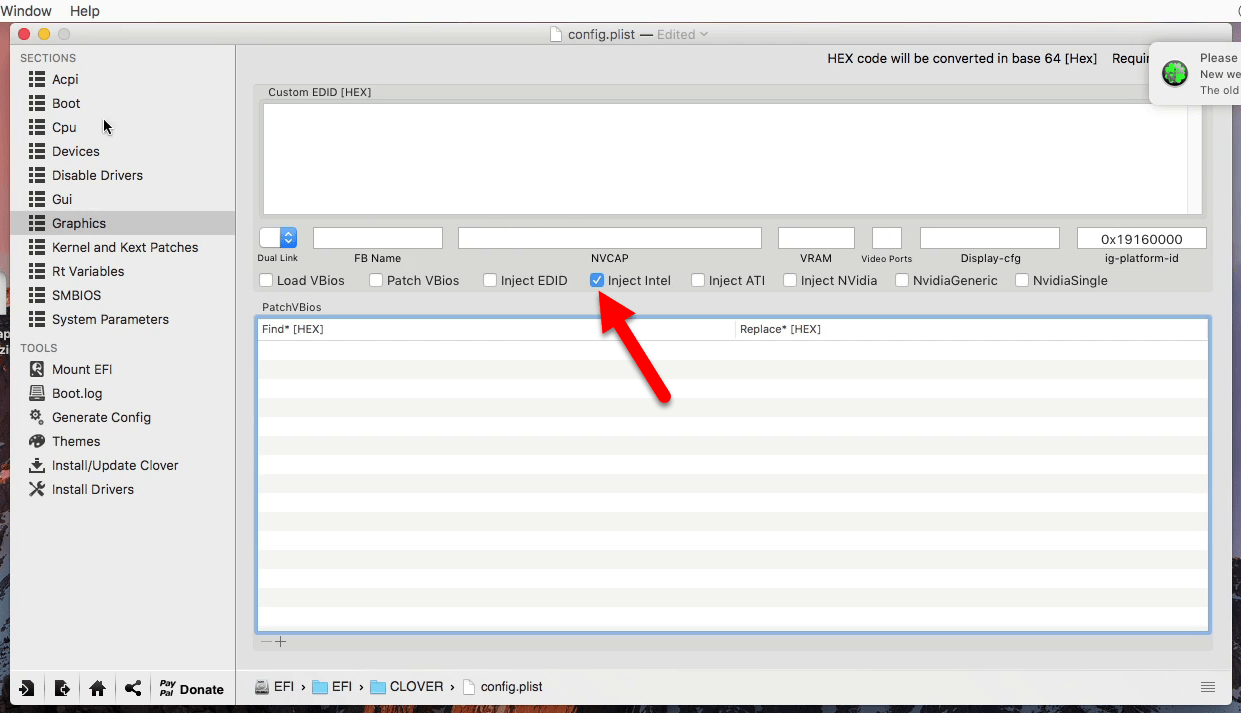
Step 4. Select the “Graphics” tab and check the “Inject Intel” box.
Step 5. When it’s done close the clover bootloader and click the “OK” option to save changes.

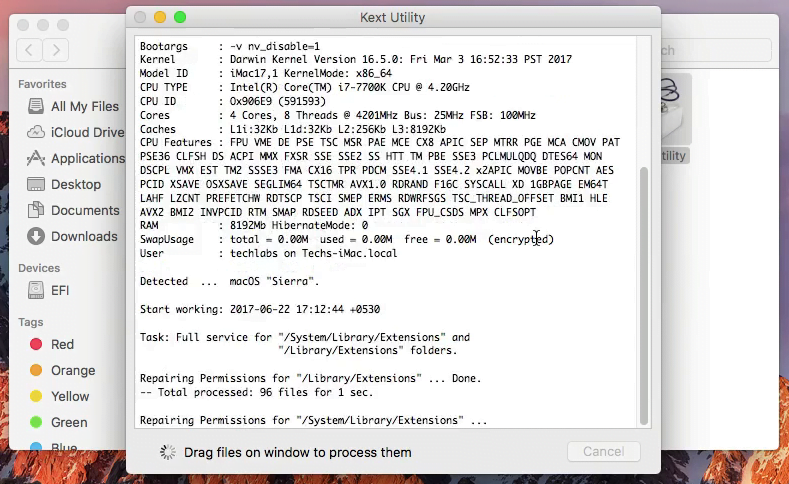
Step 6. Now open up the Extracted folder, then open up the “Kext Utility” file. Type your username password and press OK and wait for some moments.
Step 7. Now go to the fixes folder then select the 2 Kexts and move it to the Kext Utility window. And enter the username password for the confirmation and press OK.
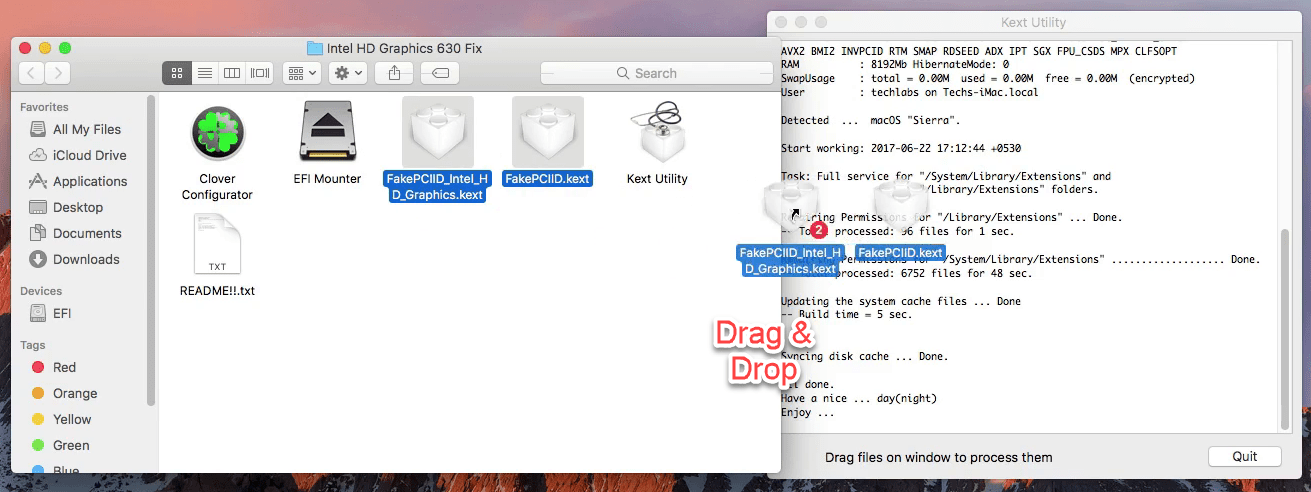
Step 8. Wait for the installation, once the installation completed click on Quit.

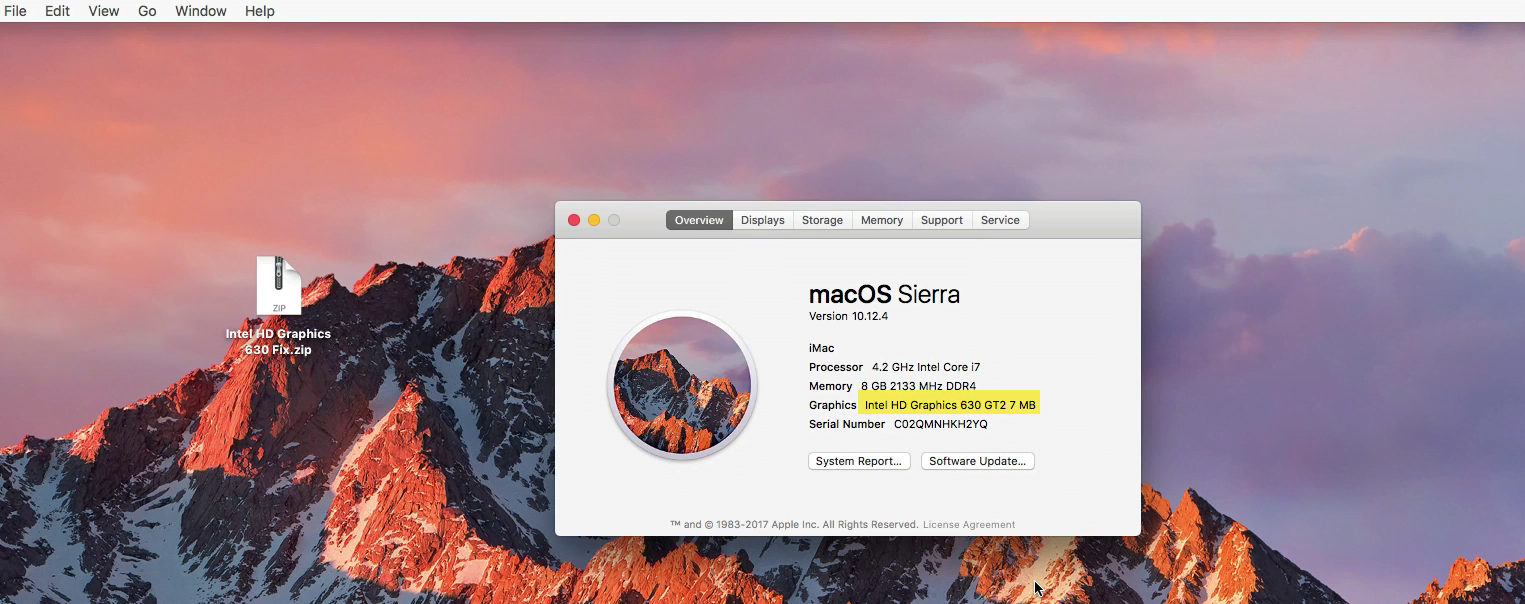
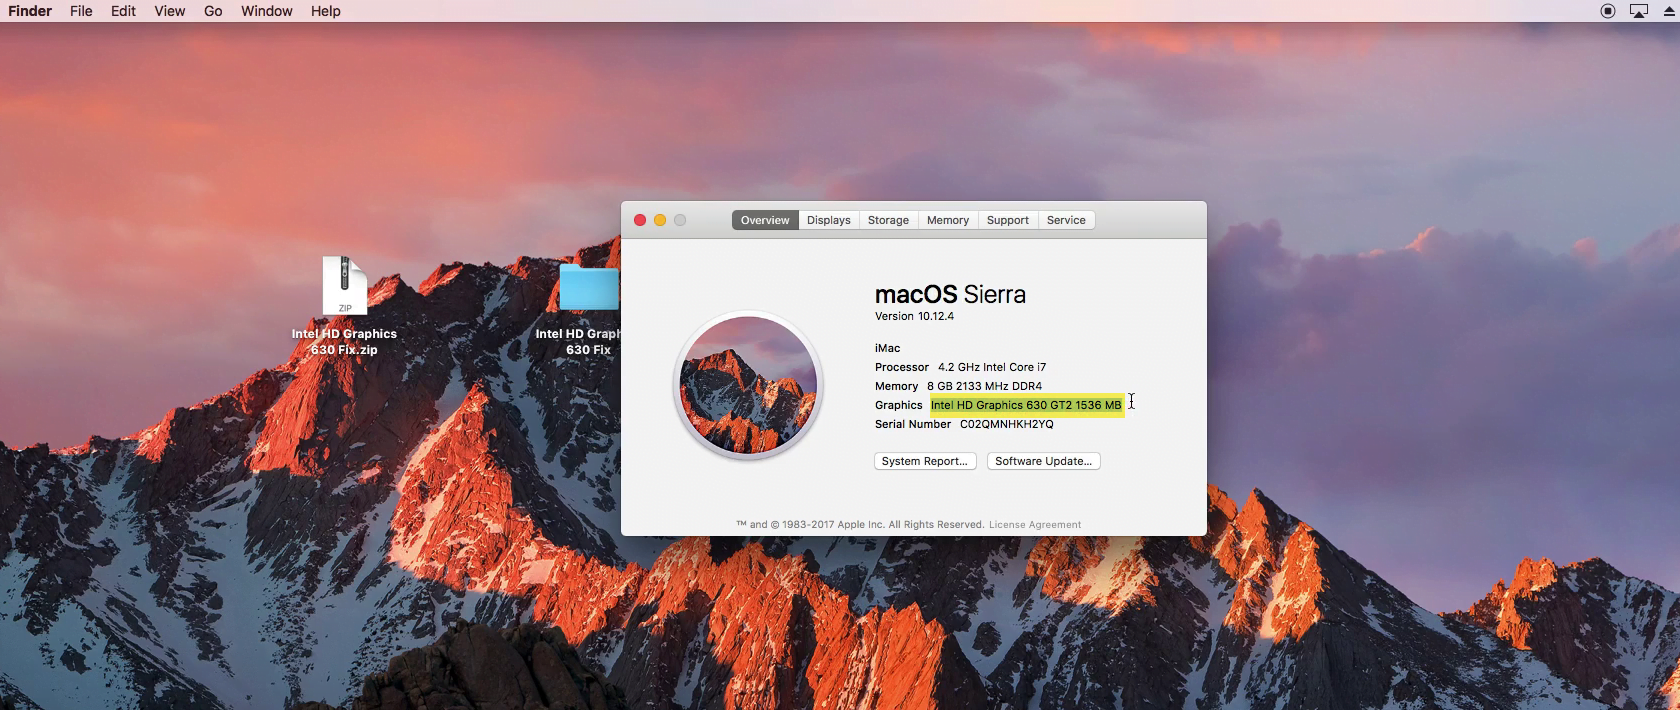
Step 10. It’s the last step once everything performed successfully restart your PC. When coming back head over to left-handed top menu bar and click on “Apple Logo” and click on “About this Mac”. As you see the process worked successfully an the graphic is now 1536 MB.
does this work with macos mojave? i have tried so many options