Everyone has accidentally deleted a file from there personal computer, or smartphones. Whether that’s a picture, video, or any other important documents from there hard drive of there computer. The data which you have been deleted does not exist if you didn’t empty the trash. But again there are several ways or methods in which you can bring those deleted files back. Through this article, I wanted to show you how to recover deleted files on Mac. While losing our important data accidentally from our devices, that is a big pain for us. And we become frustrated with that, also become confused that we have lost our data permanently.
Particularly, if you realize your mistake on the deleted files which you accidentally make it happen to your necessary files. Then of course there will be lots of hope for you to retrieve those files back. Those who are using a Mac computer for the first time. I think it will be much difficult like using the iPhone devices. Most of the people prefer Samsung then iPhone because of its simple functionalities. The same people nowadays prefer Windows PC then macOS PC. And this tutorial is for those who have lost their important data from there Mac computer. Also, to retrieve the deleted file on your Mac there are a couple of methods that you can use it. The two best method is using the Disk Drill and Time Machine.
Recover Deleted Files on Mac
What is Disk Drill?
Disk Drill a free data recovery tool that developed for Windows and macOS. Disk Drill was developed by cleverfiles, disk drill basic for the first time developed and announced in 2010. It primarily designed and developed to recover deleted files from hard disk drives, USB drives, and SSD “Solid State Drive”. In 2015 the company Inc decided to release the Windows version also. The Mac version of Disk Drill provides the service to recover the files from HFS/HFS+ and FAT partition. Remember that the Disk Drill paid version will only recover the deleted files on Mac. And the free version only allows you to preview the deleted files. Also, Disk Drill for the first time released the version for macOS High Sierra. Now you can use Disk Drill for recovering the deleted files of your smartphones. The process is pretty much easy, just connect your phone to your computer and start scanning your phone drive via Disk Drill.
What is Time Machine?
The time machine is a backup software app distributed part of the macOS operating system. Time Machine is developed by Apple Inc to work with Airport Time Capsule. It has the ability to restore the files in macOS, it allows the users to recover the whole system-specific files from recovery HD or install macOS DVD. The Machine makes it possible to restore individual projects, such as emails, photos, contacts, calendar events.
Method 1: Disk Drill
To recover the deleted files on Windows or Mac the best-recommended option is Disk Drill. The thing you need to prepare is to download Disk Drill. Navigate to your browser open it, then on the search bar type “Disk Drill” and press enter. Once its download window appeared, press on the download option.
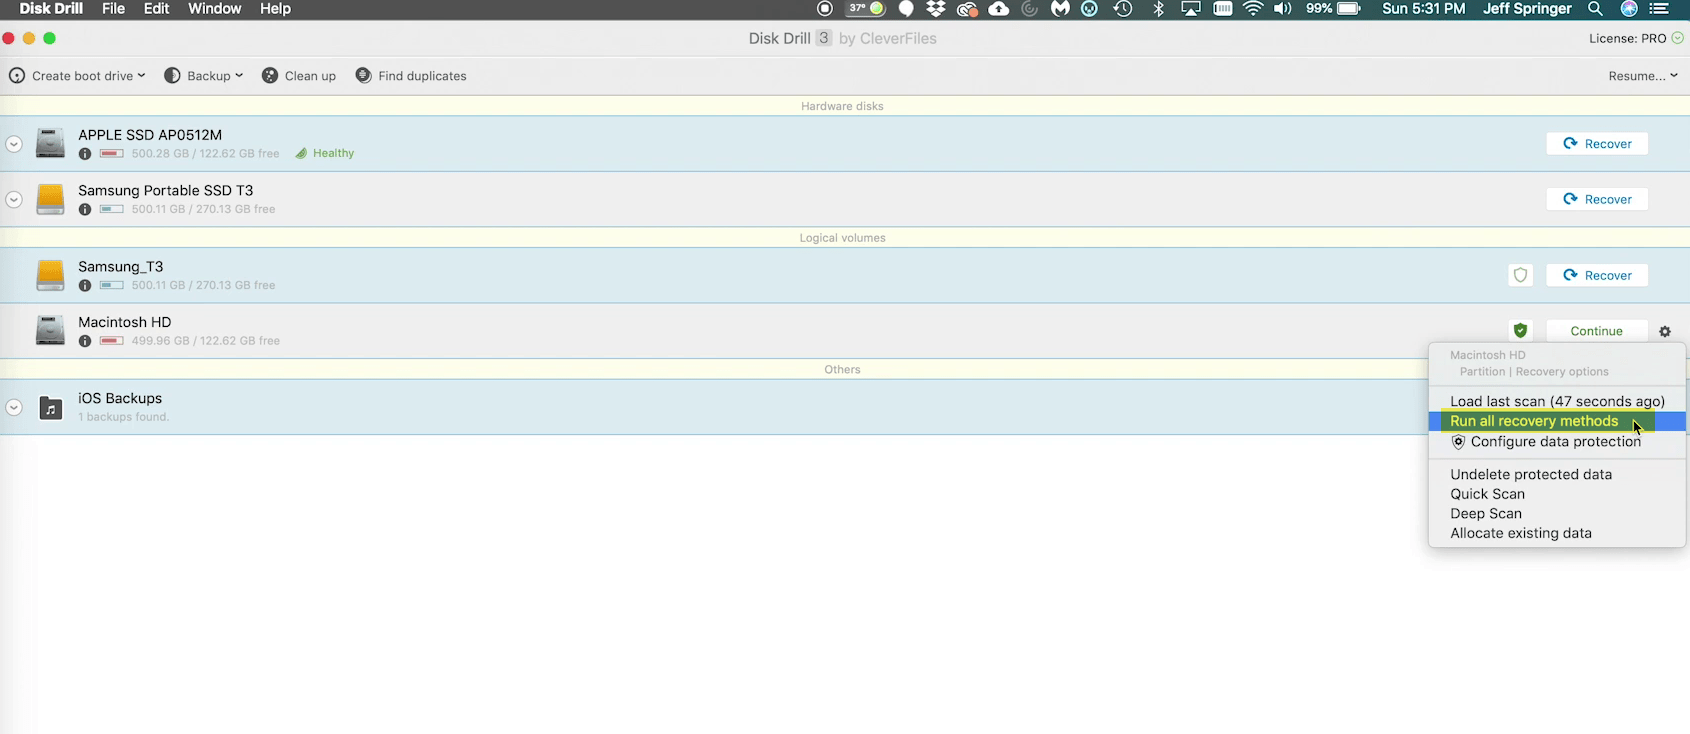
 When Disk Drill successfully downloaded on your computer, double-click and launch the installation process. Its installation process is pretty easy, everyone can do it. So, when Disk Drill installed on your computer. Then open it on the welcome screen you will see the list of connected drives. Select the drive which you want to recover, then click on the Gear setting icon and select the option “Run all recovery methods”.
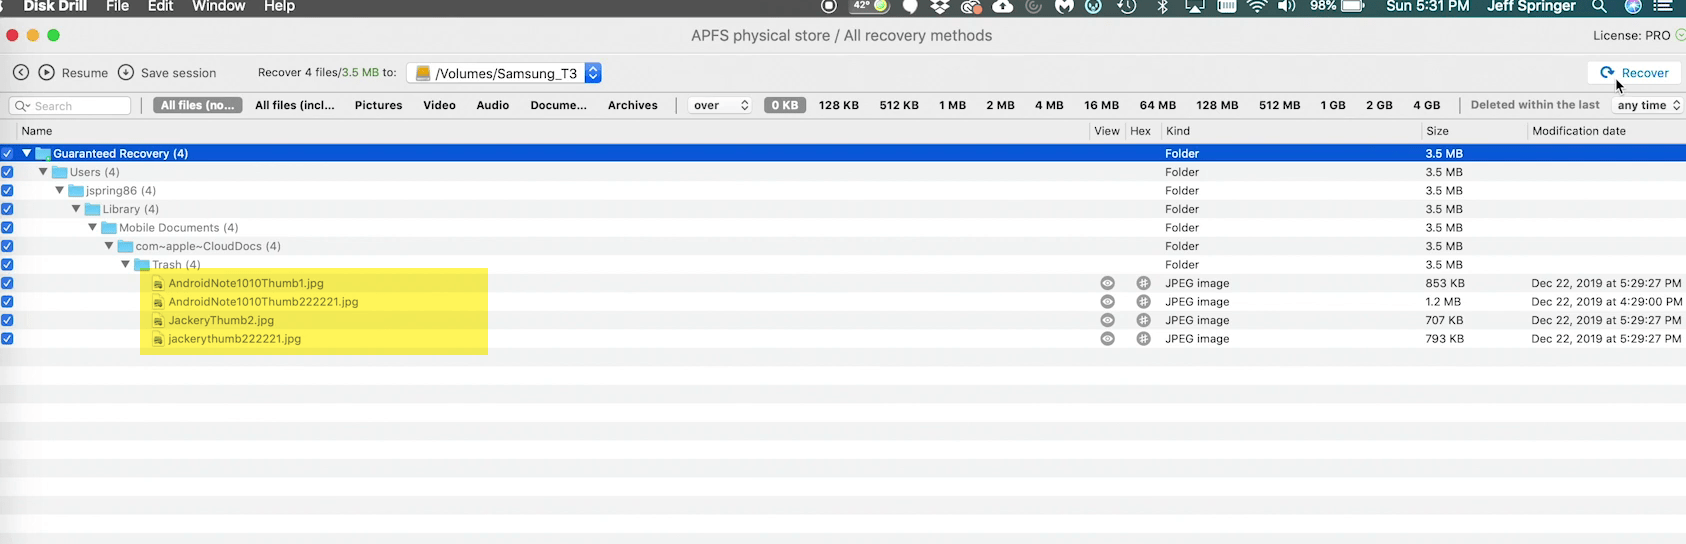
 When the Disk Drill application succeed for searching the deleted data. Select all the recovered data and click on “Recover” option from top right-handed.
Method 2: Time Machine
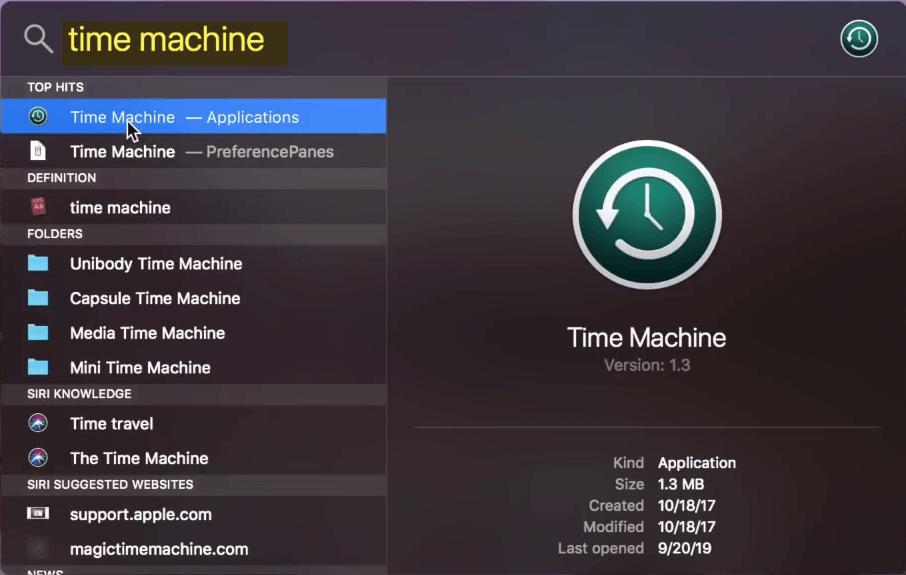
Time Machine is an inside built application on macOS operating system. To get access to this application navigate to search spotlight and type there “Time Machine” When it appeared press enter to open.
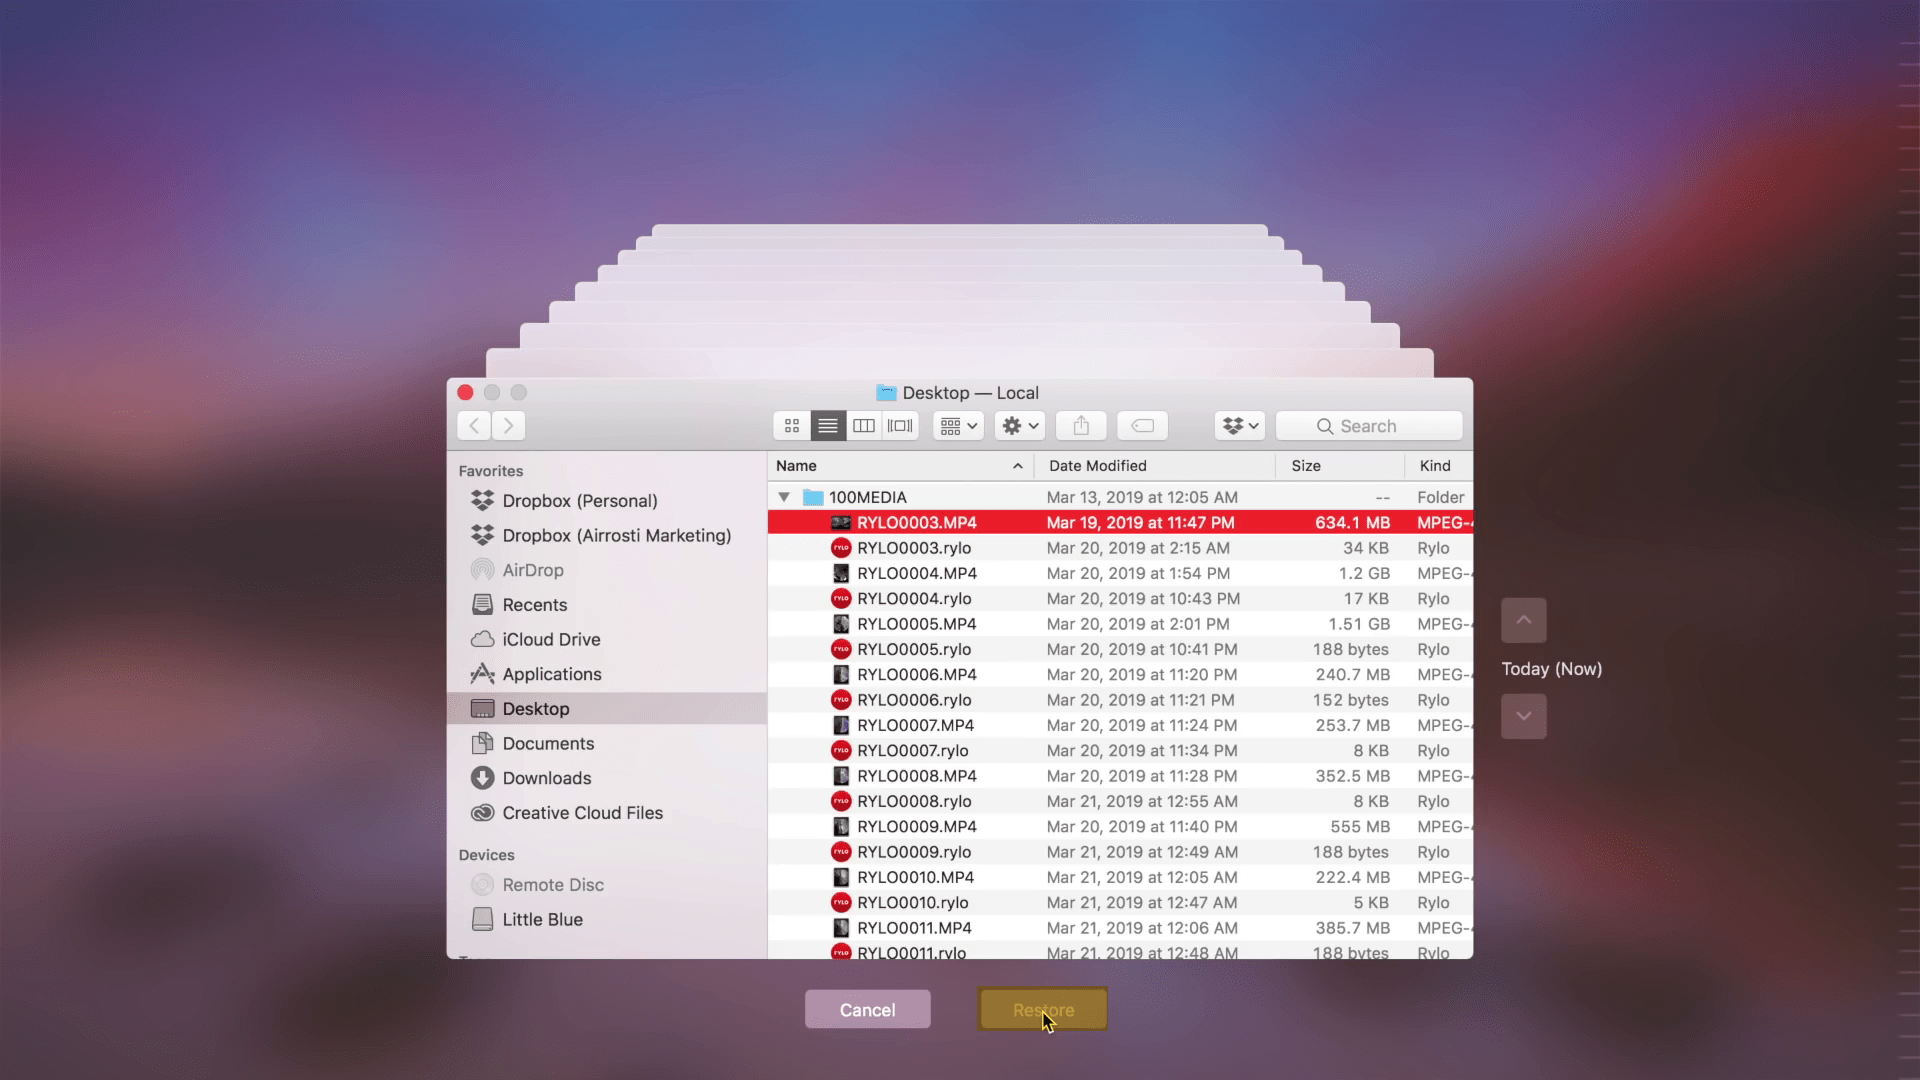
 Now here you will see the list of deleted data such as pictures, videos, and other documents. So to retrieve it back simply select those files and click on the “Restore” option.
Method 3. RecoverIT
Recover it is also an application that designed and developed for Windows and macOS operating system. It have also the role till 500mb it can recover the files freely. After that, for recovering up to 1GB or more than that you need to purchase the full version of it.
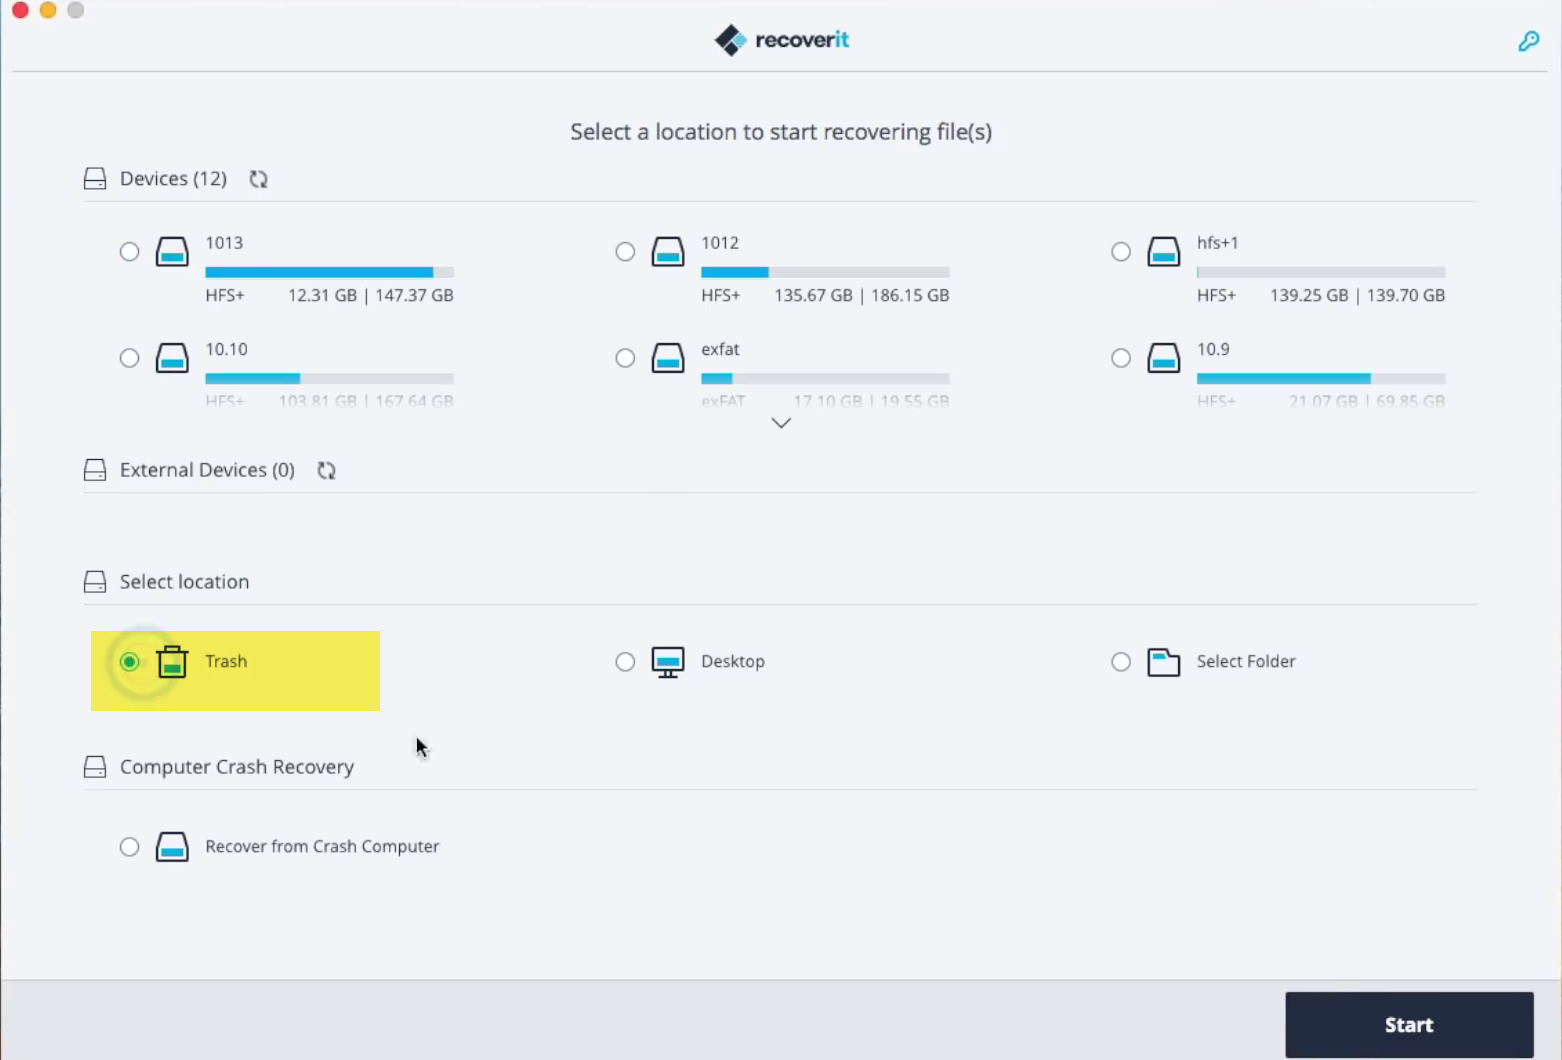
Open up the RecoverIT application and select the location in which you want to recover the files then click on the “Start” button.
 When the deleted files appeared in the list of recovered files. Select those files and click on the “Recover” option.

Method 4. Use the Commands
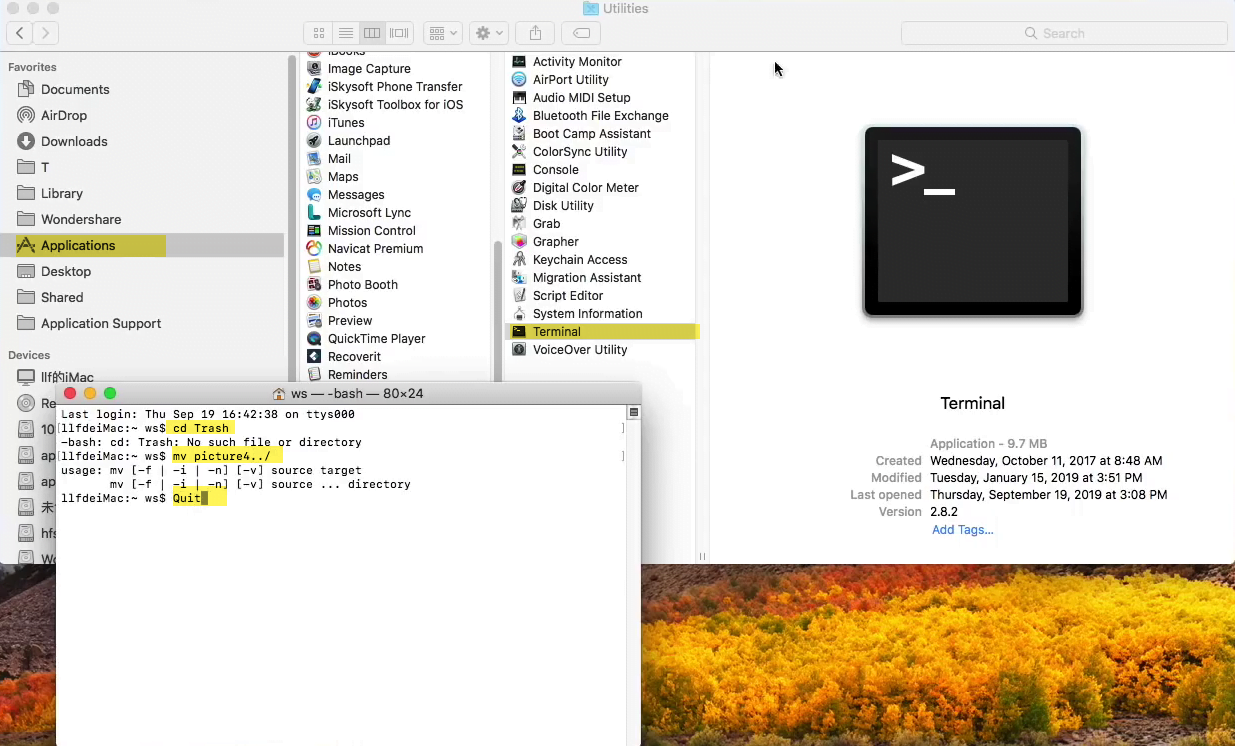
For recovering the deleted files on your Mac computer. There is a very best method which properly worked for me. And I got successful to recover all those stuffs which I have accidentally deleted that. So, for this process only you need to open the terminal. For opening the terminal navigate to the application folder then find out the “Terminal”. The next option, open the search spotlight then type terminal there and press enter to open. When the terminal opened apply the following commands which highlighted with yellow color in the below down screenshot.
 To find the recovered files navigate to the “Locations” tab, usually the folder name will store as the “Guaranteed Recovery” folder.
