
Have you gotten 100% Disk Usage in Windows 10? this is very sad news that your computer is hanging and freezing and don’t work properly. You might expect this kind of issue on the old version of the Windows 10 operating system. But if you are using the latest version of Windows 10 about a few days, and you are facing that problem then it is frustrating and makes you compelled to do not use your computer anymore.
Investigating that your system covered completely up to 100% disk usage, it’s very sad news indeed. Using the latest version of Windows 10 operating system but it overworked, or it occupied complete usage of your hard drive. While Windows 10 completely covering the 100% usage of the hard drive, of course, your computer will stop working or decreasing the performance of your computer. Sometimes this can happen on both HDD and Solid State Drive “SSD”.
Once if you have faced this sort of error on Windows 10, the bugs and problem will be reported to Microsoft. Or if your computer is getting down you might notice that there is a problem. Don’t worry there are a bunch of several options to get reduce the problems.
How To Fix 100% Disk Usage in Windows 10
1. Disable Windows Search Service
The Windows Search service is designed to access files, folders, applications, to offer quick access to all files on Windows and everything else which entails your hard drive. By disabling the Windows search service, you will be able to increase a little bit the performance.
To disable the Windows search service head over to the bottom of the window, right-click there, and select task manager. While the task manager popped up click on the “Service” tab, then from the bottom of the window click on “Open Service”.
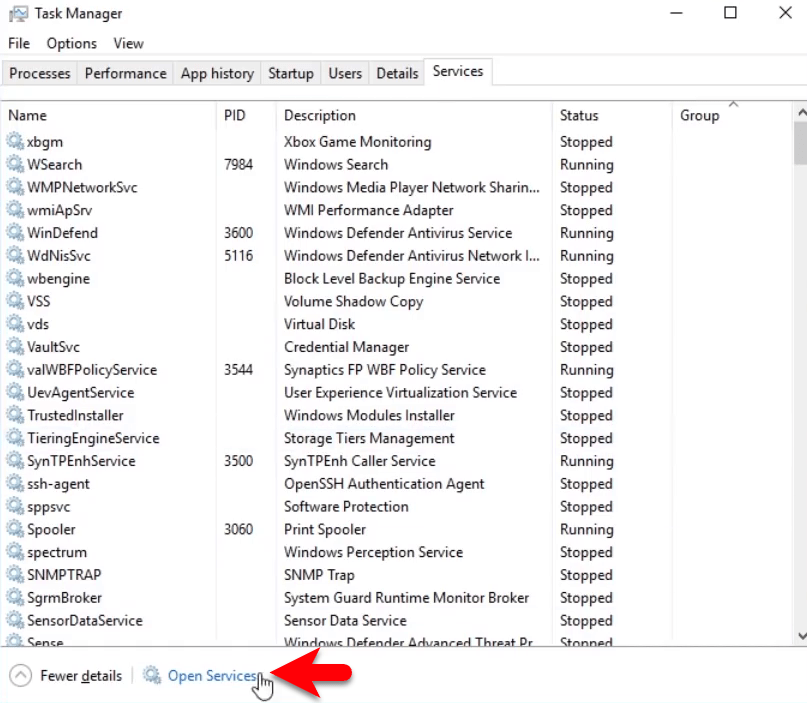
Once the services window opened, scroll down and find out the “Windows Search” option. Right-click on that and click on “Properties”.
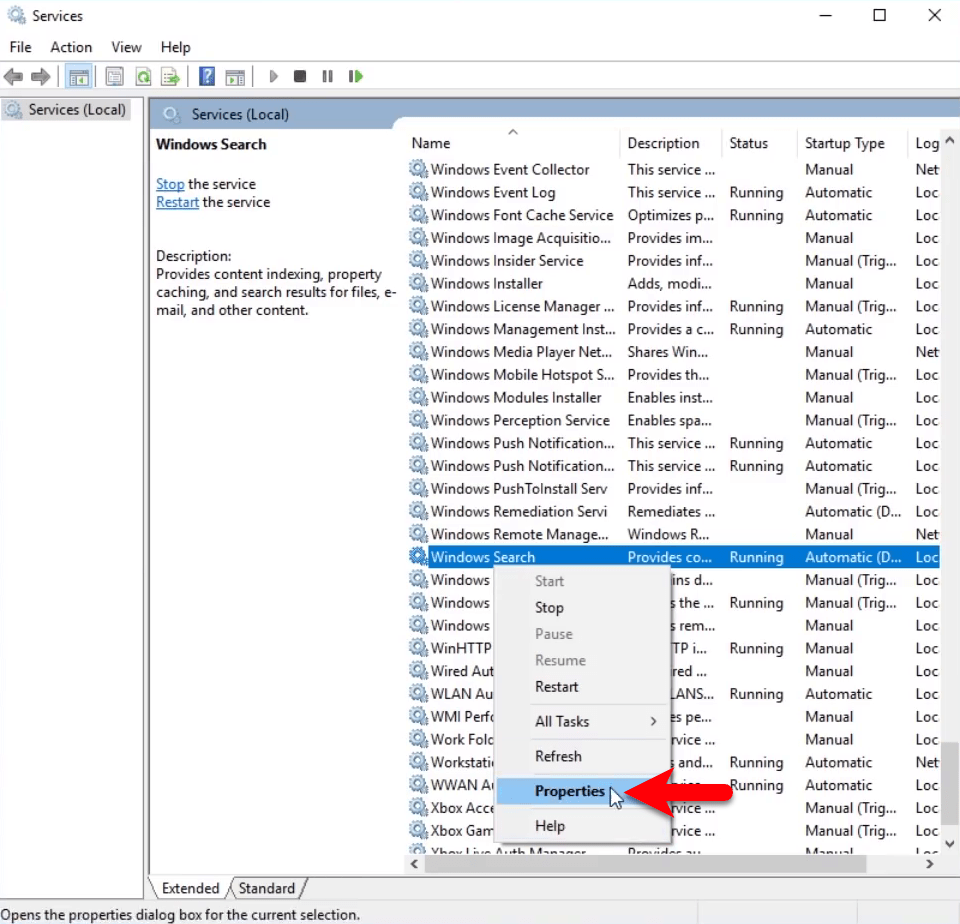
On the properties dialog box on the “Start-Up Type” click on the box to appear other options, and select the “Disabled” option. At last to make changes click “Apply” and click “OK” then close the window.

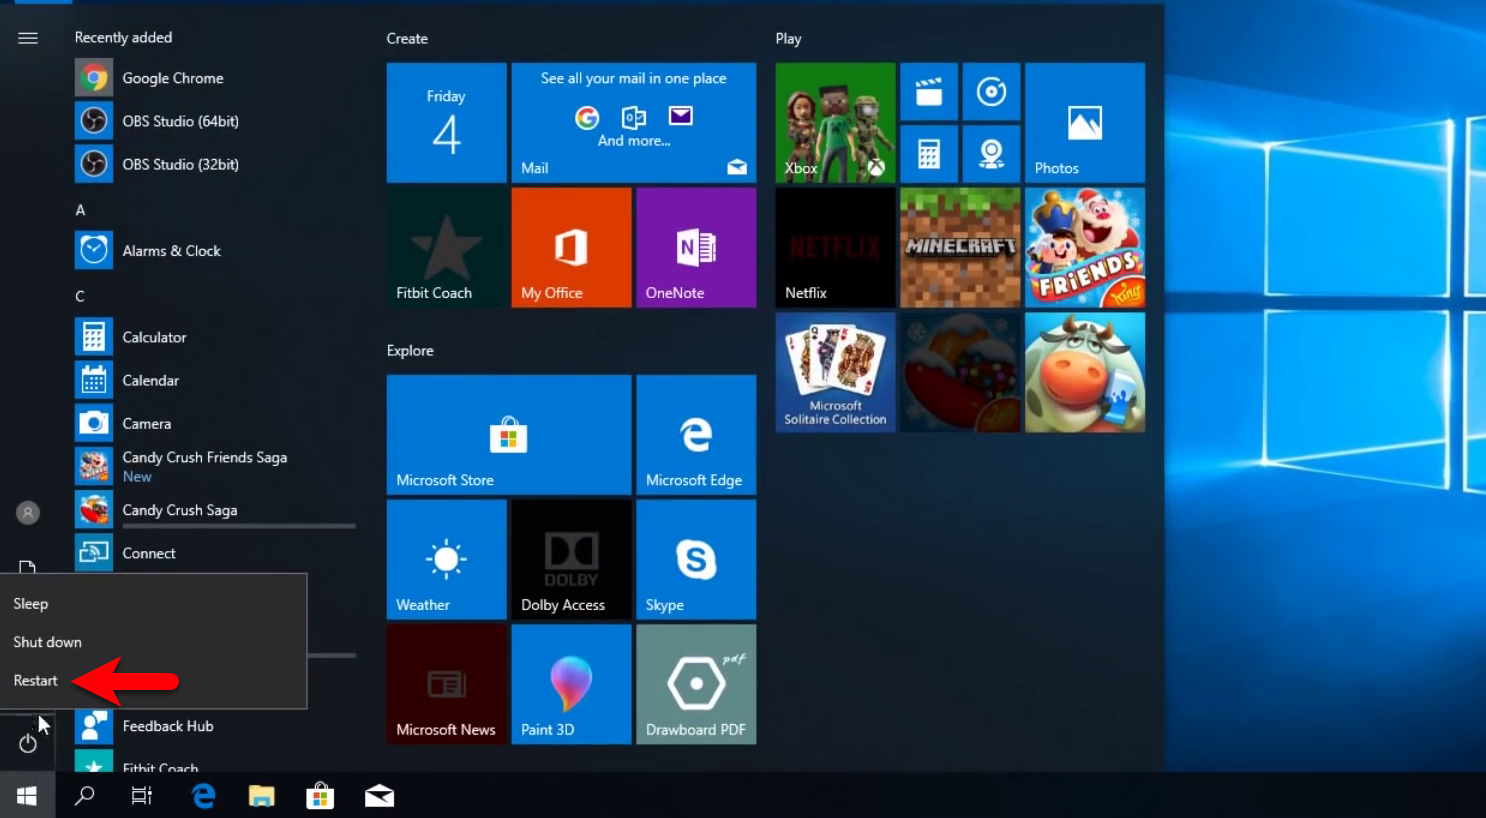
When you have done with disabling the Windows Search from the settings, navigate to the Windows start menu click on the power button and restart your computer. While you are backed you will see that the problem is solved.
2. Check Your Disk Defragment Configuration
The defragmentation you may know consolidates fragmented files on your hard drive and enable efficient and quick access to storage locations on the drive. However, this process sometimes gets corrupted by some malware or applications hence creating and undo processing in the disk causing such problem 100% disk usage to rectify you need to stop and disable secluded defragmentation from your task scheduler.
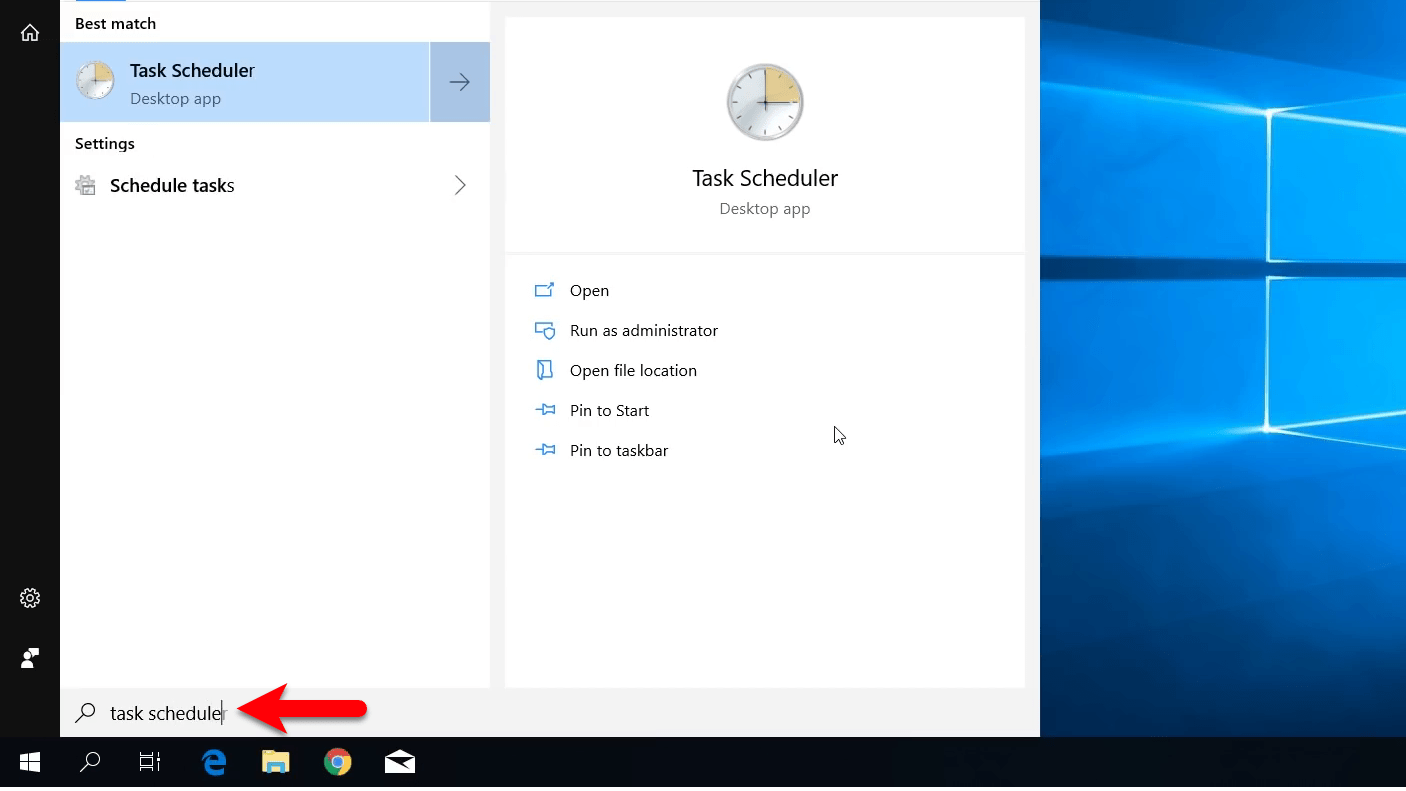
To disable the disk defragmentation go to your Windows start menu, type there “Task Scheduler” once it appeared press enter to open.
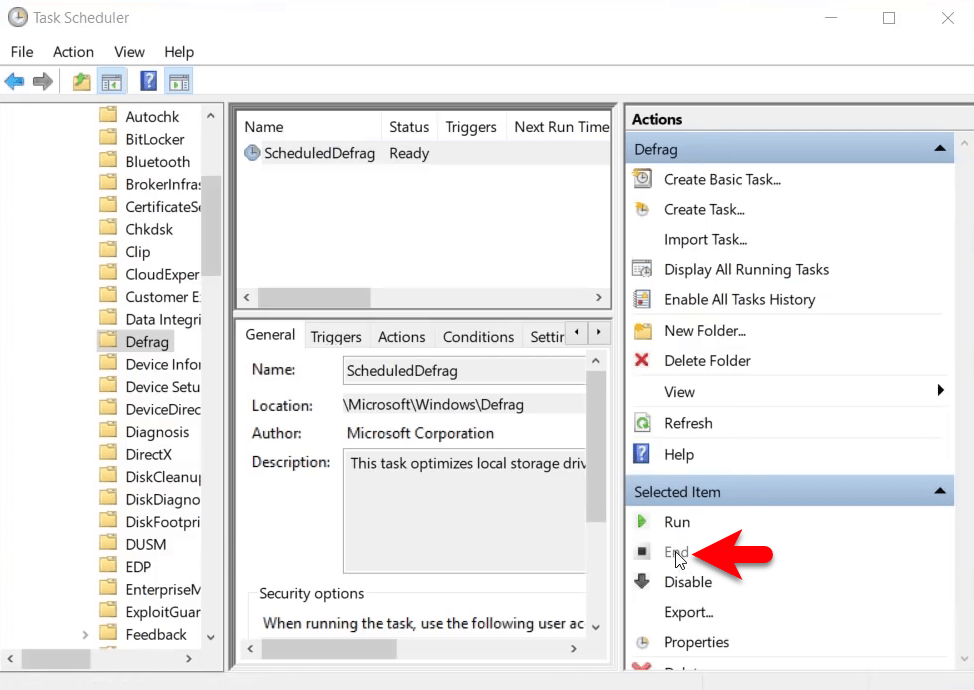
Click on the arrow next to the task scheduler library to expand then click further to expand the Microsoft folder. Then expand the Windows folder, scroll down and find out the “Defrag” folder and click on it. Click on the “SchedulerDefrag” option and click on the “End” option.
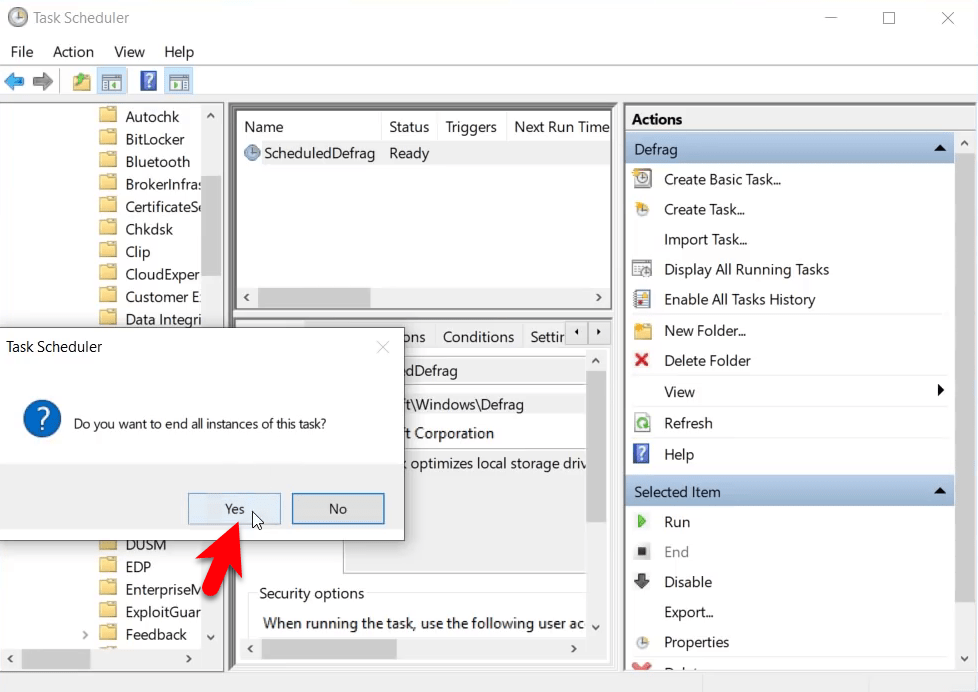
Again the below down screenshot will appear and click Yes.
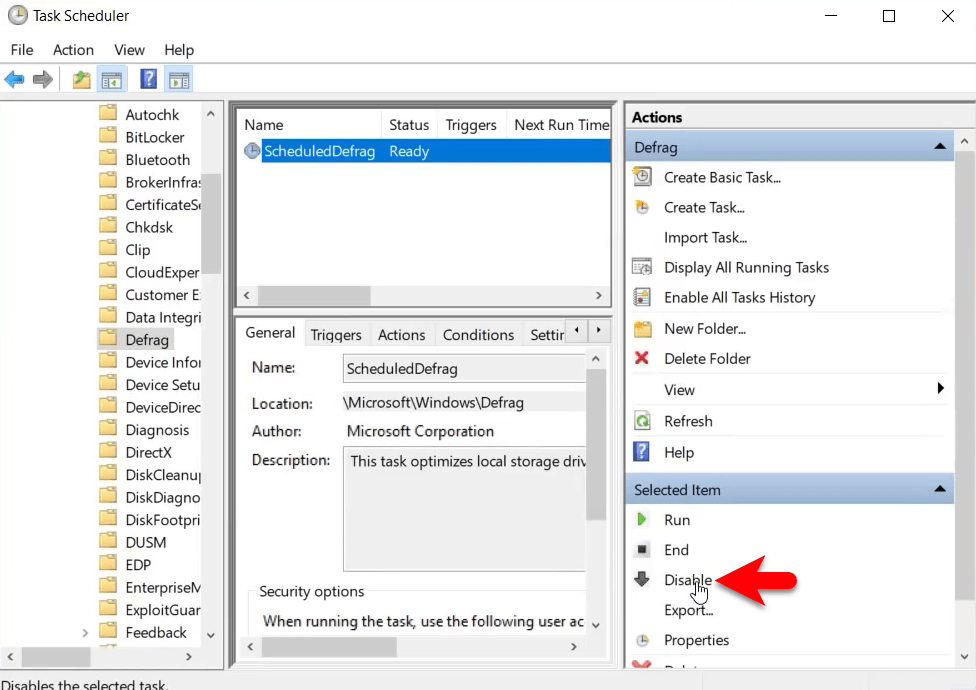
And now select the “SchedularDefrag” option and click Disable.
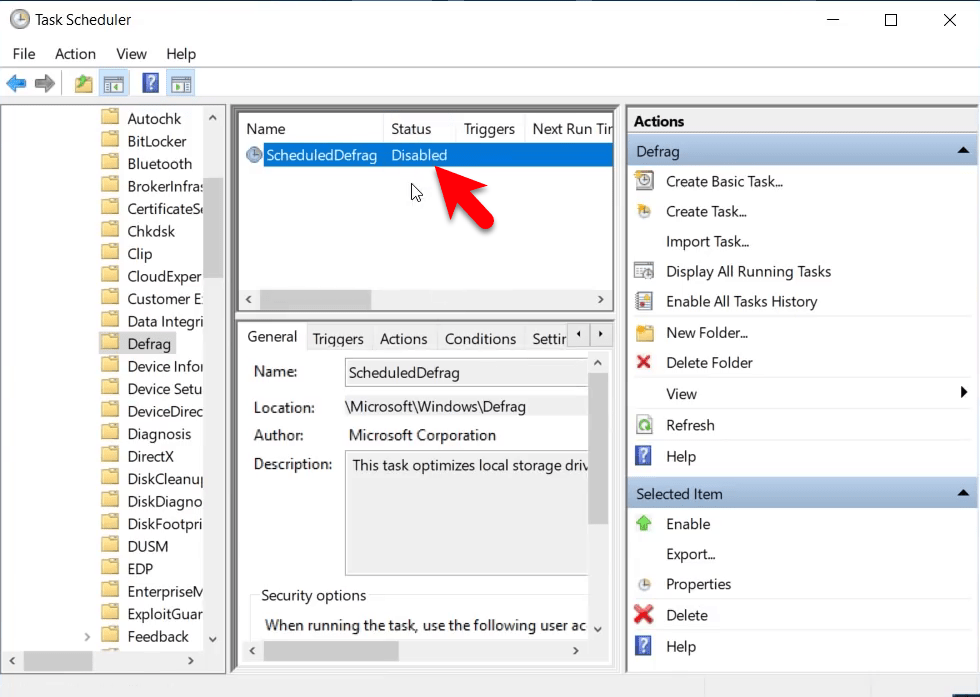
Once you have press the disable option, also check the status that it shows the disabled. Once you are done with this simply head over to the Windows start menu click on the power button and click restart. When you come back to the main screen if the changes didn’t make then head to the settings and undo back.
3. Update Your Windows Drivers
Always keeping your operating system up to date is more important ever. With every update they will release the latest features, bug fixes, and many more that can be more essiantial for your computer. On the other hand, one of the main reason to reduce the 100% usage disk on Windows 10 can be your Windows update. Due to that we have noticed this portion to add it in the article.
To do this navigate to your Windows 10 start menu, click on setting “Gear” icon. Once the setting window opened click on “Update & Security”.
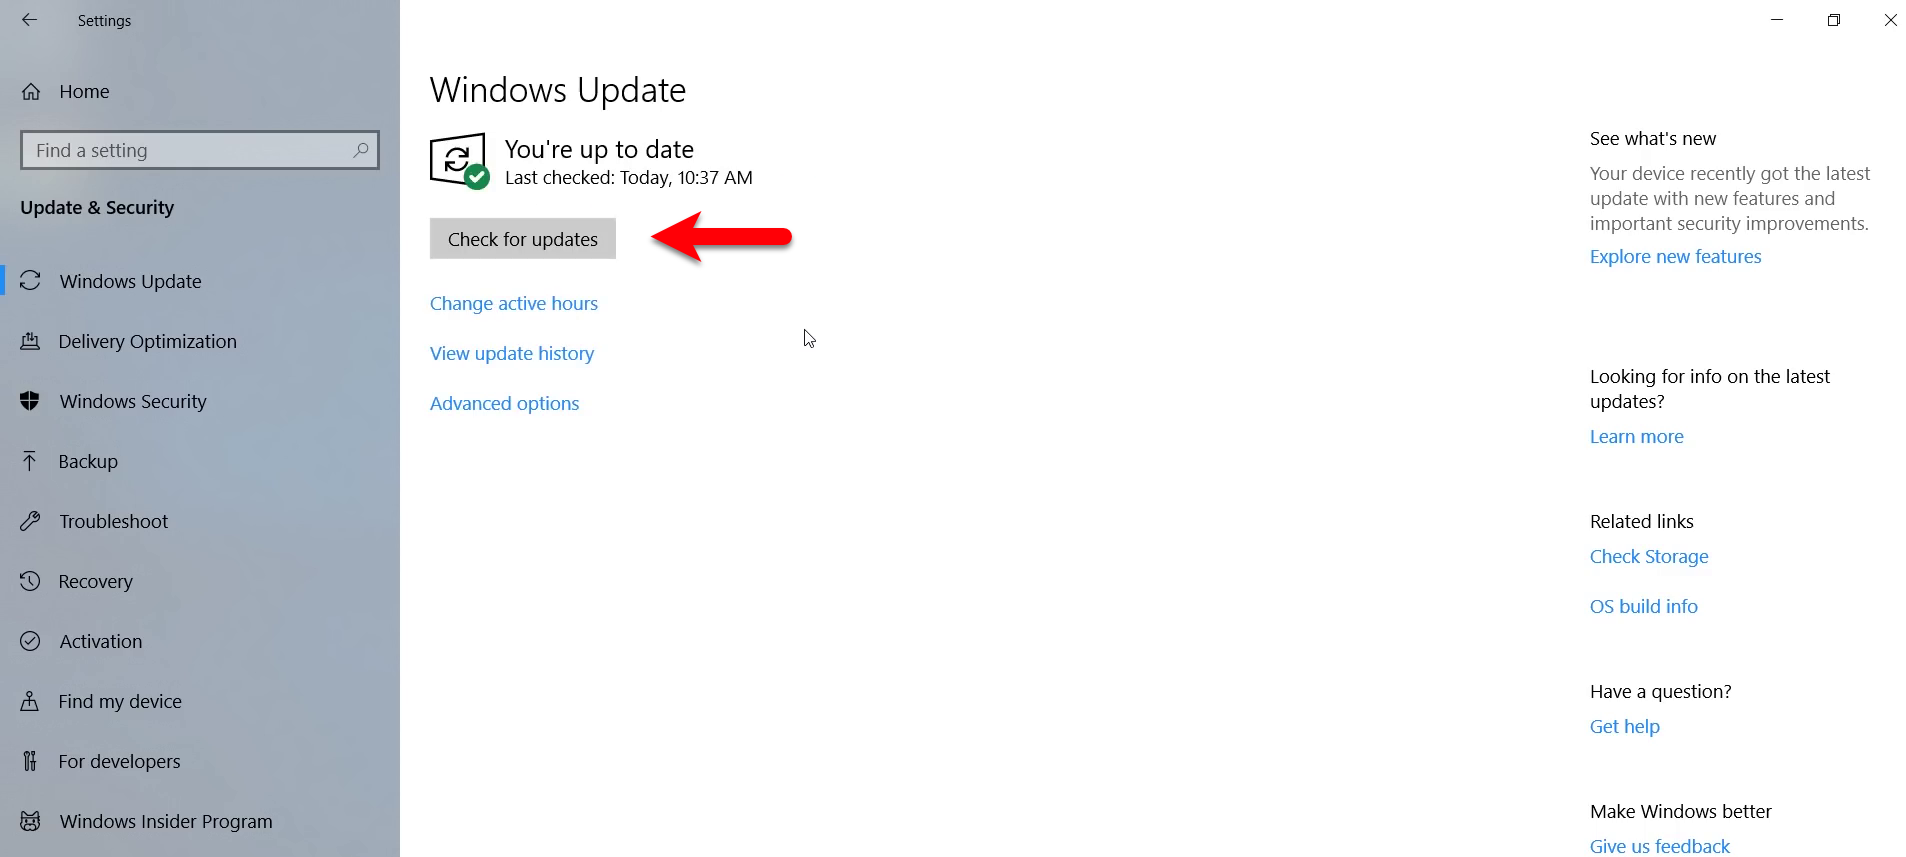
Once the Update window opened, click on “Windows Update” tab and check for update. If the latest update is available download and install it.

After checking for the update, head over to the Windows start menu to see all the device manager updates is installed.
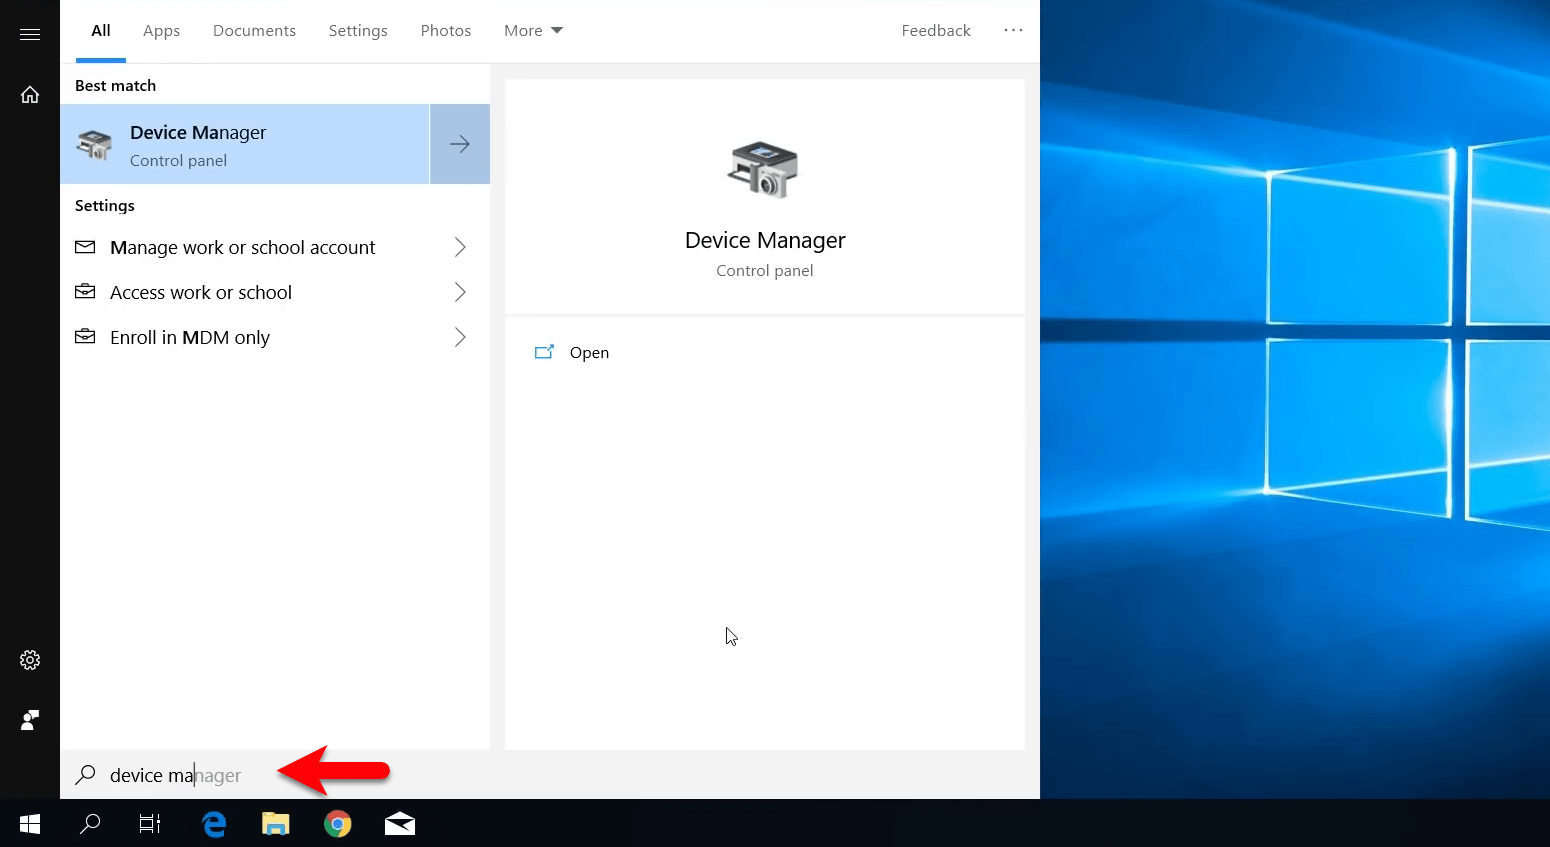
If the driver is not installed right-click on the any of the option, and click “Update Driver”. For updating the driver you need internet connection. If the driver failed in that case you need to download the driver segtup manually using your browser.

After you have updated all the drivers you need to restart you computer to fix the problem on your Windows. On the other hand, if the problem doesn’t solve you need to follow the below guide too.
4. Disable SuperFetch Service
Superfetch is the background service feature that constantly monitors memory usage patterns and observe applications you run most often. Hidden marks such apps frequently used and then preloads them into the memory ahead of time. Now just like Windows search service superfetch could silently be taking up a substantial amount of the readwrite the capacity of your disk especially if you are several different applications frequently on your Windows on over time it can be contributing to the problem of this hundred percent of disk usage and slowing down your Windows 10 performance.
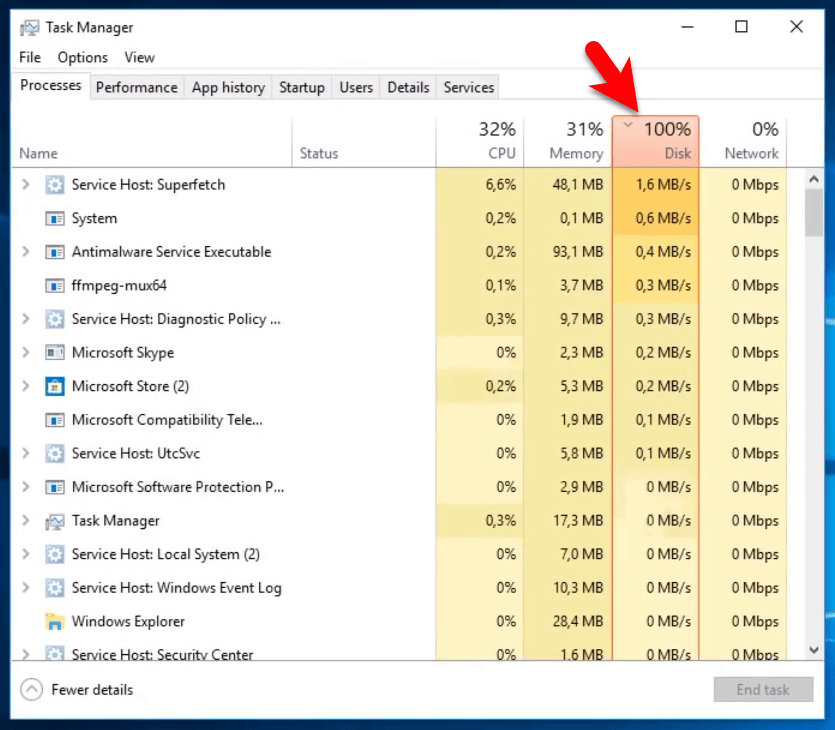
To do this right-click on the bottom of window and select task manager. As you here see the system is running up to 100%. Also the superfetch service is available as one of the internal feature on Windows task manager the play rule on Windows.
To disable Superfetch service on Windows, navigate to Windows start menu type there “CMD”. Once the cmd appeared right-click on that and “Run As Administrator”.
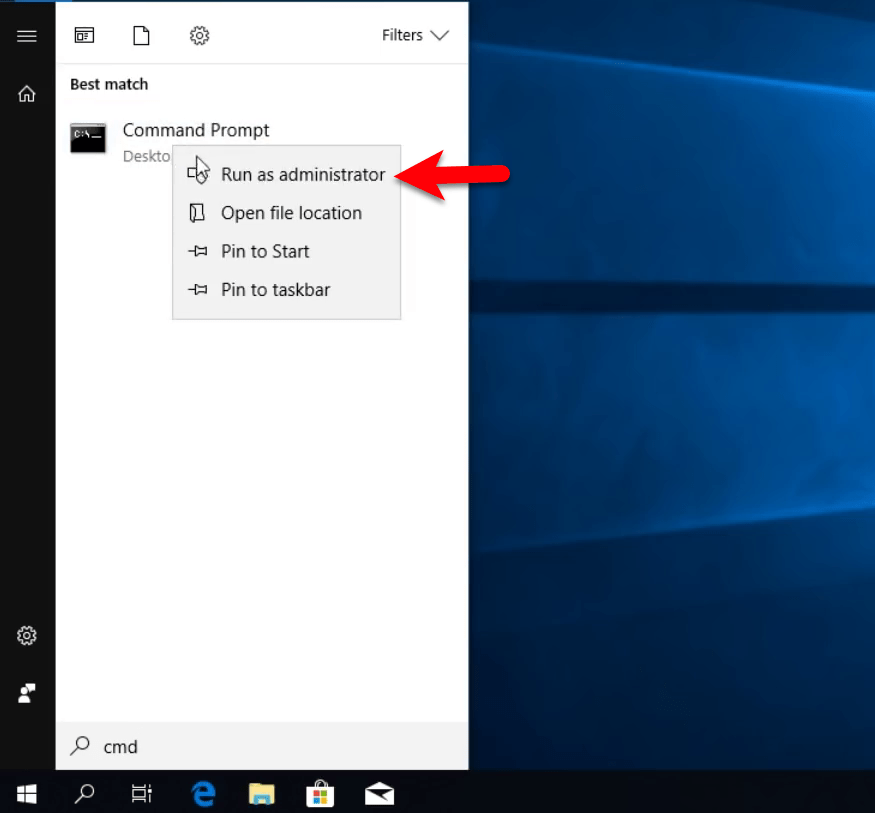
While the cmd successfully opened type the below down commands and press enter to disable superfetch service on Windows. After that, right-click on the bottom of the window and check after disabling disabling the superfetch service will you get the positive result or not.
Net.exe stop superfetch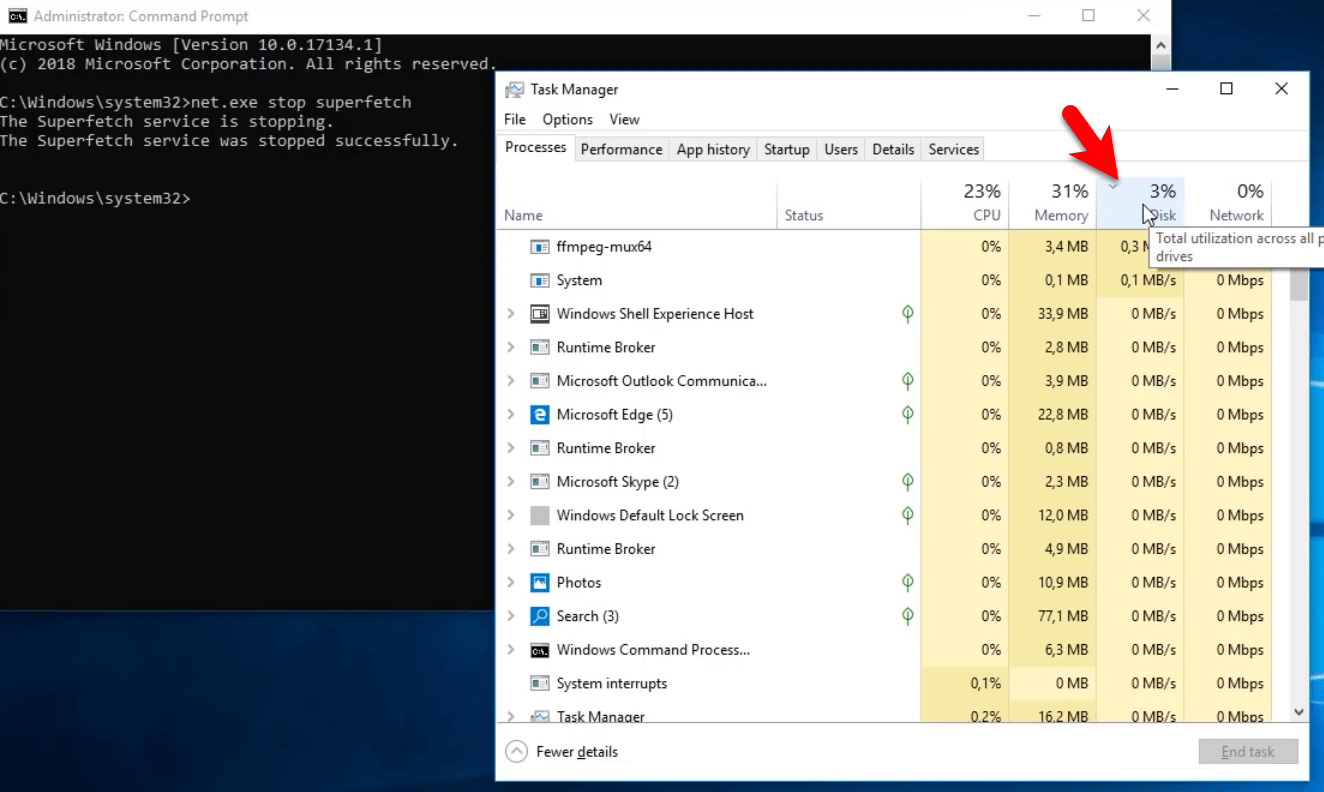
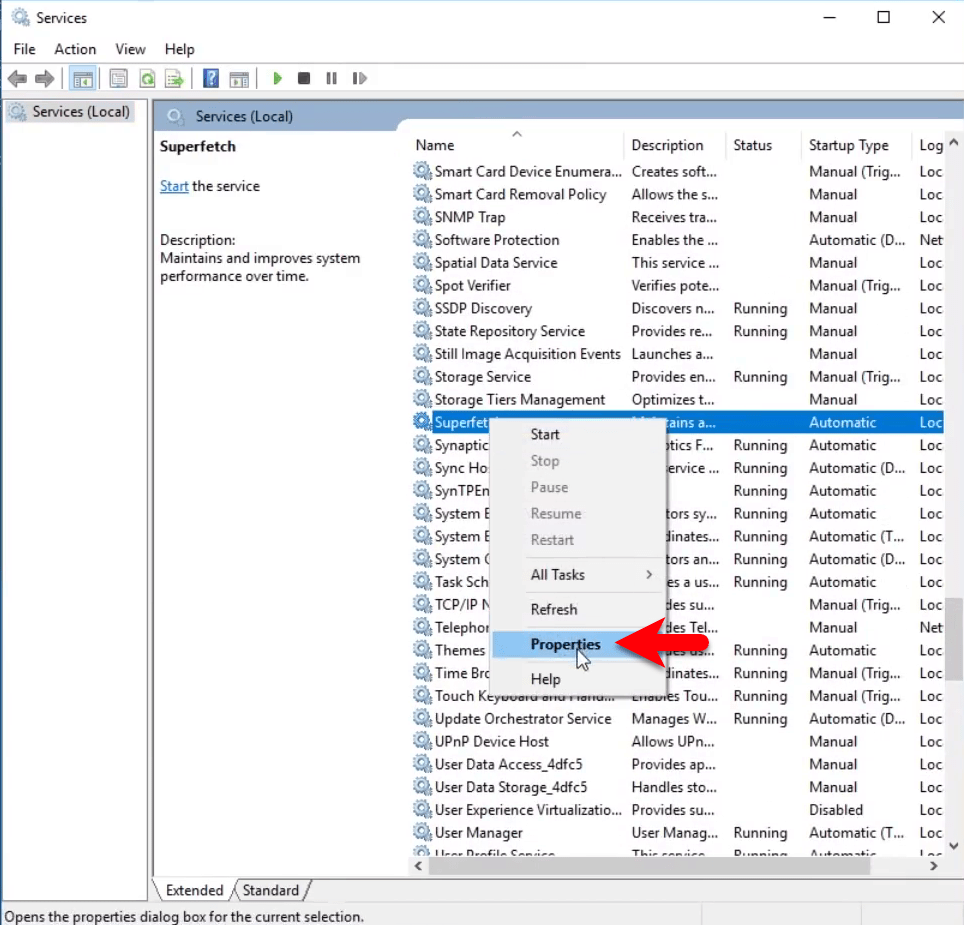
Again right-click on the bottom of window and click task manager. Once the task manager opened click on “Service” tab, and click on the bottom on “Open Services” option. On the services tab scroll down and find out the “Superfetch” option, then right-click on that and click “Properties”.
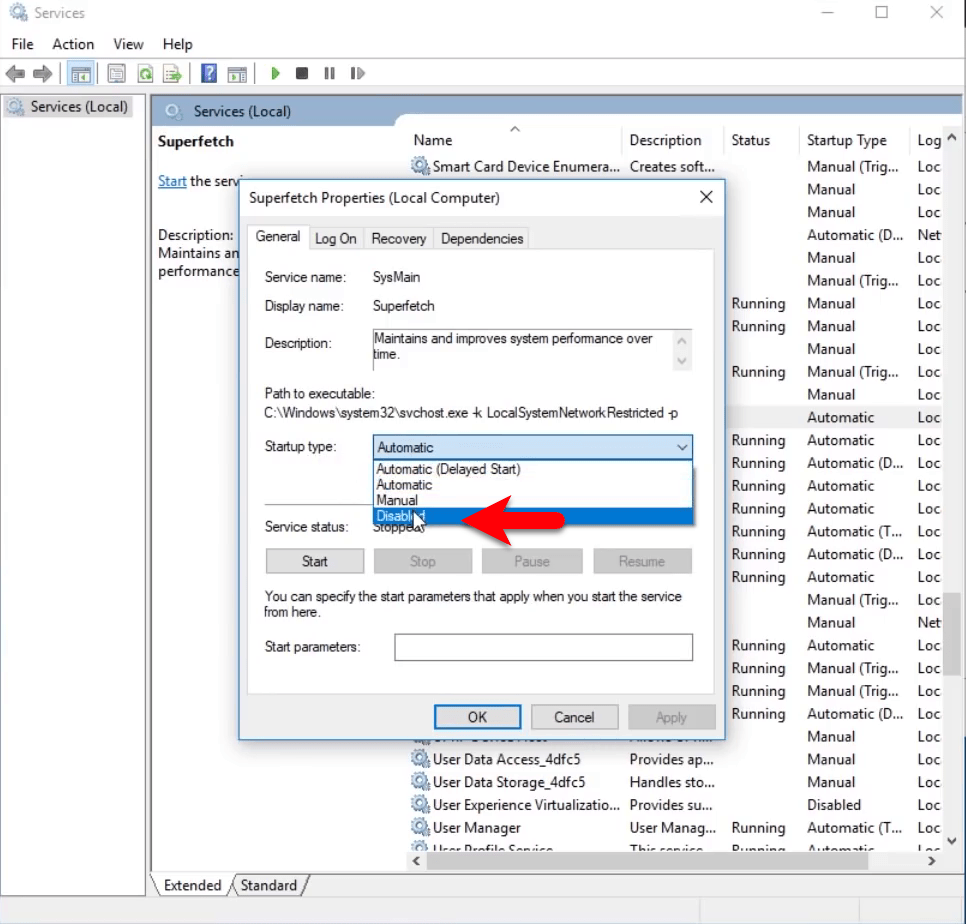
On the properties window click on “General” then click on in front of “Starup Type” to expand the option, then select the Disabled option.
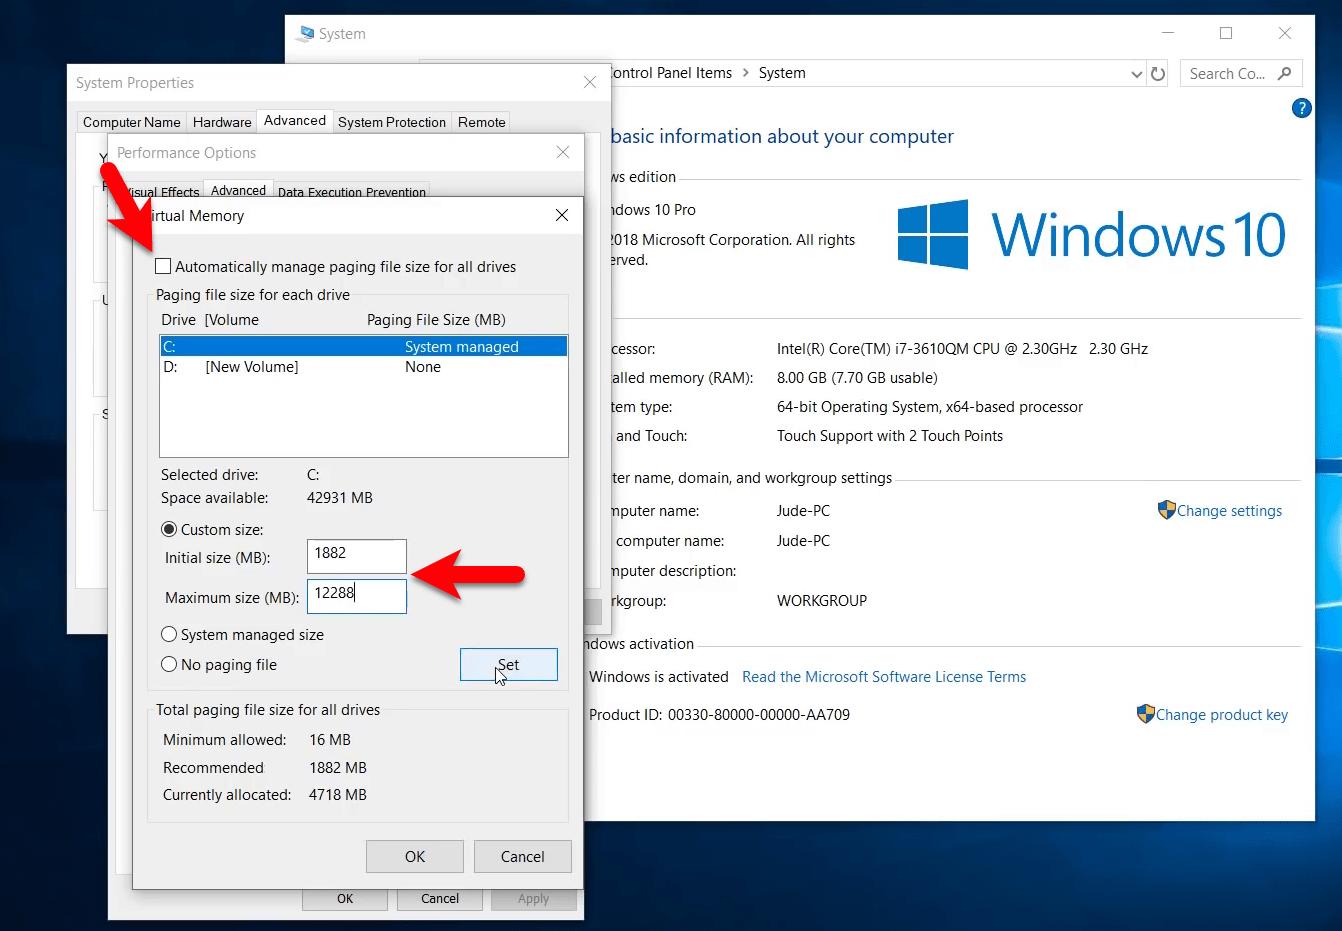
5. Reset Virtual Memory
Virtualy memory basically some kind of memory management technique that extends your arm virtually into your hard disk with the goal of improving performance. However, sometimes this technique could be generating a substantial amount of read/write requests on the hard disk hence it could lead to high disk usage. To reset you virtual memory follow the below tips.
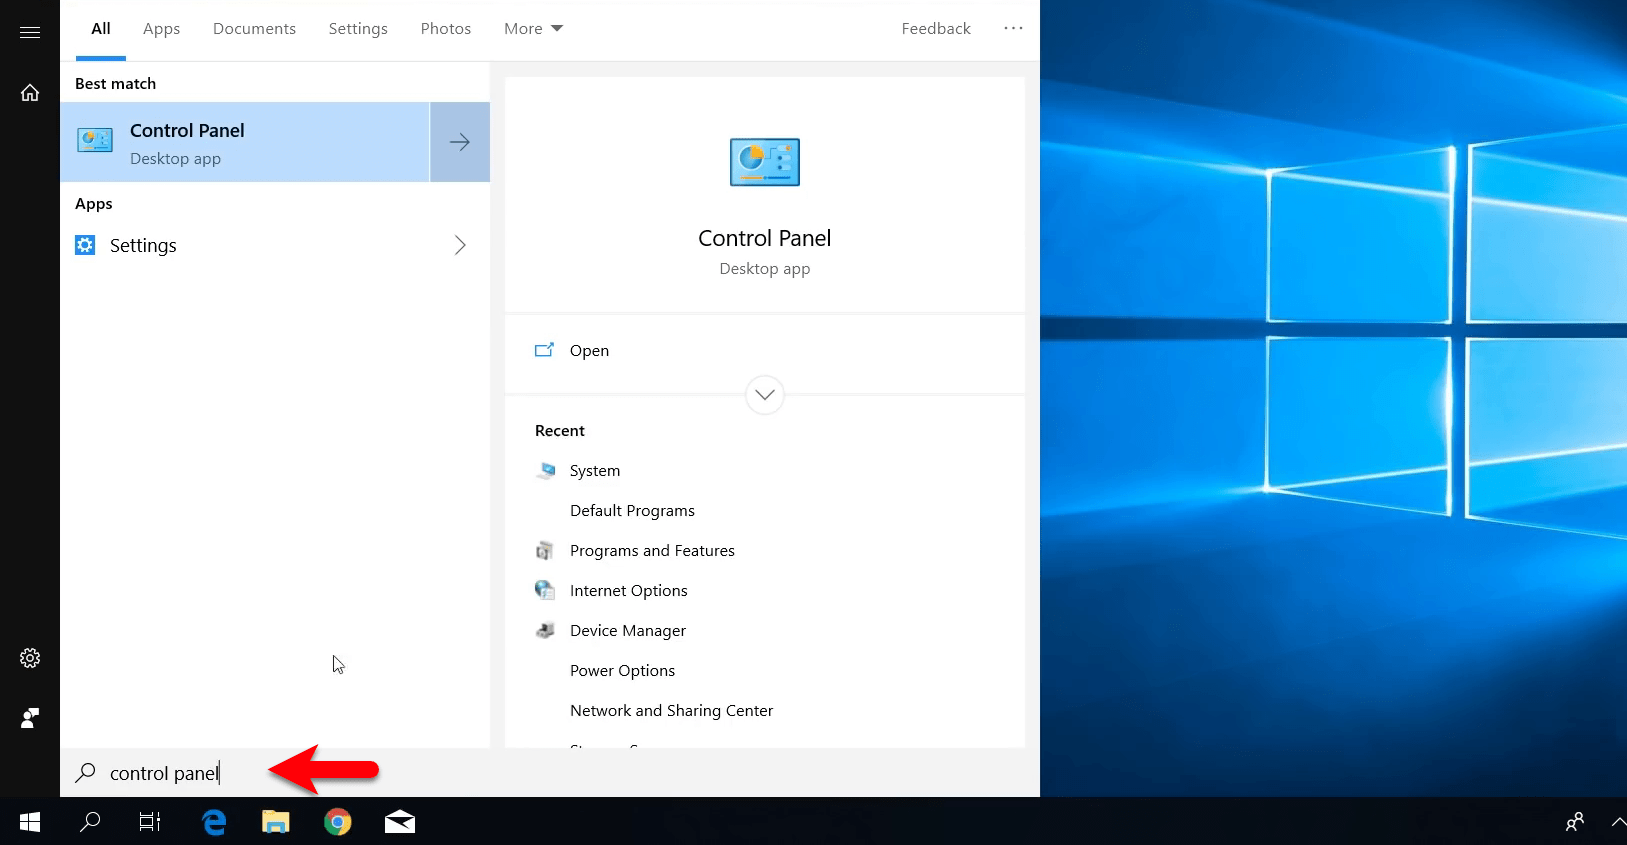
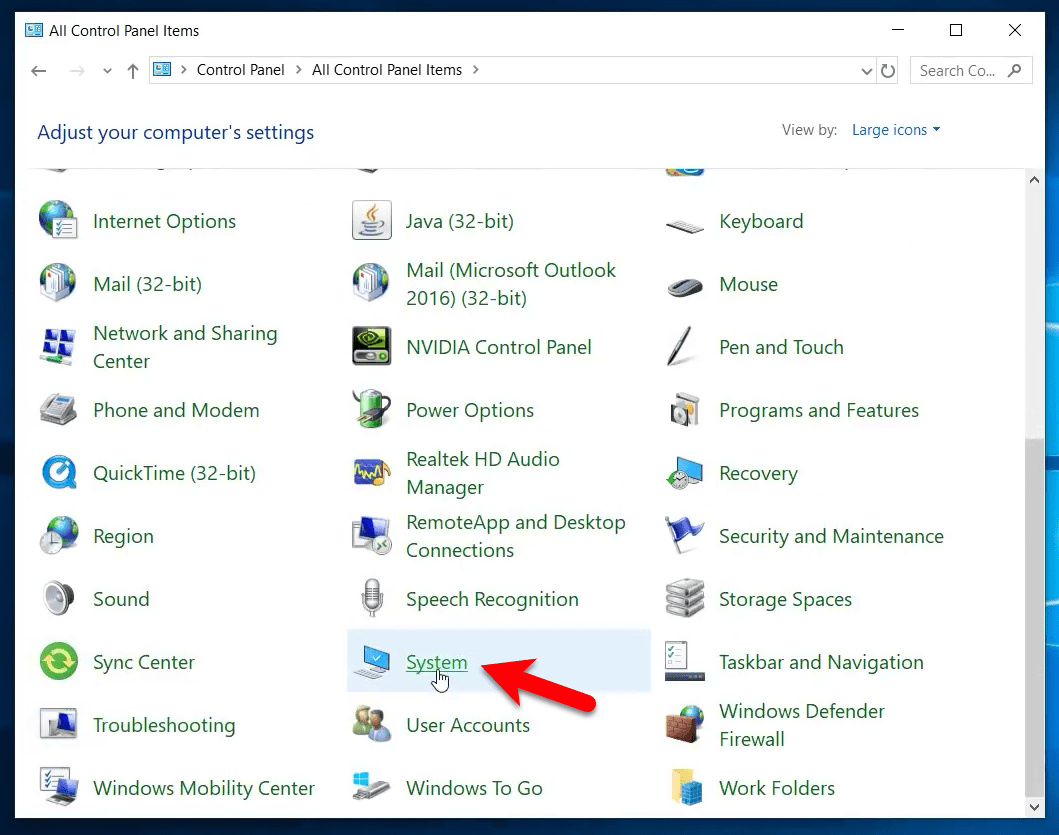
To do this navigate to Windows start menu type there control panel, once it appeared press enter to open.
Once the control panel opened, click on “System” option.
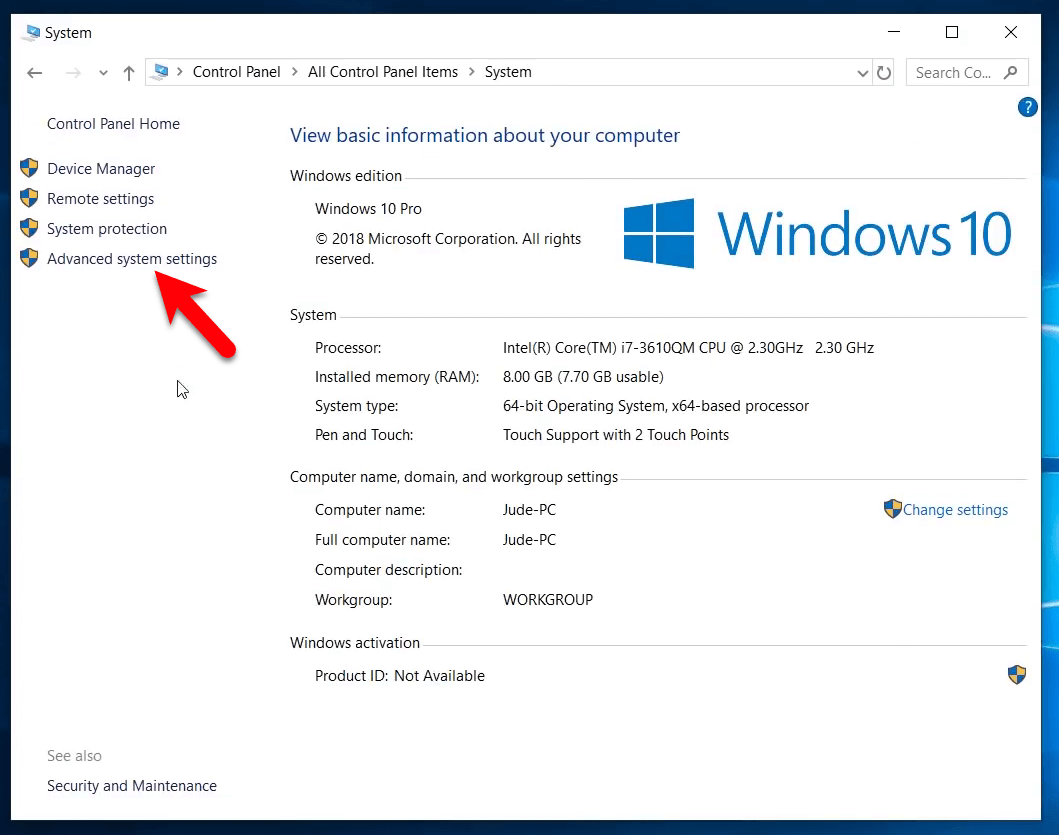
On the system window tab click on “Advanced system settings”.
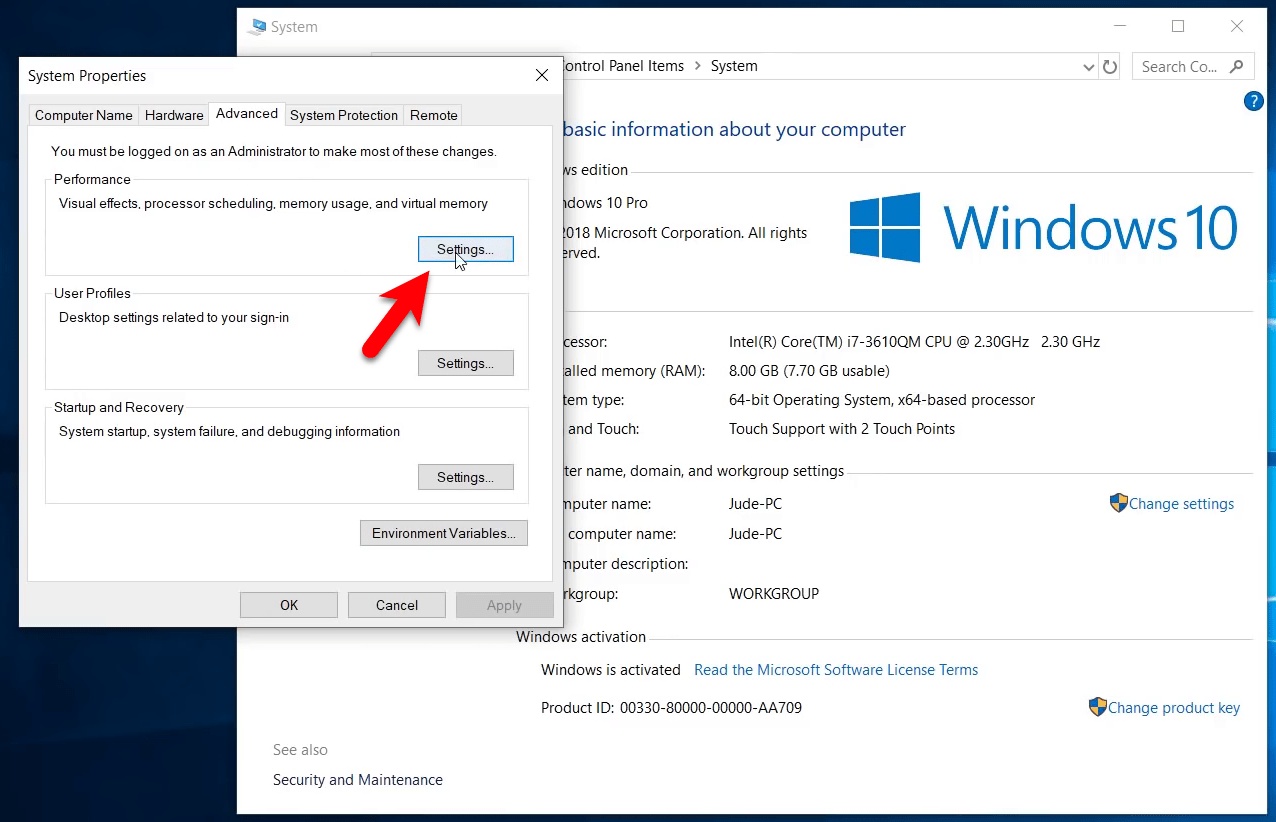
On the system properties window click on “Advanced” tab and click on “Settings”.
On the performance settings window click on change.
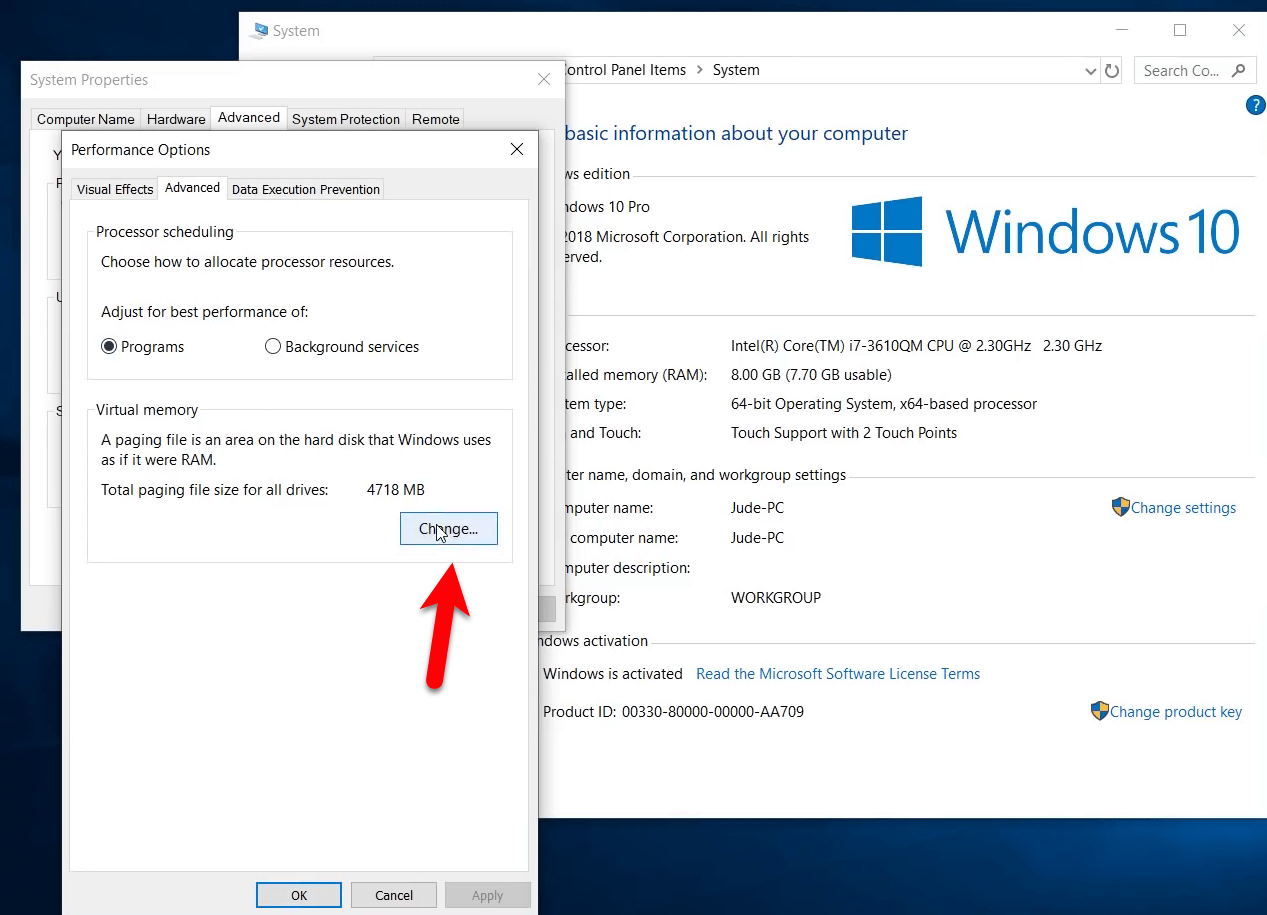
On the Virtual Memory window, diselect the option of “Automatically manage paging file size for all users”. And select the “C” drive, select the “Custom size” option, and setup the (Intial Size (MB) 1882), (Maximum Size (MB) 12288), then click set and click OK.
I hope this guide worked perfectly for you to fix 100% Disk usage on Windows 10. If you faced any kind of problem then use the comment section.
Amazing article, thanks for sharing
Nice one bro!