There several operating systems of Linux, Even Kali Linux is one of the most popular operating systems for ethical hackers. But Ubuntu is also a part of the Linux operating system with great hardware and software support. Again when it comes to using operating systems I think, sometimes we can’t handle with Linux OS. Besides that we need to use Windows OS because some key Apps can’t run under Linux. But there are no worries thanks to the world of technology that gives us a better opportunity to dual boot different operating systems with each other. Now you can dual-boot Ubuntu with Windows 10 on a single SSD drive in a very straightforward way.
Ubuntu is a free open-source Linux distribution based on Debian. Officially Ubuntu was released in three editions Desktop, Server, and Core. Most of the people nowadays have the replacement of Kali Linux with Ubuntu. Or most of people now using Ubuntu operating system then using Windows, or macOS. The way of installing is easy on the computer. Indeed, Ubuntu can fill the space for those users who want a free operating system to install on their computer. And now that Ubuntu latest version is 20.04 LTS.
Ubuntu 20.04 LTS latest features are Ubuntu Default Wallpaper, The default Yaru theme supports more applications, GNOME 3.32, Application permission control, Minor improvements in the terminal app, Live patching gets the highlight, Granular control on the night light, Revamped audio settings, Linux Kernel 5.0, Mesa 19.0, Under the hood performance improvements. Beside this for better installation you need to have the following hardware equipment.
- 2 GHz dual-core processor or better
- 4GB of system RAM
- 25GB of free hard drive storage
- Either DVD drive or Bootable USB Pendrive of installer media
- Internet access is helpful during installation
Currently Windows 10 is one of the most popular operating systems for the people. In fact, this operating system has been preinstalled over billions of devices worldwide. It keeps or evolves to continue its updates, due to that in May 2020 its latest update will come. Beside this Ubuntu for being its open-source operating system people are trying to use it. The majority of advanced programmers prefer to Ubuntu for its better privacy security performance. And Ubuntu is easy for better daily use for its customization and personalization, and it use with cloud computing.
OK, those points are all about Ubuntu latest version and Windows 10 operating system. Therefore, before getting started for dual booting you need to backup all of your necessary files. Because sometimes dual boot accidental happens to delete or lose your important data. So, in this case find time to backup your important files.
Dual Boot Ubuntu with Windows 10 on a Single SSD Drive
Dual boot is an act of assistant with other operating systems that are already installed on your computer. Sometimes we become compelled to install a different OS on our computer. Like Windows, macOS, or Linux there are doing their individual works on a computer. Currently, most of the people are using Windows 10 for there graphic works. Or people are using macOS for better security safety, because the security of macOS is more powerful then other operating systems. And people are using Linux for ethical hacking to hack other personal data.
Step 1. Download ISO File
However, before dual-booting you need some requirements to full fill it for a better installation. The following requirements are easy to get and freely.
- Be sure you have installed Windows 10
- Download the latest ISO file of Ubuntu
- USB drive to create Bootable
- Better PC with high hardware equipments
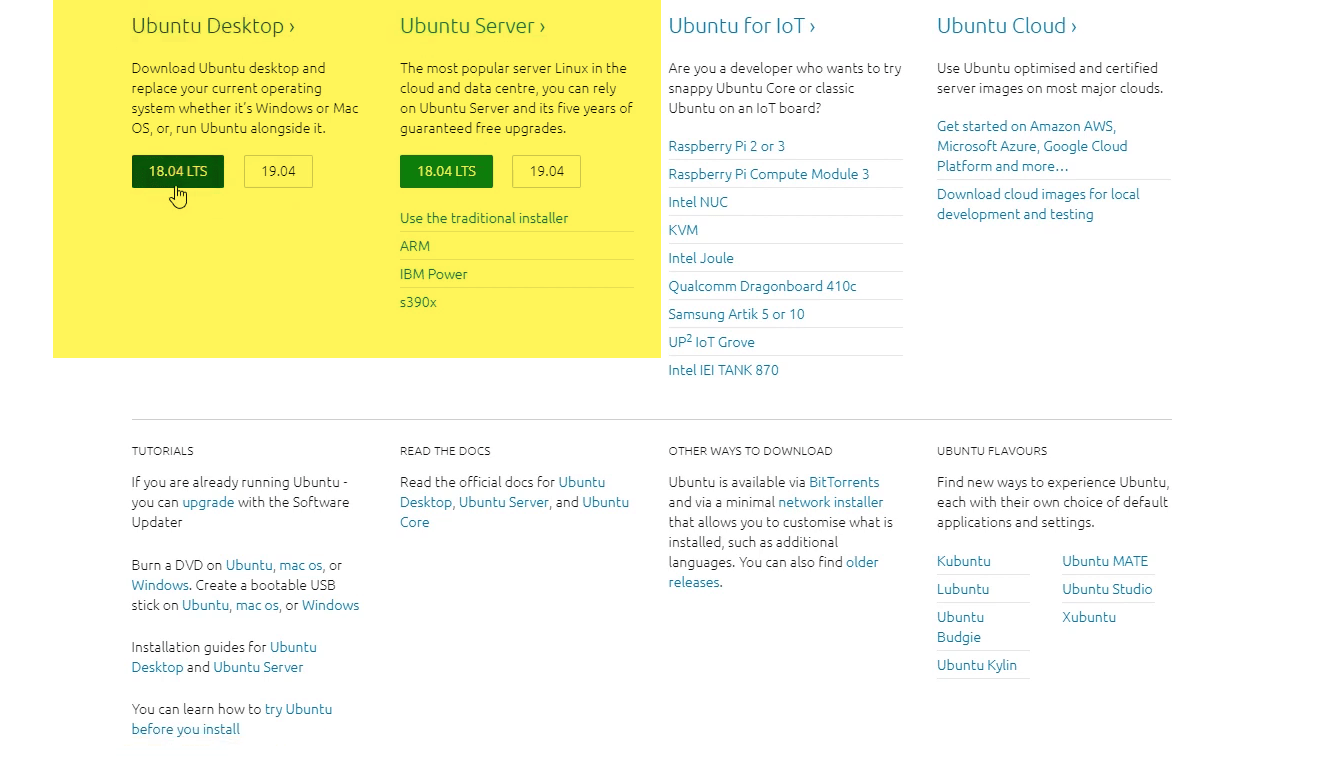
You can download the ISO file of Ubuntu from its official website, for downloading navigate to its site. Once you reached there you will see the latest version and older version of it. To download its ISO file you need a better internet connection.
Step 2. Create a Bootable USB Drive
However, once the ISO file download there you have to create a Bootable USB Pendrive. For creating a Bootable USB drive you need at least 16GB USB flash. As there are several methods that you can create a Bootable USB drive for Ubuntu. Because Ubuntu is powered by ISO, in that case, we use Power ISO application to create a Bootable USB drive. The procedure is pretty easy everyone can do it.
OK let’s get started with creating Bootable USB drive, to do that firstly install Power ISO application on your computer. Once it installed open it, when it opened navigate to top menu bar click on (Tools) and select the (Create Bootable USB Drive) below down.
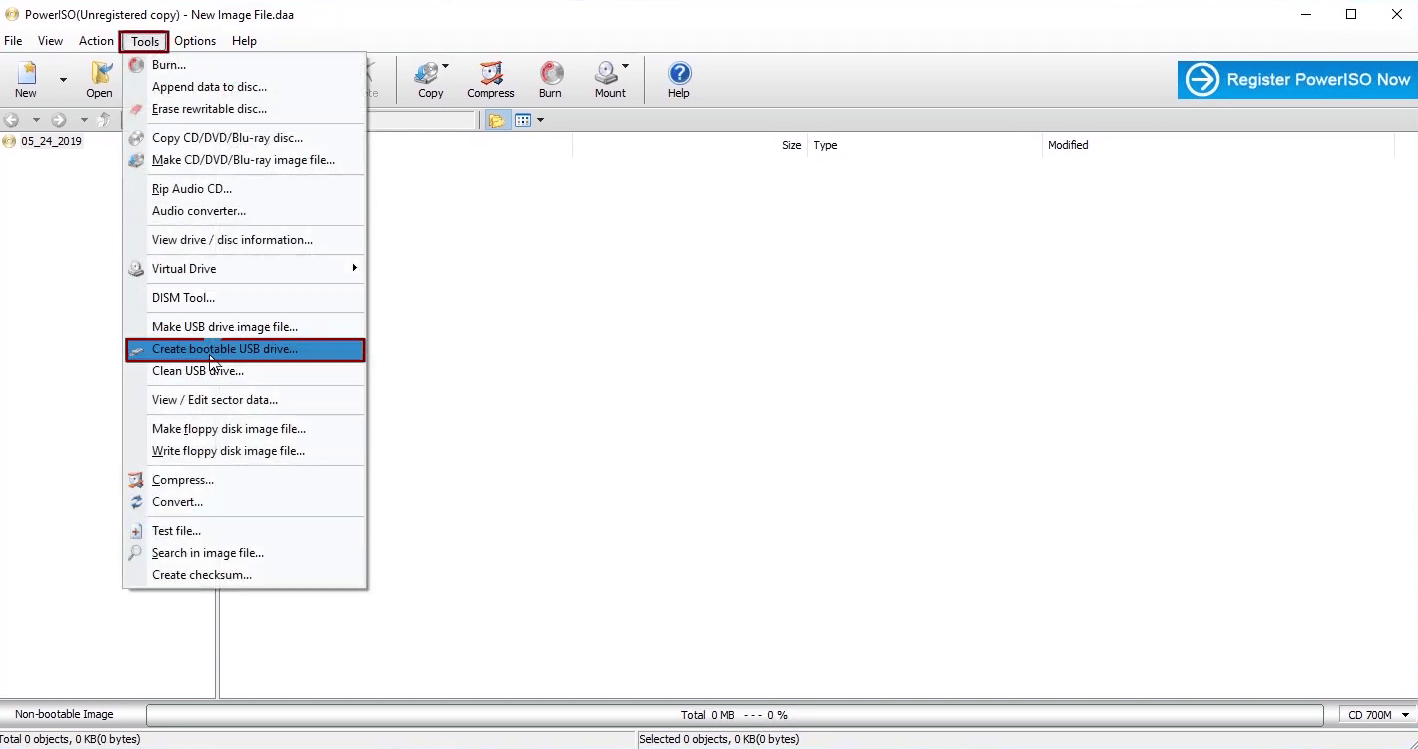
Once you clicked Create Bootable USB Drive option, another window will appear. From that window you need to insert the ISO file of Ubuntu, so click on folder icon from left-handed.
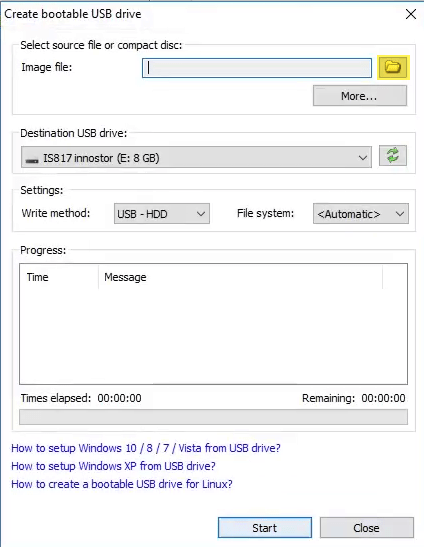
Now select the ISO file of Ubuntu and click Open.
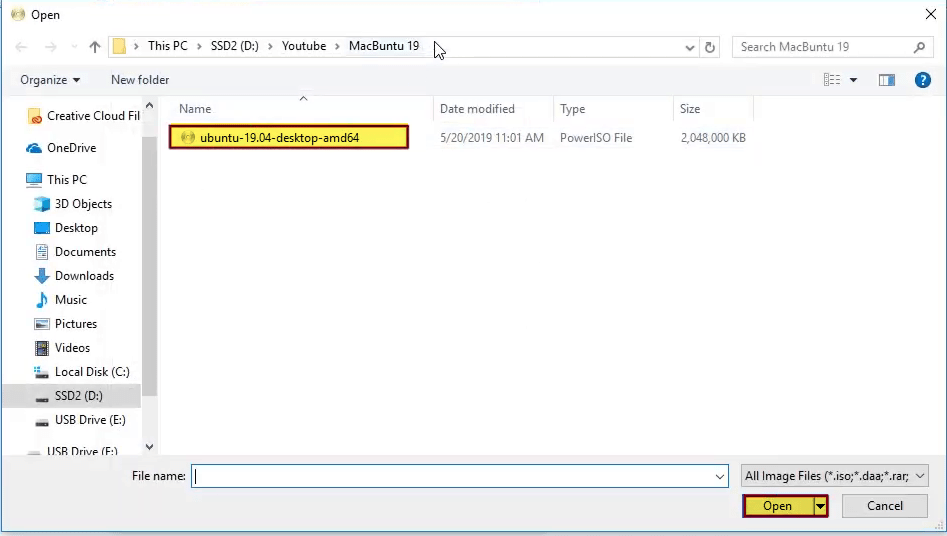
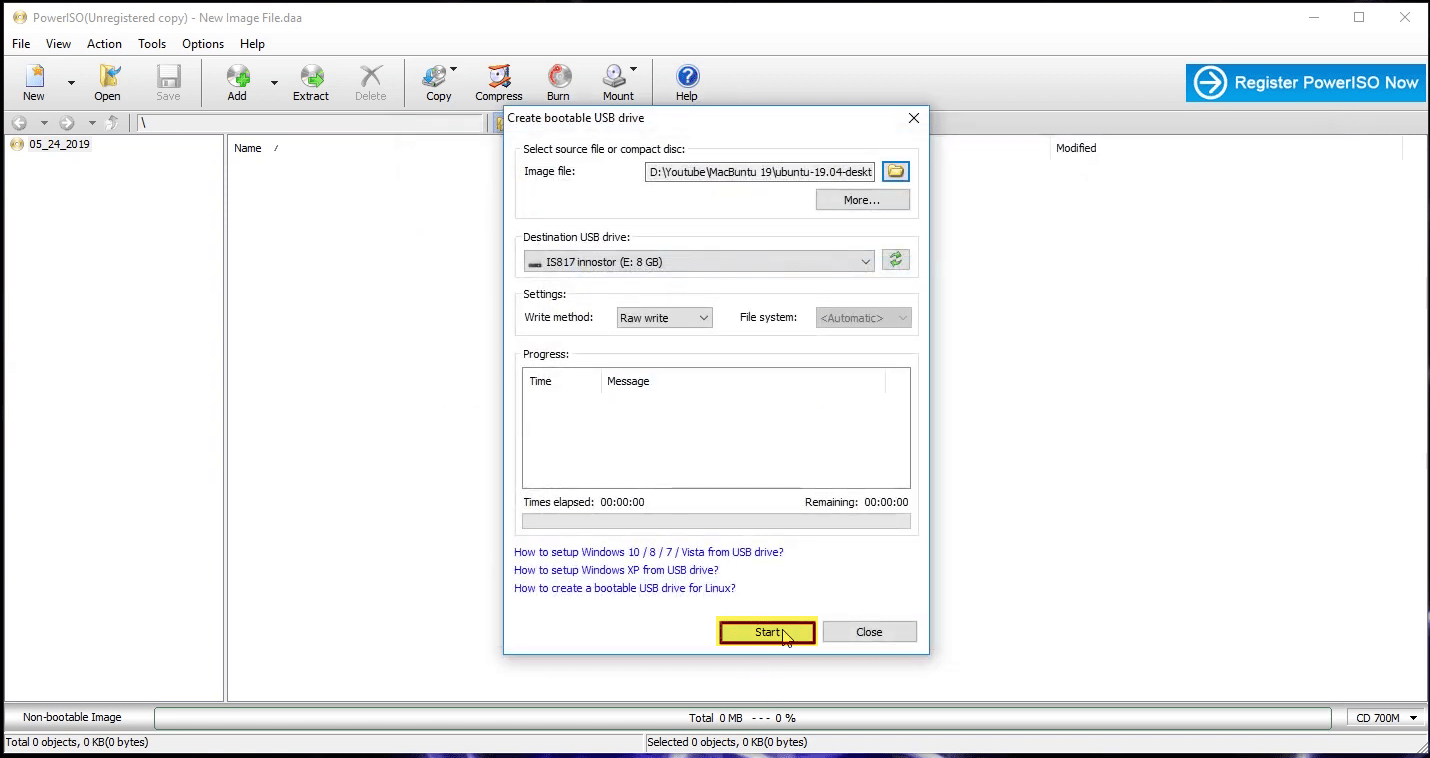
Once the ISO file inserted makes the settings of Power ISO according to the below down screenshot, after that, click Start option. This process will take up to minutes, be patient don’t do anything during the copying of files.
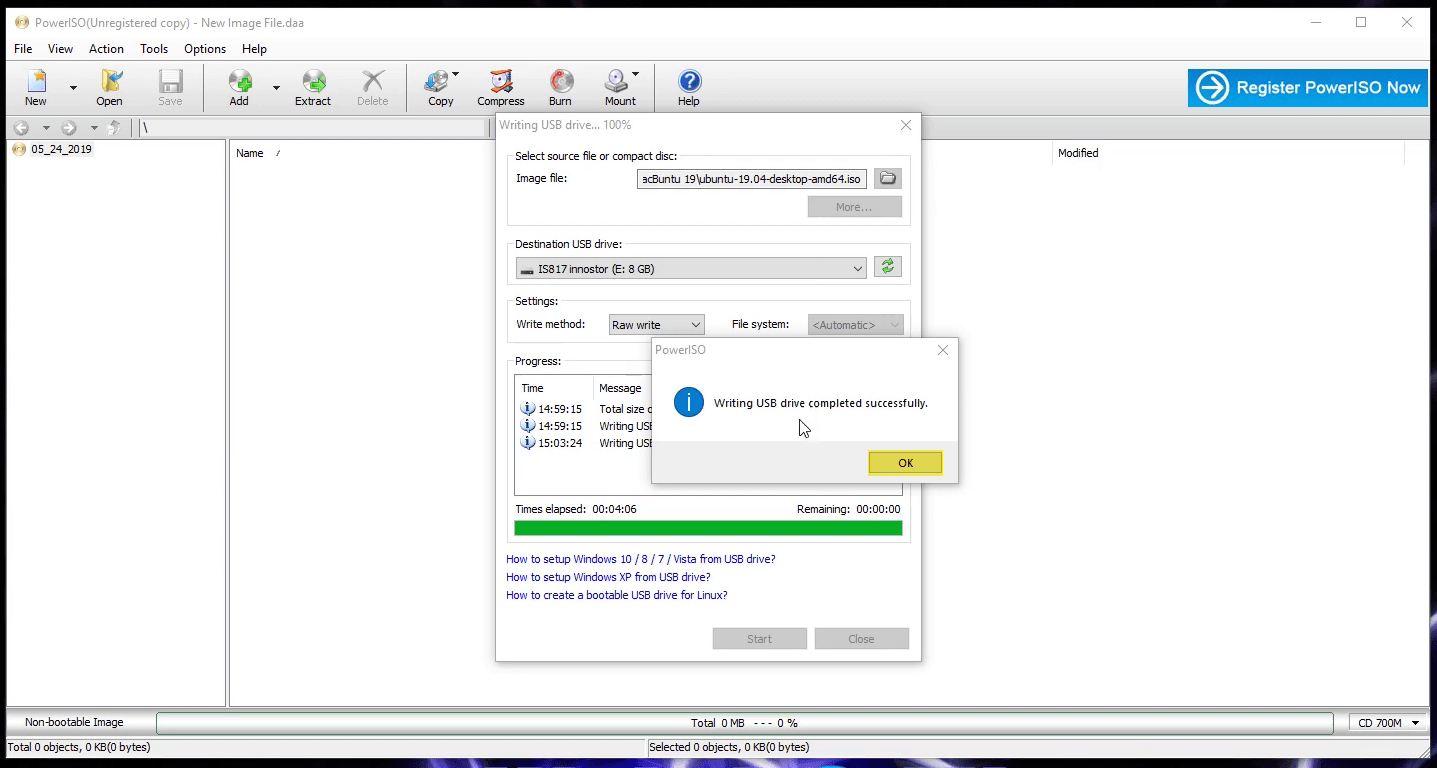
When the files successfully copied to USB drive a notification will appear. That writing USB drive completed, so click OK and close the Power ISO.
Step 3. Shrink Volume for Ubuntu on Windows 10
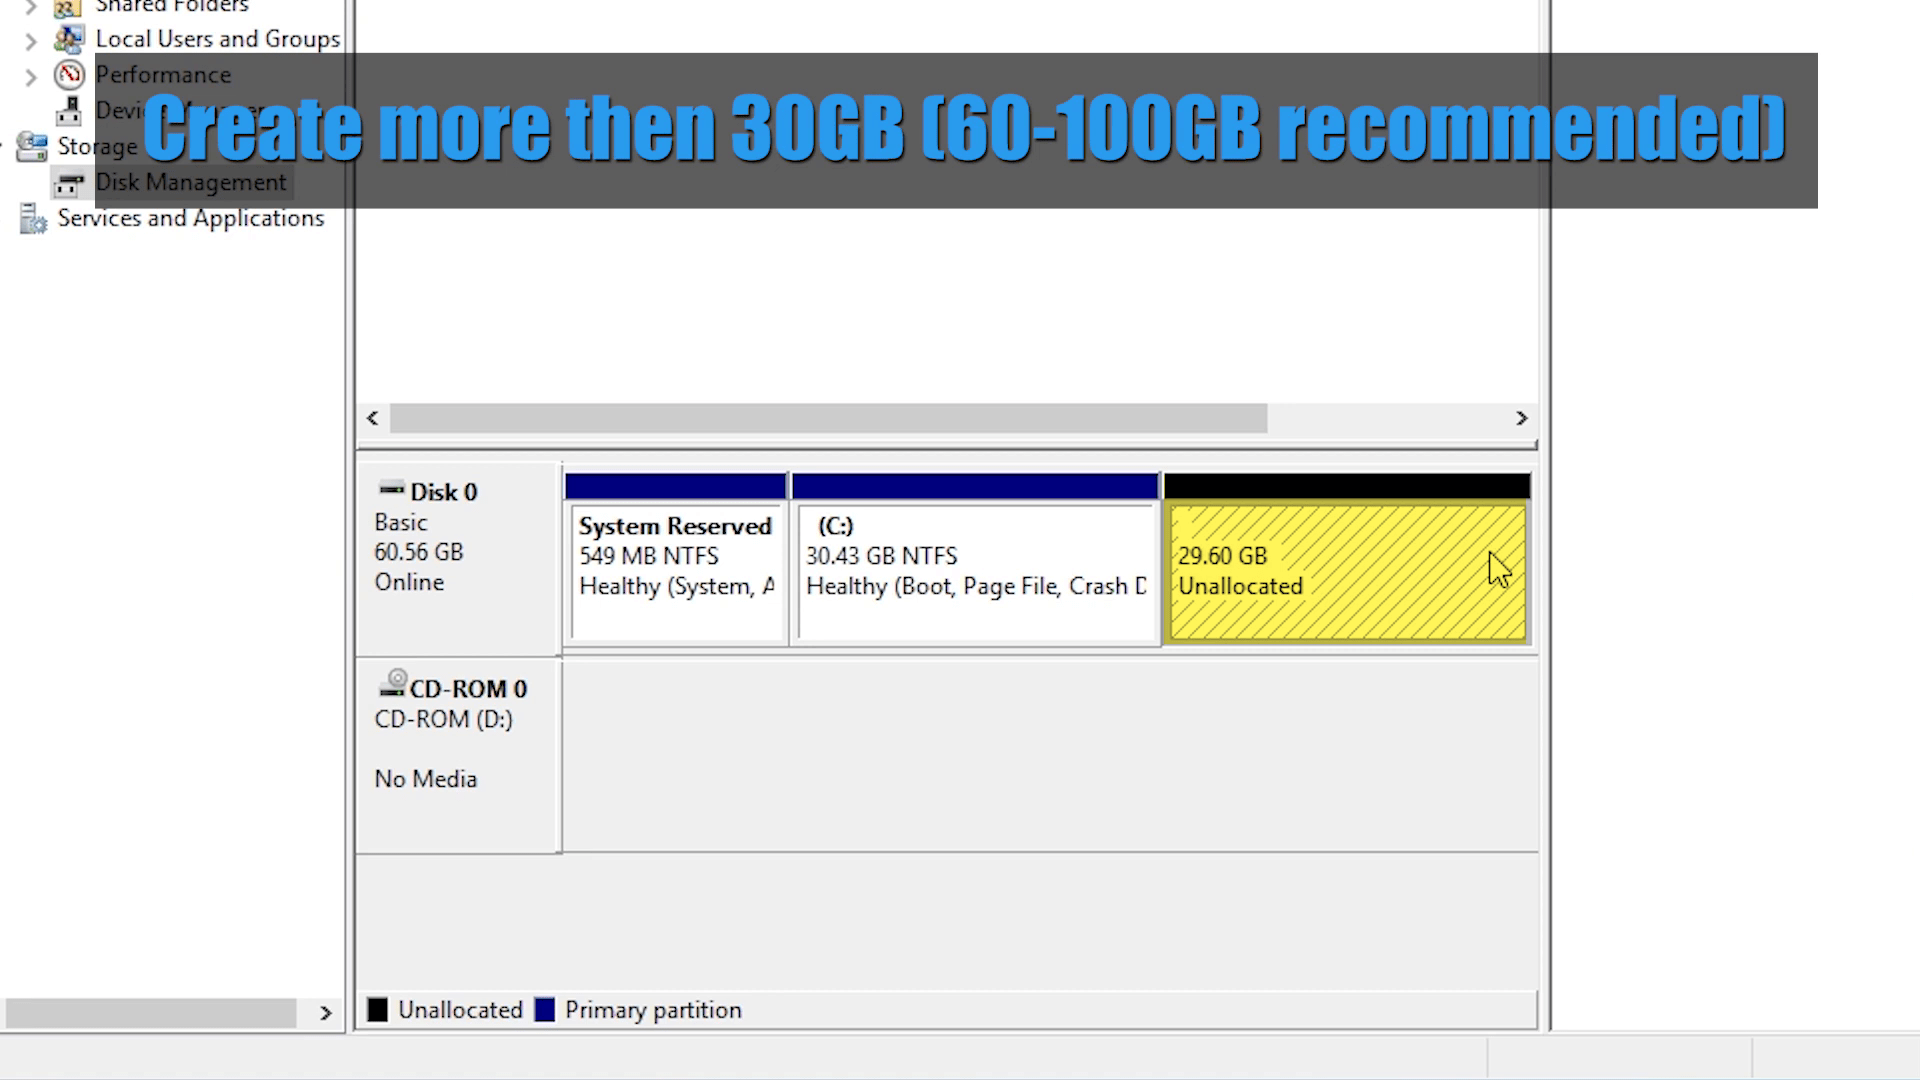
Shrink will create a free (unallocated) drive to install Ubuntu alongside Windows 10 on the same drive. This process is also, to shrink navigate to my computer then right-click and select (Manage) option.

When the computer management window opened, select device management from the left-handed menu bar. When the list of drives appeared, select the drive and right-click then click on shrink option.
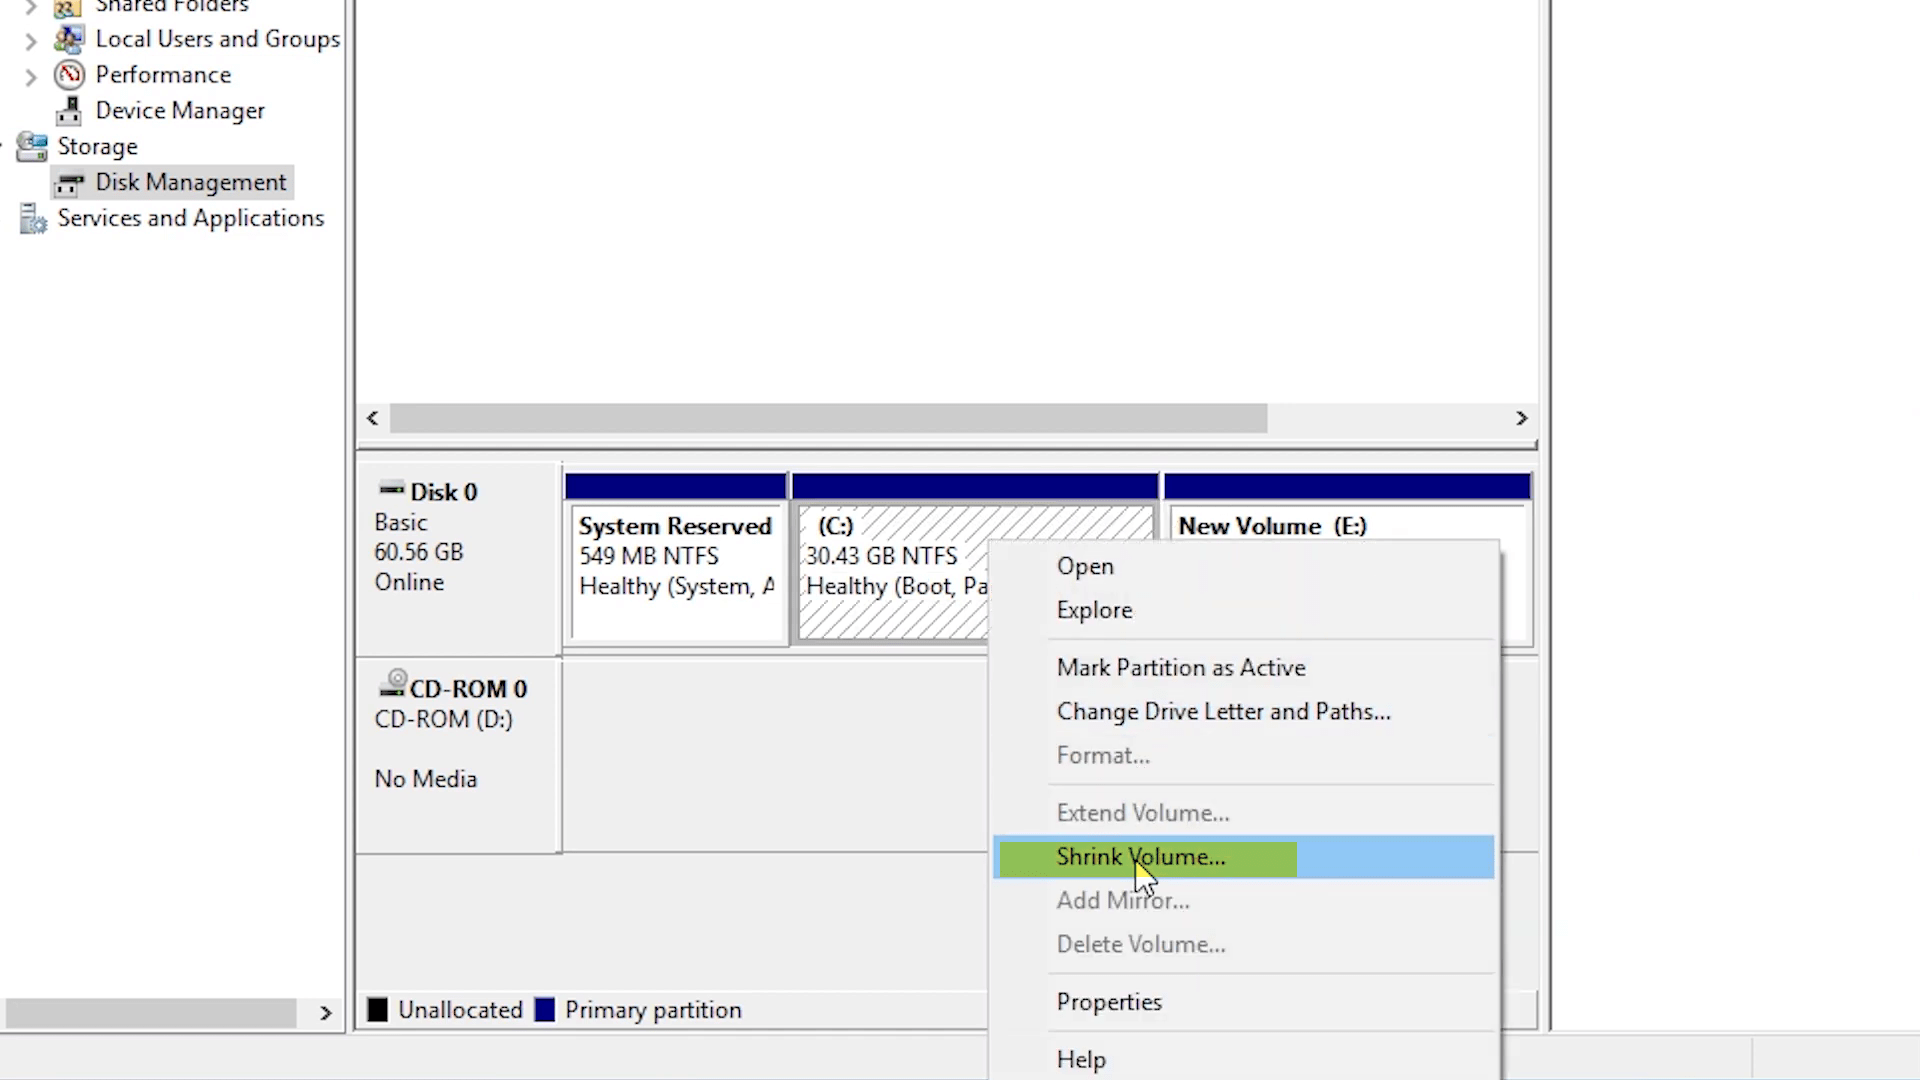
When you clicked shrink another window will come, from there specify the disk space you want to shrink. After that, the drive will create automatically the recommended is (30GB-60GB or more than that).
Step 4. Install Ubuntu
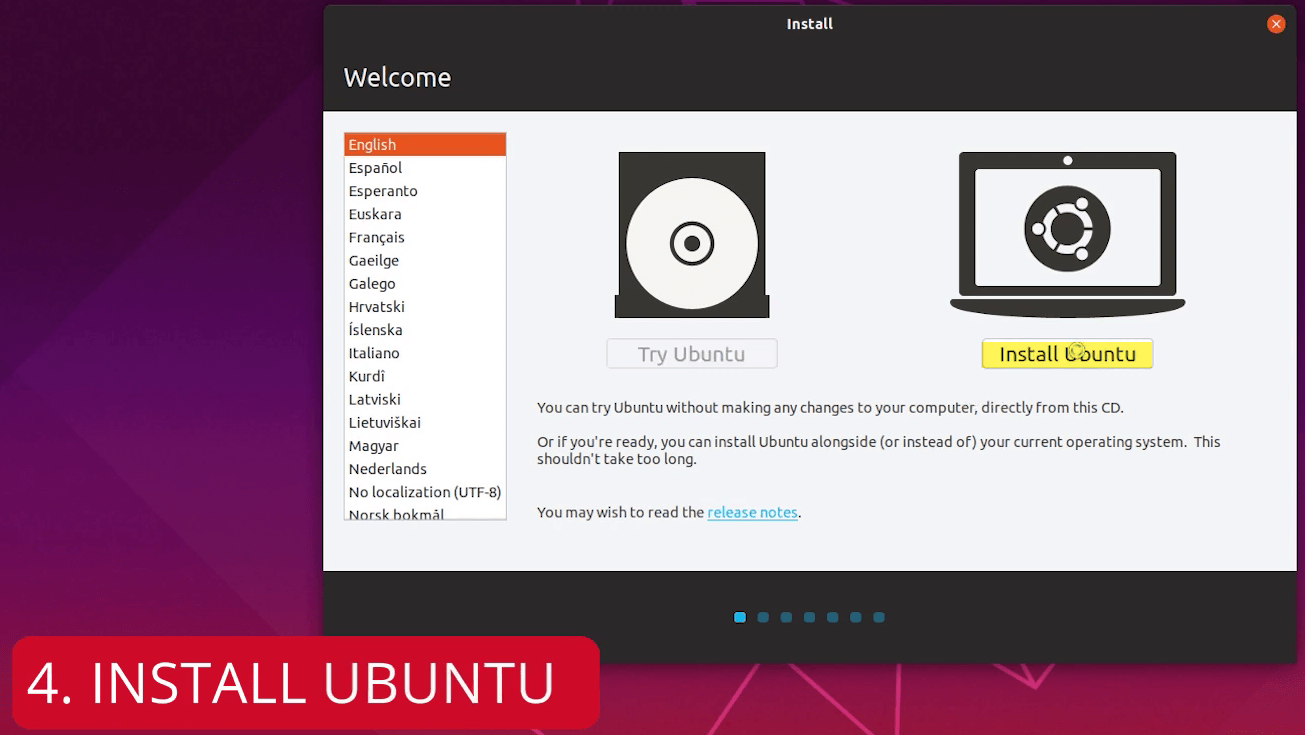
Now everything is prepared for dual-booting of Ubuntu with Windows 10 on a single SSD drive. So, why not to start its installation. The installation process of Ubuntu is easy but you need some effort to handle it. However, to install Ubuntu restart your computer then press and hold the Boot menu key. When the boot menu appeared, boot the installation from created Bootable USB drive and press enter. Once the Ubuntu boots to installation in the first screen select your (language) and press (Install Ubuntu) option.
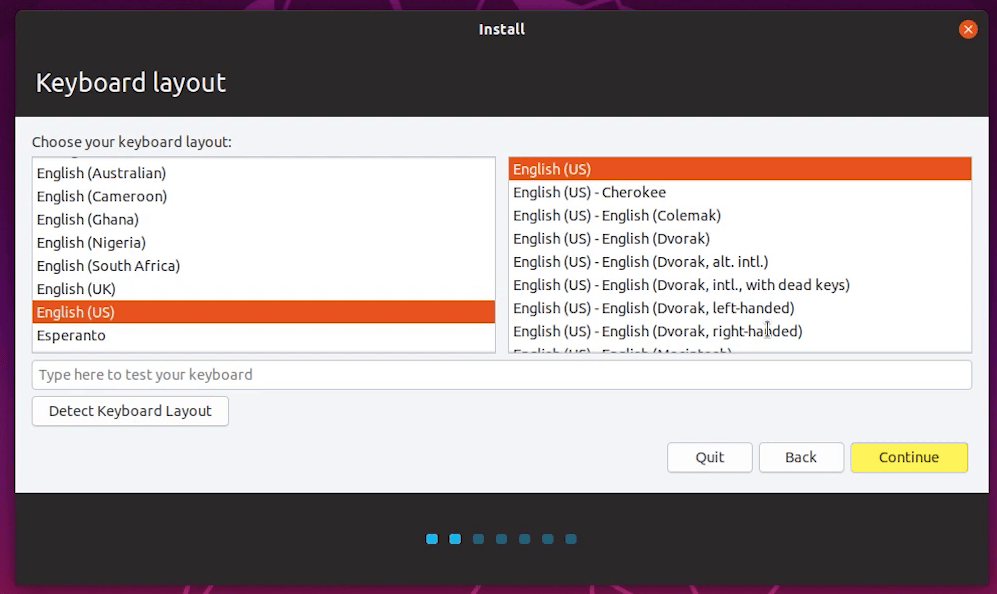
In the next window select your Keyboard layout and press continue.
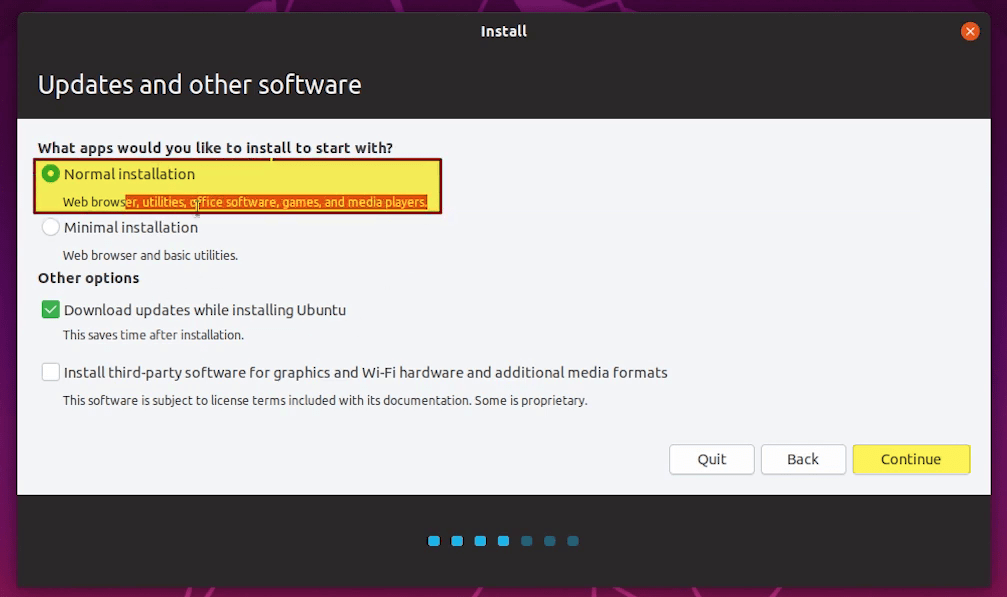
In the Update and software check the box of (Normal installation), under the (Other options) also check (Download updates while installing Ubuntu) and click continue.
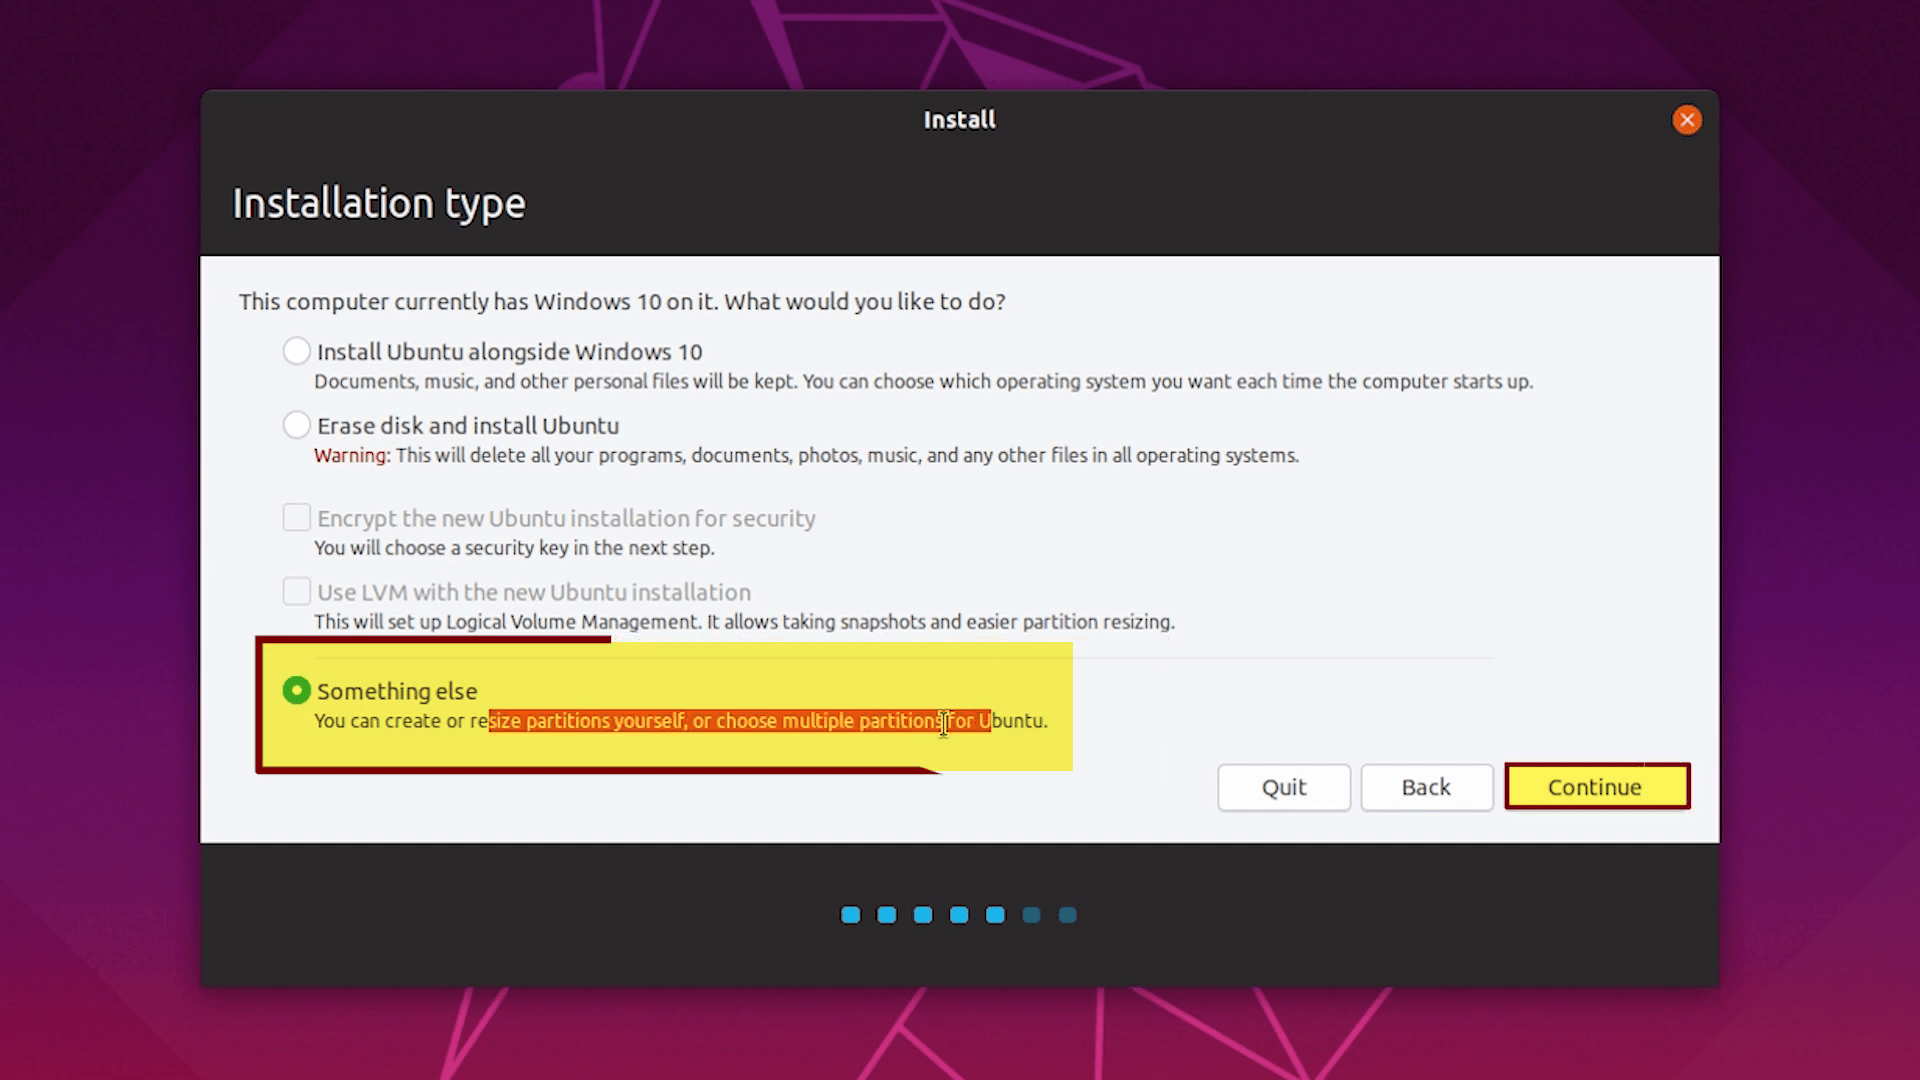
In the installation type window select the last option, Something else and click continue.
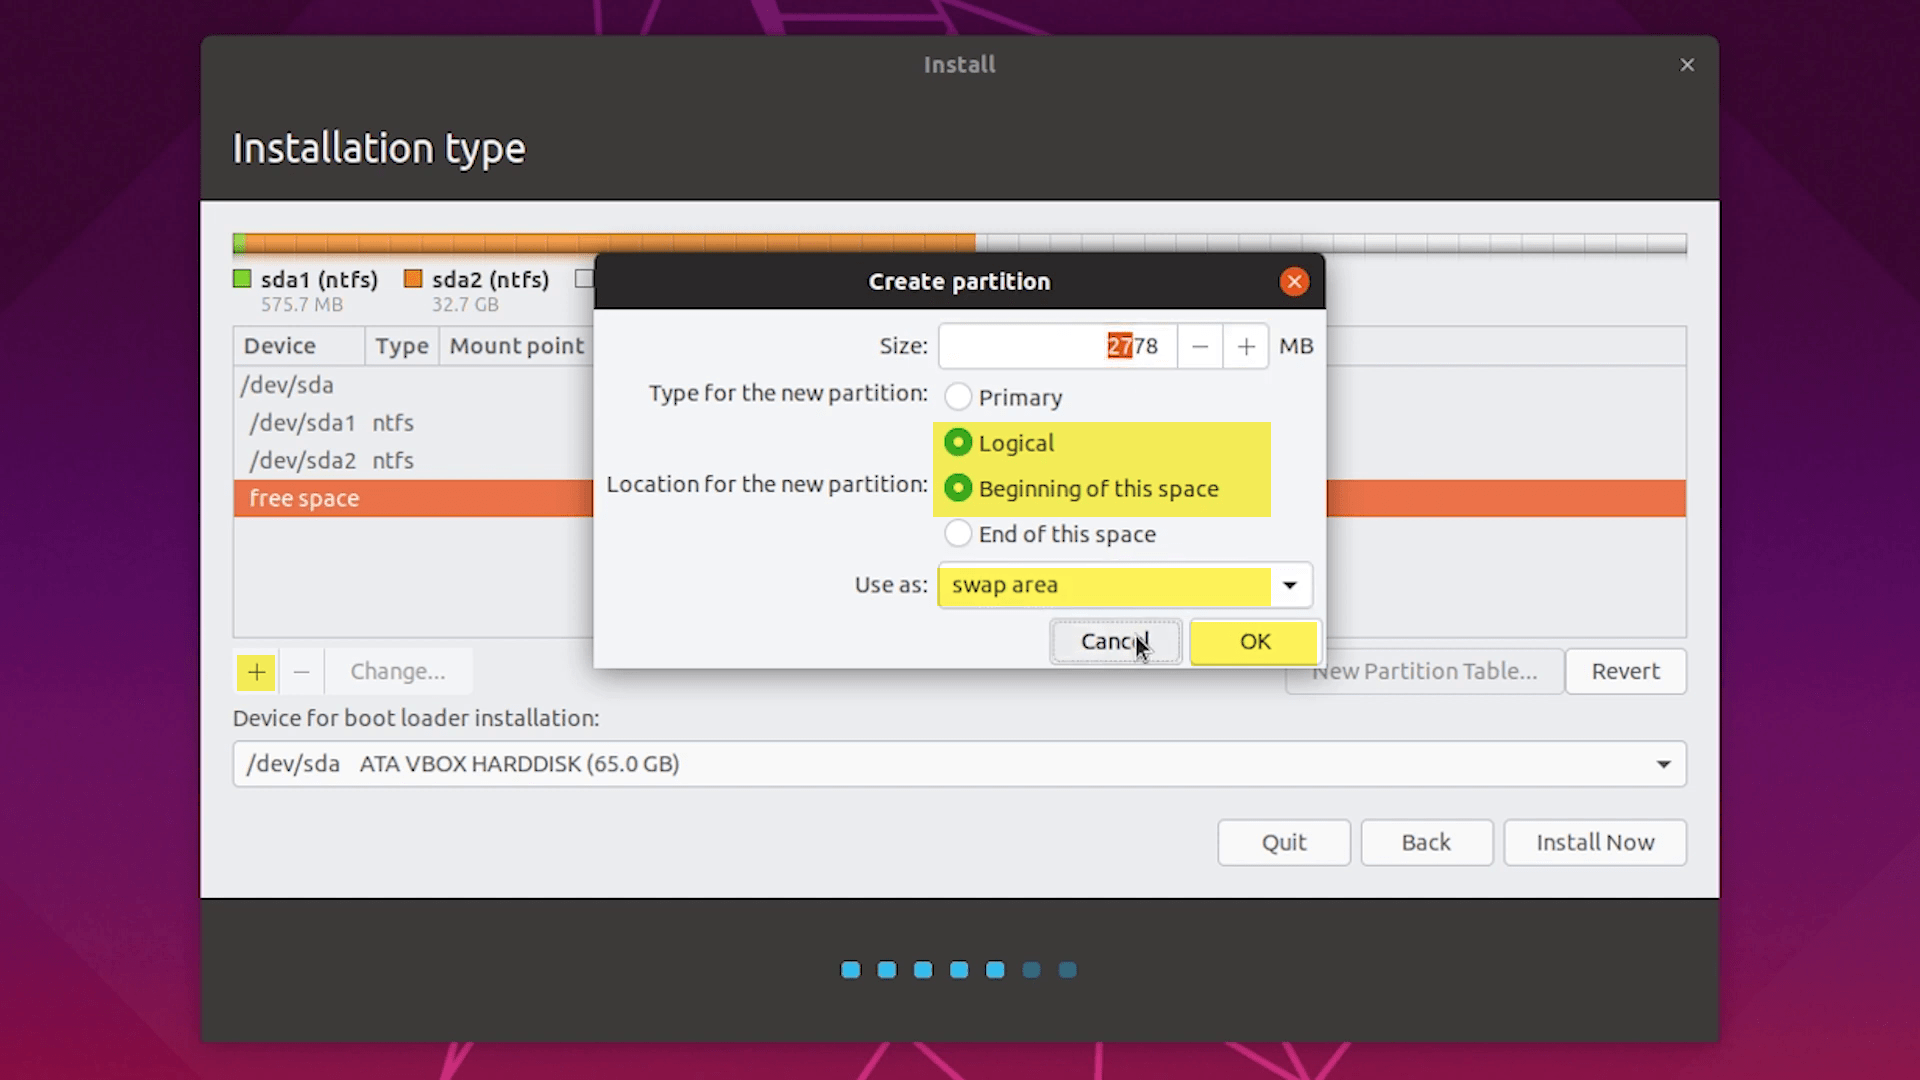
For dual-booting you need to create a 4GB swap area space, without this I think it impossible to do it. So, when the list of drives appeared, select the (Free space) drive that you created then click on (+) option. Select the size for the swap area. Select the type for the new partition (Logical), select the location for the new partition (Beginning of this space), and use as swap area then click OK.
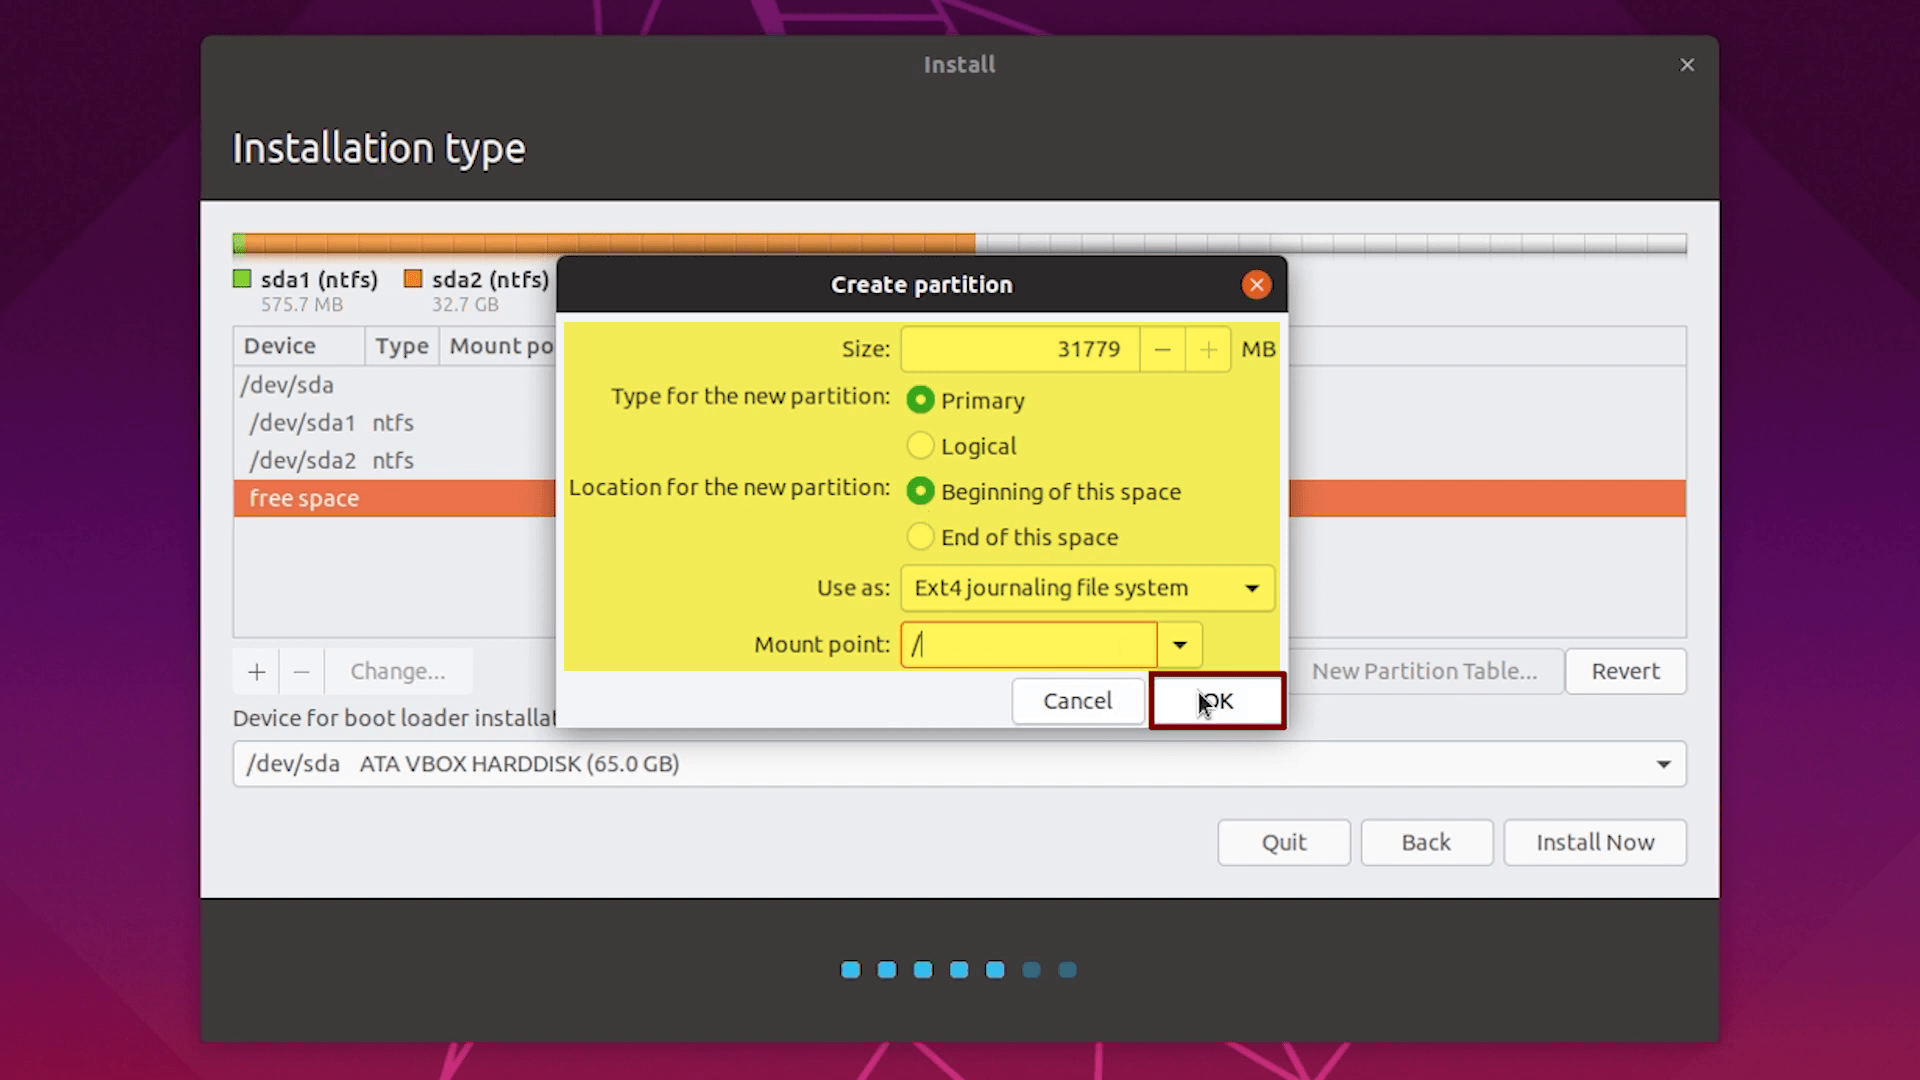
When the swap area created, you need to create another drive for the Ubuntu installation. Again select the remaining part of the free space drive and click (+) option. Specify the size of the drive select the type of partition for the new drive (Primary), select the location for the new partition (Beginning of this space), select the Use as (Ext4 journaling file system), and the mount (/) at last click OK.
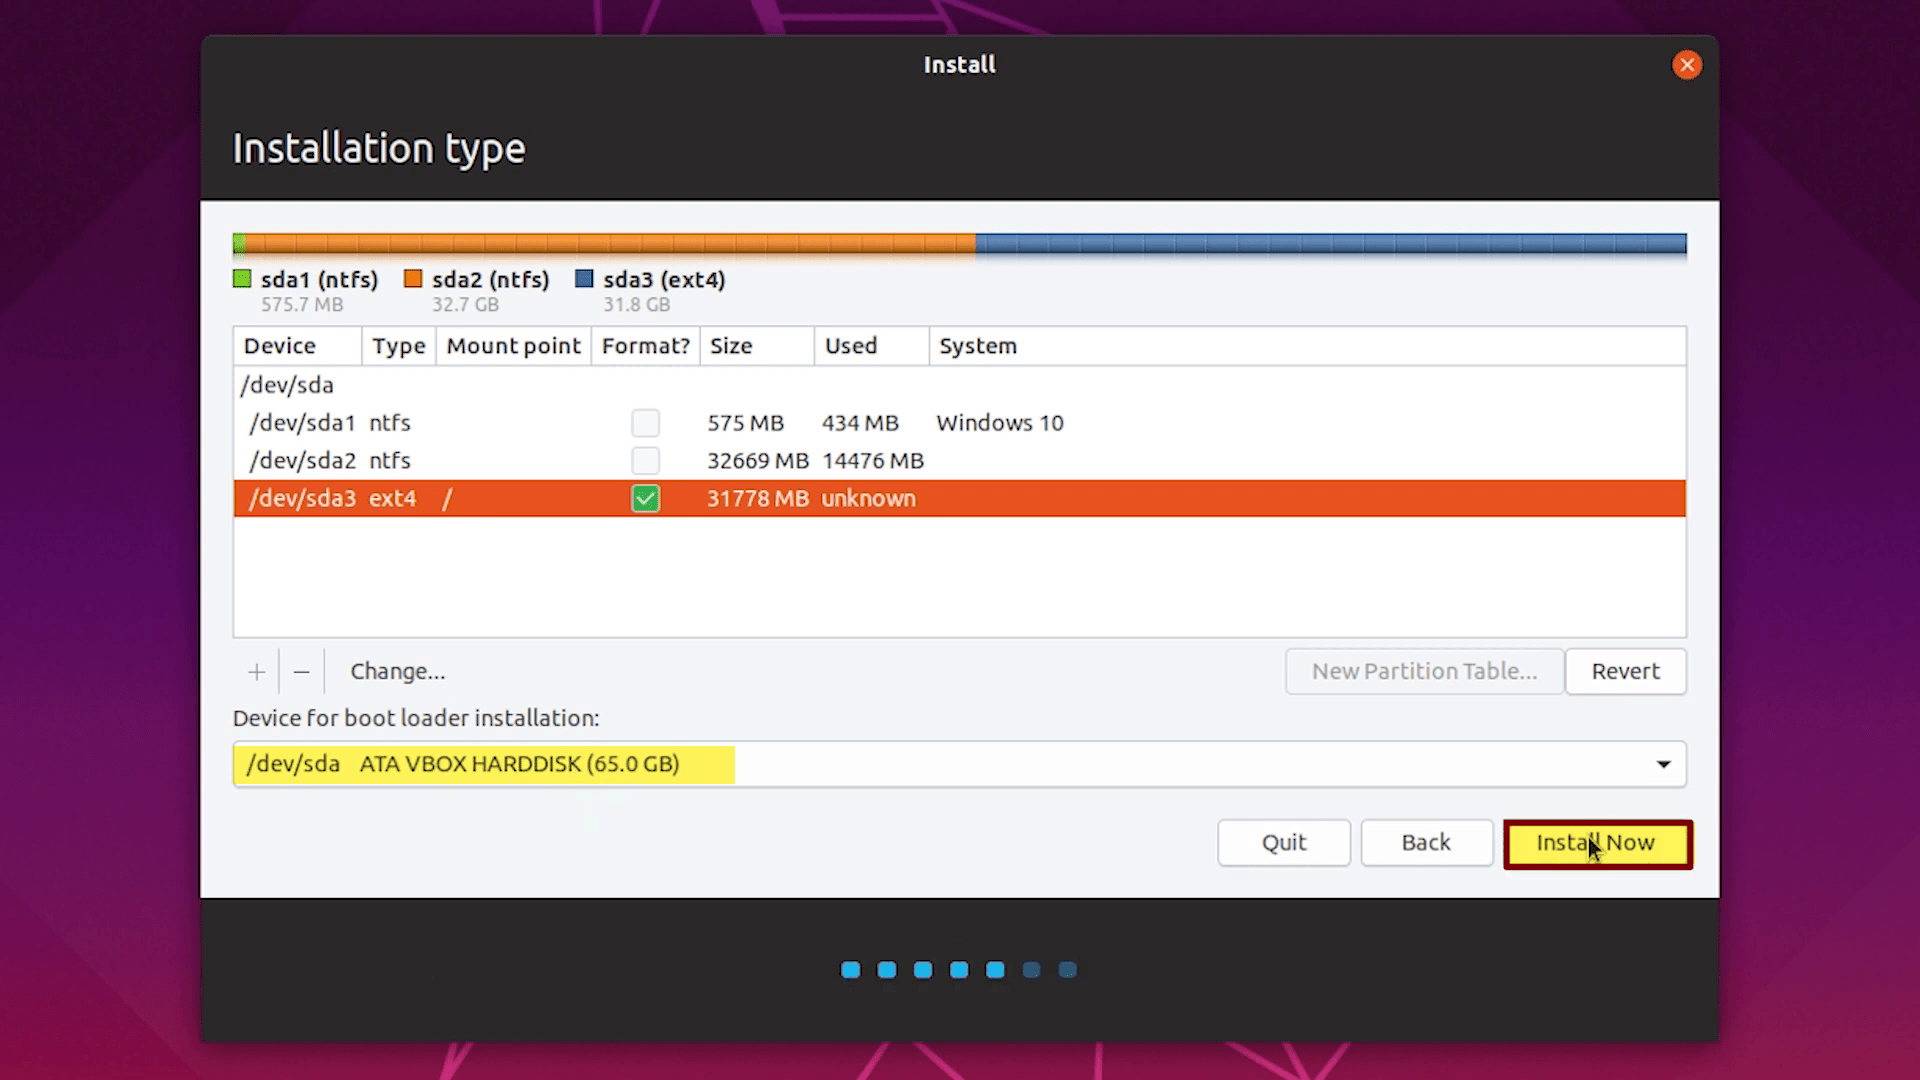
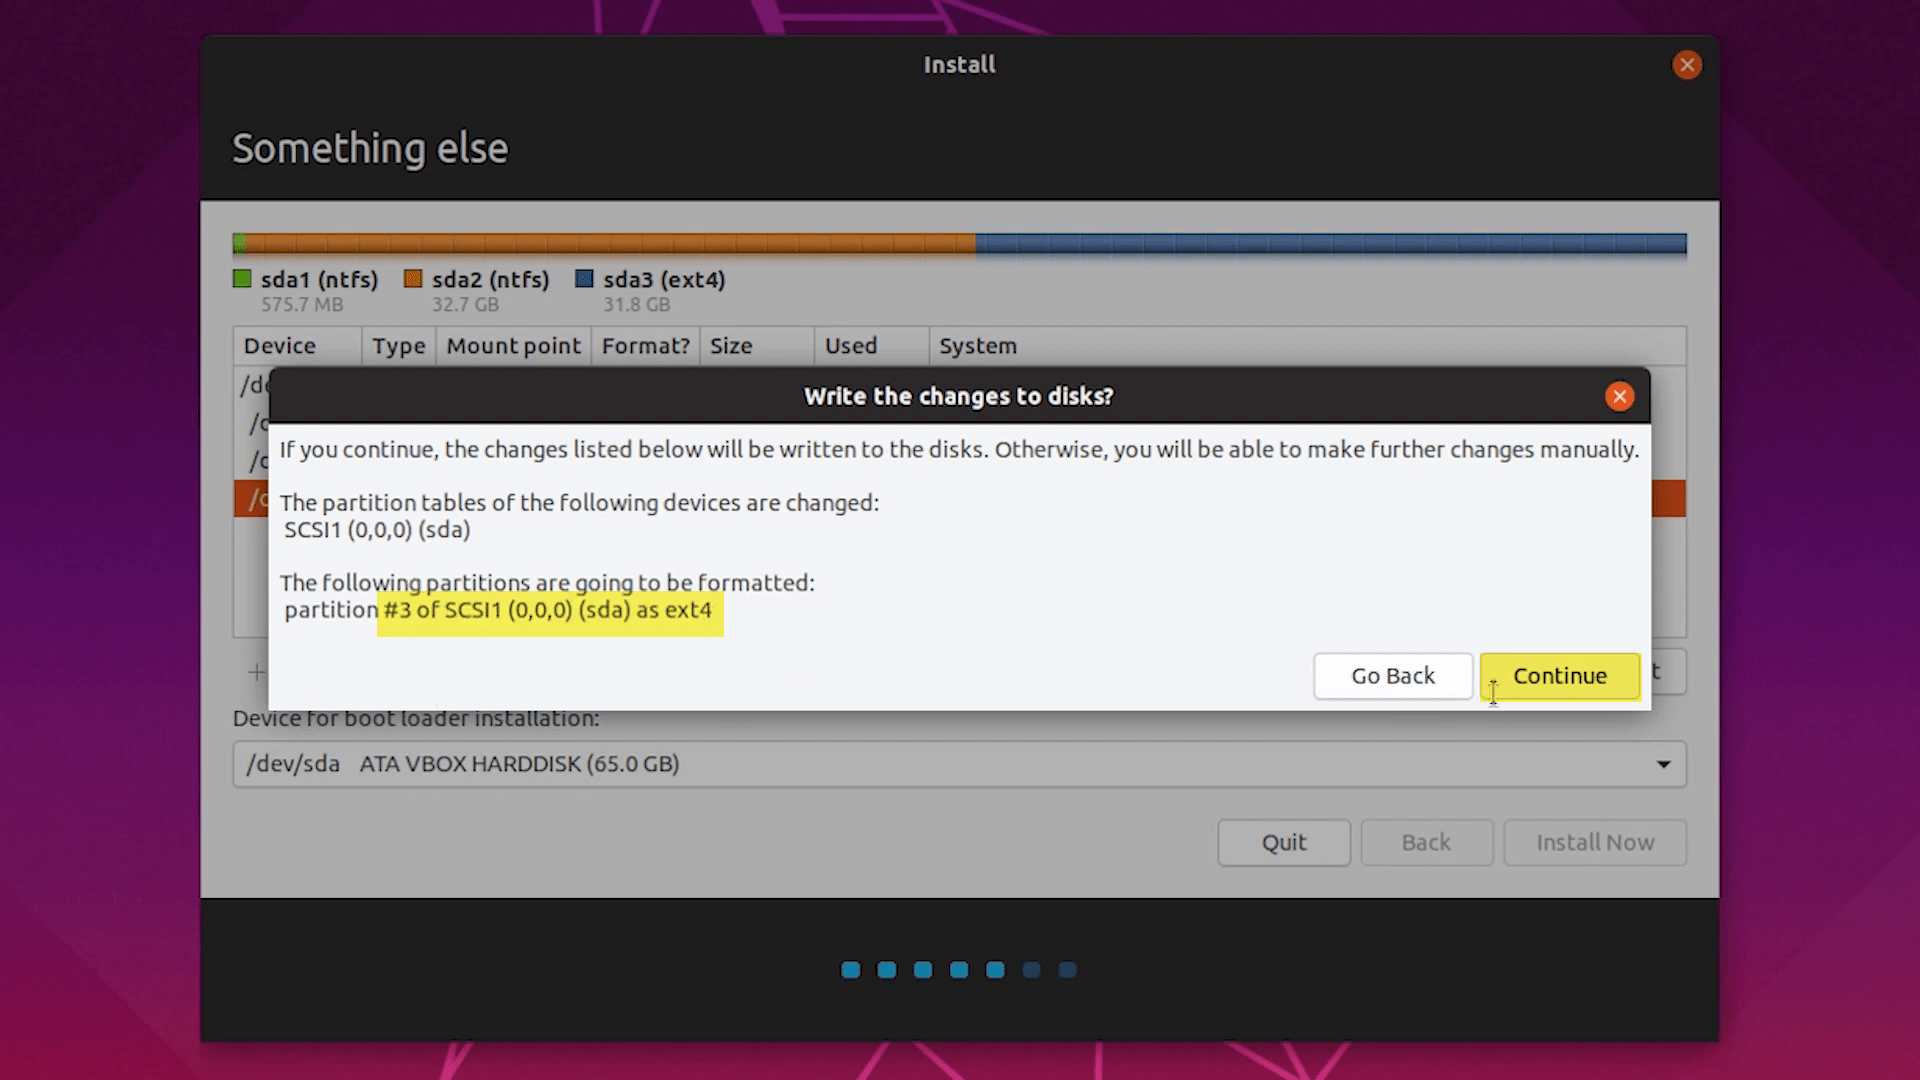
When the drive created for Ubuntu installation, after that, under the “Device boot loader installation” option select the following option according to below down screenshot and click Install Now.
Once you clicked the install button, this window will pop up. If you continue, the changes listed below will be written to the disks. Otherwise, you will be able to make further changes manually. In this case, click Continue to go over ahead to the installation process.
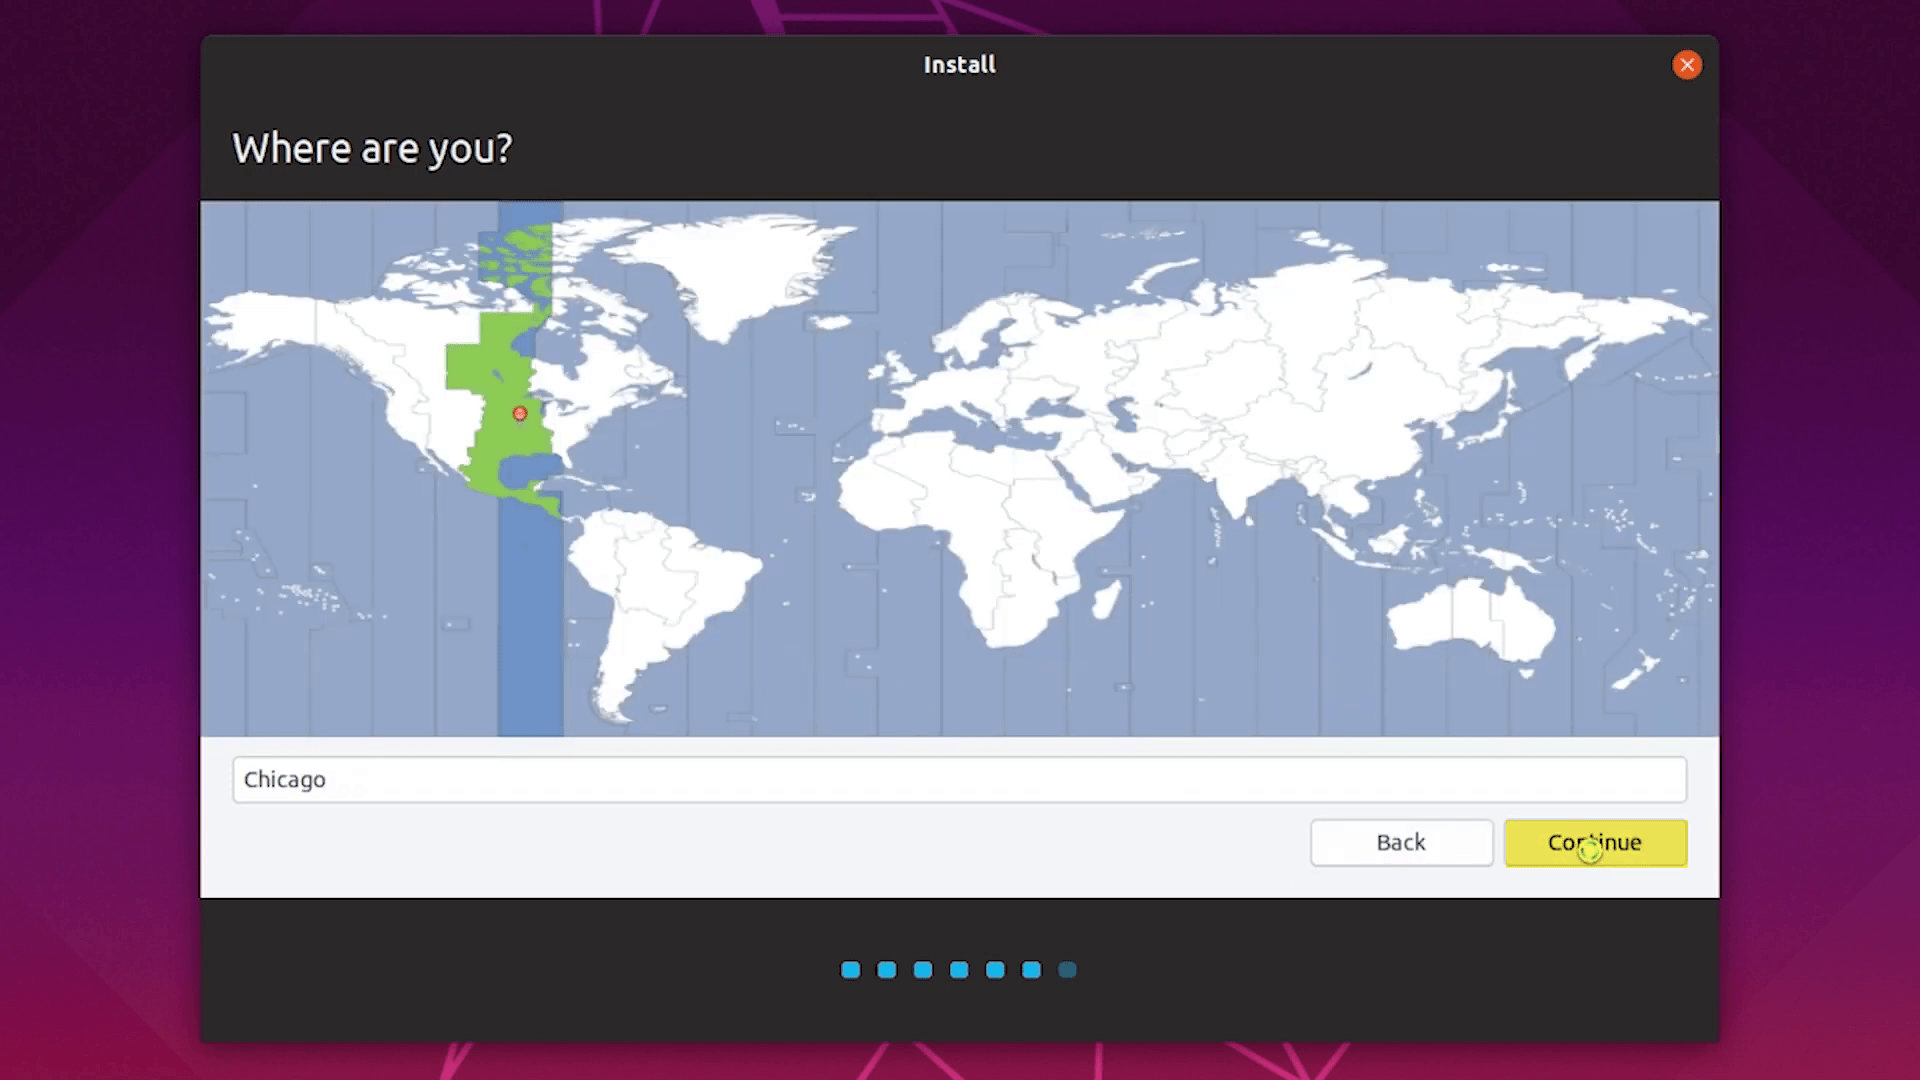
Now again select your location where you live and click continue.
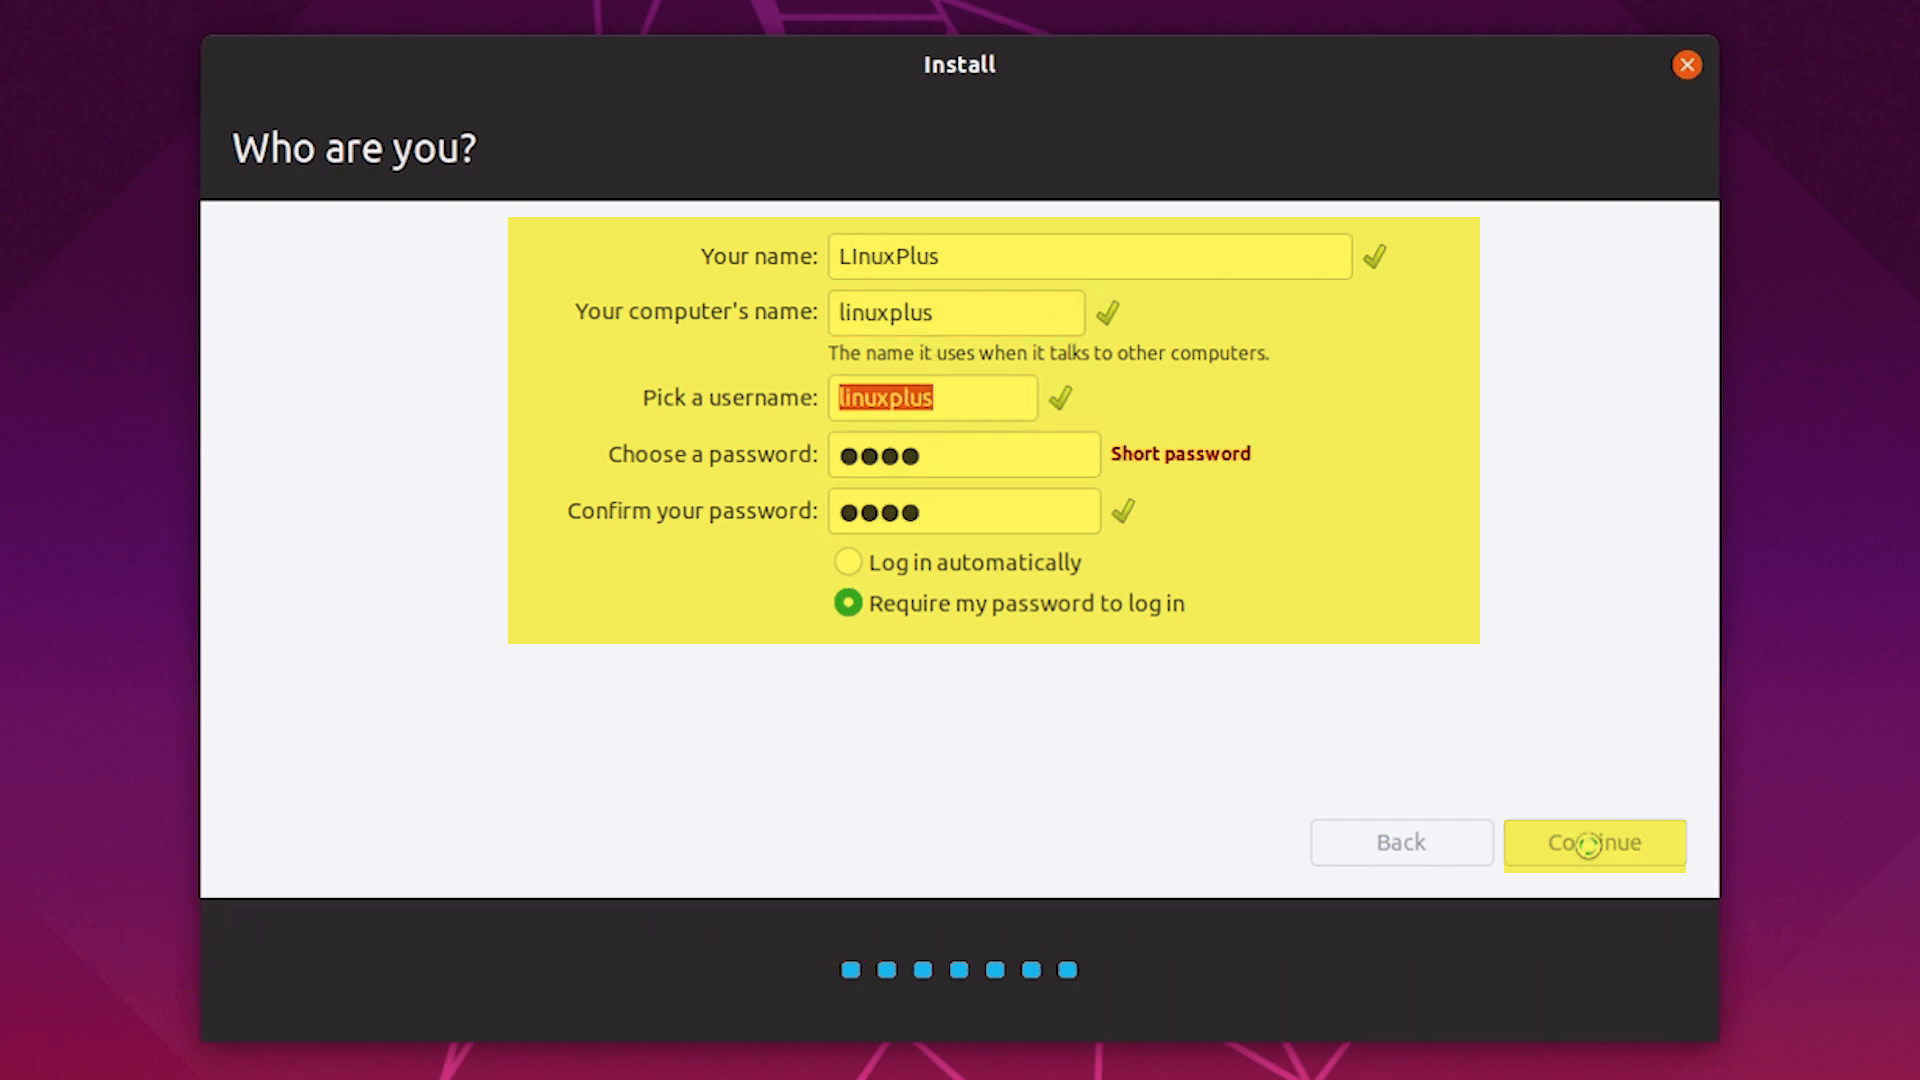
When you reached this step full fill the blanks by entering. Your name, Your computer’s name, pick a username, Enter the password, and confirm the password and click continue.
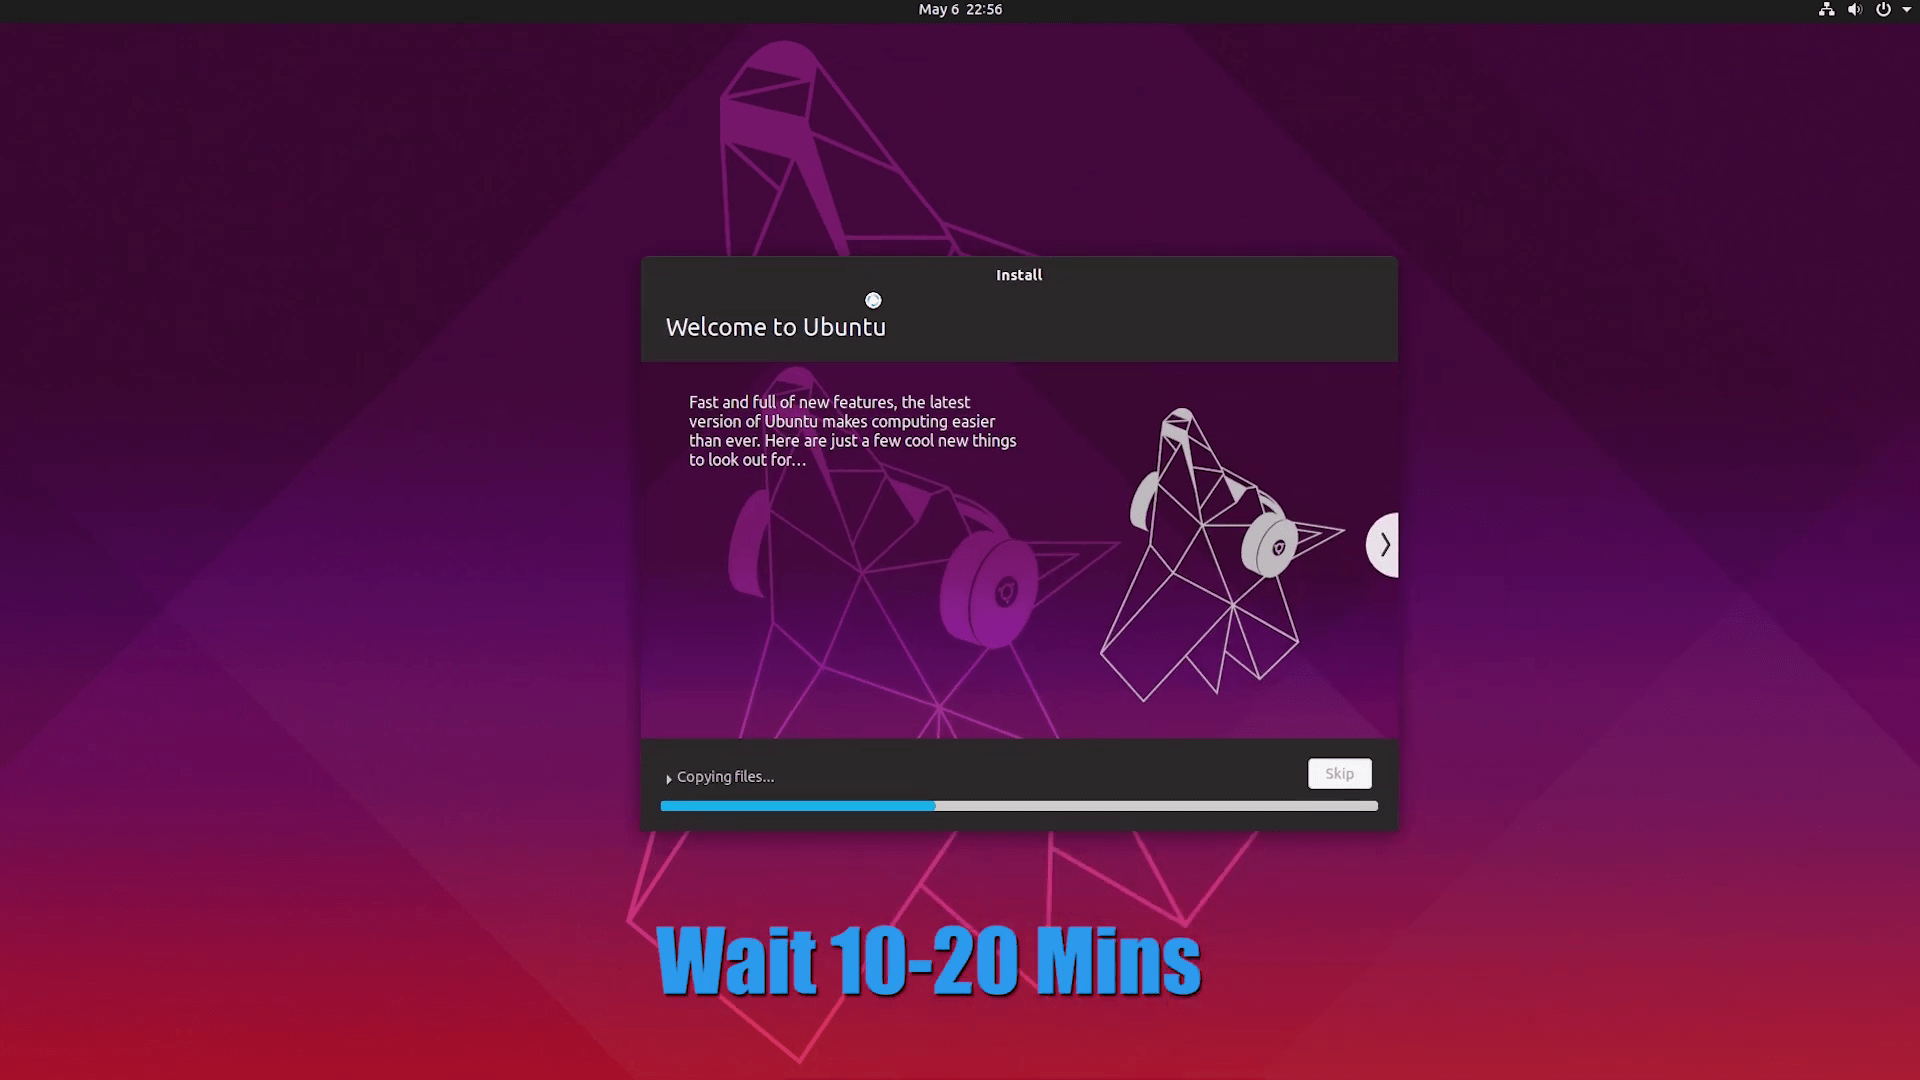
Now the installation begins here, therefore, it will take up to 10-20 minutes. Be patient until the installation should be completed.
While the Ubuntu installation completed you will be required to Restart the computer.

Here in the GRUB menu you will Ubuntu and Windows 10, now select the Ubuntu operating system and press enter key to boot.
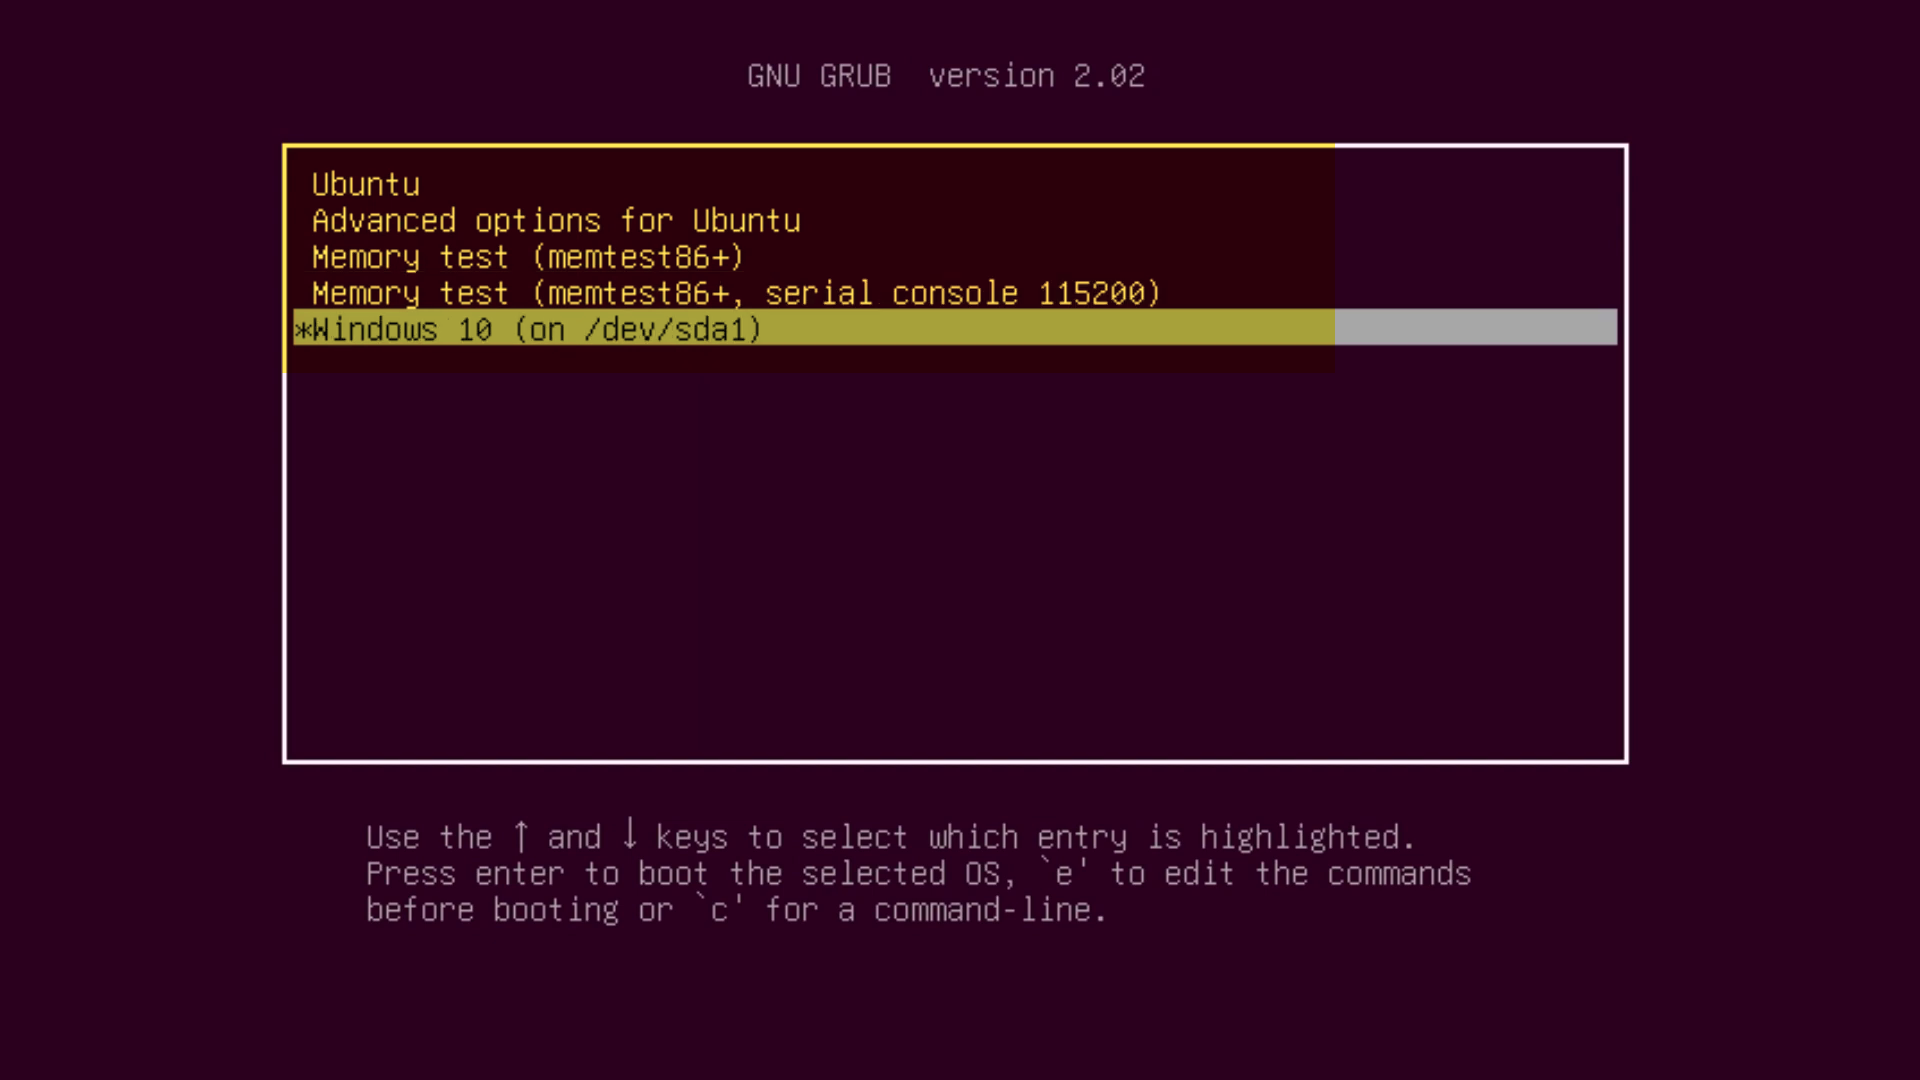
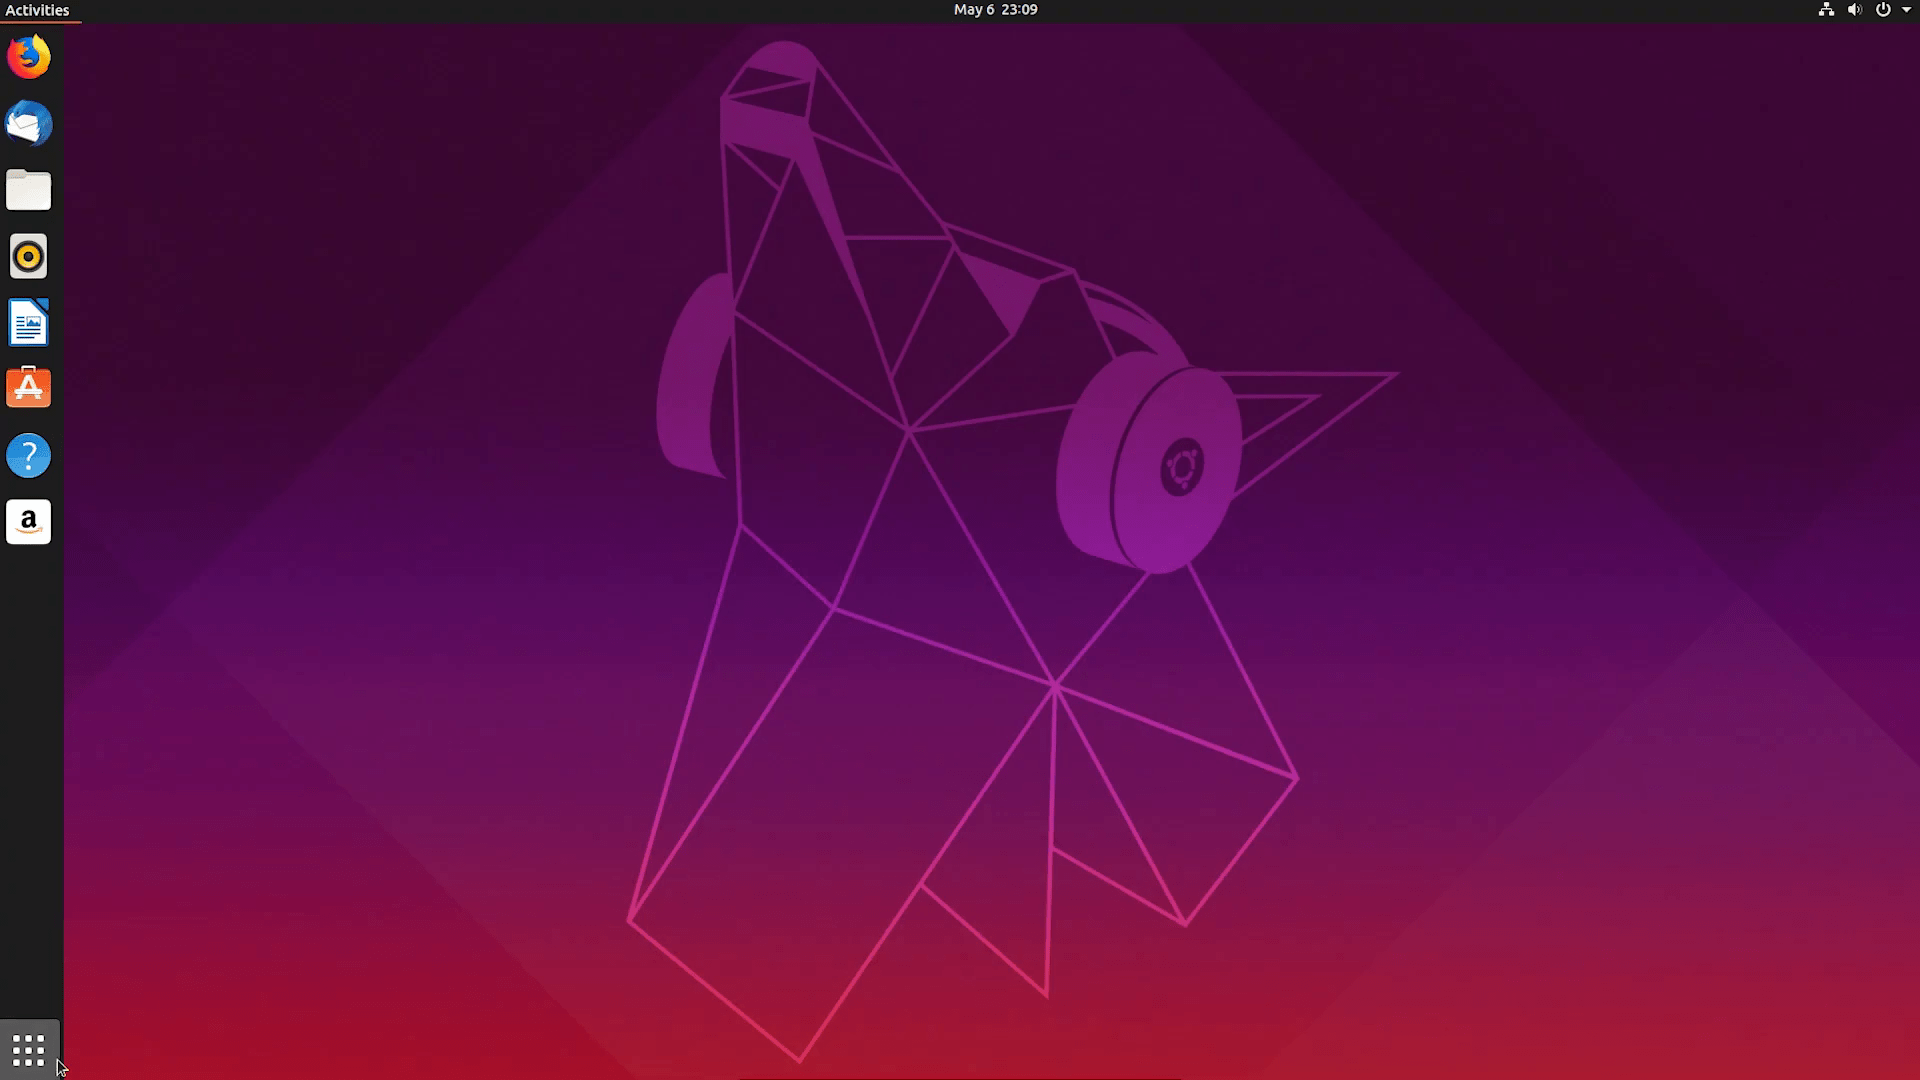
That’s it Ubuntu successfully dual-boots with Windows 10 on a single SSD drive. Now go ahead and enjoy both operating systems on your computer.
Besides this you have another installation on Windows 10. If you are not interested in dual boot two operating systems, or your compatible hardware is not compatible with dual-booting. You have the best opportunity and that is Virtual machines. A virtual machine platform allows you to test different operating systems on it. There are two different virtual machines like VirtualBox, and VMware Workstation. But with high experience as I have VMware Workstation is the best source which you can install any kind of operating system on it, with an easy method. So, if you don’t know how to install Ubuntu on VMware, or VirtualBox check out the below article to learn the complete guide.
- Install Ubuntu 19.10 on Windows 10 using VirtualBox
- Install Ubuntu 19.10 on Windows 10 using VMware Workstation
That’s all about how to Dual boot Ubuntu with Windows 10 on a single SSD drive. Additionally, if you faced any kind of problem, then use the comment section below down and share your problem.
