
Command prompt (CMD) is one of the best applications on Windows and the same terminal on the macOS operating system that plays one of the important rules on both operating systems. There are a bunch of tricks that by launching a command prompt you can do that. Such as easily using a command prompt you can create a Bootable USB drive for Windows 10. Or using the terminal on macOS you can create a Bootable USB drive for macOS operating systems.
Most of the hackers are using command prompt on Windows 10 PC in order to hack something from another platform. Alongside there are bundles of tips and tricks that we can perform using command prompt.
Have you ever tried command prompt on a Windows operating system to do something unique and different? most of the users are curious that to invent something unique, the same through this article I will show you how to lock your Windows 10 using command prompt.
Lock Your Windows 10 Using Command Prompt
One of the beginning rules for cyber-security is to lock your PC very fast and easily. When it’s not the quickest way to turn of your Windows 10 PC manually, but launching the command prompt applying some codes can be an easy and simple way.
To get started with this process navigate to Windows 10 start menu, then type there “CMD”. Once the command prompt appeared simply press the enter key to open it.
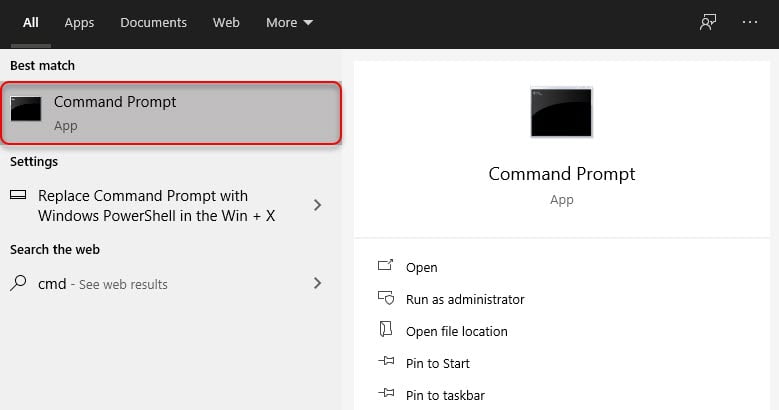
When the command prompt “CMD” successfully opened, copy and paste the below commands, or simply type the commands.
Rundll32.exe user32.dll,LockWorkStation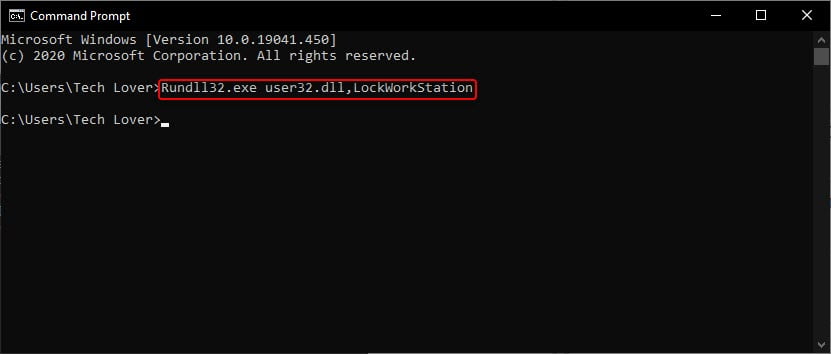
After applying the commands automatically your PC will be cloaked, and the login screen will pop-up. And to login back to Windows 10 you need to enter your password, PIN, Face Lock, or whatever you are using for the login.
Use Command Prompt to set Lock Screen Timeout
Through this guide, you will set the lock screen timeout manually according to your wish. Once you applied this step for the lock screen, certainly it will display for a certain amount of time before it’s time out. Manually, you can set the timeout time for the lock the screen using a command prompt.
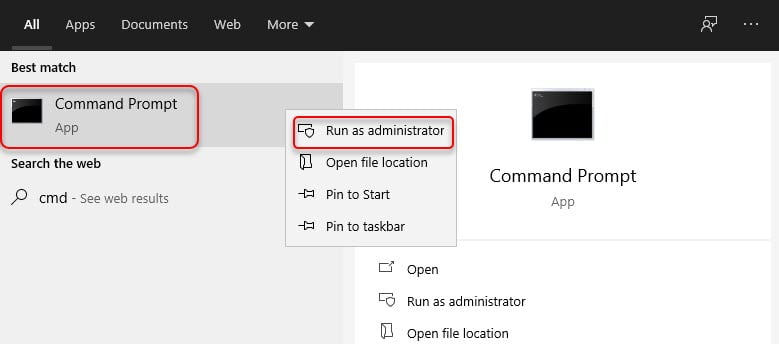
To do this navigate to Windows 10 start menu, type command prompt “CMD”. Once the command prompt appeared right-click and “Run As Administrator”.
When the command prompt opened, copy and paste the below down commands. Or manually you can set the second or minute for the lock screen timeout. For example, if you want to desire to lock Windows 10 screen for 2 minutes, then you have to apply the below commands.
powercfg.exe /SETACVALUEINDEX SCHEME_CURRENT SUB_VIDEO VIDEOCONLOCK 120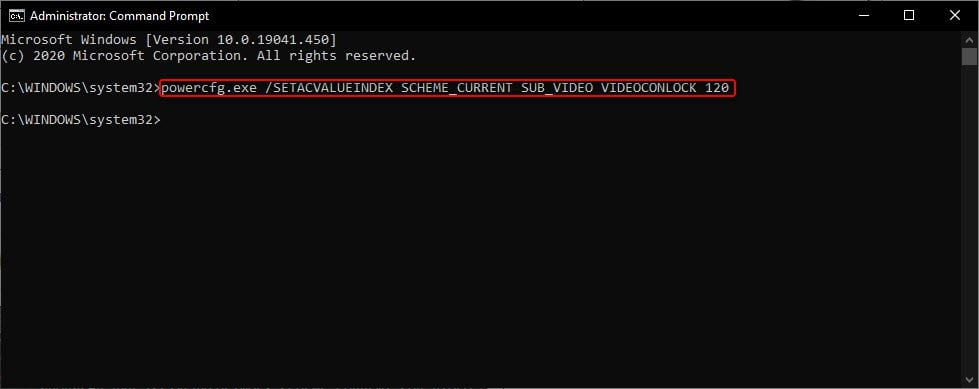
Now you need to enter the below down commands also, after that, it will automatically lock the screen with the maximum time that you have set in the above commands.
powercfg.exe /SETACTIVE SCHEME_CURRENT
Related: