We have tested out the PearOS Monterey, PearOS ThicSur on our Windows PC, VMware, and VirtualBox. Testing several operating systems on the actual operating system is interesting. For example, if you are a Windows user and there is no Mac, simply you can use the virtual machines platforms to install the macOS operating systems on your computer. Further, that the virtual machines allow you and give you the best opportunity to install any kind of operating system, including Linux, Windows, macOS, Android OS.
Right away through this article, you will learn how to install PearOS Catalina on VirtualBox on Windows PC. Overall, there are virtual machine platforms that come with VirtualBox, VMware Workstation/Player, Hyper-V. But VirtualBox is a free and open-source platform to install it on our actual PC.
Related:
- How to Install PearOS ThiccSur on VirtualBox
- How to Install PearOS ThiccSur on VMware on Windows PC
- How to Install PearOS Monterey on VirtualBox on Windows PC
- How to Install PearOS Monterey on VMware on Windows PC
Install PearOS Catalina on VirtualBox on Windows PC
For installing PearOS Catalina on VirtualBox firstly you have to download the required files from the below-down description. After that, the file is successfully downloaded simply install the VirtualBox firstly on your PC. Then create a virtual machine, and start the installation.
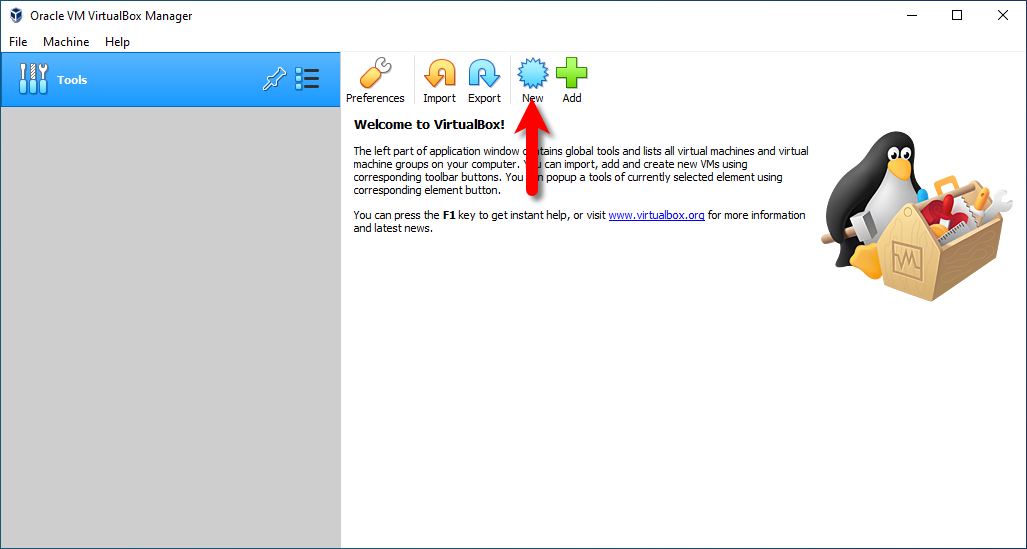
While the file is successfully downloaded opens up the VirtualBox, on the main welcome wizard click on the “New” option.
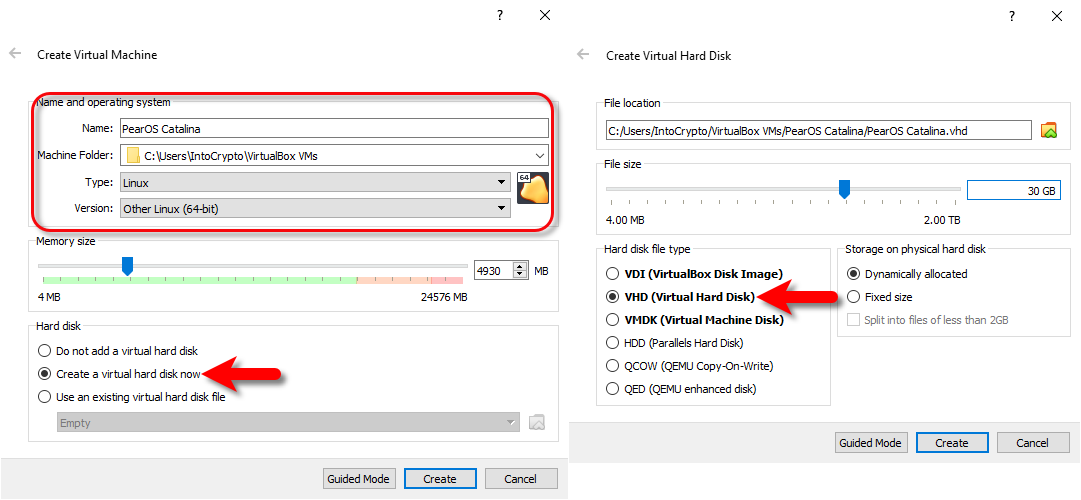
Select the name for the virtual machine, specify the folder, select the type “Linux”, select the version “Other Linux (64-Bit), and choose the Memory Size then click Create. Select the File size, then select “VHD Virtual Hard Disk” and click Create.
Once the virtual machine is successfully created, then select the virtual machine and click Settings.
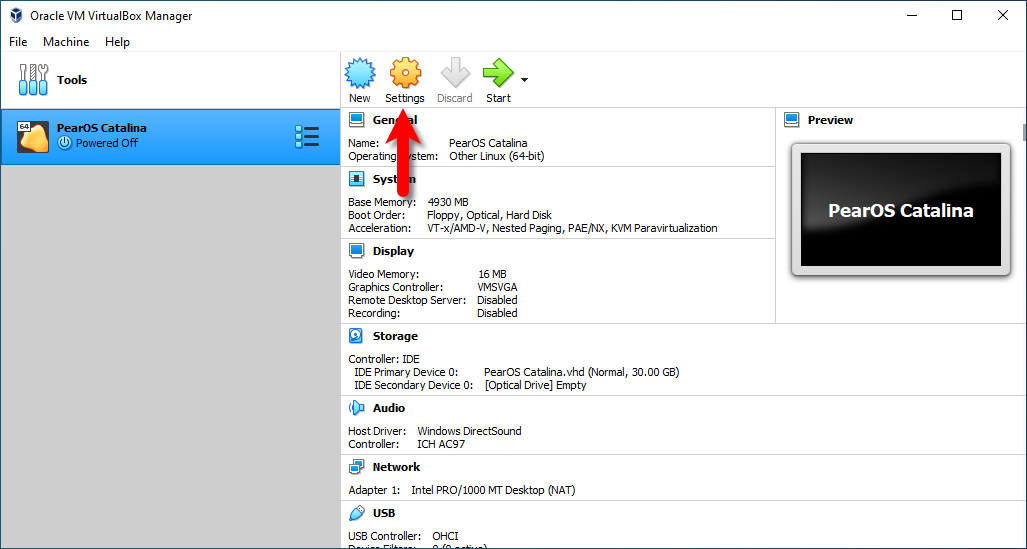
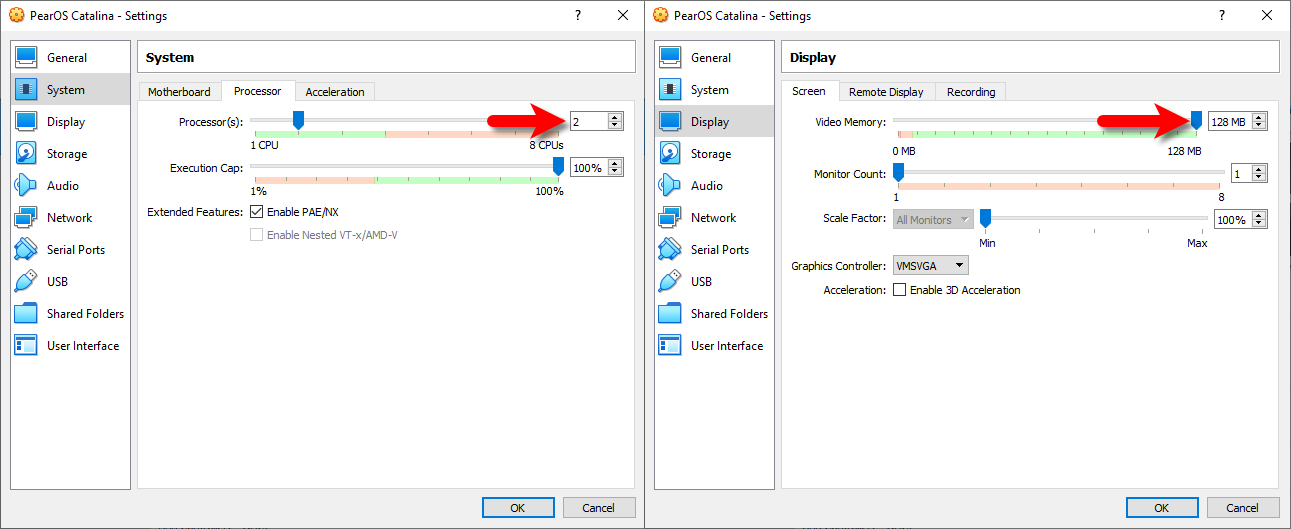
When the Settings window opened from the left-handed side select the “System” tab, and increase the number of processors. Then select the Display tab and increase the video memory up to 128MB.
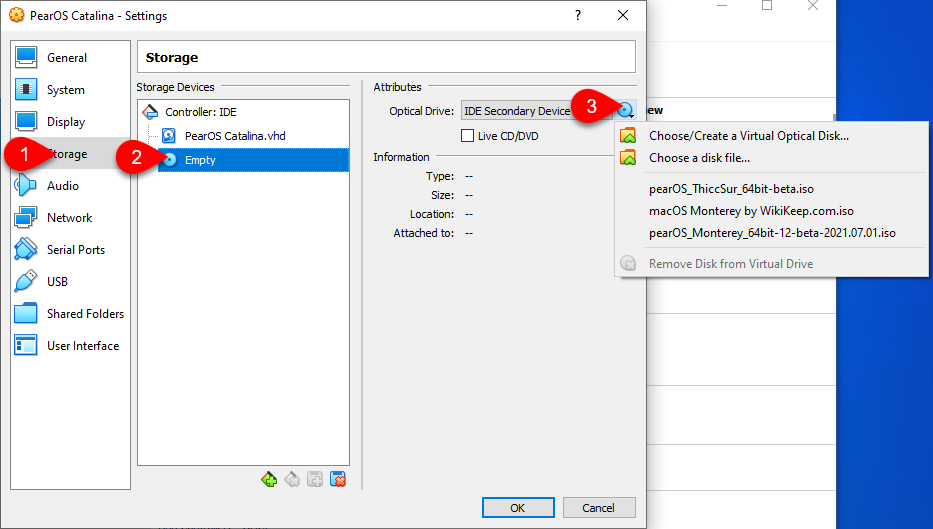
Now select the Storage tab, select Empty disk, then click on the disk icon and select Choose/Create a Virtual Optical Disk.
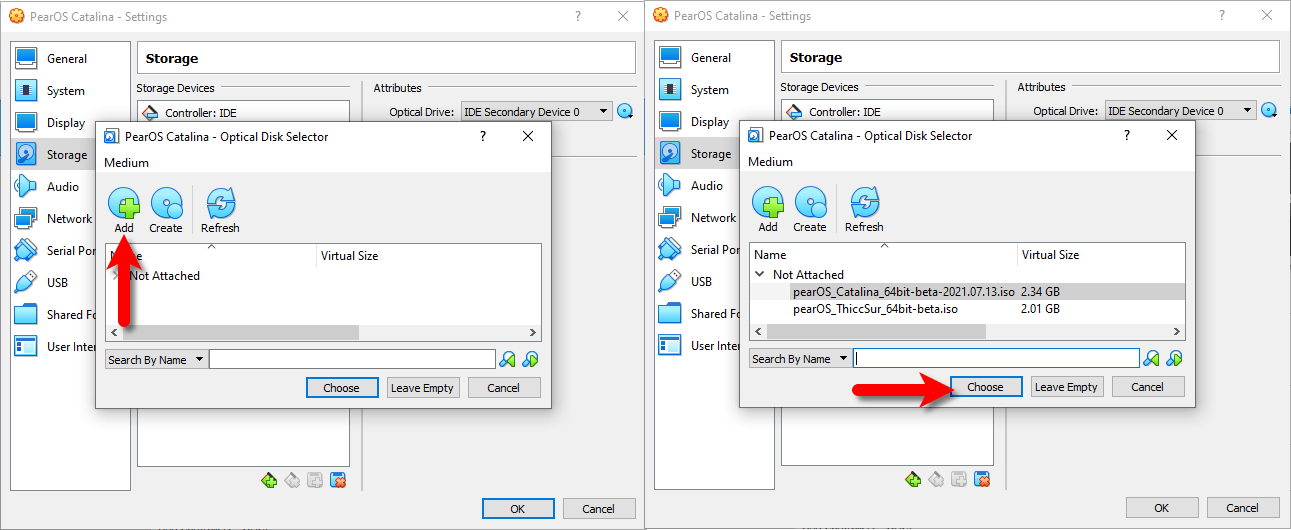
Click on Add option, then select the PearOS Catalina ISO file and click on Open. When the ISO file is inserted click Choose option.
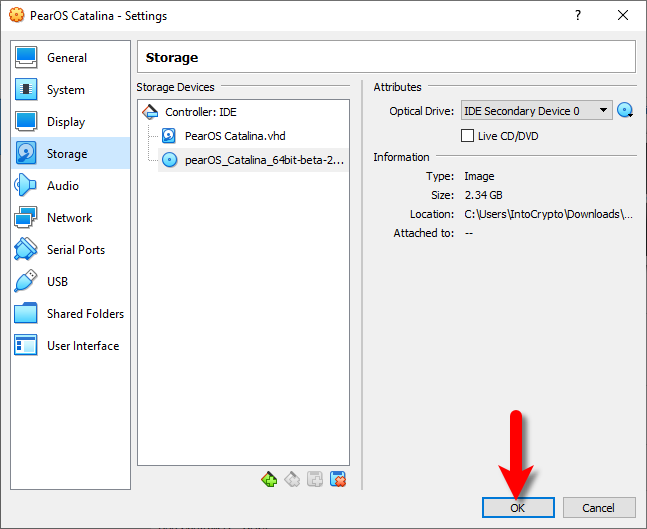
Now everything is done in the settings window, so click on OK to save the changes.
Install PearOS Catalina
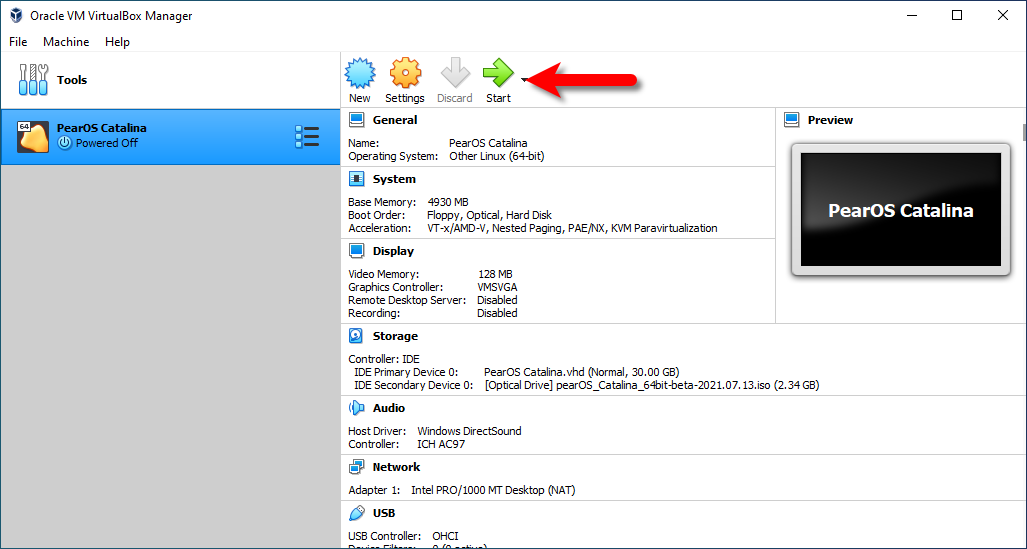
Once the virtual machine is successfully created select the virtual machine then click on the Start button to launch the installation.
- Wait for the Apple logo to go ahead.
- When the virtual machine takes you to the main screen of PearOS Catalina, on the main screen you will see the file “Install PearOS Catalina”. Double-click on that to launch the installation process.
- While the installation window opened at the first window simply, click on Next.
- Select your location where your live and click next.
- Select your keyboard layout and click Next.
- In the partition, the window selects the “Erase Disk” and clicks next.
- Enter your username, password and click next.
- Click on the Install button to start installing PearOS Catalina.
- Once the installation is completed at the last window you will be required you restart your Virtual machine.
[metaslider id=6428]
Conclusion
That was about how to install PearOS Catalina on VirtualBox on Windows PC, if you faced any kind of problem feels free to share with us via the comment section.