
Since macOS Monterey was released in the market for Macintosh users, PearOS Monterey is also now available in our hands. There is the Beta version of PearOS Monterey 12 has been released, PearOS Monterey is a Linux distribution based on Ubuntu Linux 20.04 LTS and KDE Plasma that tries to mimic the look and feel of macOS.
As you have information about testing macOS Monterey on Virtual Machines, whether that is VMware or VirtualBox. Therefore, through this article, I will guide how to install PearOS Monterey on VirtualBox on Windows PC. Virtual machines are the best platform to test several operating systems as a guest OS on the actual operating system. If you are using Windows PC, then virtual machines allow you to test operating systems like macOS, Linux, Android OS, or even Windows OS.
The system requirements for PearOS Monterey is the following:
So your Pearintosh will work at maximum performance!
- Internet Connection Required
- Free USB Port: 3.0 for fast speed (USB 2.0 works too)
- Free disk space: 15GB (20GB Recommended) (SSD for better performance)
- At least dual-core CPU (Intel Core 2, Intel Core i3)
- At least 3GB RAM (Recommended 4GB)
- 3D Hardware Acceleration (for smooth, blur, and effects)
Install PearOS Monterey on VirtualBox on Windows PC
As we have tested PearOS Monterey on VMware Workstation Pro, so I have decided to take note of PearOS Monterey on VirtualBox on Windows PC. VirtualBox is a free and open-source platform that allows you to test the different operating systems. So, here I will show you how to test PearOS Monterey on it.
Get all the required files from the below down-link:
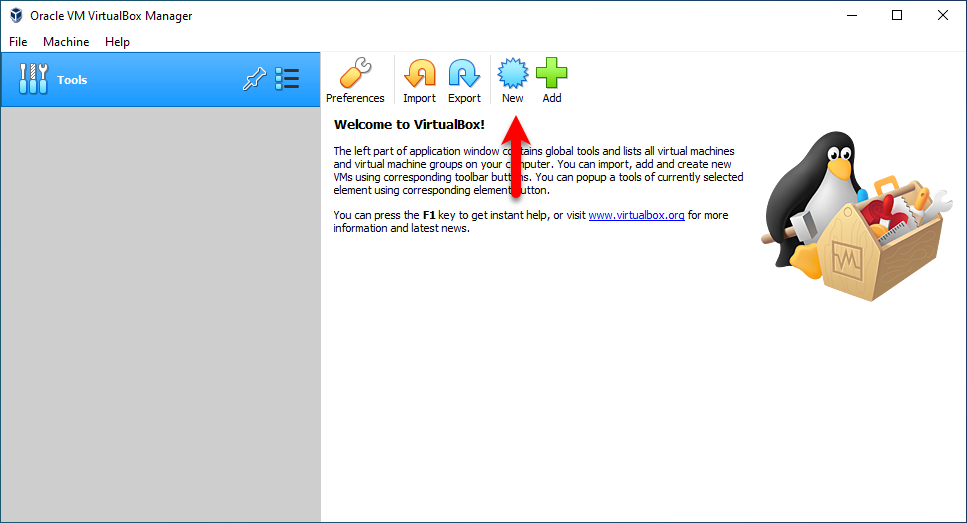
Step 1. For installing PearOS Monterey firstly you have to download and install VirtualBox on your Windows PC. Once the VirtualBox is successfully installed simply navigate to it and open it. On the main wizard of VirtualBox click the New option to create a Virtual machine for PearOS Monterey.
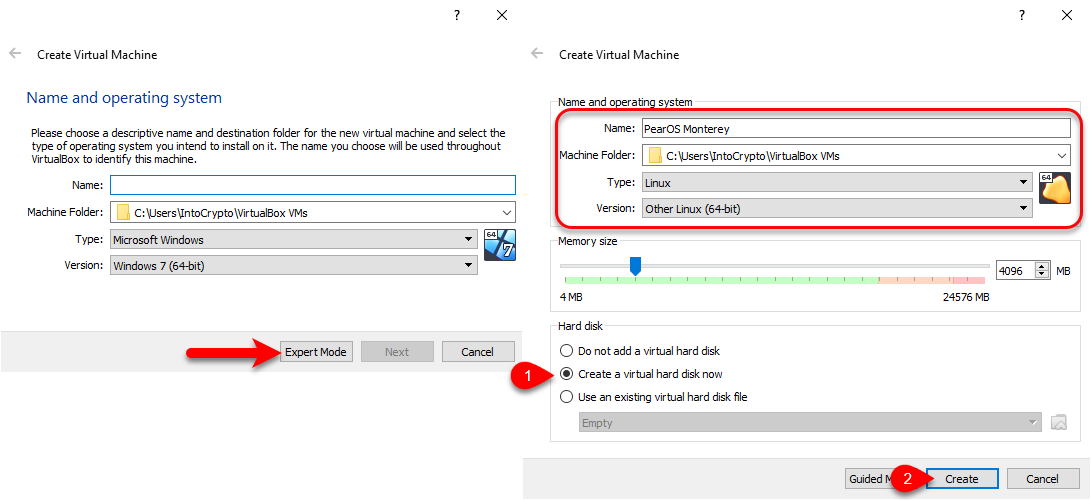
Step 2. Now click on Expert Mode, once the next window is opened type the name, select the machine folder, select the Type Linux, select the version Other Linux (64-Bit). Increase the memory size, select the “Create a virtual hard disk now” option, and click create.
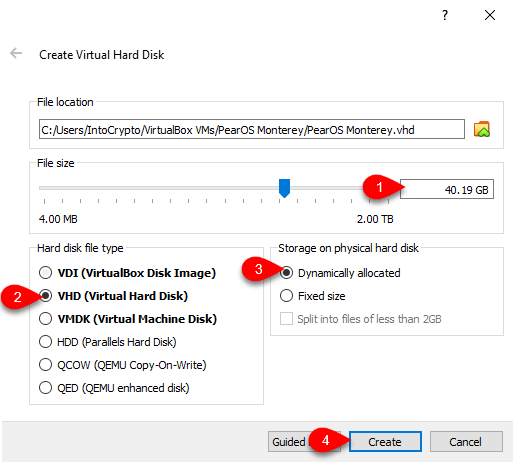
Step 3. Specify the file size, select the “VHD (Virtual Hard Disk) option, Select Dynamically allocated, and click Create.
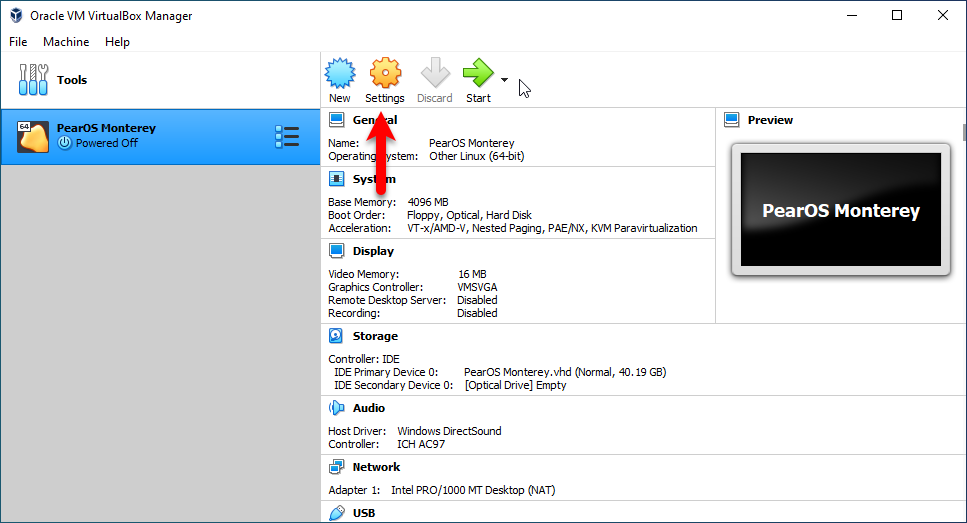
Edit Virtual Machine Settings for Better Performance
Step 4. When the virtual machine is successfully created you need to edit some settings of a virtual machine for better performance. So, select the created virtual machine and click on the Settings option.
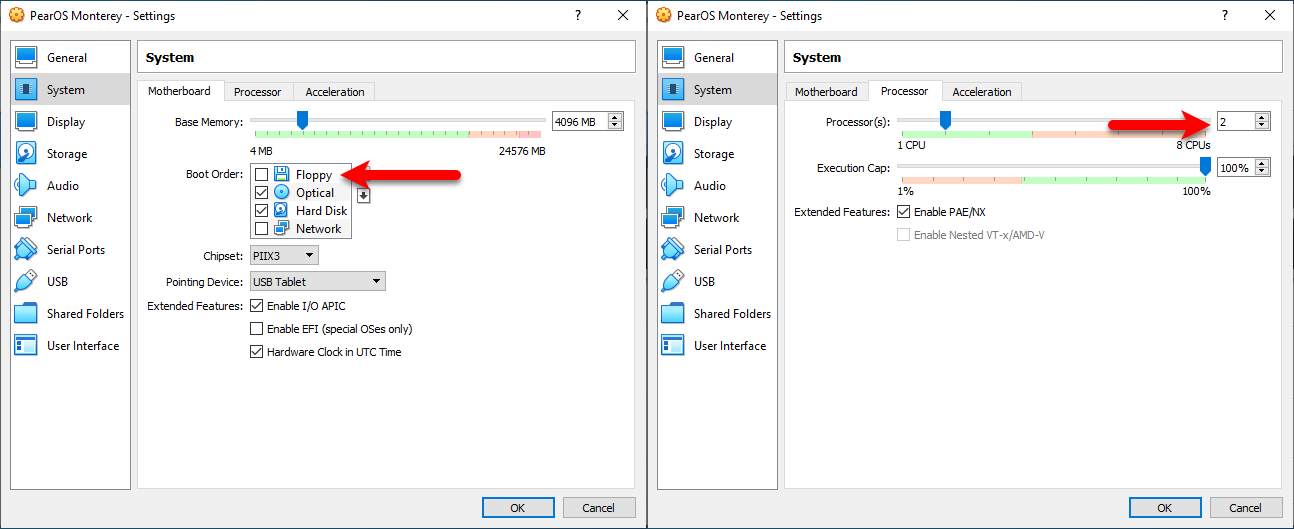
Step 5. When the Settings window opened from the tab bar select, System>Motherboard, and uncheck the Floppy disk. Select the Processor tab and increase the number of processors.
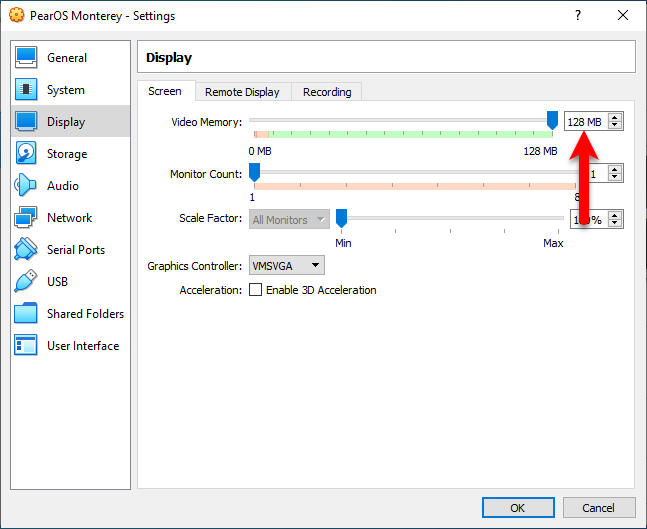
Step 6. Select the Display tab, and increase the number of Video Memory up to 128 MB.
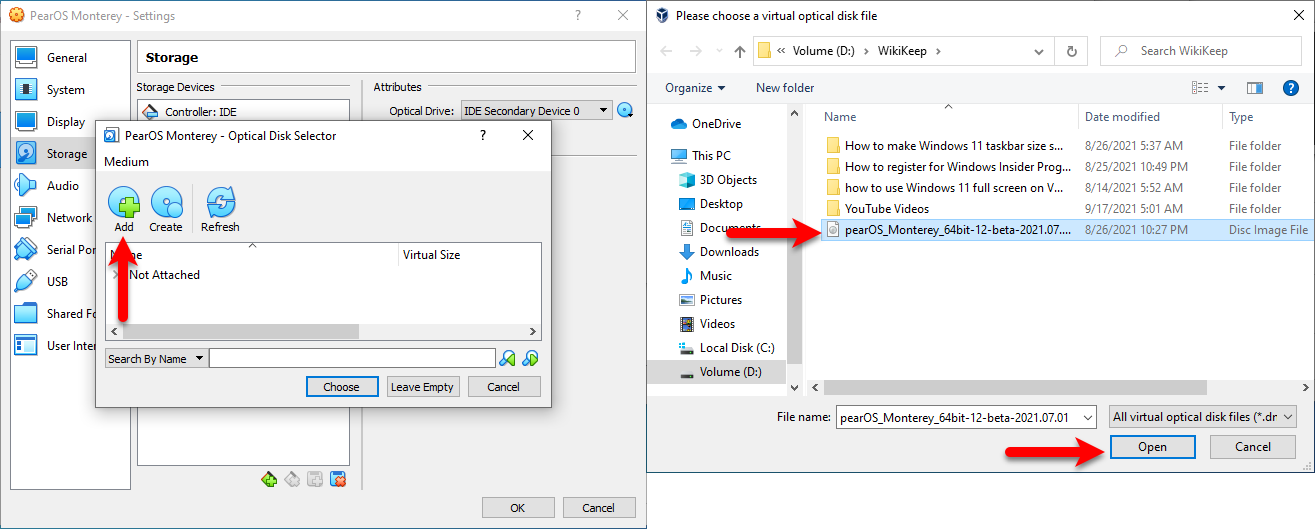
Step 7. Select Storage tab, click Empty, click on the disk icon, and click on Create/a virtual Optical disk option.

Step 8. Now click on Add option, select the PearOS Monterey ISO image file, and click on Open.
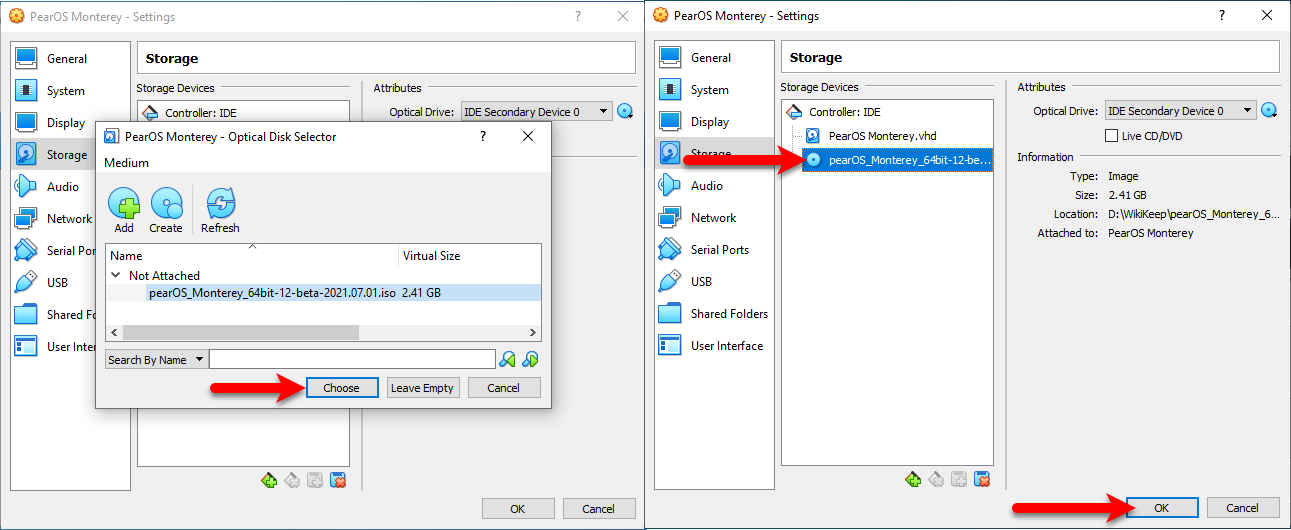
Step 9. Once the PearOS Monterey ISO is inserted click on Choose option and now click on OK to make changes to the virtual machine.
Install PearOS Monterey Now
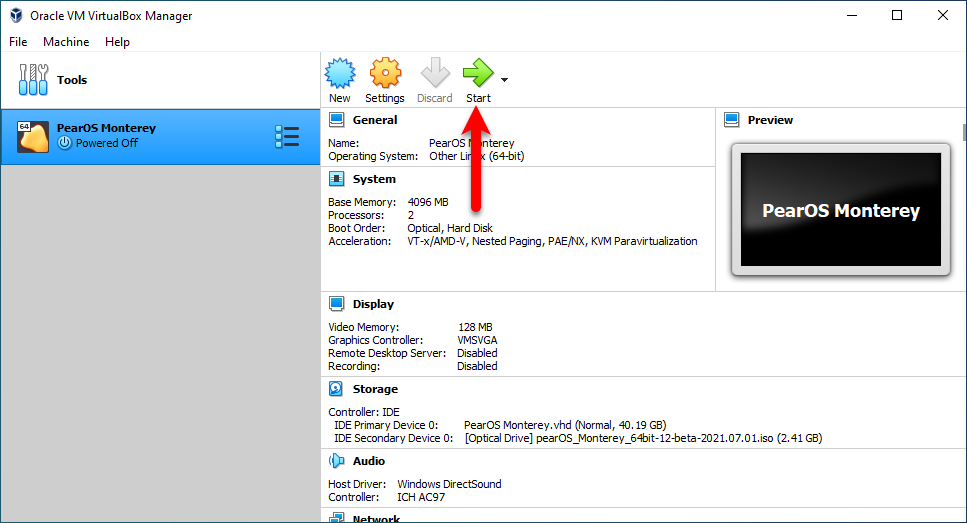
Now everything is done for a clean installation of PearOS Monterey on the VirtualBox platform. So, for the installation simply click on the Start button.
- After clicking on the start button wait for the PearOS Monterey logo to go-ahead
- When the PearOS Monterey window appeared double-click on the PearOS Monterey logo to start the installation.
- On the welcome wizard simply click on next.
- Select your location where you live and click next.
- Select your keyboard layout and click Next.
- On the partition, the window selects the “Erase Disk” option and click on the Next button.
- Enter your name and password and click Install.
- Now, wait for the installation to be completed.
- Once the installation is completed click on Done to restart your virtual machine.
[metaslider id=6295]
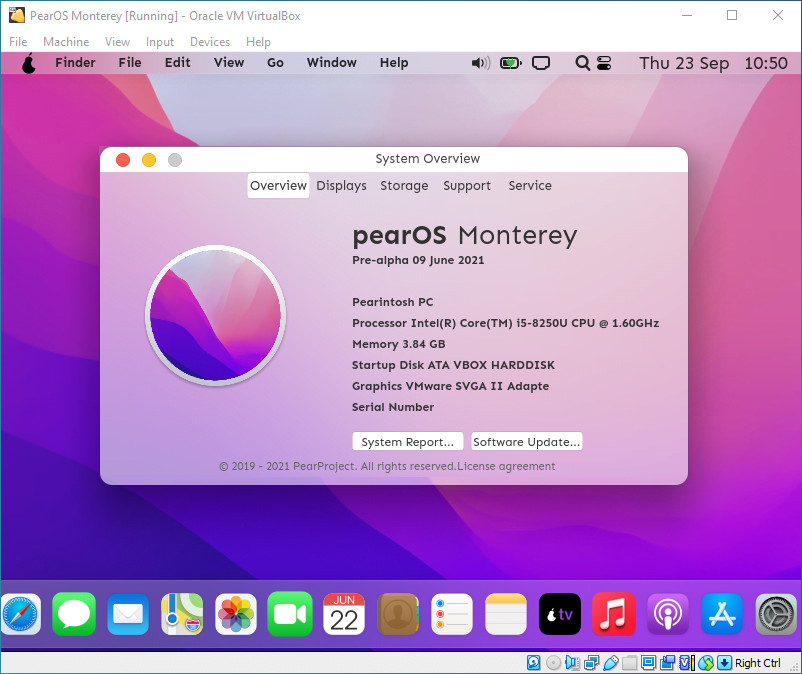
And now PearOS Monterey is being installed on VirtualBox on Windows PC.
Conclusion
That was about how to install PearOS Monterey on VirtualBox on Windows PC. If you faced any kind of problem feels free to share with us via the comment section.