Android is one of the common operating systems, and now it’s the time of Android 11 or called Android R. So, I couldn’t find the ISO file of Android 11 on the internet due to that through this post I will show you how to install Android Oreo 8.1 on VMware on Windows. It means that still you can install the Android operating system on your Windows using Virtual machines.
Android Oreo codenamed Android O, and it’s the eighth major release and the fifteenth version of the Android mobile operating system. For the first time, it was released in the Alpha preview mode in 2017, the released in the public on August 21, 2017 in the market.
The Android Oreo 8.1 including bunches of incredible features that includes Notification grouping, Picture-in-picture support for video, performance improvement and battery usage optimization, and support for auto fillers, Bluetooth 5, System-level integration with VoIP apps, and bundles of other features it includes.
It doesn’t mean that you can not enjoy the Android environment on your Windows, of course, it’s possible you can easily have it using the virtualization platforms. There are several reasons why you should have an Android operating system on your Windows PC, one of the major reason is when you are a developer and want to test the Android Apps in the beta mode.
For this purpose, you need an emulator to install the Android operating system on that, and the best-recommended option is virtualization which offers you to have the Android environment on your Windows PC. In the era of virtualization when it comes there are numbers of virtualization software that available in our hand, but the best two virtualization software that are popular is VirtualBox and VMware. You can find out the VirtualBox and VMware in the free version and paid version that makes the impossible possible for you.
While getting Android Oreo 8.1 or any other Android operating system on your Windows PC, it means that you get access to all the features of the Android operating system on your Windows including all the Apps. The installation procedure is pretty much easy just install any of the Virtualization software on your Windows PC and start creating the virtual machine and start its installation.
Install Android Oreo 8.1 on VMware on Windows
Download Required
Download VMware and Android Oreo 8.1 from the above-given links. Don’t forget that you can’t find out the VMware Workstation or Player for free on the internet. But the link which I have provided above is the completely free version. The above link contains the latest version of VMware Workstation that newly released and that is VMware Pro 16.
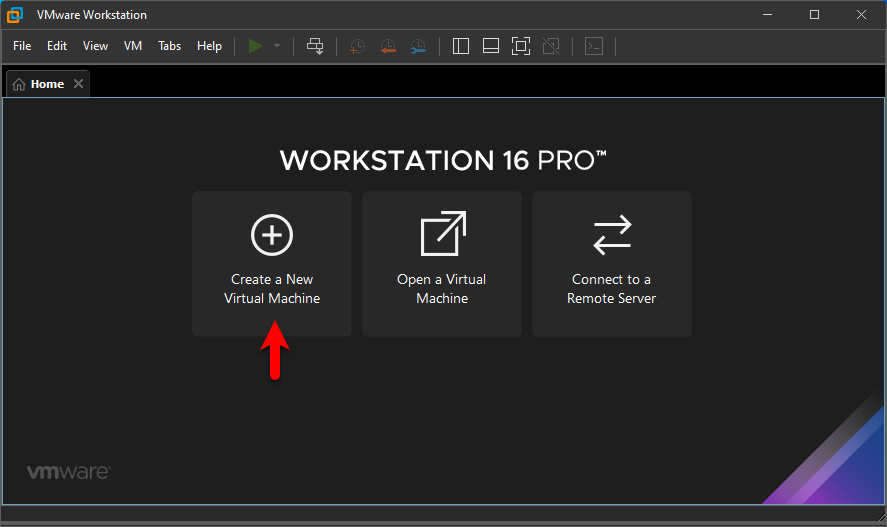
When you have successfully downloaded both required files, for the installation of Android Oreo 8.1 on Windows firstly you have to install VMware Workstation/Player on your physical machine. Navigate to the folder which you have downloaded and saved the installation file. You may find out the VMware that compressed with WinRAR, for that case you need to extract its setup file using WinRAR or 7Zip. Once the file extracted right-click on the setup and (Run As Administrator). On the welcome wizard, click Continue and go through the installation process according to the recommended settings. While the installation is successfully done it’s better to restart your machine for better performance.
#Create a New Virtual Machine
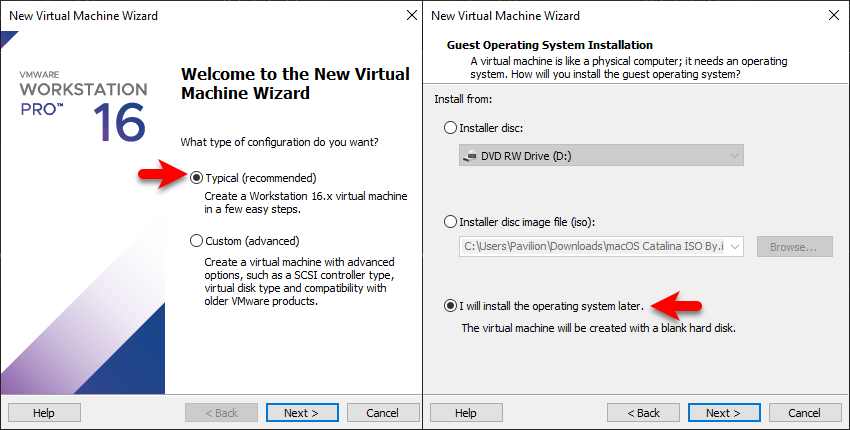
Now it’s time to create a new virtual machine for Android Oreo 8.1 on Windows PC. Be sure that you have to create the virtual machine according to the below down screenshots.
When the welcome wizard opened select the Typical recommended option then click next. On the (Guest operating system installation) select the option (I will install the operating system later) and click next.
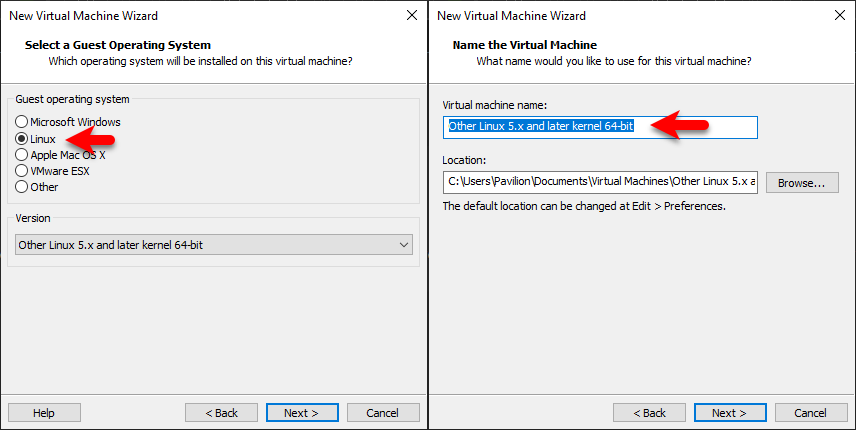
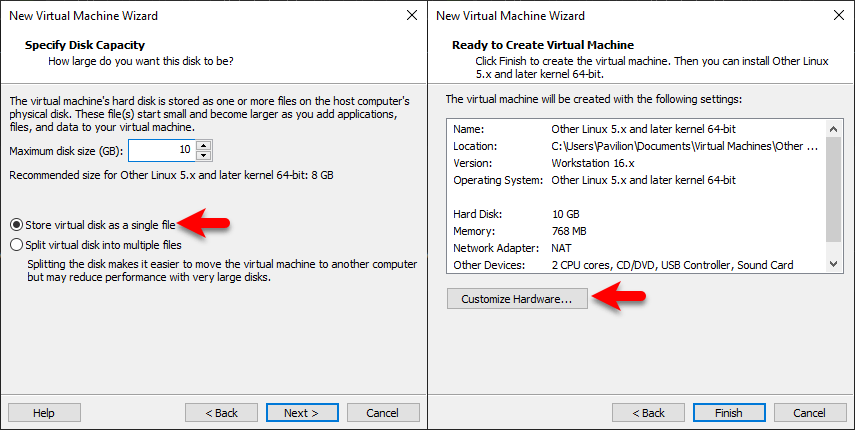
When the (Select a Guest operating system) window comes up, choose (Linux) from the guest operating system, then choose (Other Linux 5.x and later kernel 64-Bit) from the version and click next. Select a name for the Android Oreo 8.1 then specify the location and click next.
On the (Specify disk capacity) window choose the maximum disk size then choose the option (Store a virtual hard disk) option then click next. When the (Ready to create a virtual machine) comes up click on the (Customize Hardware) option.
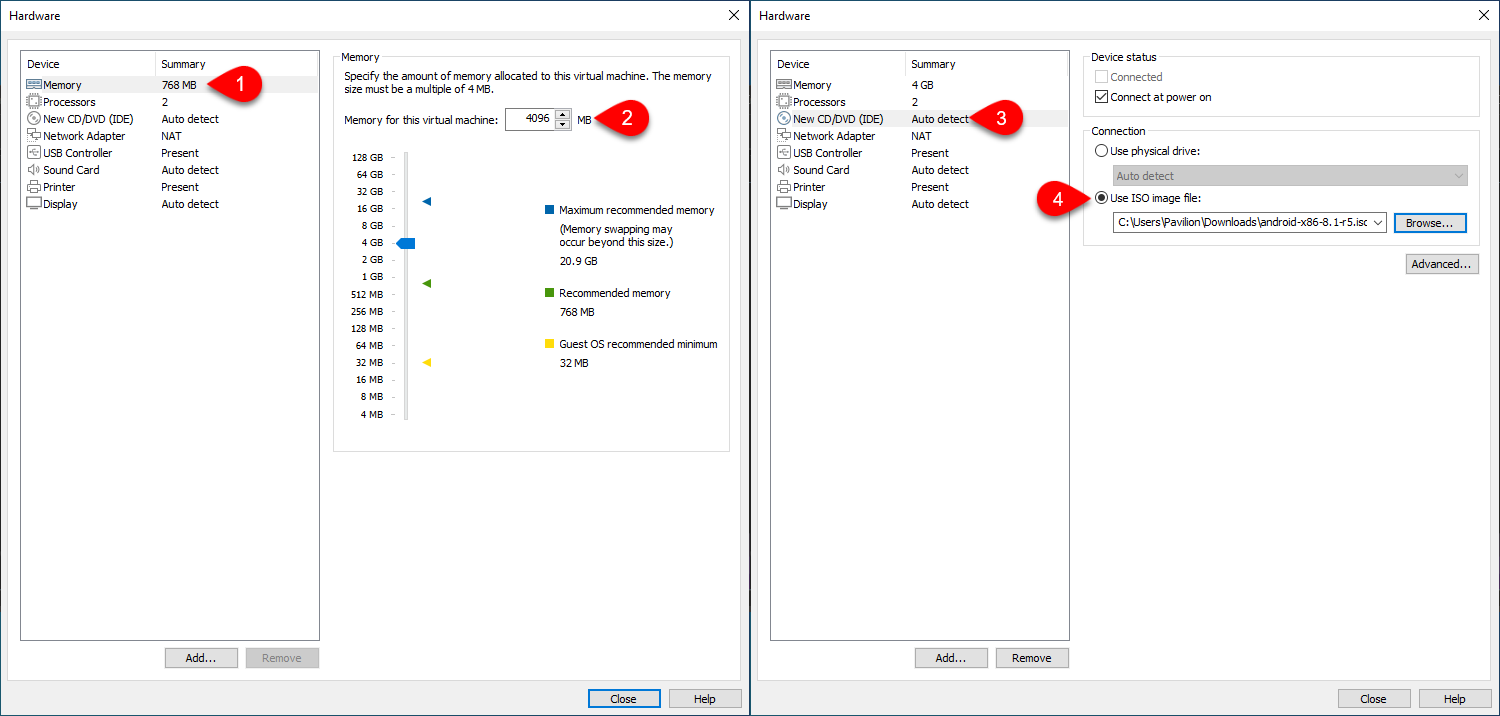
When the hardware settings window comes up, from the left-handed window choose the first option (Memory) and increase the memory size for the virtual machine. Select the (CD/DVD (IDE) option, then select (Use an ISO image file) option. At last click on the (Browse) option then insert the Android ISO file and click open.
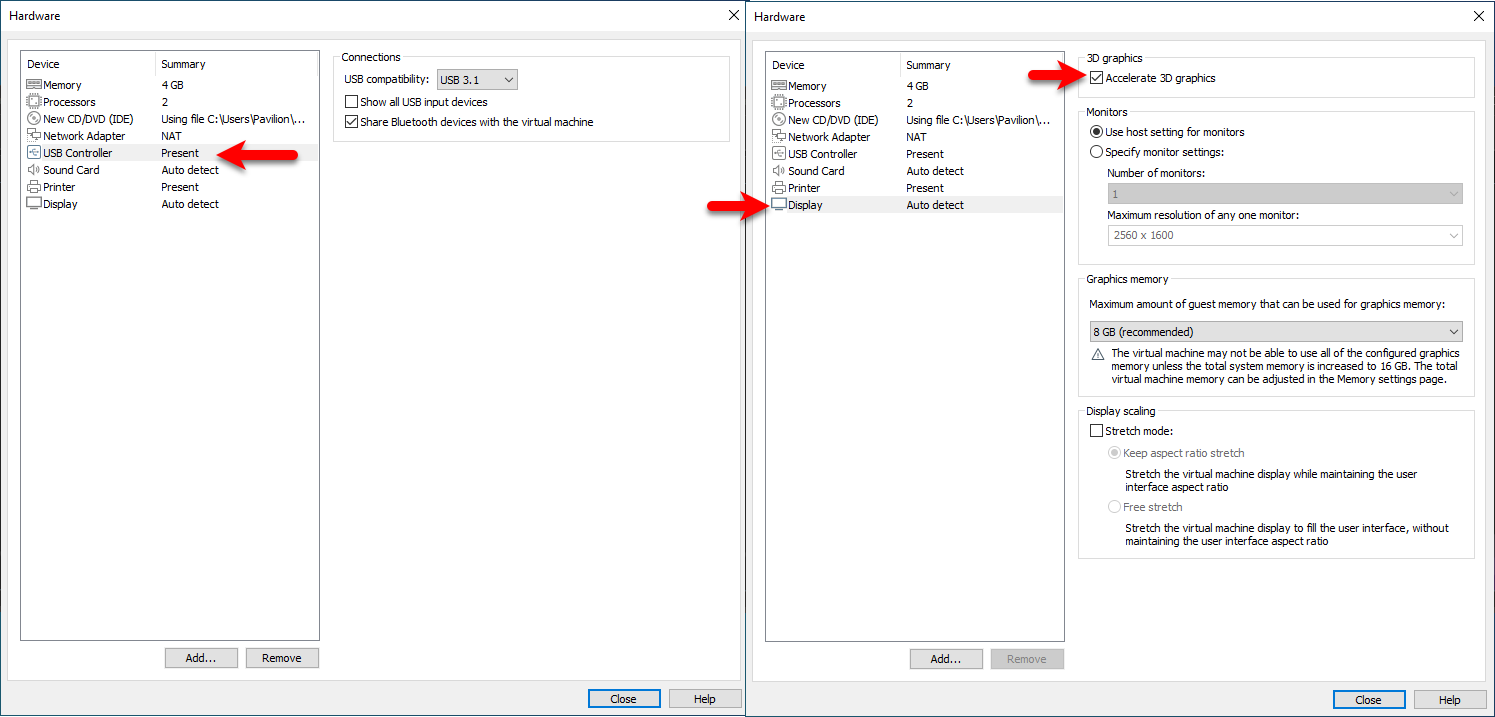
Select the (USB) option then from the (USB Compatibility) option select (USB 3.1). Select the Display option, under the (3D Graphics) check the box of (Accelerate 3D Graphics). And at the end click close and click Finish to save changes to the current virtual machine.
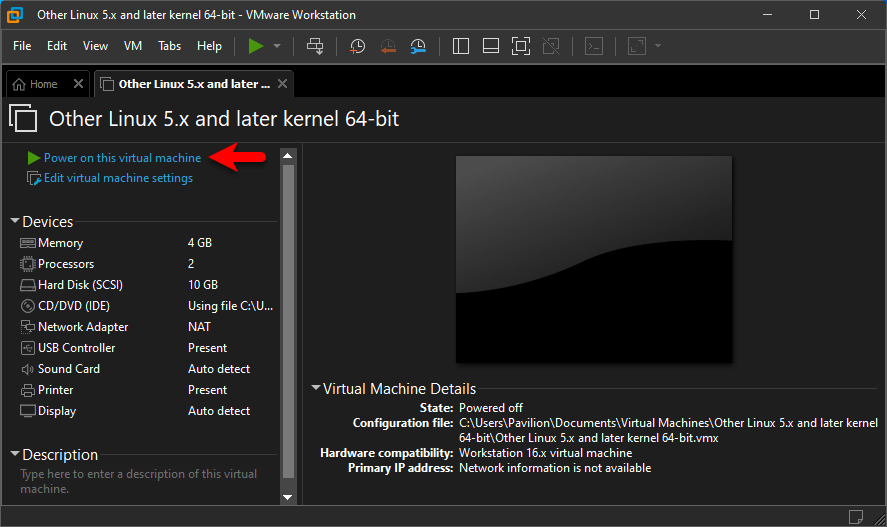
#Install Android Oreo 8.1 on VMware
When everything successfully has done you have to start installing Android Oreo 8.1 on VMware. Therefore, click on (Power on this virtual machine).
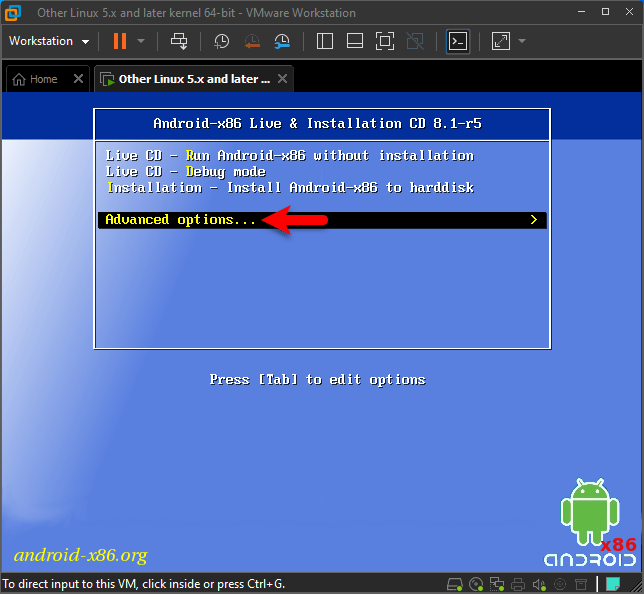
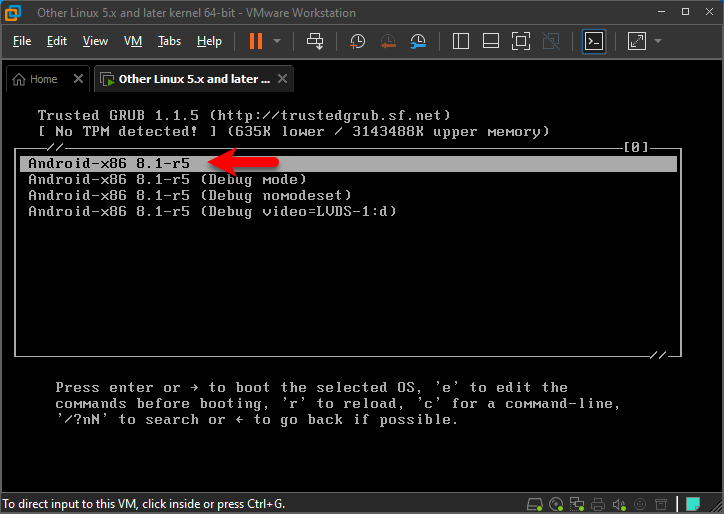
After a few seconds, it will to the installation when the blue screen comes up at the first window use your keyboard arrow key and select the Advanced options, and press enter key to boot.
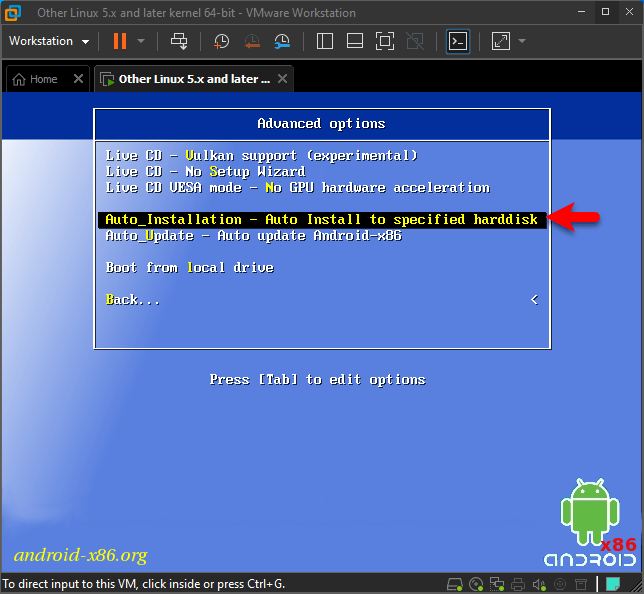
In this window select (Auto installation – Auto install to specified harddisk) and press enter to install.
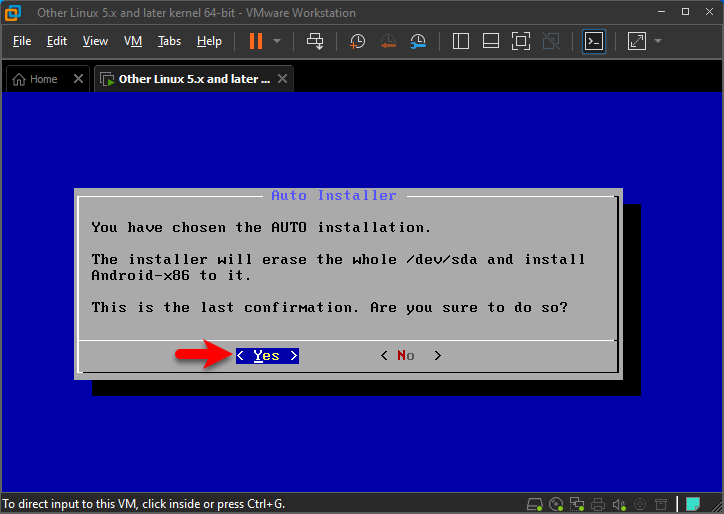
In this window after press the (Yes) option you will erase the whole /dev/sda and install Android to it.
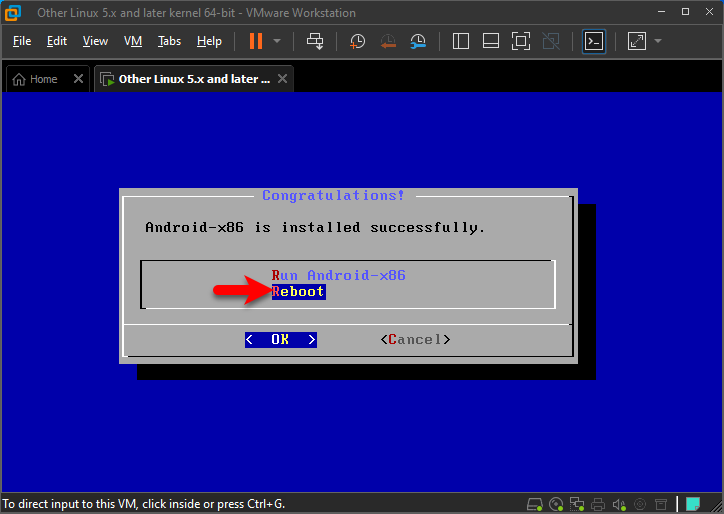
When the disk erased you need to disconnect the CD/DVD, click on the top on (VM>Removable Devices>CD/DVD>Disconnect), and select the (Reboot) option, and press enter.
#Boot with Xfore Mode
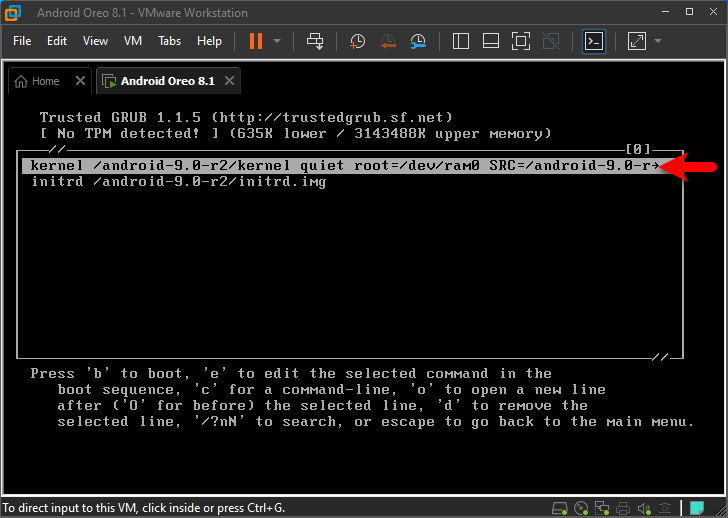
When the black screen comes up press the “e” button to edit the command before it boots.
Now again press the “e” button for editing the command.
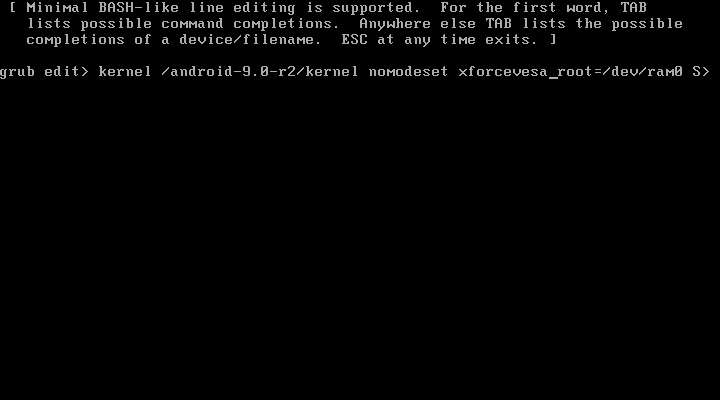
Now move your cursor to the left hand and replace the “Quite” with the following commands (nomodeset xforcevesa), when commands edited press enter key.
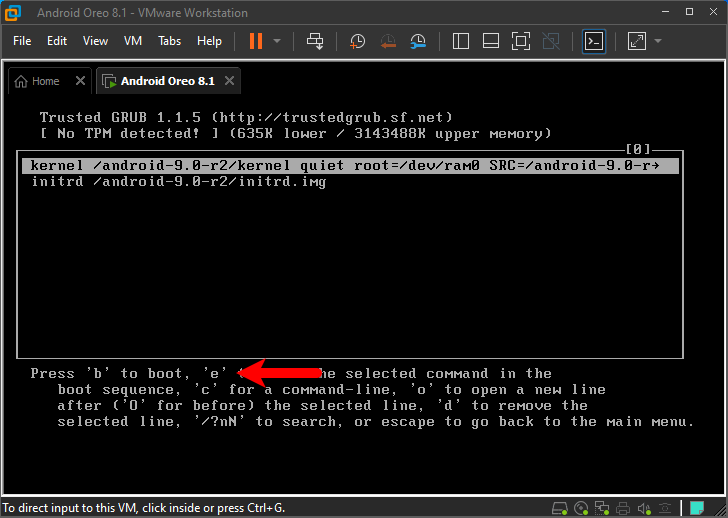
When you back to this window again press the “b” button to boot into Android.
#Complete Settings
When the Android Oreo 8.1 successfully installed on VMware you need to complete some basic settings. On the Android welcome wizard select your language and click start.

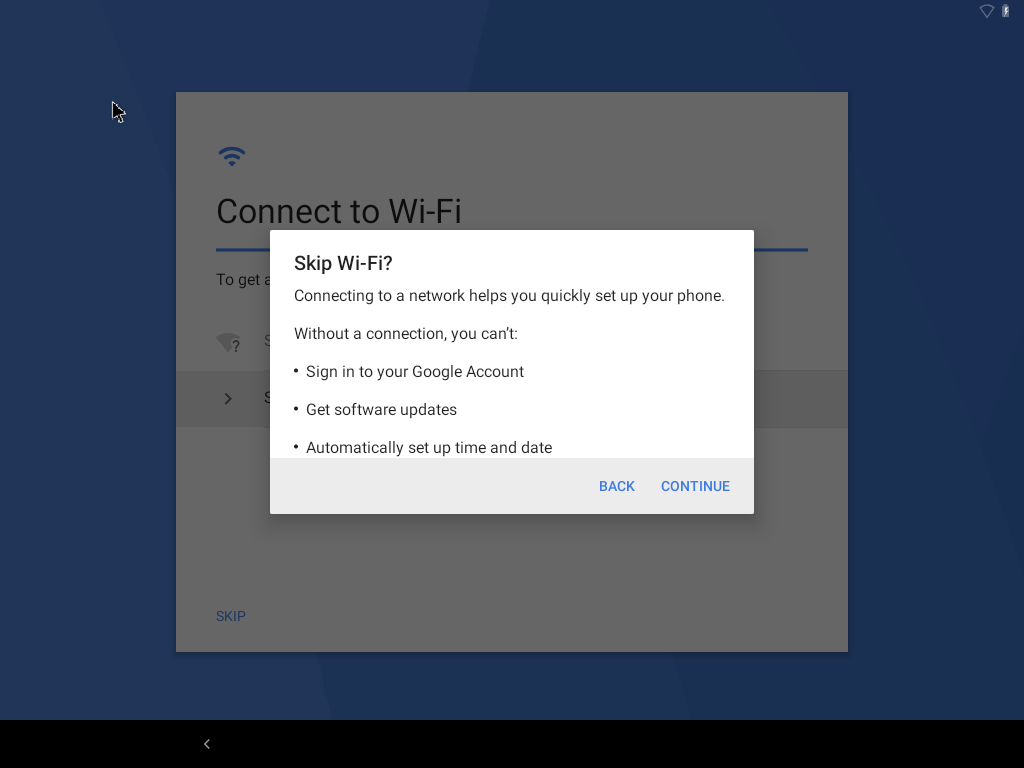
If you want to connect to WiFi then click on the available signal and enter your password, if you don’t want to connect to WiFi simply click Skip and click continue anyway.
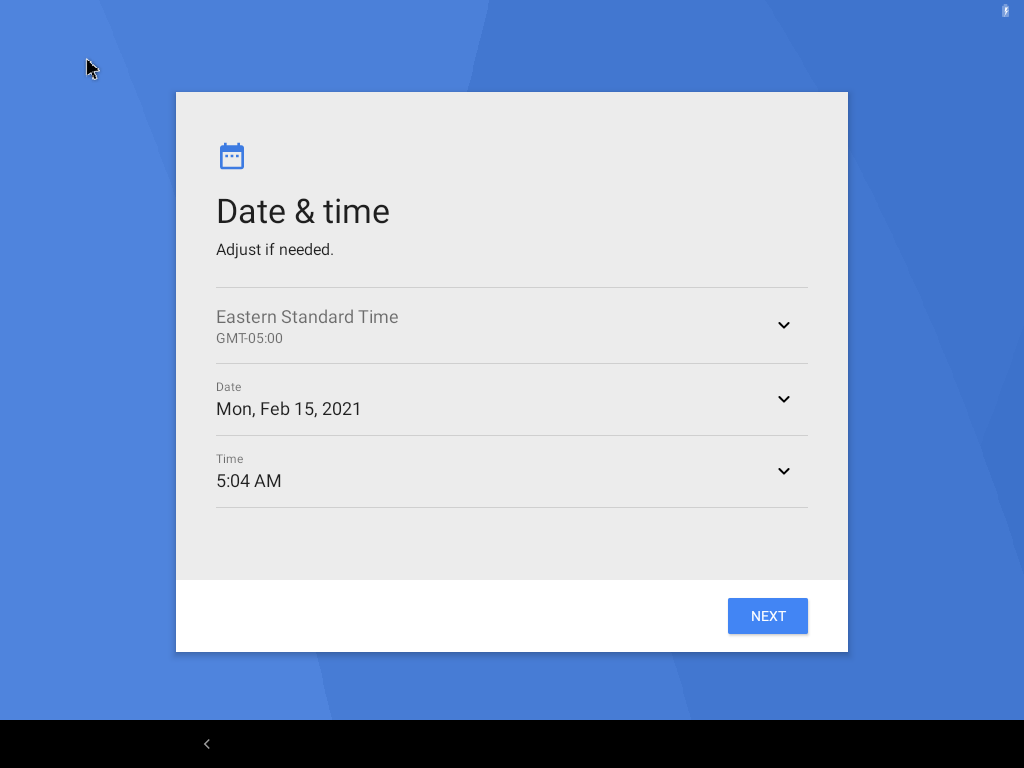
On the Data & Time screen click next.
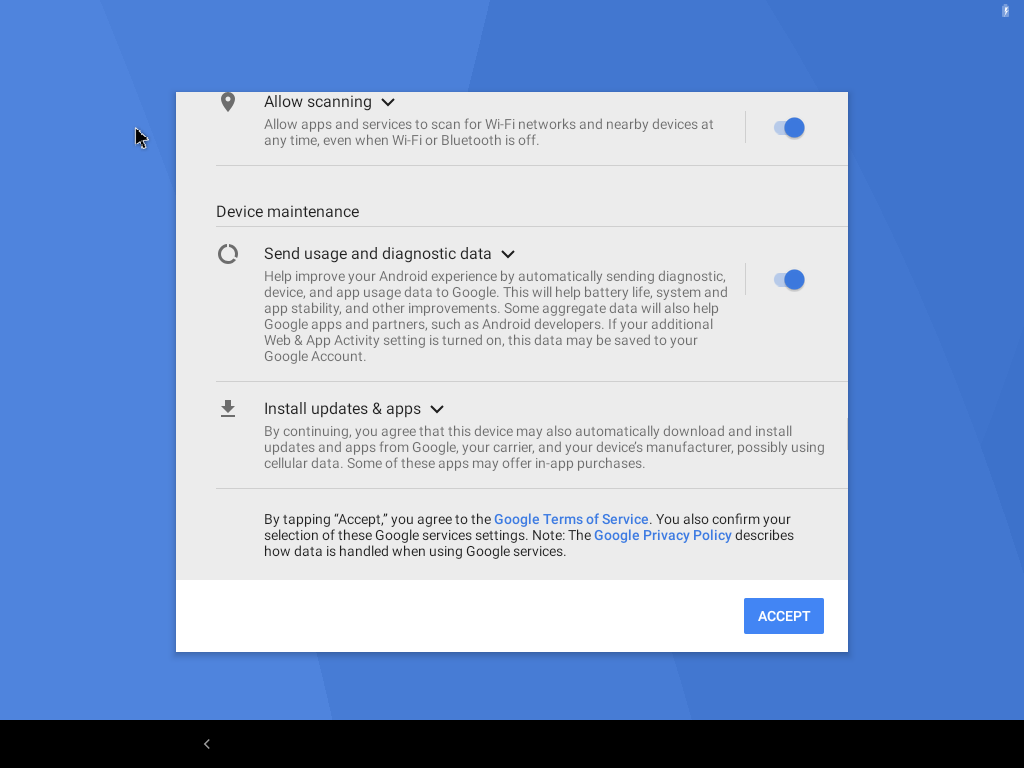
Accept with terms and conditions of Android Oreo 8.1.
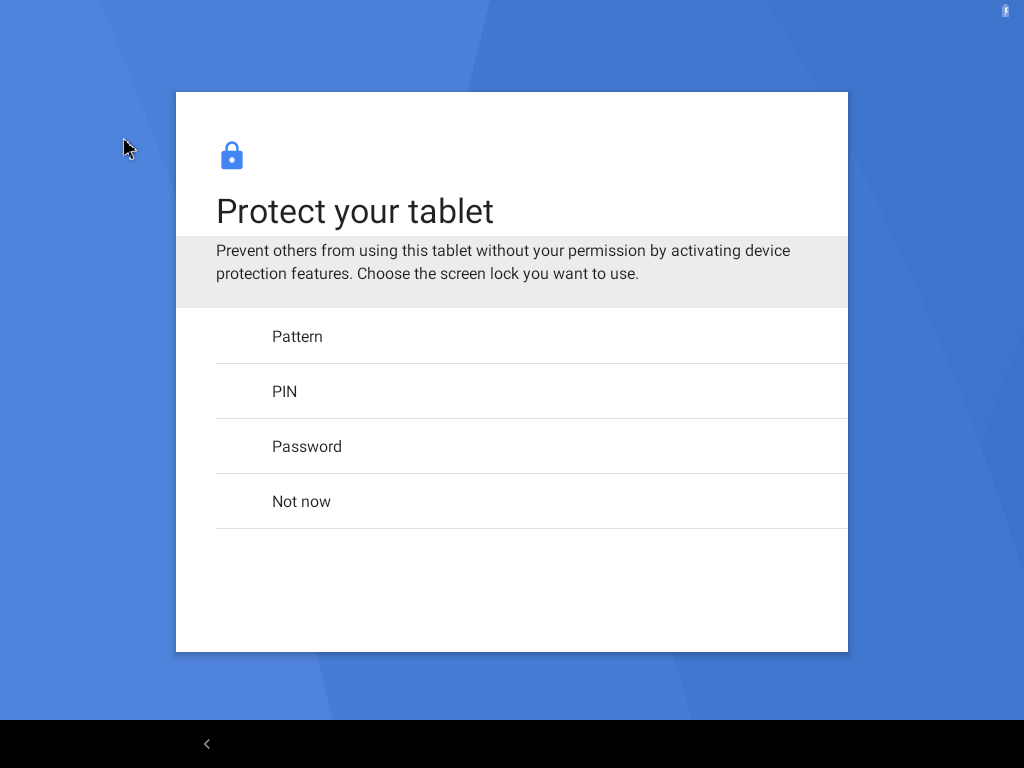
Now if you want to protect your tablet create a password, or PIN if you don’t want then simply click Not Now.
And finally, Android Oreo 8.1 successfully has been installed on VMware.
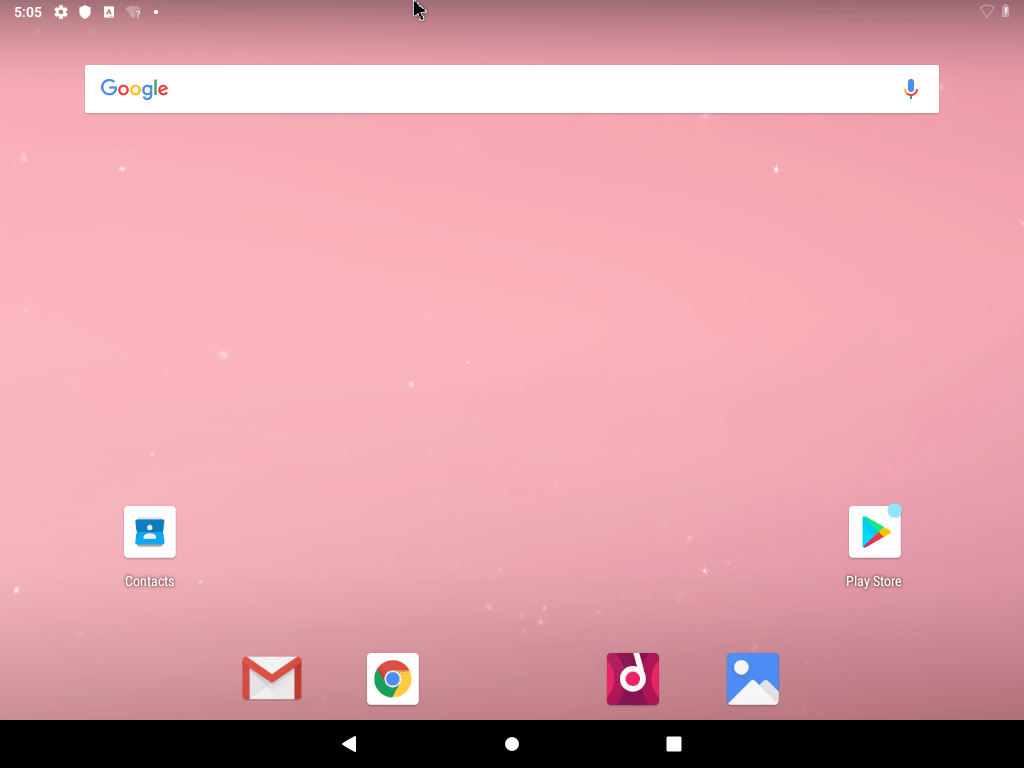
After the installation completed you can enjoy using the Android Oreo 8.1 on VMware platforms. It may contain the full and complete features which allow you to be in touch with the Android operating system on Windows. As I have tested Android Oreo 8.1 on Windows it has the complete features and Apps, therefore, it’s not the complete operating system on Windows but it will try to act as the actual operating system.
If you faced any kind of problem feel free to share with us via the comment section.