Do you want to install Windows 10 or any other version of Windows with UEFI mode on your laptop or desktop PC? Then this guide will show you how to make it happen, therefore, you can find out the two different methods of Windows installation on the BIOS setting of your laptop, one is Legacy and the next one is UEFI. When we are recommended to install Windows from UEFI mode that we should bring some changes to the hardware components.
Like I have replaced the external hard disk with CD/DVD ROM using a Kit. After that, my laptop required to reinstall Windows 10 because the Windows is being damaged due to the hard disk replacement. I have created Windows 10 Bootable USB drive with the Legacy format, when I tried to install Windows 10 then the laptop won’t be able to boot into Windows. After researching I found the solution to change the Legacy mode into UEFI mode in order to install Windows 10.
However, through this guide, you will learn the complete procedure on how to Create UEFI Bootable USB Flash Drive to Install Windows 10. Of course, for installing a clean copy of Windows 10 you need to create a Bootable USB drive that helps you to perform a perfect installation. On the other hand, some of the computers come with the Unified Extensible Firmware Interface (UEFI), instead of the Legacy Input/Output System (BIOS), so it’s important to use appropriate media for the motherboard firmware type.
On Windows 10 you can use two different methods for creating a Bootable USB drive for a UEFI-based computer. The first method is you can use the Microsoft Media creation tool that downloads the operating system online from the internet and automatically creates the Bootable USB drive that supports (UEFI and Legacy BIOS setting). And the next method is you can use third-party software which is RUFUS, it will help you to create a Bootable USB drive with UEFI format.
RUFUS is open-source software that helps you to create Windows, Linux, Bootable USB drives. And it’s completely free with having no cost at all.
Create UEFI Bootable USB Flash Drive to Install Windows 10
For installing Windows 10 on UEFI based computer, firstly you need to create a Bootable USB drive with UEFI format using RUFUS or Microsoft Media creation tool. So, RUFUS is offering you the easiest method of creating a Bootable USB drive with UEFI and Legacy format.
For creating a Bootable USB drive you have to download the latest version of the Windows 10 ISO image file. Also, you can download it from the below down given link.
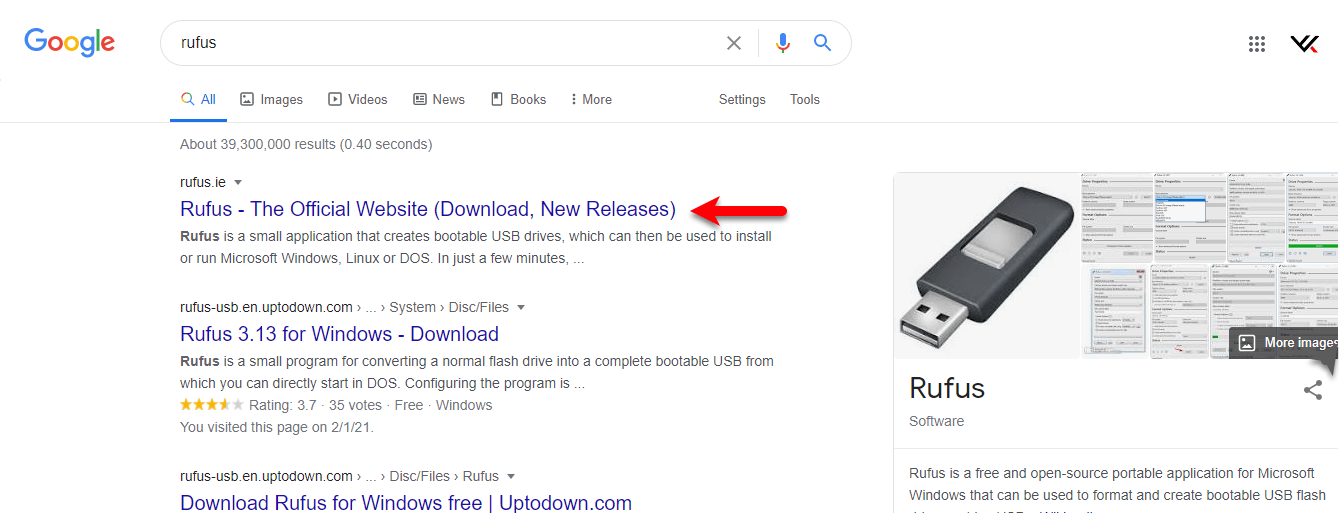
Once you have successfully downloaded the Windows 10 ISO file navigate to your computer browser and open it. When the browser opened on the search bar search for RUFUS, when its official website opened click on its link to open.
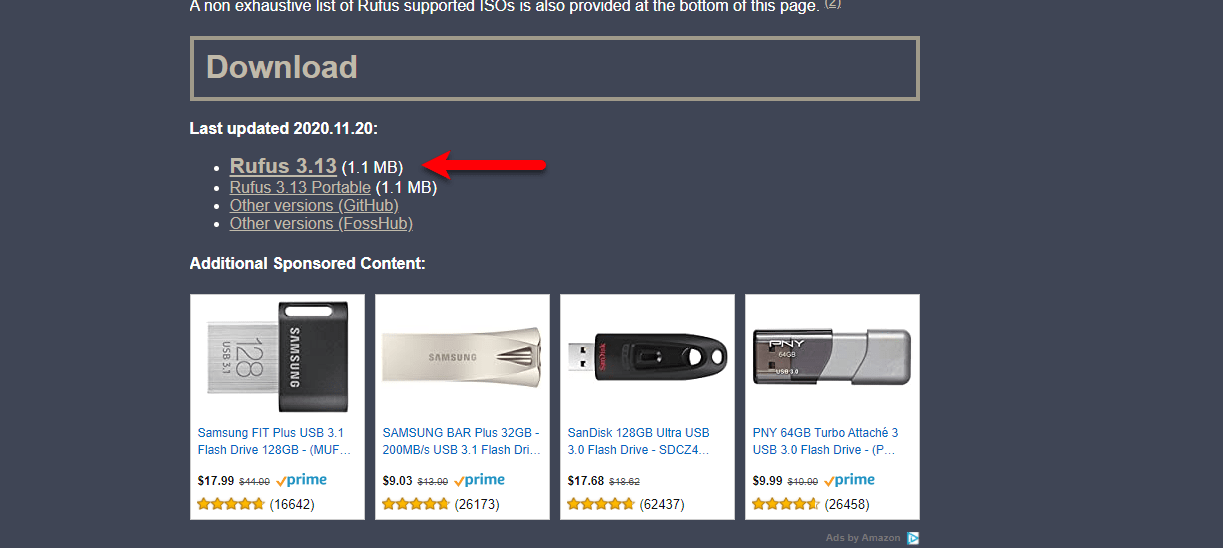
Now download the latest version of RUFUS by clicking on its link.
When the software downloaded open it, on the welcome screen it will ask you that it should check for the update or not? simply click Yes to continue.

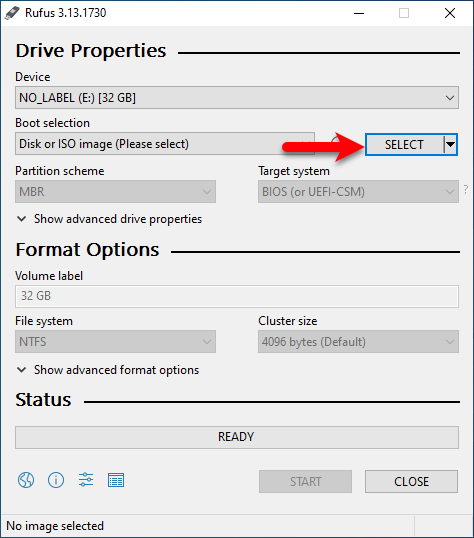
When the RUFUS opened click on Select for inserting the Windows 10 ISO image file.
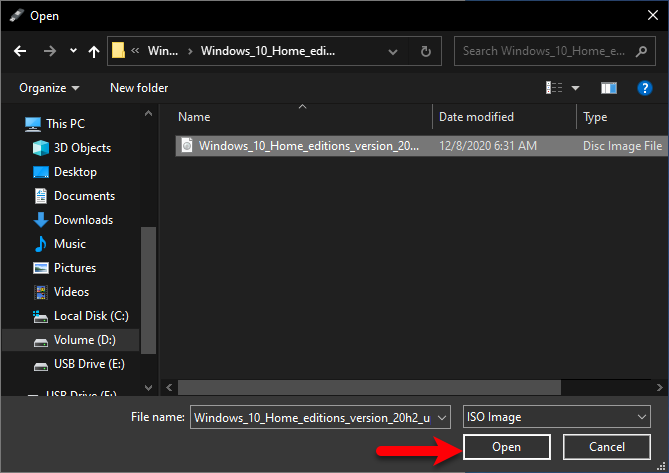
When the next window opened select the Windows 10 ISO image file where you have saved that and click Open.
When Windows 10 ISO image file inserted on the RUFUS window, configure its settings according to below down screenshot and click Start.
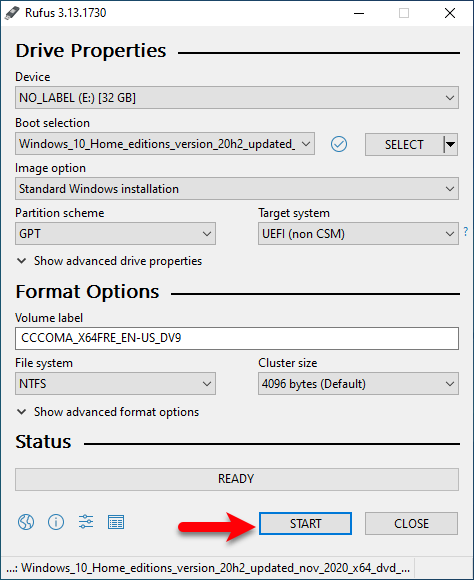
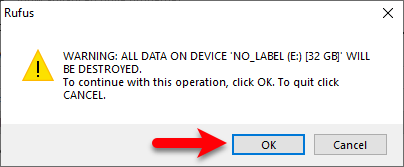
In here you will see a Warning! a pop-up that will destroy or erase all your data that exist on your USB drive so click OK to continue.
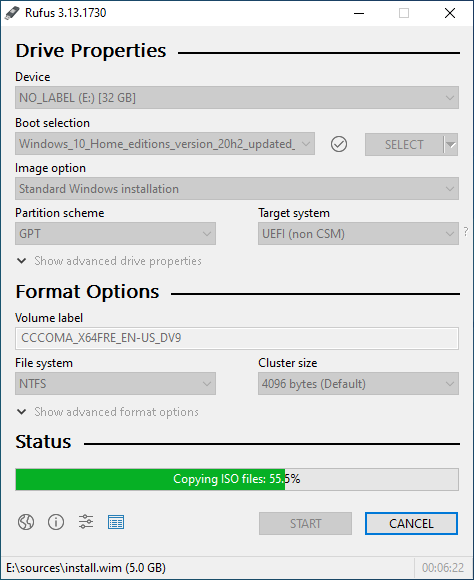
And here it will start copying Windows 10 ISO file to your USB drive. It may contain several minutes, wait until it should be completed.
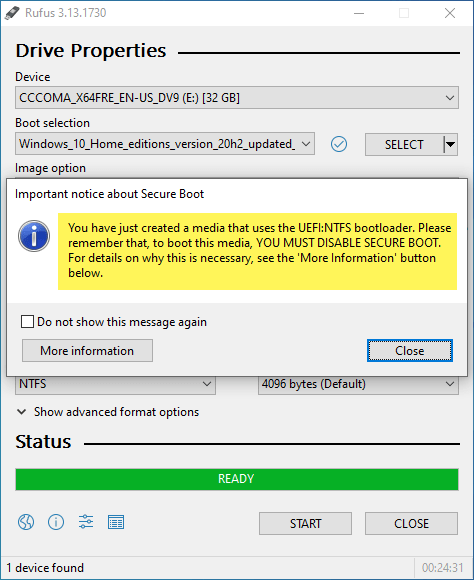
When the Bootable USB drive created you will see the notification like the below down screenshot.
Boot Windows 10 with UEFI BIOS
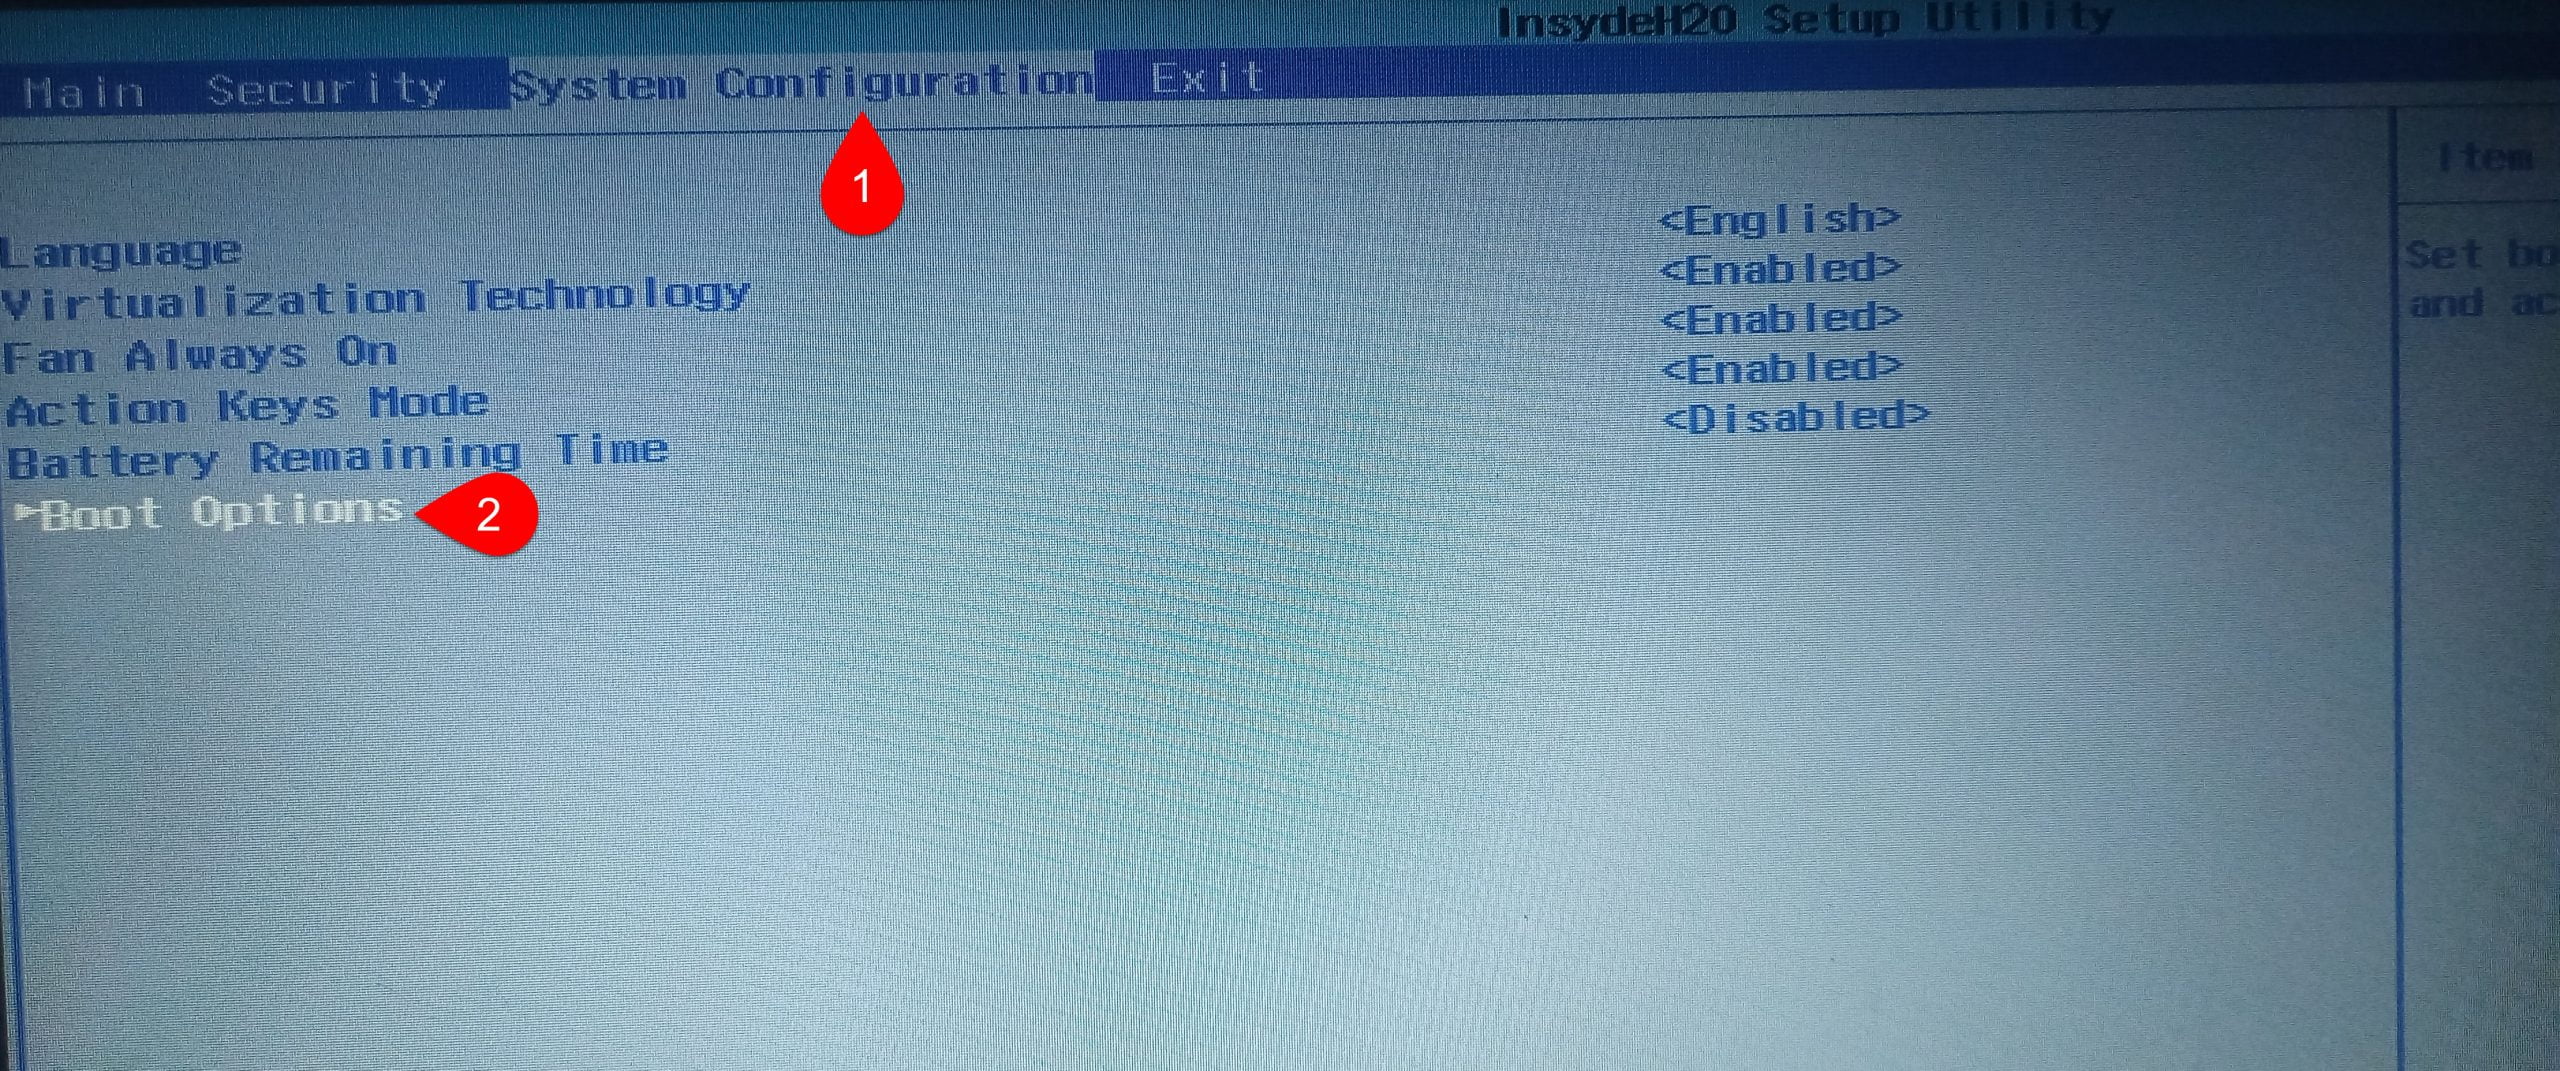
When you have successfully created Windows 10 Bootable USB drive, now it’s time to boot it into UEFI and install it. For installing Windows 10 with UEFI you need to configure the BIOS settings, simply restart your computer and press the BIOS settings Key. On the BIOS window using your keyboard arrow key, move to the (System Configuration) and select the (Boot Options) and press enter.
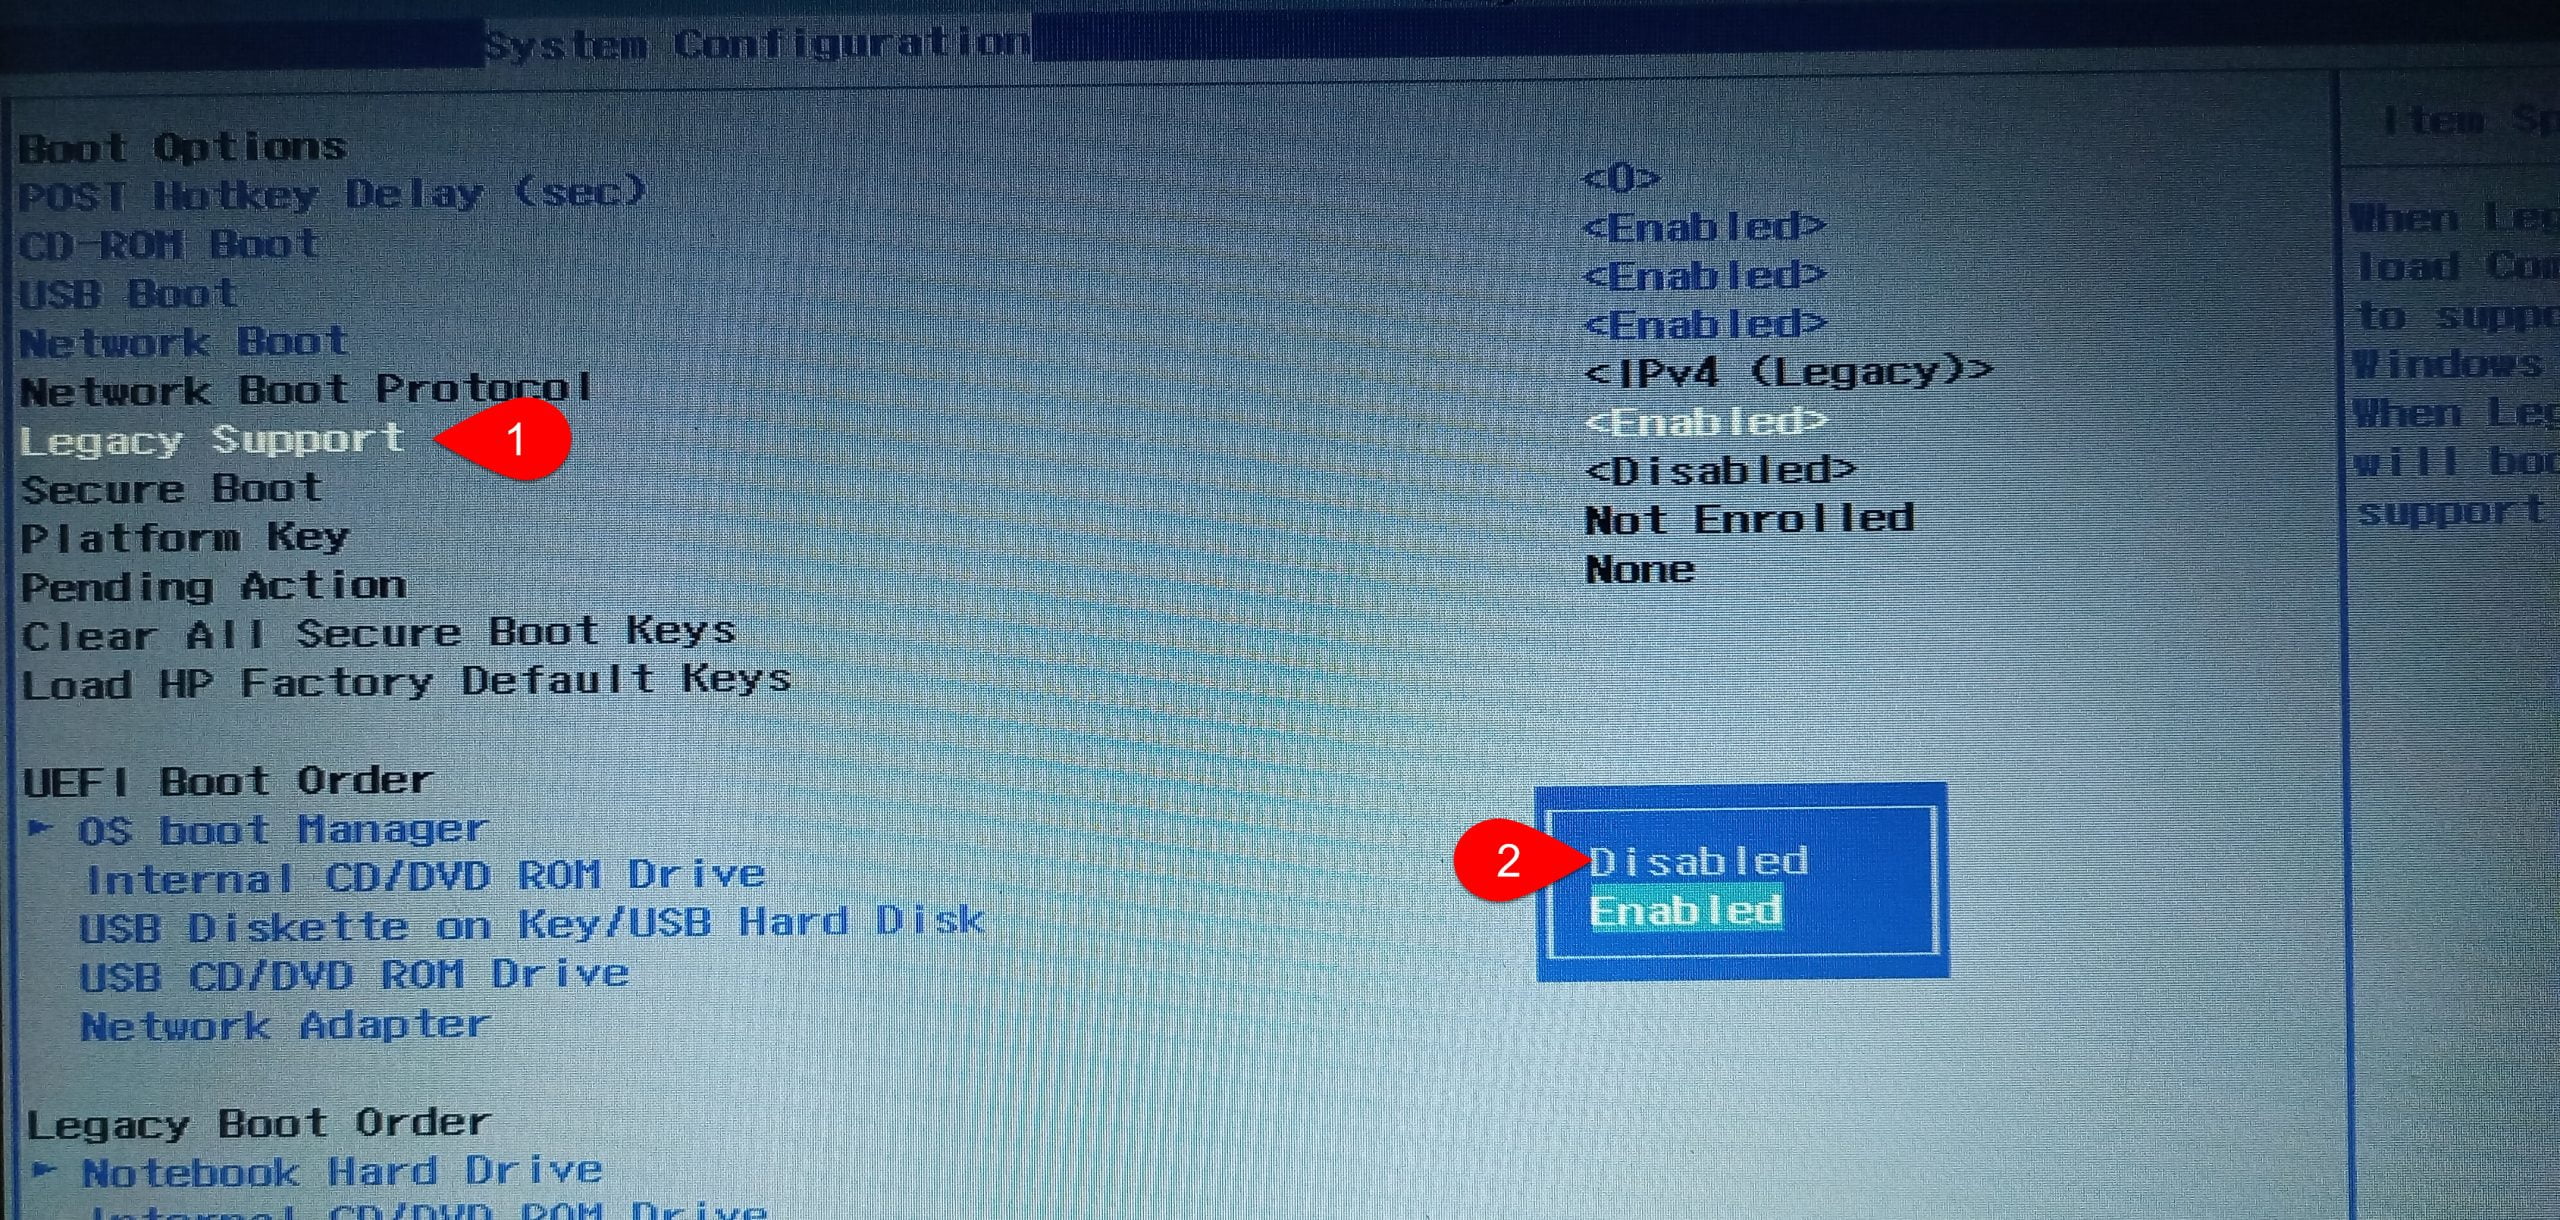
On the system, configuration select down the (Legacy Support) and press enter then select (Disabled) option. Automatically it will enable the UEFI mode and disable the Legacy.
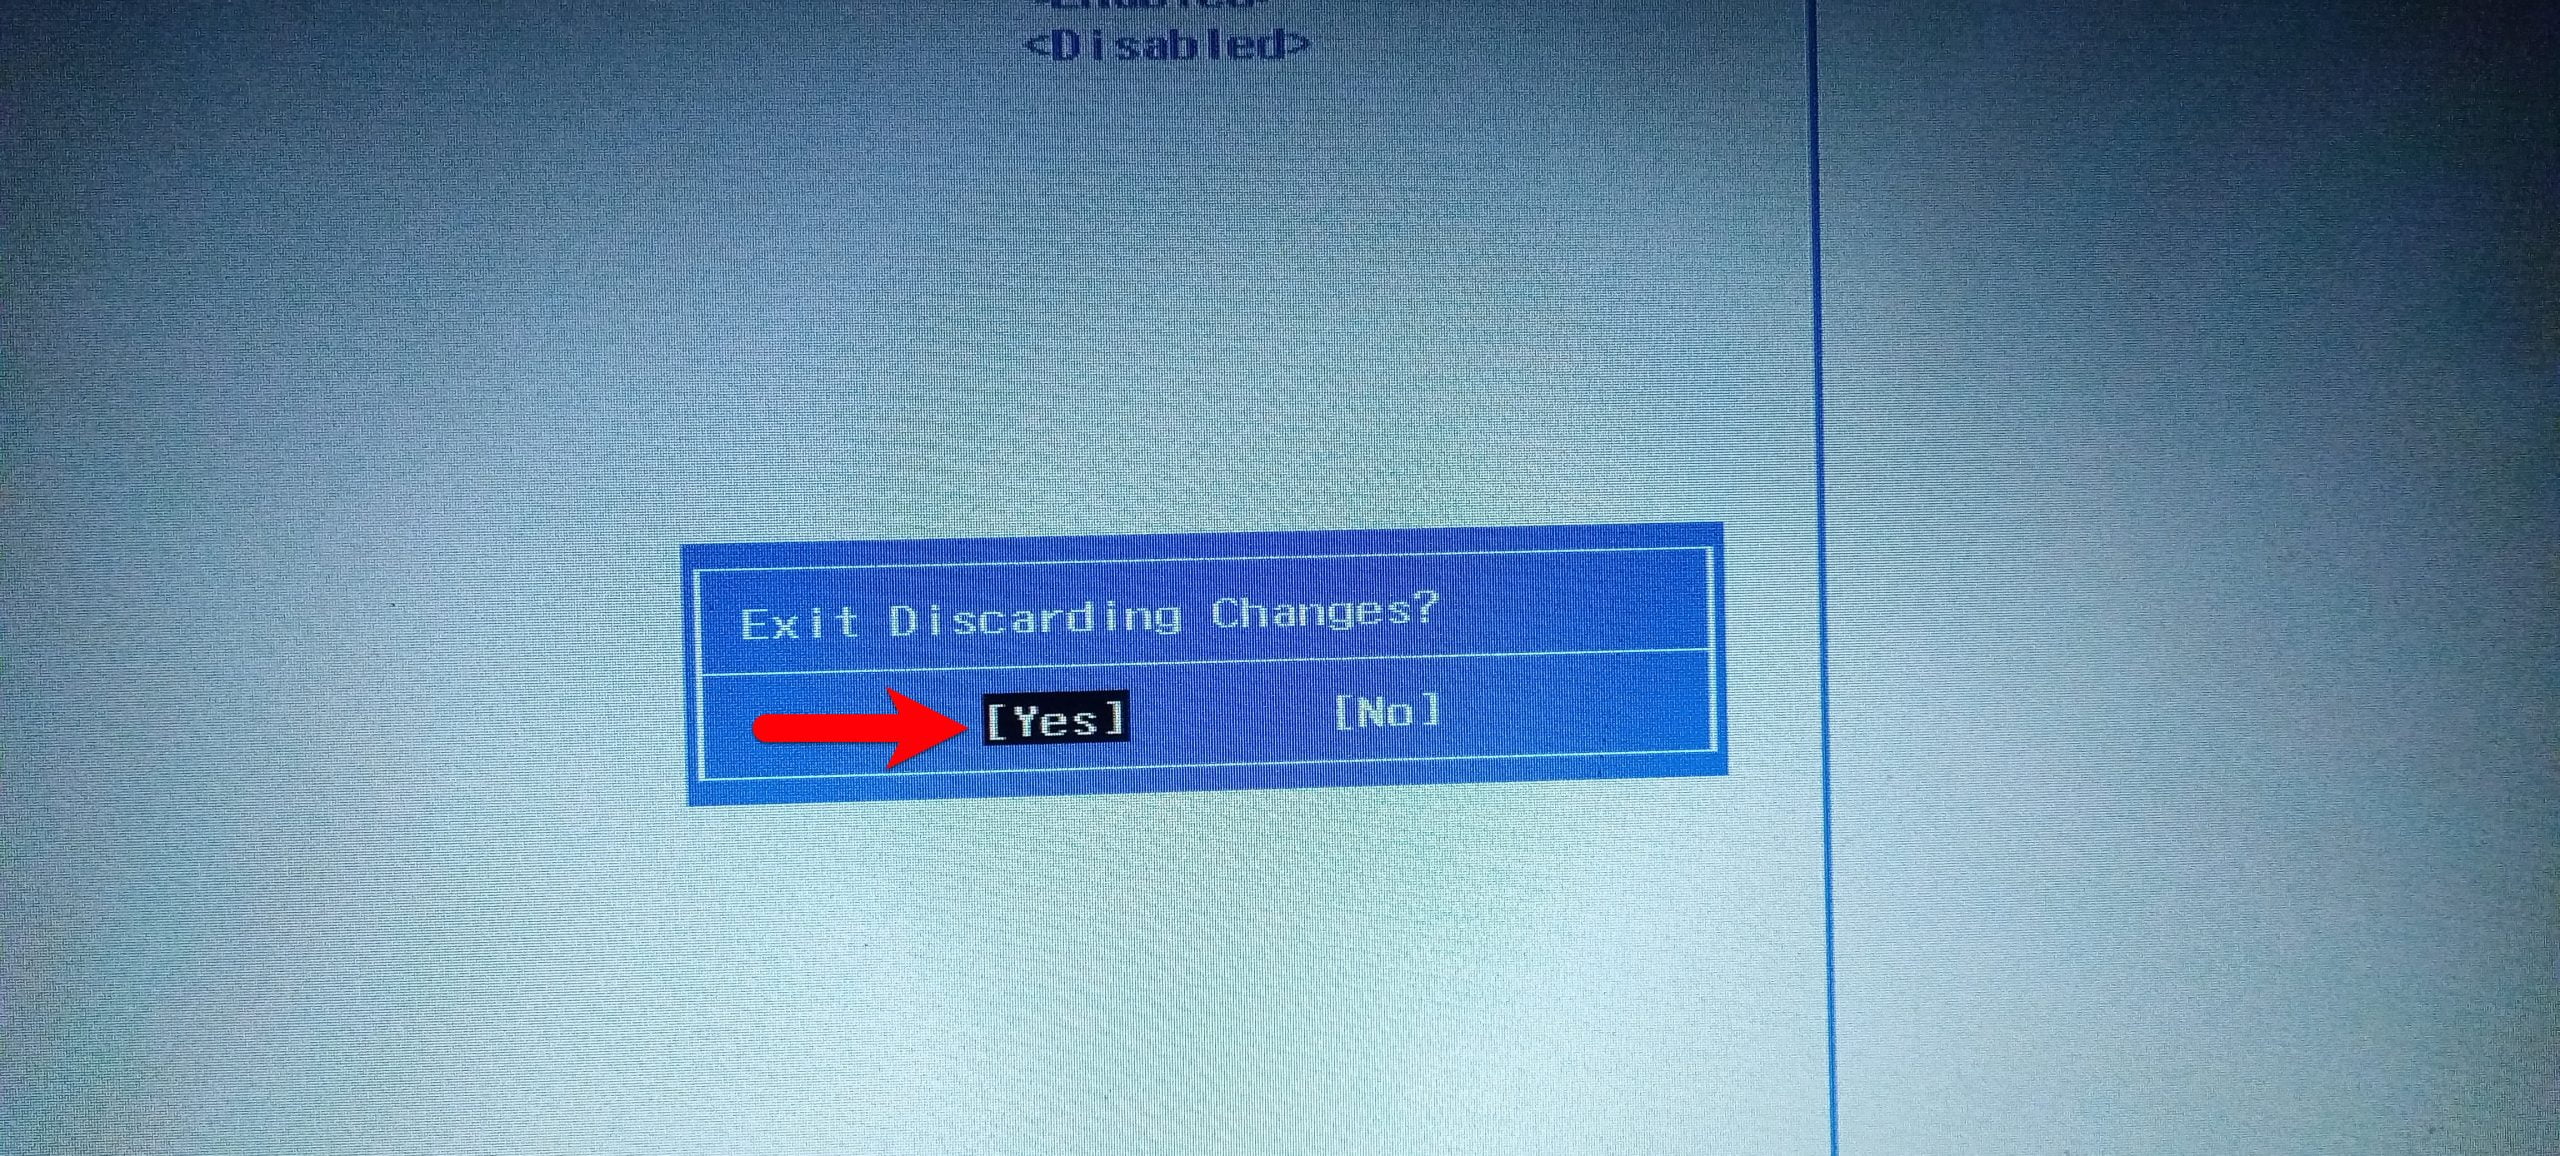
Once the Legacy disabled on the BIOS press the (Esc) key, and select (Yes) then press enter to save changes to the setting.
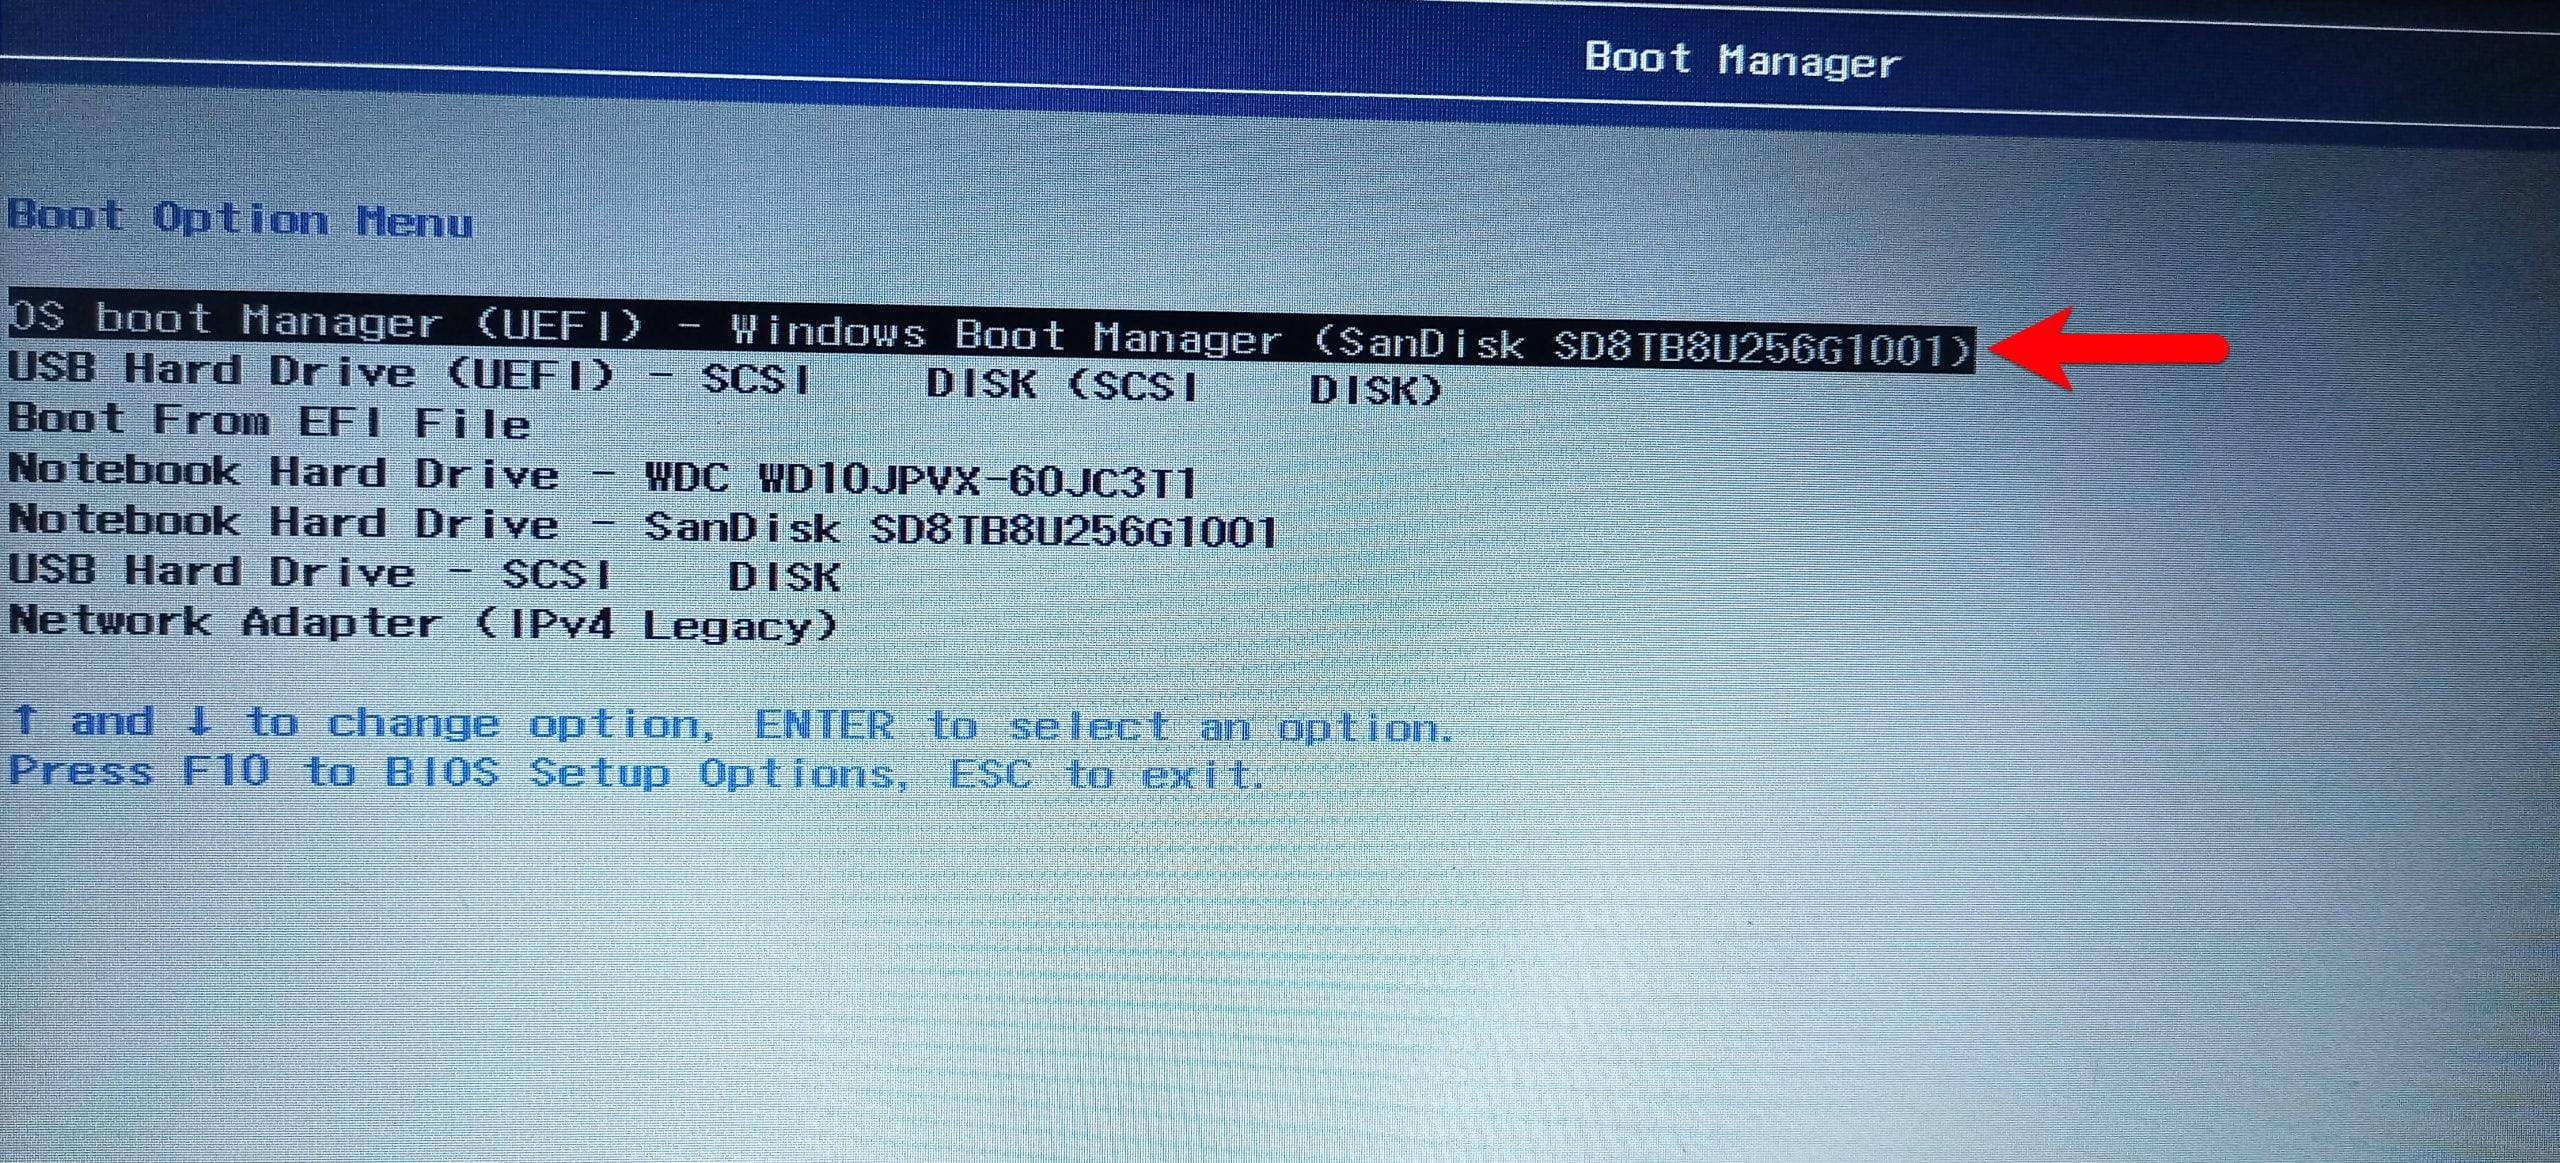
When your computer restarted press the Boot Menu key, from the boot options window select Boot OS from UEFI and press enter key. Then continue to the next process of Windows 10 installation.
If you faced any kind of problem feels free to share with us via the comment section.
