macOS Mojave 10.14 is the major success release after macOS High Sierra is. On the 14th June 2018 at the Worldwide Developer Conference “WWDC 18” macOS Mojave was released under the instruction of chief executive officer of Apple Inc. Apple released a new operating system with an unbelievable added features category to its recent operating system. This operating system has been packed with significant features. After lots of experiments finally, Apple has to be successful to add the incredible dark mode feature to its operating system. Overall macOS Mojave 10.14 has an outstanding security performance, and macOS Mojave still one of the preferred operating systems. Now its 10.15.6 update is available for you to use it.
The new macOS Mojave 10.14 is having lots of features built-in that includes best overall. And the best feature includes dark mode that most of the Mac users were expecting this point from Apple. And other features include enhancement to Apple’s desktop OS, Live wallpaper, Stacks, a dark mode helps you to use the computer at night time with easier computing, new screenshot tool, Improved Safari, Dynamic Desktop, Gallery view for finder, Four iOS apps ported over to Macs, Group Facetime, Continuity Camera, Redesigned Mac App Store.
When you are a Windows user and have enough enthusiasm to test macOS Mojave on, but you don’t have the opportunity with a lack of Mac PC. Again thanks to the Virtualization that provides Windows users for such facilities to test the macOS operating system on Windows PC. However, if you are having a perfect computer with the best hardware equipments than without any issue you can test macOS Mojave 10.14 on your computer via a virtual machine. As we have tested macOS Mojave on our computer, and work perfectly. My computer specification is 64-Bit Windows 10 OS, 500GB SSD, 16GB RAM, and 2GB Graphic Card. But it doesn’t matter whether you have SSD or HDD, again with this specification it will work perfectly.
What is Virtual Machine?
A virtual machine is an open-source platform where you can install more than one operating system on it. Whether you are using a Mac computer or Windows computer, both PC are consists of a Virtual machine. When talking about virtual machines, there are several virtual machines. Like Hyper-V, VMware Workstation, VirtualBox, Hyper-V is inside a built-in virtual machine on Windows. At any time you can turn it on. But the VMware Workstation and VirtualBox are outside built you have to download and install it on your computer manually. Installing other operating systems on the virtual machine is pretty easy, remember that it will not act like a real operating system. But easily you can fulfill your wishes via the virtual machine.
To install macOS Mojave on VMware Workstation or any other virtual machine. You need to prepare various things that need a perfect virtualization, macOS Mojave VMDK file, VMware Workstation, or VMware Player which is a free application and the Patch Tool allows you to unlock the Apple macOS option on VMware.
Install macOS Mojave 10.14 on VMware on Windows PC
1. Download macOS Mojave
[penci_button link=”http://www.mediafire.com/file/pph3v402wi4vjo0/macOS_Mojave_10.14.6.iso/file” icon=”” icon_position=”left” background=”REd” hover_bgcolor=”Green”]Download macOS Mojave[/penci_button]
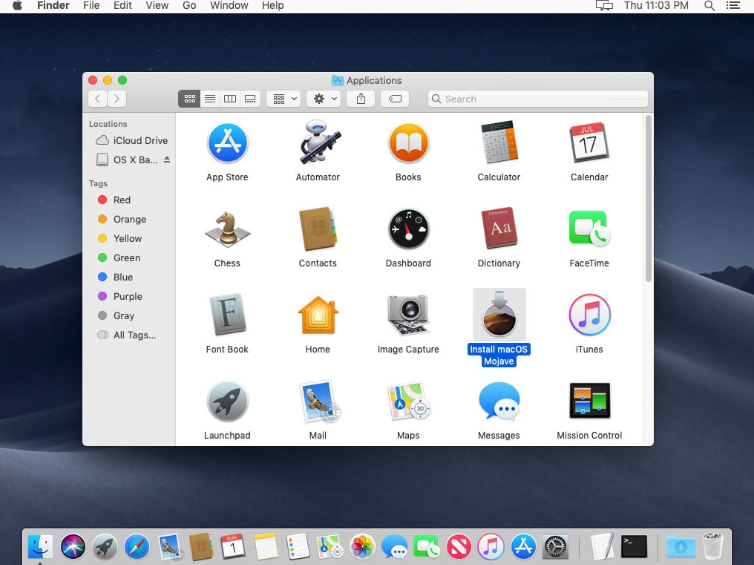
To begin the process of installing macOS Mojave 10.14 on VMware on Windows PC. Firstly you need to its VMDK file, or you can create its VMDK “Virtual Machine Disk file” by yourself. Navigate to Mac App Store, then search there macOS Mojave and press enter. Once the Download option appeared click on that, once the download completed, it will automatically start the installation. But we don’t need to install it, our purpose is to install it on a virtual machine. Therefore, quickly close the window of installation.
Now the macOS Mojave 10.14 installer file is ready for you, therefore, move the file to the application folder. Now you have the file and need to create it to VMDK file, for this process open the “Terminal”. Once the terminal opened apply the below codes for creating the VMDK file.
# Create macOS Mojave DMG Image
hdiutil create -o /tmp/mojave -size 7900m -volname mojave -layout SPUD -fs HFS+J
# Mount Mojave DMG image to macOS
hdiutil attach /tmp/mojave.dmg -noverify -mountpoint /Volumes/mojave# Create a Mojave Installer
sudo /Applications/Install\ macOS\ Mojave.app/Contents/Resources/createinstallmedia --volume /Volumes/mojave --nointeraction# Unmount Disk Image
hdiutil detach /volumes/Install\ macOS\ mojave# Convert DMG File to ISO File
hdiutil convert /tmp/mojave.dmg -format UDTO -o ~/Desktop/mojave.cdr# Rename and Move Mojave ISO file to Desktop
mv ~/Desktop/mojave.cdr ~/Desktop/mojave.iso2. Install VMware Workstation
VMware workstation is an open-source application, and it’s a hosted hypervisor that runs 64-Bit Windows and Linux operating systems. Ever VMware Workstation is one of the best virtual machine for testing different kinds of operating systems. And of them is macOS Mojave 10.14. Therefore, to use VMware Workstation Pro you need to pay money with a full activation version.
- Navigate to VMware Workstation website, once you reached there download the VMware Workstation or VMware Player.
- When the setup successfully downloads double-click to launch the installation wizard.
- On the welcome wizard simply click next.
- Agree with the terms and conditions of VMware Workstation and click next.
- Check the enhanced keyboard driver and press next.
- In this window leave it by default and press next.
- Check the box of shortcuts to be created on the desktop and start menu and press next.
- Once its setup prepared and ready for installation then press the install button.
- Wait until the installation should be completed.
- When the installation completed click Finish to close the window.
- Again re-launch the VMware Workstation, and enter its license key. Or if you don’t have it use for 15-days trial.
3. Install Patch Tool
Patch tool, usually known as the macOS Unlocker tool. What is macOS Unlocker? it’s a simple and small tool that allows you to install the macOS operating system on VMware Workstation. You will ask this how it be possible? After installing VMware Workstation on your computer, during creating a virtual machine you will see that the option of Apple macOS X is disappeared from there. So, after installing macOS Unlocker the Apple option on VMware Workstation will appear. You can get this tool from internet, after typing “macOS Unlocker”. Also, try to download its latest version.
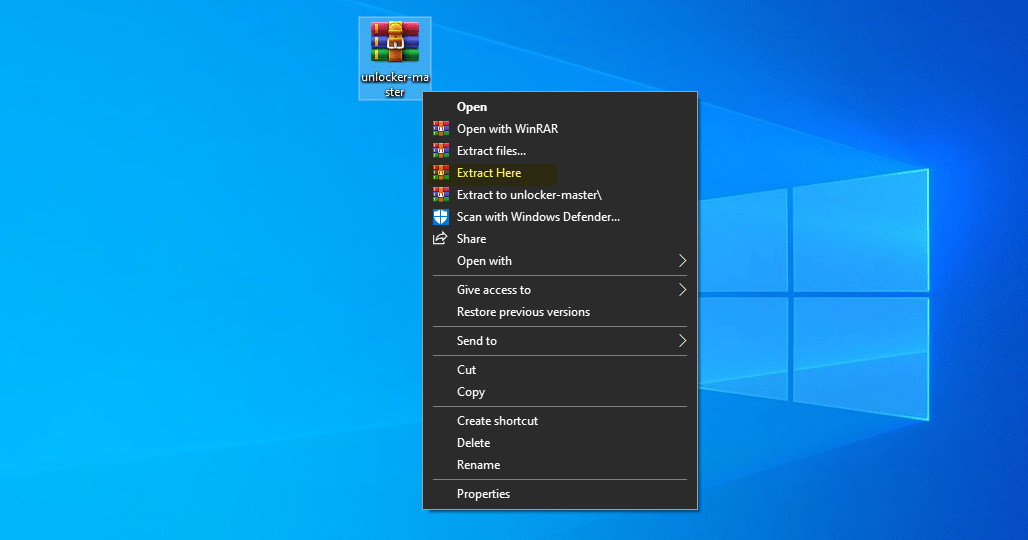
When the macOS Unlocker downloaded, right-click on the file and select “Extract Here”.
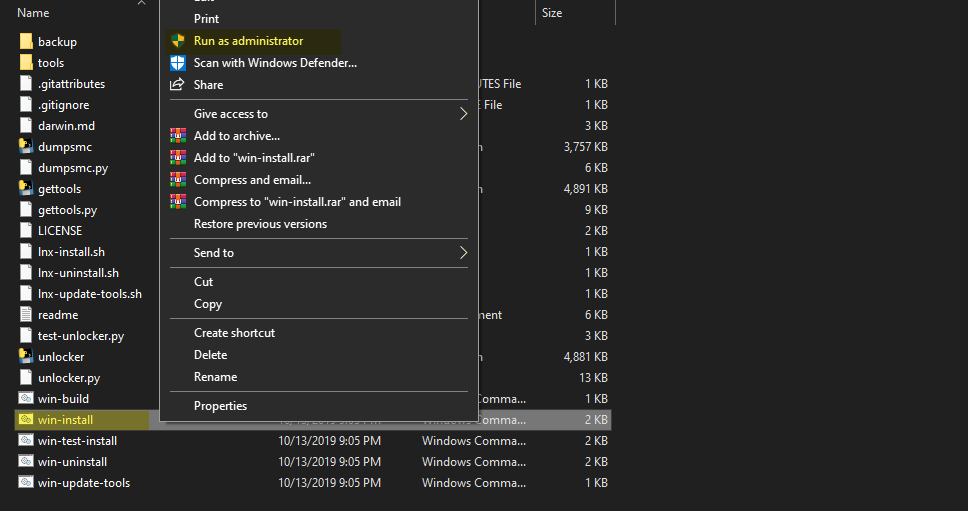
Open-up the folder of macOS Unlocker, find out the file “Win-install”, then right-click on that and select “Run As Administrator”. The latest version of its installation process will take some time, due to that you need to have a nice internet connection. Because it will download the version according to your VMware Workstation version.
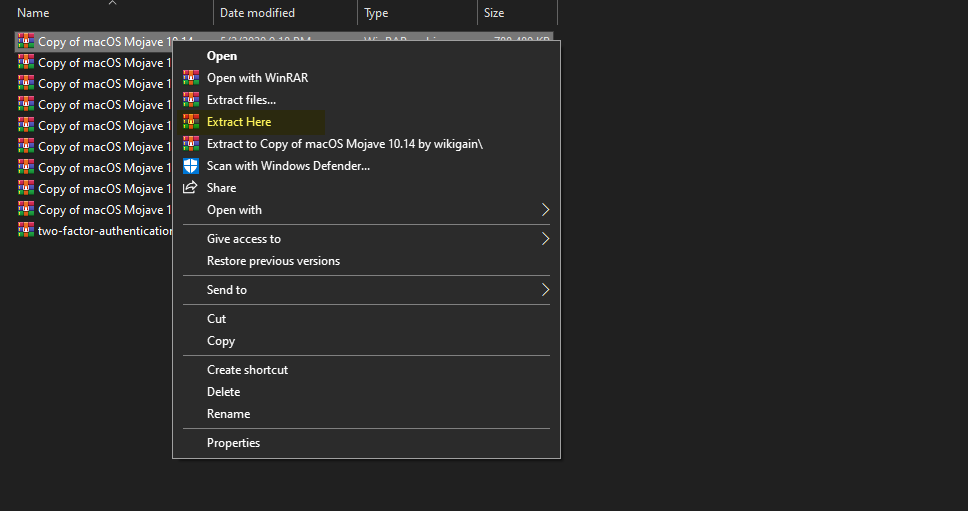
4. Extract macOS Mojave VMDK file
After downloading macOS Mojave 10.14 VMDK file you will see that its file is compressed with WinRAR. For its extraction, you can use WinRAR or 7Zip. To extract the VMDK file right-click on the 1st part of macOS Mojave VMDK and select “Extract Here”. The extracting process may take a while.
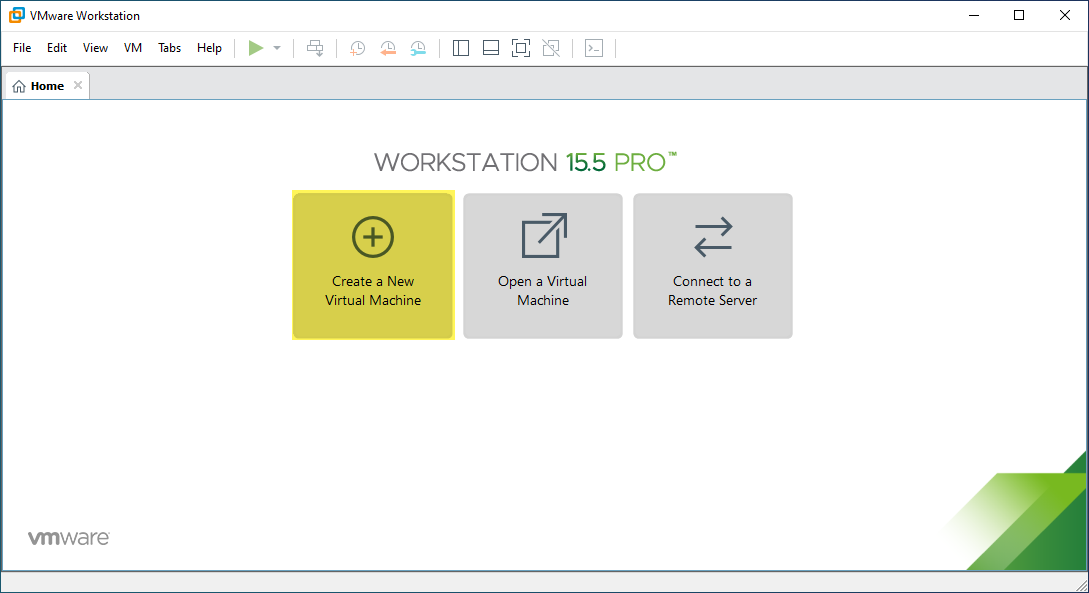
5. Create a New Virtual Machine
To install macOS Mojave 10.14 on VMware Workstation, you need to create a clear virtual machine first. The process of creating a virtual machine is pretty easy.
Over ahead to VMware Workstation and open it, when it opened on the main window click on “Create a New virtual machine”.
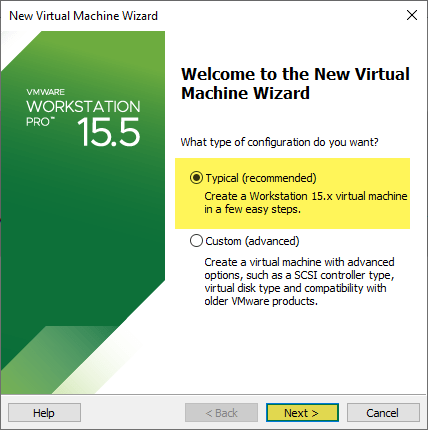
On the VMware welcome wizard select the option “Typically (Recommended”) and click next.
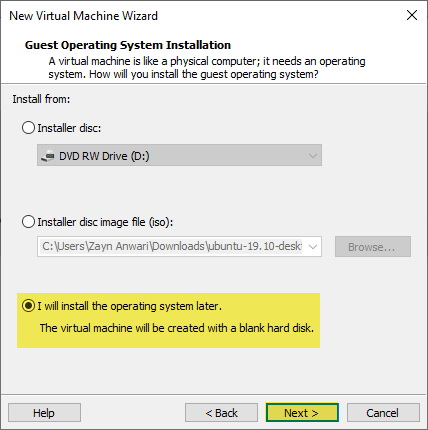
 Select how you will install a guest operating system? choose the 3rd option “I will install the guest operating system later” and press next.
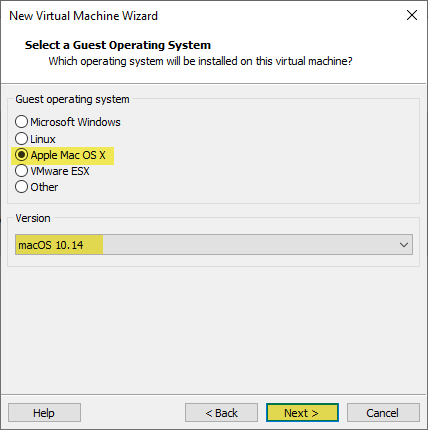
 Now select which operating system you want to install? select “Apple Mac OS X” and its version then click next.
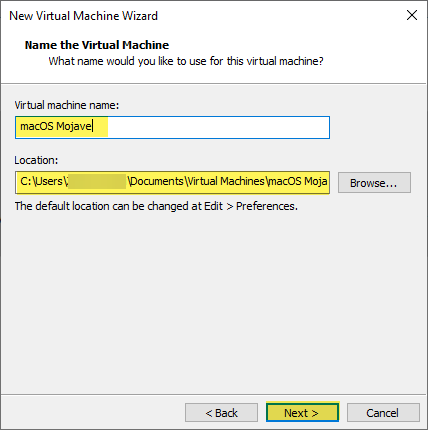
 Under the virtual machine “macOS Mojave” and specify the location and press next.
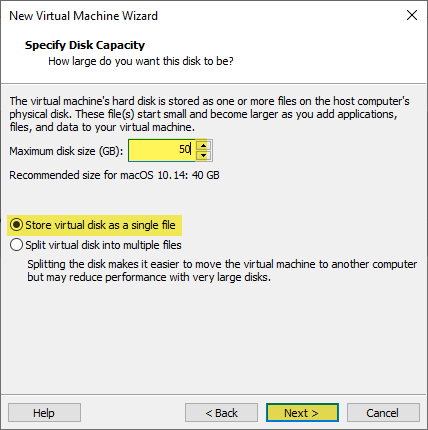
 Now manage the disk size for macOS Mojave installation, I think 50GB is enough. And select the option “Store virtual disk as a single file” and click next.
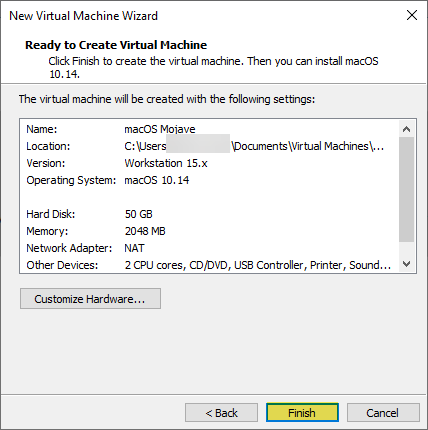
 Click Finish to create the virtual machine.
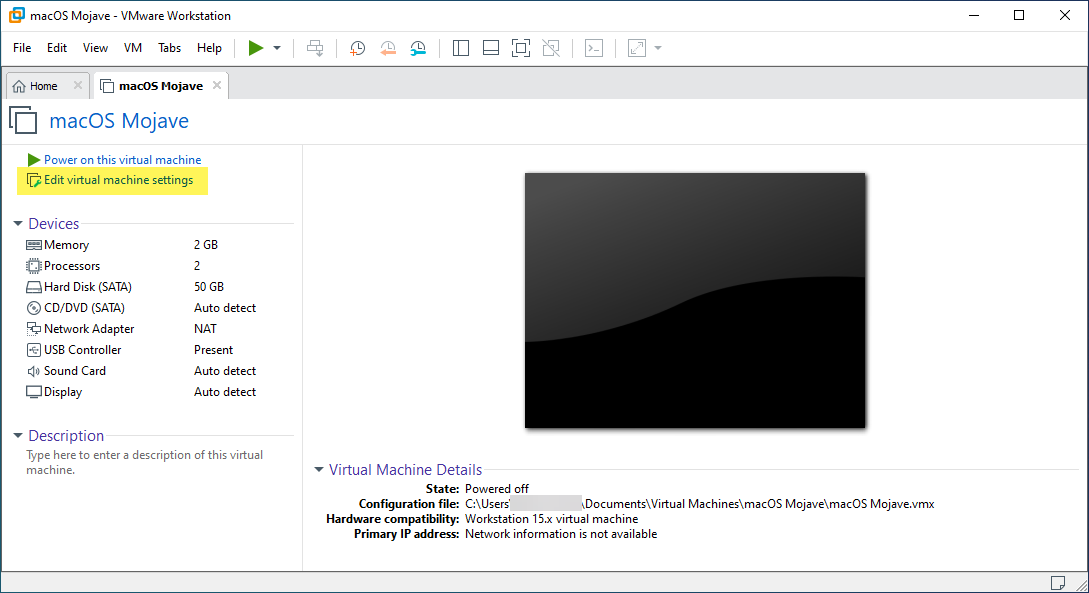
6. Edit Virtual Machine Settings
For better installation speed performance you need to edit some basic settings of the virtual machine. To do that, select the created virtual machine and click on its settings.
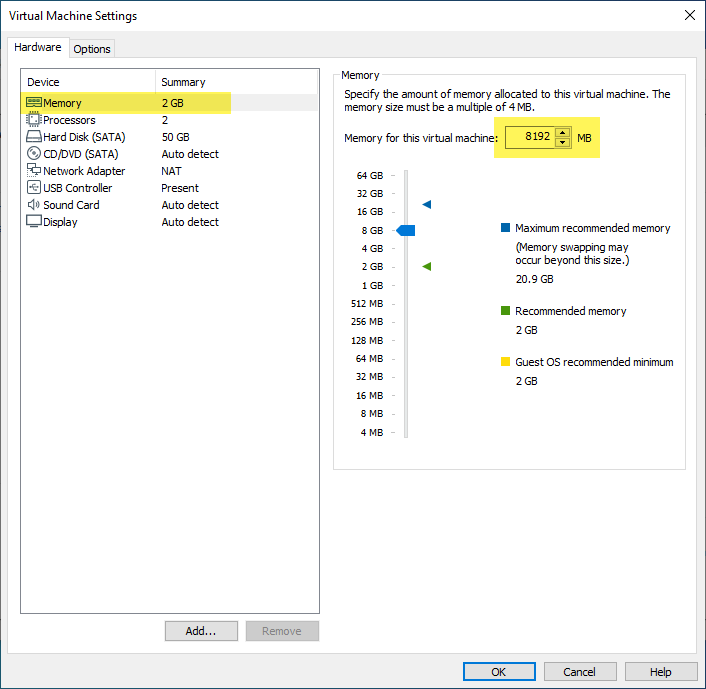
When its settings window opened from left-handed select the “Memory” tab then increase its size.
 Select the “Process” tab then increase the “Number of Processor” and “Number of Core Processor”.
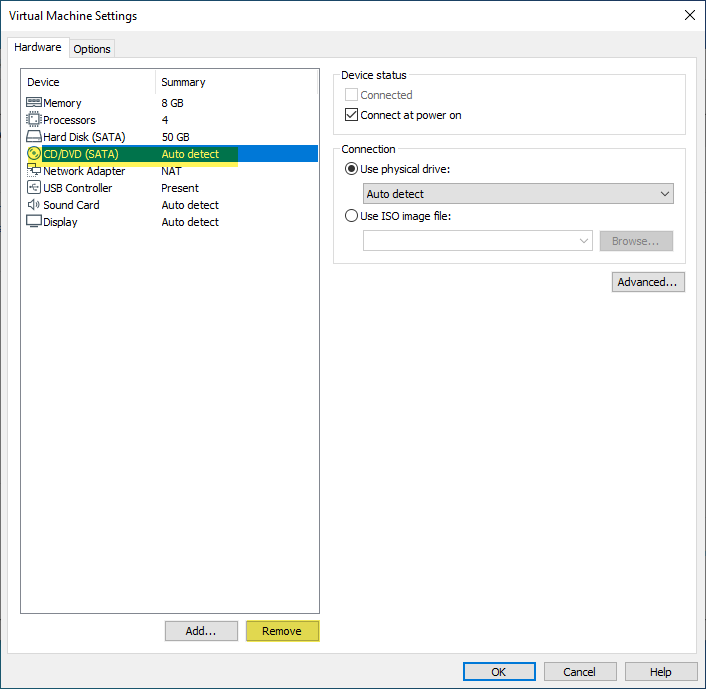
 For inserting macOS Mojave 10.14 VMDK file select the “CD/DVD (SATA)” tab, then click Remove option.
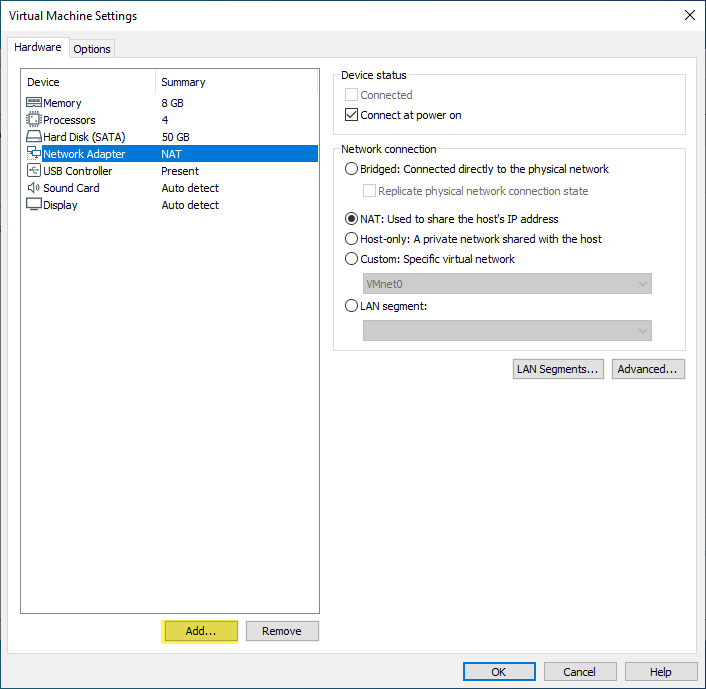
 Once the “CD/DVD (SATA)” tab removed from the list, again click “Add” from the bottom of the window.
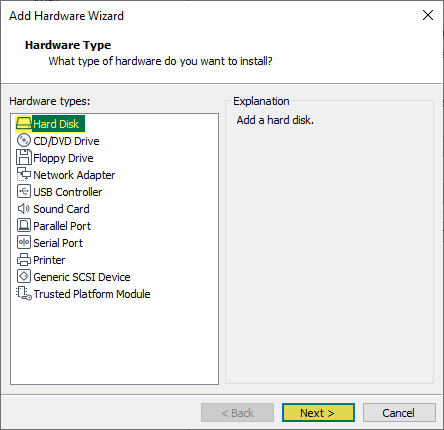
 Now select the “Hard Disk” for the “Hardware Type” and click next.
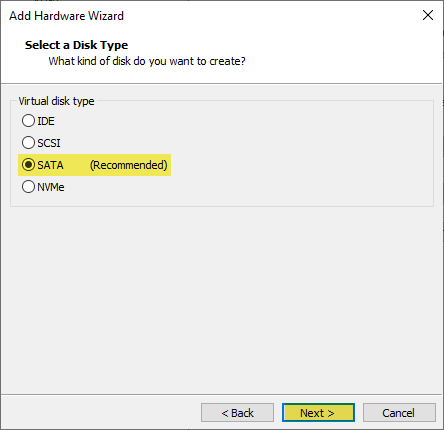
 Select the disk type “SATA (Recommended)” and press next.
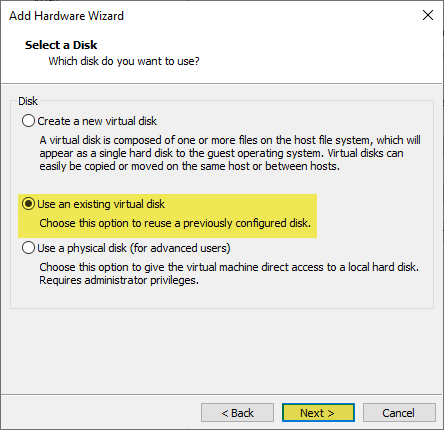
 Select the option “Use an existing virtual disk” for the disk type and click next.
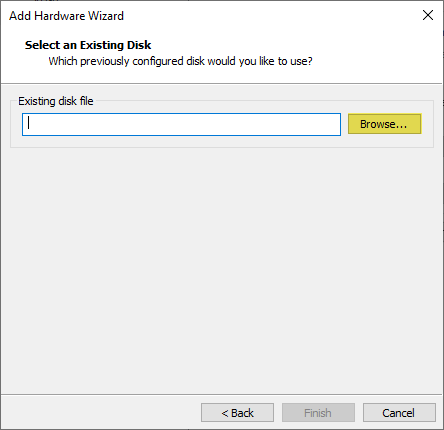
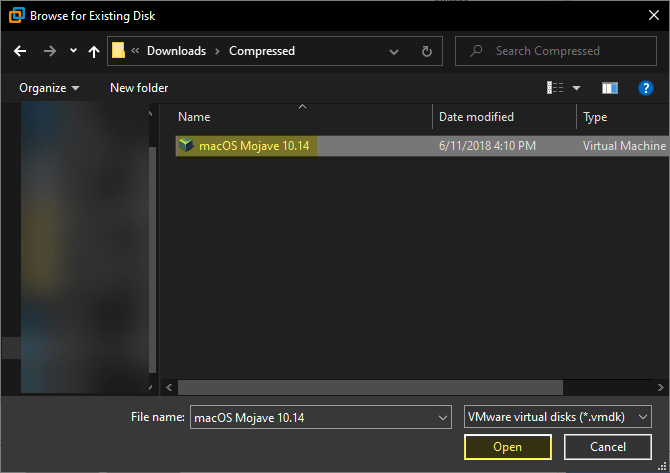
 When you reached to this window click on the “Browse” option.
 Now select the macOS Mojave 10.14 VMDK file and click open.
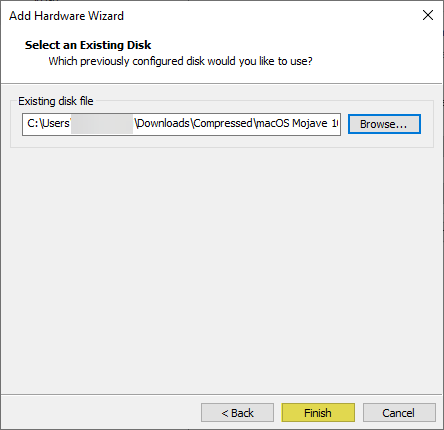
 Once the macOS Mojave 10.14 inserted click Finish.
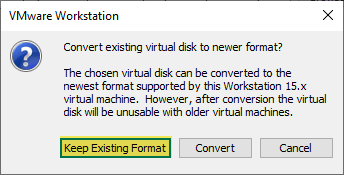
 Once you click finish then the VMware Workstation will pop up a question, that the existing virtual disk will convert to newer? for this option click on “Keep existing format”.
7. Edit VMX Code
While the macOS Mojave 10.14 VMDK file downloaded or created. And we installed the VMware Workstation, or install the macOS Unlocker tool to unlock the macOS service on VMware Workstation, and created a new virtual machine for macOS Mojave 10.14. And now its time to edit the VMX code for the current virtual machine. VMX file can be counted as the configuration of the virtual machine, during the installation of macOS Mojave 10.14 on VMware Workstation. Without this code I think you won’t be able to install macOS Mojave 10.14 on VMware Workstation or VMware Player.
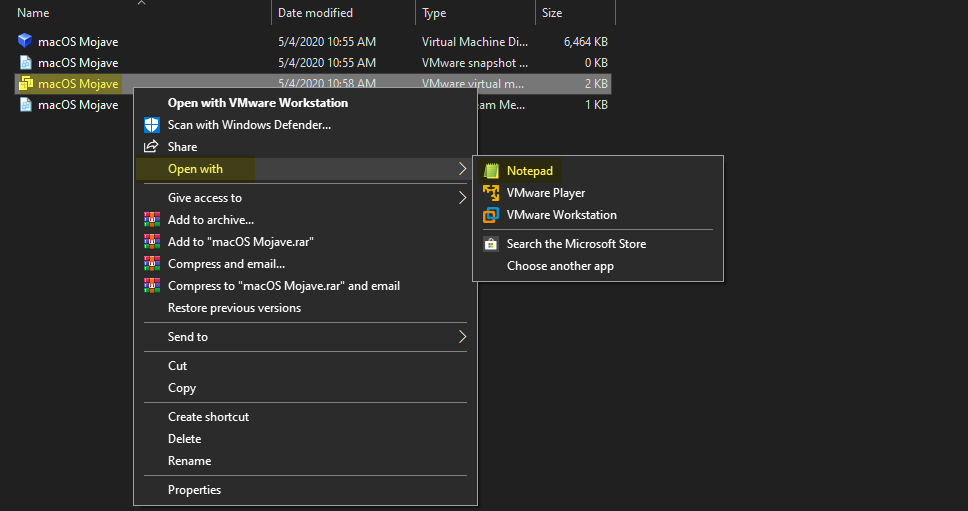
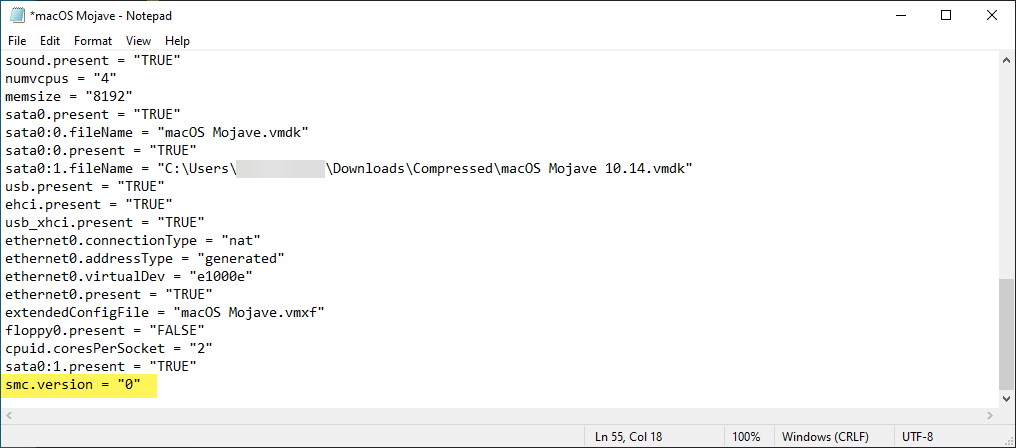
To edit the VMX file, open up the virtual machine folder. Usually, it will place in the “Documents” directory so over ahead there. So, when you find out the virtual machines folder and open up the macOS Mojave. Right-click on the VMX file and open it with Notepad.
When the VMX file opened with notepad, scroll down then type “Smc.version = “0” and press Ctrl+S to save changes.
8. Install macOS Mojave 10.14 on VMware on Windows PC
Finally, we come to the process of installing macOS Mojave 10.14 on VMware on Windows PC. Because everything is ready for a clean installation, first we created VMDK file, second, we installed VMware Workstation, third we unlock the macOS service on VMware Workstation, fourth we created a virtual machine, fifth we edit the settings of macOS Mojave 10.14 virtual machine, sixth we edit the VMX file. So, now its time to install it on VMware Workstation. Installation is pretty easy.
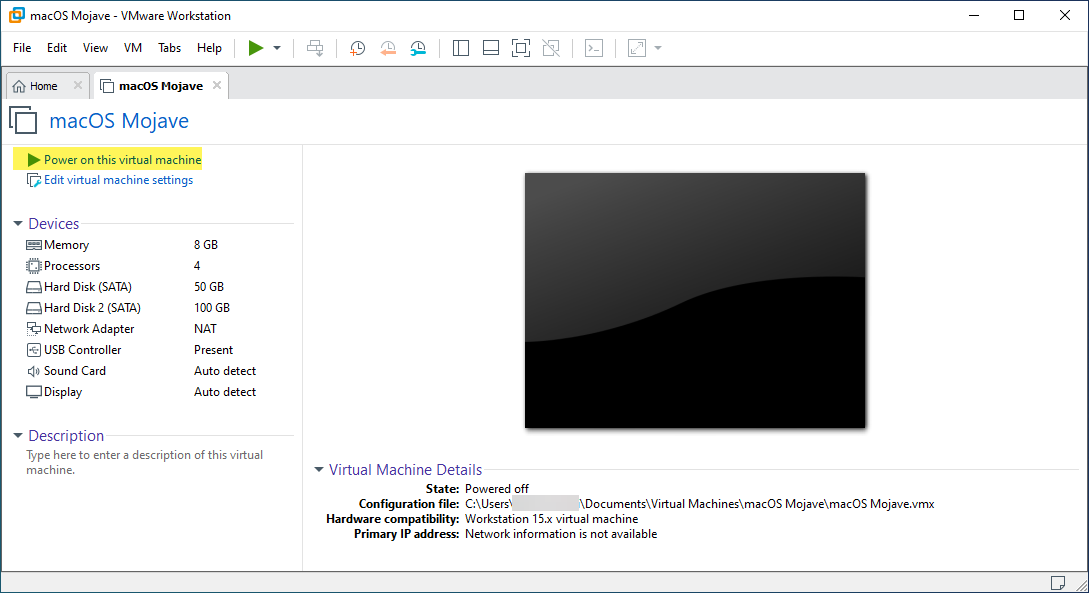
Open up the VMware Workstation, then select the created macOS Mojave 10.14 virtual machine and press the Start button.
 When you pressed the start button the installation will start, and Apple will come, wait for the Apple logo to go ahead.
 When the macOS Mojave 10.14 boot to installation, in the first screen select your “Country” and press continue.
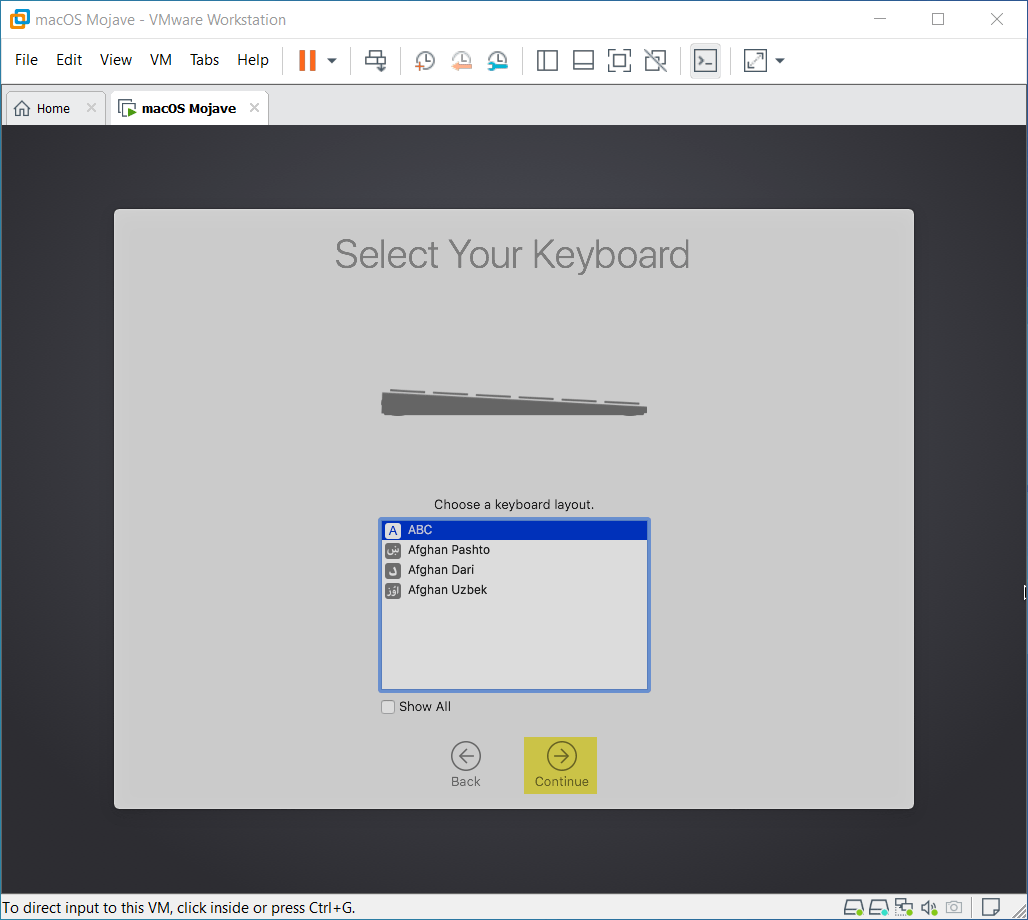
 On the next screen select your keyboard layout and press continue.
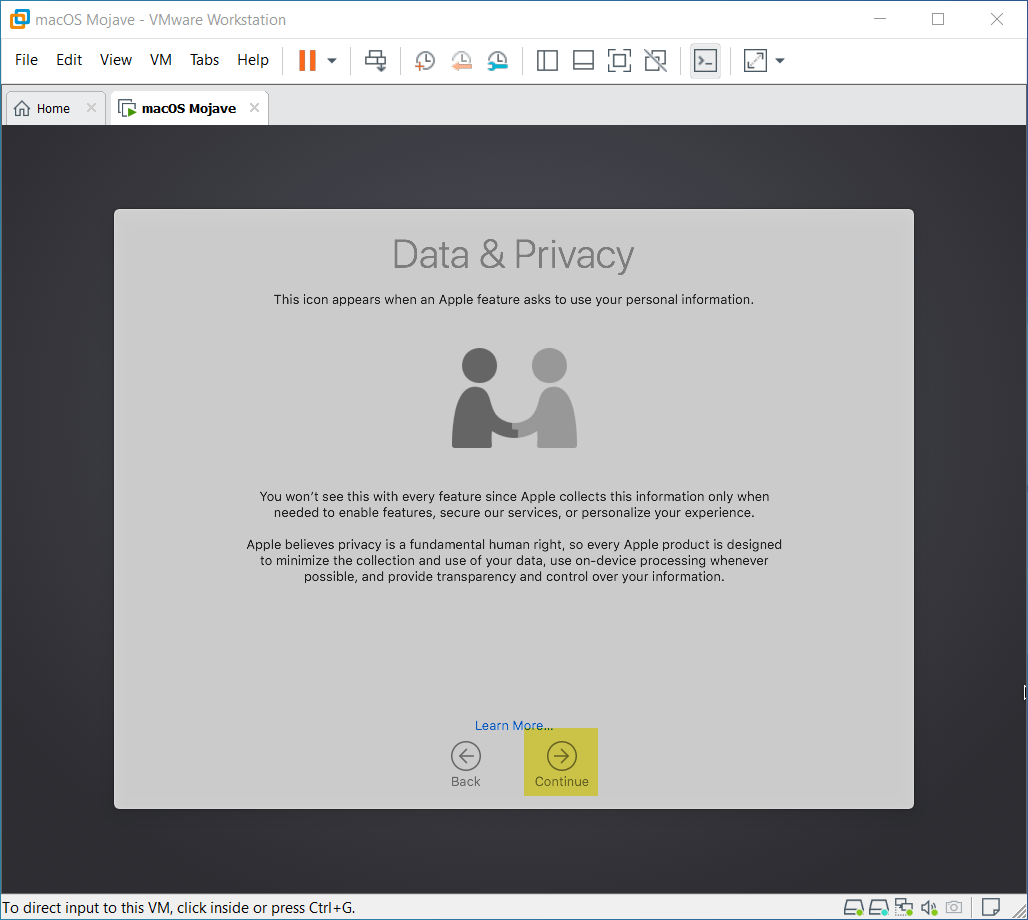
 On the “Data & Privacy” window simply click continue.
 Select the option “Don’t transfer any information right now” and click continue.
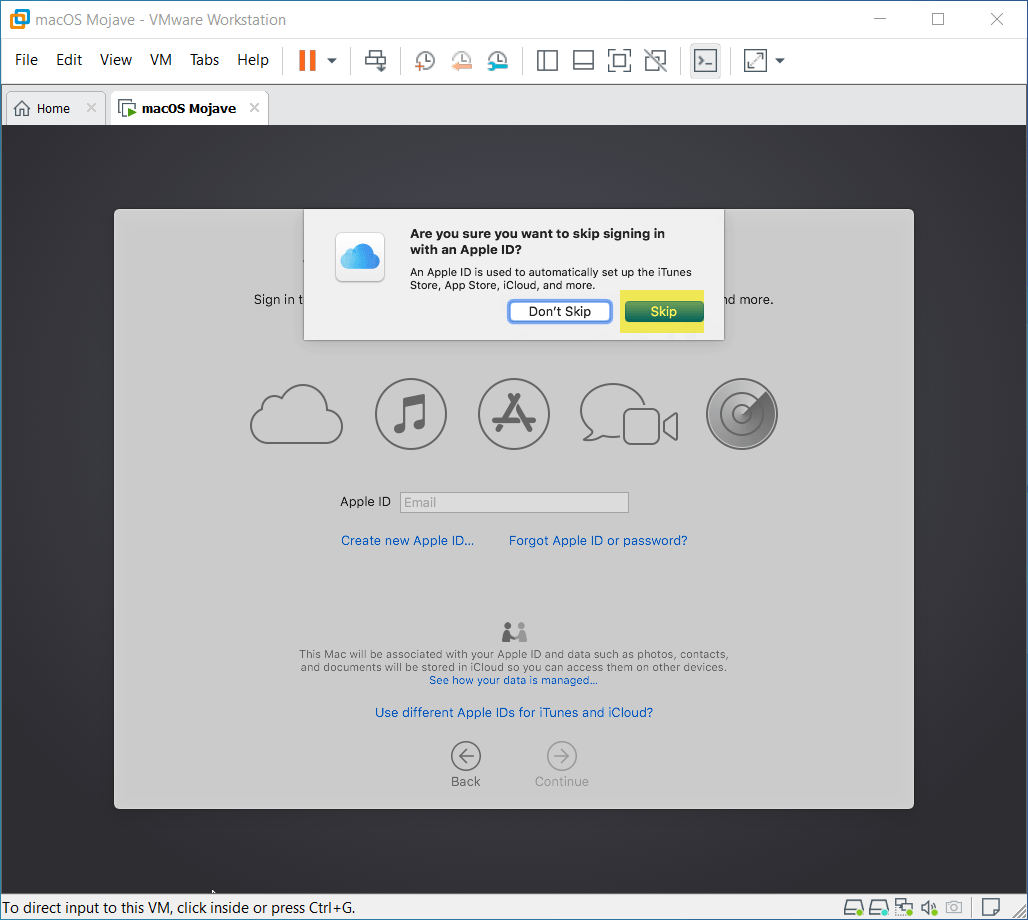
 Now if you have any Apple ID so enter it, if not click on the “Sign in Later” option and click “Skip”.
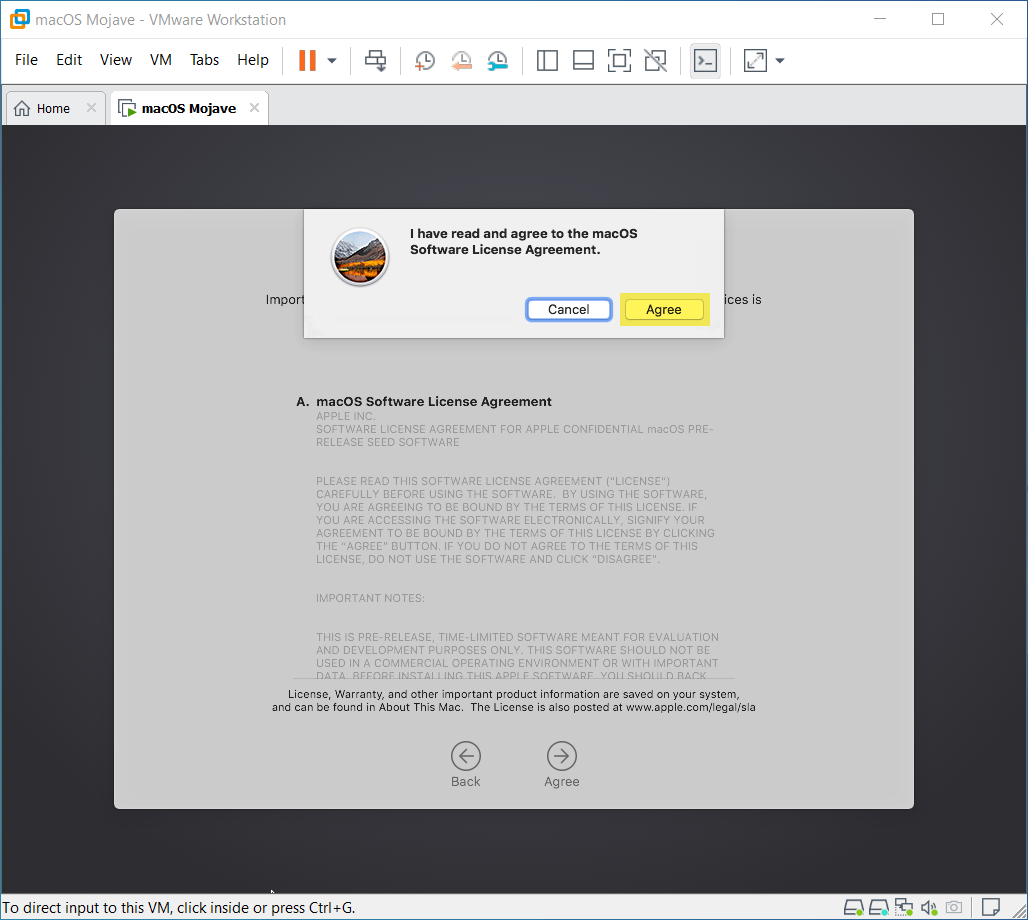
 Agree with license agreement of macOS Mojave 10.14 and press Agree.
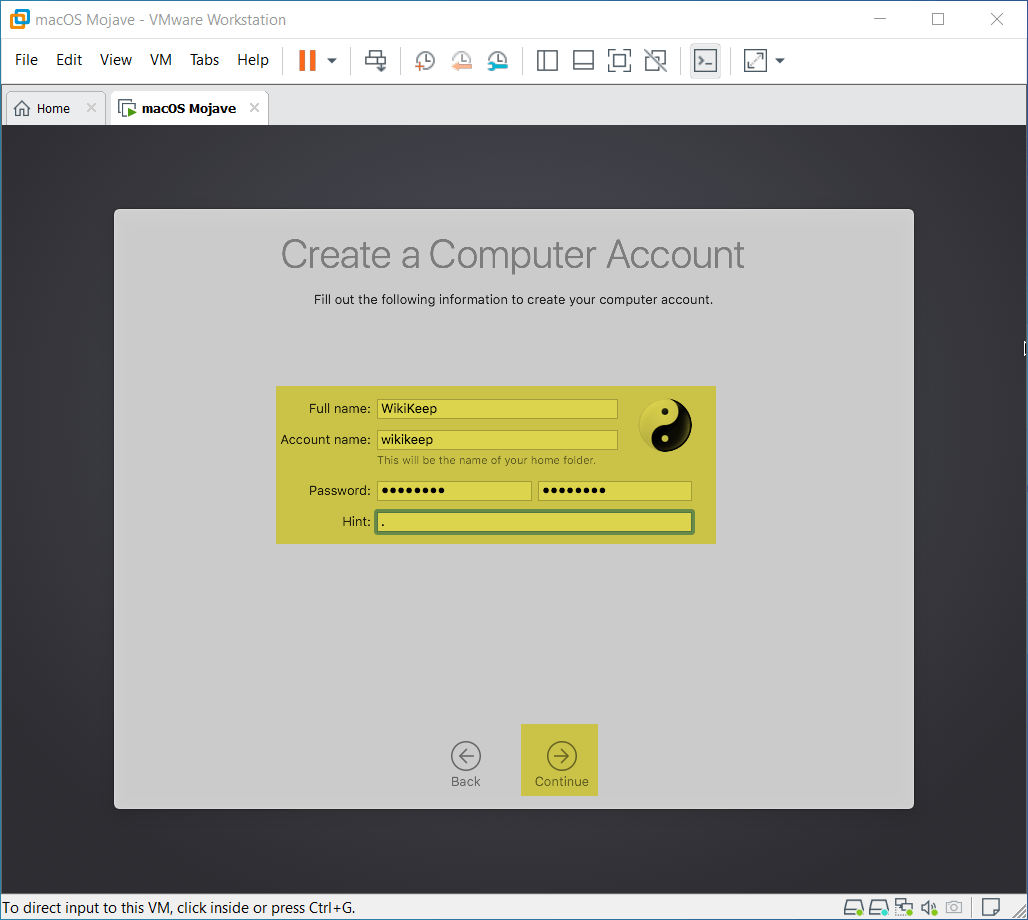
 And now create a computer account by full filling the Full Name, Account Name, Password, and Hint then click continue.
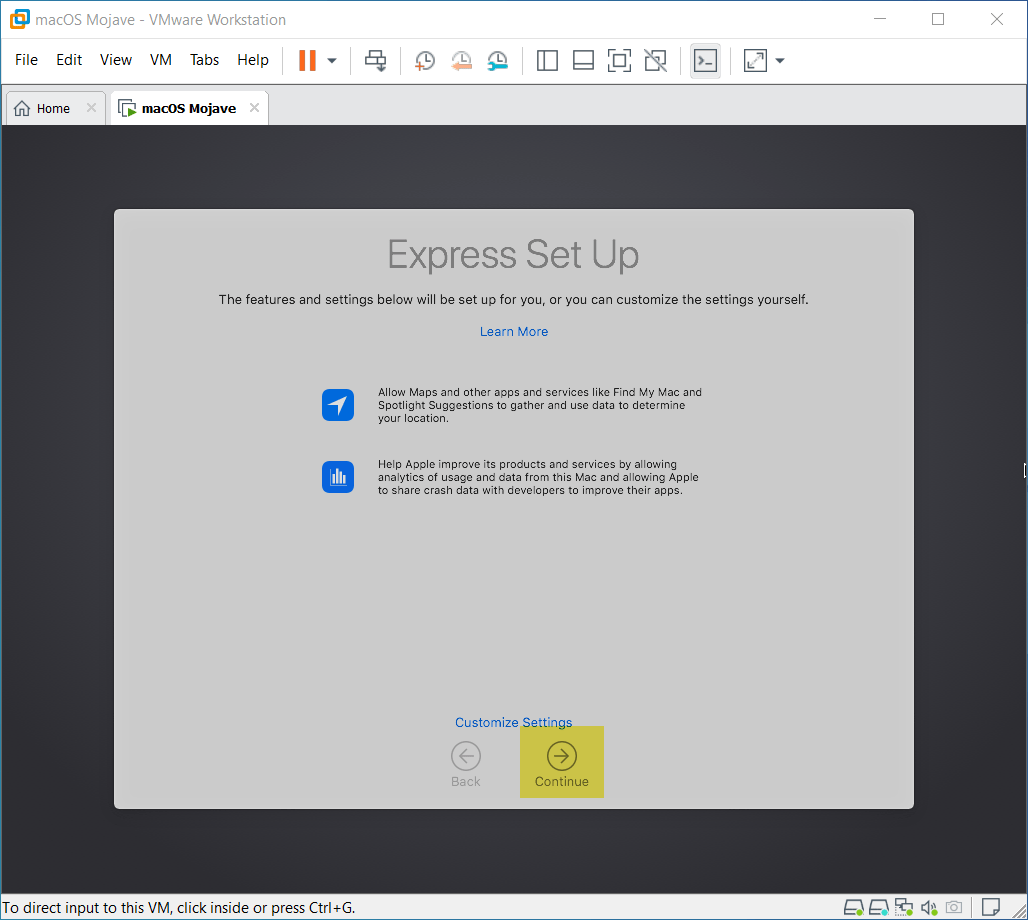
 In the express set up window don’t do anything simply press continue.
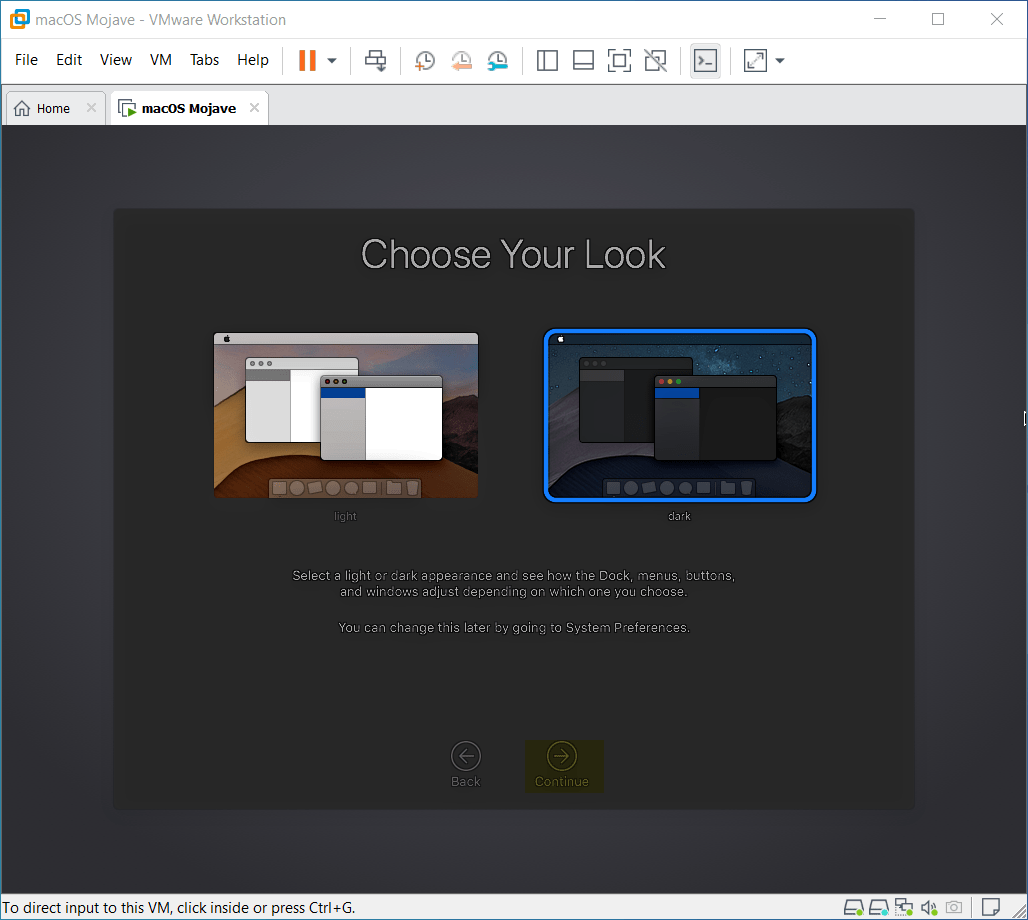
 It’s the time to select your macOS Mojave 10.14 look, once you selected the look click continue.
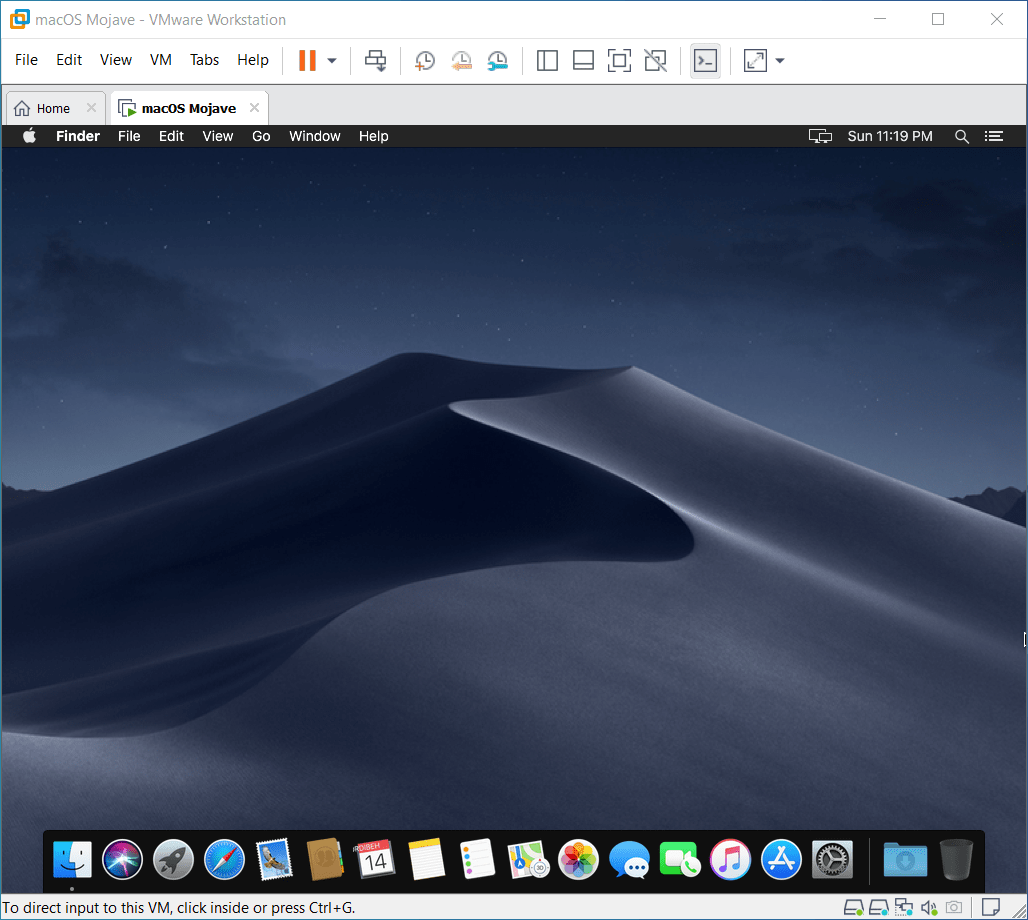
 Finally, macOS Mojave 10.14 successfully installed on VMware Workstation on Windows PC. Now go ahead and enjoy using it on your Windows PC.
- How to Install macOS Catalina 10.15 on VirtualBox on Windows PC
- How to Install macOS Catalina 10.15 on VMware on Windows PC
7. Use Full Screen of macOS Mojave 10.14 on VMware Workstation
When everything gets ready, then don’t be frustrated because there is a way to use macOS Mojave 10.14 full screen on VMware Workstation. To use the full screen of macOS Mojave 10.14 you need to install the “VMware Tool”.
- Insert the VMware tool to macOS Mojave 10.14
- When you inserted its setup will appear on the macOS Mojave desktop. To install it double-click to open its setup.
- During the installation you will face the issue “System Extension Blocked”, so click on “Open System Preference”. When the preferences window opened click “Allow”.
- Once the installation completed click the restart button.
- When coming back to macOS Mojave 10.14 screen you will see a full screen of macOS Mojave with a full size of 128MB.