
Windows 10 is one of the most popular operating systems among the other operating systems. After Windows 8.1 Windows 10 has become of the most useful operating system, that currently installed over millions of devices. However, through this guide, I will walk you on how to turn on automatic backup on Windows 10. Turning or creating an auto backup on Windows 10 is the biggest strategies that keep safe or protect your important documents on Windows. The documents such as Photos, Videos, and other files. Backup can protect your Windows 10 files from viruses, against software problems. If you back up your files it means all those stuffs is now safe from hacker attacks, viruses, malware.
Besides the internal tool which is already built-in Windows 10. Several tools allow you to create a full backup of your files on Windows 10. A full backup means that Windows is creating a full backup of your every files such as, installation files, settings, Apps.
Turn on automatic backup on Windows 10
1. Configure auto Backup
Before going to turn Windows 10 auto-backup you need some important settings to be configured in Windows 10. On the other hand, with the upcoming Windows 10 update I think the backup tool will not be available. But, still you can configure and use it for your talking backup of your files.
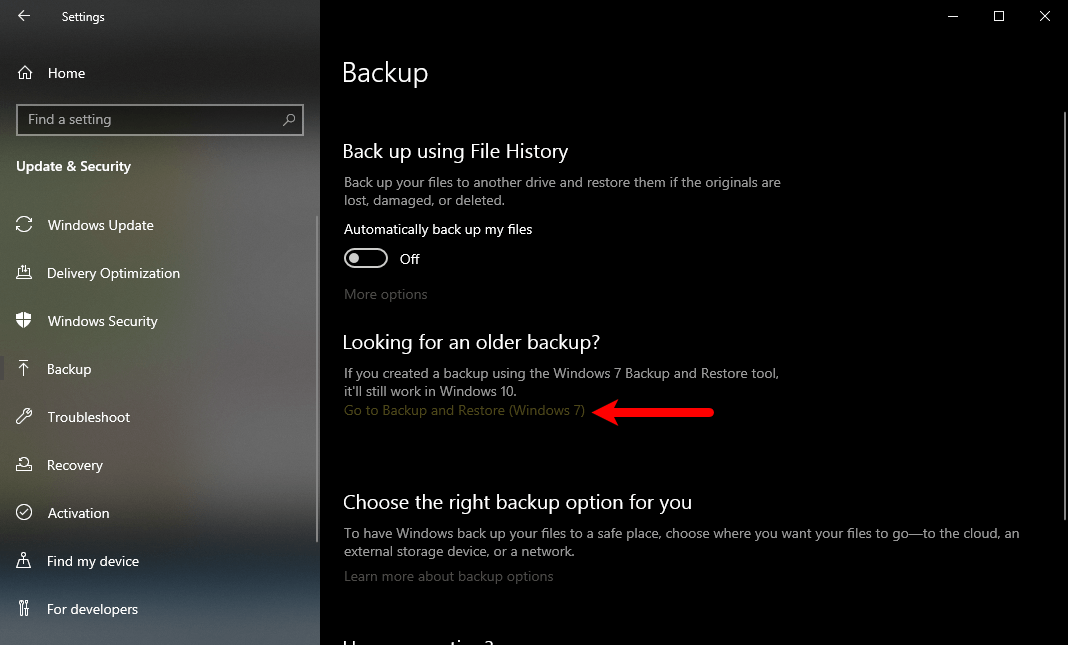
To configure the auto backup on Windows 10, navigate to Windows 10 start menu and click on Setting (Gear icon). When the setting window opened click on “Update & Security”, in the update & security click on left-handed on (Backup) option. And under the (Looking for an older backup) option, click on (Go to Backup & Restore).
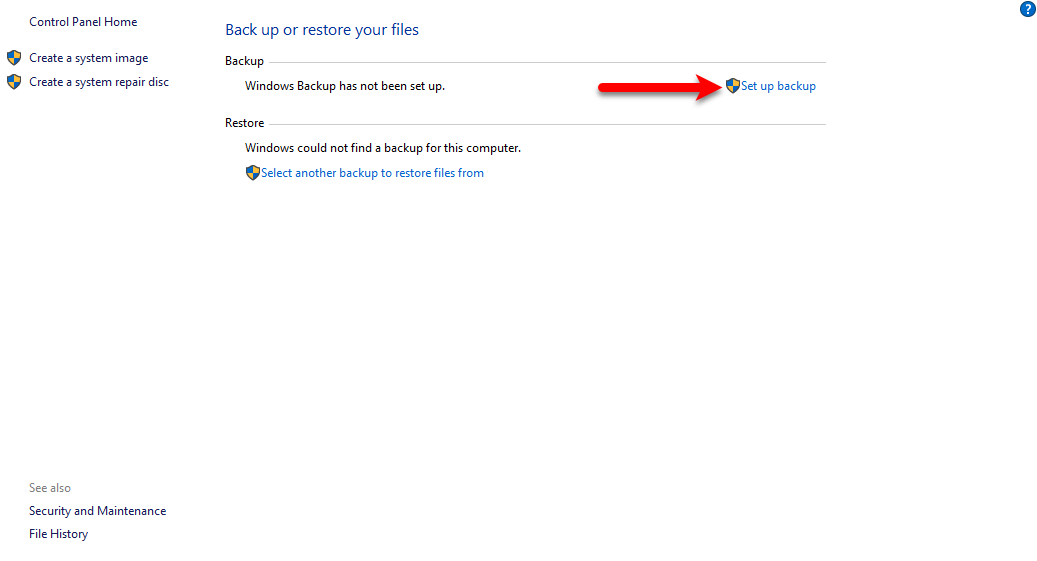
On the Backup option, click on (Set up Backup)
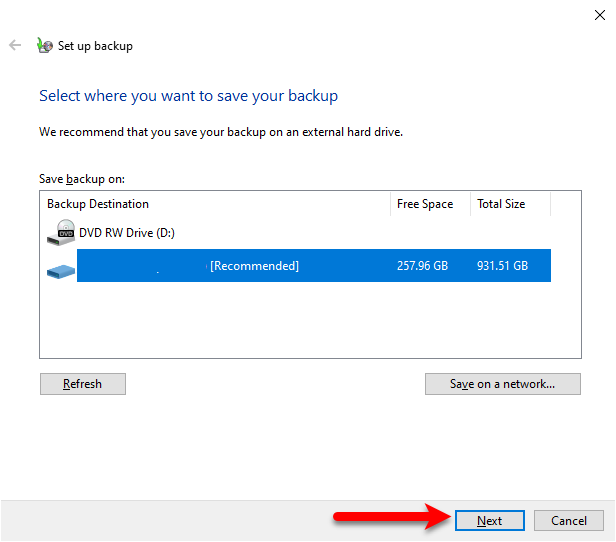
Also, you need an external drive to take backup. Therefore, insert any removable drive for auto backups, and click next.
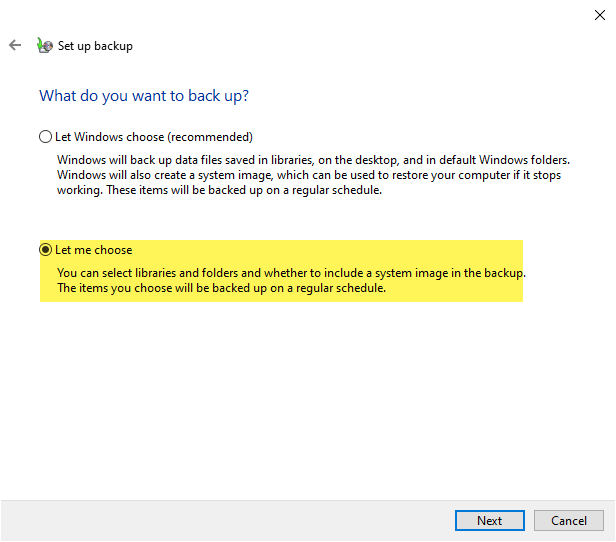
When the other window opened, you will see there two different options. Therefore, there are two different methods of backup from the Windows side.
- Let Windows choose (Recommended). Windows will backup data files saved in libraries, on the desktop, and in default Windows folder. Windows will also create a system image, which can be used to restore your computer if it stops working. These items will be backed up on a regular schedule.
- Let me choose, you can select libraries and folders and whether to include a system image in the backup. The items you can choose will be backed up on a regular schedule.
From these two options you can select any of them, but the for being sure that you backed up everything. Select the second option (Let me choose), then click Next.
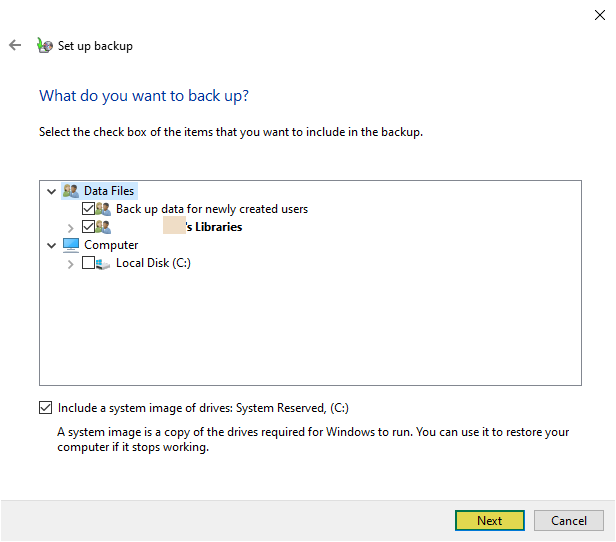
In this step, you need to check the box which you want to include in the list of Backup. Therefore, under the (Data Files) check all the boxes, and under the (Computer) check the box of “Computer”. Also, tick mark the option (Include the system image of drives; system reserved, (C) then click next.
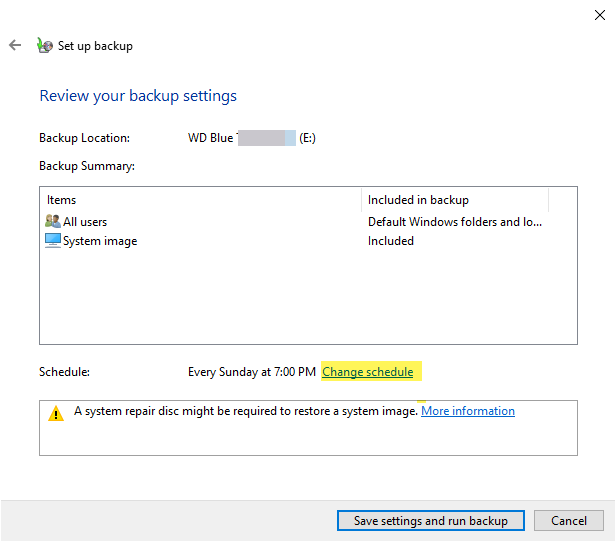
For a proper backup you need to change the schedule of backup on Windows, so for that click on (Change Schedule).
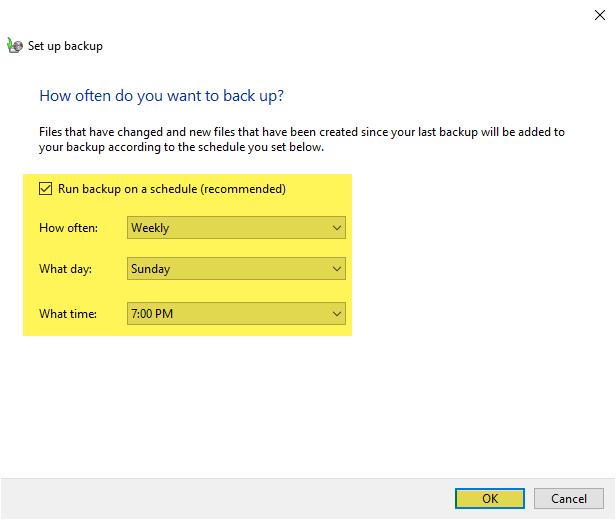
Check the box of the (Run back up a schedule (Recommended), manage the often, day, and time that when Windows 10 should take backup of files. Once everything gets ready then click OK option.
When you configured all those options on the Windows 10 backup tool. Manually Windows 10 automatically creates a backup of your files.
2. Manage Windows 10 Backup settings
After that, you configured the automatic backup on Windows 10. Then you can manage the backup settings such as date and time. Or you can change the location where you want to take the backup.
- To do that navigate to Windows 10 start menu, and click on setting icon.
- When setting opened click on Update & Security.
- From left-handed click on (Backup) option, below the (Looking for an older option), click on (Go to backup & Restore).
- You will see the automatic backup which was configured by you. So, there click on (Manage Space).
- On the (Data File Backup) section click on (View Backup) option.
- Select the oldest backup.
- Once selected click the delete option
- At last click close
- On the (System image) section, click on (Change settings).
- Now choose the option (Keep only the latest system image and minimize space used by backup) option.
- At the end click OK option, click Delete, and click Close.
When you managed Windows 10 backup settings, it means the old files are deleted. After this the latest files will replace on your drive. In case, you faced the low space you can update your drive to more storage.
That’s it if you faced any kind of problem you can use the comment section for sharing your problem.