Microsoft given the “Ultimate Performance” in the Windows 10 build number 1809. In fact, this option will help the user a little to boost up the Windows overall performance. The ultimate performance has designed on the behalf of High-Performance in order to increase the Windows performance more and more. Ultimate performance is counted as a part of the power plan in Windows 10 or the old version of the Windows operating system. This option is only working for Windows 10 which is preinstalled on any laptop, and can’t work on any desktop version.
What is Ultimate Performance? The ultimate performance power plane is designed to boost up the performance of the Windows 10 operating system on your computer by optimizing the high-performance power plan. The ultimate performance will help you to decrease the slow performance on your computer. There are piece of hardware that requires more power, that called Micro-latency. Micro-Latency is a part that slight between your OS and hardware equipment that aware of how much it deliver power.
The Ultimate performance plans eliminate the hardware on your computer, that it needs more power, automatically it will decrease the power needs. On the other hand, if any other power-saving features are disabled it will help to improve the performance. Because this option is disabled on the Windows 10 operating system, also, it will increase the battery to spend the charge more faster.
Enable Ultimate Performance Mode in Windows 10
If you are a professional gamer then of course you require more battery charge in order to play the game more and more. Therefore, here we are going to enable the Ultimate performance Power plan on Windows 10. Enabling ultimate performance on Windows 10 will help you to boost up the every operating system part performance more better. After enabling the ultimate performance, while playing game it will desperate the power among the hardware around you to play better with better performance. After changing the power plan you might face the performance after the startup or boost up the couple of frame rates per second. If you are an editor or 3D designer then enabling this option is a must for you.
This is an important notice for every Windows 10 operating system users to enable the Ultimate Performance on their PCs. Enabling this feature on Windows 10 will increase the amount of power that you consume. Or sometimes it require to plug the charger to your laptop all the time.
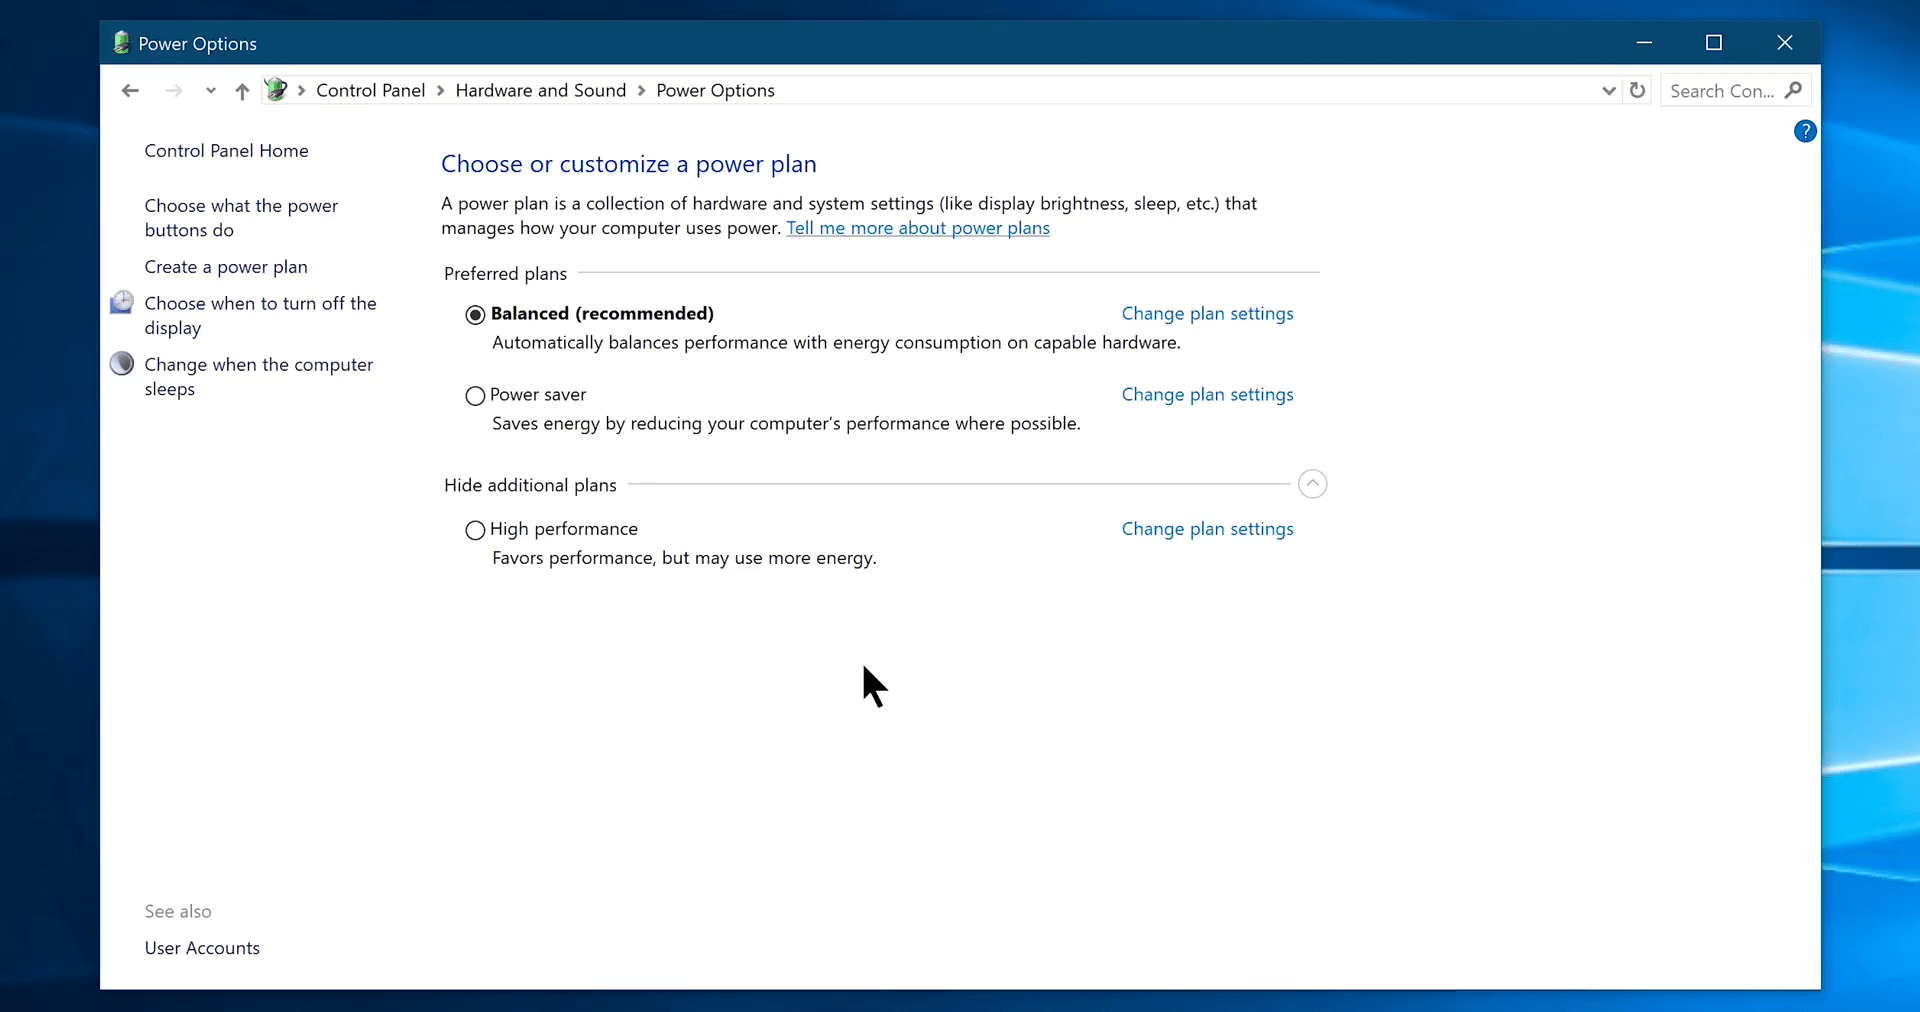
Differences Between Power Plan
- Balanced: Automatically balances the performance with energy consumption on capable hardware.
- Power Saver: Saves energy by reducing your computer’s performance where possible.
- High Performance: Favors performance, but may use more energy.
- Ultimate Performance: Provides ultimate performance on higher-end PCs.
Enable Ultimate Performance Power Plan
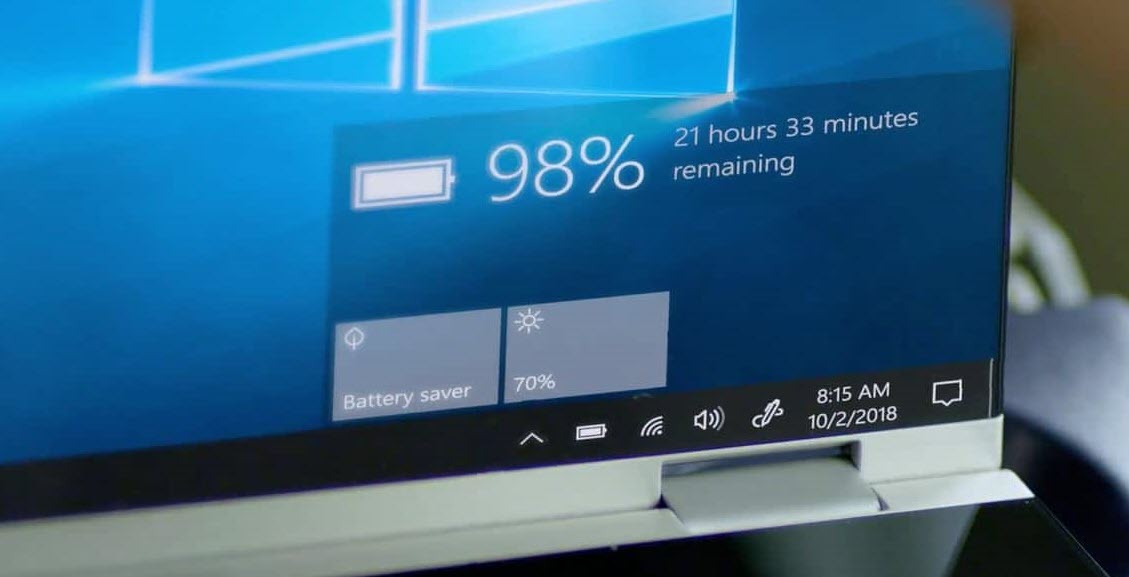
To check the Ultimate performance option, head over to right-handed fav icons and click on the battery icon to open up the pop line window.
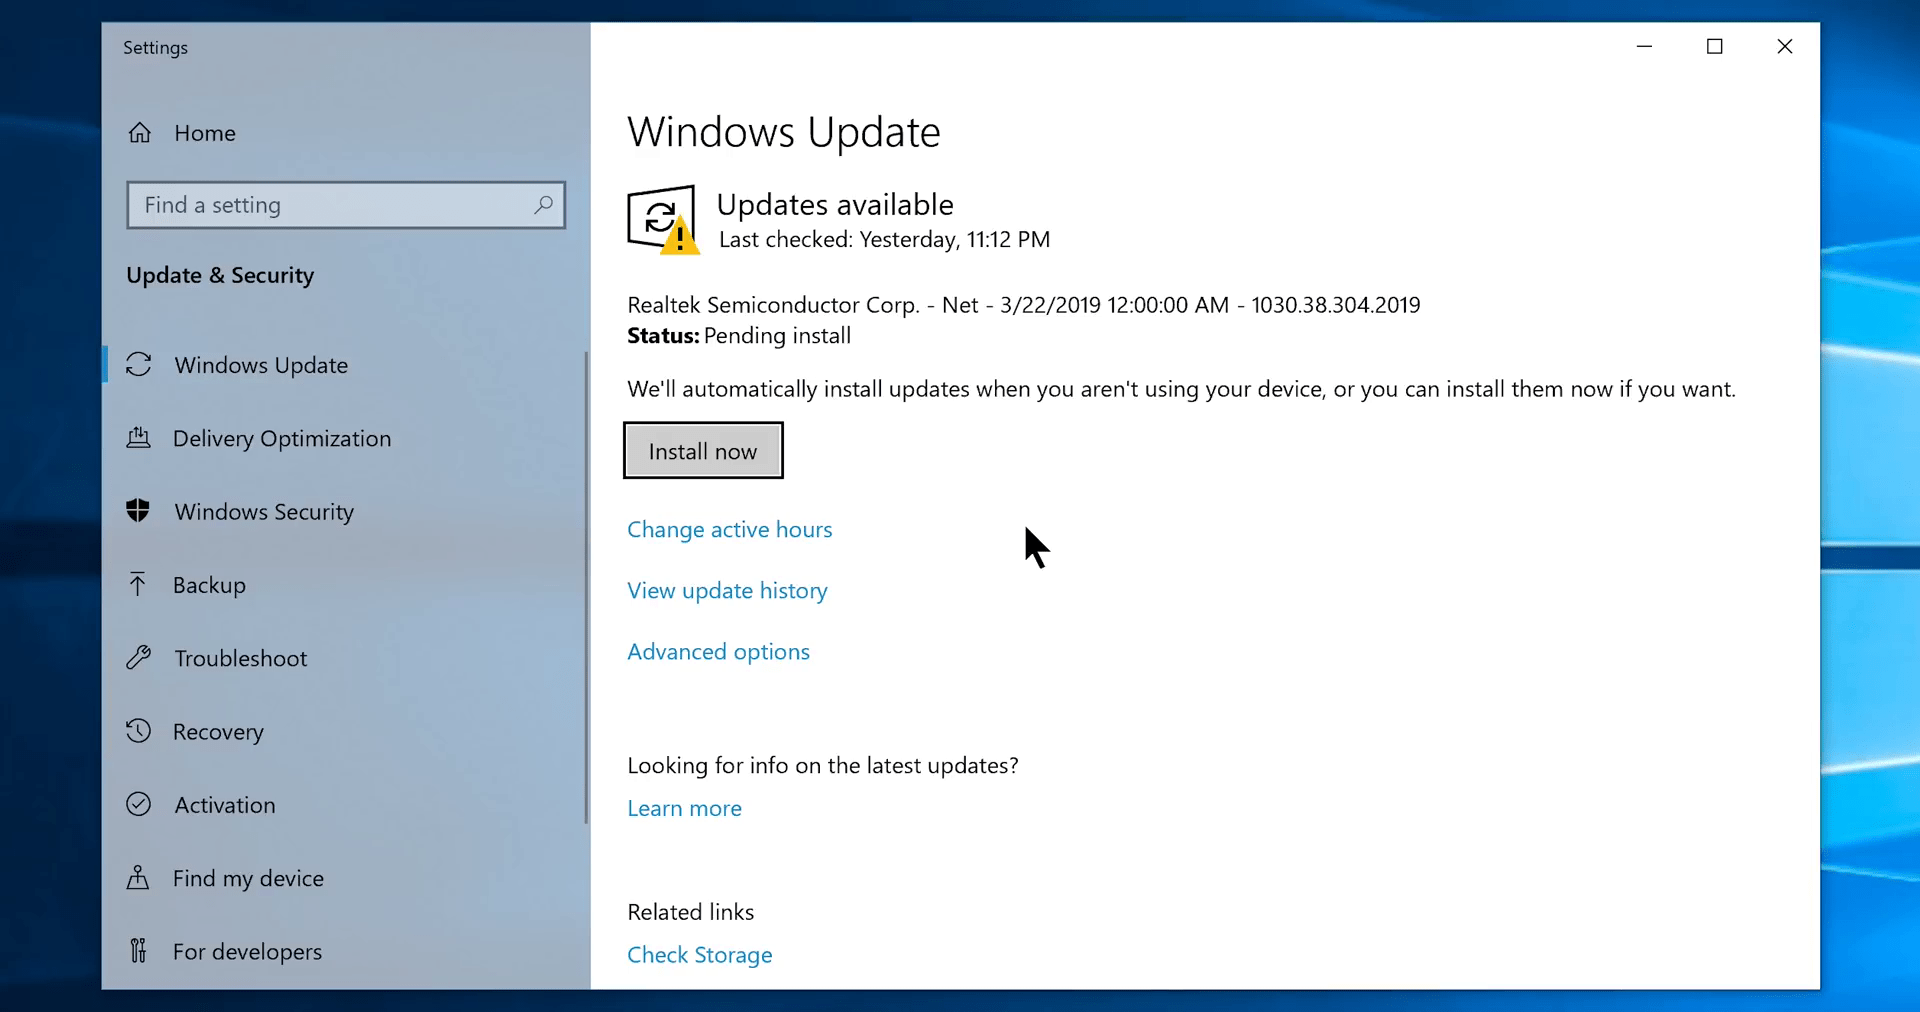
As you checked in the above screenshot that the Ultimate performance is not available there. Before getting to the point you need to check that your Windows 10 is up to date. If that is not updated make sure to update it to the latest version. To do that, navigate to Windows 10 start menu click on the setting gear icon. Once that opened click on the Update & Security option, and check for the update.
What to do if the Ultimate Performance Power Plan is not available in the Pop-Line.
Mostly as I wanted to enable the Ultimate Performance power plan on Windows 10, then I faced that is not available in the pop-line. After researching on the internet I figure out the solution on how to enable it. Usually, high-performance is available in the pop-line window, but mostly the Ultimate performance is not available there. And this can happen on the laptops, desktops, to make the ultimate performance available in the setting app. You need to run a small piece of command in the Powershell command prompt window.
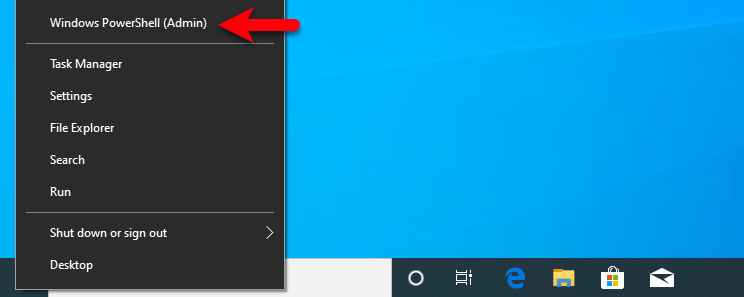
Also, you can apply the command for enabling the ultimate performance in the PowerShell, and “CMD” command prompt. That is simple, if you want to open the command prompt, navigate to Windows 10 start menu type there cmd right-click and run as administrator. Or to open the PowerShell simply right-click on Windows 10 start menu icon and click on “Windows Powershell”.
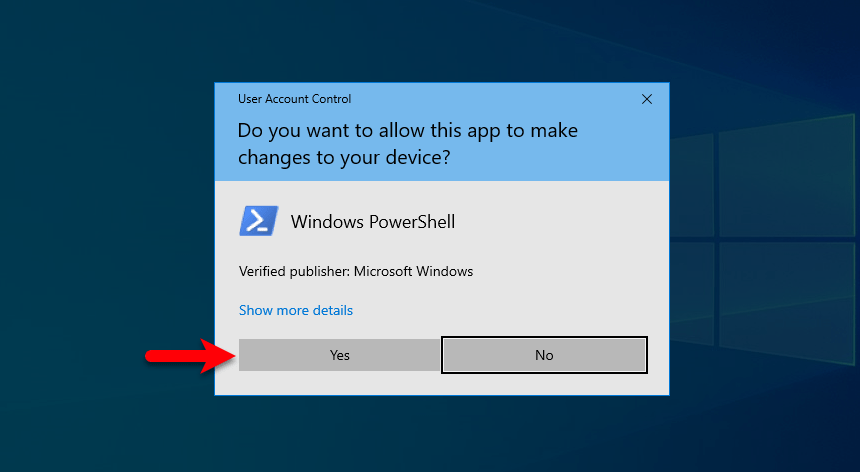
Once the below down window popped up click on Yes.
Once the PowerShell successfully launched apply the below commands and hit enter. After applying make sure that you got the Ultimate Performance notification.
powercfg -duplicatescheme e9a42b02-d5df-448d-aa00-03f14749eb61 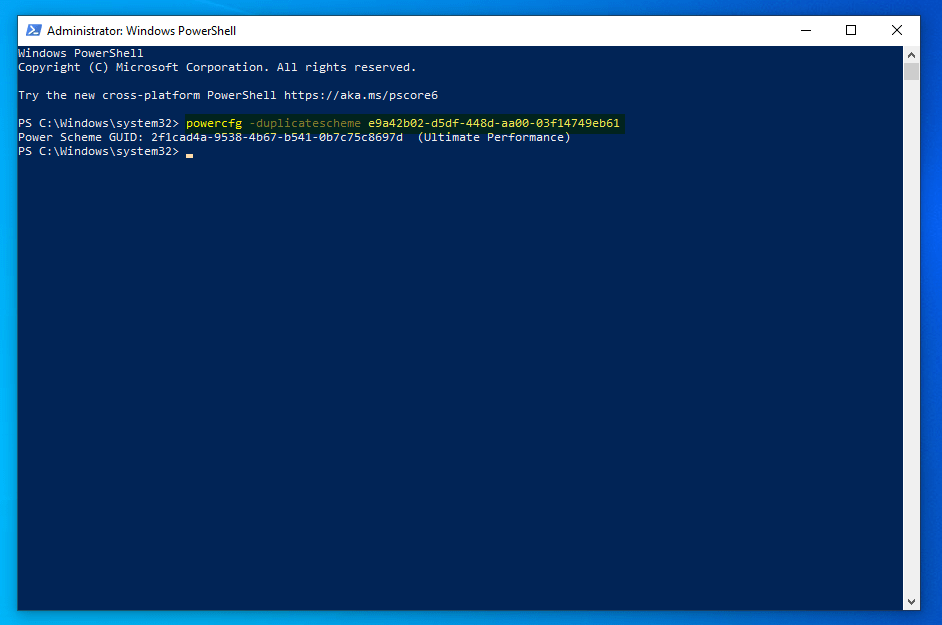
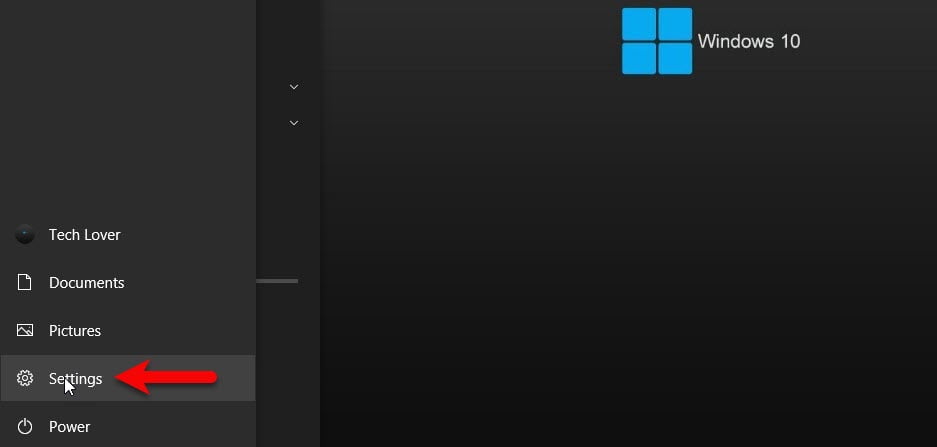
Once the commands succeed, navigate to Windows 10 start menu and click on the setting gear icon.
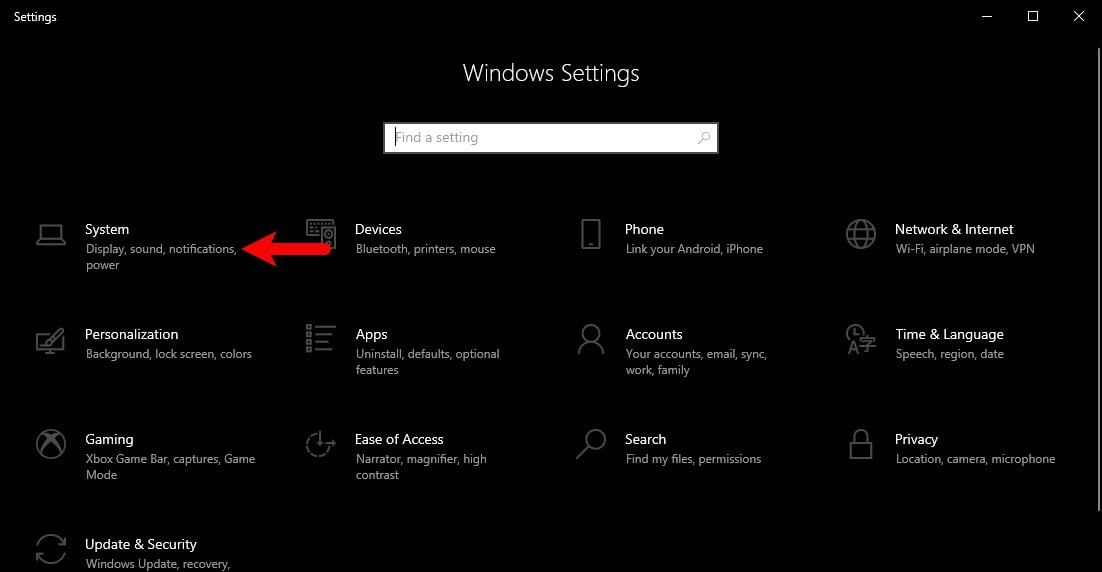
From the Windows setting window click on System option.
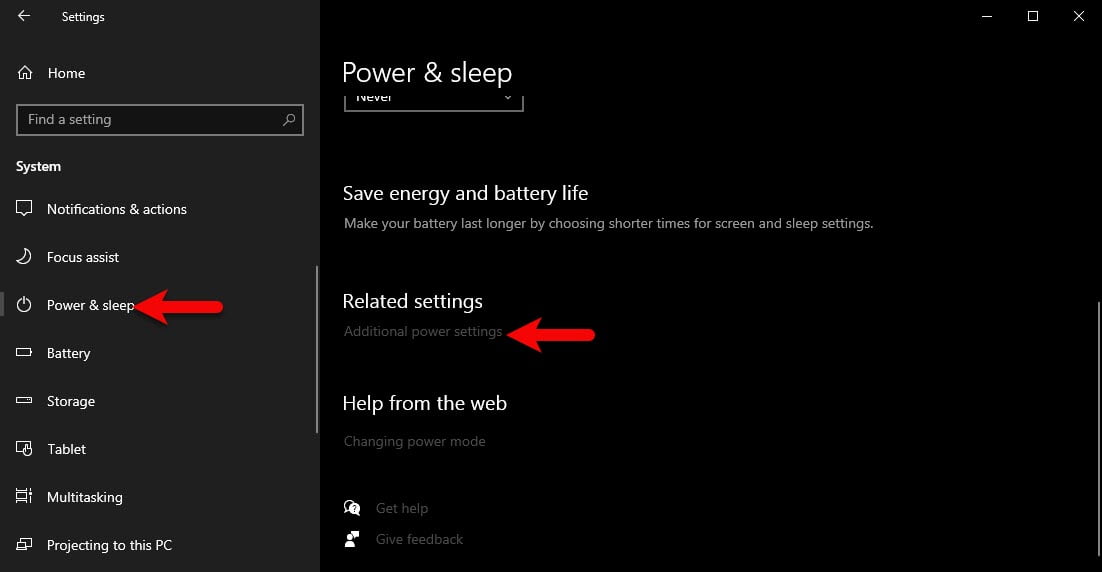
When the system window opened, from the left-handed window click on the “Power & Sleep” option. And from the Power & sleep scroll down under the Related settings option click on the “Additional Power settings” option.
Once the power plan window opened, select the Ultimate Performance option and close the window.

Related: