Windows 10 is the best operating system, but there some critical issues that can create a problem for you and for your files that make your system go slow down. The new version of the Windows 10 operating system update has a bunch of critical errors that can be harmful to your PC. Therefore, most of the users recommended to bypass or delete those temporary files which create lots of issues for them.
Windows 10 automatically create cache after downloading files from the internet, or installing any third-party applications. It can cause to make Windows 10 slower than the previous version of Windows. Indeed it can cover more storage and more memory RAM to work with, or high-performance CPU. Indeed facing less memory RAM or storage you will face less amount of them, and cause to take your PC to slow down.
For example, if you faced this problem using Google Chrome, Mozilla Firefox, or any other browser on your computer. After launching any harmful website or bunch of tabs at the same time, your browser will get stuck and can’t open any webpage. At that time it will make you compel to clear the cache of the browser. The same Windows, macOS, or any other operating system, or even mobile devices, can face the same problem. And the only solution to this problem is to clear all cache from the operating system or mobile devices. So, through this guide, I will explore how to clear all cache in Windows 10 on your PC.
Clear All Cache in Windows 10 on Your PC
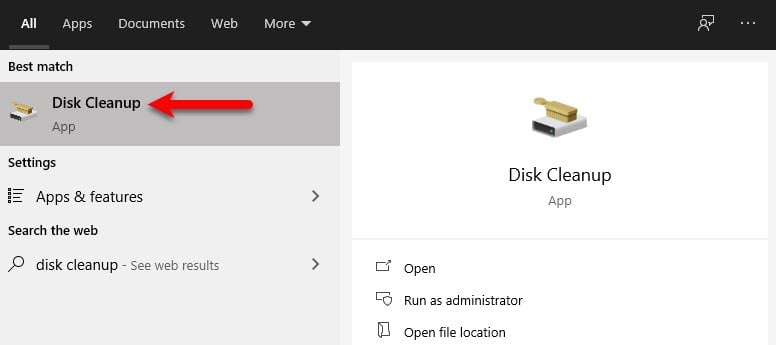
There are a bunch of temporary files which placed in your computer disk. To that, head over to the Windows 10 start menu type “Disk Cleanup”, once it appeared press enter to open.
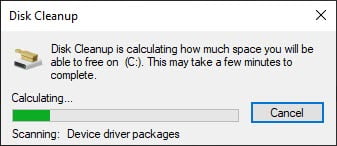
Once you opened the disk cleanup it will start calculating that how much your disk can free up from the C drive.

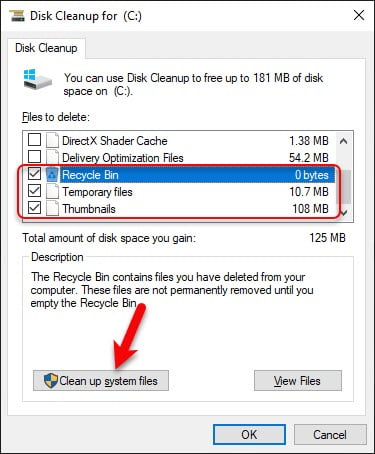
When the disk cleanup successfully launched, scroll down select the “Temporary, Recycle Bin, Thumbnails, Download”. Once you have selected the recommended options, click on “Clean up system files”.
After clicking on clean up system files, it will start calculating to clean up the files from your system drive.
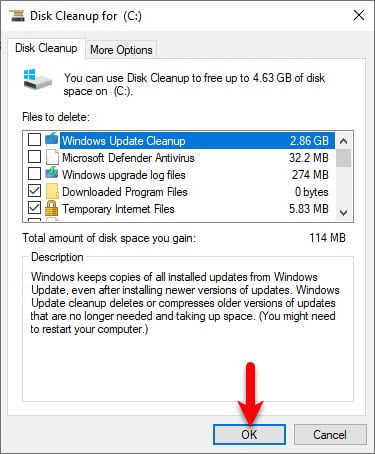
When the calculating completed, again the same page will come. Select all the previous options and click on OK.
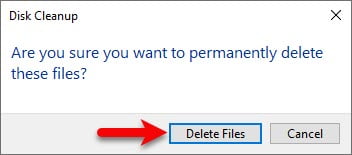
Now a warning will pop-up ask the permission, that you want to delete the files permanently, if yes click “Delete files”. And now all the necessary files successfully removed from your system drive, you could experience some betterment on Windows right now.
Clear DNS Cache
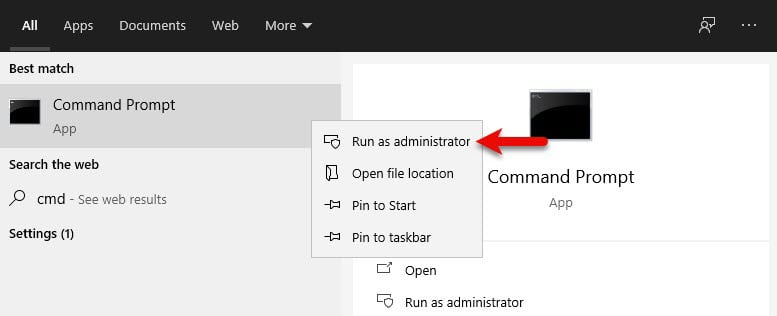
For cleaning the DNS cache on Windows 10 PC, head over to Windows 10 start menu type there “Command prompt”. Once the command prompt appeared right-click and “Run As Administrator”.
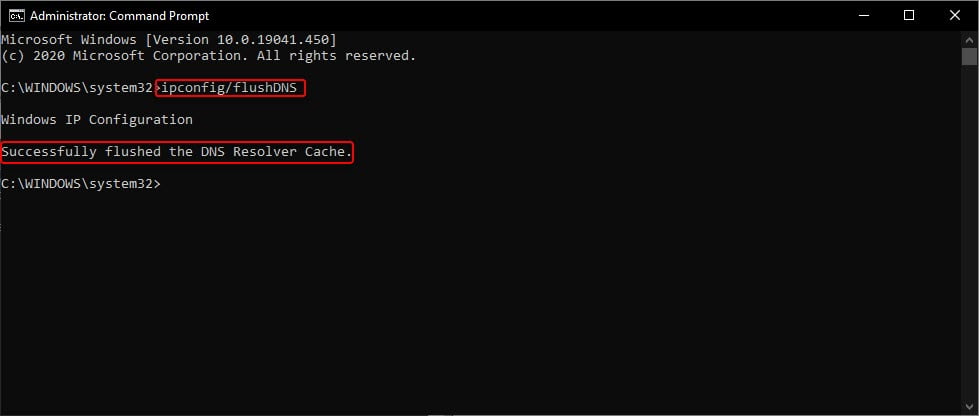
When the command prompt opened apply the below commands. After applying commands you will receive a message, the DNS successfully flushed the DNS resolver cache.
ipconfig/flushDNS
Clear Windows Store Cache
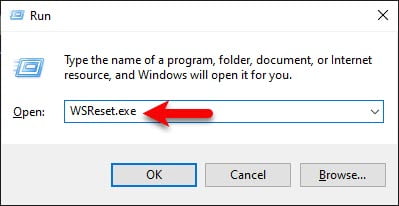
To clear the Windows store cache on your PC, press Windows+R to open the Run window. Once the Run window opened type “WSReset.exe”, then press enter to open another window.
After pressing the enter key, another black screen will open wait there. And there is nothing you have to do, itself will clear all the cache. After clearing the cache automatically the black screen will be closed.

Clear Location Cache on Windows
To clear the location cache on Windows 10, head over to the Windows start menu and click on the setting gear icon.

When the setting window opened, click on the “Privacy” option.
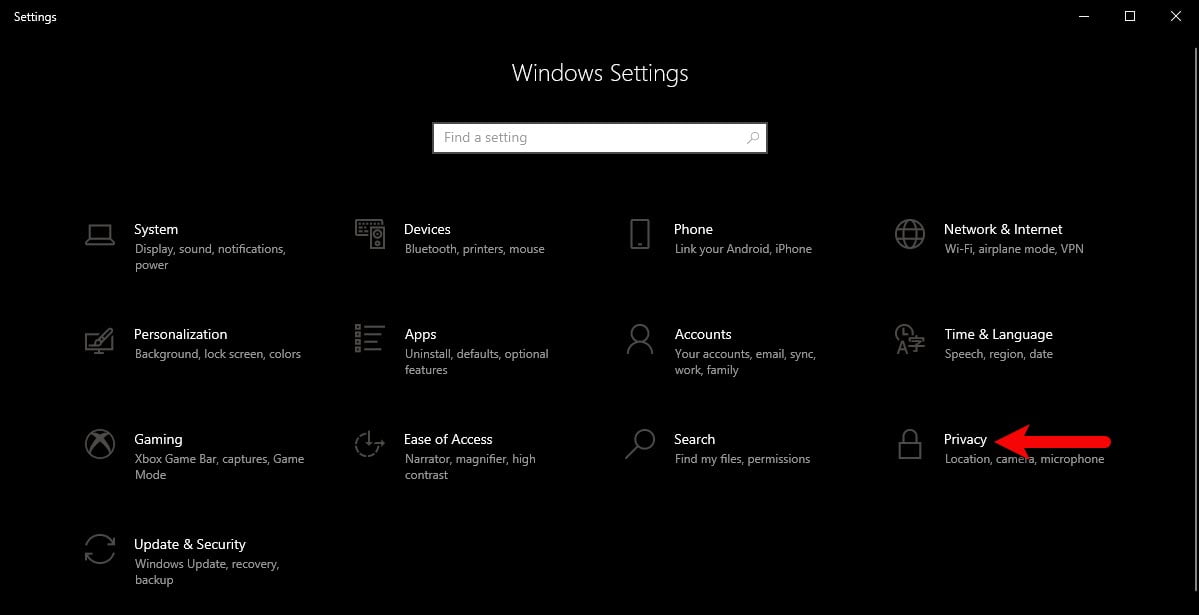
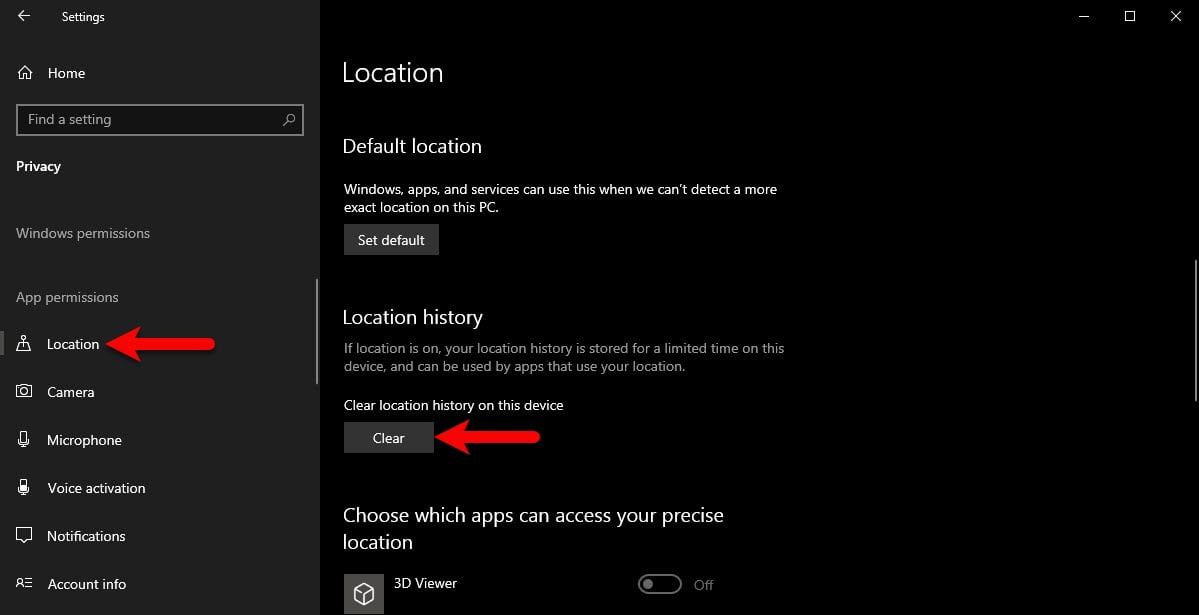
Once the privacy tab opened, from the left-handed bar click on the location option. While the location window appeared scroll down until the location history. And finally, click on the “Clear” option under the “Clear location history on this device”.
After clearing all the caches from your Windows 10 operating system, you might face the experience of your it. And your PC will run faster than the previous one.
